

Page 1

MLB SERIES INSTALLATION GUIDE
ELEVATOR BUFFERS
MLB 13-32
INSTALLATION GUIDE
ENGLISH
Page 2
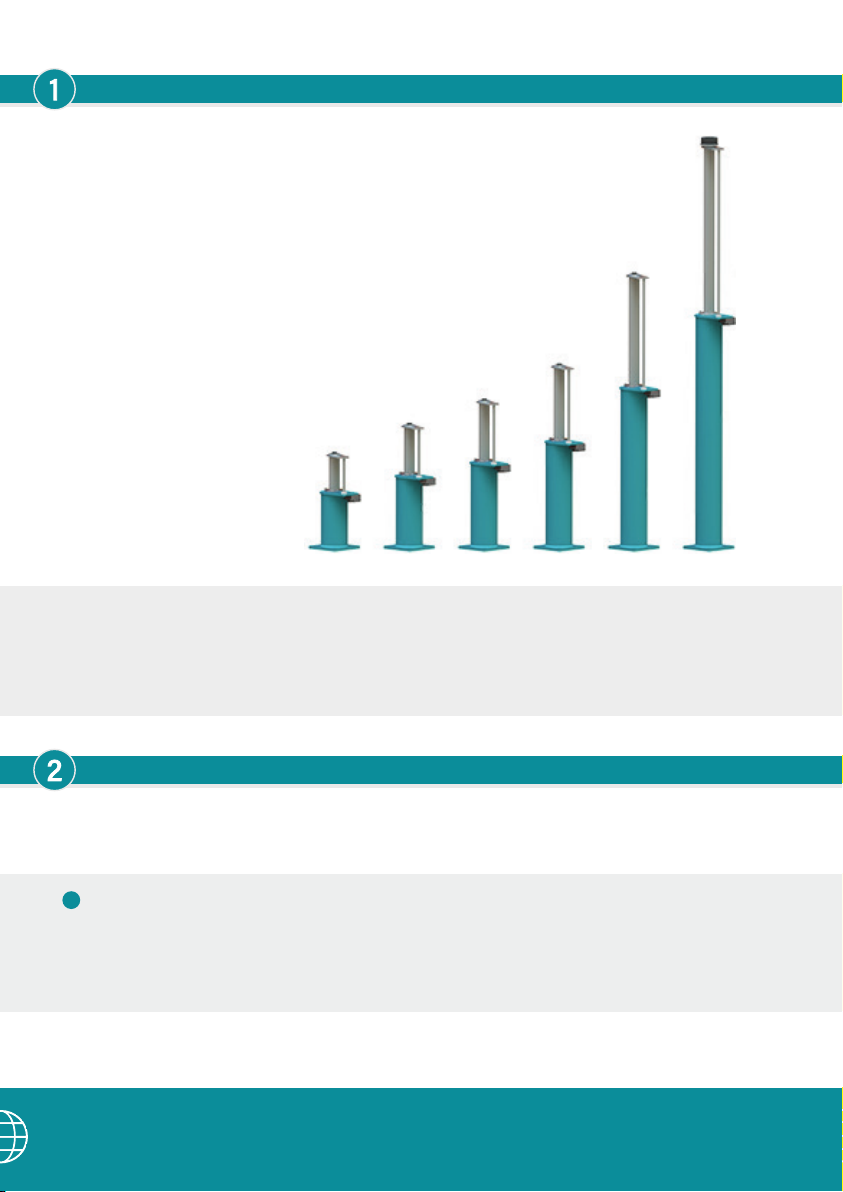
MLB 13-32 BUFFERS : INSTALLATION INFORMATION
SCOPE OF DELIVERY
Oleo buers are supplied with a standard finish suitable for dry conditions
(finished Oleo Green primer). The standard finish is not suitable for wet,
corrosive conditions.
Oleo MLB buers can be supplied pre-filled with oil, or without oil.
Check the buer to confirm it is pre-filled or without oil.
Should there be any discrepancies contact Oleo International before proceeding.
INDICATION OF USE
Environmental temperature acceptable conditions -15°C to 70°C.
WARNING
!
The Oleo MLB elevator buer is supplied containing compressed gas; the plunger is held in
the fully compressed condition during transportation by means of a bolt, this should not be
removed until the buer is in its final installed position.
2
Page 3
HANDLING
When handling MLB buers ensure your regional health and safety laws are adhered to.
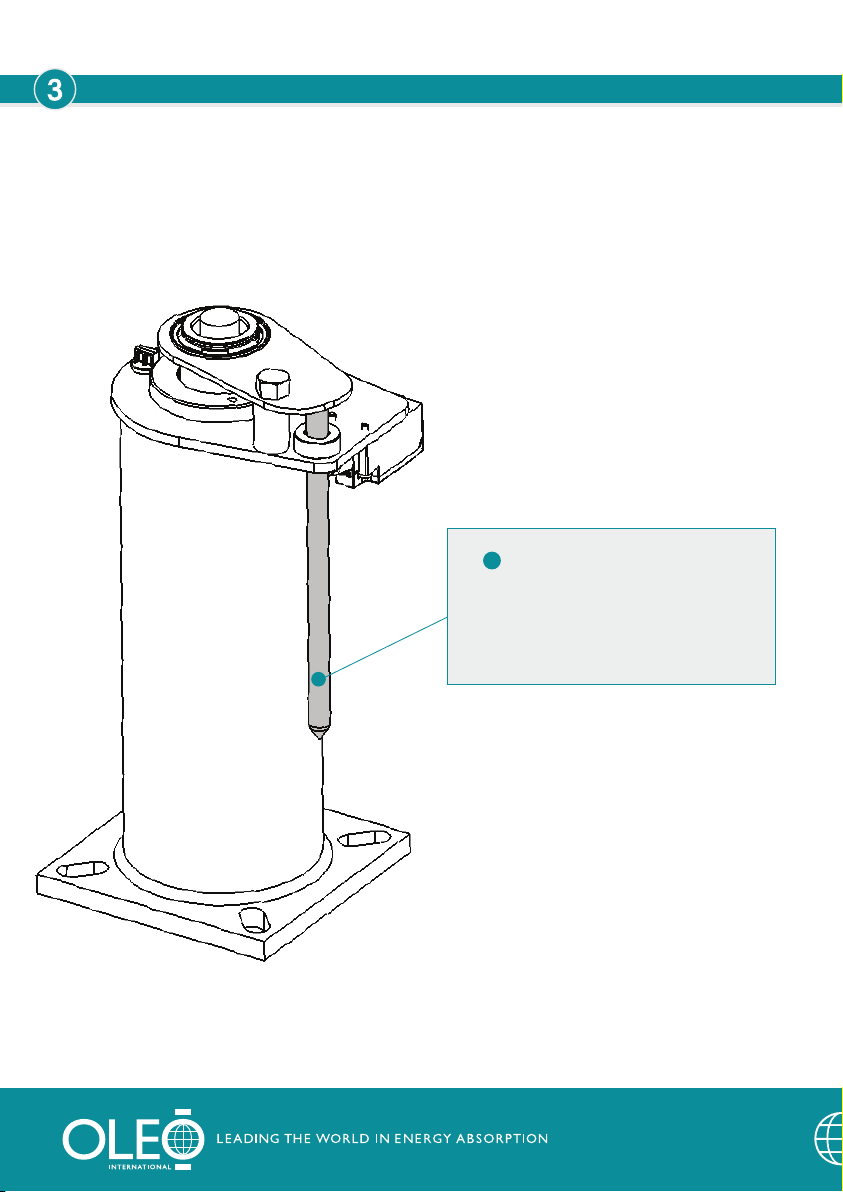
Figure 1
WARNING
!
DO NOT lift buer with the striker
shown in Figure 1. Avoid contact as
this may cause damage.
Always confirm the weight of the buer
to be lifted and ensure that a suitable
lifting method is used.
3
Page 4
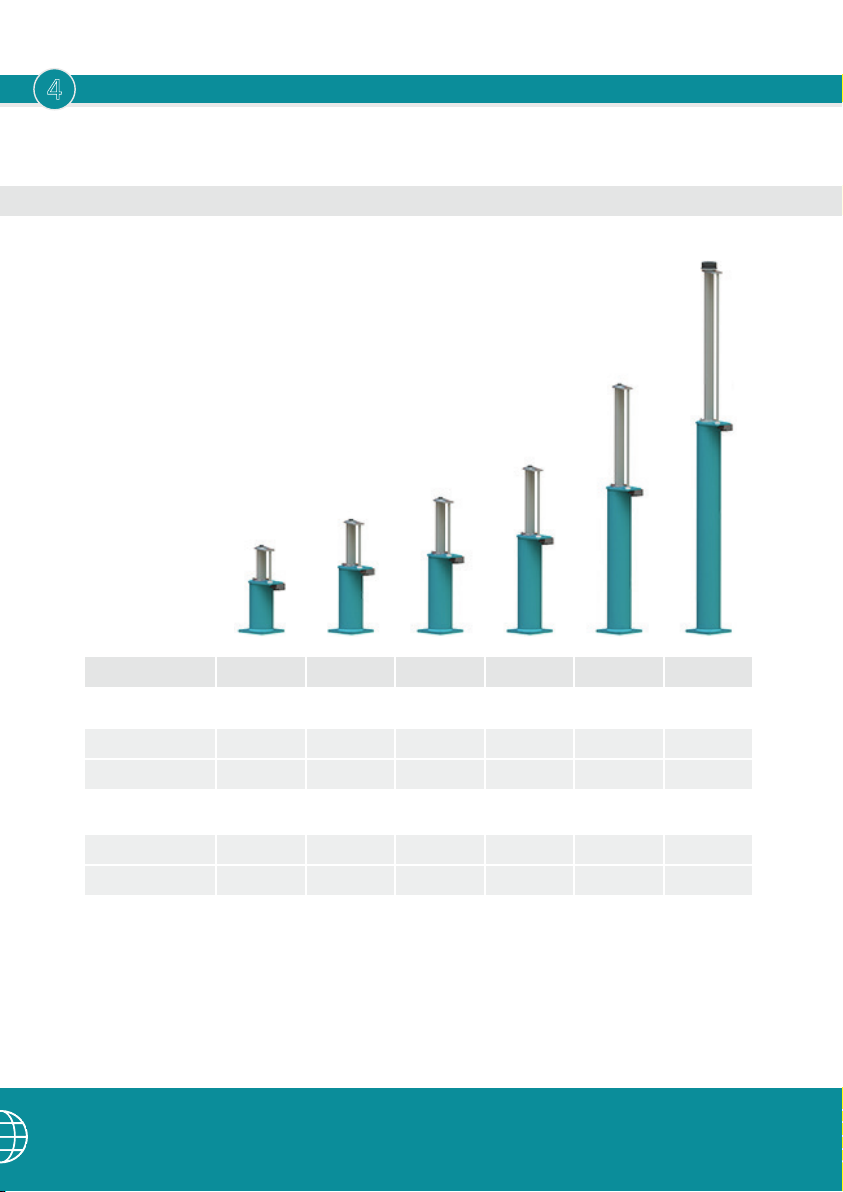
BUFFER WEIGHTS
4
MLB 13-32 Range
Buer Model
Without Oil
Kg
Lbs
When Filled with Oil
Kg
Lbs
MLB 13
9.810
21.63
10.10
23.61
MLB 16
11.15
24.58
12.39
27.32
MLB 18
12.67
27.93
14.01
30.89
MLB 20
15.02
33.11
16.94
37.34
MLB 25
21.05
46.41
23.97
52.85
MLB 32
29.72
65.52
34.29
75.59
4
Page 5
BUFFER INSTALLATION PROCEDURE
5
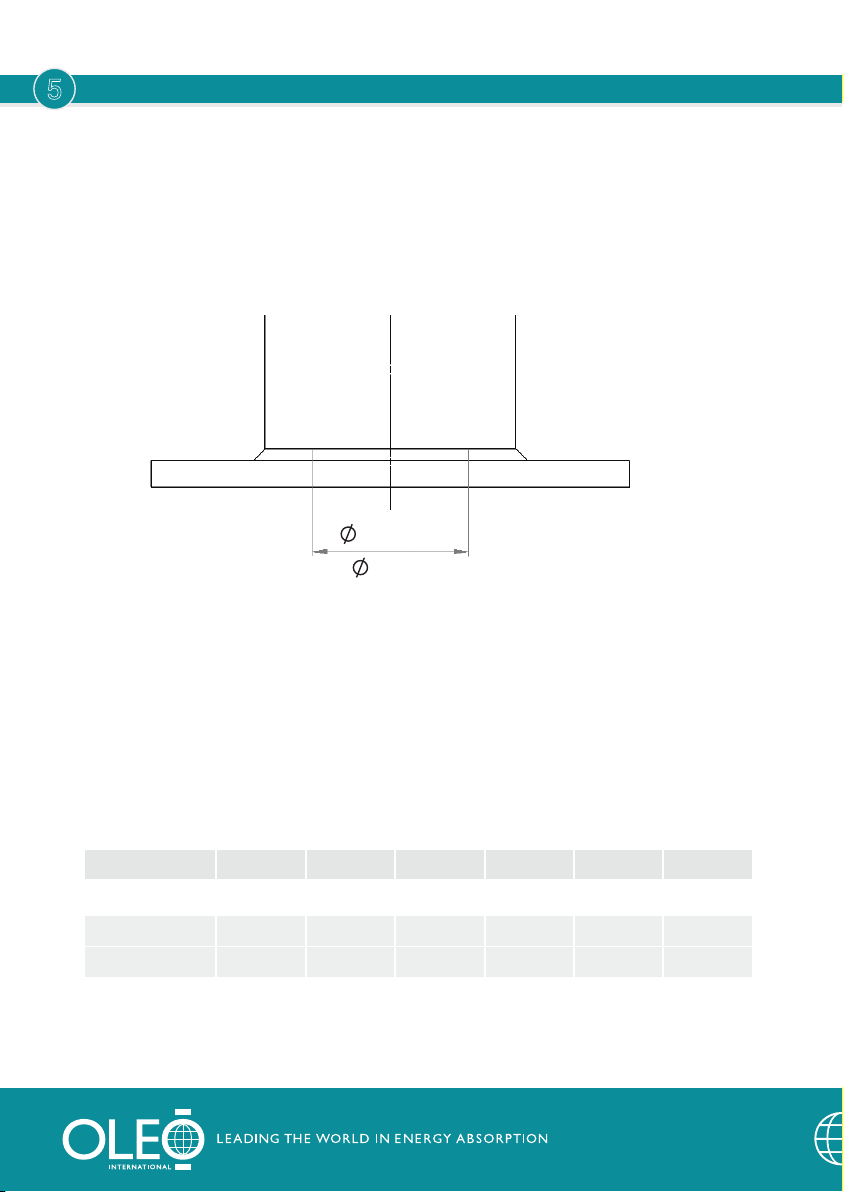
Ensure the buer has been secured into its installation position.
Oleo recommends a bolt size M12 for fixing and all four fixing positions are used.
Ensure this area at the base of the buer, shown in Figure 2 is supported.
Figure 2
69.85mm
2.750”
At this point the buer is still compressed in its transportation state, now the buer
can be released by removing the transportation bolt. The following is the
recommended removal procedure.
For a controlled release, lower the elevator car (or equivalent) onto the buer. This
mass must be at least equivalent to the minimum mass of the specified buer.
Minimum mass of the buer show in the table below:
Buer Model
Min. Mass
Kg
Lbs
MLB 13
450
992
MLB 16
450
992
MLB 18
450
992
MLB 20
450
992
MLB 25
450
992
MLB 32
450
992
5
Page 6
BUFFER INSTALLATION PROCEDURE
5
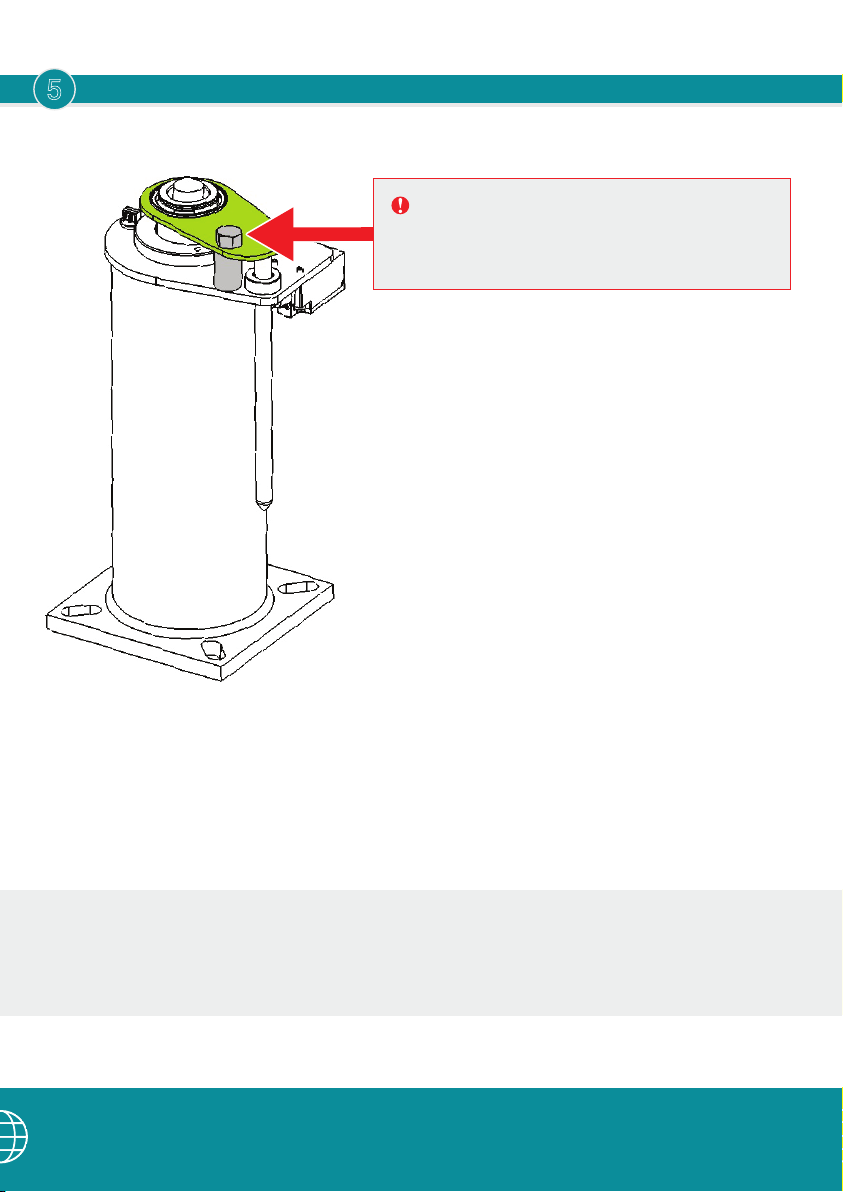
Figure 3
DANGER
Now to release the plunger.
DO NOT stand over the plunger when releasing.
To release the plunger, undo the transportation
bolt. (GREY in Figure 3).
Discard the transportation bolt and spacer (GREY
in Figure 3).
If used, remove the elevator car (or equivalent) and
this will control the recoil of the buer.
After periods of being held in the compressed
state during transportation and storage, the
plunger may require assistance to initially extend.
This should be done using rubber dead blow
mallet to tap the underside of the buer top plate
(GREEN in Figure 3) at 90 degree intervals until
the plunger extends.
(
Continued
)
Once fully extended and stroked the buer will
perform as designed.
Buers are to be fitted vertically parallel to guide
rail +/- 5mm.
Do you have a pre-filled buer?
No - Please continue to Section 6.
Yes - Go to OIL FILLING OPTIONS Section 8.
6
Page 7
OIL SPECIFICATION
6
The oil must confirm to the specification on the buer data plate –
ISOVG68: SG.88/90 at 15°C : hydraulic.
Pour Point: 18°C or lower. Viscosity index: 75 or higher
CAUTION
Take care when handling the oils.
Observe the oil manufacturers recommendations.
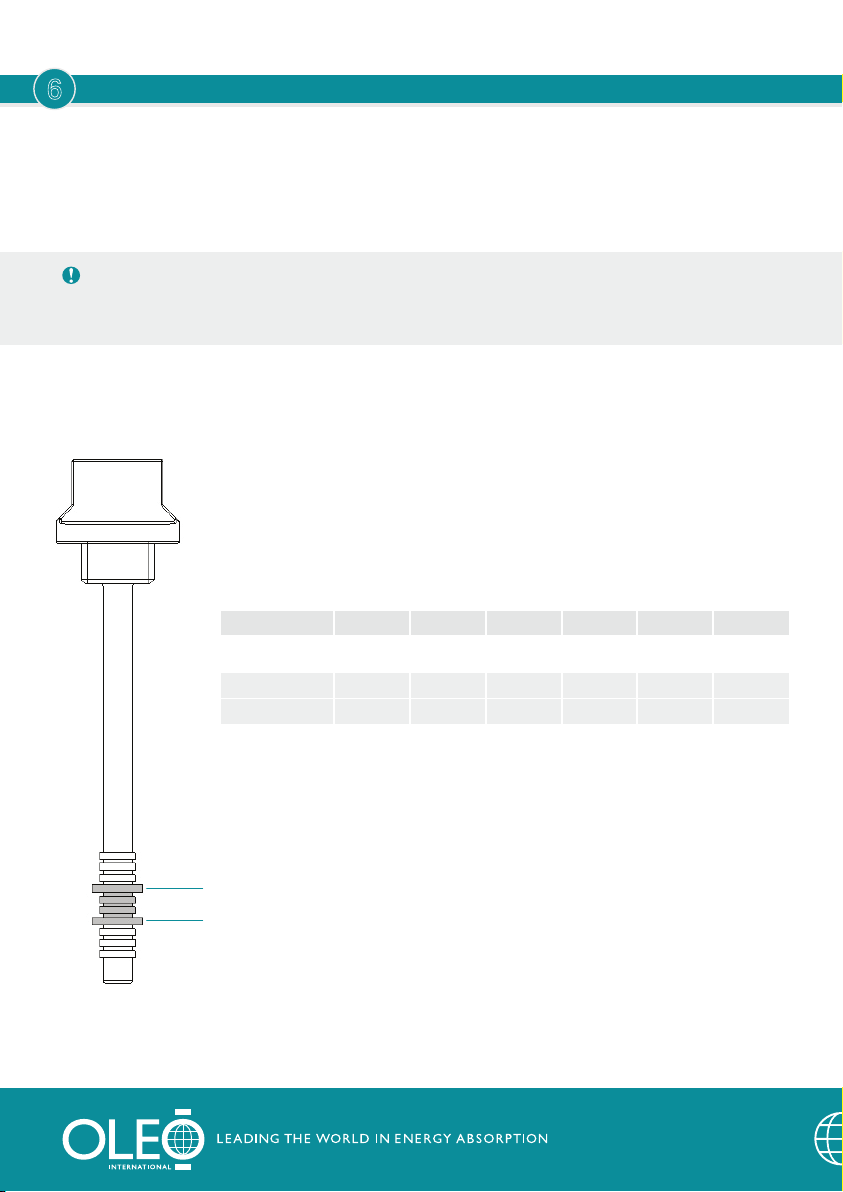
Figure 4
The oil volume guide can be found in table below:
Max
Min
Buer Model
Approximate Oil Volume
Kg
Lbs
MLB 13
1.02
0.27
MLB 16
1.41
0.37
MLB 18
1.74
0.46
MLB 20
2.18
0.58
MLB 25
3.32
0.88
MINIMUM & MAXIMUM
The oil level needs to be between the Minimum and Maximum
marks indicated on the dipstick as shown in Figure 4.
MLB 32
5.19
1.37
7
Page 8
OIL FILLING PROCEDURE
7
NOTICE
The buer must be vertical and fully extended before filling with oil.
CAUTION
Take care when handling the oils. Observe the oil manufacturers recommendations.
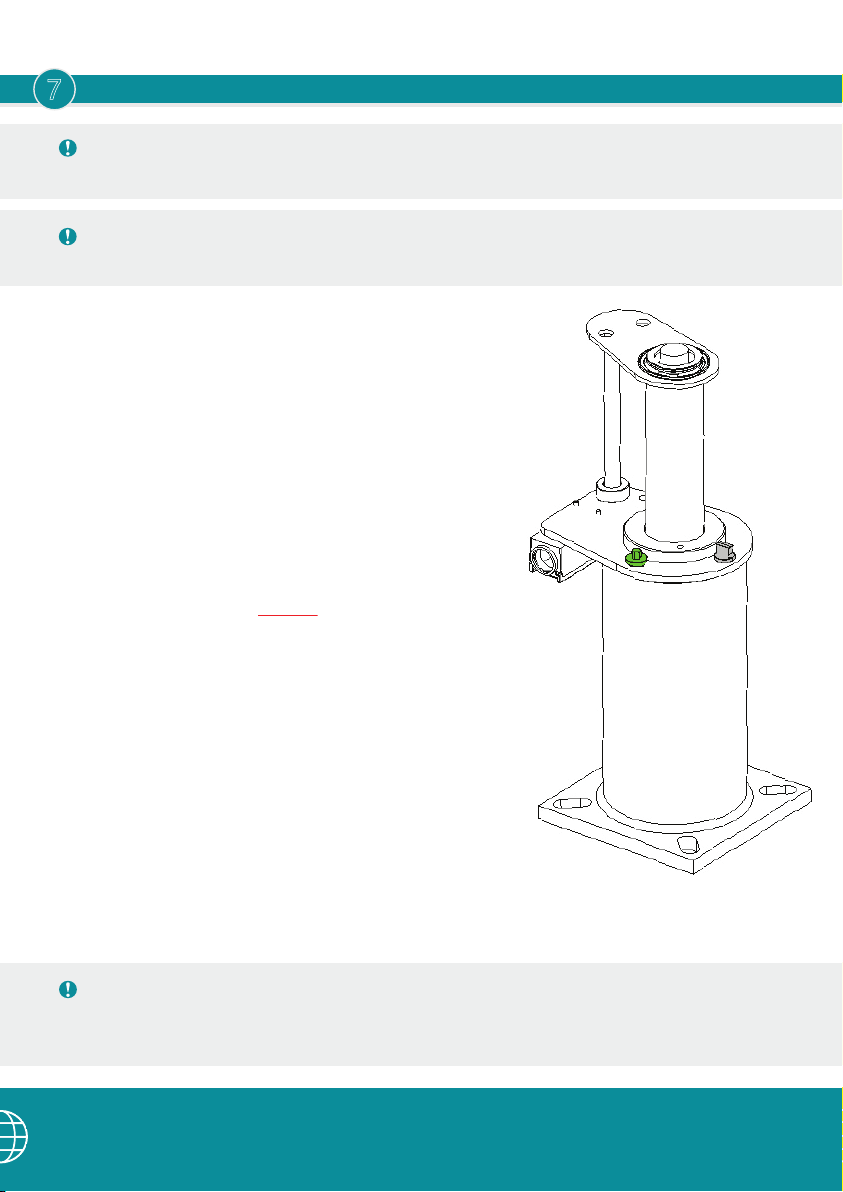
1 Unscrew the airscrew, remove from the buer and
keep safe. (GREEN in Figure 5).
2 Unscrew the dipstick, remove from the buer and
keep safe. (GREY in Figure 5).
3 Gradually fill the buer with oil until the oil level is
visible between the minimum and maximum
levels on the dipstick (indicated on Figure 4).
4 Allow the buer to stand for a minimum of
30 minutes.
5 Re-insert the dipstick DO NOT screw down.
6 Remove dipstick and inspect level. The oil level
needs to be between the minimum and maximum
marks indicated on the dipstick as shown in Figure 4.
Figure 5
7 Once oil level is correct replace airscrew and
securely fasten.
8 Once oil level is correct replace dipstick and
securely fasten.
The oil must be within the correct operating range for the buer to perform
correctly. If further oil is required after checking repeat steps 1-8.
WARNING
DO NOT overfill past the maximum dipstick mark.
If this occurs, then oil must be removed from the buer.
8
Page 9
OIL FILLED OPTIONS
8
OIL CHECKING PROCEDURE
9
The oil level must be correct and needs to be checked
using the following procedure:
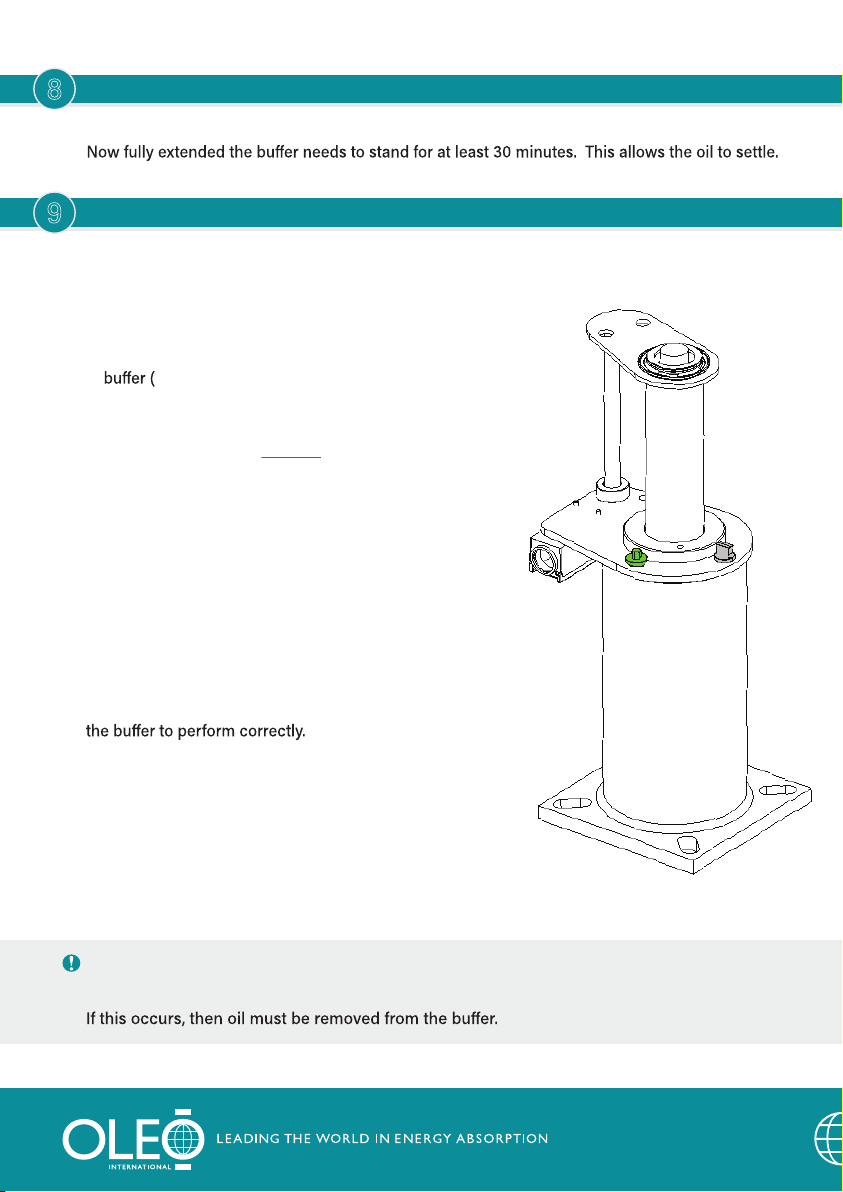
1 Unscrew the dipstick and remove from the
GREY on Figure 5).
2 Wipe dipstick clean.
3 Re-insert the dipstick DO NOT screw down.
4 Remove dipstick and inspect level. The oil
level needs to be between the maximum and
minimum marks indicated on the dipstick as
shown in Figure 4.
5 Once oil level is correct replace dipstick and
securely fasten.
The oil must be within the correct operating range for
If further oil is required after checking refer to Oil
Filling Procedure Section 7.
WARNING
DO NOT overfill past the maximum dipstick mark.
Figure 5
9
Page 10
FINAL COMMISSIONING
10
Oleo recommends the final 7 step process is followed prior to commissioning:
1 Ensure oil level is correct.
2 Ensure striker is vertically aligned to +0.5 mm.
3 Complete electrical connections to the limit switch.
WARNING
As a safety critical component, buers should not be installed without a switch.
4 Compress the buer at slow speed across the full working stroke then allow to recoil.
5 Allow the oil to settle for 30 minutes then recheck oil level – see Section 9.
6 Finally, impact the buer at the full rated speed of the elevator.
7 Complete final checks of oil level and the buer is at correct working height.
NOTICE
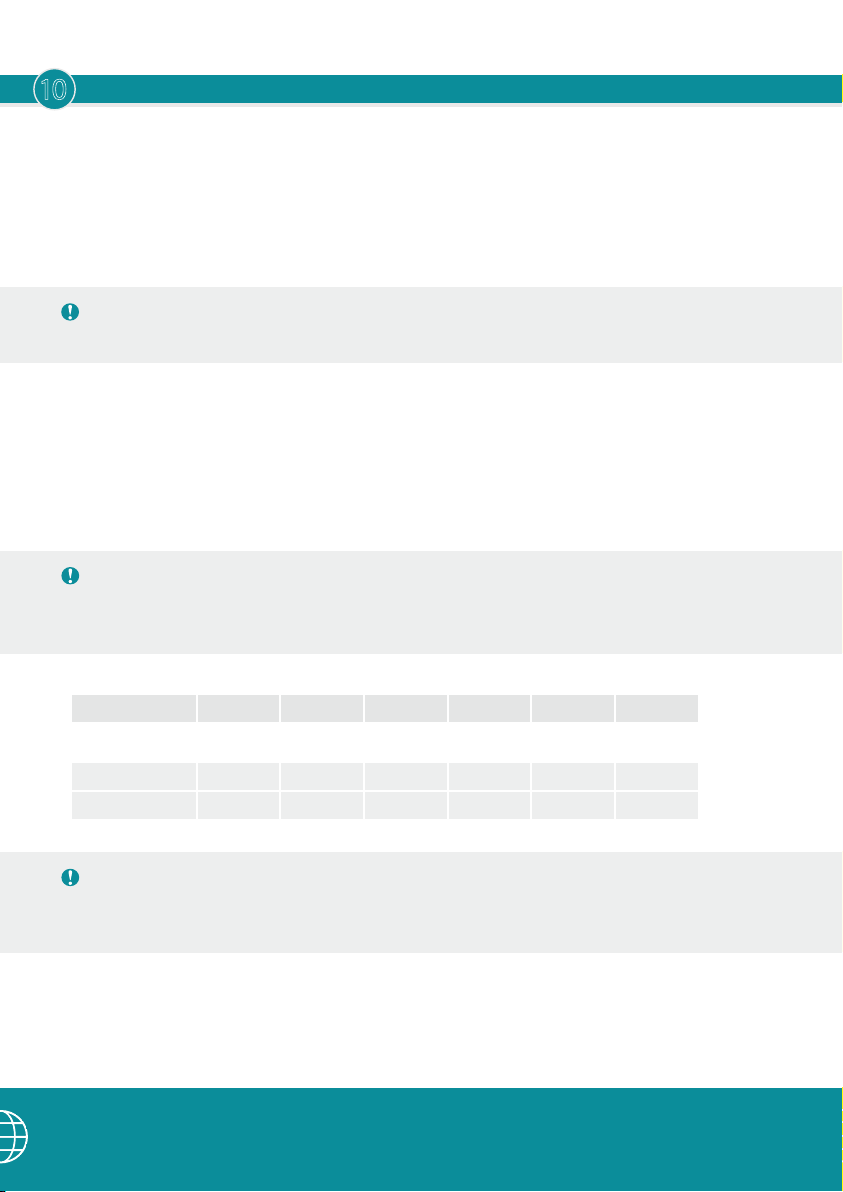
CHECK: The maximum overall height against table below MLB 13-25 +0/-8.8mm and
MLB 32 +0/-8.2mm of the figure stated.
Buer Model
Extended Height
m
in
MLB 13
0.4103
16.154
MLB 16
0.5323
20.957
MLB 18
0.6343
24.972
MLB 20
0.7823
30.799
MLB 25
1.1643
45.839
NOTICE
If the buer has not returned to the fully extended position (determined by measuring
overall height) contact Oleo International.
10
MLB 32
1.7305
68.130
Page 11

MAINTENANCE
11
Oleo recommends the following be carried out every 12 months from installation:
1 Clean away debris and dirt from around the plunger and switch.
2 Check the oil level is correct.
3 Compress the buer across its full working stroke.
4 After the compression, ensure the buer has returned to its correct working
height and visually check for any damage. See correct working height in table
in Section 10.
Ensure regional jurisdictions and laws for maintenance are adhered to.
11
Page 12
OLEO INTERNATIONAL
Grovelands
Longford Road
Exhall
Coventry
United Kingdom
CV7 9NE
oleo.co.uk
OLEO BUFFERS SHANGHAI
COMPANY LTD
Plant A15 Xinfei Garden
No.3802 Shengang Road
Songjiang
Shanghai
201612 China
E
T +86 21 6776 0688
F +86 21 6776 0689
W
oleo.cn
ALTERNATIVE LANGUAGE INSTALLATION INSTRUCTIONS
This Installation Guide can be found in the following languages;
0086
ASME
GB7588
EUROPE
CANADA/USA
CHINA
KOREA
RUSSIA
Français Deutsche Español Porigiese
French German Spanish Portuguese
Brasileiro Italiano Pусский
한국어
Brazilian Italian Russian Korean
Please visit:
https://www.oleo.co.uk/downloads/elevator-installation-booklets
9-35703-1 Issue 2 July 2018
Oleo International is a division of T.A. Savery and Co Limited, whose ultimate parent is Brigam Limited. T.A. Savery and
Co Limited is a company incorporated in England and Wales under company number 00272170 and whose registered
oice is at Grovelands, Longford Road, Exhall, Coventry, CV7 9NE, UK .
中文
Chinese
日本語
Japanese
 Loading...