

Page 1

Skid Plate Kit
Installation
Instructions
Please read kit instructions carefully prior to installation.
Many of our kit installations can be viewed at www.youtube.com/oldtowncanoeandkayak
KIT CONTENTS:
Part Number Description Quantity
1311.1050 Sandpaper 2
1311.0446 Stirring Stick 2
1331.0645 Skid Plate Felt 2
1331.0640A Can Resin 2
1331.0640B Can Hardener 2
125 Gilman Falls Road
Building B
Old Town, ME 04468 USA
800-8-KAYAKS
www.oldtowncanoe.com
TOOLS REQUIRED: Clean dry cloth * Plastic sheet for drip cover * 2” wide masking tape * Disposable
gloves * Disposable paintbrush * Measuring tape
For Polyethylene canoes: Small handheld propane torch
Before getting started we recommend sorting out and separating the parts for easy access during assembly.
Step 1: Preparing the Surface:
Position canoe upside down in a clean, well-ventilated area out of
direct sunlight
Measure 14 inches from the edge of the black deck to the bottom of
the canoe and place mark. The narrow end of skid plate will start
14”
Fig.#1 Masking felt perimeter
here.
Lay one piece of the skid plate felt with the smoother side up on the
center of the bottom, using 2 small pieces of masking tape on each
end to hold it in place.
Mask 1/8” away from perimeter of the skid plate with tape – See
Fig.#1. Cut the small tape pieces and remove the felt.
Rev.A
Issue Date: 12/08/2010
Doc. # K-01.1331.0640
Page 1 of 5
Page 2
Skid Plate Kit
Installation
Instructions
125 Gilman Falls Road
Building B
Old Town, ME 04468 USA
800-8-KAYAKS
www.oldtowncanoe.com
Please read kit instructions carefully prior to installation.
Many of our kit installations can be viewed at www.youtube.com/oldtowncanoeandkayak
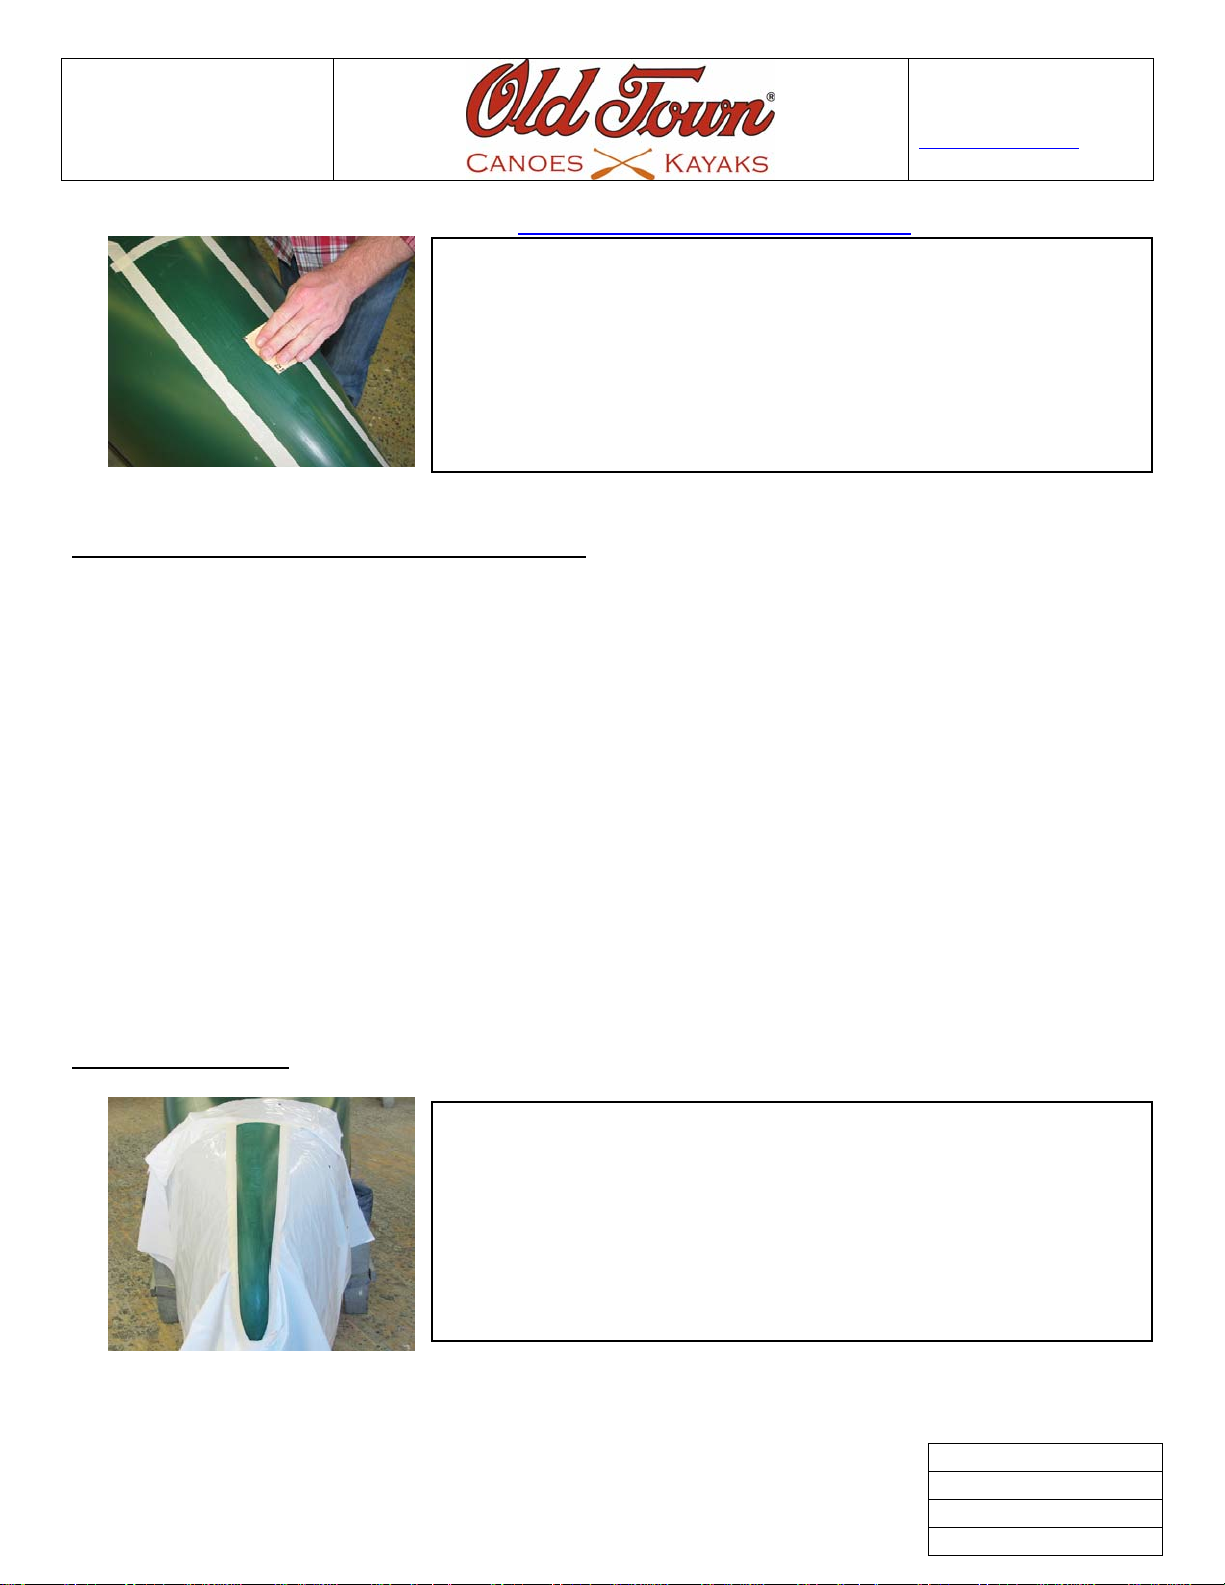
Sand the area inside the tape outline with rough sandpaper – See
Fig.#2. Wipe the sanded area with a clean dry cloth. Look carefully
at the surface for any shiny areas showing missed places. Sand them
again.
Fig.#2 Sanding
Step 1.5: For Polyethylene Discovery Canoes Only: You MUST use this extra step…
You will use the handheld propane torch to “flame” the entire sanded surface. The process does NOT involve melting or
blackening the surface.
Remove tape outline.
Light the propane torch. The flame will have an inner cone and an outer cone. Adjust the flame so that the inner
cone extends about 1” from the nozzle.
Moving quickly and smoothly, bring the tip of the inner cone briefly in contact with the surface of the canoe, and
move up one long side, down the other, and up the center. Keep the flame moving while covering the entire area.
If the surface of the hull becomes shiny you are not moving the flame enough.
If you feel that you have missed some of the area, wait approximately 20 minutes and repeat process.
Do not touch the area after flaming as the oils from your fingers could reverse the process.
Reattach tape outline.
Step 2: Apply the felt
: DO NOT apply in direct sunlight. Wear gloves. Work in a well-ventilated area.
Fig.#3 Drip Cover
Resin working time is 20 minutes at 70 Fahrenheit, about 10 minutes
at 90F.
Tape the edge of the drip cover to the tape outline. Be careful not to
overlap into the working area, and be sure that the tape adheres all
around to prevent runs onto the canoe hull – See Fig.#3.
Rev.A
Issue Date: 12/08/2010
Doc. # K-01.1331.0640
Page 2 of 5
Page 3

Skid Plate Kit
Installation
Instructions
Please read kit instructions carefully prior to installation.
Many of our kit installations can be viewed at www.youtube.com/oldtowncanoeandkayak
Mix resin by pouring all of one can B (hardener) into one can A
(resin) and stirring thoroughly with the stirring stick for
approximately 1 minute– See Fig.#4 . Make sure to scrape the
inner sides of the can to achieve a uniform mix.
Fig.#4 Pour Hardener into Resin
With the paintbrush, apply a light layer of mixed resin to the area
that has been sanded – See Fig.#5. The sanded area should be
completely covered with the resin.
125 Gilman Falls Road
Building B
Old Town, ME 04468 USA
800-8-KAYAKS
www.oldtowncanoe.com
Fig.#5 – Apply resin to hull
Fig.#6 Lay Felt
Fig.#7 Apply Resin to Felt
Lay the dry felt carefully in place. Pat it firmly with your (gloved)
hand or the paintbrush to bring the excess resin up through the skid
plate – See Fig.#6.
Using the brush, apply as much of the remaining resin as needed to
completely wet through the felt – See Fig.#7.
Remove any air trapped under the felt by gently working it over to
the edge
Rev.A
Issue Date: 12/08/2010
Doc. # K-01.1331.0640
Page 3 of 5
Page 4

Skid Plate Kit
Installation
Instructions
125 Gilman Falls Road
Building B
Old Town, ME 04468 USA
800-8-KAYAKS
www.oldtowncanoe.com
Please read kit instructions carefully prior to installation.
Many of our kit installations can be viewed at www.youtube.com/oldtowncanoeandkayak
Step 3: Finishing:
Remove the drip cover and the masking tape after the resin has
gelled enough so that it will not run down the boat. Allow the resin
to cure for 24 hours.
After 24 hours smooth the surface of the skid plate by sanding it
with medium grit sandpaper after it is dry.
Repeat this set of instructions on the other end of the boat with the
remaining can of Hardener and Resin.
Fig.#8 – Finished Skid Plate
Rev.A
Issue Date: 12/08/2010
Doc. # K-01.1331.0640
Page 4 of 5
 Loading...