

Oktober SL1 Homebrewer Owner's Manual
OKTOBER CAN SEAMERS
Operator’s Manual.
SL1 Homebrewer
Can Seamer
SL1
1
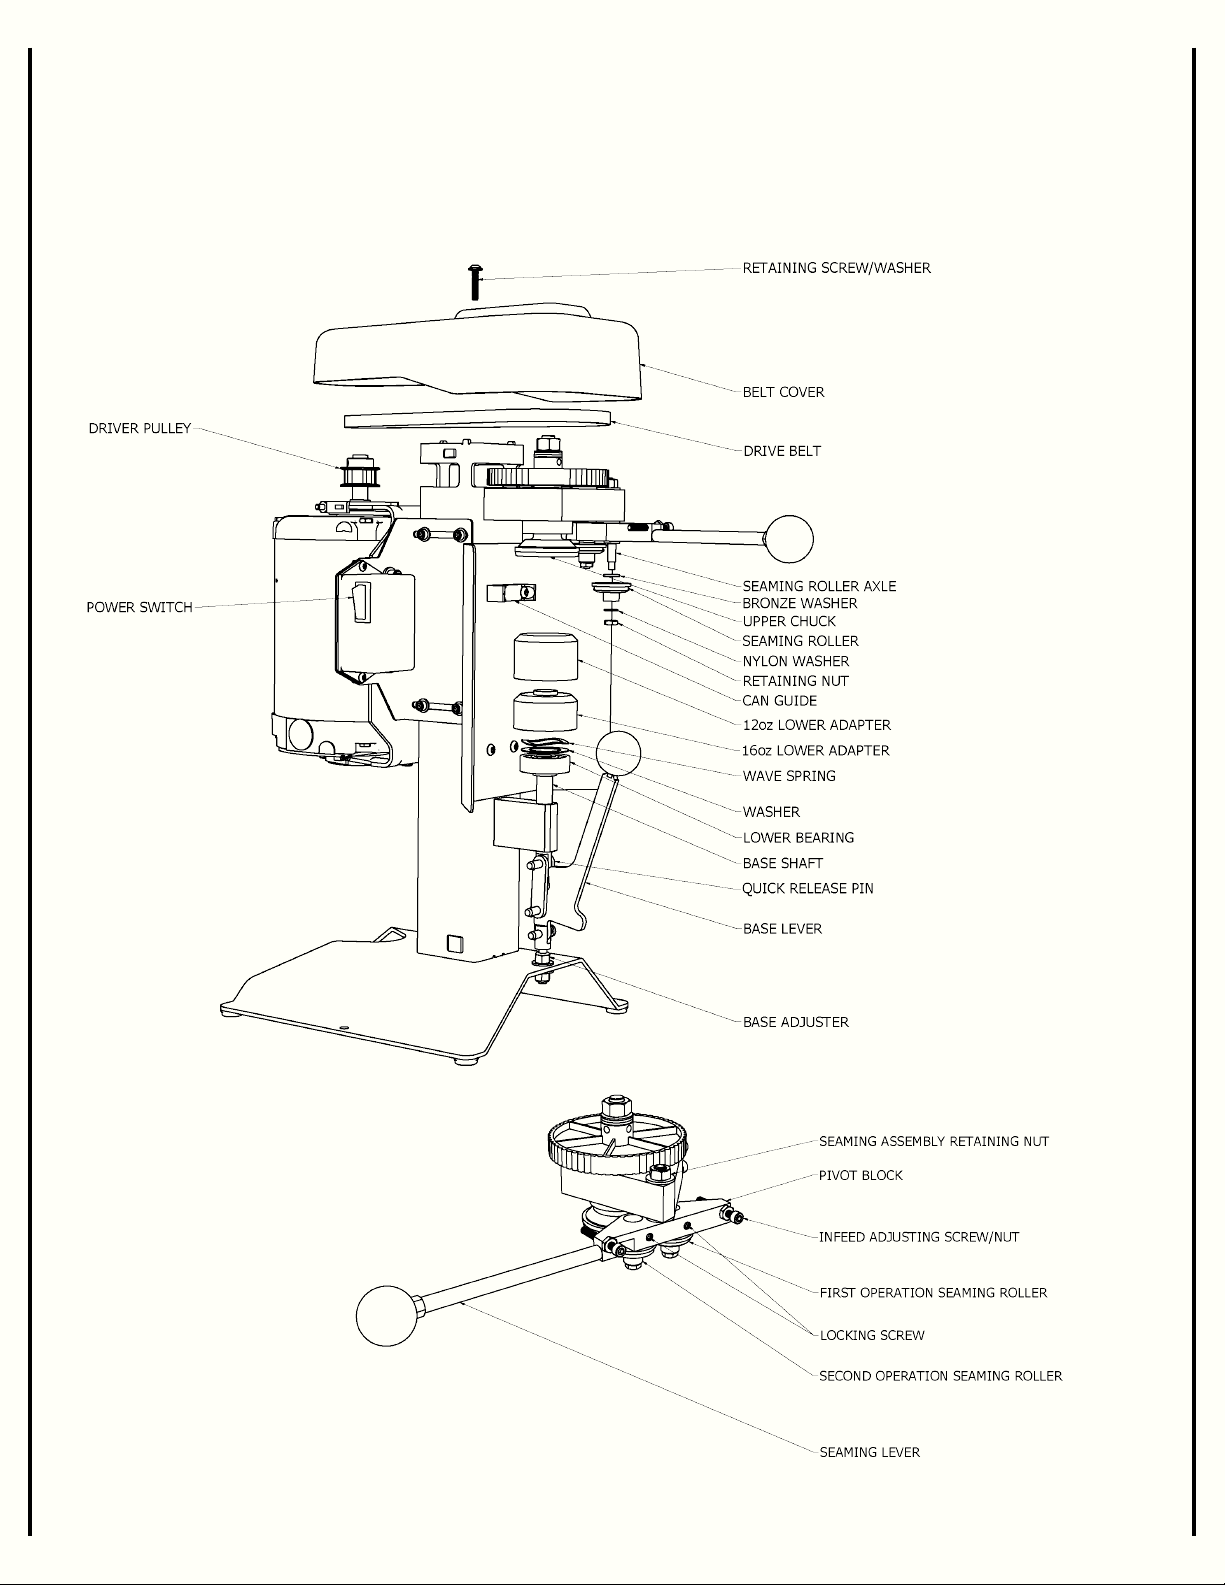
The SL1 Homebrewer Can Seamer
2

Setup
To get started, assemble the Seaming Lever into the Pivot
Block. Use a 7/16in wrench to lightly tighten the lever as
shown. If the lever backs out during seaming, it can bend the
threads and break!
The SL1 comes set up for 16oz cans. To seam 12oz cans, place
the 12oz lower adapter (white plastic cylinder) onto the 16oz
lower adapter and press it into place.
You seamer comes PRE-CALIBRATED, so you don’t need to make any
adjustments before getting started.
3
Safety First!
Make sure to locate your seamer in a position
that has enough space to move around it
easily. Also, make sure to pay attention to
things like long hair, loose clothing, etc.
as the can will be spinning and can cause
injury if anything gets caught on or around
it. Be careful to not reach into the machine
or remove the cover at any time while it is
plugged in! Canning is done in a wet environment, so always plug the seamer into a
GFCI outlet to avoid shocking hazards.
Seaming
Seaming is simple, and after a few practice cans it should be a
smooth, continuous process. It helps to go through the steps
without a can a few times to get a feel for it. The force
required to actually seam a can is not much more than it takes
to run the seamer without a can.
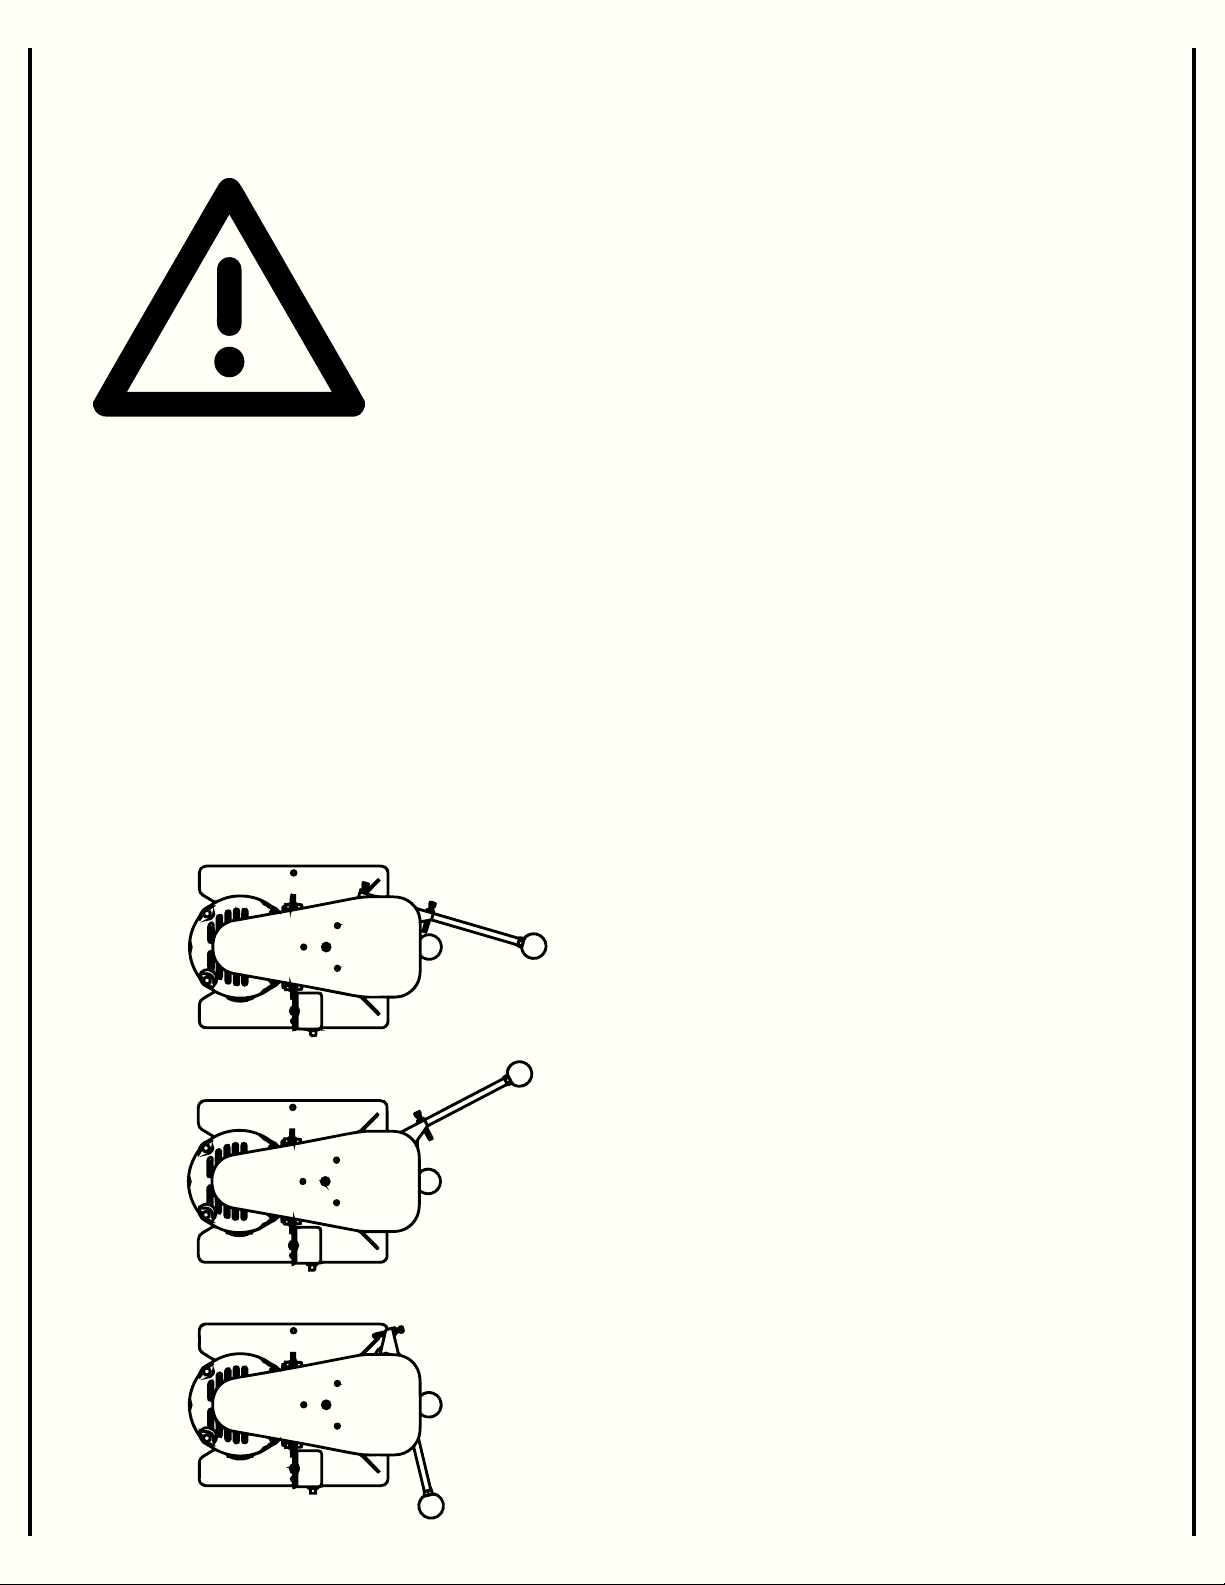
POSITION 0
POSITION 1
POSITION 2
4

1. Rotate the Seaming Lever to position 0 as shown. The black
knob should be somewhere near centerline of the seamer.
2. Place an end (can top) onto the can to be seamed.
3. Set the can onto the lower adapter, and lean the can back
against the Can Guide.
4. Raise the Base Lever until it is locked into place. Note:
the lever will not lock in-place without a can placed on the
lower adapter.
5. Turn the Power Switch to “on”
6. Rotate the Seaming Lever to the right until the first
operation Seaming Roller contacts the rim of the can end, then
continue rotating the lever until it contacts the hard-stop.
It should take about 2sec to rotate from first contact to the
stop. Hold the lever against the stop for a second or two,
then rotate the lever back to position 0. Note: it doesn’t
take much force to seam the can; as soon as the lever stops,
it has gone far enough.
7. Rotate the Seaming Lever toward position 2 until the second
operation Seaming Roller contacts the rim of the can end.
Continue rotating the lever to until it contacts the hard-stop.
It should take about 2sec to rotate from first contact to the
stop. Hold the lever against the stop for a second or two,
then immediately rotate the lever back to position 0.
8. Turn the Power Switch to “off”
9. Rotate the Base Lever down to release the sealed can.
If the can stops spinning during the seaming cycle, its likely
that the lever is being rotated too quickly.
Make sure to not hold the lever against the stops at position 1
and 2 for too long; eventually the seaming rollers will create
a rough surface on the edges of the can.
5
 Loading...