

Page 1
OklahOma SOund COrpOratiOn
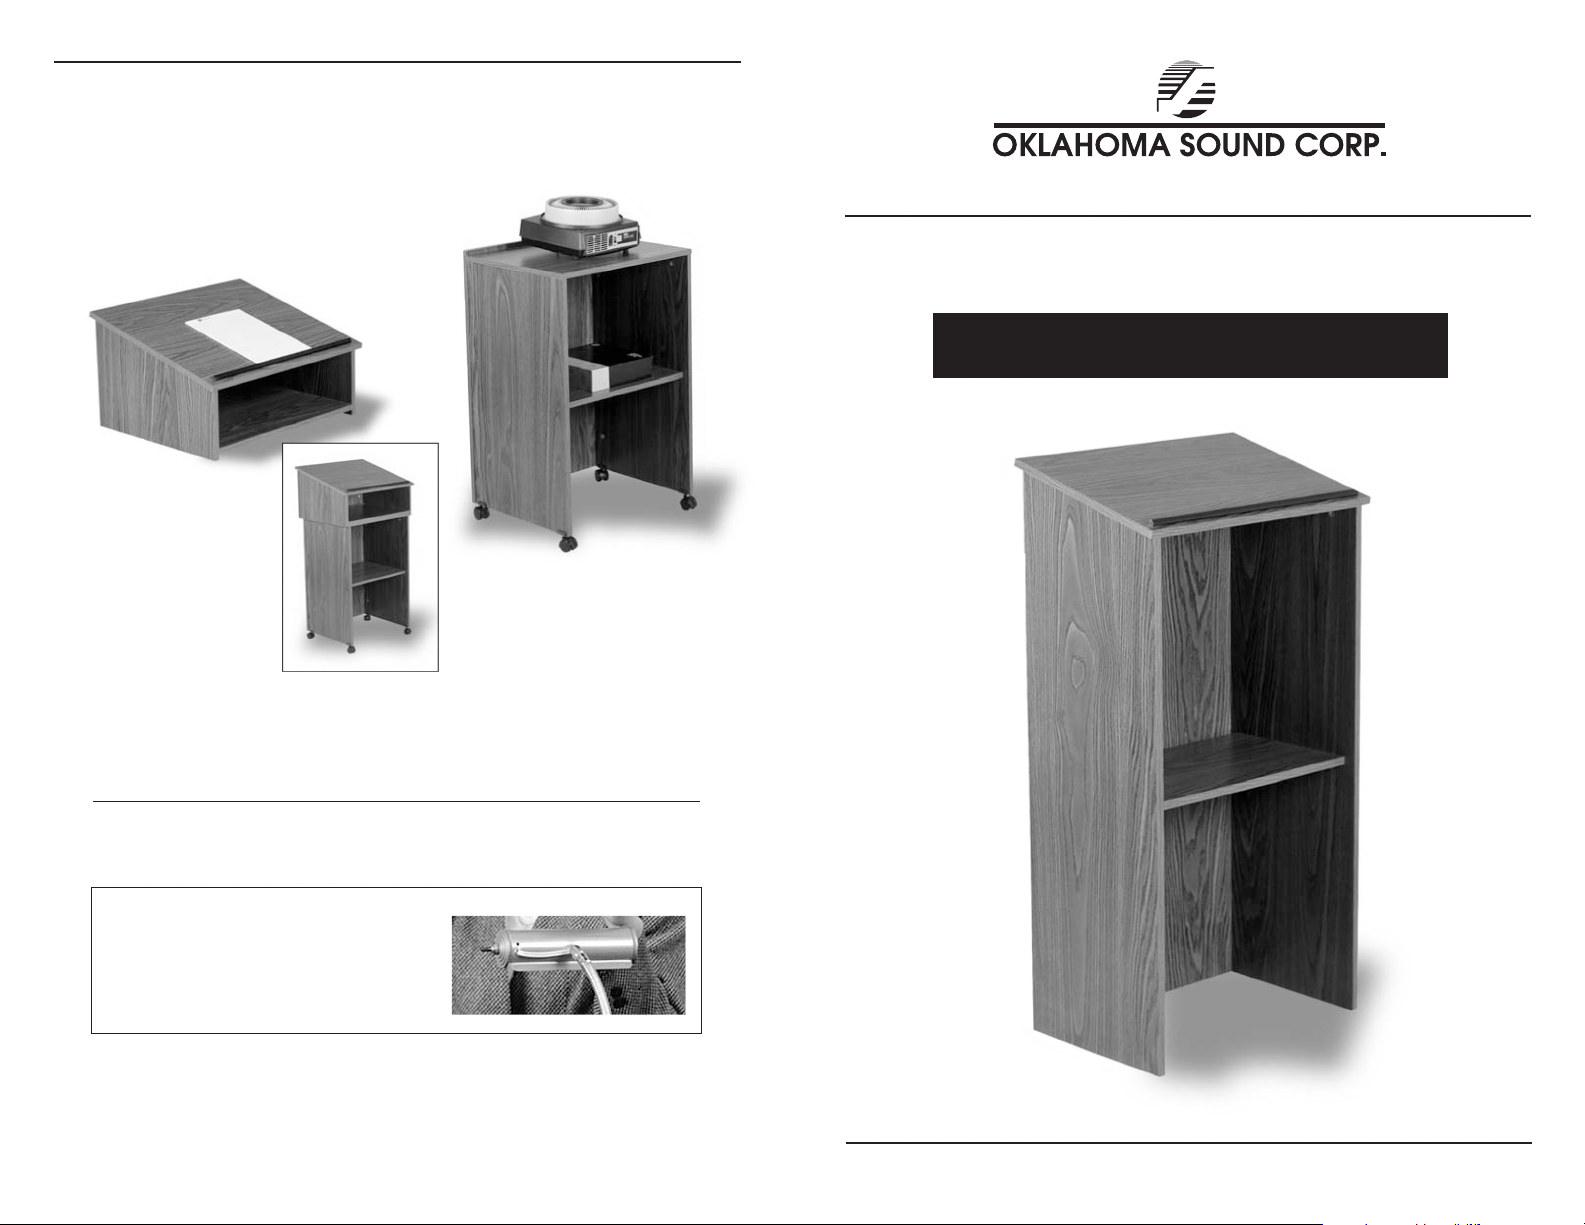
OPTIONAL EQUIPMENT
Additional Units (sold separately)
MODEL #22
TABLE TOP LECTERN
This versatile, portable
table top lectern, can
be used on its own or as
a oor lectern with the
optional base (sold separately). ⁄" stain and scratch resistance
thermofused melamine laminate on
MDF. Paper/book stop included.
Dimensions: 23¾" W x 13¾" H x 19⁄" D
MODEL #112
LECTERN BASE AV CART
Converts your TABLE TOP Lectern
to a FULL FLOOR Lectern or use as
an AV cart for your presentation equipment. Includes shelf and four easy roll
casters with two locking.
Dimensions: 21⁄" W x 33¾" H x 17½"D
Full Floor Lectern
ASSEMBLY MANUAL
Available Color Options
Medium Oak • Light Oak • Mahogany • Walnut
BRASS READING LAMP / #BRL
Attach an elegant brushed brass reading lamp
to the reading table of your new Speaker Stand.
Not only will you shed light on the subject, but
you will add pizzaz to your new stand.
For these and other OSC accessories, please contact your dealer, or:
OKLAHOMA SOUND CORP.
149 Entin Road, Clifton, NJ 07014
Tel 973-594-9000 • Fax 973-594-9339
www.oklahomasound.com • email: [email protected]
MODEL #222
Page 2
OklahOma SOund COrpOratiOn
FULL FLOOR LECTERN: Model 222
INTRODUCTION
The model #222 Full Floor Lectern is attractive and durable: this Full Floor Lectern is made of " stain resis-
tant thermofused melamine laminate on akeboard.
Full sized reading surface, shelf and paper/book stop
built in. Floor glides provided. Assembly required.
Dimensions: 23" W x 46½" H x 16" D.
Manufacturers Warranty
Our lectern undergoes the most rigid and exacting tests for superior quality
and performance before leaving the factory. Our lectern is made in America
by American craftsmen. Oklahoma Sound Corporation warrants this product to be free from defective material and workmanship for two years from
the date of resale by an authorized Oklahoma Sound distributor. Oklahoma
Sound will replace defective parts and repair malfunctioning products under
this warranty when the defect occurs under normal installation and use,
provided the unit is returned to our factory via prepaid transportation after
direct authorization and approval by Oklahoma Sound. is warranty
provides that examination of the returned product must disclose in our
judgement, a manufacturing defect. is warranty does not extend to any
product which has been subject to misuse, neglect, accident, improper installation, or where the serial number has been removed or defected and is given
in lieu of any other warranty implied or expressed and will not cover any
consequential damages.
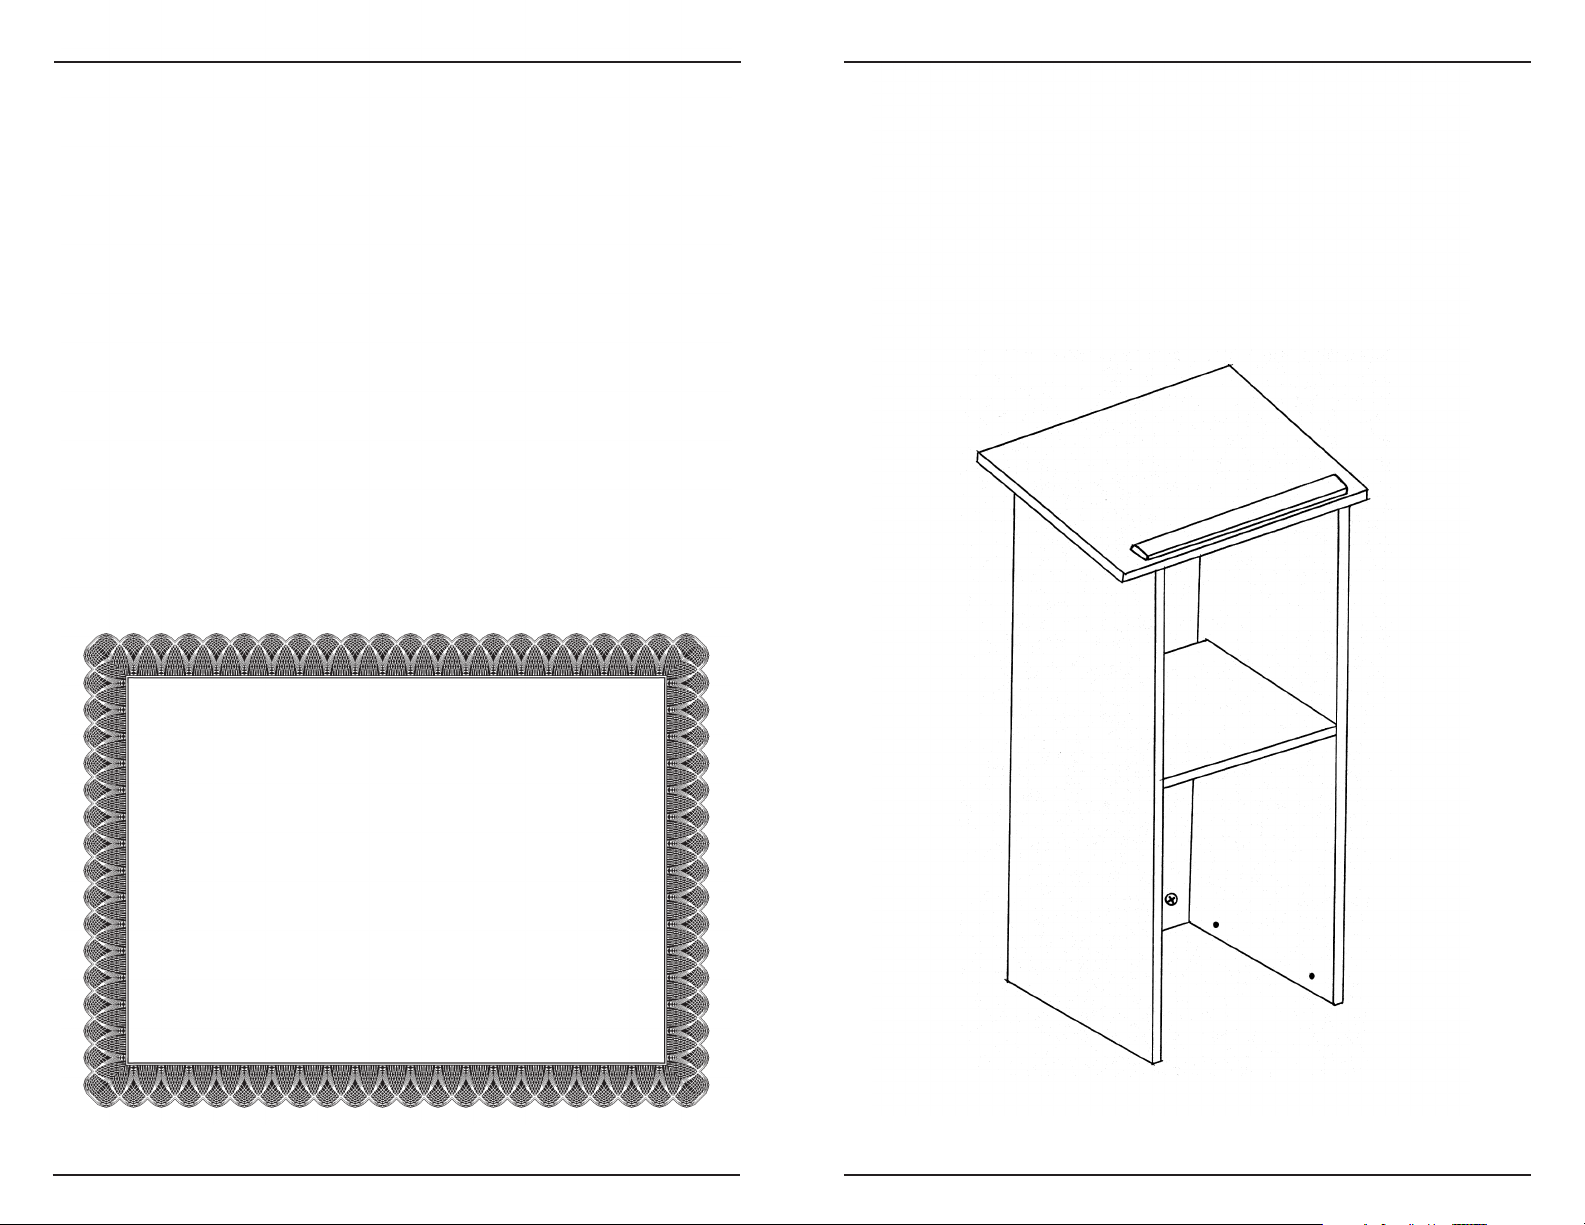
6) Once again go over all the cams and check to make
sure the lectern is sturdy.
Congratulations! You have successfully assembled your
lectern, which if cared for correctly should give you long
and satisfactory usage (Diagram F).
Diagram "F"
2 7
Page 3
OklahOma SOund COrpOratiOn
FULL FLOOR LECTERN: Model 222
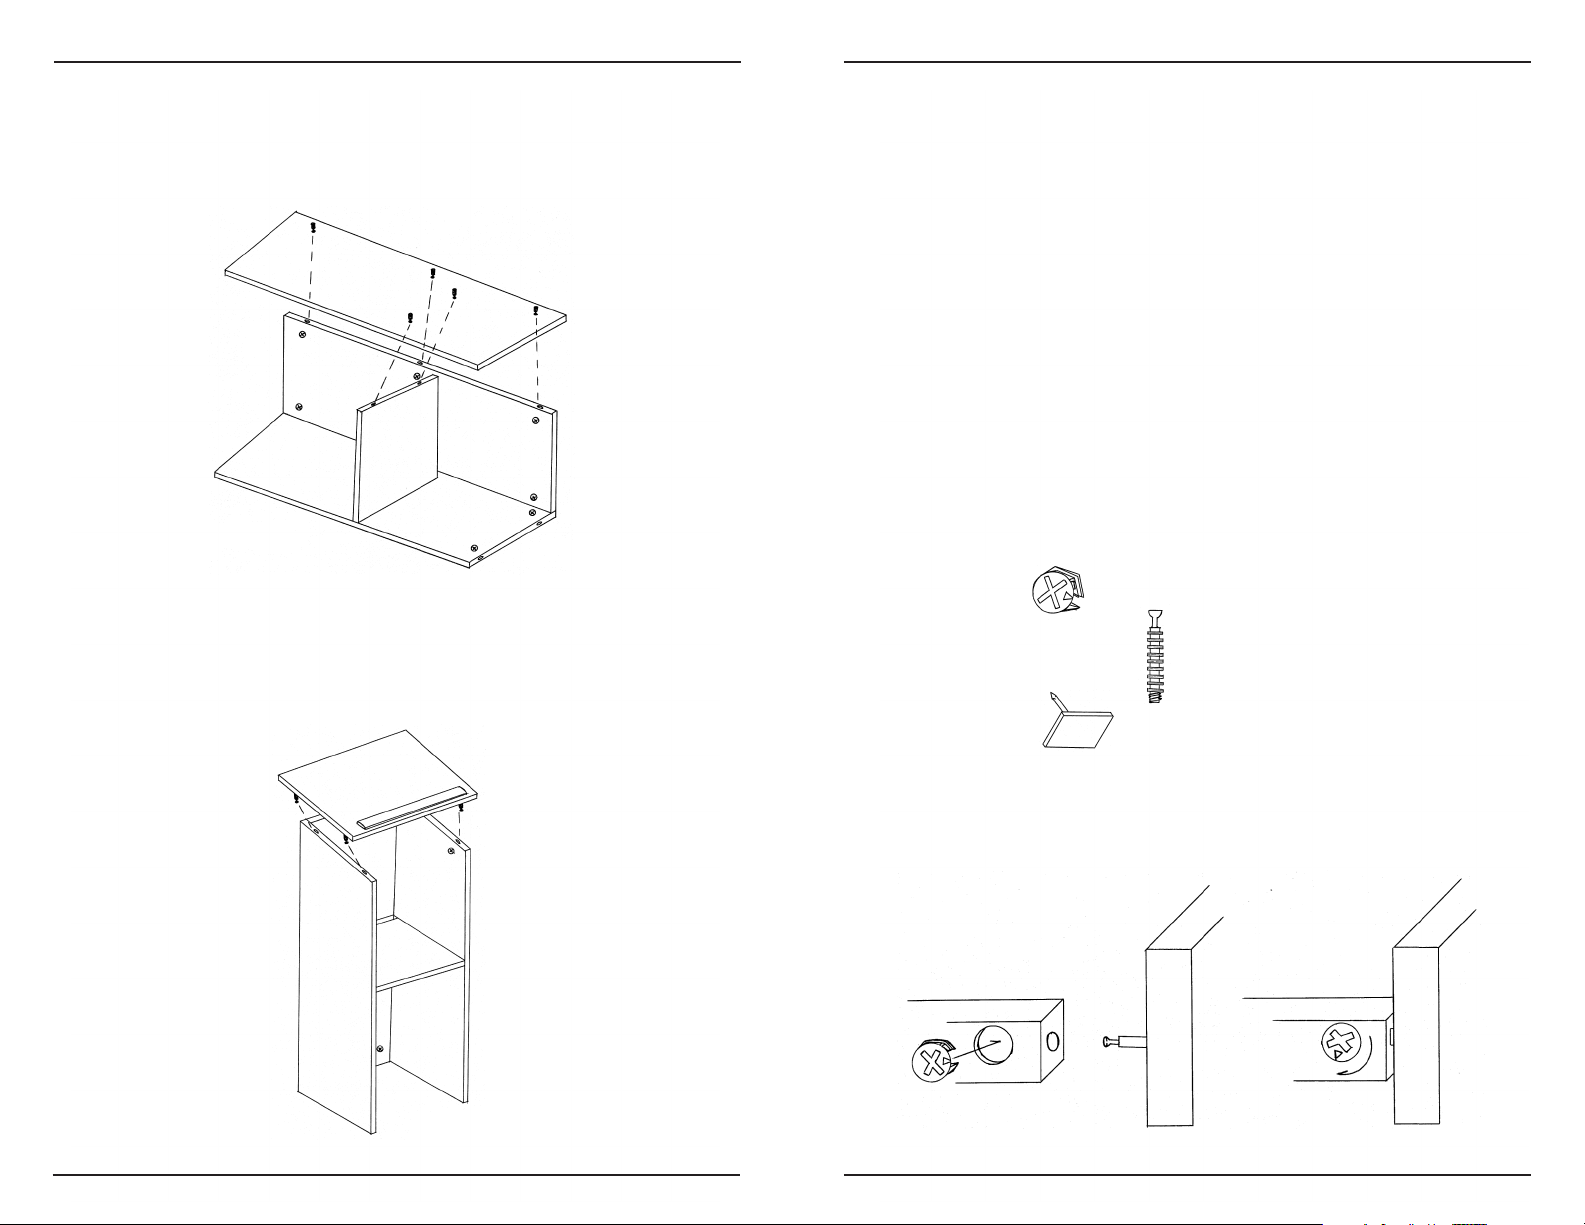
3) Now apply the left side Panel C to the semi assembled unit. Be
sure to align the cam bolts to the holes on both the front
Panel B and the shelf Panel E. Tighten cams (Diagram D).
Diagram "D"
4) Stand the lectern up. Taking the reading surface Panel D of the
lectern with the 4 installed cam-bolts facing down (the book
stop will be facing up), align bolts with holes on the top edges.
Once they are in place apply gentle pressure on the reading
surface until it lies at on all of the top edges, then tighten cams
(Diagram E).
ASSEMBLY INSTRUCTIONS
Assembly Tips
• Do not use a sharp instrument such as a knife or screwdriver to
open the packaging, as this may scratch or damage the unit
• All assembly should be done on a clean protected surface
such as carpet or the like.
• Make sure that you have all the required parts. (A list of all
the parts is listed below.)
• Read the instructions carefully and follow the diagrams to
ensure an easy and correct assembly.
Tools Required
#2 Phillips Head Screwdriver
Hammer
Parts
14 Cams...............
14 Cam Bolts ..............................
4 Platic Glides .........
1 Front Panel
1 Right Panel
1 Left Panel
1 Shelf
1 Reading Surface
(can be identied by bookstop
which is already installed)
Diagram "E"
Example of Cam Lock Assembly
6 3
Page 4
OklahOma SOund COrpOratiOn
FULL FLOOR LECTERN: Model 222
INSTALLATION OF HARDWARE
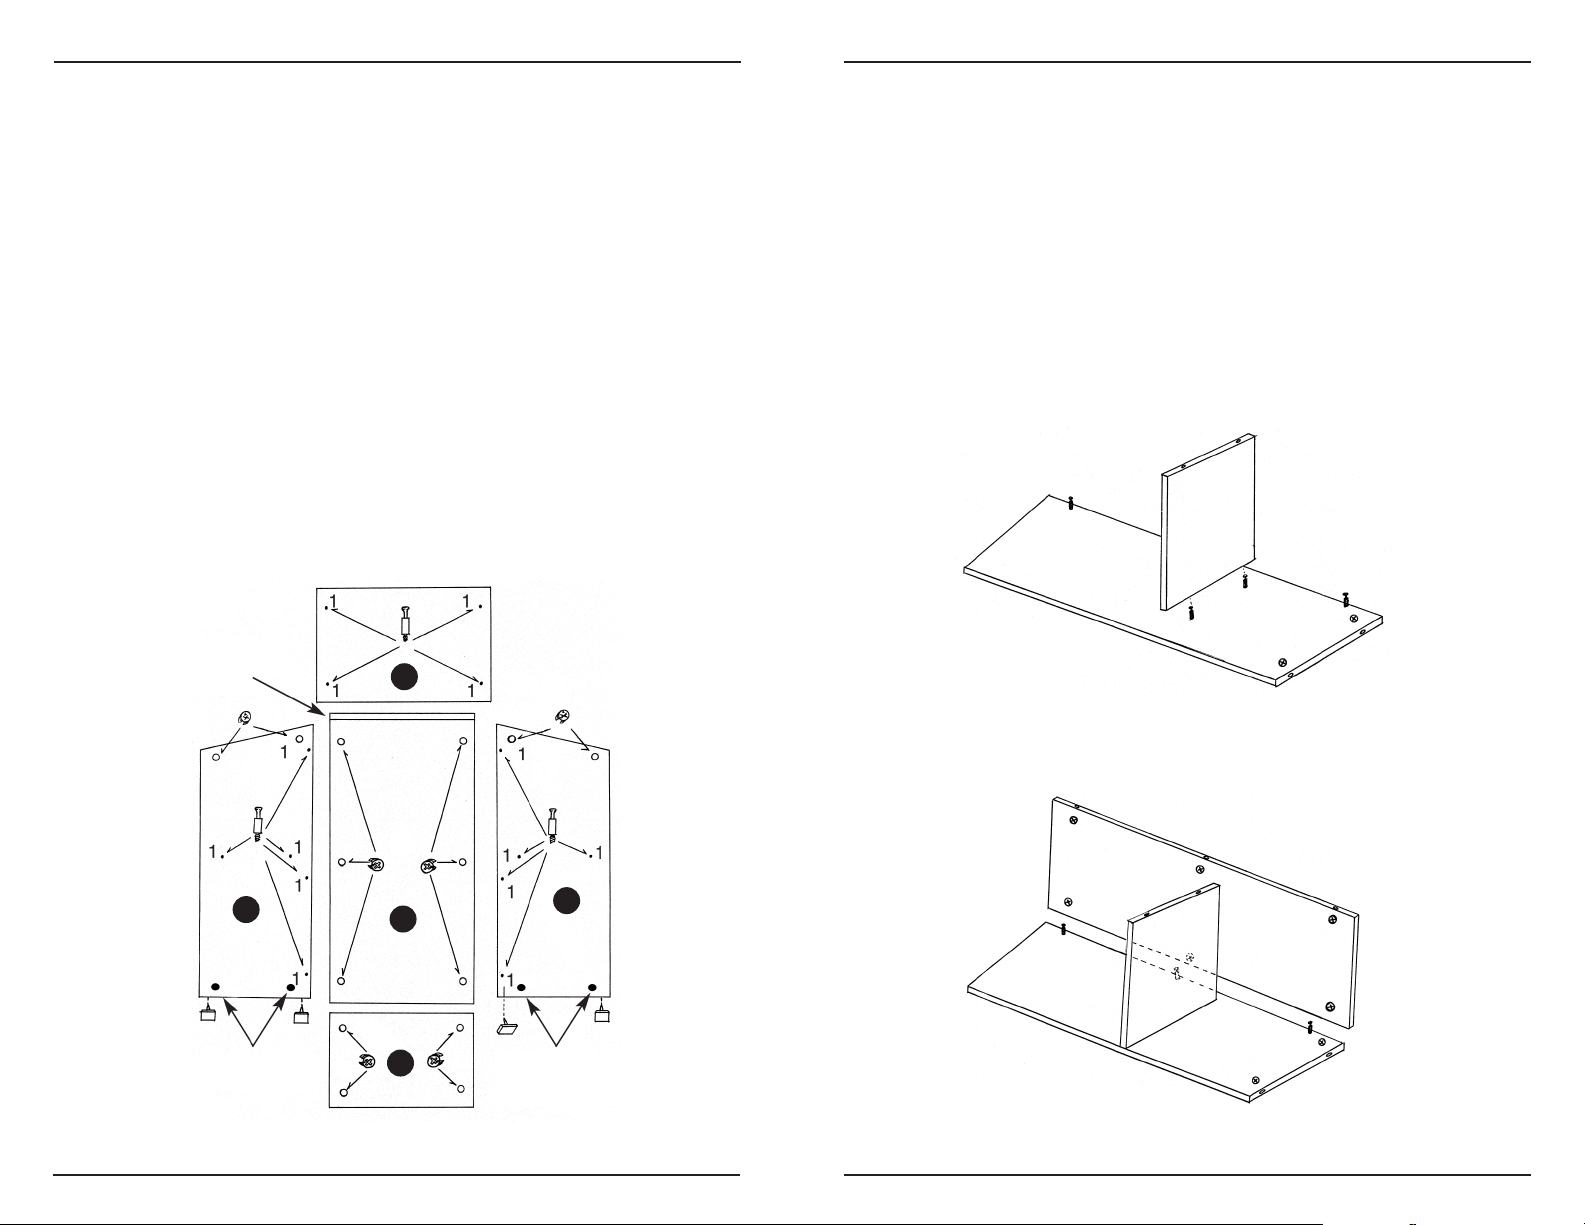
1) Lay out the wood panels as shown in Diagram A (make
sure the factory drilled holes are facing upwards). You
can determine the top of the front panel by identifying
the edge cut on an angle.
2) Identify the holes numbered "1" in Diagram A. Screw
the bolts into the inserts with the #2 Phillips head
screwdriver. Be sure to tighten the screws all the way.
BE CAREFUL NOT TO OVER-TIGHTEN THE BOLTS AS THIS
WILL STRIP THE WOOD!
3) The cams should be inserted in the larger holes as
shown on diagram. MAKE SURE THE ARROW ON THE
CAM IS POINTING TO THE CLOSEST EDGE AND ALIGNED
WITH THE HOLE ON THE EDGE.
4) Using a hammer gently tap plastic glides into bottom
edge as shown below (Diagram A). GLIDES SHOULD BE
INSTALLED NO FURTHER THAN ONE INCH FROM END.
Angle Cut Edge
D
ASSEMBLY OF LECTERN
It is important that the instructions on the assembly are
followed carefully
1) The rst piece of equipment that will be installed will
be the shelf Panel E. Make sure the cams face the bottom of the lectern. The two bolts in the center of the
right hand panel A will align with the two holes on the
edge of the shelf (these holes reach until the cams)
gently push the shelf down on to the cam bolts until
the shelf is completely on the Panel A. Tighten the
cams by turning clock-wise until locked. (Diagram B)
Diagram "B"
Optional Casters
Mounting Holes
Diagram "A"
2) Align holes on the edge of Panel B with three cam bolts
on the side of back Panel A, tighten cams. (Diagram C)
C
B
E
Optional Casters
Mounting Holes
A
Diagram "C"
4 5
 Loading...