

Page 1
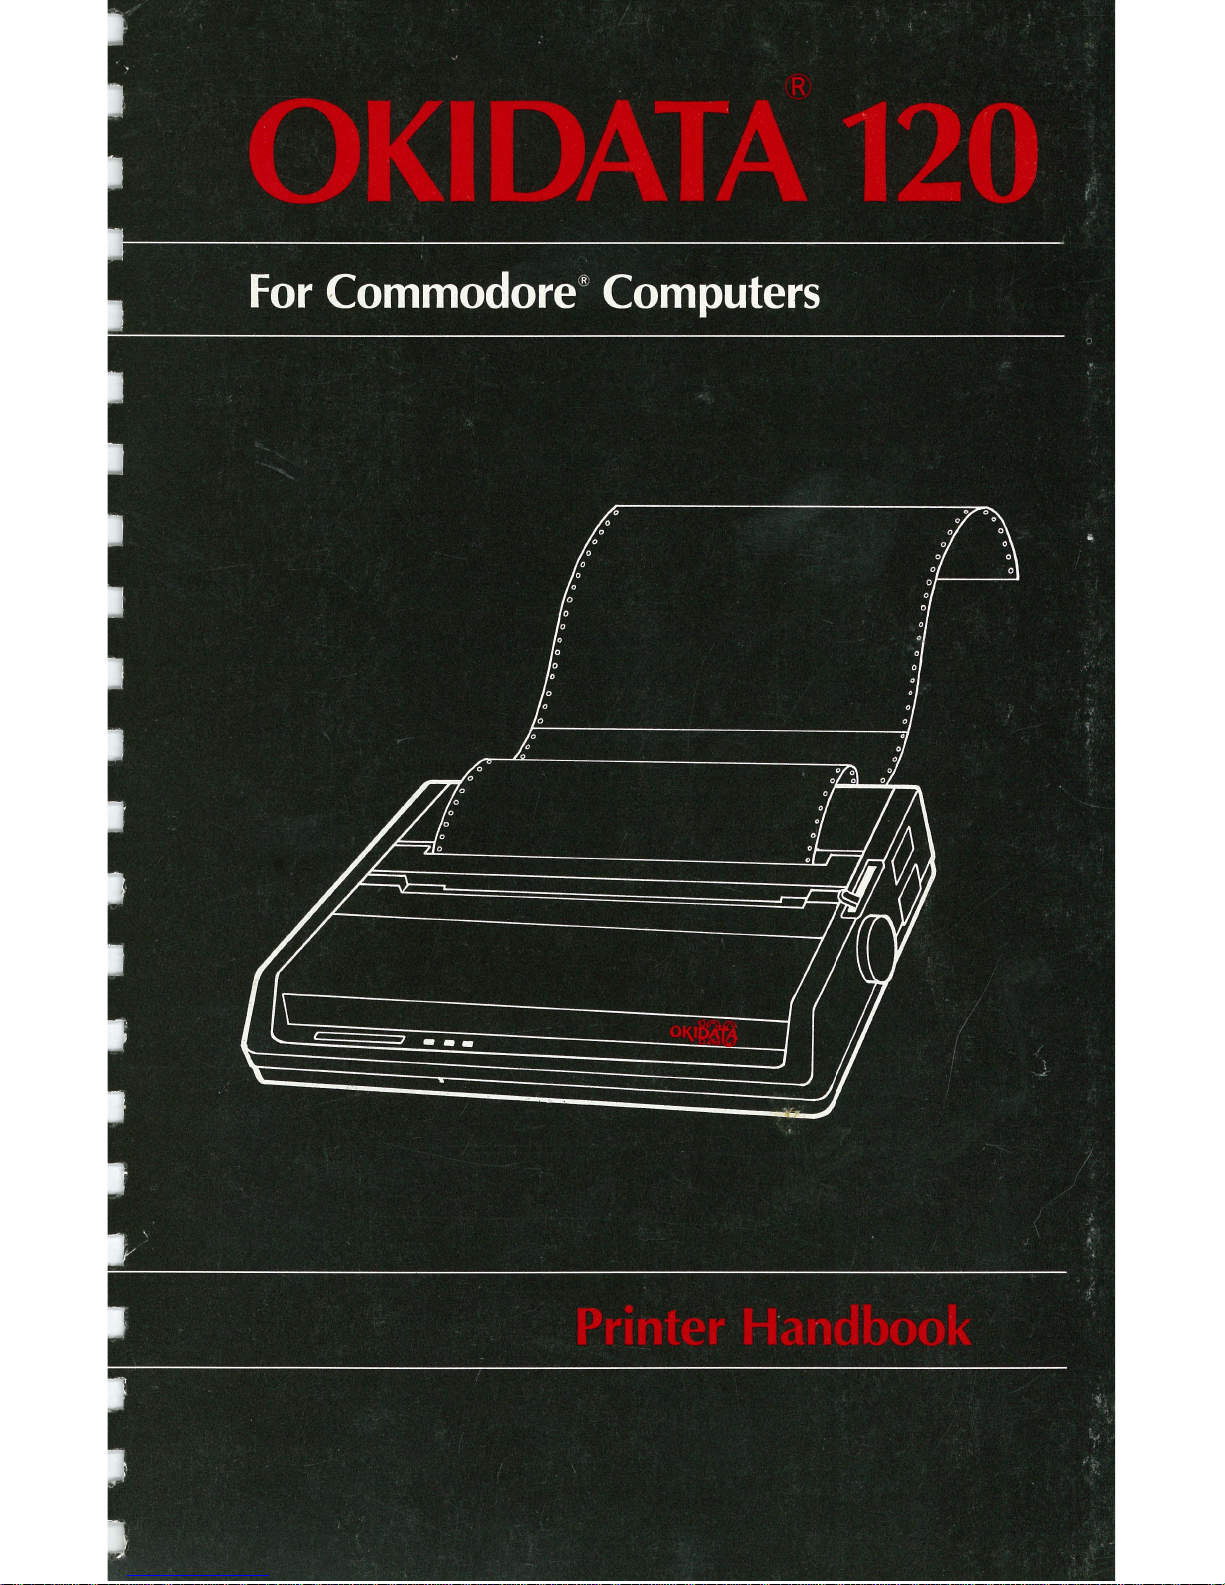
Page 2
Page 3

lRBlE
OF
CONTENTS
YOUR NEW
PRINTER
............................
......
...........
1
Setting
up.......................
.............
..
...............
... 2
Loading the ribbon cartridge
...................................
4
Loading
paper...................
...
...
.........................
7
Self-test. . . . . . . .. . . . . . . . . . . . . .. . . . . . . . . . . . .
...
. .. .. .. .. . . . . . . . .. 10
Connecting to your Commodore
.............................
12
Printer controls
......
..........................................
14
WORKING WITH
THE
OKIDATA
120
..........
.....
...
........
16
Printing
with
software packages ..
............................
16
PROGRAMMING
ON
YOUR
OWN
..................
.
......
...
19
Using control codes
...........................................
21
Characters in commands
.................................
.....
22
Sample program
...............................................
24
PROGRAMMING
FEATURES
....................................
26
Printing style
.................................
........
..........
26
Character size
.........................................
.
....
26
Double-width characters
...................................
26
Underlining
.................................................
27
Super-/subscript
..............
.
.....
...
.....................
27
Enhanced/emphasized
......................................
27
Character
sets
................................
.
..............
28
Reverse
print.
...............................................
29
Forms control. . . . . . . . . . . . . . . . . . . . . . . . . . . . . . . . . . . . . . . . . . . . . . . . .. 30
Carriage return
.............................................
30
Line spacing
.........................................
.
......
30
Form length
.................................
.
......... ,.....
31
Skip over perforation
..............
..
.......................
31
Override paper-out sensor
.......
.......................
...
32
Print start position ...
...
....................................
32
Graphics
..................................
..
...
................
34
Printing graphics
.................................
...
.......
34
Mapping your image
.......................................
35
Writing the program
........................................
36
Repeating graphics
.....................
.
...................
37
Miscellaneous
.....................
.
.........................
.. 38
Function cut code
.....................
..
...................
38
Cancel function
...............
.
................
.
.........
.. 38
Secondary address
.............
.....
......................
.. 39
APPENDIX A: INTERNAL SWITCH
SETTINGS
...............
..
A-1
APPENDIX
B:
INTERFACE
SPECiFiCATIONS
....
..............
B-1
APPENDIX
C:
COMMODORE
ASCII
TABLE
..................
.
C-1
APPENDIX D: PROGRAMMER'S GUiDE
.......................
D-1
SPECIFICATIONS
FCC
STATEMENT
Page 4

YOUR
NEW
PRINTER
The OKIDATA 120 connects to your Commodore personal
computer to provide quality, high-performance printing.
Its
small size and light weight make the printer
an
ideal desk-
top companion for your Commodore.
When you unpack the printer and accessories,
(save
the
box for later storage or shipping) check to make sure you
have everything:
•
OKIDATA
120 printer
• Ribbon cartridge
• Platen knob
• A spare fuse
• Printer cable
• Power cord
• Sprocket paper
• This handbook,
of
course
If anything's missing, confact your dealer right away.
Now
follow
the illustrated
steps
on the next few
pages
to
set
up your printer and get it running.
Page 5

-
Setting
Up
_________________
..::...Jo
1)
NOT
YET!
2) Lift
off
access cover.
2
Page 6

3)
Remove the cardboard retainer.
(Save
it
in
case
you
have to ship your printer.)
4)
Install the platen knob.
LINE
UP
THE
NOTCH
IN
THE
PLATEN
KNOB WITH
THE
PIN
ON
THE
SHAFT
AND PUSH IN.
3
Page 7

_
Where
to
put
your
printer
_______________
_
,
•
• in a well-ventilated place away from direct sunlight
or heat-generating equipment.
• on a slotted stand
if
you're feeding paper from the
bottom.
DON'T
put diskettes on top
of
the
printer-the
printhead's permanent
magnet may zap your data!
_ load
the
ribbon
cartridge
______________
..:-:.
4
1)
Center the pri nthead.
MAKE
SURE
THE
PAPER
BAIL
IS
AGAINST
THE
PLATEN
(THE
BLACK
2)
Insert the flat end
of
the cartridge into the carriage
with
the blue knob faCing up.
~
i
Page 8

3)
Lower the front
of
the cartridge
over
the printhead.
RIBBON
SHIELD
(DO
NOT
REMOVE)
4)
Press
the cartridge until
it
snaps
into place.
,
Be
careful not to
snag the clear ribbon shield .
•
5)
To replace the cartridge, just
lift
up.
,
•
Use genuine
OKIDATA
ribbon cartridges or other OKIDATA-approved
brands only. Other brands may damage the printhead
l
5
Page 9

6)
Switch OFF.
SWITCH
OFF
INSERT
POWER
CORD.
7)
Now
plug it in. You must
use
a grounded outlet!
6
Page 10

~_,~
__
loading paper
________________
_
The OKIDATA 120 can print on standard single sheet paper
or, using the built-in pin feed mechanism, you can print on
computer paper.
You can
use
multi-part paper
as
well (up to 4-parts).
Just
set
the printhead gap lever for the kind
of
paper you're
using:
PRINTHEAD
GAP
LEVER
5~i~~~~
;;;~~i~~
1'""1"
___
lnserting computer paper
--------------
The feed pins on the OKI DATA 120 adjust to handle
sprocketed computer paper between 9
112
and 10 inches
wide . (Actual paper
width
without
borders
is
8
112
to 9
inches.)
1)
Remove the access cover.
ALWAYS
KEEP
PAPER
LEVER
FORWARD
FOR SPROCKET
PAPER.
7
Page 11

8
2)
The left and right pin feed units slide to adjust for
various paper sizes. MAKE
SURE
THESE
ARE
PROP-
ERL
Y ADJUSTED FOR YOUR
PAPER
SIZE.
Insert
the paper
as
far
as
you can into the slots provided
by the black paper guides. The pins should
fit
into
the sprocket holes and move the paper along the
platen.
TAB FORWARD.
3)
Use the platen knob to advance paper to first printing line. Again, make sure the pins move the paper
properly.
REAR
fEED:
PAPER GOES IN THE GUIDES.
PRINTER MUST
BE
ON
A SLOTTED STAND.
Page 12

4)
Push the paper bail against the platen and replace
the access cover.
lHE
"
....
"ER
lEVER
ST
....
YS
OPEN.
,b.CCESS COVER
1_'
''"'--------
\nserting
sing\e
sheets
--------------------------------
1)
~ou
load single sheets
01
paper like
yoU
load paper
into a typewriter.
ClOSE
THE "
....
"ER lEVER.
(OPEN
ONLY
TO
STRAIGHTEN "
....
"ER.)
SliDE
THE
"IN
w
....
y
IF
NECESS
....
RY.
9
Page 13

2)
Push
the paper bail against the platen and replace
the access cover before printing.
_
Double-check
the
paper
controls
--
__________
_
, SINGLE·SHEET PAPER (FRICTION·FEED)
l ·PART
01
2·PART PAPER
~
HEAD·GAP
ADJUSTMENT
LEVER
-~
_
Self-test
_____________________
..,.
,
10
This built-in test lets you check out the printer before"you
connect
it
to your computer. It's a good idea to run this test
any time you
want
to make sure the printer
is
working
properly.
1)
Make sure the printer
is
ready to run,
with
the rib-
bon cartridge in place and the paper loaded.
Page 14

2)
Press
the
LlNEFEED
button and,
while
holding it
down, turn on the printer.
HOLD
THE
lINEFEED
BUTTON.
TURN
ON
HERE.
3)
When you release the
LlNEFEED
button, here's
what
you'll
see:
.!0123Q5G7S9:;
(=)?@ABCDEFGHIJKLMNOP[
10123456789:;
(=»)@nSCDEFGHIJKLMNOPQF
0123456789:;
\=}?@PBCDEFGHIJKLMNOPQRE
123456709
: ;
(~»)@nBCnEFGHIJKLMNOPQRSl
(~:~;/I~:;G7E!":i:
;
(;:)
~i(ilnBCDFFbHI
Jf<Lt'ir-KlPC!f6TL
CI-ARACTER
:34:'::'6113':3:
;
(.::::>~iIi1(H:3CDEFGH
I
JI<Utll\IClPC
nSTU\! D15PlAY
456789:;
(=)?@ABCDEFGHIJKLMNOPQRSTUVW
56189:;
(=)?@ABCDEFGHIJKLMNClPQRSTUVWX
6789:;
(=\ ?@ABCDEFGHIJKLMNOPQRSTUVWXY
789:;
(=}?@nBCDE~GHIJKLMNGPQRSTUVWXYZ
89:=
(=)?@ABCDEFGHIJKLMNOPQRSrUVWXYll
4)
To
stop the test, turn your printer
OFF
or
press
the
SELECT
button.
"MEtEED
FOR>IFEEO
,Of
SE'
rSELECT-,
ALARM
POWER
PRESS
SELECT
BUTTON
TO
STOP
TEST.
11
Page 15

-
Connecting
the
OKIDATA
120
to
your
Commodore
_____
......
12
...
is
easy
. We '
ve
designed the OKIDATA 120
so
you
don't
have to do anything more than plug it into your VIC-20,
Commodore 64, SX-64,
+
14,
C-16 or C-128.
,
Be
sure all equipment
is
turned
OFF
before connecting .
•
If you have peripherals (like a disk drive,
cassette
recorder,
or another printer) advance to
Step
3.
Otherwise
follow
only
steps
1 and
2.
1)
Plug one end
of
the cable into the I/O socket on the
back
of
your printer.
(The
plug and socket
are
keyed,
so
it
will
fit only one way.
You
shouldn't
have to force it.)
®-
I/OSOCKET
2)
Plug the other end
of
the cable into the serial socket
_____
:,
of
the computer.
OKIDATA
120
COMMODORE
OKIDATA
120 DIRECT CONNECTION:
OKIDATA
120
TO
COMMODORE
Page 16

3)
If you have other peripherals (like a disk drive, data
cassette
or
second pri nter), pi ug the pri nter cable
into one socket on the back
of
the peripheral. The
peripheral's cable runs from the other socket to the
serial socket
of
the computer.
'
The
OKIDATA
120
has
only
one
110
socket,
so
the printer
has
to be the
last item in the peripher
al
chain .
•
COMMODORE
SAMPLE MULTIPLE
CONNECTION:
OKIDATA 120 TO
DISK
DRIVE TO C-64
:.-
___
Now you're
set
to
go!
______________
_
The OKI
DATA
120
is
preset at the factory for normal oper-
ation
with
Commodore computers. For special applica-
tions, you can take advantage
of
some extra
OKIDATA
features by resetting a few switches inside the printer. You
can select:
• special characters for foreign languages.
• page lengths other than
11
inches.
• high resolution
bit
image graphics.
• alternate device number (if you have
two
printers).
• cancel automatic line feed.
The appendix
will
explain these features.
13
Page 17

-=
-=
lhe
printe
r
(ontro\s
....
-------------------------------------
NoW
that yoo'
ve
set up your printer, leI's take a closer look
at lights, buttons and levers on the
OKlO
1\'
1\
120.
l\N.EfEED
FORMf"EEO
TOF
SE1
,SELECT-,
ALARM
POWER
I I
llGI·n
s
POWER
liOn:
Lights
when the power
is
switched on.
I\lARr-\
lIGl'll:
Light; when the printer runs out
01
paper
or
it
tne
paper iams.
SElEClllGl'll:
Light; when the printer
is
selected (ready
to print).
0«
when the printer
is
deselected (not ready
to
print) .
SElECl
\llJ'fT
ON
: Select;
or
deselects the printer. When
the printer
is
selected, the seL light comes on and the
printer
is
ready to receive data Irorn the computer. When
the printer is deselected, it won't print
(unleSS
you're run'
ning a seH.te
st
), but
yOU
can peno
rrn
some
01
the pnnter
tunctions described
be\ow.
10f
(lOP
01
fo,rn) SEl
\10'11
0
1'1:
set;
the Iirst printing
line
01
each page.
'0
set'
Of,
deselect the pn nter and
then press the
,Of
button.
You
can
alsO
select line print
(page
26)
with this button. lust hold the
,Of
button down
while you're switching on the printer.
14
Page 18

FORM
FEED:
Advances paper to the top
of
the next page.
Press
th
is
button
wh i Ie
the pri nter
is
deselected.
LINE
FEED:
Advances the paper one line.
Press
this button
while the printer
is
deselected. You can also
use
this button
to perform a self-test.
Hold
this button
down
while
switch-
ing on the printer.
ADJUSTABLE
PIN
FEED:
PULL
TABS
FORWARD
AND
SLIDE THE
PIN
FEED
UNITS
TO
THE
LEFT
OR
9.5
TO
10.5
INCHES WIDE.
BACK
FOR SINGLE SHEETS
PAPER
LEVER:
Always move the lever FORWARD (towards
the front
of
the printer) when using computer sprocket pa-
per. Always move it BACK when using single sheets, ex-
cept
if
you're adjusting the paper.
PRINTHEAD GAP
LEVER:
Move the lever towards the front
of the printer when printing on three- or four-part paper.
Move it towards the platen when printing on single
sheets
or two-part paper.
15
Page 19

WORKING
WITH
THE
OKIDATA
120
Now
that you've
set
up
your
OKIDATA 120 and connected
it to your Commodore, it's time to start printing.
Generally speaking, there are
two
ways you can
use
your
printer:
• With commercial software packages, you can produce
all kinds
of
information: letters, home budgets, recipe
files ... even computerized horoscopes and personal ity
profiles. Your OKIDATA 120
will
increase the packages'
usefulness by giving you attractive printed copies
of
your
work.
We'll
give you some general information on
how
packages handle printers,
as
well
as
a few pointers on
getting the most out
of
the OKIDATA 120 and your
software .
• If you do your
own
programming, you can easily add a
printout.
We'll
explain
how
Commodore's version
of
BASIC
controls the printer, and show you
how
you can
program the OKIDATA 120's many special features to
spruce up your printouts.
_
Printing
with
software
packages
____________
_
16
Most likely,
you'll
do most
of
your printing using a software
package, like word processing or a spreadsheet program.
There
are
many other kinds
of
software
as
well:
recipe fil-
ers,
gardening design programs, stamp cataloguers, and
self-help packages.
As
a rule, most programs like this that
produce information on the screen
will
let you make a
printed copy. For example, Infocom's adventure games,
like "Hitchhiker's Guide to the Galaxy," let you print out
each step
of
your adventure. Waveform's Musicale
2,
part
of
a music synthesizer package, can print out a score for
you. Br0derbund's Printshop lets you create banners and
other printer "special effects."
Even
a few graphic drawing
packages can print a black and white copy
of
your
doodles.
The first and most important step:
STUDY
THE
INSTRUCTIONS
THAT
CAME
WITH
YOUR
SOFTWARE!
Page 20

These manuals should tell you
how
to print. The informa-
tion may be hard to find, but it
will
be there.
'
When you're reading the instrutions you may
see
references to
TRUE
ASCII
and
COMMODORE (or
PET)
ASCII. Follow the directions for COM-
MODORE ASCII!
•
Here's
why:
ASCII
(American Standard Code for Information Inter-
change)
is
a system for numerical coding
of
characters
so
that computers and peripherals can communicate
with
each other. Almost all personal computers
use
it.. .but
Commodore doesn't. Commodore computers
use
a differ-
ent coding system, usually called
PET
ASCII or Commodore
ASCII. Some software packages have different setup procedures, depending on whether you have a Commodore
pri nter or another model that
uses
the ASCII standard. The
OKIDATA 120
is
designed to
use
Commodore ASCII.
So
follow
any instructions for Commodore printers or Commo-
dore ASCII. If you don't, you may end up with upper and
lower
case
letters mixed up
with
a strange assortment
of
graphic symbols.
Some
packages are simple. For example, in some Infocom
text adventure games, all you have to do
is
enter
SCRIPT
at
any point in the game, and
you'll
get a printout
of
each
following
move and the game's response. (Enter UNSCRIPT
to cancel.) Because the game assumes you have a Commodore or Commodore-compatible printer,
which
the OKI-
DATA 120
is,
you
don't
have to make choices.
With
some packages, you do have to make choices. Often
the software
will
have some kind
of
installation procedure,
which
sets
it up for the particular printer you have. Usu-
ally,
you'll
have to pick from a
"menu"
(list)
of
printer
types. Look for:
OKIDATA
120
or
COMMODORE
MPS
PRINTER
(Such
as
801, 802, 1525)
or
COMMODORE
ASCII CHARACTER
SET
(See
explanation
above)
or
OKIMATE 10
17
Page 21

'
Don't
pick any other OKIDATA printer (like Microline). It
won't
work
properly!
•
If you choose the Commodore
MPS
selection, you may not
be
able to
use
some
of
the
OKIDATA
120 exclusive fea-
tures (underlining, foreign language characters)
without
doing some customizing. Your software documentation
is
the best source
of
information on
how
to do this.
_
Using
printing
features
with
software
packages
-------.
n
Special codes control the printer's features, like changing
character size, underlining, and
so
on.
How
the computer
sends
these codes to the printer varies
with
the package.
There
are
four general ways codes are handled:
• Separate files (sometimes called "drivers")
assign
codes to particular keys. Usually, the package comes
with
files for particular printers. You can customize
these ready-made files, or create your own.
Easy-
script
uses
this method.
• You
assign
a list
of
codes to particular
keys
and in-
sert the list into each document file. Paper Clip,
Speedscript, and Wordpro 3
+
work
this way.
• You
press
a particular series
of
keys
before and after
the codes at the place inside the file where you want
to
use
a printing"feature.
•
In
some accounting and spreadsheet programs, you
have the option
of
adding codes when you give the
command to print a document. You can
use
this option to change printing styles for the entire document, to print in condensed type, for example.
Again, check your software's instructions to find out what
to do.
-
Where
do
the
codes
come
from?
------------
1'""
('
The chart in the appendix
of
this book gives you a sum-
mary of the
OKIDATA
120's printing features.
For
more de-
tails,
see
the Programmer's Reference Section. The control
18
Page 22

codes
are
listed in
two
formats, labeled decimal and hexa-
decimal.
Be
sure to
use
the form your software instructions
tell you to
use
.
Remember, your software may
notlet
your OKIDATA 120
do everything it's capable
of.
You
may not
be
able to turn
a feature on and off in the middle
of
a line, for example, or
you may only
be
able to print
an
entire file using a particu-
lar feature.
PROGRAMMING
ON
YOUR
OWN
In
addition to printing
with
commercial software, you can
also write your own programs for the OKIDATA 120, con-
trolling all the printing features directly. Many Commodore
computer owners
won't
have to
read
this section. It ex-
plains the programming codes
used
by your printer. If you
don't
plan on writing programs, skip this section for now.
You
may need it later
if
you plan to write programs or
if
you have software that requires you to enter printer codes.
We'll explain
how
to program your printer, and show you
some examples in
BASIC.
You
will,
however,
need
at
least
a little knowledge
of
programming in order to do some-
thing useful.
For
more details on programming,
see
your
computer's Owner's Guide or Programmer's Reference
Guide. There
are
also a number
of
books available that
teach
BASIC.
To
start printing with Commodore
BASIC,
you'll
need
these
three statements:
OPEN 1
A,O
PRINT#l,
CLOSE1
The statements above
are
the ones any program
needs
in
order to control the printer. Let's look at them one at a
time:
• The
OPEN
statement opens a line
of
communication
19
Page 23

20
with a peripheral (printer, disk drive , or data
cassette)
.
It
looks like this:
OPEN 1
,4,7J~---
SECONDARY
/
(OPTIONAL)
71
ADDRESS
LOGICAL
FILE
DEVICE NUMBER
The LOGICAL
FILE
number represents the file name
of
the channel open to the printer.
We
use
a 1 here, but
you
can
choose any number between 1 and 255 .
Your printer
has a DEVICE
NUMBER assigned to it. Usu-
ally, the printer
will
be device 4.
If you
use
two
printers,
you'll
have to name one printer
device 4 and the other device
5.
Using the SECONDARY
ADDRESS
gives you the choice
of several printing modes.
Page
39 explains this feature
in detail. This number
is
optional, you
don't
need to in-
clude it in your OPEN statement
if
you want the
standard printing mode.
• The PRINT#1 statement
sends
a line
of
data to the
printer. Use the logical file number in this command (we
use
#1 here).
• A
CLOSE1
statement closes the channel to the printer
that you opened
with
the OPEN statement. The number
in
your
CLOSE
command must
be
the logical file num-
ber. If you
don't
close the file, you'll get a
?FILEOPEN
error
message
when you try to open it again.
• A fourth command, the
CMD
1 statement, makes your
printer act like a monitor. Anything that
would
normally
print out on the screen
now
prints out on the printer in-
stead. Any PRINT or
LIST
command
goes
directly to the
printer. To end a
CMD
command, write a program line
with nothing but a PRINT# command, followed by a
program line
with a CLOSE
statement.
Page 24

,.;;;;;;;.-
__
Putting
it
together
_______________
_
Here's a sample program that illustrates these statements:
10
OPEN
1,<';,0
20
PRINT#l,
"THE
OKIDATA
120"
3D
PRINT#l,
"PRINTS
LIKE
THIS."
<';0
CMD
1
50
PRINT
"THIS
PRINTS,
TOO
...
"
60
PRINT#l,
70
CLOSE1
.rul-
---
Using
control
codes
_______________
_
If you
use
a PRINT# command followed
only
by text, OKI-
DATA 120 gives you standard printing:
HERE'S
NORMAL
PRINTING
By
using "control codes," you
can
spice up this standard
printing
with
headlines, underlining, and different type
sizes
. You can control spacing and page length. The codes
even let you print graphics.
When the computer
sends
the OKI DATA 120 a control
code, the printer responds by changing one
of
its
printing
features. Changes aren't permanent, however; they can
be
canceled by sending certain other codes or by switching
the pri nter off.
When you write a program, you should insert the control
code right before you want the "special effect" to take
place. Here's
an
example:
10
OPEN
1,<';
20
PRINT#l,"HERE'S
NORMAL
PRINTING"
3D
PRINT#l,
CHR$
(M)
;
"DOUBLE
WIDTH"
<';0
CLOSE1
HERE'S
NORMAL
PRINTING
DOUBLE
WIDTH
21
Page 25

The CHR$(14) code
is
a non-printing control code that tells
your printer to print in
double-width
size. The printer reads
the number 14
as
a Commodore ASCII decimal code number, a standard code system used by Commodore computers. Notice the CHR$ code and the quotation mark are
separated by a semicolon.
Sometimes, for more complex features, the
OKIDATA
120
uses
combinations
of
CHR$ codes. The first code in this
combination
is
usually CHR$(27), called the
"ESCAPE"
code. This code tells the printer to interpret the codes that
follow
as
part
of
an
instruction. For example:
10
OPEN
1,<';
20
PRINT#1,"THIS
CODE
";CHR$(27);CHR$(67);
"STARTS
UNDERLINING,"
30
PRINT#1,"AND
THIS
CODE
";CHR$(27);CHR$(61l);
"STOPS
IT."
<';0
CLOSE1
TH I S CODE
S1B.~T~l)J~J!_~_8.J::!.I.NI~.g
..
L
8-'~JL
TH.I.!2.
__
!;';;P...R's.
STOPS
IT.
-
Characters
in
commands
________________
..l
J
22
Commodore ASCII decimal code numbers
32
through 126
represent printable characters,
including
letters, numbers
and symbols. The chart in Appendix C shows these characters and codes. Using a PRINT#
with
one
of
these codes
causes
it
to print the corresponding character. For example,
CHR$(65) equals the letter
"A":
10
OPEN
1,<';
20
PRINT#l
CHR$(65)
causes the letter
"A"
to
be
printed.
This works in reverse, too. When
an
ASCII decimal code
used
in a command also represents a printable character,
you can substitute the decimal number
with
the actual
character, surrounded by quotes. To clarify this,
we'll
use
Page 26

an
example. The code for underlining
is
CHR$(27);
CHR$(67). If you check the Commodore ASCII chart in Appendix
B,
you'll
see
the decimal code CHR$(67) also repre-
.
sents
the character
"C".
To underline, you can
use
this
command:
CHR$(27);IICII
The C wasn't printed; it
is
used
as
part
of
the non-printing
ESCape sequence.
Since many people find these character sequences easier to
read
and remember than a sequence
of
decimal com-
mands, we
use
them often throughout this section.
This certainly isn't all there
is
to programming,
of
course,
but it should be enough to get you started
as
you go
through the descriptions shown for programming features
here. First,
we'll
discuss
how
to program features that affect
the appearance
of
printing, like underlining
or
character
size. Then,
we'll
outline
features that control the format
of
your printed page, like line spacing and page length. Next,
graphics will
be
discussed. Finally,
we'll
review miscella-
neous programming features.
23
Page 27

_
Sample
program
________________
-:...J
0
24
The printout
below
demonstrates many
of
the printing fea-
tures described in this reference guide. It
is
followed by the
BASIC
program needed to produce this printout. You may
try typing and running it on your
own
computer or just
use
it for reference when writing other programs.
CHECK
OUT
SOME
OF
OKIDATA
120'S
FEATURES:
OKIDATA
120
PRINTS
IN
PICA,
FINE
AND
ELITE;
DDUBLE-W
I
DTH
___
BACK
TO
NORMAL
START UNDERLINING
...
UNDERLINE
CANCELED
SUPERSCRIPTS:
OKIDATATM
SUBSCRIPTS:
H..,O
EMPHASIZED
PRINT
•••
NORMAL
ENHANCED
PRINT
•••
NORMAL
SPANISH CHARACTERS: ! 0 i
~
L
AMERICAN
CHARACTERS: # 0 @ [ ]
SIX
LINES
PER
INCH
SIX
LINES
PER
INCH
SIX
LINES
PER
INCH
EIGHT
LINES
PER
INCH
EIGHT
LINES
PER
INCH
EIGHT
LINES
PER
INCH
1.;.
__
:J:t..
....
:II*'_=il;I.i
•••
I[I;I
BACK
TO
STANDARD
PRINTING
TEXT
INDENTED
15
SPACES
BACK
TO
NORMAL
Page 28

And here
is
the program:
10
OPEN
1,L;
20
PRINT#l,"CHECK
OUT SOME OF
OKIDATA
120'S
FEATURES:"
25
PRINT#l,"
"
3D
PRINT#l,"OKIDATA
120
PRINTS
IN
";CHR$(15);
"PICA,
";
35
PRINT#1,
CHR$
(29) ; "FINE
";
CHR$
(28)
;
"AND
ELITE"
L;O
PRINT#1,CHR$(15)
;CHR$(M)
;"DOUBLE-
WIDTH
...
";CHR$(129);"BACK
TO
NORMAL"
L;5
PRINT#l,"
"
50
PRINT#1,CHR$(27);"C";"START
UNDERLINING
...
";
CHR$(27);"D";"UNDERLINE
CANCELED"
55
PRINT#l,"
"
60
PRINT#1,
"SUPERSCRIPTS:
OKIDATA";
CHR$
(27);
"J";"TM";CHR$(27)
;"K"
65
PRINT#l,"SUBSCRIPTS:
H";CHR$(27);"L";"2";
CHR$(27)
;"M";"O"
70
PRINT#l,"
"
75
PRINT#1,
CHR$
(27) ; "T";
"EMPHASIZED
PRINT
...
";
CHR$(27);"I";"NORMAL"
80
PRINT#1,CHR$(27);"H";"ENHANCED
PRINT
...
";
CHR$(27);"I";"NORMAL"
85
PRINT#l,"
"
90
PRINT#1,CHR$(27);"!";CHR$(67);
"SPANISH
CHARACTERS:
# 0 @ [
l"
95
PRINT#1,CHR$(27);"!";CHR$(6L;);
"AMERICAN
CHARACTERS:
# 0 @ [
l"
100
PRINT#l,"
"
105
FOR X = 1
TO
3
110
PRINT#l,
CHR$(27);"6";"SIX
LINES
PER
INCH"
115
NEXT X
120
PRINT#l,"
"
125
FOR X = 1
TO
3
130
PRINT#l,
CHR$
(27);
"8";
"EIGHT
LINES
PER
INCH"
135
NEXT X
lL;O
PRINT#l,"
"
M5
PRINT#l,
CHR$
(18);
"THIS
IS
REVERSE
PRINTING"
150
PRINT#l,
CHR$
(M6);
"BACK
TO
STANDARD
PRINTING"
155
PRINT#l,
CHR$
(16) ; "15";
"TEXT
INDENTED
15
SPACES"
160
PRINT#l,
CHR$(2L;)
165
PRINT#l,
"BACK
TO
NORMAL"
170
CLOSEl
25
Page 29

PROGRAMMING
FEATURES
-
Printing
Style
-----------------
-Fi
q
The following features let you change the printing style of
26
your OKIDATA 120. It includes such features
as
print size
and
underlining.
-------
Character
Size
-------
Function:
Pica (10
CPI)
Elite (12
CPI)
Fire
(17.1
CPI)
Code:
CHR$(15)
CHR$(28)
CHR$(29)
Your printer normally prints 10 Characters
Per
Inch
(CPI)
,
like a pica typewriter.
With
control codes, you can change
the character size to
elite-12
CPI,
or fine print-
17
.1
CPI.
Use
the CHR$(28) command for elite printing and
CHR$(29) for fine print.
To
return to pica,
use
the
CHR$(15) command.
Double-Width
Characters
Function:
5
CPI
6
CPI
8.5
CFI
Stop
double-width
Code:
CHR$(15);CHR$(14)
CHR$(28);CHR$(14)
CHR$(29);CHR$(14)
CHR$(129)
For
a "headline" effect, you can double the width of your
printing. This turns 10
CPI
pica print into 5
CPI,
12
CPI
elite
print into 6
CPI,
and 17.1
CPI
fine print into 8.5
CPI.
Double width prints for one line only.
The
CHR$(14) code doubl
es
the width
of
the print size
you're currently using.
To
print 6
CPI,
for example, com-
bine the elite code, CHR$(28), with the double -width code
to get the CHR$(28);CHR$(14) code.
NOTE: This feature doubl
es
the
width of
pica, eli
te
and fi
ne
printing only.
It
won't
double the width of superscript and subscript characters or custom-de-
sign
ed
graphics .
Page 30

Function:
Start
underlining
Stop
underlining
Underlining
Code:
CHR$(27);"C"
CHR$(27);"D"
To
add emphasis to a
word
or
phrase, you can underline it.
Use the CHR$(27);"C" code to start underlining, and the
CHR$(27);"D"
to stop it.
NOTE: Underlining
won't
work
with reverse printing, or custom-designed
graphics.
r
Function:
Super-/Subscript
Code:
Start
subscript
Stop
subscript
Start
superscript
Stop
superscript
CHR$(27);"L"
CHR$(27);"i\Ii"
CHR$(27);"J"
CHR$(27);"K"
Subscripts and superscripts are small
block
-style characters
used
when
writing
formulas, equations and trademark
symbols.
Superscript characters print slightly higher than normal
characters. If you
want
to program superscript,
use
the
CHR$(27);"J" command before you type the characters you
want printed that way. To cancel the superscript command,
use
the CHR$(27);"K" code.
Subscript characters print slightly
below
the print line. To
program a subscript,
use
the CHR$(27);"L" command before you type your subscript characters. To cancel the subscript command,
use a CHR$(27);"M"
code.
NOTE: The subscript command will automatically cancel superscripts. Likewise,
a superscript command
will
cancel subscripts .
.------
Enhanced/Emphasized
-----
.....
Function:
Start
enhanced
Start
emphasized
Stop
emphasized/enhanced
Code:
CHR$(27);"H"
CHR$(27);"T"
CHR$(27);"I"
Emphasized and enhanced printing give your printing a
27
Page 31

28
darker, bolder look that's useful when you want to call attention to a word or phrase.
Each
character
is
printed
twice, with the second printing slightly offset from the first.
In
enhanced print, each character
is
printed
twice
by shift-
ing the dots vertically.
To
program enhanced printing
use
a
CHR$(27);"H" command. To stop it,
use
the CHR$(27);"I"
command.
In
emphasized printing, each character
has
a slight hori-
zontal offset. To start emphasized printing,
use
the
CHR$(27);"T" command.
To
stop it,
use
the CHR$(27);"I"
command.
You
can combine emphasized and enhanced for extra-bold
printing.
Use
the
two
codes together like this:
CHR$(27);"T";CHR$(27);"I" in your program. To cancel,
use
the CHR$(27);"I" command.
NOTE: The Commodore graphics characters, superscript and subscript characters, and custom-designed graphics
won't
print in enhanced or emphasized
modes.
_------
Character
Sets
-------.
Function:
Commodore
modes:
Cursor
Up
mode
Cursor
Down
mode
Language features:
Slashed zero
Unslas.ed zero
French Canadian
Span
is.
Code:
CHR$(145)
CHR$(17)
CHR$(27);"!";CHR$(64)
CHR$(27);"!";CHR$(65)
CHR$(27);"!";CHR$(66)
CHR$(27);"!";CHR$(67)
As
your computer manuals explain, the Commodore com-
puter gives you the choice
of
using the Cursor
Up
character
mode or the Cursor
Down
character mode.
Commodore's Cursor
Up
mode offers upper
case
letters
and graphic symbols. If you want your printer to print these
symbols,
use
a CHR$(145) code.
Commodore's Cursor
Down
mode gives you upper and
lower
case
letters. It
is
useful for word processing applica-
tions. To switch to Cursor Down mode,
use
the CHR$(17)
code.
Page 32

Once
you have chosen
which
Commodore mode you
will
use,
you may wish to choose particular character
set
options:
Slashed/unsiashed
zeros
The slashed zero
set
gives you standard Commodore characters, and the zeros have slash bars through them. Slashed
zeros are useful in computer applications and other
cases
where it's important to distinguish between a zero and the
letter
"0".
If you
don't
want
a slashed zero, choose the un-
slashed zero selection.
Spanish/French-Canadian
When you
use
the command for one
of
these character
sets,
you can
print
symbols and characters unique to these
languages. You
see
standard characters on the screen, but
they'll print
out
as
language characters.
For
example,
if
you
enter the Spanish character
set
by using the
CHR$(27);"!";CHR$(67) command, and then type the @
key, it
will
appear on the screen
as
@.
But when your
document
is
printed, the @
will
be replaced by the Spanish
i symbol.
The chart
below
shows
how
your
OKIDATA
120 prints
symbols in various character
sets.
Language Character
Commodore 0
# & 0
@
[
£
1
t
~
-
+
~~
Commodore 0
#
& 0
@
l
£
1
t
~
-
+
l{
I
Fren'~h-Canadian
U e
0
a a
<;:
e I
·i
6 e u
Spanish ! &
0
i
N Ii
l
U
~
a e i
Decimal
35 38
48 64
91
92 93 94 95 96 123 124
Reverse
Print
Function:
Start reverse
print
Stop reverse
print
Code:
CHR$(18)
CHR$(14E)
I
I
e
6
125
'7T
'7T
a
U
126
This feature creates
white
letters on a black background. It
works
only
with
pica (10 CPI) and 5
CPI
printing. The
29
Page 33

CHR$(18) command starts reverse printing and the
CHR$(146) returns the printer to normal black on
white
printing.
Reverse printing
is
automatically canceled at the end
of
each line. If you
want
more than one line, add CHR$(18)
at the beginning
of
each new line.
,
•
Heavy lise
of
reverse printing can damage the OKIDATA 120'5 printhead.
Don't
r;rint more than five consecutive lines in reverse printing .
_
Forms
control
____________________
__
30
These features let you control the length,
width
and format
of
your printed page.
Function:
CR
with
LF
CR without
LF
Carriage
Return
Code:
CHR$(13)
CHR$(141 )
A Carriage Return
(CR)
with
Line
Feed
(LF)
command-
CHR$(13)-causes
the printer to print a line
of
data and
then advance the paper one line.
A
CR
without a LF
-
CHR$(141)- prints a line
of
data but does not cause the
paper to advance.
NOTE: The
CR
with
LF
command wor
ks
only if function switch 5
is
ON.
See
Appendix A for details .
.--------
line
Spacing
--------~
Function:
Line feed
6
LPI
8
LPI
Multiples of n1144"
Code:
CHR$(lO)
CHR$(27);16"
CHR$(27);18"
CH
R$(2
7)
;CH
R$(l 0)
;CH
R$(
n)
NOTE: n = a number between 0 and 255.
Sending a Line
Feed
(LF)
command makes the printer ad-
vance the paper one line. The standard line spacing
is
6
Lines
Per
Inch (LPI). You can reset the line spacing to 8
Lines
Per
Inch by sending a CHR$(27);"8" command. To
return to 6
LPI,
use
the CHR$(27);"6" command.
Page 34

For
special applications, like graphics, you can adjust the
line feeds by multiples
of
11144
inch
with
the
CHR$(27);CHR$(1 O);CHR$(n) command. The letter n
equals n/144 inch line feed. You can choose any number
between 0 and 255.
For
example,
if
you wanted to add 72/144 inch line feed,
you
would
use
the code CHR$(27);CHR$(1 O);CHR$(72).
NOTE
: If n = 0 then you will
add a 2561144 inch line
feed.
--------
Form
Length
-------
......
Function:
Advance to next page
(Form
Feed)
Set
page length
by
lines
Code:
CHR$(12)
CHR$(27);"F"
;"nn"
NOTE: nn
= A two-digit number between
01
and
99
that indicates the
numb
er
of lin
es
per
page.
When you
send
a "Form Feed"
command-CHR$(12)
- the
paper automatically advances to the top
of
the next page.
The length
of
each page
is
determined by
an
Internal
Switch setting
(see
page A-1). The factory setting
is
11
inches, the size
of
a standard typewriter sheet.
You can program your printer's page length
with
the
CHR$(27);"F"
;"nn"
command. Here,
nn
equals the number
of
lines per page. It can
be
any
two-digit
number from
01
to 99.
For
example, if you wanted a page that
was
50 lines
long,
use
a CHR$(27);"F";"50" command.
------
Skip
Over
Perforation
------
\..
Function:
Start auto-skip
Stop auto-skip
Code:
CHR$(27);"A"
CHR$(27);"B"
The CHR$(27);"A" command
causes
the printer to automat-
ically advance to the top
of
the next page when there
is
only 1 inch remaining on a page. (The printer ingores this
command
if
you've
set
the form length to
less
than 1 inch.)
31
Page 35

32
Unless you send this command, this feature
is
turned off,
because some software packages perform their
own
skip
over perforation.
,
Override Paper-Out
Sensor
Function:
Paper
sensor
OFF
Paper
sensor
ON
Code:
CHR$(27);IE"
;"1"
CHR$(27);"E";"
O"
A sensor in your printer can detect the end
of
a paper sheet
or roll
so
whenever
OKIDAT
A 120 comes to
within
1 inch
of
the paper's end, printing stops and the paper alarm
lights. This feature
is
normally
OFF. To turn the sensor
ON,
use
the CHR$(27);IE";"O/l command.
To disable the sensor again,
use
the CHR$(27);/IE/I;/Il/l
command.
,
Don't
print beyond the edge
of
the paper! Printing on the platen can dam-
age
the pri nthead .
•
Function:
Set
starting position
by
character column
Set
starting position
by
dot
column
Print
Start
Position
Code:
CHR$(16);/lcc "
CHR$(27);CHR$(16);CHR$(
dl
);CHR$(d2 )
NOTE: cc = a two-digit number indicating the
sta
rti
ng
character column.
dl = tens
digit
of nn.
d2
= ones digit
of nn.
nn
= number
of
dot columns.
This feature lets you start printing at a specific distance
from the left margin. You can program this distance in
character columns, or, for more exact placement,
dot
columns .
If you
want
to
set
the distance by character columns,
use
the CHR$(16);/lcc/l command. The /lcc/l
is a two-digit
num-
ber that equals the number
of
columns from the left margin
that you
want
printing to start. For example,
if
you wanted
to print 10 columns in from the left margin,
use
a
Page 36

CHR$(16);"10" command. If you're printing in pica (10
CPI),
"cc"
can't be greater than
79
columns. If you're print-
ing
in
elite
(12
CPI),
"cc"
can't be higher than
95
columns.
If you're printing in fine print,
"cc"
can't
be
higher than
135. Remember,
"cc"
must
be
a two-digit number,
so
if
your value
is
higher than 99, you must
use
substitute the
numbers
with
these codes:
#
Code
#
Code
#
Code
#
Code
100
:0
110
;0
120
<0
130
=0
101
: 1
111
; 1
121
<1
131
=1
102
:2
112
;2
122
<2
132
=2
103
:3
113
;3
123
<3
133
=3
104
:4
114
;4
124
<4
134
=4
105
:5
115
;5
125
<5
135
=5
106
:6
116
;6
126
<6
107
:7
117
;7
127
<7
108
:8
118
;8
128
<8
109
:9
119
;9
129
<9
For
example, if the value
of
"cc"
is
134, you would
use
this command:
CHR$(16);II:=L;1I
If you're printing graphics, you may want a more precise
starting position. The CHR$(27);CHR$(16);CHR$(d1);
CHR$(d2) command lets you specify
an
exact dot column
where you want your printing to begin.
Suppose you wanted to start printing
at
the 180th dot col-
umn, which
is
3 inches from the margin. Add this
command:
PRINT#1,
CHR$(27);CHR$(16);
Then
follow
the command
with
two
codes which represent
the number of dot columns. Take the number of dot col-
umns (180 in our example) and divide it by 256. The quotient
is
the fi
rst
code (known
as
d 1) and the remai nder
is
33
Page 37

34
the second code. First
divide
180 by 256, like this:
256)18g
-0
180
quotient (d1)
subtract
remainder (d2)
Now
take
dl
and d2 and add them to your print statement.
You'll get this command:
PRINT#1,
CHR$
(27)
; CHR$
(16)
; CHR$
(0)
; CHR$
(180) ; "TEXT
...
"
Function:
Start graphics
Normal density
High density
Repeat graphics
Graphics
-------
........
"1
Code:
CHR$(8)
CHR$(27);"P"
CHR$(27);"Q"
CHR$(26);"n"
NO-E:
n = a number between 0 and 255.
If n
= 0 the pattern
is
repeated 256 times.
This section reviews
how
the
OKIDATA
120 prints graphic
images like charts and pictures
..
Printing
graphics
The
OKIDATA
120's graphics capabilities let your print
charts, graphs and pictures. The easiest
way
to create
graphics
is
by using a graphics software package.
With
these packages, you usually create
an
image on your
screen and then instruct your computer to send the image
to your printer. Like a newspaper photograph, these images
are composed
of
thousands
of
tiny dots. Your software
package tells the
OKIDATA
120 where to print each dot.
More advanced programmers might want to try
writing
programs that produce graphic images. This takes time, patience, and
an
understanding
of
how
your printer functions.
Page 38

When the
OKIDATA
120 prints standard text,
it
receives
an
ASCII code from your computer that
is
assigned to a partic-
ular character. CHR$(65), for example, represents the
"A"
character. But when you enter graphics mode, ASCII codes
no longer stand for characters ... each code
now
represents
a unique pattern
of
dots
in
a single column, seven dots
high. For example, the CHR$(65) code prints this dot
pattern:
Mapping
your
image
To program graphics, you must first map your image
as
a
series
of
dot
columns.
We'll
use
a square here
as
an
'
example:
0 0 0 0 0 0
0
0
0
0
0
0
0
0
0
0
0
0
0 0
0 0 0 0
35
Page 39

36
We've
assigned values to each
of
the grid's seven rows.
Whenever a
dot
appears in a row, add that value for a col-
umn total, like this:
Column
1 2 3 4 5 6 7
Position 64
Value
32
16
8
4
2
0
0
0
0
0
0
0
0
0
0
0
0 0 0
0
0
0
0
0
0
0 0 0 0
. Subtotal: 127 65 65 65
65 65
127
+128
Total: 255193193193193193255
Take each
column
total and add 128. You
will
use
these
totals
as
ASCII codes when you
write
your
graphics
program.
Writing
the
program
You can
print
your
image in either normal density
or
high
density.
In
normal density, each
row
of
dots in your picture
has
a horizontal resolution
of
60 Dots
Per
Inch (DPI) and a
vertical resolution
of
72 DP!.
In
high density, the vertical
resolution stays the same,
but
each
row
of
dots
has
a hori-
zontal resolution
of
120 DP!. The result?
In
high density,
your image
has
a darker, denser look.
When
you
write
your
graphics program, you must first send
a normal
density-CHR$(27);/IP"
command or a high den-
sity- CHR$(27);/lQ"
command.
Follow
this
with
the /lstart
graphics"-CHR$(8)
command.
Once
the printer receives
this command, any codes
which
follow
are printed
as
graphic columns. You should
follow
the graphics command
with
the values you calculated for
your
graphic image. The
graphics
command
stays on for
only
one
print
line,
so
if
Page 40

you have more than one program line containing graphic
data, each line should end
with
a semicolon.
Let's
use
the values
we
calculated for the square pattern to
create a graphic image.
10
OPEN
1,~
:REM OPEN
code
20
PRINT#l,
CHR$
(27) ; "P" : REM
Normal
density
25
PRINT#1,
CHR$
(8);
:
REM
Start
graphics
30
PRINT#l,CHR$(255);CHR$(193);
CHR$
(193)
; CHR$
(193);
:
REM
Graphic
data
35
PRINT#l,CHR$(193)
;CHR$(193);
CHR$(255);CHR$(15)
:REM
More
data
and
exit
graphics
~o
CLOSE1
:REM CLOSE
code
And here's
what
you get:
CI
Repeating
graphics
/The
repeat graphics command allows you to repeat a
dot
pattern across the page.
You'll
find this useful in creating
decorative borders
or
bar charts. To repeat a column,
use
the CHR$(26);CHR$(n) command. The
"n"
represents the
number
of
times (from 1 to 256) you want the
column
re-
peated.
Follow
this command
with
your graphics value.
Try this example:
10
OPEN
1,~
:REM OPEN
code
20
PRINT#l,"
SALES"
:
REM
Chart
title
30
PRINT#1,
"MARCH"
;CHR$(8)
;CHR$(26);
CHR$(~5);CHR$(255);CHR$(15)
:REM
Bar
chart
~o
PRINT#l,
"APRIL";
CHR$
(8)
;
CHR$(26)
;CHR$(55)
;CHR$(255);
CHR$
(15)
:
REM
Bar
chart
SO
CLOSE1 :REM
Close
code
37
Page 41

Here's the printout:
SALES
IYIARCH
APRIL
115-_
_
Miscellaneous
____________________
IJ"...J
38
This section covers programming codes not explained in
previous sections.
--------
Function
Cut
Code
------
......
Function:
Code:
Set
function
cut
(FCUT) CHR$(34)
This command converts control codes into printable sym-
bols. This feature
is
useful when troubleshooting your
printer or programs. After you
use
the CHR$(34) command,
all data, including function codes,
will
be
printed out. You
must enclose inside quotation marks all the data you want
printed.
All non-printing codes
will
print out in reverse printing.
Any non-printing codes
with
ASCII decimal values from 00
to
31
will
be
printed
as
ASCII
values 64 to 95. Codes
with
ASCII
decimal values from 128 to 159
will
print
as
ASCII
values 192 to 223 .
.--------
Cancel
Function
-------
.....
Function:
Code:
Cancel
CHR$(24)
The cancel command clears any printing features from the
printer's memory. If you've
set
double-width, emphasized,
elite printing with
an
indent and then want to cancel them
Page 42

all, the CHR$(24) command
will
do
it. This command re-
turns you to these standard settings:
Feature:
Character size
Line spacing
Character
set
Paper
sensor
Auto-skip
Auto line feed
Graphics mode
Page
length
Language
set
Standard setting:
Pica (10
CPI)
6 Lines
Per
Inch
(LPI)
Cursor
Up
mode
ON
OFF
ON
or
OFF
*
Normal or High-density*
5.5,8.5,
11
or 14 inches*
Slashed
zero, unslashed zero,
French-Canadian or Spanish *
* Determined by function switch settings.
NOTE: The cancel command
won't
clear the
following
functions:
page
length,
top
of
page location or paper end sensor.
------
Secondary
Address
------
Function:
Cursor
Up
mode (Upper
case
letters and graphics)
Cursor Down mode (Upper
and
lower
case
letters)
Reset
printer
Code:
OPEN 1,4,0
OPEN
1,4,7
OPEN
1,4,10
On
page 20
we
explained
how
to
use
software commands
to enter Cursor
Up
mode (capital letters and graphic sym-
bols) or Cursor
Down
mode (upper and
lower
case
letters).
As
an
alternative to this method, you can
use
a secondary
address number in your OPEN statement. If you
want
to
enter Cursor
Down
mode, add a 7 to your OPEN state-
ment, like this:
OPEN
1,,:;,7
NOTE: The first
two
numbers
(1
and
4)
serve other programming purposes
(see
page 20). The 7
is
the optional secondary address number.
39
Page 43

40
The
reset
mode works like the Cancel command described
on page 38.
It
clears the printers memory and
erases
all
previously-set printing features.
To
reset your printer,
use
the OPEN
1,4,10
command.
NOTE: Unlike
CANCEL,
this command resets secondary address, page length,
top of page and the paper end sensor setting, returning them
all
to
standard
settings.
Page 44

APPENDIX
A:
INTERNAL
SWITCH
SETTINGS
If you remove the small panel at the back
of
your printer,
you'll find a
set
of
switches numbered 1 to
8.
By
turning
these switches
ON
or
OFF,
you can control features like
foreign language character
sets,
page length and Commo-
dore device numbers. After you
set
these switches, the
printing features you selected
will
go
into effect automati-
cally whenever you turn on your printer.
To
set
the switches:
1)
Make sure the printer
is
OFF
and unplugged.
2)
Take
a phillips-head screwdriver and loosen the
screw on the panel located
at
the back of your
printer.
A-1
Page 45

A-2
3)
Use a fine-tipped tool, like a
ballpoint
pen, to slide
the switches to one
of
the selections I isted here.
88888888
1 2
3'15b78
/
Switches 1 and 2
allow
you to select one
of
the printer's
four language character
sets
described on page 29.
Language
Switch 1 Switch 2
Commodore
ASCII (Slashed zero)
OFF OFF
Commodore
ASCII (Unslashed zero)
ON
OFF
French Canadian OFF
ON
Spanish
ON
ON
Switches 3 and 4
set
your printer for various page lengths:
Length
Switch
3 Switch 4
5.5 inches
OFF OFF
8.5 inches
ON
OFF
11
inches
OFF
ON
14 inches
ON ON
Switches 5 through 7 perform other functions. Switch 8
is
not used;
it
should remain
OFF.
Switch
ON
Function
OFF Function
Notes
5
Auto
LF
No
Auto
LF
Adds Linefeed after
CR
.
6
Device
#4
Device
#5
Sets
printer device
number.
See
page
20.
7
Normal
High density
Sets
graphics
density.
See
page
34.
8
Factory
set
Not
used.
Page 46

APPENDIX
B:
INTERFACE
SPECIFICATIONS
Your
printer
is
sold
with
an
interface cable that connects
your printer to your computer. More technically-oriented
owners, however, may wish to design their own cable for
special needs. The information here
will
assist
the experi-
enced in identifying the printer's configuration and wiring
requirements.
This printer requires a shielded serial interface cable
with
the
following
connectors:
Printer end: DIN 6-hole socket TeS 4460-01-1-11 or
equivalent
Cable end: DIN 6-pin plug TeS 0566-01-0201 or
equivalent
Signals
for
Serial Pin Assignments
Pin Direction
Signal
Symbol Description
1 From pri nter Service request
SRQ
Not
used
2
-
. Ground
GND
-
3 Both directions
Attention ATN Low: Attention
frame
High: Print data
frame
4 Both directions Clock
CLK
Data sample timing
and data frame end
signal
5 Both directions Data
DATA
Receive data and
--
response signal
6
To
printer
Reset
RESET
Reset
signal to
initialize printer
CONNECTOR
APPEARANCE
8-1
Page 47

('\
....
CURSOR
UP
MODE
4 6 8 10
11
12 13 14 15 16 17 18
I I I I I I
l-rT-r
II
I I
I-I
I I I I
-
-- --
_.
--
--
-
I"
'"
"I"
I" I"
I"
I" I"
1
'"
I"
1
'"
I"
I"'
I:
I::
1:1:1:1
I:
: :
I:
1:1:1:
I~I:
1:1:1:
I:I:I:I:I:I;I~I
I::
:I:I~I:I:I:I:I:I~I:I:I;I:I~I:I:I:I
I~:
:I:I;I:I:I:I~I~I:I:I:I:I:I:I:I:I:I
1
~
~
I : 1
:'
1
~
1
~:
1
'"'
1 : 1
:"'
1
'";
1
~:'I
':
1
~:
1 : 1 :
I-~:-I
~
1
~
1 : 1
I:
: 1
;"
1
':
I:
I:
1 : 1
";
1 : 1 : 1
~'I
":
1 : 1-: 1 m 1
'"
1
,~
1
'"
1
'"
1
:::i)
"'t)
;R
z
c
><
f:\
~
o
c
o
:J)
tI\
:::i)
'"
a
-
:s
w
~
Page 48

1"'\
N
CURSOR
UP
MODE
(Continued)
I
'"
I
'M
I
n,
I
'$1
m [ no [
,~
[
,~
[
'"
[
",
[
'"
[
".
[
'"
[
,~
[ w [
,~
[
,
~
[
,~
[
'"
[
-
--
-
I
'"
I
'"
[
'"
[
"'['%
[
'"
[
'"
[
""
[
""
[ ;' [:
[=-
: ,'" [ : [
'"'I
: : I
n.,
I
[
n~
I
':
I
'~[~"
[
~
[
n:
[ : [ : [ : [
,'00
[~"'
[
'"~
~
:.
[ :
[~:'
':
I
::
I
[::
I
~
I
=-
[ : [
';
[
=-
[
=-
[
~
[
~
[
;"
[
'~
[~:
'
'~ ~:
[ :
[-:,
-=
;:
I
~
I
I : I : I : [
:"
[
':
[ : [ : [ : [
";
[ : [ :
[:"
";
;;
[
~
I'"
;'
::
[
~
I
I
~
I''''
I~:
I
"',
[:
[ : [
'M,
[
':
[
':
[
':
[:0
[:
':
: [ :
[:
I'"~
~"[':
I
247 248 249 250
251
252 253 254 255
I-I-l-I~I-I-I~
I-I~[
I I I I I I I I I I
,-..
:::D
n."
0."
~tI\
5°Z
cO
~
a..)(
'-"
n
00
n
o
~
~
o
o
o
:::D
tI\
:::D
II'
o
-
~
Wi)
~
Page 49

I"'l
W
CURSOR
DOWN
MODE
o 4 6 9 10
11
12
13
14.
15
16
17 18
I I I I I I I I I I
I-I
II
I I I I I I
..
""
.....
"
....
~
.......
......
,..
~ ,.,~
--
--
I
'"
I
'"
I " I " I " I " I
'"
I"
"I
'"
I " I
~
" I >< : : I : I
::
I : I
I:I:'I:I:I:I:I:'I~
~I:I:I:
:1::
:':1:1:1
1:1:1:1:1:1:1:1;
:1:1:1:
:1;:
:I:'~I:I
I:I~I~I:I;I:I:I:
:1:1:1:
:1:
:
:1:1=':1
1:1:1:1:1:1=1:1:
:1=1:1:1:1=1:
:1:1:1=1
114 115 116 117 118 119 120
121
122
123
124 125 126 127 128 129 130
131
132
IRlsITlulvlwlxlvlzl+l~
Illxl~1
I I I I I
-
:::D
n~
O~
::::)",
!:!"oZ
~C
~-
0.><
-n
00
n
o
3:
3:
o
c
o
~
'"
:::D
'"
Q
-
ii
a»
~
Page 50

~
J:.
CURSOR
DOWN
MODE
(Continued)
I
'"
I
'M
I
B'
I
B'
I m I
BO
I
BO
I
""
I
'"
I
'"
I
""
I ,M I
'"
I
,~
I W I
"0
,~
'""
'"'
I
~
I
I
'"'
I
'""
I
,~
I
'"'
I
'"'['"'
I
'""
I
,eo
I
''"
I
~'
I
~
I:
I
~
1,"'1;:
"',
:, ;
n",
I
1-
~
I
':
I
':
I
':~
I~'
I
~
I
';
I
::
I:
I
~O
I'''"
I
~"
I
';
1=
1:'1:
::
~"'
":: I·
~
190
191
192 193 194 195 196 197 198 199 200
201
202 203 204 205 206 207 208
~
1-
1-1-IAlalcloIEIFlaIHIIIJIKIL M N a
pi
8
I:I:I:I:I:I:I:I:I:I:I:I:I~I:I:
-: :
:1
;
I:
I
;'"
I : I
""I:
I
;c
I
'MIl
n:
I
n:
I
n~
I
~~
I
=-
I
':-1:
I::
:
;M
:'"
': I i
247 248 249 250 251 252 253 254 255
1-1_·1_1·-1-1-1-'1-1=-=11111111111
Page 51

APPENDIX
D:
PROGRAMMER'S
GUIDE
This chart summarizes the commands described in this
handbook's programming section. It includes decimal,
hexadecimal, and
Commodore
ASCII values for each
command.
Commodore
Function
Decimal
Hexadecimal
ASCII
CHARACTER
SIZE
Changes the size
of
printed
characters (page 26)
Pica (10 CPI)
15
OF
SI
Elite (12 CPI)
28
1C
FS
Fine (17.1 CPI)
29
10
GS
DOUBLE
WIDTH
CHARACTERS
Doubles the
width
of
the
current character size (page 26)
Start
double-width
14
OE
SO
Stop
double-width
129
81
UNENHANCE
UNDERLINING
U nderl i
nes
all characters (page
27)
Start underlining
27/67
lB/43
ESCC
Stop underlining
27/68
1 B/44
ESC
D
SUPER/SUBSCRIPTS
Prints
sma
ll characters above
or
below
the printline (page 27)
Start subscript
27/76 1 B/4C
ESC
L
Stop subscript
27/77
lB/4D
ESCM
Start superscript
27/74
1 B/4A
ESCJ
Stop superscript
27/75 1 B/4B
ESC
K
ENHANCED/EMPHASIZED
Prints boldface-style characters
(page 27)
Start
en
hanced
27/72
1 B/48
ESC
H
Start emphasized
27/84
1 B/54 ESCT
Stop enhanced/emphasized
27/73 1 B/49
ESC
I
CHARACTER
SETS
Selects Commodore
or
language
character
sets
(page 28)
Commodore modes:
Cursor
Up
145
91
CURSOR UP
Cursor
Down
17
11
DCl
Language features:
Slashed zero
27/33/64 1 B/21/40 ESC! @
Unslashed zero 27/33/65 lB/21/41
ESC! A
French-Canadian
27/33/66 1 B/21/42 ESC! B
Spanish
27/33/67 1 B/21/43
ESC! C
D-1
Page 52

Commodore
Function Decimal
Hexadecimal ASCII
REVERSE
PRINT
Prints white letters on a black
background (page 29)
Start
reverse
print 18
12 DC2
Stop reverse print 146
92
RVS
OFF
CARRIAGE RETURN
(CR)
Prints line
of
data with
or
without
line feed (page 30)
CR
with
line feed
13
OD
CR
CR
without
line
feed
141
8D
CR
wlo
LF
LINE
FEED
(LF)
Advances paper one line (page
30)
Line feed
10
OA
LF
LINE SPACING
Changes the number
of
lin
es
per inch (page 30)
6
LPI
27/54
1 B/36
ESC
6
8
LPI
27/56 1 B/38
ESC
8
Multiples
of
n1144"
LF
2711 Oln 1
B/OA/
n
ESC
LF
n
(n
= 0 to 255)
FORM
FEED
Advances to next page (page
31)
FF
12
OC
FF
FORM LENGTH
Sets
form length by lines (page
31)
Set
form length 27170/
nn
1 B/46/nn
ESC
F nn
SKIP
OVER PERFORATION
Controls skip over perforation
(page 31)
Start auto-ski p
27/65
1B/41
ESC
A
Stop auto-ski p
27/66 1B/42
ESC
B
OVERRIDE PAPER-OUT
SENSOR
Controls sensor
which
detects
end
of
paper (page 32)
Paper sensor OFF
27/69/1 1 B/45/01
ESC
E 1
Paper sensor
ON
27/69/0
1
B/45100
ESC
E 0
PRINT
START
POSITION
Starts
printing at specific
distance from left margin (page
32)
Set
by character
column
2711
6/c 1 I
c2
1
BI1
Ol
c 1 I
c2
ESC
POS
cc
(c1
= tens
digit
c2 = ones digit)
Set
by
dot
16/d1/
d2
1
Ol
d 1 I
d2
POS
d1
d2
FUNCTION CODE
CUT
Converts control codes into
printable characters (page 38)
Set
function code cut
34
22 FCUT
D-2
Page 53

Commodore
Function
Decimal Hexadecimal
ASCII
CANCEL
Resets
printer to default settings
(page 38)
Cancel
24 18
~AN
GRAPHICS (page 34)
Start graphics
8
08
8S
Normal density
27/80 18/50
':SC
P
Graphics density
27/81 18/51
::SC
Q
Repeat graphics 26m
lAi
n SU8 n
0-3
Page 54

SPECIFICATIONS
I.
PERFORMANCE
Print
speed .........
................
..........
..........
120
CPS
Print technique .
...............
Bidirectional/short line seeking
II.
PRINTING
Dot matrix, standard characters .. .. .. ..
...........
....
...
9 x 9
Characters per line .
......
.....
..........
...
.......
80 at 10
CPI
III. MEDIA
96
at
12
CPI
137at17.1CPI
Number of
sheets
.............
..
...
...
.........
...
...
.....
1 to 4
Maximum paper
width ....
.... ...
...
Roll paper: 8.5 inches
Pin feed: 10.5 inches
Tractor feed: 10.5 inches
Paper
weight. .. .
..........
...
.....
...........
. 16 to 24 pounds
Paper
path
....
........ .
......
... ... ..
.........
.... bottom or top
Ribbon .. .
.......
......
........
... .
...
....... ..
....
cartridge load
IV. RELIABILITY
Me
an
time between failures
..............
..........
4000 hours
Mean time to repair
.................
...
............
15
minutes
Printhead life
...........................
200
million
characters
V.
ELECTRICAL
CHARACTERISTICS
Voltage ..
......
... ....
.......
....
........... .. 120V AC
±10
%
For Customer Service,
caII1-800-0KIDATA
(In
New
Jersey, call
609-235-2600
and ask for Customer Service)
Specifications subject to change without notice
Page 55

FEDERAL
COMMUNICATIONS
COMMISSION
Radic
Frequency
Interference
Statement
Class
B
WARNING: This equipment complies
with
the limits for a
Class
B computing device in accordance
with
the specifica-
tions
in
Subpart J
of
Part
15
of
FCC
Rules. These specifica-
tions
are
designed to
minimize
radio frequency interferen'
ce
in
a residential installation; however, there
is
no guarantee
that radio or television interference
will
not occur in any
particular installation. If this equipment does cause interference to radio or television reception,
which
can
be
deter-
mined by turning the equipment off and on when the radio
or television
is
on, the user
is
encouraged to try to correct
the interference by one or more
of
the
following
measures:
• Reorient the radio or television receiving antenna.
• Relocate the printer
with
respect to the receiver.
• Move the printer away from the receiver.
• Plug the printer into a different outlet
so
that printer
and
receiver are on different branch circuits.
If necessary, the user should consult the dealer
or
an
experienced radio/television technician for additional suggestions. The user may find the
following
booklet prepared by
the Federal Communications Commission helpful:
"How
to Identify and Resolve Radio-TV Interference
Problems" .
This booklet
is
available from the U.S. Government Print-
ing Office, Washington, DC 20402 by ordering Stock Num-
ber
004-000-00345-4.
Page 56
Page 57
Page 58
 Loading...