

Page 1
Finisher Unit Installation Guide
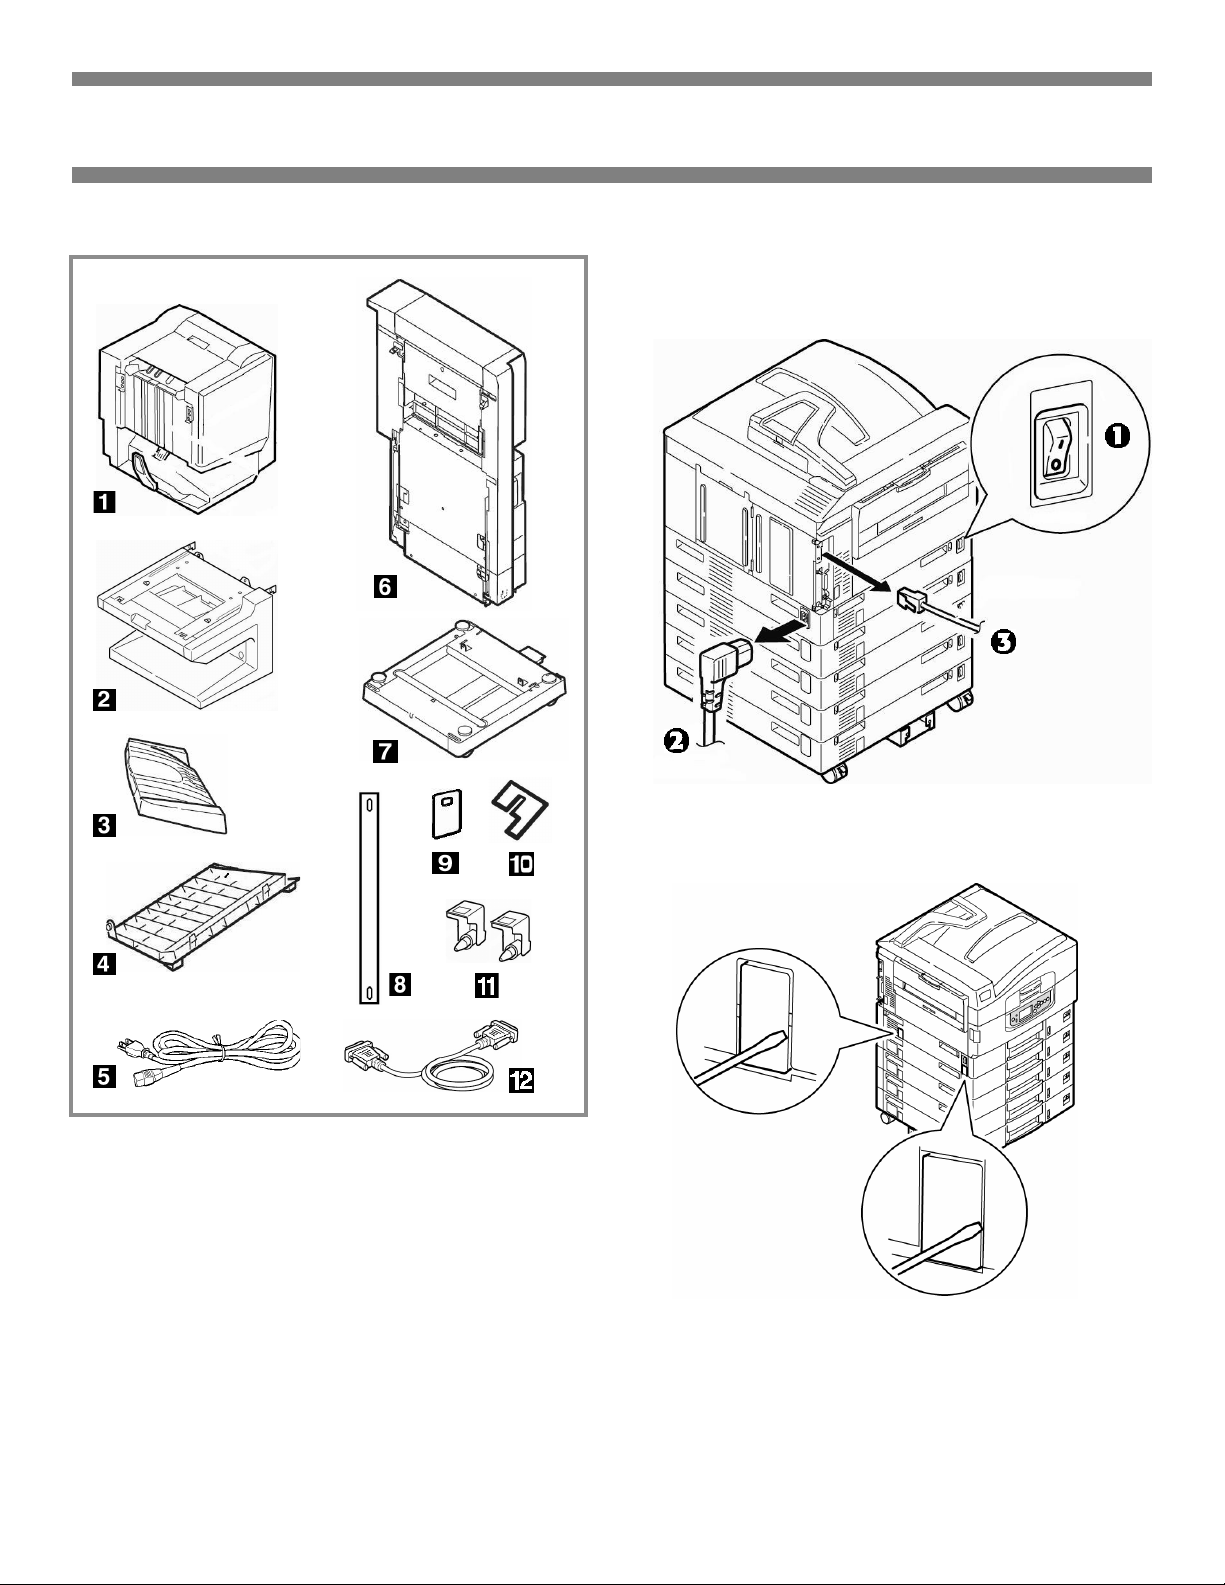
Components
Step 1: Prepare the Printer
1. Turn the printer off (!) and disconnect the
"
power cord (
) and interface cable (#).
1
Finisher Unit
2
Finisher stand
3
Finisher Stacker
4
Finisher Cover
5
Power Cord
6
Inverter Unit
Not illustrated: Screws
7
Inverter Stand
8
Clear Band
9
Band Stopper, Small
10
Band Stopper, Large
11
Metal Brackets
12
Cable (inverter to printer)
2. Using a screwdriver, remove the breakout
panels on the side of the printer.
Page 2
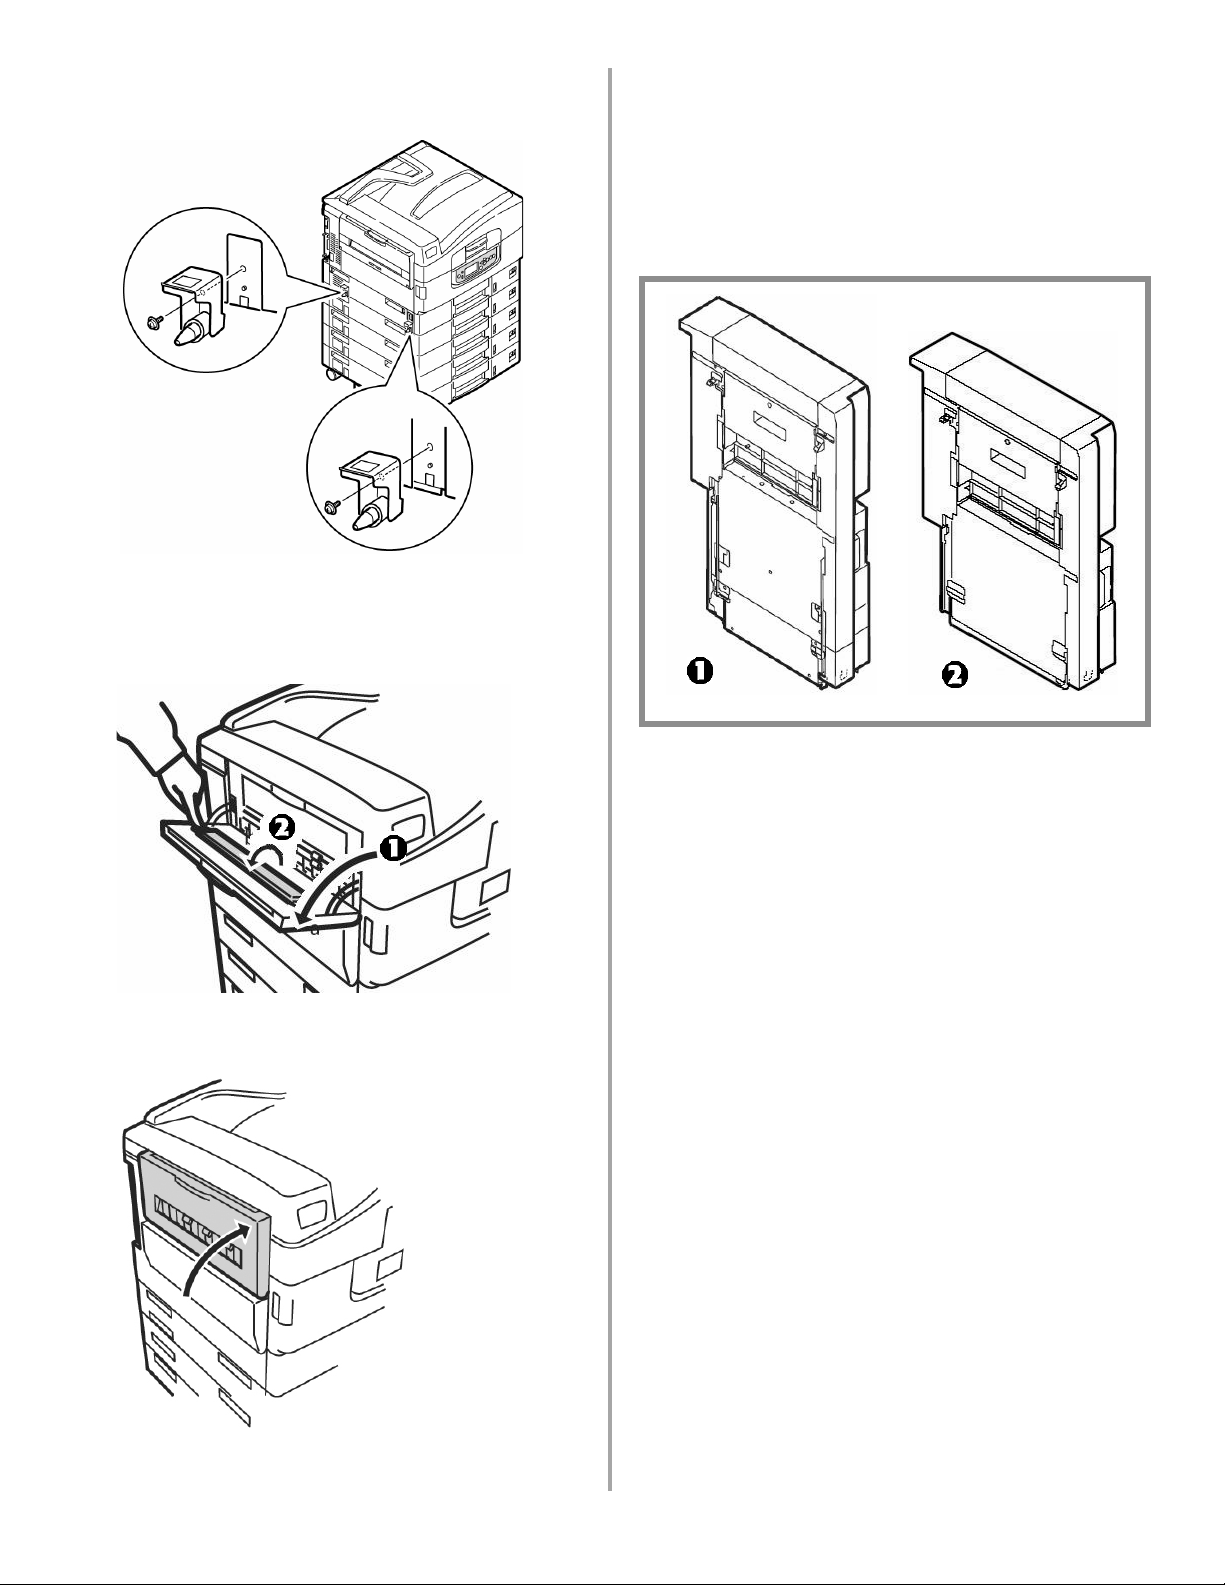
3. Install the metal brackets where the
breakout panels were.
4. Open the face-up stacker (!), then open
the flap and press it onto the stacker surface
"
).
(
Step 2: Prepare the Inverter
Before assembling the finisher, you must adjust the
height of the inverter unit to match the finisher:
!
Inverter as supplied
"
Inverter changed for use with 4-tray
finisher.
5. Close the stacker.
1. Unpack the inverter and remove any packing
materials.
2
Page 3
2. Remove the two bottom caps:
a. Turn the inverter over.
b. Remove the two screws securing the bottom
caps on either side of the inverter.
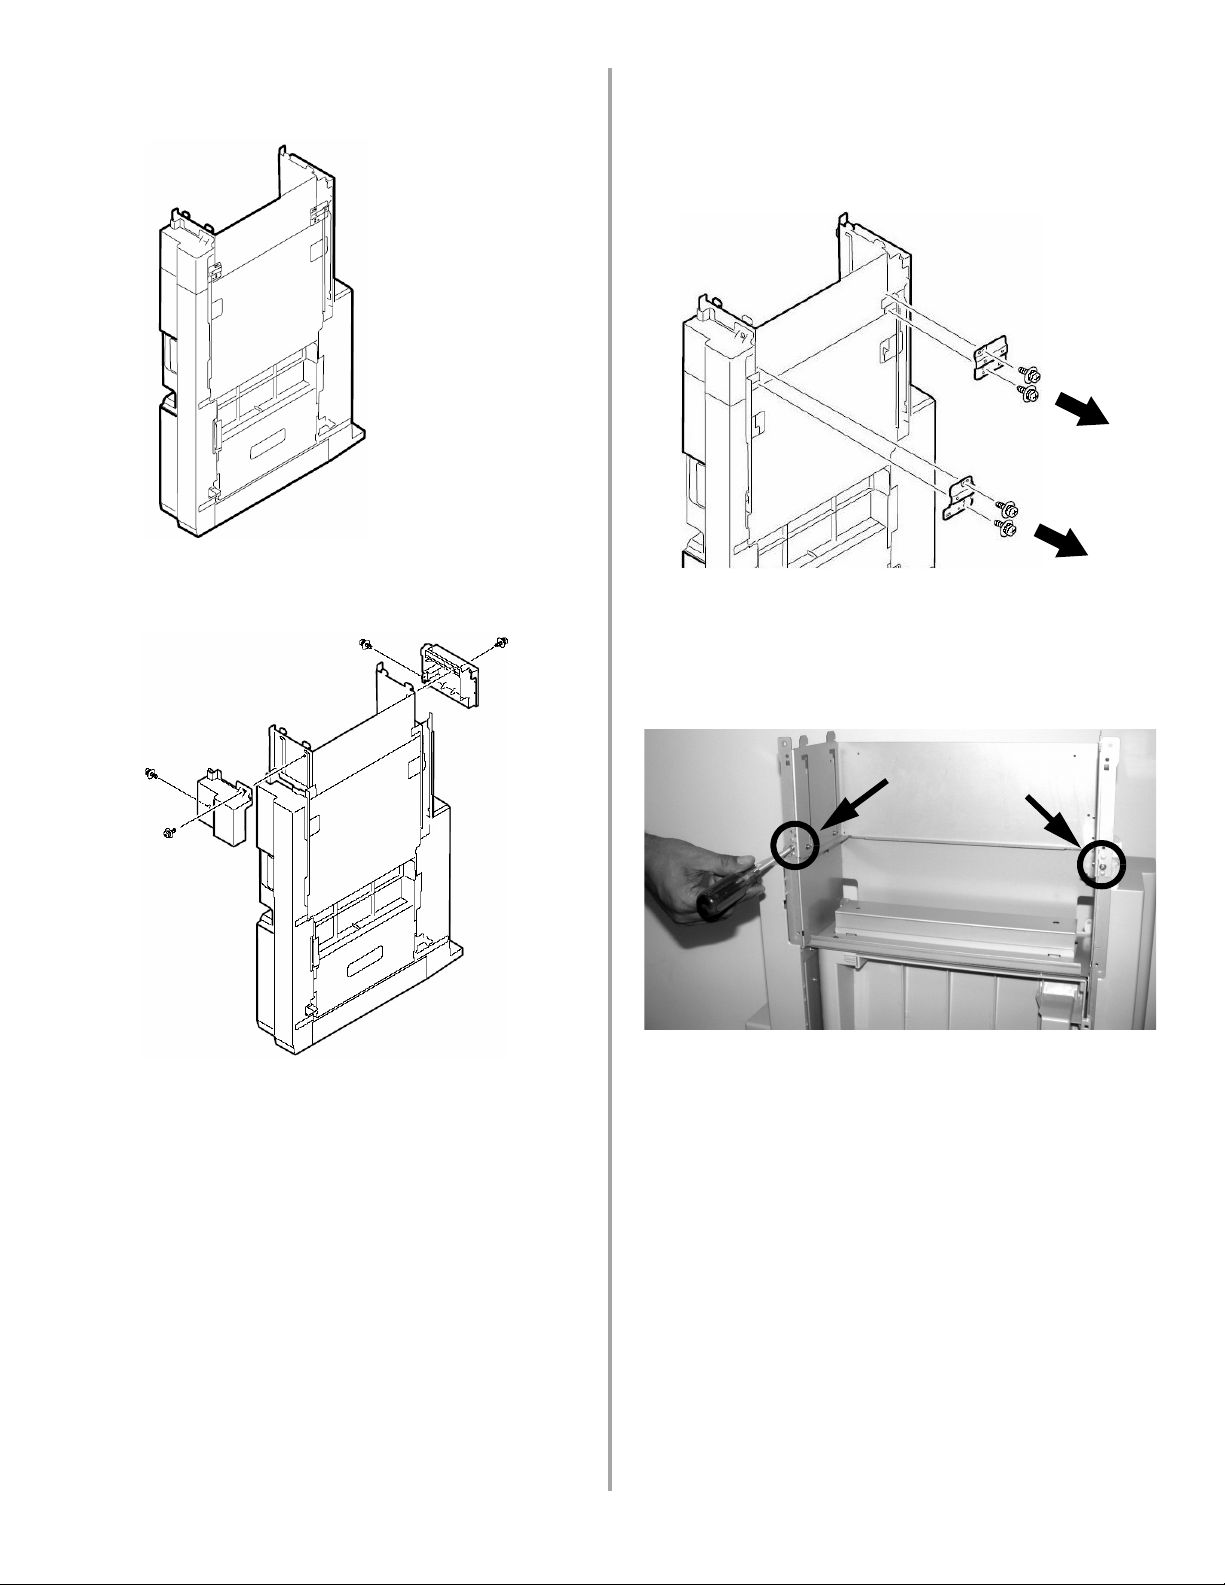
3. Turn the inverter around and remove the
screws holding the metal brackets in place.
Keep the screws and brackets handy: they are
used to help secure the extension plate once it
is repositioned.
4. Turn the inverter around and remove the
two screws holding the extension plate.
Keep them handy to reattach the plate once
it is repositioned.
c. Remove the end caps and store them along
with the four screws in case you ever need
to convert the unit back.
3
Page 4

5. Pull forward on the extension plate to
disengage the pins from the top channel stops,
then slide it down into the inverter and push
back to engage the pins on the bottom channel
stops.
6. Reattach the extension plate using the
screws you removed earlier.
7. Turn the inverter around and reinstall the
brackets.
Step 3: Assemble the Inverter
1. Place the hooks on the bottom of the
inverter into the slots on the inverter stand,
then slide the inverter to lock the hooks in
place.
4
Page 5

2. Attach the front of the inverter to the stand
using two screws on either side.
3. Attach the back of the inverter to the stand
using one screw on either side.
Step 4: Assemble the Finisher
1. Hook the finisher stand onto the inverter.
4. Attach the guard rail on the inverter stand to
the printer using 2 screws.
2. Attach the finisher stand to the inverter with
2 screws.
5
Page 6

3. Place the finisher cover near the back of the
!
finisher. Locate the tab (
the cover.
4. Hold the clear band perpendicular to the cover
and slip one end over the tab (
the band 90 degrees (
toward the finisher:
) on the right side of
!
), then pivot
"
) so that it is aimed
6. Place the large stopper over the tab on the
cover and turn it to lock it in position.
5. Slip the other end of the band (!) through
the retainer on the finisher and secure it
"
with the small stopper (
).
7. Attach the cover to the finisher and close it.
6
Page 7

8. Pull the finisher platform about half way out,
then loosen the screw on the locking piece (
viewed from the opposite direction) so that it
drops through the slot below it. This keeps the
platform from moving while you attach the
finisher to it.
!
:
9. Position the finisher on the stand and attach
it with two screws from the back.
10. Lift the locking piece back up and tighten the
screw firmly. Be sure it’s out of the way and
the screw is tight—otherwise the platform
will not move freely.
11. Install the stacker, making sure the hooks
are firmly engaged and that the lever on the
finisher is positioned above the stacker (
!
).
7
Page 8

12. Secure the stacker with four screws.
13. Push the finisher against the printer until the
prongs on the printer brackets fit into the
holes in the finisher.
Step 5: Make Connections
1. Connect the finisher’s cable to the inverter
!
). Use the cable supplied to connect the
(
"
inverter to the printer (
).
Note:
If you need to, turn the levellers (!) on
either side of the finisher to raise or
lower it so the holes and prongs align
properly. Make sure the finisher is level.
2. Plug the power cord supplied into the
inverter, then connect it to a suitable
grounded outlet.
3. Reconnect the printer’s interface cable.
4. Plug in the printer’s power cord and turn on
the printer.
Note:
When the printer is turned on, power
is supplied to both the printer and the
finisher.
58374501
 Loading...