

Page 1
Page 2

Contents
Notes and Disclaimer . . . . . . . . . . . . . . . . . . . . . . . . . . . . . . 1
Safety . . . . . . . . . . . . . . . . . . . . . . . . . . . . . . . . . . . . . . . . . . . 2
General..............................................................................2
Installation hints................................................................2
Operation & Maintenance.................................................3
Toner Cartridge & Image Drum Handling .......................4
Emergency First Aid.........................................................4
Introduction. . . . . . . . . . . . . . . . . . . . . . . . . . . . . . . . . . . . . . 5
Features.............................................................................5
Safety Instructions . . . . . . . . . . . . . . . . . . . . . . . . . . . . . . . . 6
Product Options . . . . . . . . . . . . . . . . . . . . . . . . . . . . . . . . . . 7
Memory Expansion...........................................................7
Second Paper Cassette ......................................................7
Components. . . . . . . . . . . . . . . . . . . . . . . . . . . . . . . . . . . . . . 7
Component Identification .................................................8
Control Panel & Indicators ...............................................10
One-Touch Dialing .................................................................. 12
One-Touch Keys for Selecting Functions & Programming..... 13
Signal Tones .....................................................................14
Installation. . . . . . . . . . . . . . . . . . . . . . . . . . . . . . . . . . . . . . . 15
Getting Started..................................................................15
Where to install your fax machine........................................... 15
Unpacking................................................................................ 15
Setting Up . . . . . . . . . . . . . . . . . . . . . . . . . . . . . . . . . . . . . . . 16
Installing Document Stacker.................................................... 16
Installing Toner Cartridge ........................................................16
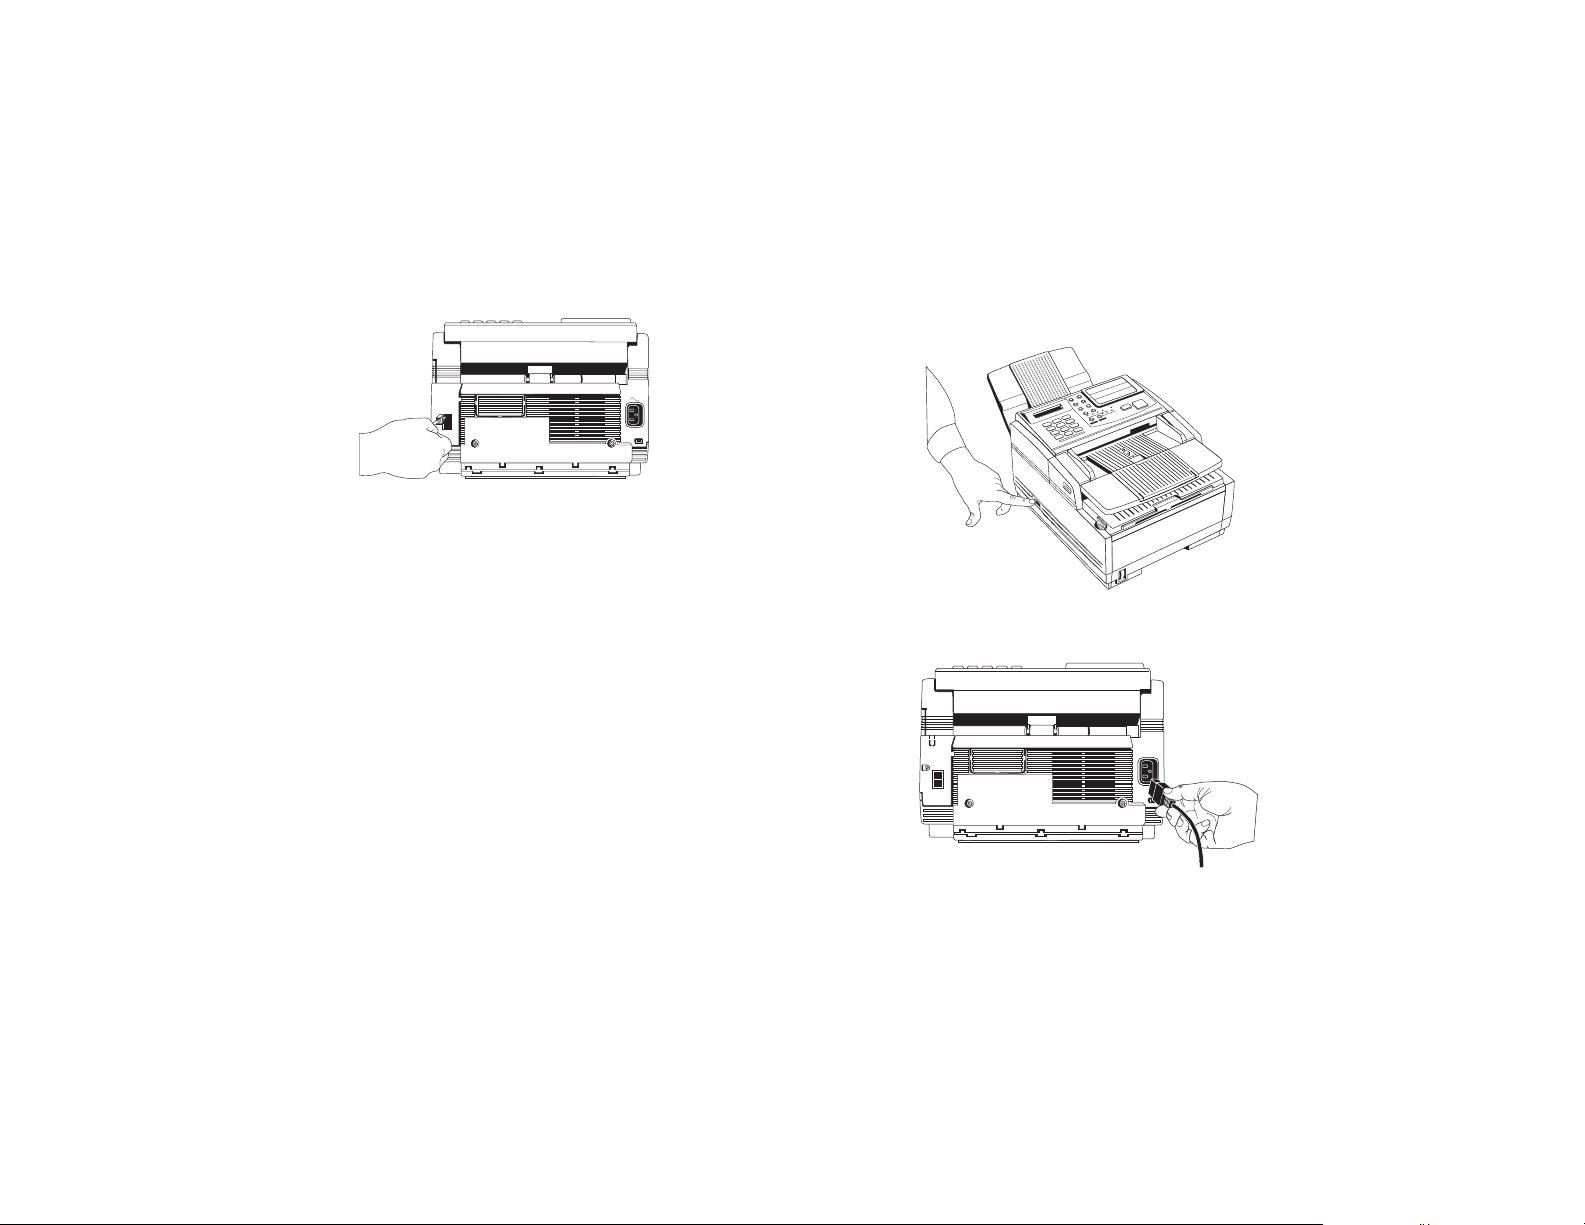
Connecting Telephone Line .....................................................19
Installing External Handset ......................................................19
Connecting External Telephone or Answering Machine .........20
Connecting Power ....................................................................20
Paper. . . . . . . . . . . . . . . . . . . . . . . . . . . . . . . . . . . . . . . . . . . 21
Paper Types ..............................................................................21
Loading Paper .................................................................. 21
Setting Time & Date . . . . . . . . . . . . . . . . . . . . . . . . . . . . . . 23
Setting Answering Mode . . . . . . . . . . . . . . . . . . . . . . . . . . . 23
Answering Mode Options ................................................ 23
Auto Receive Mode [FAX] ......................................................23
Manual Receive Mode [TEL]................................................... 23
Telephone/Fax Auto Switch Mode [T/F] .................................24
Telephone Answering Device Mode [TAD]............................24
Memory Reception Mode [MEM] ...........................................24
Fax Forwarding Mode [FWD] .................................................24
Changing Answering Mode . . . . . . . . . . . . . . . . . . . . . . . . . 25
Fax Machine Identification . . . . . . . . . . . . . . . . . . . . . . . . . 25
TSI/CSI.....................................................................................25
Sender ID..................................................................................25
Call Back Number .................................................................... 25
Setting Fax Machine Identification .................................. 25
Setting Forwarding Number. . . . . . . . . . . . . . . . . . . . . . . . . 27
Setting Language . . . . . . . . . . . . . . . . . . . . . . . . . . . . . . . . . 27
Connecting to a PBX . . . . . . . . . . . . . . . . . . . . . . . . . . . . . . 28
ii
Page 3

Dial Directories . . . . . . . . . . . . . . . . . . . . . . . . . . . . . . . . . . . 29
One-Touch Keys. . . . . . . . . . . . . . . . . . . . . . . . . . . . . . . . . . 29
Programming One-Touch Keys........................................29
Chain Dialing........................................................................... 31
Programming Auto Dial Numbers . . . . . . . . . . . . . . . . . . . . 31
Programming Groups . . . . . . . . . . . . . . . . . . . . . . . . . . . . . . 32
Basic Operation. . . . . . . . . . . . . . . . . . . . . . . . . . . . . . . . . . . 34
Preparing Documents . . . . . . . . . . . . . . . . . . . . . . . . . . . . . . 34
Document size.......................................................................... 34
Multiple page documents......................................................... 34
Loading Documents . . . . . . . . . . . . . . . . . . . . . . . . . . . . . . . 34
Sending Faxes To Single Location. . . . . . . . . . . . . . . . . . . . 35
Search Key Dialing...........................................................36
Real-Time Dialing ............................................................36
Redialing...........................................................................36
Confirming Results...........................................................36
Stopping Transmissions....................................................37
Receiving Faxes Manually . . . . . . . . . . . . . . . . . . . . . . . . . . 37
Receiving Faxes Into Memory . . . . . . . . . . . . . . . . . . . . . . . 37
Memory Reception .................................................................. 37
No Paper Reception ................................................................. 38
No Toner Reception................................................................. 38
Print Memory Reception...................................................38
Canceling Messages Stored In Memory...........................38
Rejecting Unsolicited Fax Messages................................39
Power Failures & Memory ...............................................39
Making Copies . . . . . . . . . . . . . . . . . . . . . . . . . . . . . . . . . . . 40
Making Copies Using Manual Paper Feeder....................40
Using Voice Request . . . . . . . . . . . . . . . . . . . . . . . . . . . . . . 41
Initiating Voice Request................................................... 41
Answering Voice Request................................................ 42
Advanced Operations. . . . . . . . . . . . . . . . . . . . . . . . . . . . . . 42
Broadcast . . . . . . . . . . . . . . . . . . . . . . . . . . . . . . . . . . . . . . . 42
Perform a Broadcast Operation........................................ 42
Delayed Sending of Faxes . . . . . . . . . . . . . . . . . . . . . . . . . . 43
Sending Delayed Faxes .................................................... 44
Canceling Delayed Transmissions ................................... 44
Confidential Faxes . . . . . . . . . . . . . . . . . . . . . . . . . . . . . . . . 45
Sending Confidential Faxes ............................................. 45
Receiving Confidential Faxes .......................................... 46
Creating Confidential Mailbox................................................. 46
Changing Password or Closing Mailbox..................................47
Printing Confidential Faxes......................................................47
Relay Broadcasting . . . . . . . . . . . . . . . . . . . . . . . . . . . . . . . 48
Relay Initiating Station.............................................................48
Relay Key Station.....................................................................48
Initiating Relay Broadcasts .............................................. 48
Polling (Sending Documents Requested by Another Fax) . 49
Polling Transmission........................................................ 49
Canceling ITU Bulletin Polling Transmission................. 50
Printing Bulletin Messages .............................................. 50
Polling Reception (Dialing Another Fax Machine to Request
Documents) ...................................................................... 51
Dual Access . . . . . . . . . . . . . . . . . . . . . . . . . . . . . . . . . . . . . 51
While Sending Faxes........................................................ 51
While Receiving Faxes .................................................... 52
While Making Copies ...................................................... 52
While Printing Reports..................................................... 52
iii
Page 4

Customizing Features & Operations. . . . . . . . . . . . . . . . . . 53
Viewing Your Current Settings ........................................53
User Function Settings . . . . . . . . . . . . . . . . . . . . . . . . . . . . . 53
User Function Settings List ..............................................53
Broadcast Mode .................................................................... 56
25 Instant Dial = ON: ............................................................ 56
25 Instant Dial = OFF, 17 Mem./Feeder SW = MEMORY:. 56
25 Instant Dial = OFF, 17 Mem./Feeder SW = FEEDER:.... 56
Changing User Function Settings .....................................57
Setting Distinctive Ring........................................................... 57
Dial Parameter Settings ....................................................58
Dial Parameter Settings List.................................................... 58
Changing Dial Parameter Settings ........................................... 59
Reports . . . . . . . . . . . . . . . . . . . . . . . . . . . . . . . . . . . . . . . . . . 60
Understanding Reports . . . . . . . . . . . . . . . . . . . . . . . . . . . . . 60
Activity Report .................................................................60
Broadcast MCF (Confirmation) Report............................60
Active Memory Files Report ............................................61
Telephone Directory .........................................................61
Configuration Report........................................................61
Protocol Dump..................................................................62
Other Reports . . . . . . . . . . . . . . . . . . . . . . . . . . . . . . . . . . . . 62
Message Confirmation Report..........................................62
Confidential Reception Report ......................................... 62
Broadcast Entry Report.....................................................62
Power Outage Report........................................................63
Printing Reports . . . . . . . . . . . . . . . . . . . . . . . . . . . . . . . . . . 63
Printing Message Confirmation Report............................63
Printing Reports................................................................63
Codes Used In Reports 64
Result Codes..................................................................... 64
Communication Codes ..................................................... 64
Problem Solving . . . . . . . . . . . . . . . . . . . . . . . . . . . . . . . . . . 65
Clearing Document Jams . . . . . . . . . . . . . . . . . . . . . . . . . . . 65
Clearing Printer Paper Jams. . . . . . . . . . . . . . . . . . . . . . . . . 66
Replacing Toner Cartridge. . . . . . . . . . . . . . . . . . . . . . . . . . 69
Replacing Image Drum Unit . . . . . . . . . . . . . . . . . . . . . . . . 71
Reading Print Counters .................................................... 73
Shipping the Fax Machine . . . . . . . . . . . . . . . . . . . . . . . . . . 73
Problem Checklist . . . . . . . . . . . . . . . . . . . . . . . . . . . . . . . . 74
I-Fax. . . . . . . . . . . . . . . . . . . . . . . . . . . . . . . . . . . . . . . . . . . . 78
Operation Overview. . . . . . . . . . . . . . . . . . . . . . . . . . . . . . . 78
To Use Internet Fax.......................................................... 78
What Your I-Fax Machine Can Do . . . . . . . . . . . . . . . . . . . 79
Installation Requirements . . . . . . . . . . . . . . . . . . . . . . . . . . 79
Machine Installation......................................................... 79
Network Setup.................................................................. 79
Customization .................................................................. 79
LAN Topologies and Operating Systems ........................ 79
LAN.......................................................................................... 79
Internet Fax Protocols .............................................................. 80
Internet Fax Transmission . . . . . . . . . . . . . . . . . . . . . . . . . . 80
General Information .................................................................80
SMTP Server Address / Name ......................................... 80
DNS Server’s IP ADDRESS............................................ 80
Email Address .................................................................. 80
Internet Fax Reception. . . . . . . . . . . . . . . . . . . . . . . . . . . . . 80
General Information .................................................................80
iv
Page 5

POP Server Address / Name.............................................81
DNS Server’s IP Address .................................................81
POP Server User Name ....................................................81
POP Server Password .......................................................81
Network Settings List. . . . . . . . . . . . . . . . . . . . . . . . . . . . . . 81
List of Settings ......................................................................... 81
Components of an Internet Fax . . . . . . . . . . . . . . . . . . . . . . 81
Header...............................................................................82
Email.................................................................................82
Attachment(s): TIFF or PDF ............................................82
Helpful Hints (I-Fax) . . . . . . . . . . . . . . . . . . . . . . . . . . . . . . 82
PSTN Faxing vs. Internet Faxing .....................................82
Internet Fax.......................................................................82
Email Addresses vs. PSTN (Phone) Numbers..................82
Status of Server.................................................................83
Backup/Archive (Email Scanning)...................................83
I-Fax Network Set Up. . . . . . . . . . . . . . . . . . . . . . . . . . . . . . 83
Identifying Current Settings on Fax Machine ..................83
Print the Configuration Report ................................................ 83
I-Fax NIC Options . . . . . . . . . . . . . . . . . . . . . . . . . . . . . . . . 84
I-Fax NIC Settings............................................................85
Text Print............................................................................... 85
Header Print .......................................................................... 86
Coding Mode......................................................................... 86
Ex.Fine Mode ........................................................................ 86
Sender ID (Email) ................................................................. 86
Send File Format ................................................................... 87
Send Notification .................................................................. 87
I-Fax NIC Update.................................................................. 87
POP Interval......................................................................87
Daily ......................................................................................88
Network Settings.............................................................. 88
IP Address..............................................................................88
Subnetmask............................................................................89
Default Gateway ....................................................................89
SMTP Server Name...............................................................89
POP Server Name .................................................................. 89
Pop User Id ............................................................................90
Pop Password.........................................................................90
DNS P.SRV Address .............................................................91
DNS S.SRV Address .............................................................91
FAX Email Address...............................................................91
I-Fax NIC Initialize .......................................................... 91
Email Settings . . . . . . . . . . . . . . . . . . . . . . . . . . . . . . . . . . . 92
Registering Addresses...................................................... 92
Program OT Email Addresses ..................................................92
Program Group Email Addresses.............................................93
I-Fax User Interaction . . . . . . . . . . . . . . . . . . . . . . . . . . . . . 94
Sending Email . . . . . . . . . . . . . . . . . . . . . . . . . . . . . . . . . . . 94
Email Using Email Key ................................................... 94
Email Key Options ...................................................................94
Email Using OT Key........................................................ 95
Email Using Group Email Setting.................................... 95
Email Using Broadcast Feature........................................ 95
Receiving Email. . . . . . . . . . . . . . . . . . . . . . . . . . . . . . . . . . 96
Manual Email Reception.................................................. 96
I-Fax Troubleshooting . . . . . . . . . . . . . . . . . . . . . . . . . . . . . 97
SMTP Communication..................................................... 97
POP3 Communication...................................................... 97
Transmission Troubleshooting......................................... 98
v
Page 6

Reception Troubleshooting...............................................98
Authentication - Unable To Send Global E-mails............99
Symptom.................................................................................. 99
Cause........................................................................................ 99
Resolution ................................................................................ 99
Additional Info......................................................................... 99
Specifications. . . . . . . . . . . . . . . . . . . . . . . . . . . . . . . . . . . . . 100
Part Numbers . . . . . . . . . . . . . . . . . . . . . . . . . . . . . . . . . . . . 101
Consumables.....................................................................101
Options..............................................................................101
Warranty, Regulatory, and Safety Information . . . . . . . . 102
Limited Warranty: U.S. & Canada ...................................102
Service and Support: U.S. & Canada................................103
Oki Data Service Providers: U.S. & Canada....................103
Oki Data Contact Locations: U.S. & Canada ...................103
United States ............................................................................ 103
Canada ..................................................................................... 103
Sales and Service Dealers: U.S. & Canada.......................103
Telephone Support................................................................... 104
Automated Attendant ............................................................... 104
Customer Support Professionals.............................................. 104
Material Safety Data Sheet. . . . . . . . . . . . . . . . . . . . . . . . . . 104
Safety Information . . . . . . . . . . . . . . . . . . . . . . . . . . . . . . . . 108
Regulatory Information . . . . . . . . . . . . . . . . . . . . . . . . . . . . 109
Federal Communications Commission.............................110
Industry Canada (IC) . . . . . . . . . . . . . . . . . . . . . . . . . . . . . . 112
European Union Council of the European Communities . . . 113
vi
Page 7

Notes and Disclaimer
Note: A note appears in this manual like this. A note provides
additional information to supplement the main text which
may help you to use and understand the product.
CAUTION:
A caution appears in this manual like this. A caution provides additional information which, if ignored, may result
in equipment malfunction or damage.
WARNING:
A warning appears in this manual like this. A warning provides
additional information which, if ignored, may result in a risk of
personal injury.
Every effort has been made to ensure that the information in this
document is complete, accurate, and up-to-date. The
manufacturer of this equipment assumes no responsibility for the
results of errors beyond its control.
The manufacturer of this equipment also cannot guarantee that
changes in software and equipment made by other manufacturers
and referred to in this User’s Guide will not affect the
applicability of the information in it.
Mention of software products manufactured by other companies
does not necessarily constitute endorsement by the manufacturer
of this equipment.
This product complies with the requirements of the Council
Directives 89/336/EEC and 73/23/EEC on the approximation of
the laws of the member states relating to electromagnetic
compatibility and low voltage.
© 2003 Oki Data Americas. All rights reserved.
Energy Star is a trademark of the United States Environmental
Protection Agency.
Windows is either a registered trademark or a trademark of
Microsoft Corporation in the United States and/or other countries
Please address any comments on this publication by mail to:
Oki Data Americas
Training and Publications Department
2000 Bishops Gate Boulevard
Mount Laurel, NJ 08054-4620
or by email to:
pubs@okidata.com
Please visit Okidata’s multilingual web site at:
http://www.okidata.com
1
Page 8

OKIFAX is a registered trademark/marque déposée/marca
registrada of Oki Electric Industry Company, Ltd.
ENERGY STAR
NERGY STAR Partner, Okidata has
As an E
determined that this product meets the Energy Star
guidelines for energy efficiency.
Safety
Your fax machine has been carefully designed to give you years
of safe, reliable performance. As with all electrical equipment,
however, there are a few basic precautions you should take to
avoid hurting yourself or damaging the fax machine.
General
• Read this User’s Guide carefully and keep it in a safe but
accessible place so that you can use it for future reference.
• Read and follow all warning and instruction labels on the fax
machine itself.
• Disconnect the fax machine before you clean it. DO NOT
use liquid or aerosol cleaners to clean the fax machine.
• Place your fax machine on a firm, solid surface. If you place
the fax machine on something unsteady, it may fall and
become damaged or injure someone. If you place the fax
machine on a soft surface, such as a rug, sofa, or bed, the
vents may become blocked causing the fax machine to
overheat.
• Do not use your fax machine near water, or spill liquid of
any kind into it.
Installation hints
• Install your fax machine in a dust-free location away from
direct sunlight.
2
Page 9

• Do not connect your fax machine to a power source that is
used by other equipment producing electrical noise (i.e., air
conditioners, etc.).
• Leave electronic adjustments to authorized service
personnel.
• The LINE port connects your fax machine to a standard
telephone line. To avoid damage to your telephone system or
to the fax machine, do not connect your fax machine into
anything other than a standard telephone socket.
• Your fax machine has an earthed, 3-pin plug as a safety
feature an it will only connect to an earthed outlet. If you
cannot connect this plug to your power outlet, then it is
possible that you have an older, non-earthed outlet. Contact
an electrician to have your power outlet replaced. Do not use
an adapter to defeat the earthing.
• The electrical power outlet should be located near the fax
machine and should be easily accessible.
• The TEL ports on the back of the fax machine are only
suitable for 2 wire devices. Not all standard telephones will
respond to incoming ringing when connected to an extension
socket.
• This fax machine may not necessarily provide an effective
handover of a call from a telephone connected to the same
line.
• If the fax machine is sharing the line with another piece
telephone equipment, the audible alarms of the other
equipment MAY trigger the ring detector of the fax.
Likewise, the audible alarms of the fax may trigger the ring
detectors of the other equipment.
• Please note that this fax machine does comply with Machine
Noise Information Ordinance 3. GSGV 18.1.1991 where the
maximum sound pressure level is equal or less than 70 dB
(A) according to ISO 7779.
Operation & Maintenance
• Use a dry cloth to clean the control panel and the main body
of the unit.
• Aside from the instructions specifically mentioned in this
User’s Guide, your fax machine is not user serviceable. DO
NOT attempt to service the machine or lubricate moving
parts by yourself.
• Disconnect the power cable before trying to remove any
objects that may have fallen into the machine.
• Immediately disconnect the fax machine if it becomes
physically damaged and arrange for its repair or disposal.
• When relocating your fax machine, always disconnect the
telephone line before disconnecting the power cable. When
reconnecting your fax machine, connect the power cable
first, then the telephone line.
• This fax machine is designed for use with tone dial
telephones and has a parallel pick-up feature with remote
receive.
3
Page 10

Toner Cartridge & Image Drum Handling
• Leave unused toner cartridges and image drum units in their
packages until needed. When replacing a toner cartridge or
image unit, reuse the packaging to dispose of the old toner
cartridge or image drum unit.
• Do not expose the toner cartridges and image drum units to
light for more than five minutes. Never expose the green
drum (inside the image drum unit) to direct sunlight.
• Always hold the image drum unit by the ends - never by the
middle. Never touch the green drum inside the image drum
unit.
• To avoid damage to the image drum unit, always use OKI
toner cartridges.
• Exercise care when removing the toner cartridge. Do not let
it touch your clothing or porous materials. The toner powder
causes permanent stains.
• Small amounts of toner spilled on skin or clothing can be
readily removed with soap and cold water. Using heated
water will make removing the stain much more difficult.
Emergency First Aid
• IF TONER IS SWALLOWED: Induce vomiting and seek
medical attention. Never attempt to induce vomiting or give
anything by mouth to a person who is unconscious.
• IF TONER IS INHALED: Take the person to an open area
for fresh air. Seek medical attention.
• IF TONER GETS IN THE EYES: Flush eyes with large
quantities of cool, NOT cold, water for a minimum of 15
minutes keeping eyelids open with fingers. Seek medical
attention.
4
Page 11

Introduction
Features
Your fax machine includes all the following features:
• 40 One-Touch keys for automatic, single-key dialing of preprogrammed telephone numbers.
• 150 Auto Dial numbers for automatic dialing of additional
pre-programmed telephone numbers.
• Group programming (20 groups) that enables transmission
of a document to multiple locations with a single selection.
• A search feature allowing you to look for pre-programmed
telephone numbers by name.
• Halftone transmission in up to 64 shades of gray.
• High-speed fax transmission and reception at up to 33600
bits per second.
• 16 mail boxes for confidential reception or bulletin polling.
• Automatic redial and page re-transmission when a telephone
number is busy or when problems occur in communication.
• Advanced transmission and reception features, including up
to 20 delayed transmissions, transmission to multiple
locations, confidential transmission and reception, relay
broadcast initiate and polling.
• Advanced memory transmission and reception features,
including automatic reception into memory.
• Reports to help you keep track of your fax machine’s
operations and settings.
• Automatic power save mode.
• Answering modes for manual and automatic fax reception,
automatic switching between incoming voice and fax
messages. Also allows an answering machine to be
connected in series to the telephone line after the fax
machine.
• A closed network feature to allow you to limit who can send
faxes to your fax machine, or to limit both where faxes can
be sent to and received from.
• Your fax machine can also make up to 99 sorted copies of an
original document using standard weight (75 g/m
paper.
• 2.5 Mbytes of built-in memory.
• An advanced dual access feature which allows you to load
and prepare multiple documents for transmission while your
fax machine is sending or receiving another message.
• High-speed scanning of original documents.
• A manual paper tray to allow you to load a different type of
paper while making copies. Paper size is dependent on 1st
paper size setting.
• A fax forwarding feature to allow your fax machine to
receive messages into memory and automatically forward
the messages to another remote fax machine.
2
, 20 lb.)
5
Page 12

Safety Instructions
This machine has been carefully designed to provide years of
safe, reliable performance. As with all electrical equipment,
however, there are a few basic precautions that should be taken to
avoid personal injury or damaging the machine:
• Read this guide carefully and save it for future reference.
• Read and follow all warning and instruction labels on the
machine itself.
• Disconnect the machine before cleaning. Use only a damp
cloth. Do not use liquid or aerosol cleaners to clean the
machine.
• Do not use the machine near water, or spill liquid of any kind
into it.
• Make sure that the power source matches the rating listed on
the back of the machine. If you are not sure, check with your
dealer or with your local power company.
• To avoid damaging the power cable, do not put anything on
it or place it where it will be walked on. If the cable becomes
damaged or frayed, replace it immediately.
• The power outlet into which the machine is connected must
remain accessible at all times.
• Aside from the routine maintenance described in this user’s
guide, do not try to service the machine yourself. Opening a
cover may expose you to shocks or other hazards.
• Do not make any adjustments other than those outlined in
this user’s guide as damage may be caused to the machine.
• The machine employs a grounded plug as a safety feature,
and it will only fit into a grounded outlet.
• If you cannot plug it in, you probably have an older, nongrounded outlet; contact an electrician to have the outlet
replaced. Do not use an adapter to defeat the grounding.
6
Page 13
Product Options
Components
Memory Expansion
Installing additional memory allows the fax machine to store
more pages of information in memory. If you are constantly
seeing a
MEMORY OVERFLOW message on your fax machine, you
should consider purchasing additional memory. An optional 2.0/
4.0/8.0 Mbyte memory expansion board is available. See “Part
Numbers” on page 101 for the expansion kit part number.
The memory expansion board option includes a built-in backup
battery.This feature protects memory operations and other
communication settings for up to 20 hour in the event of a power
failure.
Second Paper Cassette
The second paper cassette option adds an additional 500 pages of
paper capacity to your fax machine. When the main paper
cassette runs out of paper, your fax machine automatically
switches to the second paper cassette to continue printing
received faxes or copies. See “Part Numbers” on page 101 for
the part number.
What you should receive:
Document Stacker
Toner Cartridge
Fax Machine
Image Drum Unit
(inside fax machine)
Power Cable
Telephone Cable
7
Page 14
The following are not pictured but also included:
5
• User’s Guide
• Warranty, Regulatory, and Safety Information
Note: If any items are missing, contact your dealer immediately.
Keep your packing materials and carton in case you ever
need to ship or transport the unit. Refer to “Shipping the
Fax Machine” on page 73 for more information.
Component Identification
13
12
11
10
9
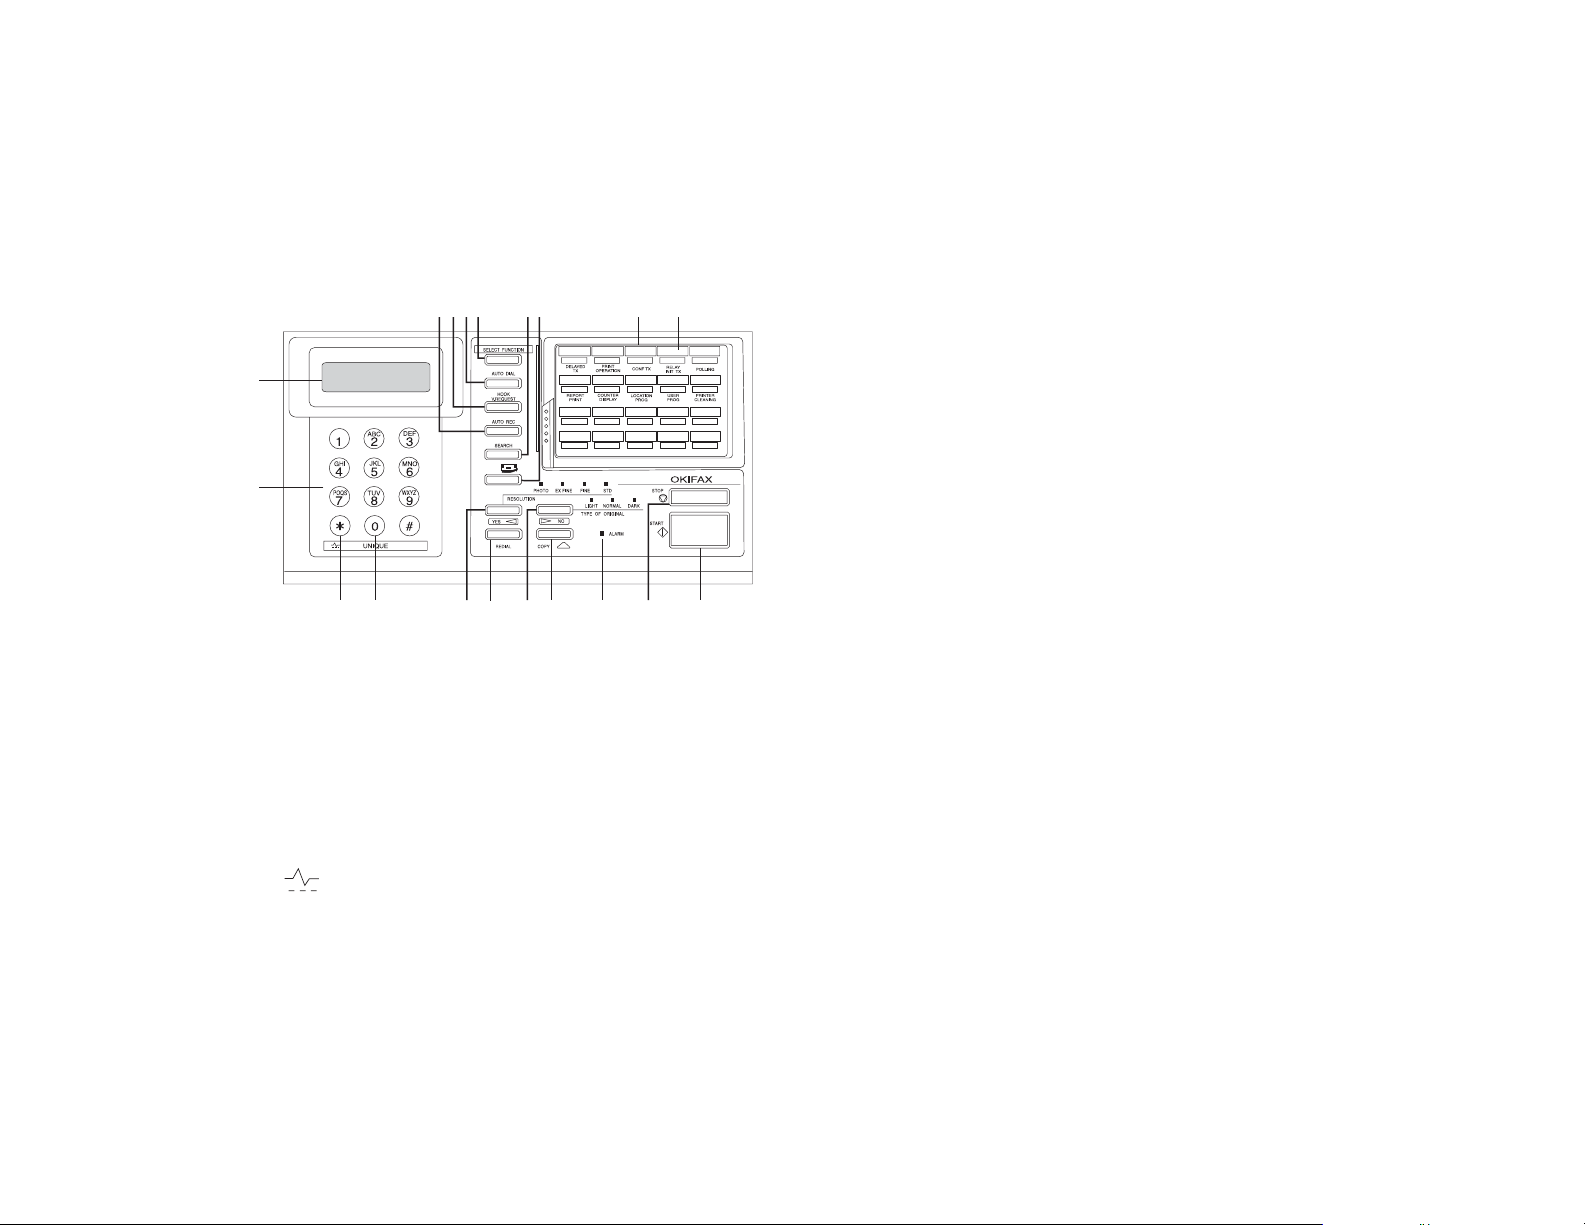
1. One-Touch Keypad
1
2
3
4
6
7
8
2. Document Table: Covers the copy stacker and holds
original documents that are to be faxed or copied.
Document Table Extension: Flips out to support longer
3.
documents that are to be faxed or copied.
Copy Stacker: Holds copies or received faxes.
4.
Front Panel: The panel on the front of the fax machine
5.
gives you access to the manual paper feeder. This allows you
to bypass the paper cassette and feed paper directly into the
machine. Use this feature when you want to use a different
type of paper.
Copy Stacker Extension: Slide this tray out to help
6.
support copies or received faxes.
Paper Cassette: Holds up to 250 sheets of paper.
7.
Paper Indicator: Indicates how much paper remains in the
8.
paper cassette.
Power Switch: Press the | to turn ON the fax machine and
9.
O to turn OFF the fax machine.
the
10. Document Guides: Adjust these guides to the page width
of the documents that are to be faxed or copied.
Control Panel: See “Control Panel & Indicators” on
11.
page 10 for further information.
Document Stacker: Holds your original documents after
12.
they have been faxed or copied.
Paper Path Icon: Load documents face down here.
13.
8
Page 15
18
14
17
16
15
14. AC Power Socket: Connect the power cable supplied with
your fax machine into this socket.
Cable Run: When installing the optional external handset,
15.
feed the telephone line through this line run to TEL
terminals.
TEL Terminals: Terminals for connecting an external
16.
handset, external telephone, or answering machine to the fax
machine.
LINE Terminal: Terminal for connecting the fax machine to
17.
a telephone line.
Expansion Slot Cover: Open this cover for access to
18.
expansion slots for Network interface board and memory
expansion boards
19.
Image Drum Unit: The image drum unit contains the
photosensitive drum, which receives images from the LED
print head and transfers these images to the printing paper.
CT
N
LE
E
TIO
S
C
FUN
C
E
R
O
L
T
A
I
U
A
D
T
R
O
A
T
T
U
S
A
H
C
R
A
E
L
S
A
I
P
D
O
E
T
R
S
M
R
N
A
E
L
H
A
P
T
K
Y
S
H
O
E
O
U
H
Q
E
R
V.
K
R
D
Y
A
T
P
S
D
L
O
A
C
M
E
R
N
I
O
F
N
E
T
N
H
I
F
G
I
L
X
E
O
T
F
O
E
H
D
P
3
C
B
A
N
2
M
6
L
K
1
J
Y
X
5
W
9
I
H
V
G
U
4
T
8
#
S
R
Z
P
Q
7
O
0
*
19
21
20
Toner Cartridge: This black cylinder, installed inside the
20.
image drum unit, contains black powder, which acts as the
ink for your fax machine.
LED Print Head: This black bar is the part of your fax
21.
machine, that transfers received or copied images onto the
image drum unit. Clean this bar each time you change a
toner cartridge.
9
Page 16
Control Panel & Indicators
5678 910
1/CAPS 2/AB 3/CD 4/EF 5/GH
1
e-mail
2
3 4
11
12
6/IJ 7/KL 8/MN 9/OP 10/QR
11/ST 12/UVW 13/XYZ 14/@ 15/.
16/DEL 17/PAUSE 18/+ 19/HYPHEN 20/UNIQUE
14 15
13
1. LCD Panel: Refer to this liquid crystal display (LCD) panel
for instructions and information while operating or
programming your fax machine.
Numeric Keypad: When dialing, these twelve keys work
2.
like the keypad on a telephone. You will also use the keypad
to enter numbers, letters, and other characters while
programming. After pressing the
Search key, you can also
use the numeric keypad to alphabetically search for the
names of locations programmed into your fax machine.
*/ Key: If your fax machine is set to pulse dialing, this
3.
key allows you to switch the dialing operation of your fax
machine from pulse to tone dialing during your current call.
18 19
OKI
16
5680
17
You can also use this key while programming to create
numbers with mixed pulse-then-tone operations.
0/Unique Key: When dialing, use this key to enter a “0”.
4.
When programming your Sender ID or a Location ID, you
can use this key to enter a variety of unique characters, e.g. 0
! # & ‘ ( ) * + , - . / : ; = ? · @ \ “ _ % ˜ ä ß ñ ö ü Æ Å Ø æ å ø.
Select Function Key: Using this key activates the
5.
advanced transmission and reception functions, to obtain
reports and for programming. To select a function, press the
Select Function key, and then press the One-Touch key
labeled with the function you want to use. When
programming or selecting other functions, pressing the
Select Function key a second time returns you to the stand-
by mode.
Auto Dial Key: Auto Dial numbers are abbreviated numbers
6.
for rapid dialing. Rather than dialing the entire telephone
number, you can enter a 3-digit code number to
automatically dial a number instead. You can also use the
Location IDs (names) associated with Auto Dial numbers to
search for these locations by name using the
Hook/V. Request Key: During a fax communication,
7.
Search key.
pressing this key alerts the operator at the other fax machine
that you wish to talk at the end of your transmission or after
reception of any page has been completed. To use this
feature both fax machines must have either the external
telephone handset or an external telephone connected. To
answer a voice request, press this key after lifting your
telephone handset. When no fax communication is taking
10
Page 17

place, pressing this key opens the telephone line for manual
dialing (not available in some countries). You will hear the
dialing tone through the speaker of your fax machine.
Auto Rec Key: This key sets the answering mode (auto
8.
receiving, manual receiving, memory receive, TEL/FAX
automatic switching, TAD interface and forwarding) of your
fax machine. The answering mode controls how your fax
machine answers incoming calls and receives faxes. The
display of your fax machine will always indicate your
current selection. See “Setting Answering Mode” on page 23
for more information about the answering modes available
in your fax machine.
Search Key: One-Touch keys and Auto Dial numbers can
9.
be programmed to have a name or location ID associated
with their telephone numbers. Using this key by itself or in
combination with the numeric keypad, you can search for
these numbers alphabetically.
10. E-mail Key: Pressing this key allows you to perform
e-mail
e-mail operations. See “I-Fax” on page 78 for details.
Transmit Resolution/YES key: This key changes the
11.
resolution used for transmitting documents. Use STD for
standard originals, FINE and EX.FINE for detailed or small
print originals, and PHOTO for originals that include colors
or many shades of gray. You will also use the
YES key when
making selections or to move your cursor to the left while
programming.
12.
Redial Key: Pressing this key manually redials the last
number dialed on your fax machine.
Type of Original/NO key: This key selects the document
13.
contrast after loading a document for transmission. Use
LIGHT for originals that are too light, NORMAL for
documents with good contrast, and DARK for originals that
are too dark. You can also use the
NO key when making
selections or to move your cursor to the right while
programming.
Copy Key: After loading a document, press this key to make
14.
a copy. When no documents are loaded, press this key once
to obtain a Message Confirmation Report about your last
transmission on the LCD Display Panel and a second time to
receive a printed report. You can also use the
Copy key as a
short cut for programming One-Touch keys and AUTO
DIAL numbers. After you have manually entered a
telephone number, press
Copy so you can instantly program
that number into an unassigned One-Touch Key or AUTO
DIAL number.
Alarm Indicator: This indicator turns on (red) and an alarm
15.
sounds to notify you of any problem that occurs. To turn the
alarm indicator off, press the
Stop key and correct the
problem.
Stop Key: This key cancels any operation currently in
16.
progress and turns off the Alarm Indicator. During
programming, pressing the
Stop key returns you step-by-
step through the programming functions you have already
selected.
11
Page 18

17. Start Key: Pressing the Start key initiates the operation
indicated on the display or confirms information you have
entered into the display. While the fax machine is in power
save mode, press the
Note: The fax machine also exits power save mode if a
Start key to exit power save mode.
document is placed on the document feeder, the handset is
lifted, or if there is an incoming fax message.
18.
One-Touch Keypad: The One-Touch keys are an important
tool on your fax machine. You will use them for quick, OneTouch dialing, and to access the functions and programming
options of your fax machine. For a description of all the
functions, including the special characters assigned, of the
One-Touch keypad, see below. Important key descriptions
are listed below:
• Caps Key (One-Touch key 1): In character string input,
when
Caps is showing on the LCD display panel, pressing
this key allows you to make a case shift.
• Space Key (One-Touch key 36): Use this key on the
One-Touch Keypad to enter spaces while programming.
Unlike the
only and have no effect on dialing.
• Delete Key (One-Touch key 16): In character string and
numeric string input, by pressing this key, the character the
cursor is sitting under is deleted and the right character string
of the cursor is moved to the left.
Pause key, spaces are used for easier reading
• Pause Key (One-Touch key 17): Use this key on the
One-Touch keypad to enter automatic 3-second pauses in
dialing when programming telephone numbers. For example, you may want to use this key to tell your machine to wait
for an outside or international line to open. Pauses in telephone numbers are marked by a “P” symbol.
• Plus Key (One-Touch key 18): Each fax number you
enter or program into your fax machine can be up to 40 digits
long. In the case that you need to dial a number which is
longer than 40 digits, it is possible to dial a number using
any combination of One-Touch keys, Auto Dial numbers or
the numeric keypad. When programming a chain dial number into a One-Touch key or Auto Dial number, press the
Plus key at the end of the first part of the number to indicate
to the fax machine that this is a chain dial number.
19. One-Touch Labels: After programming a location into a
One-Touch key, write the name of the location on the OneTouch label. Lift off the plastic cover and use a pencil to
write in the name, then replace the cover.
One-Touch Dialing
To use a One-Touch key for dialing, just press the appropriate
One-Touch key. For each key, you may program up to two telephone numbers: a primary number, which will always be dialed
first, and an alternate number which will be automatically
dialed if the first number is busy or if there is no answer.
12
Page 19

You can also use the Location
IDs (names) associated with
One-Touch keys to search for
these locations by name using
the Search key. There are 40
One-Touch Keys available for
programming. To access OneTouch keys 21-40, grasp the
One-Touch keypad latch and
swing the main One-Touch
panel up and out of the way.
When you are finished, close
the One-Touch keypad to
continue with other options and programming.
One-Touch Keys for Selecting Functions &
Programming
You will also use One-Touch keys 1 to 10 for selecting special
transmission and reception functions, obtaining reports and programming.
• To select a function from the One-Touch keypad, press the
Select Function key, and then press the corresponding
One-Touch key.
Delayed TX Key: This key programs to send a fax at a later
1.
time and date which you can specify for up to three days
later.
Print Operation Key: Your fax machine can be set to
2.
receive messages into memory and not print them when it
runs low on toner. Using this key you can also force
messages to print when toner is low, but print quality may be
poor. Using this key prints out confidential fax messages
received into mailboxes in the memory of your fax machine
after entering the correct password. If memory reception
mode is set on your fax machine, use this key to print faxes
that have been received in memory. Also use this key to print
any bulletin polling messages that have been stored in
memory for transmission.
Confidential TX Key: This key sends a confidential
3.
document to a personal mailbox (a memory storage area) in
the receiving fax machine.
Relay Initiate TX Key: This key sets up a relayed fax
4.
transmission. During a relayed fax transmission, your fax
machine initiates the transmission by sending a document to
a second fax machine, which then broadcasts the message to
a number of other fax machines.
Polling Key: When a document is loaded on the document
5.
table, use this key to set your fax machine to wait for another
fax machine to call and request the document to be sent
(polling transmission). When no document is loaded on the
document table, using this key calls another fax machine and
requests it to send the documents it has loaded (polling
reception).
Report Print Key: This key manually prints reports from
6.
your fax machine.
13
Page 20

7. Counter Display Key: Your fax machine keeps track of the
number of pages it has printed and scanned. Using this key
checks the print counters of your fax machine and resets the
drum counter of your fax machine after replacing the image
drum unit.
Location Prog Key: This key programs One-Touch keys,
8.
Auto Dial numbers and groups into your fax machine.
User Prog Key: This key allows you to program
9.
identification information; set the clock; set forwarding
telephone number; set up mail boxes for confidential
reception or storing bulletin polling messages; and to change
the function and dial parameter settings of your fax machine.
10. Printer Cleaning Key: This key prints to print a cleaning
page to clear accumulated toner from your fax machines
image drum.
Signal Tones
Your fax machine emits a number of sounds to inform you of
specific conditions.
• Key Select Tone: This is a short beep that occurs each time
that you press a key.
Error Tones: If you press a wrong or inappropriate key,
•
your fax machine will emit three short beeps. If your fax
machine experiences a problem during communications, it
will emit three long beeps. Press the
Stop key to turn the
error tone off, then print a Message Confirmation Report to
check the source of the problem by pressing the
Copy key
twice with no documents loaded.
Voice Request Tone: During a fax session, either you or
•
the person at the remote fax machine may initiate a voice
request. When the person at the remote fax machine either
initiates or answers your voice request, your fax machine
emits a repetitive warbling sound.
End of Session Tone: At the end of every successful fax
•
session, your fax machine emits a long beep to inform you
that there were no errors or problems in the communication.
Off-Hook Alarm Tone: If your fax machine is equipped
•
with a handset and if the handset is left off the hook, your fax
machine will emit an intermittent warbling sound. To turn
off the sound, hang up the handset or press the
Stop key.
14
Page 21

Installation
Getting Started
To install your new fax machine, follow the instructions for the
steps from Unpacking (below) to “Fax Machine Identification”
on page 25. You must complete these steps for your fax machine
to operate properly. If you have purchased an option package for
your fax machine, refer to the documentation you received with
that option.
Where to install your fax machine
– Install your fax machine in a dust-free location away from
direct sunlight.
– Allow several inches on each side of the fax machine to ensure
adequate ventilation.
– Make sure there are both power and telephone outlets nearby.
– Choose a location where the relative humidity is between 20%
and 80%, and where the temperature is between 10°C/50°F
and 32°C/90°F.
Unpacking
Before you begin, be sure that all the items listed below are
included in your package. Refer to the illustrations in “Component Identification” on page 8 to identify the items. After
removing the items from the carton, place them on a sturdy surface.
– Fax machine unit
– Toner cartridge
– Image drum unit (inside facsimile unit)
– Power cable
– Telephone line cable
– Paper tray/Copy stacker
– This User’s Guide
Note: If any items are missing, notify your dealer immediately
for a replacement. Keep your packing materials and
carton in case you ever need to ship or transport the
machine.
CAUTION: Do not ship the fax machine with the image
drum unit and toner cartridge installed. Refer to “Shipping the Fax Machine” on page 73.
15
Page 22
Setting Up
Installing Toner Cartridge
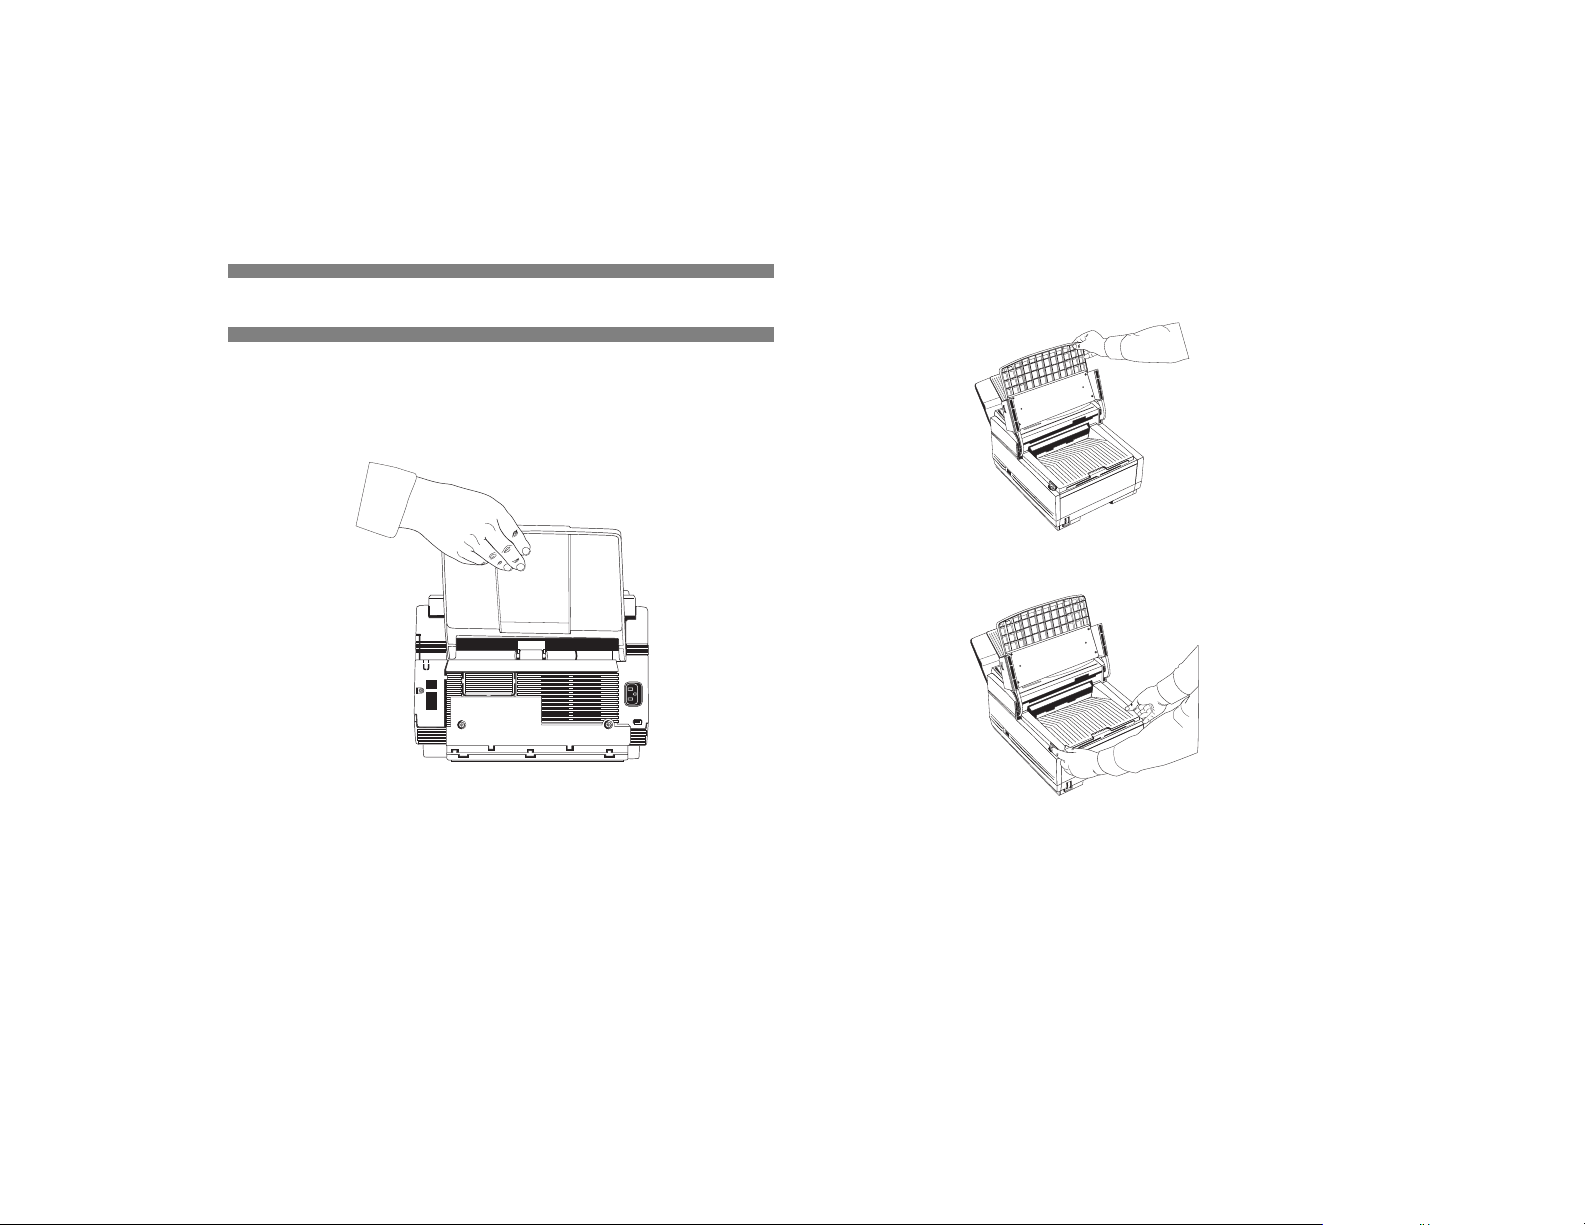
1. Lift the document table into an upright position.
Installing Document Stacker
1. Slip the document stacker indents over the tabs on the rear of
the unit. You will feel them lock into place.
T
C
N
E
L
O
I
E
T
S
C
N
U
F
C
E
R
O
T
L
U
A
I
A
D
T
O
T
R
A
T
U
S
A
H
C
R
A
E
S
L
A
I
P
D
O
E
T
R
S
M
R
N
A
E
L
H
A
P
K
Y
T
O
S
H
O
E
H
U
Q
E
R
.
V
K
R
D
Y
A
T
P
S
D
O
L
C
A
E
M
N
R
I
O
F
N
E
T
N
H
I
F
G
I
L
X
E
O
F
T
E
O
D
H
P
3
C
B
A
N
2
M
6
L
K
1
J
Y
X
5
W
9
I
H
G
V
U
4
T
8
#
S
R
P
Z
Q
7
O
0
*
2. Press in the cover release buttons on the sides of the copy
stacker until you hear a click. Lift the copy stacker.
T
C
N
E
O
L
I
E
T
S
C
N
U
F
C
E
R
O
L
T
A
I
U
A
D
T
R
O
A
T
T
U
S
A
H
C
R
A
E
L
S
A
I
P
D
O
E
T
R
S
M
R
N
A
E
L
H
A
P
T
K
Y
S
H
O
E
O
U
H
Q
E
R
V.
K
R
D
Y
A
T
P
S
D
L
O
A
C
M
E
R
N
I
O
F
N
E
T
N
H
I
F
G
I
L
X
E
O
T
F
O
E
H
D
P
3
C
B
A
N
2
M
6
L
K
1
J
Y
X
5
W
9
I
H
V
G
U
4
T
8
#
S
R
Z
P
Q
7
O
0
*
16
Page 23
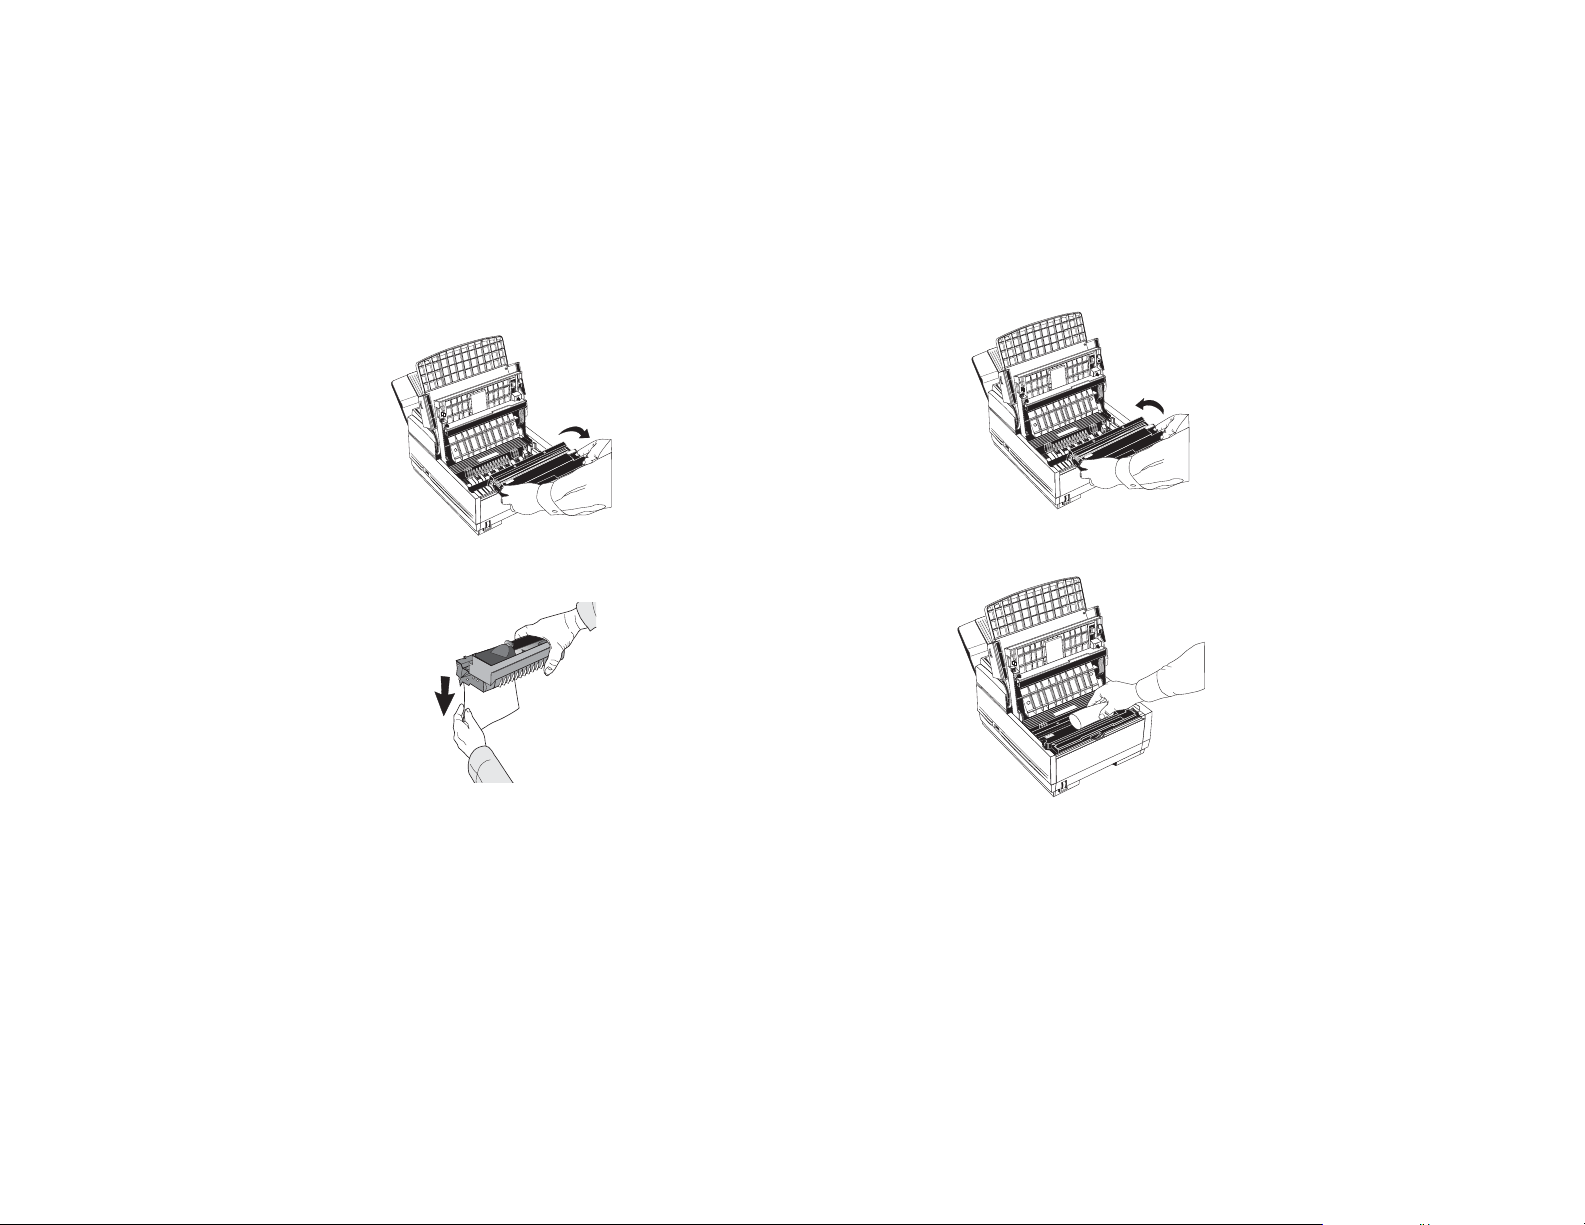
3. Lift the image drum unit out, keeping the image drum unit
out of direct sunlight. DO NOT touch the green surface of
the drum.
T
C
N
E
O
L
I
E
T
S
C
N
U
F
C
E
R
O
L
T
A
I
U
A
D
T
O
R
T
A
T
U
S
A
H
C
R
A
E
L
S
A
I
P
D
O
E
T
R
S
M
R
N
A
E
L
H
A
P
T
K
Y
S
H
O
E
O
U
H
Q
E
R
V.
K
R
D
Y
A
T
P
S
D
L
O
A
C
M
E
R
N
I
O
F
N
E
T
N
H
I
F
G
I
L
X
E
O
T
F
O
E
H
D
P
3
C
B
A
N
2
M
6
L
K
1
J
Y
X
5
W
9
I
H
V
G
U
4
T
8
#
S
R
Z
P
Q
7
O
0
*
USH
P
H
S
PU
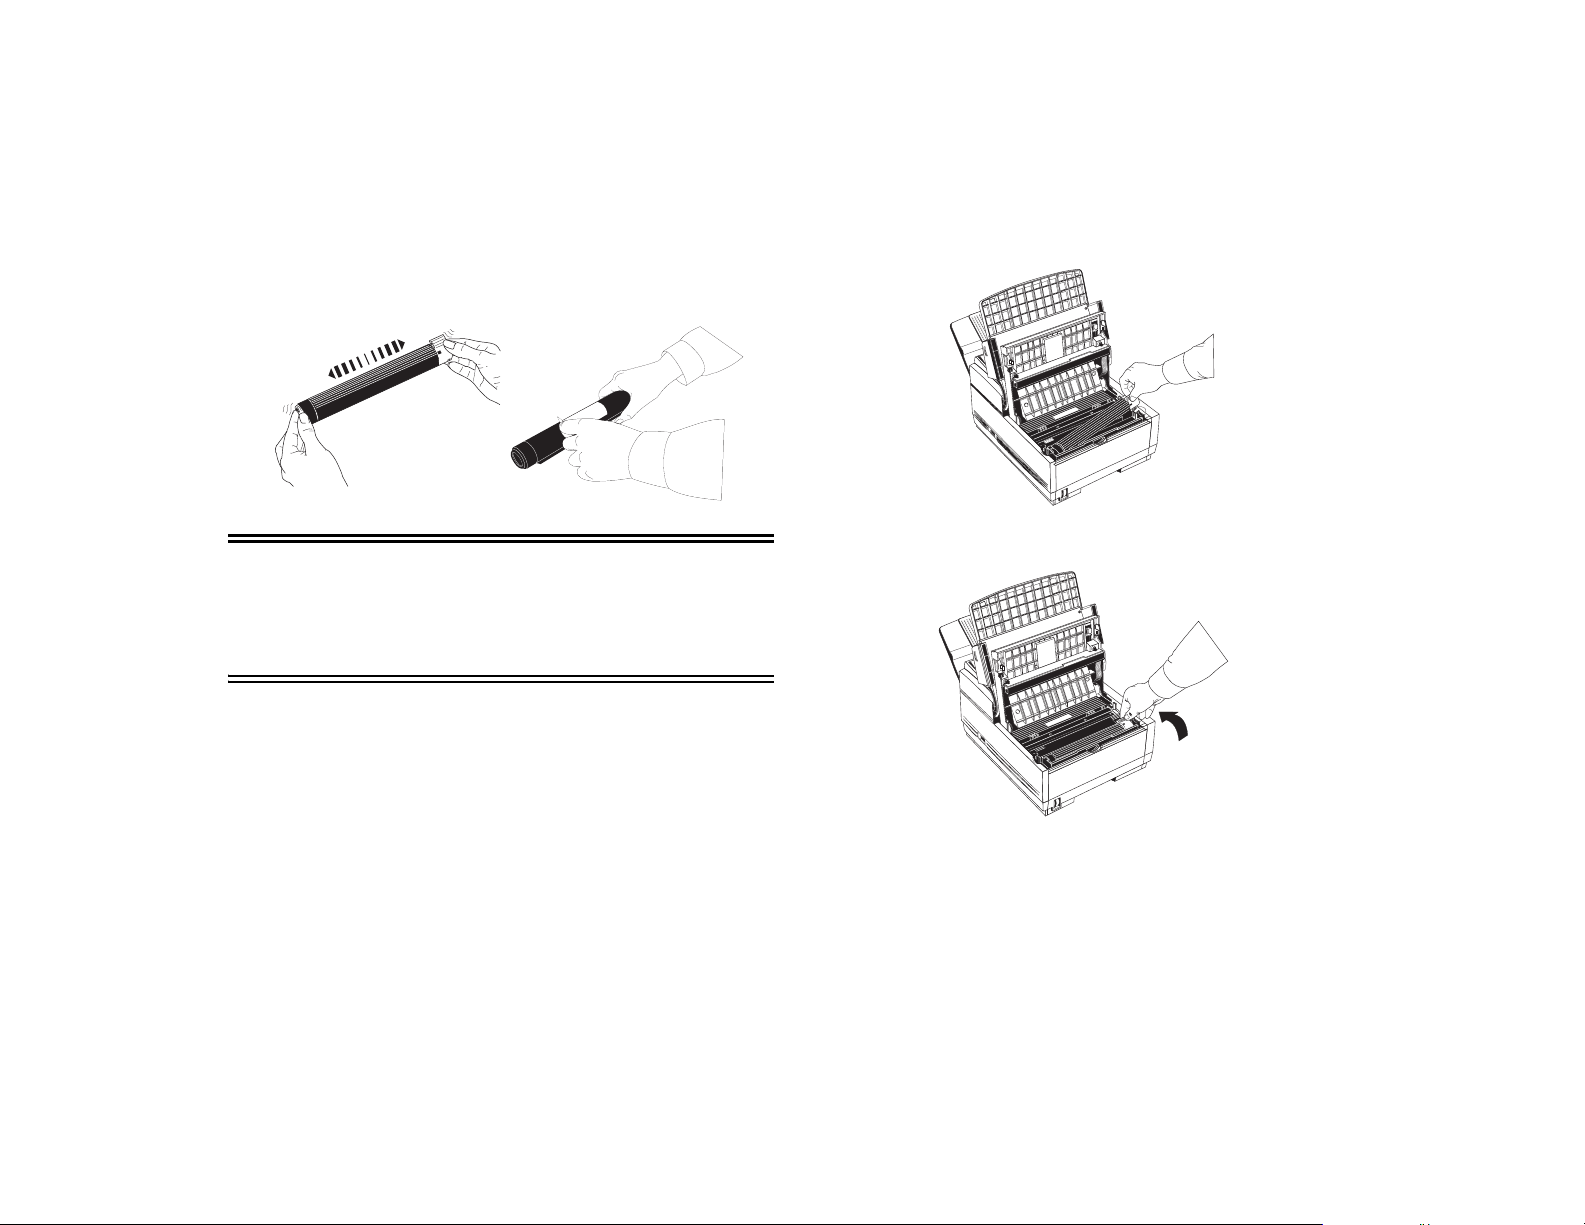
4. Carefully remove the protective sheet from the image drum
unit.
down firmly on both of the locations on the image drum
marked “PUSH.”
T
C
N
E
O
L
I
E
T
S
C
N
U
F
AUTOREC
TODIAL
ART
ST
AU
SEARCH
REDIAL
STOP
ALARM
HYPHEN
HOOK
V.REQUEST
STD
DARK
COPY
FINE
NORMAL
LIGHT
EXFINE
F
E
D
PHOTO
3
C
B
A
N
2
M
6
L
K
1
J
Y
X
5
W
9
I
H
V
G
U
4
T
8
#
S
R
Z
P
Q
7
O
0
*
USH
P
H
S
PU
6. Remove the protective foam cylinder from the toner well in
the image drum unit.
T
C
N
E
L
IO
E
T
S
C
N
U
F
AL
UTOREC
A
T
STAR
AUTODI
H
C
EAR
S
DIAL
RE
STOP
M
R
LA
A
PHEN
ST
HY
OK
HO
REQUE
.
V
K
PY
STD
DAR
AL
CO
FINE
NORM
E
N
HT
FI
LIG
EX
O
T
F
E
D
PHO
3
C
B
A
N
2
M
6
L
1
JK
XY
5
W
9
I
H
V
G
U
4
T
8
#
S
R
P
QZ
7
O
0
*
5. Place the image drum unit back into your fax machine. To
ensure that the image drum is positioned correctly, press
7. Remove the toner cartridge from its package and gently
shake it from side to side to distribute the toner. Then
17
Page 24
carefully peel the white plastic tape from the bottom of the
toner cartridge.
WARNINGs
Be careful when handling the toner cartridge. Do not let toner
spill onto your clothing or other porous materials. If you
experience any problems with toner, refer to the safety
instructions at the beginning of this User’s Guide.
8. With the ridged side facing up and the colored lever on your
right, insert the toner cartridge into the image drum unit.
Slide the left end of the cartridge in first, and then lower the
right end into place.
T
N
C
O
E
I
L
T
E
C
S
N
U
F
C
E
R
O
L
T
IA
U
A
D
T
R
O
A
T
T
U
S
A
H
C
R
A
E
L
S
IA
P
D
O
E
T
R
S
M
R
N
A
E
L
H
A
T
P
K
S
Y
O
E
H
O
U
H
Q
E
R
V.
K
D
Y
R
T
P
A
S
D
O
L
A
C
E
M
N
R
I
F
O
E
N
T
IN
H
F
IG
X
L
E
O
T
F
O
E
H
D
P
3
C
B
A
N
2
M
6
L
K
1
J
Y
X
5
W
9
I
H
V
G
U
4
T
8
#
S
R
Z
P
Q
7
O
0
*
9. Once the toner cartridge is in place, push the colored lever
all the way forward to secure it and release the toner.
T
C
N
E
O
L
I
E
T
S
C
N
U
F
C
E
R
O
L
T
A
I
U
A
D
T
R
O
A
T
T
U
S
A
H
C
R
A
E
L
S
A
I
P
D
O
E
T
R
S
M
R
N
A
E
L
H
A
P
T
K
Y
S
H
O
E
O
U
H
Q
E
R
V.
K
R
D
Y
A
T
P
S
D
L
O
A
C
M
E
R
N
I
O
F
N
E
T
N
H
I
F
G
I
L
X
E
O
T
O
EF
H
D
P
3
BC
A
2
MN
6
L
K
1
J
XY
5
W
9
HI
V
G
U
4
T
8
#
S
PR
7
OQZ
0
*
10. Close the copy stacker until you hear the copy stacker click
into place. Be sure that the cover is latched on both sides.
11. Close the document table.
18
Page 25

Connecting Telephone Line
1. Insert one end of the telephone cable into the LINE terminal
at the back of the machine.
2. Insert the other end of the telephone cable into your wall
telephone socket.
2. Position the handset cradle on the left side of the fax
machine.
Note: An external telephone or optional external handset can be
connected to the fax machine. See the instructions below.
Installing External Handset
If you purchased an optional external handset with your fax
machine, follow these instructions to install it.
1. Insert the supplied telephone cable into the socket located on
the bottom of the cradle and feed the cable to the back of the
cradle.
3. Plug one end of the handset cable into the handset. Then
plug the other end of the handset cable into the socket
located on the front of the cradle. Place the handset in the
cradle.
4. Feed the telephone cable from the back of the cradle through
the cable run located on the back of the fax machine.
19
Page 26
5. Insert the other end of the telephone cable into the TEL
sockets on the back of the fax machine.
Connecting External Telephone or Answering Machine
1. Insert one end of the telephone cable into the TEL terminals
on the back of the machine.
2. Insert the other end of the telephone cable into the socket in
your external device.
Note 1:To connect both an answering machine and a telephone,
first connect your answering machine to your fax
machine, then insert the cable of your external telephone
into the telephone socket on your answering machine.
Note 2:You will need to have the TAD mode feature turned on for
an answering machine to work with your fax machine. See
“Setting Answering Mode” on page 23 in Installation.
Connecting Power
1. Make sure the power switch is in the OFF position (the O on
the switch should be pressed down).
2. Insert the power cable into the power inlet socket located on
the back of the fax machine.
3. Connect the unattached end of the power cable into an
earthed AC power outlet.
20
Page 27

4. Turn the power switch on (the I should be pressed down).
Your fax machine will take a few moments to warm up.
5. The time and current answering mode will appear on the
display. Your fax machine is now in standby mode, ready to
send or receive faxes.
Paper
Paper Types
The manufacturer of this fax machine recommends the following guidelines when selecting paper for use in your fax
machine:
– Paper should be stored flat and away from moisture, direct
sunlight and heat sources.
– It is recommended to use a smooth finished paper such as
copier or laser type paper with a Sheffield (smoothness) rating
of 250 or less. If in doubt, please ask your paper dealer.
– The use of heavily laid or textured paper will seriously impact
the life of the image drum.
– Do not use very smooth, shiny/glossy paper.
– Do not use heavily embossed headed paper.
– Avoid printing on both sides and putting paper through the fax
machine twice.
– Avoid using paper with perforations, cut outs and ragged
edges.
Loading Paper
Your fax machine can hold up to 250 sheets of standard-weight
(75 g/m
legal size.
Your fax machine automatically reduces the vertical length of the
page images it receives to fit on the paper loaded in your fax
machine (down to 75% of the original length). For example, if a
document created originally on legal-size paper is received, your
fax machine reduces the received pages to fit on A4 or letter-size
paper.
Note: Your fax machine is set at the factory to use letter-size
2
, 20 lb.) paper. Available sizes are A4, letter size and
paper. If you intend to use a different paper size, change
the 1’ST PAPER SIZE user function setting to match your
new paper size. See“Customizing Features &
Operations” on page 53 later in this User’s Guide.
1. Pull the paper cassette out of the fax machine.
21
Page 28
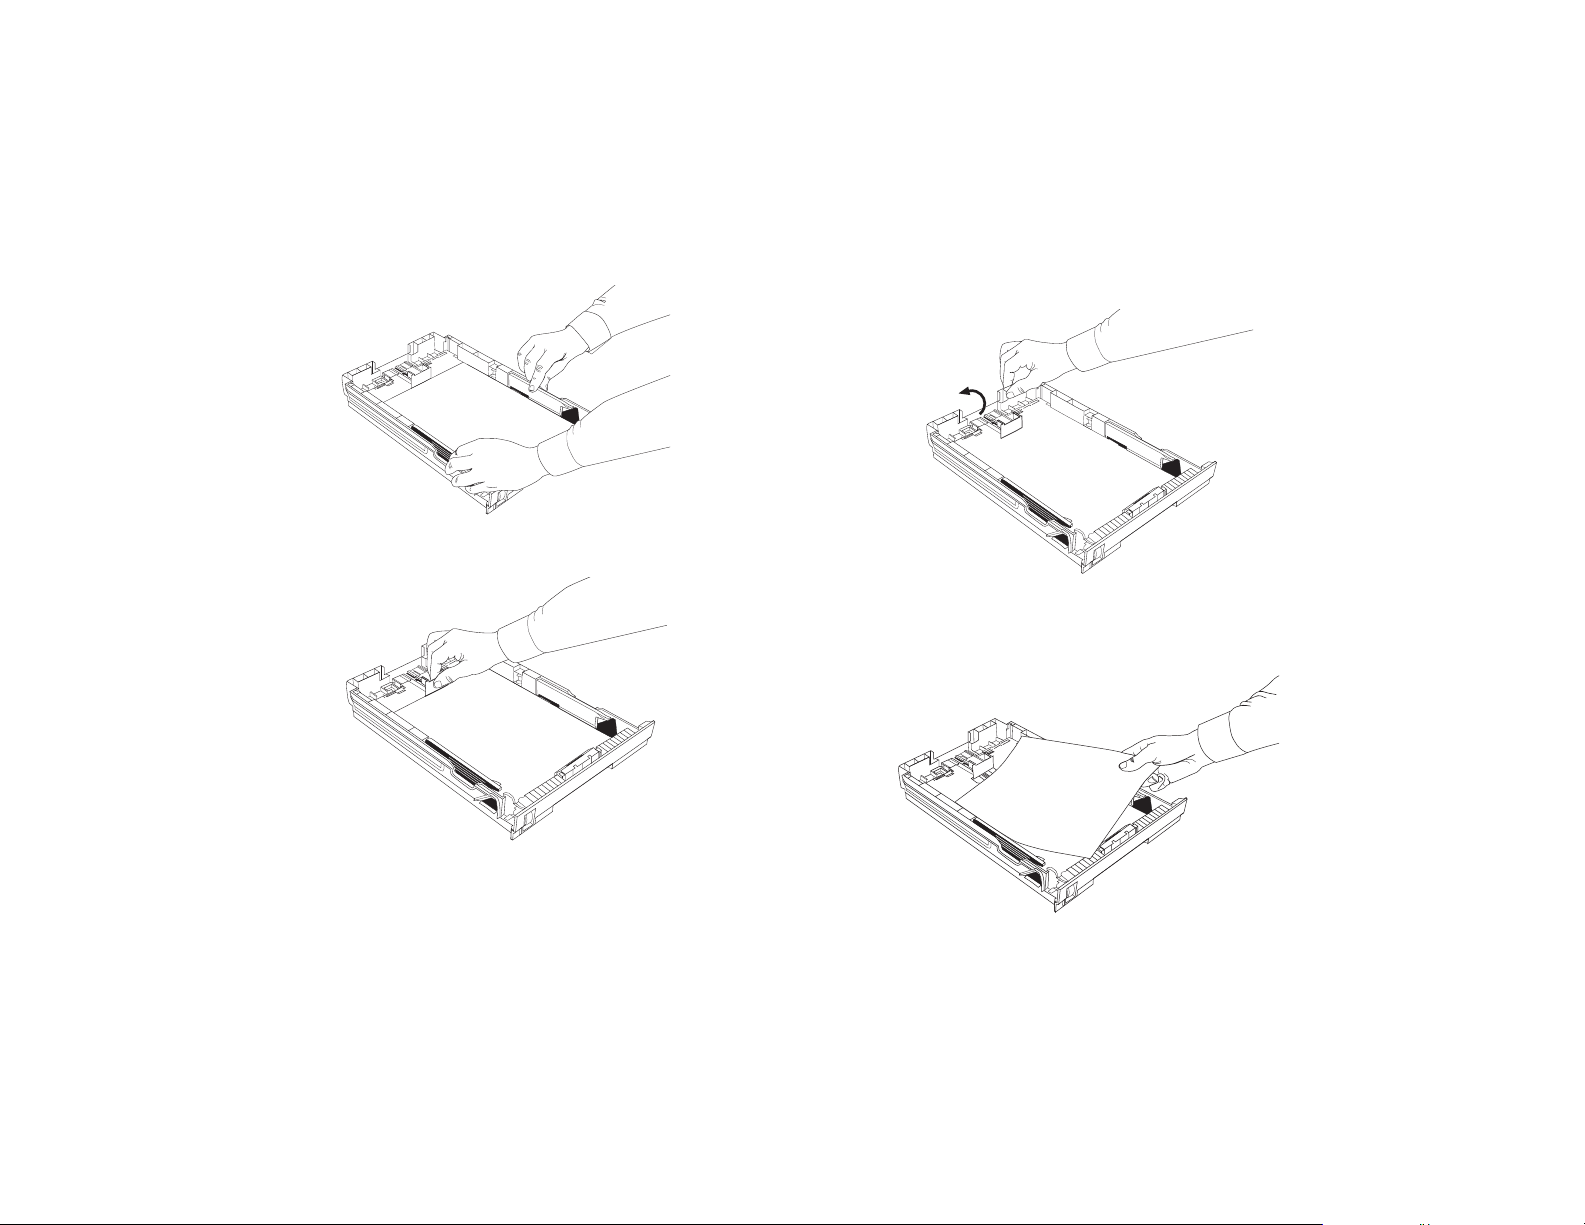
2. Adjust the paper guides to the width of your paper.
3. If necessary, lift and adjust the vertical paper guide for the
length of your paper.
4. If you are using legal size paper, pull out the extension at the
back of the paper cassette.
5. Remove the paper from its wrapper (up to 250 sheets). Note
the “Print side” notice printed on the label. Fan the paper.
6. Load the paper into the cassette, print side down.
22
Page 29

Note: Be sure the paper is under the tabs at the left and right
edges of the cassette. Do not fill past the Paper Full
marker. If necessary, readjust the guides for a snug (but
not tight) fit.
7. Return the tray to the slot. Push it forward until it locks.
Setting Time & Date
Follow these instructions to set the time and date on your fax
machine.
SELECT
FUNCTION
1. Press the Select Function key.
2. Press the
3. On the numeric keypad, press 3. The display will show
3:CLOCK ADJUSTMENT.
4. Press the
date and time.
5. Using the numeric keypad, enter the new date and time.
6. Press the
7. Press the
9/OP
PROG.
USER
3:CLOCK ADJUSTMENT
DEF
YES ( ) NO( /1-9)
3
YES
9/User Prog. One-Touch key.
YES key. The display will show the currently set
YES key to confirm your entry.
Select Function key to finish.
Setting Answering Mode
Your fax machine has a number of answering modes, which
determine how it handles incoming calls (both fax and voice).
The current answering mode appears on the LCD panel of your
fax machine.
Answering Mode Options
The answering mode which is best for you will vary depending
on how you use your fax machine and what external telephone
devices are connected to it. Read through the answering modes
listed here, then follow the instructions below.
Auto Receive Mode [FAX]
If your fax machine is connected to a telephone line reserved
only for fax communications, use the Auto Receive mode. Your
fax machine will assume all incoming calls are fax messages
and automatically receive all incoming fax messages.
Manual Receive Mode [TEL]
If you use the same line for both fax and telephone calls and the
majority of your incoming calls are telephone calls, then the
TEL answering mode is your best choice. Each time someone
calls, your fax machine rings like a telephone. You can answer
from either an external handset or from an external telephone
connected to your fax machine. If you pick up the handset and
hear fax machine CNG tones (normally a short peep every three
seconds), press the
Start key to receive the fax. If you do not
23
Page 30

answer the telephone and someone tries to send you a fax message, your machine will not accept it.
Note: Some older types of fax machines do not send CNG tones
and the line may be silent when you answer a call in TEL
answering mode.
If you answer a call using a telephone connected to the
same telephone line, but not connected directly to your
fax machine, you can remotely tell your fax machine to
start fax reception by entering a two digit remote receive
number using the telephone keypad. See Remote Receive
on page 55 in Programming later in this User’s Guide.
Telephone/Fax Auto Switch Mode [T/F]
When incoming calls are a mixture of fax and telephone calls,
your best choice is the Telephone/Fax Auto SW mode. In this
mode, your fax machine detects whether the incoming call is a
fax or voice call. When the call is from another fax machine,
your machine will switch to fax mode and receive the message.When the call is a voice call, your fax machine will ring
like a telephone. If you do not answer, your fax machine will
switch back to fax mode to allow the calling party to manually
send a fax.
Note: Only use this mode if the telephone is located close to
your fax machine. After the initial ring, the telephone falls
silent, but the fax machine continues ringing.
Telephone Answering Device Mode [TAD]
Use this mode if you have connected an answering machine to
your fax machine. When a call is received and is not answered,
your answering machine activates and is ready to send out your
recorded outgoing message. At the same time, your fax
machine monitors the incoming call to check if the call is a fax
or voice call. If the incoming call is a fax call, your fax machine
will receive the fax and no voice message will be recorded on
your answering machine. If the incoming call is a voice call,
then your fax machine will not activate and the calling party
will be able to leave a voice message on your answering
machine.
Note: In some countries, the Telephone Answering Device mode
is normally turned off. To have it turned on, contact your
dealer.
Memory Reception Mode [MEM]
Use this answering mode if you want incoming faxes to be
stored in the memory of your fax machine and not immediately
printed. You can then use the
2/Print Operation One-Touch
Key print operation to print out any messages that have been
stored in memory.
Fax Forwarding Mode [FWD]
When set to this mode, your fax machine receives all fax messages into memory, and then automatically re-sends the fax
messages to the forwarding number programmed into your fax
machine. For information on setting the forwarding number,
refer to “Setting Forwarding Number” on page 27 in Installation.
24
Page 31

Changing Answering Mode
Follow these instructions to change the answering mode on your
fax machine.
1. Press the Auto Rec key. Your fax machine
displays your current answering mode.
2. Press the
Auto Rec key again. Your fax
AUTO REC
machine switches to the next answering mode.
3. Continue pressing the
Auto Rec key until the desired
answering appears on the display. After a short pause, your
fax machine programs the new answering mode and returns
to standby mode displaying the new answering mode setting.
Fax Machine Identification
Fax machines use the information you will enter here to identify
themselves during communications. In most countries
programming this information into your fax machine is a legal
requirement. The information you will enter here includes:
TSI/CSI
This is the telephone number of your fax machine. This number
appears on displays and reports of other fax machines with
which you communicate. This number may also be printed at
the top of faxes you send to other fax machines.
Sender ID
This is a descriptive title and is usually the location of your fax
machine or the name of your company or office. The Sender ID
is printed at the top of every fax you send. You can enter up to
32 characters. The first 16 characters of your Sender ID will
also be used as your Personal ID, which may appear on the displays or reports of other fax machines with which you are communicating.
Note: Some fax machines do not print your TSI/CSI on their
received pages. To make sure that your TSI/CSI is always
printed, you can include your fax number as part of your
Sender ID.
Call Back Number
The Call Back Number is a telephone number (not a fax number) which the operator of the remote machine can use to reach
you. If you use the voice request function while you are transmitting to another fax machine and no one is there to answer,
your fax machine will automatically send a cover letter with a
call back message. The call back message is printed on a separate sheet with the message “Please call back” and a telephone
number where you can be reached. The call back number
entered here is the number that appears on the call back message.
Setting Fax Machine Identification
SELECT
FUNCTION
1. Press the Select Function key.
9/OP
USER
PROG.
GHI
YES
4
NO=<TSI/CSI>
ID=<SENDER ID>
25
Page 32

2. Press the 9/User Prog. One-Touch key. The display shows
1:FUNC.PROGRAMMING.
3. On the numeric keypad, press
4:SYSTEM DATA PRG.
4. Press the
ID=<SENDER ID>
YES key. The display shows NO=<TSI/CSI>,
.
4. The display shows
5. After the display clears, enter the full telephone number of
your fax machine using the numeric keypad.
Note: Use the 18/+ One-Touch key to enter a “+” character
before the number, which is the generally recognized
method of indicating the international access code before
the country dialing code. The
36/Space One-Touch key
is used to enter spaces in a number.
6. Press the Start key to save your entry.
7. Enter your Sender ID. This is a descriptive title up to 32
characters long. Refer to the instructions below.
To do this Use
Enter Numbers Numeric keypad (press once)
Enter Spaces Space One-Touch key
Enter Hyphens Hyphen One-Touch key
Enter Pause Pause One-Touch key
Enter Plus Plus One-Touch key
Delete Delete One-Touch key
Caps Caps One-Touch key
To do this Use
Enter alphabet characters Locate the character you want on the numeric keypad.
Press that key repeatedly until the character appears. It
is also possible to input characters using One Touch
key.
Enter unique character Press the 0/Unique key repeatedly until the character
you want appears. The following characters are
available:
! # & ‘ ( ) * + , - . / : ; = ? · @ \ “ _ % ˜ ä ß ñ ö ü Æ Å Ø
æ å ø.
Note: Some unique characters can be entered using
one-touch keys.
Move the cursor to make
corrections
8. Press the
NO=<CALL BACK NO.>.
Start key to save your entry. The display shows
YES and NO keys.
9. After the display clears, use the numeric keypad to enter the
telephone number you want to use for call back messages.
Enter up to 20 characters.
10. Press the Start key to save your entry.
11. Press the
Select Function key to finish.
26
Page 33

Setting Forwarding Number
SELECT
FUNCTION
When the answering mode of your fax machine is set to Fax
Forwarding [FWD], it will receive fax messages into memory
and then automatically resend the faxes to the number which you
enter here.
1. Press the Select Function key.
2. Press the
1:FUNC.PROGRAMMING.
3. Using the numeric keypad, press
6:FORWARDING NO. PRG.
4. Press the
5. Enter the fax number to which you want your messages
forwarded.
To do this Use
Enter Numbers Numeric keypad. Press once for each number
Enter Spaces Space One-Touch key
Enter Hyphens Hyphen One-Touch key
Enter Pause (i.e., to wait for
long distance or outside
lines)
9/OP
PROG.
USER
MNO
YES
6
FORWARDING NO.
9/User Prog. One-Touch key. The display shows
6. This display shows
YES key. The display will show FORWARDING NO.
required.
Pause One-Touch key
To do this Use
Add a switch from pulse to
tone dialing for part of the
call
Move the cursor to make
corrections
6. Press the
7. Press the
Start key to save your entry.
Select Function key to finish.
*/Tone key
YES and NO keys.
Setting Language
SELECT
FUNCTION
Your fax machine comes with some languages (English and
other) installed, which appear on the display and in reports.
Follow the instructions below to switch languages.
Note: Your dealer may be able to provide you with additional
1. Press the Select Function key.
2. Press the
1:FUNC.PROGRAMMING.
3. Press the
4. Using the numeric keypad, enter 14. The display shows
14:USER LANGUAGE.
5. Press the
9/OP
USER
PROG.
YES
GHI
1
14: USER LANGUAGE
4
[ENG.] YES ( ) NO ( )
languages.
9/User Prog. One-Touch key. The display shows
YES key. The display shows FUNCTION NO. [ ].
NO key to switch to the other installed language.
27
Page 34

6. To accept the language change, press the YES key.
7. Press the
Select Function key to finish.
Connecting to a PBX
SELECT
FUNCTION
A PBX (Private Branch Exchange) is a private telephone system
used to route internal calls. If you have to dial a prefix (access)
number to get an outside line, then your line is connected to a
PBX. If you are connecting your fax machine to a PBX, follow
the instructions below. These setting changes allow your fax
machine to identify the numbers of the prefix digits required to
dial an outside line on your PBX. After it dials the prefix digits,
your fax machine will wait until it sees that the outside line is
available before dialing the rest of the number.
Note: In some countries you may require service assistance to
1. Press the Select Function key.
2. Press the
1:FUNC. PROGRAMMING.
3. On the numeric keypad, press
PARAMETER
9/OP
USER
PROG.
ABC
YES
2
PBX LINE
[ OFF ] YES ( ) NO ( )
make these changes. Also, some PBX installations may
require additional adjustments to your fax machine. If you
continue to have difficulty with fax communication after
following these steps, contact your dealer.
9/User Prog. One-Touch key. The display shows
2. The display shows 2:DIAL
.
4. Press the
5. Press the
6. Press the
[OFF]
7. Press the
ENTER 4DIGITS
YES key until the display shows PBX LINE / [OFF].
NO key. The display changes to PBX LINE / [ON].
YES key until the display shows DIAL PREFIX /
.
NO key. The display changes to DIAL PREFIX / [ ]
.
8. Using the numeric keypad, enter the number you normally
dial from your PBX to obtain an outside line.
9. Press the
YES key and then the Select Function key to
finish.
Note: The DIAL PREFIX number of your PBX LINE must be
included in all outside telephone numbers you program
into your fax machine or dial with the numeric keypad.
To later turn off the PBX LINE and DIAL PREFIX
functions, follow Steps 1 - 7 above. At Step 8, press the
Space key four times, then continue with Steps 9 - 10.
28
Page 35

Dial Directories
One-Touch Keys
Programming One-Touch Keys
SELECT
FUNCTION
8/MN
LOCATION
PROG.
LOCATION PROGRAMMING
ENTER (SRCH, OT, A/D, #)
Your fax machine has 40 One-Touch keys for rapid dialing. You
can store up to two fax numbers with 40 digits on each OneTouch key, a main number and an alternate number. The alternate
number is used if the main number is busy or does not answer.
You can also enter a 15 character Location ID (name) for each
One-Touch key or an email address. Refer to “Email Using OT
Key” on page 95 for further details.
L
Note: To program or use One-
Touch keys 21 to 40, grasp
the One-Touch keypad
latch and swing the main
One-Touch panel up and
to the right. You can then
select from One-Touch
keys 21 to 40. When you
are finished, close the
One-Touch keypad to
continue.
To fi n d On e -Touc h ke ys
which are not yet programmed, you may repeatedly press
the Search key in Step 2 below. If all your One-Touch keys
are programmed, searching automatically looks for the
first unassigned Auto Dial number.
1. Press the Select Function key, then press the 8/Location
Prog.
One-Touch key. The display shows LOCATION
PROGRAMMING
.
2. Press a One-Touch key to program and the display briefly
NO=<FAX NO.>, ID=<LOCATION ID> or a previously-
shows
programmed fax number and Location ID.
3. Enter the main fax number as follows:
To do this Use
Enter Numbers Numeric keypad. Press once for each number
required.
Enter Spaces Space One-Touch key
Enter Hyphens Hyphen One-Touch key
29
Page 36

To do this Use
Enter Pause (i.e., to wait for
long distance or outside
lines)
Add a switch from pulse to
tone dialing for part of the
call
Enter Plus Plus One-Touch key
Delete Delete One-Touch key
Caps Caps One-Touch key
Move the cursor to make
corrections
Pause One-Touch key
*/Tone key
YES and NO keys.
4. Press the Start key.
5. Enter the Location ID. This is a descriptive title up to 15
characters long. Refer to the instructions below.
To do this Use
Enter Numbers Numeric keypad (press once)
Enter Spaces Space One-Touch key
Enter Hyphens Hyphen One-Touch key
Enter Pause Pause One-Touch key
Enter Plus Plus One-Touch key
Delete Delete One-Touch key
Caps Caps One-Touch key
Enter alphabet characters Locate the character you want on the numeric keypad.
Press that key repeatedly until the character appears. It
is also possible to input characters using One-Touch
keys.
To do this Use
Enter unique character Press the 0/Unique key repeatedly until the character
you want appears. The following characters are
available:
! # & ‘ ( ) * + , - . / : ; = ? · @ \ “ _ % ˜ ä ß ñ ö ü Æ Å Ø
æ å ø.
Note: Some unique characters can be entered using
one-touch keys.
Enter two letters using the
same key.
Move the cursor to make
corrections
6. Press the
Start key. The display shows NO=<OR LOCATION>.
Press the NO key to move to the next character.
YES and NO keys.
7. If an alternate fax number is required, refer to the
instructions following Step 3. If no alternate number is
required, continue with the next step.
8. Press the
SPEED.[33.6K] YES (<-) NO (->)
9. Select with the
Start key. The machine displays G3 COMMUN.
.
NO key and then press the YES key.
10. G3 ECHO PROTECTION [ON] YES (<-) NO (->) is displayed.
Select and press the
11. Press the
Start key to finish programming the One-Touch
key. The display shows
YES key.
LOCATION PROGRAMMING.
12. To continue programming One-Touch keys, go back to Step
2. If you are finished programming, press the
Function
key.
Select
30
Page 37

13. Lift off the plastic cover above the One-Touch label. Using a
pencil, write in the name for your newly-programmed OneTouch key. Replace the cover.
Note: If you want to delete any programming for a One-Touch
key, follow Steps 1 - 2. At Step 3 press the
Space key until
the number is deleted, then continue with Steps 8 - 10.
Chain Dialing
Each fax number that you enter or program into your fax
machine can be up to 40 digits long. In the case that you need to
dial a number that is longer than 40 digits, then you can use the
chain dial feature.
To create a chain dial number, program the first 39 digits of the
number into a One-Touch key or Auto Dial number. Then press
the Plus One-Touch key to make this a chain dial number. Next,
program the rest of the number into another One-Touch key or
Auto Dial number. You can, if so desired, leave the second part
of the number unprogrammed and enter it manually on the
numeric keypad.
1. To use a chain dial number, select the One-Touch key or
Auto Dial number programmed with the first part of the
chain dial number. The display will show
SRCH KEY
.
PRESS OT/AD/
2. Then select the One-Touch key or Auto Dial number
programmed with the second part of the chain dial number.
If the second part of the chain dial number was not
programmed, enter it manually on the numeric keypad.
3. Press the
Start key to begin sending the fax.
Programming Auto Dial Numbers
Your fax machine has 150 Auto Dial numbers available for
quick, three-digit selection and dialing. For each Auto Dial
number, you can enter a fax number up to 40 digits long and a
Location ID (name) up to 15 characters long.
Note: To find Auto Dial numbers which are not yet programmed,
repeatedly press the
One-Touch keys are not programmed, searching
automatically looks for the first unassigned One-Touch
key.
1. Press the Select Function key, then press the 8/Location
Prog.
One-Touch key. The display shows LOCATION
PROGRAMMING
2. Press the
.
Auto Dial key.
3. Using the numeric keypad, enter a 3-digit number for the
Auto Dial number (001 to 150) you want to program.
4. The display will briefly show
ID>
or a previously-programmed fax number and location.
5. Enter the fax number. Refer to the instructions below.
To do this Use
Enter Numbers Numeric keypad. Press once for each number
Enter Spaces Space One-Touch key
Enter Hyphens Hyphen One-Touch key
Search key in Step 2 below. If some
NO=<FAX NO.>, ID=<LOCATION
required.
31
Page 38

To do this Use
Enter Pause (i.e., to wait for
long distance or outside
lines)
Enter Plus Plus One-Touch key
Delete Delete One-Touch key
Caps Caps One-Touch key
Move the cursor to make
corrections
Pause One-Touch key
YES and NO keys.
6. Press the Start key.
7. Enter the Location ID. This is a descriptive title up to 15
characters long. Refer to the instructions below.
To do this Use
Enter Numbers Numeric keypad (press once)
Enter Spaces Space One-Touch key
Enter Hyphens Hyphen One-Touch key
Enter Pause Pause One-Touch key
Enter Plus Plus One-Touch key
Delete Delete One-Touch key
Caps Caps One-Touch key
Enter alphabet characters Locate the character you want on the numeric keypad.
Press that key repeatedly until the character appears. It
is also possible to input characters using One-Touch
keys.
To do this Use
Enter unique character Press the 0/Unique key repeatedly until the character
you want appears. The following characters are
available:
! # & ‘ ( ) * + , - . / : ; = ? · @ \ “ _ % ˜ ä ß ñ ö ü Æ Å Ø
æ å ø.
Note: Some unique characters can be entered using
one-touch keys.
Enter two letters using the
same key.
Move the cursor to make
corrections
8. Press the
SPEED.[33.6K] YES (<-) NO (->)
Start key. The machine displays G3 COMMUN.
9. Select with the
Press the NO key to move to the next character.
YES and NO keys.
.
NO key and then press the YES key.
10. G3 ECHO PROTECTION [ON] YES (<-) NO (->) is displayed.
Select and press the
YES key.
11. To continue programming Auto Dial numbers, go back to
Step 3. If you are finished programming, press the
Function
key.
Select
Programming Groups
Once you have programmed some One-Touch keys or Auto Dial
numbers, you can then program these numbers into groups to
allow you to send the same fax to multiple locations.
32
Page 39

1. Press the Select Function key, then press the 8/Location
Prog.
One-Touch key. The display shows LOCATION
PROGRAMMING
2. On the numeric keypad, press the
GROUP SETTING.
.
# key. The display shows
3. Using the numeric keypad, enter the group number (01 - 20)
you want to program.
4. The display shows the number of your current group and
SELECT LOC.(S). You can now add a location to your group
(or delete a location from it). Refer to the instructions below.
To Do This Use
Add a One-Touch location Press the One-Touch key. Press START to add it to the
Add Auto Dial location Press Auto Dial. Enter the 3-digit Auto Dial number.
Delete One-Touch location Press the One-Touch key. Press START to delete it
Delete Auto Dial location Press the Auto Dial key. Enter the 3-digit Auto Dial
Search for a location name
to add or delete
group.
Press START to add it to the group.
from the group.
number. Press START to delete it from the group.
Press the Search key continuously until by the location
you want appears. Press START to add it to the group.
Press START to delete it.
6. When you are finished programming your group, press the
NO key. The display shows LOCATION PROGRAMMING.
7. To program another group, go back to Step 2. If you are
finished, press the
Select Function key.
5. After you have completed your selection (by pressing
NO), the display again shows SELECT LOC.(S). Continue
or
to add or delete locations from your group. Each group can
contain up to a maximum of all of the One-Touch and Auto
Dial locations available on your fax machine.
YES
33
Page 40

Basic Operation
Preparing Documents
– Try to use good quality documents for your transmissions.
Documents that are typed or created in felt-tip black ink on
white (or light) paper work best.
– Do not send documents which are not rectangular.
– Never use documents that have wet or sticky surfaces,
wrinkles, staples or paper clips. However, your fax machine
can transmit documents that have been subject to normal wear,
such as documents with staple holes, letter folds and minor
corner folds.
– If you are not sure how a document will fax, try making a copy
first on your fax machine (load the document face down and
press the
– If your documents are bent, creased or torn, make a copy on a
photocopier and send the copy instead. You can also use a
photocopier to enlarge or reduce documents before sending.
Document size
All documents must have a minimum width of 5.83" (148 mm)
and a minimum length of 5.04" (128 mm). Documents cannot
be wider than 8.5" (216 mm) or longer than 14.02" (356 mm).
Copy key).
Note: If you often have documents longer than 356 mm, your
dealer may be able to adjust your fax machine to scan and
transmit documents up to 59.06
Please be aware that adjusting the length setting to
59.06” (1500 mm) cancels detection of multiple document
misfeeds.
Multiple page documents
Your fax machine can scan paper with a base weight between
2
60 g/m
sheets of standard 75 g/m
type paper) at the same time. If you use a heavier paper, you can
load up to 15 sheets. For very heavy paper, load and send pages
sheet-by-sheet. When loading multiple-page documents, do not
load paper which is thinner than 0.08 mm or thicker than 0.13
mm. For documents, do not load paper which is thinner than
0.06 mm or thicker than 0.15 mm.
(16 lb.) and 105 g/m2 (28 lb.). You can load up to 30
2
(20 lb.) paper (e.g. copier or laser
" (1500 mm) in length.
Loading Documents
To prevent paper jams and problems during scanning, neatly
stack your documents, aligning their edges, before loading. Do
not load documents of different sizes at the same time.
Note: You can load and prepare to transmit a document while
your fax machine is still sending or receiving another
message (as long as the document feeder is clear). To do
this, load the document, select your location and press the
Start key. Your document will be sent when the current
communication ends.
34
Page 41

1. Adjust the document guides to the width of the paper you are
using.
3. Your fax machine will grip the documents, and pull the
bottom page into the machine.
4. If necessary, use the
Transmit Resolution/YES key to set
the resolution of your document.
To Do This Use
Normal office documents STD (Standard)
Documents with small type
or other fine details
Documents with photos or
many shades of gray
FINE or EX. FINE
PHOTO
2. Neatly stack your documents, and then insert them face
down into the document feeder. If necessary, readjust the
document guides for a snug fit.
5. If necessary, use the
Type of Original/NO key to set the
level of contrast in your document.
To Do This Use
Documents with normal
contrast
Light documents LIGHT
Dark documents DARK
NORMAL
6. Your documents are now ready for faxing or copying.
Sending Faxes To Single Location
1. Load your documents.
2. Select a location. Refer to the instructions below.
35
Page 42

To Do This Use
One-Touch key Press the One-Touch key. Lift the main One-Touch
keypad to access One-Touch keys 21-40.
Auto Dial number Press the Auto Dial key, and then enter the 3-digit
Auto Dial number on the numeric keypad.
Numeric keypad Dial as you would on a normal telephone. If you make
External telephone Pick up the handset of your external telephone and
a mistake, press the YES key to go back and re-enter
the number.
dial the number of the machine you wish to transmit
to. If the receiving fax machine is in automatic
reception mode, you will hear a high pitched tone. If a
person answers the phone, ask them to press the Start
key on their fax machine.
3. If necessary, press the Start key to begin the transmission.
Search Key Dialing
If unsure which One-Touch key or Auto Dial number contains
the location you want to communicate with, use the
to look through an alphabetical list of all of the Location IDs
programmed into your fax machine.
1. When selecting locations, press the Search key. The display
will show
2. Repeatedly press the
ENTER 1-ST CHAR.
Search key to look through the entire
list of locations in alphabetical order, or locate the letter you
want on the numeric keypad, and press that key repeatedly to
look through Location IDs beginning with that letter.
Search key
Real-Time Dialing
Normally, your fax machine dials the entire number of the
location you have selected at one time. Occasionally, it may be
necessary to dial numbers in real time (one digit at a time).
1. If your fax machine is equipped with a handset, you can dial
in real time by picking up the handset or pressing the
V. Request
key.
Hook/
2. Dial the number manually.
Note: Real-time dialing with the use of the Hook/V. Request key
is not available in some countries.
Redialing
If the line is busy or if there is no answer, your fax machine waits
and then automatically redials the number. Also, if your fax
machine is transmitting and a communication error occurs, it will
automatically redial the number and try to send the fax again.
1. You can redial a number manually at any time by pressing
Redial key.
the
Confirming Results
After transmission, press the Copy key once (with no documents
loaded) to see a report confirming your transmission on your fax
machine’s display. To print the report, press the
second time. See “Reports” on page 60 for more information.
Copy key a
36
Page 43

Stopping Transmissions
To stop a transmission while it is in progress, follow the
instructions below.
1. Press the Stop key twice. The display will show STOPPED.
2. If documents are stuck part way through the document
feeder, you may see the following message on the display
RELOAD DOCUMENT. Press the STOP key again and your
fax machine will feed the document the rest of the way
through the document feeder.
Note: If your fax machine cannot feed your document through
the document feeder, refer to “Problem Solving” on
page 65.
Receiving Faxes Manually
Your fax machine receives faxes automatically unless the fax
machine has been set to the manual receive [TEL] mode. If your
fax machine is set to the manual receive [TEL] mode, follow the
instructions below.
1. When your telephone or fax machine rings, pick up the
telephone handset. If the call is a voice call, start speaking to
the caller.
2. If the call is a fax call, or if a person wishes to fax you a
document after having a conversation, press the
and hang up the handset.
Note: You can also tell your fax machine to start fax reception
by entering your 2-digit code for remote receive using
Start key
your telephone keypad. Refer to Remote Receive on
page 55 in Programming.
3. After you receive the fax, a long beep will tell you that the
transmission was successful.
Receiving Faxes Into Memory
Your fax machine automatically receives messages into memory
and does not immediately print them in the following situations.
Memory Reception
• When your fax machine has been set to Memory Reception
mode [MEM], any received faxes are stored in the memory
of your fax machine and are not automatically printed. The
display shows
received during memory reception mode.
• When you change the reception mode of your fax machine,
any nonconfidential fax messages stored in memory are
automatically printed.
Note: If you want to print any fax messages stored in memory
without changing reception mode, use the procedure
described below in “No Toner Reception” on page 38.
• If you want to protect any messages received into memory
with a password, then mailbox 16 has to be set to
confidential and a password created. When password
protection has been set for memory reception, then printing
MSG. IN MEMORY if any faxes have been
37
Page 44

of any messages can only be done after entering a four-digit
password. Refer to “Confidential Faxes” on page 45 in
Advanced Operations for the procedures on how to create a
mailbox and password.
No Paper Reception
• When your fax machine has run out of paper, a MSG. IN
MEMORY, REPLACE PAPER
message appears on the display.
Your fax machine continues to receive faxes into memory
when it has run out of paper. Your fax machine automatically
prints out any messages received in memory when the paper
is replaced.
No Toner Reception
When your fax machine is running low on toner, it displays a
TONER LOW, REPLACE TONER CART. message. Rather than risk
printing an unreadable message, your fax machine can be set by
the dealer to automatically receive faxes into memory. The
default setting not to receive faxes into memory when toner is
running low allows time for you to change the toner cartridge.
• If your fax machine has received a message in memory
because toner is low,
MSG. IN MEMORY appears on the
display.
Print Memory Reception
• To print out a message stored in memory when toner is
running low, replace the toner cartridge or follow the
instructions below.
SELECT
FUNCTION
1. Press the
2. Press the
shows
2/AB
PRINT
OPERATION.
1: PRINT MEMORY MSG?
YES
Select Function key.
2/Print Operation One-Touch key. The display
1:PRINT MEMORY MSG.?
3. Press the YES key.
Note: Even if you see a TONER LOW message on your fax
machine, you may be able to use the
2/Print Operation
One-Touch key to continue printing faxes, but the print
quality cannot be guaranteed. Replace your toner
cartridge as soon as possible.
Canceling Messages Stored In Memory
It is also possible to erase messages received in memory without
printing them.
1. After you have followed the instructions to print out
messages stored in memory, the display shows
MEMORY, PRINTING
.
2. To erase the message instead of printing it, press the
key. The display shows
CANCEL?
MESSAGE IN
Stop
38
Page 45

3. Press the YES key to erase the message from the memory of
your fax machine.
Rejecting Unsolicited Fax Messages
SELECT
FUNCTION
The closed network option allows you to limit the locations with
which your fax machine can communicate. Using this function,
you can set your fax machine to refuse to receive any faxes from
locations whose telephone numbers are not programmed into
your One-Touch keys or Auto Dial numbers. This function
allows you to reject any unsolicited faxes such as advertising.
Note: In some countries, this function cannot be set by the user.
You can also set your fax machine not to send faxes to locations
whose telephone numbers are not programmed into your OneTouch keys or Auto Dial numbers.
The available settings are:
• Limit Reception Only (RX)
• Limit both Transmission and Reception (T/R)
• No Limitation on Transmission or Reception (OFF).
Follow the instructions below to set the parameters desired.
1. Press the Select Function key.
9/OP
PROG.
USER
YES
TUV
0
08: CLOSED NETWORK
8
Please contact your dealer for assistance.
2. Press the
1:FUNC. PROGRAMMING.
3. Press the
9/User Prog. One-Touch key. The display shows
YES key. The display shows FUNCTION NO. [ ].
4. Using the numeric keypad, enter 08. The display shows
08:CLOSED NETWORK, and the current setting of this
function.
5. Press the
NO key until the setting you want appears in the
display.
6. Press the
YES key to confirm the new setting then press the
Select Function key to finish.
Power Failures & Memory
Although the memory is backed up by battery (about 20 hours
when the battery has been fully charged and the temperatures are
normal), the following problems occur when power is cut off for
lengthy periods of time.
• Any messages your fax machine has scanned into memory,
but not yet transmitted, are lost.
• Any messages your fax machine has received into memory,
but not yet printed, are lost.
• If you have loaded documents onto the document feeder of
your fax machine, any dialing or transmission settings are
lost.
Your fax machine prints a power outage report to inform you of a
power failure. Use this report to determine which received
messages you may have lost and which transmissions you may
39
Page 46

have to resend. Refer to “Reports” on page 60 for more
information.
Making Copies
Your fax machine can also be used to make copies. You can make
up to 99 copies at one time. Your fax machine automatically
makes all copies in FINE mode. STD, EX.FINE and PHOTO
mode can be selected manually by pressing the
1. Load your documents.
2. Press the
[1SETS]
Your fax machine waits a moment, then begins copying.
3. To make multiple copies, enter the number of copies you
desire on the numeric keypad. Then press the
again. Your fax machine begins making the required number
of copies.
Copy key. The display shows PRG. NO. OF COPIES,
. If you want to make just one copy, you are finished.
Making Copies Using Manual Paper Feeder
The manual paper feeder of your fax machine allows you to
make copies on a different type of paper than what is normally
kept in the paper tray of your fax machine. To make copies using
the manual paper feeder, follow the instructions below.
1. Load your documents.
YES key.
Copy key
2. Press in on the lower half of the front panel indents, just
above the paper cassette.
3. Pull the manual paper feeder down until it is horizontal.
40
Page 47

4. Adjust the paper guides on the manual paper feeder.
5. Insert a sheet of paper face up, adjusting the guides again to
ensure the paper is straight.
6. Press the
Note: It is recommended to make single copies only when using
COPY key.
the manual paper feed slot. This will prevent any possible
paper feed jams from occurring.
Using Voice Request
The voice request feature allows you to have a conversation with
a person at a remote fax machine during a fax communication.
Either the sender or receiver can initiate a voice request.
If you are sending a fax, you can answer a voice request only
after all pages have been transmitted. If you are receiving a fax,
you can answer a voice request after reception of each page. You
will know if the person on the other fax machine has issued a
voice request when you hear a warbling tone. If you do not
respond in approximately six seconds, the voice request is
automatically cancelled.
Note: You need to have either an attached handset or an
external telephone to use the voice request function.
With the ITU-T V.34 modem, this feature can’t be used.
This function can only be used during Feeder-TX.
Initiating Voice Request
1. During a fax communication, press the Hook/V. Request
key.
2. When the other party answers your request, your fax
machine will emit a repetitive warbling sound. The display
LIFT HANDSET AND PRESS VOICE REQUEST.
shows
3. Lift your handset and press the
Note : If you press your Hook/V. Request key to initiate a voice
request during transmission, but no one is there to answer,
Hook/V. Request key.
41
Page 48

your fax machine automatically sends a call back
message to the remote site giving a telephone number
where you can be reached.
A call back message is only sent if you have programmed
a call back number into your fax machine. Refer to
“Setting Fax Machine Identification” on page 25.
Advanced Operations
Broadcast
Answering Voice Request
1. Lift the handset and press the Hook/V. Request key.
A broadcast fax is a fax sent to several locations and is a onetime event. It consists of a collection of destinations (fax and/or
email addresses) and is NOT saved (programmed) into the
machine.
A broadcast can be any combination of One-Touch or Auto-Dial
keys or manually entered number(s) from the numeric keypad. If
an email address is required, only those pre-programmed can be
used. The manually entered numbers must be entered last.
Refer to “Programming Auto Dial Numbers” on page 31 for
further reference.
Perform a Broadcast Operation
1. Load your documents.
2. Enter locations by pressing One-Touch keys or Auto Dials.
3. After pressing the first entry, you have three seconds to enter
the next location in your broadcast list. The machine groups
the list of numbers for the broadcast. You must enter the
One-Touch and Auto Dial numbers before entering manual
42
Page 49

numbers from the numeric keypad. Refer to the instructions
below.
To Do This Do This
One-Touch key Press the One-Touch key. Lift the main One-Touch
keypad to access One-Touch keys 21-40.
Auto Dial number Press the Auto Dial key, and then enter the 3-digit
Auto Dial number on the numeric keypad.
A group Using the numeric keypad, press the # key after press
Auto Dial key, then enter the number of the group you
want to use.
A number dialed on the
numeric keypad
4. When finished selecting locations, press
Dial as you would on a normal telephone.
Start. The display
shows:
ENTRY IS OK?
DIAL(START)CHECK( )
5. If satisfied with the entries submitted, press Start to begin
transmission or to load the documents. If you wish to
CHECK what entries have been submitted, press the NO key
to access an Entry Report or to check the entries via the LCD
screen.
6. If checking the entries, the display will read:
7. Press the
YES key to print the Entry Report or press NO to
check the entries via the LCD. If checking via LCD the
following appears:
CHECK LOCATIONS(S)
YES(STR/LOC.) EXIT( )
8. Press the
Press
9. Once finished, press
Start key repeatedly to cycle through the entries.
Start to accept the entry or NO to clear the entry.
No to exit the verification menu and the
display will read:
ENTRY IS OK?
DIAL(START)CHECK( )
10. Press Start to begin transmission or to load the documents
and then send.
Delayed Sending of Faxes
The delayed transmission feature allows you to send documents
at a specified date and time, and frees you from the need to
manually start the transmission. You can program a delayed
transmission to occur at any time on the day of your
transmission, or at any time over the next three days.
PRINT ENTRY REPORT?
YES( ) NO( )
43
Page 50

You can send a delayed fax either from the document feeder or
from memory. Refer to the table below to decide which method
you want to use.
Delayed TX Features &
Limitations
Number of locations One Multiple
Number of delayed faxes in your fax
machine at any one time
Fax machine can be used for other
transmissions while a delayed fax is
waiting to be sent?
From Feeder From Memory
One Up to twenty
No Yes
Sending Delayed Faxes
1. Load your documents.
2. Press the
3. Press the
DELAYED TX and today’s date.
4. If transmission is to occur today press
step 7. If transmission is to occur at a later date press the
key.
5. Using the numeric keypad, enter the date on which you wish
the transmission to begin.
6. Press the
7. Using the numeric keypad, enter the time on which you wish
the transmission to begin.
Select Function key.
1/Delayed TX One-Touch key. The display shows
YES key and go to
NO
YES key. The display shows DELAYED TX TIME.
Note: Enter the time using a 24-hour clock, i.e., 8:00 a.m. would
be entered as 08:00 and 8:00 p.m. would be entered as
20:00.
8. Press the YES key and the display shows SELECT
LOCATION(S)
.
9. Select a location. Refer to the instructions below.
To Do This Do This
One-Touch key Press the One-Touch key. Lift the main One-Touch
keypad to access One-Touch keys 21-40.
Auto Dial number Press the Auto Dial key, and then enter the 3-digit
A number dialed on the
numeric keypad
Auto Dial number on the numeric keypad.
Dial as you would on a normal telephone.
10. Press Start.
•If the MEM/FEEDER SW is on MEM, the machine will begin
scanning. After scanning, the machine will stand by for the
delayed TX.
•If the
MEM/FEEDER SW is on FEED, the machine will stand by
for the delayed TX.
Canceling Delayed Transmissions
To cancel a delayed transmission from the document feeder or
from memory before it has been sent, follow the instructions
below.
1. Press the Stop key. The display shows COMMUNICATION
CANCEL
.
44
Page 51

2. Press the YES key. The display shows the Location ID or
telephone number of the first delayed transmission currently
loaded in your fax machine.
3. Press the
YES key to cancel the delayed transmission that is
displayed. If more than one delayed transmission has been
programmed into your fax machine, press the
NO key until
the location of the delayed transmission you want to cancel
appears, then press the
YES key to cancel.
4. If the delayed transmission was a feeder transmission, press
Stop key again to remove the document from the
the
document feeder.
Confidential Faxes
Fax machines are often placed in public places where anyone can
look through received faxes. To overcome this, use the
confidential fax feature when sending and/or receiving
confidential faxes.
You can send and receive confidential faxes to/from other fax
machines with personal mailboxes. The International
Telecommunications Union (ITU) has now created a worldwide
standard that uses ITU sub-addressing to allow fax machines or
PC fax software from different manufacturers to send and receive
confidential faxes.
When sending confidential faxes, you must know in advance the
mailbox number, or ITU sub-address, of the recipient you are
sending the message to. Ask the person who is receiving the fax
to tell you their mailbox number, or ITU sub-address.
A receiving fax machine stores the message in a confidential
mailbox or ITU sub-address protected by a password and will not
print any confidential faxes until the correct password is entered.
Sending Confidential Faxes
1. Load your documents.
2. Press the
3. Press the
will ask you to enter the number of a confidential mailbox,
or ITU sub-address, on the receiving fax machine.
4. Using the numeric keypad, enter the number of the
confidential mailbox or ITU sub-address you are
transmitting to.
5. Press the
SELECT LOCATION.
6. Select your location as follows.
To Do This Do This
One-Touch key Press the One-Touch key. Lift the main One-Touch
Auto Dial number Press the Auto Dial key, and then enter the 3-digit
A number dialed on the
numeric keypad
Note: You cannot send a confidential fax to a group or multiple
Select Function key.
3/Confidential TX One-Touch key. The display
Start key to confirm your entry. The display shows
keypad to access One-Touch keys 21-40.
Auto Dial number on the numeric keypad.
Dial as you would on a normal telephone.
individual locations.
45
Page 52

7. Press the Start key and your fax machine will begin sending
the fax.
Receiving Confidential Faxes
Before you can receive confidential faxes, you have to create a
confidential or personal mailbox on your fax machine that is
password protected (see below). You then have to tell the person
sending the confidential fax your mailbox number.
When your fax machine receives a confidential message, it will
store the message unprinted in the mailbox (in memory) until
you enter a password. Your fax machine can have a maximum of
16 mailboxes.
Your fax machine automatically prints a confidential RX report
to indicate that a confidential fax has been received and is
waiting to be printed. Also,
display after receipt of a confidential fax.
Creating Confidential Mailbox
SELECT
FUNCTION
9/OP
PROG.
USER
Create a confidential or personal mailbox on your fax machine
as follows:
1. Press the
2. Press the
1:FUNC. PROGRAMMING.
Select Function key.
9/User Prog. One-Touch key. The display shows
MSG. IN MEMORY appears on the
1: FUNC.PROGRAMMING
JKL
5
YES
3. Using the numeric keypad, press
5:PERSONAL BOX PRG.
4. Press the
NO. [ ]
YES key. The display shows PERSONAL BOX
.
5. The display shows
5. Using the numeric keypad, enter the 2-digit number of the
personal box you want to use and press the
display normally shows
6. Press the
[CONF]
NO key until the display shows PERSONAL BOX
.
PERSONAL BOX [CLOSE].
YES key. The
Note: If you cannot select [CONF], then the mailbox number
you have selected already contains a bulletin polling
message. If you get the message
ILLEGAL OPERATION,
then the mailbox number you have selected already
contains a confidential message in memory. Please select
another personal box number to use.
7. Press the YES key and using the numeric keypad, enter the
4-digit password you want to use with your mailbox.
8. Press the
YES key to confirm your entry.
9. Your fax machine will ask you to enter another mailbox
number. To continue programming mailboxes, go back to
Step 5. If you are finished programming, press the
Function
key.
Select
46
Page 53

Changing Password or Closing Mailbox
SELECT
FUNCTION
9/OP
PROG.
USER
1: FUNC.PROGRAMMING
JKL
YES
5
If you want to change the password of an existing mailbox, or if
you want to close an existing mailbox, follow the instructions
below.
1. Press the
2. Press the
1:FUNC. PROGRAMMING.
3. Using the numeric keypad, press
5:PERSONAL BOX PRG.
4. Press the
NO. [ ]
Select Function key.
9/User Prog. One-Touch key. The display shows
5. The display shows
YES key. The display shows PERSONAL BOX
.
5. Using the numeric keypad, enter the 2-digit number of the
mailbox whose password you want to change, or which you
want to close.
6. Press the
[CONF]
7. To close a mailbox, press the
displayed and press
8. To change the password, press the
shows
YES key. The display shows PERSONAL BOX
.
NO key until [CLOSE] is
YES. Go to Step 11.
YES key. The display
PRG. PASSWORD [XXXX].
9. Enter a new 4-digit number on the numeric keypad.
10. Press the YES key to accept the new password.
11. The fax machine shows
DELETE PERSONAL BOX. Press Yes.
To continue programming mailboxes, go back to Step 5. If
you have finished programming, press the
Select Function
key.
Printing Confidential Faxes
SELECT
FUNCTION
2/AB
PRINT
OPERATION.
1: PRINT MEMORY MSG?
NO
YES
Each time your fax machine receives a confidential fax, it automatically prints a confidential reception report telling you
which mailbox number received the message. To print a confidential fax after your fax machine has received it, follow the
instructions below.
1. Press the
2. Press the
shows
3. The display shows
Select Function key.
2/Print Operation One-Touch key. The display
PRINT MEMORY MSG.? Press No.
PRINT PERSONAL BOX?
4. Press the YES key. The display shows PERSONAL BOX
NO. [ ]
.
5. Using the numeric keypad, enter the two-digit number of the
mailbox you want to print from. The display shows
PERSONAL BOX NO. [ ] YES OR NO. Press the YES key.
Note: If no message is stored in that mailbox, the display shows
NO DATA IN MEMORY.
47
Page 54

6. Using the numeric keypad, enter the 4-digit password for the
mailbox you want to print from.
7. Press the
YES key. The message begins printing.
Note: If you want to clear the mailbox without waiting for
printing, press the
changes to
CANCEL? Press the YES key to clear the
Stop key at this point. The display
mailbox.
Relay Broadcasting
Relay broadcasting is where one fax machine, which is the relay
initiating station, sends a document to another fax machine. The
receiving fax machine, which is the relay key station, then resends (broadcasts) the document to a number of other locations.
Relay Initiating Station
Your fax machine can act as the relay initiating station, which
starts the relay broadcast by sending the original documents.
Before programming your fax machine to initiate a relay broadcast, you will need to obtain the following information from the
operator of the fax machine you intend to use as a relay key station:
Note: The designated recipient of the receipt report sent by the
relay station (function in which the relay station sends a
report on transmission results to the destination specified
by the relay initiating station) shall be the destination
programmed into Auto-Dial number 150.
Relay Password: This is the relay password (up to 20
digits) which is programmed into the relay key station.
Remote List Number: These numbers (up to 20 digits) are
the code numbers of locations or groups of locations
programmed into the relay key station.
Relay Key Station
The relay key station is the fax machine that receives the original fax message, and then automatically relay broadcasts the
message to other remote fax machines. For this feature to be
available, the fax machine operating as a relay key station must
be able to receive and relay broadcast the message to other fax
machines (OKIFAX 2600, 5750, 5950, 5980, or fax of another
maker with a SUB PWD relay function).
Initiating Relay Broadcasts
SELECT
FUNCTION
1. Load your document.
2. Press the
3. Press the
RELAY PASSWORD.
shows
4. Using the numeric keypad, enter the password from the hub
relay station (up to 20 digits).
5. Press the
6. Using the numeric keypad, enter the remote list number.
4/EF
RELAY
INIT. TX
Select Function key.
4/Relay Initiate TX One-Touch key. The display
Start key. The display shows REMOTE LIST NO.
4: RELAY PASSWORD
48
Page 55

7. Press the YES key and the display changes to SELECT
LOCATION
.
8. Select the location of the relay key station as follows:
To Do This Do This
One-Touch key Press the One-Touch key. Lift the main One-Touch
keypad to access One-Touch keys 21-40.
Auto Dial number Press the Auto Dial key, and then enter the 3-digit
Auto Dial number on the numeric keypad.
A number dialed on the
numeric keypad
9. Press the
Start key. Your fax machine will begin sending the
Dial as you would on a normal telephone.
fax.
Polling (Sending Documents
Requested by Another Fax)
When you normally send faxes, you load your document into
your fax machine, select a location and, if required, press the
Start key to begin sending the document. However, sometimes it
is more useful to be able to simply load your document into your
fax machine and set it to wait for the another fax machine to call
and collect the document. This is called setting your fax machine
to be polled, or polling transmission. Calling another fax
machine to receive documents someone else has loaded into their
fax machine is called polling reception.
There are two standards for polling. Standard polling is to an old
standard that is used by many, but not all manufacturers and ITU
selective polling, which is the latest standard. Your fax machine
supports both standards.
ITU selective polling allows you to retrieve documents from
individual mailboxes or ITU sub-addresses from a fax machine
that meets the standard for ITU selective polling.
Polling Transmission
SELECT
FUNCTION
5/GH
POLLING
BULLETIN POLL.
1. Load your documents.
2. Press the
3. Press the
BULLETIN POLL.
Select Function key.
5/Polling One-Touch Key. The display shows
4. For standard one-time polling, press the NO key. The display
WAITING TO BE POLLED and your document remains
shows
in the document feeder until your fax machine has been
polled. To cancel standard polling, simply remove your
document.
Note: Depending on the MEM/FEEDER SW setting, the unit
can switch to polling stand-by after reading the memory.
5. For ITU bulletin polling, press the YES key and the display
changes to
PERSONAL BOX NO. [ ].
6. Using the numeric keypad, enter the 2-digit number of the
personal mailbox you want to use and press the
NO
OR
YES
YES key.
49
Page 56

Your document is then scanned into the memory of your fax
machine and the message
BULLETIN MSG. IN MEM appears on
the display.
Note: If you get the message ILLEGAL OPERATION appearing
on the display, then the personal mailbox you have
selected is already in use as a confidential mailbox.
Please select another personal mailbox to use.
If you get message OVER WRITE appearing on the
display, then the personal mailbox you have selected is
already in use for ITU bulletin polling. You can select
another personal mailbox to use or over write the bulletin
message already in the personal mailbox.
After your fax machine has been polled and the document
has been sent, your document remains in mailbox
allowing the document to retrieved more than once.
To cancel ITU bulletin polling transmission, close the
mailbox using the following instructions.
Canceling ITU Bulletin Polling Transmission
SELECT
FUNCTION
1. Press the Select Function key.
2. Press the
1:FUNC. PROGRAMMING.
3. Using the numeric keypad, press
5:PERSONAL BOX PRG.
9/OP
PROG.
1: FUNC.PROGRAMMING
USER
JKL
YES
5
9/User Prog. One-Touch key. The display shows
5. The display shows
4. Press the
NO. [ ]
YES key. The display shows PERSONAL BOX
.
5. Using the numeric keypad, enter the two-digit number of the
mailbox you want to close and press the
display shows
6. Press the
PERSONAL BOX [POLL].
NO key first and then press the YES key twice to
YES key. The
close the mailbox.
Printing Bulletin Messages
SELECT
FUNCTION
1. Press the Select Function key.
2. Press the
shows
3. Press the
BOX?
4. Press the
NO. [ ]
5. Using the numeric keypad, enter the 2-digit number of the
mailbox you want to print from and press the
message begins printing.
Note: If no message is stored in that mailbox, the display shows
2/AB
PRINT
OPERATION.
1: PRINT MEMORY MSG?
2/Print Operation One-Touch Key. The display
PRINT MEMORY MSG?.
NO key. The display shows PRINT PERSONAL
.
YES key. The display shows PERSONAL BOX
.
NO DATA IN MEMORY.
NO
YES
YES key. The
50
Page 57

If you want to clear the mailbox without printing, press
the
Stop key. The display changes to CANCEL?. Press the
YES key to clear the mailbox.
Polling Reception (Dialing Another Fax Machine
to Request Documents)
SELECT
FUNCTION
5/GH
POLLING
NO.=MAIL BOX NO.
When carrying out polling reception, the fax machine you are
polling should be able to carry out standard polling transmission
or ITU polling transmission.
1. With no documents loaded, press the Select Function key.
2. Press the
NO.=MAIL BOX NO.
3. Press the
5/Polling One-Touch key. The display shows
Start key when the fax machine you are contacting
supports standard polling and go to Step 5.
4. If the fax machine you are contacting supports ITU polling,
using the numeric keypad enter the number of the mailbox or
ITU subaddress on the fax machine you are polling and press
Start key. The display changes to POLLING RX, SELECT
the
LOCATION
.
START
5. Select the location of the fax machine you are polling as
follows:
To Do This Do This
One-Touch key Press the One-Touch key. Lift the main One-Touch
keypad to access One-Touch keys 21-40.
Auto Dial number Press the Auto Dial key, and then enter the 3-digit
Auto Dial number on the numeric keypad.
A number dialed on the
numeric keypad
6. Press the
Start key. Your fax machine will begin polling the
Dial as you would on a normal telephone.
remote fax machine.
Dual Access
The advanced dual access feature of your fax machine allows
you to load and prepare documents for transmission while your
fax machine is sending or receiving another message, or
automatically printing reports. This feature increases your
productivity and reduces the time you must spend waiting for
other operations to finish.
If you load a document on the document table and the display
SELECT LOCATION, then your fax machine is ready to
shows
allow you to prepare for the next transmission.
While Sending Faxes
After your fax machine has finished scanning a document into
memory (and while it is transmitting from memory), you can do
the following:
51
Page 58

• Load another document and prepare it for transmission.
• Continue to load documents as long as there is memory
available on your fax machine. When the first transmission is
complete, the next fax is automatically sent.
• Make copies.
While Receiving Faxes
While your fax machine is receiving a fax, you can:
• Load another document and prepare it for transmission.
• Continue to load documents as long as there is memory
available on your fax machine. When the first transmission is
complete, the next fax is automatically sent.
• Continue to receive faxes while earlier messages are being
printed if your fax machine has been set to memory reception
mode.
While Making Copies
While your fax machine is making local copies, you can:
• Continue to receive faxes while copies are being printed if
your fax machine has been set to memory reception mode.
While Printing Reports
While your fax machine is automatically printing reports, you
can:
• Continue to receive faxes while reports are being
automatically printed if your fax machine has enough
memory available. When the report has finished printing,
your received fax message is then printed.
• Continue to load documents as long as there is memory
available on your fax machine. After the report is printed,
your fax is automatically sent.
52
Page 59

Customizing Features &
Operations
Many features and functions of your fax machine have settings,
which can be changed to customize the operations of your fax
machine. Because each country has different regulations, you
may not be able to access all of the settings listed below. If you
have trouble changing a setting, contact your dealer for
assistance.
Viewing Your Current Settings
SELECT
FUNCTION
Follow these instructions to obtain a configuration report
showing your fax machine’s current settings.
1. Press the Select Function key.
2. Press the
1:ACTIVITY REPORT.
3. Using the numeric keypad, press
5:CONFIGURATION.
4. Press the
6/IJ
REPORT
PRINT
6/Report Print One-Touch key. The display shows
YES key and the report will begin printing.
JKL
5
5:CONFIGURATION
YES ( ) NO( /1-6)
5. The display shows
5. Press the
Select Function key to finish.
User Function Settings
User function settings allow you to customize the general
operation of your fax machine. Refer to the list below to
determine which settings you may need to change, then refer to
“Changing User Function Settings” on page 57 to make the
change.
Note: Depending on local telephone regulations, some of the
following user function settings may not be available.
User Function Settings List
01: MCF. (SINGLE-LOC.): This function automatically prints a
Message Confirmation Report after each single location
transmission or polling transmission. Available settings are On
and Off.
02: MCF. (MULTI-LOC.): This function automatically prints a
Message Confirmation Report after each multiple location
transmission. Available settings are On and Off.
03: ERR. REPORT (MCF): This function automatically prints a
Message Confirmation Report each time an error occurs during a
transmission or polling transmission operation. Available settings
are On and Off.
04: IMAGE IN MCF: When a message confirmation is printed,
this function adds the first page your fax machine transmitted.
This is printed at the bottom of the message confirmation report.
Available settings are Part., Whole and Off.
53
Page 60

• When Part. is selected, the common header of the first page is
added in original size.
• When Whole is selected, the first page is added at a reduced
size.
05: SENDER ID: This function controls the printing of the
Sender ID of your fax machine on the faxes you send. When
turned on, your Sender ID, date and time will be printed on each
page slightly outside the image area of your document. When
turned off, your Sender ID, date and time will not be printed.
However, some fax machines will print your TSI/CSI.
06: MONITOR VOLUME: This function sets the volume your
fax machine uses for telephone line monitoring sounds during
dialing. Available settings are Off, Low, Middle, High Middle
and High.
07: BUZZER VOLUME: This function sets the volume of the
various beep and alarm tones your fax machine emits during
operations. Available settings are Low, Middle and High.
08: CLOSED NETWORK: This function allows you to program
your fax machine to refuse to receive faxes from or transmit
faxes to locations whose telephone numbers have not been
programmed into the One-Touch keys or Auto Dial numbers of
your fax machine. Using this function, you can set up a closed
network of fax machines. If you do not want your fax machine to
transmit faxes to or receive faxes from locations outside your
network, select T/R. If you only want your fax machine to refuse
to receive faxes from outside your network, select RX. Available
settings are OFF, T/R and RX.
09: TX MODE DEFAULT: This function allows you to change
default type of original, transmit and copy resolution settings of
your fax machine. Unless you select otherwise using the
Transmit Resolution/YES or Type of Original/NO keys, your fax
machine is set to use the STD and NORMAL settings. If you are
constantly sending faxes, which require some other combination
of transmission modes, use this function setting to change the
default transmission modes to any other combination of settings.
While you are programming, the new default combinations will
appear on the LEDs above the Transmit Resolution/YES or Type
of Original/NO keys.
10: T/F TIMER PRG.: When set to the telephone/ fax answering
mode, your fax machine automatically distinguishes between
incoming voice and fax calls. If the incoming call is a voice call,
your fax machine will ring to tell you to pick up the handset. If
you do not answer, your fax machine automatically switches
back to facsimile mode to allow the calling party to send a fax.
The T/F TIMER function controls how long your fax machine
waits before switching back to fax mode. Available settings are
20 seconds or 35 seconds.
11: RING RESPONSE: This function controls how long your
fax machine waits before answering an incoming telephone call
when your fax machine is set to auto receive or telephone/fax
auto switch answering modes. The available settings are 1 ring, 5
seconds, 10 seconds, 15 seconds or 20 seconds.
Note: If your fax machine is set to telephone/fax auto switch
answering mode, it is recommended that you set ring
response to one ring.
54
Page 61

12: DISTINCTIVE RING: Distinctive ringing is a service offered
by some telephone services that allow you to have different
numbers on one line, each with its own distinctive ring. In this
way, when you get an incoming call, you can identify what
number is being called by the ring pattern. Your local telephone
service can provide you with more information about this service
and if it is available. If available, this service is usually offered as
a monthly charge to your normal telephone bill. Available
settings are Off, Set and On. To use this function, refer to
“Setting Distinctive Ring” on page 57.
13: PAPER SIZE: This function allows you to tell your fax
machine what size of paper you are using in the paper cassette
and manual paper feed of your fax machine. Available settings
are A4, letter, legal 13 and legal 14.
14: USER LANGUAGE: This function allows you to select
among the languages programmed into your fax machine.
15: INCOMING RING: This function controls the telephone
ringing sound your fax machine makes when a call comes in.
When this function is set to off, your fax machine will not ring
during incoming calls. When set to on, your fax machine only
rings when set to manual receive mode or 11:RING RESPONSE
is set to 5 to 20 seconds (except 1 ring). When set to DRC, your
fax machine rings for each incoming call with the same tone,
even if you have function 12:DISTINCTIVE RING set to on.
Available settings are On, Off and DRC.
Note: DRC is only available if the setting of user function
12:DISTINCTIVE RING is available. Also, when set to
OFF, there is no effect on the ringer in telephone/fax auto
switch answering mode.
16: REMOTE RECEIVE: When you receive an incoming call,
this function allows you to remotely tell your fax machine to
switch from telephone to fax mode to receive an incoming fax.
To use this function, use the keypad of a handset or an external
telephone to enter the remote receive number you have
programmed into your fax machine. Available settings are Off,
00, 11, 22, 33, 44, 55, 66, 77, 88, 99, ** and ##. This function
only works if your telephone system is a touch-tone dialing
system.
17: MEM./FEEDER SW.: This function selects the transmission
mode of MEM. TX (scan before sending) or FEED. TX (send
each page directly from document feeder). This becomes
available when 25: INSTANT DIAL is off.
19: ECM FUNCTION: The error correction mode function helps
your fax machine to improve communication in areas where
telephone line conditions are poor. Available settings are On and
Off.
Note: When using ECM, the transmitting fax machine
automatically checks the data as it is sent. If the receiving
fax machine cannot verify the transmission, the
transmitting fax machine will retransmit as necessary.
Using ECM also increases transmission time because the
data is checked as it is transmitted.
Not all fax machines have ECM. If you have activated
ECM and then transmit to a fax machine not using ECM,
55
Page 62

there will be no change in fax transmission time because
ECM will not be used.
20: REMOTE DIAGNOSIS: The remote diagnostics feature
allows a service person to remotely dial and service your fax
machine. Available settings are On and Off.
22: NO TONER MEM RX: With this function turned on, your
fax machine will automatically receive and store messages in its
memory when it is low on toner. When turned off, messages will
print even if toner is low or empty. Available settings are On and
Off.
23: MEM FULL SAVE: With Broadcast Transmission and other
functions, call origination starts after an entire document is read
into memory. If during this process, memory becomes full and an
“operator time out” seems likely, a message to that effect is
shown in the Display Panel if this MEM full save function is on.
If it is off, data that could not be read into memory is
automatically deleted. Available settings are On and Off.
24: CONTINUOUS TONE: With this function on, you can
choose whether to have a warning tone sound when receiving a
transmission. Pressing the
STOP key turns off the tone. Set this
function to off for no warning sound. Available settings are On
and Off.
25: INSTANT DIAL: Set this function to start reading documents
upon call origination when transmitting. Available settings are
On and Off.
Broadcast Mode
• Memory available: all the documents are read into the mem-
ory before call origination.
• Memory full: reading is impossible.
25 Instant Dial = ON:
• Memory available: document reading starts upon call origi-
nation.
• Memory full—Feeder transmission: starts reading document
when receiving the CFR signal of the remote machines after
call origination.
25 Instant Dial = OFF, 17 Mem./Feeder SW = MEMORY:
• Memory Available: call origination after all documents are
read into memory.
• Memory Full—Feeder transmission: starts reading document
when receiving the CFR signal of the remote machines after
call origination.
25 Instant Dial = OFF, 17 Mem./Feeder SW = FEEDER:
• Memory Available—Feeder transmission: starts reading doc-
ument when receiving the CFR signal of the remote
machines after call origination.
• Memory Full—Feeder transmission: starts reading document
when receiving the CFR signal of the remote machines after
call origination.
56
Page 63

26: RESTRICT ACCESS: Select whether or not you want
restricted access. Turning on this function renders your restricted
ID registration active. Available settings are On and Off.
27: WIDTH REDUCTION: Turning this function on enables you
to print received data at a slightly reduced width.
28: TONER SAVE: This function allows you to select whether
to use toner saving during facsimile printing. The settings are On
and Off.
29: CNG COUNT: This function allows you to switch to a
facsimile reception mode at a certain CNG signal quantity (1-5)
when the unit is operating in T/F.
30: 600DPI FAX TX: This function sets whether to enable 600-
DPI read when Ex. FINE is selected for TX RESOLUTION. The
settings are On and Off.
Changing User Function Settings
SELECT
FUNCTION
1. Press the Select Function key.
2. Press the
1:FUNC. PROGRAMMING.
3. Press the
9/OP
USER
PROG.
1: FUNC.PROGRAMMING
YES
9/User Prog. One-Touch key. The display shows
YES key. The display shows FUNCTION NO. [ ].
4. Using the numeric keypad, enter the 2-digit number of the
function you want to change. This display then shows the
name of the selected function.
5. Press the
function, then press the
NO key to cycle through the settings for the user
YES key to confirm your selection.
The name of the next user function appears in the display.
6. Press the
Select Function key to finish or the Stop key to
back out.
Note: As an example for changing the settings, see Setting
Distinctive Ring.
Setting Distinctive Ring
SELECT
FUNCTION
9/OP
USER
PROG.
1: FUNC.PROGRAMMING
YES
Note: In some countries, distinctive ring service is not available
from the local telephone company.
1. Press the Select Function key.
2. Press the
1:FUNC. PROGRAMMING.
3. Press the
9/User Prog. One-Touch key. The display shows
YES key. The display shows FUNCTION NO.[ ].
4. Using the numeric keypad, enter 12. The display shows
12:DISTINCTIVE RING and its current setting OFF.
5. Press the
NO key to change the setting to SET.
57
Page 64

6. Press the YES key. The display changes to SETUP FAX RING,
CALL FAX NUMBER NOW
.
7. Using a separate telephone line, immediately dial the
number assigned to the fax machine (you must do this within
90 seconds). When your fax machine begins to ring, the
display changes to
AUTO DETECTING, RING PATTERN.
8. Your fax machine then automatically detects and remembers
its assigned ring pattern. When your fax machine has
finished programming its ring pattern, the display shows
DISTINCTIVE RING SET, RESULT=OK. After detecting and
remembering the ring pattern, the display changes to
DISTINCTIVE RING, [ON].
9. Press the
YES key to confirm your selection.
10. Press the Select Function key to finish.
Note: Occasionally, your fax machine may not be able to detect
the ring pattern on its first try. If this happens, the display
changes to
DISTINCTIVE RING SET, RESULT=NG. If this
happens, follow the above instructions again.
Dial Parameter Settings
These functions allow you to control the way your fax machine
dials telephone numbers. Refer to Dial Parameter Settings List to
determine which settings you may need to change, then refer to
“Changing Dial Parameter Settings” on page 59 to make the
change.
Note: Some settings are not available in some countries. If you
have trouble accessing a dial parameter setting listed
here, contact your dealer for assistance.
Dial Parameter Settings List
REDIAL TRIES: This function controls how many times your
fax machine automatically redials a number which is busy or
which does not answer. Available settings are from 0 to 10 tries.
(In FRE, the available settings are 1-5 tries.)
REDIAL INTERVAL: The function controls how long your fax
machine waits between each automatic redial attempt. Available settings are from 1 to 6 minutes. (In FRE, the available settings are 1-12 minutes.)
DIAL TONE DETECT: This function allows your fax machine
to wait for and detect a dial tone before proceeding with dialing. Available settings are on and off.
BUSY TONE DETECT: This function allows your fax machine
to detect a busy tone when sending a fax. Available settings are
on and off.
MF(TONE)/DP(PULSE): This function controls what method
your fax machine uses for dialing. Two dialing methods are in
common use. DP, or dial pulse dialing, uses monotone pulses to
dial a number (like a rotary telephone). MF, or multi-frequency
dialing (touch-tone), uses different tones to dial a number.
Available settings are MF and DP.
MF(TONE) DURATION: If your fax machine is set to tone dial-
ing, this function controls the duration of the tones used for
58
Page 65

dialing (the tone duration varies in different countries). Available settings are 75 ms, 85 ms, and 100 ms.
PBX LINE: Turn this function on if your fax machine is con-
nected to a PBX. Once this function has been turned on and the
dial prefix function has been programmed, your fax machine
will recognize the dial prefix number you use in your PBX to
get an outside line. After it dials your dial prefix number, your
fax machine pauses to wait for an outside line before dialing the
rest of the telephone number. Available settings are On and Off.
See “Connecting to a PBX” on page 28 in Installation for
instructions on changing this setting.
AUTO START: When enabled, your fax machine will automat-
ically begin dialing as soon as you have selected a location by
pressing a One-Touch key or entering an Auto Dial code. You
do not have to press the
Start key. Available settings are On and
Off.
DIAL PREFIX: If your fax machine is connected to a PBX, use
this function to tell your fax machine what access number is
used to obtain an outside line from your PBX. You can enter up
to 4 digits. See “Connecting to a PBX” on page 28 in Installation for instructions on changing this setting.
Changing Dial Parameter Settings
SELECT
FUNCTION
9/OP
USER
PROG.
1: FUNC.PROGRAMMING
1. Press the Select Function key.
2. Press the
1:FUNC. PROGRAMMING.
3. On the numeric keypad, press
PAR AMETER
4. Press the
9/User Prog. One-Touch key. The display shows:
2. The display shows 2:DIAL
.
YES key until the display shows the dial parameter
you want to change.
5. Repeatedly press the
NO key until the setting you want
appears in the display.
6. Press the
YES key to confirm your selection. The name of
the next dial parameter setting will appear in the display.
7. Press the
Select Function key to finish.
59
Page 66

Reports
Understanding Reports
Your fax machine provides a variety of useful reports, which help
you understand the current settings, programming, and
operations of your fax machine. Refer to the reports listing below
to determine which reports you may want to print, then refer to
“Printing Reports” on page 63 for instructions on printing a
report.
Activity Report
The activity report provides a communication record of your fax
machine. Information provided on this report includes:
– The total amount of time your fax machine spent sending faxes
and the total amount of time spent receiving faxes.
– The date, time and duration (S, R-TIME) of each transmission
or reception.
– The name or telephone number of the fax machine you were
communicating with (DISTANT STATION ID). If you were
sending a fax, the Personal ID or telephone number of the
remote fax machine that received the document will be printed.
If the remote fax machine does not have a Personal ID or
telephoned number programmed, the Location ID or telephone
number you entered will be printed. If you were receiving a
fax, the Personal ID or telephone number of the remote fax
machine that sent the document will be printed. If you were
receiving a fax and the remote fax machine does not have a
Personal ID or telephone number programmed, no data is
printed.
– The communication mode used for each transmission or
reception.
– The number of pages sent or received.
– The result of each communication.
– Service codes.
Note: This report does not contain the results of fax messages
which were received without errors and printed
immediately, i.e. only transmissions, receptions with
errors and memory receptions are recorded.
Broadcast MCF (Confirmation) Report
Use this report to confirm the results of a multiple-location
transmission (or broadcast). Information provided on this report
includes:
– The date and time at which the broadcast started.
– The total amount of time used to complete the broadcast.
– For each location, the Location ID or telephone number, the
number of pages sent and the result of the communication.
Note: If there have been no transmissions to multiple locations
(broadcast) then this report cannot be printed
60
Page 67

Active Memory Files Report
The active memory files report provides a list of all messages
stored in your fax machine’s memory, either documents waiting
for transmission or documents that have been received and not
yet printed. Information provided on this report includes:
RECEPTION: Prints out memory reception information.
ENTRIES lists the number of received messages stored up in
your facsimile unit’s memory. PAGES lists the total number of
pages received.
PERSONAL BOX: Prints out set up status of your Personal
Boxes (Confidential, Bulletin Polling). MODE describes the Box
types. ENTRIES list the number of received messages stored up
in each Box. PAGES lists the total number of pages in each Box.
POLLING TX/RX: Prints out information on polling reception
and polling transmission not using a Box. Polling transmissions
are indicated in the mode column along with the scanned number
of pages. Polling Reception lists the date & time sent, sender and
transmission mode.
TRANSMISSION: Prints out information on Delayed Fax and
Redialing Wait transmissions. (However, polling reception
information will be listed in the above POLLING TX/RX).
Transmission date & time, receivers and transmission modes are
listed.
– This report will not be printed out if there is no message stored
in memory.
Telephone Directory
This report provides a complete listing of all of the telephone
numbers programmed for the One-Touch keys, Auto Dial codes
and groups of your fax machine. The information includes:
– The Location ID and main fax number (TEL NO) for each One
Touch key and Auto Dial code.
Note: One-Touch Parameters exist for not only One-Touch keys
but also Auto-Dial - A listing of all of the One Touch keys
and Auto Dial codes included in each group.
– The alternate number (OR) for each One Touch key.
– The Communication Parameter settings (G3- ECHO, G3-
RATE) for each One-Touch key, and Auto Dial code.
Note: The standard parameter settings are ECHO and RATE.
Configuration Report
The configuration report provides a list of the current operational
settings of your fax machine that can be set by you. The
information includes:
– The current settings of all your fax machine’s user functions.
– The Sender ID (ID=), fax number (TEL NO.), forwarding
number and call back number (CALL BACK NO.) currently
programmed into your fax machine.
– The current setting of dial parameters for your fax machine.
61
Page 68

Protocol Dump
In the event of an obstruction to transmission, use the following
report to analyze the cause of the obstruction. Send this report to
the dealer or service center if so requested.
Other Reports
Message Confirmation Report
This report provides information about your last single-location
fax transmission or polling transmission. To print, see “Printing
Message Confirmation Report” on page 63. Information in this
report includes:
– The date of the communication.
– The total amount of time your fax machine spent sending (S,
R-TIME).
– The Personal ID or telephone number of the fax machine you
were sending a fax to (DISTANT STATION ID). If the remote
fax machine does not have a Personal ID or telephone number
programmed, the Location ID or telephone number you
entered is printed.
– The communication mode used.
– The number of pages sent.
– The result of the communication.
– Service codes.
– Depending on the settings of your fax machine, a portion of the
page will be printed after the report (see 04:IMAGE IN MCF.
on page 53).
Confidential Reception Report
This report is automatically printed each time your fax machine
receives a confidential message into a mailbox. Information in
this report includes:
– The date the message was received.
– The total amount of time your fax machine spent receiving the
message (S, R-TIME).
– The Personal ID or telephone number of the fax machine you
were communicating with (DISTANT STATION ID). If the
Personal ID or telephone number has not been programmed by
the sending fax machine, no DISTANT STATION ID is
recorded.
– The number of the mailbox into which the message was
received.
– The number of pages sent or received.
– The result of the communication.
– Service Codes
Broadcast Entry Report
Each time you program a multiple-location transmission (or
broadcast), your fax machine will give you the option of printing
this report to confirm your entries. Information in this report
includes:
62
Page 69

– The Location ID of the One Touch keys and Auto Dial codes
you have selected.
– Telephone numbers you have manually entered using the
numeric keypad.
To access this report, generate a Broadcast. See “Perform a
Broadcast Operation” on page 42 for details.
Power Outage Report
If the electrical power to your fax machine has been interrupted
and your fax machine had delayed transmissions or messages
received into memory, your fax machine automatically prints a
power outage report to alert you that fax messages have been
lost.
Printing Reports
Printing Message Confirmation Report
After transmission, press the Copy key once (with no documents
loaded) to see a report confirming your transmission on the
display of your fax machine. To print the report, press the
key a second time.
Copy
Printing Reports
SELECT
FUNCTION
This only applies to the reports available using the 6/Report
Print
One-Touch key. The other reports are available as the
situation demands.
1. Press the
2. Press the
1:ACTIVITY REPORT.
3. If not printing an Activity Report, press the
repeatedly until the desired report appears on the display.
4. Press the
5. Press the
6/IJ
REPORT
PRINT
Select Function key.
6/Report Print One Touch key. The display shows
YES key. The report will begin printing.
Select Function key to finish.
1: ACTIVITY REPORT
NO key
NO
63
Page 70

Codes Used In Reports
Result Codes
The following codes indicate the results of communications.
Code Description
BUSY The other machine’s line was busy or there was no
answer.
CANCL A message was erased after being held in memory for
10 days.
COMP. A multiple-location transmission was completed.
COVER The fax machine’s cover was opened during the
communication.
NO The transmission or reception failed due to a
communication error.
OK The communication was completed successfully.
PA PE R The communication failed because the receiving
machine ran out of paper.
PUNIT Indicates a problem with the printing unit. Contact
your supplier.
R_JAM A paper jam occurred in your fax machine while it
was receiving a fax, and your fax machine was unable
to receive the entire message in memory.
S_JAM A document jam occurred in your fax machine.
STOP The Stop key was pressed, ending the communication
session.
Communication Codes
The following codes indicate the communication mode used for a
communication.
Code Description
B.C. Multiple-location transmission (broadcast).
CONF=** Confidential reception (** is the box number)
TX A communication initiated by your fax machine.
RX A communication initiated by a remote fax machine.
POLL RX One-time standard polling reception.
POLL=** Bulletin polling transmission (** is the box number)
POLL TX Polling transmission.
FWD-T Forward transmission
FWD-R Forward reception
64
Page 71

Problem Solving
Clearing Document Jams
When a document jam occurs, your fax machine beeps and an
error message appears in the display. If the jammed document
looks like it is positioned straight in your feeder, press the
key to try to feed the document the rest of the way through the
feeder. If this fails, follow the instructions below.
1. Grasp the control panel. Pull up and toward you until it
releases. Swing the control panel out of the way.
Stop
2. Pull out the jammed document.
3. Push the control panel back down until it locks.
65
Page 72

Clearing Printer Paper Jams
If your fax machine displays PAP ER JA M or NO PAPER when the
paper cassette still contains paper, there may be one or more
sheets of paper jammed in the machine. Clearing paper jams is as
follows:
Note: If you are experiencing many paper jams, it may be due to
the type of paper you are using. For best results, select a
paper, which has been developed specifically for
photocopying or laser printing. Be sure to fan the paper
before loading it into your paper tray.
1. Lift the document table and swing it out of the way.
T
C
N
E
L
O
I
E
T
S
C
N
U
F
C
E
R
O
T
L
U
A
I
A
D
T
O
T
R
A
T
U
S
A
H
C
R
A
E
S
L
IA
P
D
O
E
T
R
S
M
R
N
A
E
L
H
A
P
K
Y
T
O
S
H
O
E
H
U
Q
E
R
.
V
K
R
D
Y
A
T
P
S
D
O
L
C
A
E
M
N
R
I
O
F
N
E
T
N
H
I
F
G
I
L
X
E
O
F
T
E
O
D
H
P
3
C
B
A
N
2
M
6
L
K
1
J
Y
X
5
W
9
I
H
G
V
U
4
T
8
#
S
R
P
Z
Q
7
O
0
*
2. Check for paper jammed in the slot where received faxes or
copies exit onto the document stacker. If you see paper
jammed in the exit slot, lift the blue bar out of the way and
carefully pull the paper out.
T
C
N
E
O
L
I
E
T
S
C
N
U
F
C
E
R
O
L
T
A
I
U
A
D
T
R
O
A
T
T
U
S
A
H
C
R
A
E
L
S
A
I
P
D
O
E
T
R
S
M
R
N
A
E
L
H
A
P
T
K
Y
S
H
O
E
O
U
H
Q
E
R
V.
K
R
D
Y
A
T
P
S
D
L
O
A
C
M
E
R
N
I
O
F
N
E
T
N
H
I
F
IG
L
X
E
O
T
F
O
E
H
D
P
3
C
B
A
N
2
M
6
L
K
1
J
Y
X
5
W
9
I
H
V
G
U
4
T
8
#
S
R
Z
P
Q
7
O
0
*
3. Push the buttons on the side of the copy stacker until you
hear a click. Lift the copy stacker out of the way.
CT
LE
ION
SE
NCT
FU
C
E
R
O
L
T
A
I
U
A
D
T
R
O
A
T
T
U
S
A
H
C
R
A
E
L
S
A
I
P
D
O
E
T
R
S
M
R
N
A
E
L
H
A
P
T
K
Y
S
H
O
E
O
U
H
Q
E
R
V.
K
R
D
Y
A
T
P
S
D
L
O
A
C
M
E
R
N
I
O
F
N
E
T
N
H
I
F
G
I
L
X
E
O
T
F
O
E
H
D
P
3
C
B
A
N
2
M
6
L
K
1
J
Y
X
5
W
9
I
H
V
G
U
4
T
8
#
S
R
Z
P
Q
7
O
0
*
CAUTION: Never expose the image drum unit to light
for more than 5 minutes. Never expose the image drum
unit to direct sunlight. Always hold the image drum unit
66
Page 73

by the ends. Never touch the surface of the green drum
inside the image drum unit.
4. Lift the image drum unit out and set it aside. Keep it out of
direct sunlight and DO NOT touch the green surface of the
drum.
T
C
N
E
O
L
I
E
T
S
C
N
U
F
C
E
R
O
L
T
A
I
U
A
D
T
O
R
T
A
T
U
S
A
H
C
R
A
E
L
S
A
I
P
D
O
E
T
R
S
M
R
N
A
E
L
H
A
P
T
K
Y
S
H
O
E
O
U
H
Q
E
R
V.
K
R
D
Y
A
T
P
S
D
L
O
A
C
M
E
R
N
I
O
F
N
E
T
N
H
I
F
G
I
L
X
E
O
T
F
O
E
H
D
P
3
C
B
A
N
2
M
6
L
K
1
J
Y
X
5
W
9
I
H
V
G
U
4
T
8
#
S
R
Z
P
Q
7
O
0
*
USH
P
H
S
PU
5. Carefully pull out any paper you see jammed inside the
machine.
T
N
EC
EL
TIO
S
NC
U
F
C
E
R
O
L
T
A
I
U
A
D
T
O
R
T
A
T
U
S
A
H
C
R
A
E
L
S
IA
P
D
O
E
T
R
S
M
R
N
A
E
L
H
A
P
T
K
Y
S
H
O
E
O
U
H
Q
E
R
.
V
K
R
D
Y
A
T
P
S
D
L
O
A
C
M
E
R
IN
O
F
N
E
T
H
IN
F
IG
L
X
E
O
T
F
O
E
H
D
P
3
C
B
A
N
2
M
6
L
K
1
J
Y
X
5
W
9
I
H
V
G
U
4
T
8
#
S
R
Z
P
Q
7
O
0
*
6. Pull out the paper cassette. If any of the paper in the paper
cassette is damaged, remove and replace it.
7. Push the paper down until it is under the plastic tabs.
67
Page 74

8. Slide the paper cassette all the way back into your fax
machine.
down firmly on both of the locations on the image drum
marked “PUSH”.
T
C
N
E
O
L
E
TI
S
NC
U
F
EC
AUTOR
F
E
D
3
C
B
A
2
L
K
1
J
5
I
H
V
G
U
4
T
8
S
R
P
7
O
*
ART
ST
AUTODIAL
SEARCH
REDIAL
STOP
RM
ALA
ST
HYPHEN
HOOK
V.REQUE
STD
DARK
COPY
FINE
NORMAL
LIGHT
EXFINE
O
T
PHO
N
M
6
Y
X
W
9
#
Z
Q
0
USH
P
H
S
PU
10. Close the copy stacker and push down on it until you hear a
click. Be sure both slides are latched.
9. Place the image drum unit back into your fax machine. To
ensure that the image drum is positioned correctly, press
11. Close the document table.
68
T
C
N
E
O
L
I
E
T
S
C
N
U
F
C
E
R
O
L
T
A
I
U
A
D
T
R
O
A
T
T
U
S
A
H
C
R
A
E
L
S
A
I
P
D
O
E
T
R
S
M
R
N
A
E
L
H
A
P
T
K
Y
S
H
O
E
O
U
H
Q
E
R
.
V
K
R
D
Y
A
T
P
S
D
L
O
A
C
M
E
R
N
I
O
F
N
E
T
N
H
I
F
G
I
L
X
E
O
T
F
O
E
H
D
P
3
C
B
A
N
2
M
6
L
K
1
J
Y
X
5
W
9
I
H
V
G
U
4
T
8
#
S
R
Z
P
Q
7
O
0
*
Page 75

Replacing Toner Cartridge
The number of pages you can print with one toner cartridge
varies depending on the type of documents you usually receive or
copy. The first toner cartridge installed in a new image drum unit
will have a decreased yield because the image drum unit itself
has to be filled. Refer to “Part Numbers” on page 101 for the
toner cartridge replacement part number.
If your fax machine displays
CART.
, replace the toner cartridge with a new one. However, if
the print density is high enough, you can continue to use the
toner cartridge without replacing it until the print density
becomes too low.
If the print density becomes low even before your fax machine
displays
TONER LOW or REPLACE TONER CART., gently wipe the
lens surface of the LED array (see Step 8 ). If the print density
does not improve, replace the toner cartridge. When your fax
machine’s display shows
drum unit.
WARNING: Be careful when handling the toner cartridge. Do
not let toner spill on your clothing or other porous materials.
See Safety at the beginning of this User’s Guide.
TONER LOW or REPLACE TONER
CHANGE DRUM, replace the image
1. Lift the document table into an upright position.
T
C
N
E
L
O
I
E
T
S
C
N
U
F
C
E
R
O
T
L
U
A
I
A
D
T
O
T
R
A
T
U
S
A
H
C
R
A
E
S
L
A
I
P
D
O
E
T
R
S
M
R
N
A
E
L
H
A
P
K
Y
T
O
S
H
O
E
H
U
Q
E
R
V
.
K
R
D
Y
A
T
P
S
D
O
L
C
A
E
M
N
R
I
O
F
N
E
T
N
H
I
F
G
I
L
X
E
O
F
T
E
O
D
H
P
3
C
B
A
N
2
M
6
L
K
1
J
Y
X
5
W
9
I
H
G
V
U
4
T
8
#
S
R
P
Z
Q
7
O
0
*
2. Push in the cover release buttons on the side of the copy
stacker until you hear a click. Lift the copy stacker.
T
N
O
LEC
I
E
T
S
C
UN
F
C
E
R
O
T
AL
I
AU
D
T
R
O
A
T
T
U
S
A
H
C
AR
L
SE
IA
P
D
O
E
T
R
S
M
N
AR
L
HE
A
T
K
YP
H
O
ES
O
H
QU
E
R
V.
K
D
Y
AR
T
P
S
D
L
O
C
MA
E
IN
OR
F
N
E
T
N
H
FI
IG
L
X
E
O
T
F
O
E
H
D
P
3
C
B
A
N
2
M
6
L
K
1
J
Y
X
5
W
9
I
H
V
G
U
4
T
8
#
S
R
Z
P
Q
7
O
0
*
3. Pull the colored lever on the old toner cartridge all the way
toward you. Carefully pull the old toner cartridge out of the
69
Page 76

image drum unit. Dispose of it in the plastic bag you
received with your new toner cartridge.
T
C
N
E
O
L
I
E
T
S
C
N
U
F
C
E
R
O
L
T
IA
U
A
D
T
R
O
A
T
T
U
S
A
H
C
R
A
E
L
S
IA
P
D
O
E
T
R
S
M
R
N
A
E
L
H
A
P
T
K
Y
S
H
O
E
O
U
H
Q
E
R
V.
K
R
D
Y
A
T
P
S
D
L
O
A
C
M
E
R
IN
O
F
N
E
T
H
IN
F
IG
L
X
E
O
T
F
O
E
H
D
P
3
C
B
A
N
2
M
6
L
K
1
J
Y
X
5
W
9
I
H
V
G
U
4
T
8
#
S
R
Z
P
Q
7
O
0
*
4. Remove the new toner cartridge from its package and gently
shake it from side to side to distribute the toner. Then
carefully peel the white plastic tape from the bottom of the
toner cartridge.
CAUTION: Be careful not to insert the toner cartridge
backwards into the image drum unit.
5. With the ridged side facing up and the colored lever on your
right, insert the toner cartridge into the image drum unit.
Slide the left end of the cartridge in first, then lower the right
end into place.
T
N
C
E
IO
L
T
E
C
S
N
U
F
C
E
R
O
L
T
A
I
U
A
D
T
R
O
A
T
T
U
S
A
H
C
R
A
E
L
S
A
I
P
D
O
E
T
R
S
M
R
N
A
E
L
H
A
T
P
K
S
Y
O
E
H
O
U
H
Q
E
R
V.
K
D
Y
R
T
P
A
S
D
O
L
A
C
E
M
R
IN
F
O
E
N
T
N
I
H
F
G
I
X
L
E
O
T
F
O
E
H
D
P
3
C
B
A
N
2
M
6
L
K
1
J
Y
X
5
W
9
I
H
V
G
U
4
T
8
#
S
R
Z
P
Q
7
O
0
*
6. Once the toner cartridge is in place, push the colored lever
all the way forward to secure it and release the toner.
70
Page 77

7. Using the cleaning wipe provided in the package with your
new toner cartridge, gently wipe back and forth across the
full length of the LED array.
T
C
N
E
L
IO
E
T
S
C
N
U
F
C
E
R
O
L
T
A
I
U
A
D
T
R
O
A
T
T
U
S
A
H
C
R
A
E
L
S
A
I
P
D
O
E
T
R
S
M
R
N
A
E
L
H
A
P
T
K
Y
S
H
O
E
O
U
H
Q
E
R
V.
K
R
D
Y
A
T
P
S
D
L
O
A
C
M
E
R
N
I
O
F
N
E
T
N
H
I
F
G
I
L
X
E
O
T
F
O
E
H
D
P
3
C
B
A
N
2
M
6
L
K
1
J
Y
X
5
W
9
I
H
V
G
U
4
T
8
#
S
R
Z
P
Q
7
O
0
*
8. Close the copy stacker and push down until you hear the
copy stacker click into place. Be sure that the cover latches
on both sides.
9. Close the document table.
CAUTION: Please abide by the disposal laws of your
country when disposing of replaced toner cartridges.
Replacing Image Drum Unit
Press the
One-Touch key and then the
Select Function key, then the 10/Printer Cleaning
YES key.
Your fax machine prints a cleaning page to clean the image drum.
Repeat this procedure several times and then check whether you
still have dirty print-outs. If this procedure does not solve the
problem, your fax machine needs a new image drum unit.
Contact your dealer to order one.
If the faxes you receive are light or have vertical streaks in them
and you are not out of toner, or if your fax machine displays a
CHANGE DRUM message, your fax machine needs a new image
drum unit. Contact your dealer to order one. Refer to “Part
Numbers” on page 101 for the image drum replacement part
number.
The life of an image drum depends on a number of factors,
including temperature and humidity, the type of paper you use,
and the number of pages per job.
CAUTION: Never expose the image drum unit to light
for more than 5 minutes. Never expose the image drum
unit to direct sunlight. Always hold the image drum unit
by the ends. Never touch the surface of the green drum
inside the image drum unit.
If you have dirty print-outs then the image drum may have
accumulated toner on it.
71
Page 78

1. Lift the document table into an upright position.
T
C
N
E
L
O
I
E
T
S
C
N
U
F
C
E
R
O
T
L
U
A
I
A
D
T
O
T
R
A
T
U
S
A
H
C
R
A
E
S
L
A
I
P
D
O
E
T
R
S
M
R
N
A
E
L
H
A
P
K
Y
T
O
S
H
O
E
H
U
Q
E
R
.
V
K
R
D
Y
A
T
P
S
D
O
L
C
A
E
M
N
R
I
O
F
N
E
T
N
H
I
F
G
I
L
X
E
O
F
T
E
O
D
H
P
3
C
B
A
N
2
M
6
L
K
1
J
Y
X
5
W
9
I
H
G
V
U
4
T
8
#
S
R
P
Z
Q
7
O
0
*
2. Push in the cover release buttons on the side of the copy
stacker until you hear a click. Lift the copy stacker.
T
C
N
E
O
L
I
E
T
S
C
N
U
F
AUTOREC
T
STAR
AUTODIAL
SEARCH
REDIAL
STOP
N
ALARM
HYPHE
HOOK
V.REQUEST
STD
DARK
COPY
FINE
NORMAL
LIGHT
EXFINE
F
E
D
PHOTO
3
C
B
A
N
2
M
6
L
K
1
J
Y
X
5
W
9
I
H
V
G
U
4
T
8
#
S
R
Z
P
Q
7
O
0
*
3. Remove the old image drum unit (with its toner cartridge),
wrap it in the packaging materials from your new image
drum unit and dispose of it following local regulations.
T
C
N
E
O
L
I
E
T
S
C
N
U
F
C
E
R
O
L
T
A
I
U
A
D
T
O
R
T
A
T
U
S
A
H
C
R
A
E
L
S
A
I
P
D
O
E
T
R
S
M
R
N
A
E
L
H
A
P
T
K
Y
S
H
O
E
O
U
H
Q
E
R
V.
K
R
D
Y
A
T
P
S
D
L
O
A
C
M
E
R
N
I
O
F
N
E
T
N
H
I
F
IG
L
X
E
O
T
F
O
E
H
D
P
3
C
B
A
N
2
M
6
L
K
1
J
Y
X
5
W
9
I
H
V
G
U
4
T
8
#
S
R
Z
P
Q
7
O
0
*
USH
P
H
S
PU
4. Take the new image drum unit out of its package and insert it
into your fax machine. To ensure that the image drum is
positioned correctly, press down firmly on both of the
locations on the image drum marked “PUSH.”
T
C
N
E
L
IO
E
T
S
NC
U
F
EC
R
O
AL
UT
A
F
E
D
3
C
B
A
N
2
M
6
L
K
1
J
5
I
H
V
G
U
4
T
8
S
R
P
Q
7
O
0
*
T
AR
ST
AUTODI
CH
EAR
L
S
IA
OP
T
RED
S
M
R
EN
LA
A
YPH
ST
H
OK
UE
HO
REQ
V.
K
STD
DAR
L
OPY
C
MA
E
FIN
NOR
T
H
INE
F
LIG
X
E
O
OT
PH
Y
X
W
9
#
Z
SH
U
P
H
S
PU
72
Page 79

5. Install a new toner cartridge. Follow Steps 4 to 9 in
“Replacing Toner Cartridge” on page 69.
6. With the copy stacker and document table closed, wait until
the time and answering mode appear on the display. Then
press the
FUNCTION
7. Press the
shows
8. Press the
9. Press the
Select Function key.
SELECT
7/KL
COUNTER
7/Counter Display One-Touch key. The display
DRUM COUNT.
YES key to clear the image drum unit counter.
Select Function key to finish.
SELECT
FUNCTION
YES
DISPLAY
you are experiencing a problem, a service person may ask you to
check these counters.
Note: If the image drum unit has reached the end of its life, you
will also use this function to reset the drum counter. See
“Replacing Image Drum Unit” on page 71 for more
information.
1. Press the Select Function key.
2. Press the
7/Counter Display One-Touch key. The display
shows DRUM COUNT.
3. Press the
NO key again. The display shows the PRINT
COUNT.
4. Press the
NO key again. The display shows the SCAN
COUNT.
5. Press the
Select Function key to finish.
CAUTION: Please abide by the disposal laws of your
country when disposing of replaced Image Drum Units.
Reading Print Counters
SELECT
FUNCTION
7/KL
NO
COUNTER
DISPLAY
The print counters of your fax machine count the number of
pages your fax machine has printed or scanned in its lifetime. If
3X
SELECT
FUNCTION
Shipping the Fax Machine
CAUTION: DO NOT ship the fax machine with the
image drum unit installed unless it is a new fax machine
and has never been used.
When shipping the fax machine, after it has been in use, please
follow the re-packaging procedure below:
1. Remove the image drum unit with toner cartridge from the
fax machine.
73
Page 80

2. Place the image drum unit with toner cartridge still attached
into a black plastic bag and keep it away from direct
sunlight.
3. Re-package the fax machine and the image drum unit
separately into packaging material and a shipping carton.
Problem Checklist
Your fax machine is a complex machine with many features and
functions, which allow it to operate in different ways. Many
problems you experience may be due to improper programming.
If you are experiencing a problem, read through the list of
problems and solutions before calling your dealer.
o Your telephone does not ring if your fax machine is
set to tel/fax answering mode and the incoming call is
a voice call.
mode, your fax machine answers the incoming call
and detects whether if the call is a voice call or a fax
call. If the call is a voice call, your fax machine will
ring, but your telephone will remain silent. It is recommended that you only use tel/fax answering mode
if your telephone is located near the fax machine.
o The display is blank. Check that the power switch is
on. Check the power cord to make sure that it is
firmly plugged in. Check your wall outlet to make
sure that it has power.
This is normal. In the tel/fax answering
o Nothing happens when you press the control panel
keys.
Turn the fax machine off, wait 10 seconds, then
turn it on again.
o The display tells you to replace paper even though
there is paper in the paper cassette
. Take the paper
cassette out and make sure that the paper is firmly
stacked in the tray. Push the paper firmly under the
plastic tabs on the edge of the tray. Check for a paper
jam in the fax machine.
o Your documents jam. Check the document for wrin-
kles, tears or other damage. Make sure there are no
staples or paper clips and that the paper is clean and
dry. Make sure the document is not wider than your
fax machine can load. Try making a copy of the document on a photocopier and faxing the copy.
o Your fax machine will not dial. Check the power cable
and wall outlet. Make sure that your telephone line
(not your external telephone or handset) is connected
to the LINE outlet on the back of your fax machine.
If you have an external telephone connected, lift the
handset and check for a dial tone. If you do not have
an external telephone connected, press the Hook/V.
Request
key and check for a dial tone. If you do not
hear one, there may be a problem with your telephone line. If you do hear a dial tone, your fax
74
Page 81

machine may be using the wrong dialing method
(pulse or tone) for your area. If you hear changing
tones instead of dialing pulses and you know that
your area uses pulse dialing, refer to the MF(TONE)/
DP(PULSE) dial parameter setting in Programming.
If your fax machine is connected to a PBX, make
sure you have instituted the correct programming to
work with a PBX (see Connecting to a PBX in Installation).
o The display shows a communication error. This alarm
indicates any of a number of problems. You may be
trying to communicate with an incompatible fax
machine (your machine can only communicate with
ITU-T Group 3 fax machines). The remote machine
may not be able to perform the function that you
want, such as polling or confidential messages. The
remote machine may also be out of paper or experiencing a paper jam. Bad telephone line conditions
can also cause communication errors. Try sending
the fax again and check to make sure you are dialing
the correct telephone number. If you have to dial an
access digit to get an outside line, or if you are dialing internationally, you may need to enter a pause
(using the Pause One-Touch key) after the access
digit or international dialing code to tell your
machine to wait for a dial tone. If you have frequent
problems communicating with a particular remote
fax machine, try programming the number into one
of your One-Touch keys and then changing the OneTouch Parameters for that One-Touch key (see “Dial
Directories” on page 29). Lastly, either your fax
machine or the remote fax machine may need servicing. Try sending a fax to another location to check
your machine.
o You sent a fax but the image the remote fax machine
received was very poor
. If your document had a lot of
small type, complex illustrations, photos, or was very
light or very dark, try changing your Transmit Resolution and Type of Original settings (see “Loading
Documents” on page 34 in Basic Operations). Copy
the document on your fax machine to see how it will
transmit. The problem may be caused by telephone
line interference. Try sending the document again
later.
o You keep getting reports you do not want. Check
your user function settings and turn off the reports
you do not want. See “Customizing Features &
Operations” on page 53.
75
Page 82

o You sent a fax but it was received completely blank.
Make sure that you have correctly loaded your document face down.
o The image received on your fax machine was very
poor
. Contact the person sending you the fax and ask
them to change their Transmit Resolution and Type
of Original settings. Ask the person to make a copy
of the document on their fax machine to ensure that it
is working properly. Then ask them to send the fax
again. If you still have a problem, try making a copy
of a document on your machine to make sure it is
working properly.
o You tried dialing with a One-Touch key or an Auto Dial
code but nothing happened
. Make sure that the OneTouch key or Auto Dial code you are using has been
programmed. Check the fax number to make sure it
was entered correctly (see “Dial Directories” on
page 29). When you are dialing with an Auto Dial
code, be sure to press the Auto Dial key before you
enter the code. If your fax machine has the Auto Start
feature turned off, you will have to press the Start
key before dialing will begin (see “Customizing Features & Operations” on page 53).
o Your fax machine does not answer the phone or
receive faxes
. First check to see that the power cable
is connected to the power outlet and the telephone
line is connected to LINE. Also check the reception
mode you are using. Your fax machine will not automatically receive faxes in manual answering mode
[TEL]. See “Setting Answering Mode” on page 23 in
Installation.
o Your received documents are light or have vertical
streaks on them and you are not out of toner
wipe the lens surface of the LED array on your fax
machine and then see if the machine works properly
(refer to “Replacing Toner Cartridge” on page 69). If
your fax machine still does not work properly,
remove the image drum unit (refer to “Replacing
Image Drum Unit” on page 71), tap the toner cartridge, and slowly swing it 20-30 degrees vertically
several times. Be careful not to let the toner leak
from the cartridge. If this does not work, you may
need to replace your image drum unit. Contact your
dealer to get a replacement.
o You set your fax machine for delayed transmission
but it did not send
. Check the display to make sure
that you have set the clock on your fax machine to
the correct time. See “Setting Time & Date” on
page 23 in Installation.
76
. Gently
Page 83

o Your fax machine disconnected before you could
answer a voice request
. You must answer a voice
request while the warbling tone is being emitted.
When you hear the warbling tone, press the Hook/V.
Request
Key after picking up your handset.
o Someone tried to send you a confidential fax but
nothing happened
. You must set up a mailbox before
anyone can send you a confidential fax. See “Receiving Confidential Faxes” on page 46 in Advanced
Operations. Make sure the person sending you the
fax knows the correct mail box number.
o Your fax machine will not poll a remote fax machine.
Call the person at the remote fax machine and make
sure that they have loaded documents and set their
fax machine in polling transmission mode. Check
also if their fax machine uses either standard polling
transmission or ITU polling transmission.
o Your fax machine is connected to a PBX and you can
not dial out
. You must enter your access digit before
the telephone number for each number that you dial
or program into your machine. Also, your fax
machine must be programmed for PBX operations
before it will work. See “Connecting to a PBX” on
page 28 in Installation.
o You want to answer an external telephone but your
fax machine always answers first
. If you are using an
external telephone, change the user function setting
for ring response on your fax machine. See “Customizing Features & Operations” on page 53.
o Your received faxes sometimes look distorted. If the
document received is wider or longer than the paper
you have loaded into your paper tray, your fax
machine automatically reduces either the width or
the length of the document to fit on your paper. This
type of problem could also be communication
related.
o You are constantly receiving unsolicited advertising
on your fax machine
. Try using the closed network
function. See “Rejecting Unsolicited Fax Messages”
on page 39.
o Your fax machine does not immediately switch to TEL
mode when you make or receive a voice call
. Try
pressing the Stop key. Your fax machine will return
to standby mode so that you can converse. This condition may happen infrequently due to telephone line
conditions, or the type of external telephone used. If
this problem happens often, consult your dealer.
77
Page 84

I-Fax
I-Fax, despite its complicated nature, is an easy-to-use feature.
The T.37 protocol allows your fax machine to send and receive
email over your LAN connection, without ever needing to be
hooked up to your computer. Note, if your email server uses
authentication, see important information “Authentication Unable To Send Global E-mails” on page 99.
This section is divided into four primary areas.
1. “Operation Overview” on page 78
2. “I-Fax Network Set Up” on page 83
3. “I-Fax User Interaction” on page 94
4. “I-Fax Troubleshooting” on page 97
Each section will walk you through the setup and usage of this
product.
Operation Overview
This overview has several sections to help you decipher and use
the I-Fax process easily.
• “Operation Overview” on page 78.
• “What Your I-Fax Machine Can Do” on page 79.
• “Installation Requirements” on page 79.
• “Internet Fax Transmission” on page 80.
• “Internet Fax Reception” on page 80.
• “Network Settings List” on page 81.
• “Components of an Internet Fax” on page 81.
• “Helpful Hints (I-Fax)” on page 82
This section is intended as a quick-reference for using the I-Fax
feature. This section does not provide detailed explanations of
features or settings, as other sections provide these.
To Use Internet Fax
• a Network Card must be installed in the machine
• the machine must be connected to a LAN
The Network Card for this machine can be connected to a
•10 baseT
or
• 10/100baseTX LAN (will only operate at 10 base T).
To make a LAN connection, the following information must be
configured on this machine. Ask your network administrator
about these settings.
• an IP Address
• SubnetMask
• Default Gateway
If the LAN uses a DHCP server, it is not necessary to configure
these settings as the server will perform them automatically.
After setting the correct IP Address, SubnetMask and Default
Gateway, configure the machine for Internet Fax transmission/
reception.
78
Page 85

What Your I-Fax Machine Can Do
I-Fax is a feature with many capabilities.
This unit can:
• send and receive faxes via a Public Switched Telephone
Network (PSTN)
• send and receive faxes via the Internet (over a LAN)
• print via a Local Area Network (LAN) (Windows only)
• act as an email scanner (see “Backup/Archive (Email
Scanning)” on page 83
• act as a Gateway service
• act as a convenience copier
Important!
!
Internet faxes differ from traditional faxes in these ways:
Although your OKIFAX has security features, faxes sent over
the Internet are more vulnerable to interception than faxes
sent over the PSTN.
There is no way to verify that a message has been received by
the machine to which it was addressed.
Installation and setup requirements may vary from system to
!
system.
Machine Installation
Installation covers the physical procedures, such as removing the
unit from the shipping packaging, connecting the power,
telephone, and network lines, installing consumables.
Installation may be performed by anyone.
Refer to “Installation” on page 15” for more information.
Network Setup
Setup covers the network installation procedures, such as
establishing the IP Addresses and configuring the network card.
A network administrator will perform setup.
Customization
Customization covers the programming procedures, such as OneTouch keys, machine settings, and network settings.
You can perform some of the customization procedures. Others
must be performed by a network administrator.
Installation Requirements
Before the machine is used, three processes must be completed.
• Machine Installation
•Network Setup
• Customization
LAN Topologies and Operating Systems
LAN
10base-T Ethernet
79
Page 86

Internet Fax Protocols
TCP/IP SMTP
POP3 DNS
Internet Fax Transmission
General Information
To send an Internet Fax message, you need a mail server from
which to send email.
Please consult your network administrator about the settings
listed below, which are required in order to make a connection
to the mail server.
• SMTP Server Address / Name
• DNS Server’s IP Address
•Email Address
These settings are similar to those of popular mail clients such
as Netscape Messenger, Outlook and Eudora.
You can start transmission when these settings have been configured.
To send a fax, place a document on the machine and press the
one-touch button on which the email address of the recipient
has been registered; the document will be scanned into memory,
converted into a TIFF file and sent to the recipient.
SMTP Server Address / Name
1. Enter the SMTP server name or IP Address. If entering the
server’s IP Address, be sure to type the dots (full-stops)
dividing the numbers. Example: 192.168.1.1
2. You may enter a server name only if a DNS server has been
configured.
DNS Server’s IP ADDRESS
This setting is not required if the SMTP server has been specified
by its IP ADDRESS. A DNS server can convert a server name
into an IP ADDRESS.
Email Address
Enter the email address assigned to this machine.
Internet Fax Reception
General Information
To receive an Internet Fax message, a mail server is required for
sending email.
Please consult your network administrator about the settings
listed below, which are required in order to make a connection
to the mail server.
• POP Server Address / Name
• DNS Server’s IP Address
• POP Server User Name
• POP Server Password
80
Page 87

The machine is ready to receive Internet Fax messages when
these settings have been configured. To receive a fax message,
the machine will access the server automatically at regular
intervals according to the POP Interval Time setting.
If there is mail, the machine will print it out automatically.
This machine only receives TIFF files and text-format mail. It
cannot receive files in other formats (such as Word, Excel, and
certain formats of TIFF files).
POP Server Address / Name
1. Enter the POP server name or IP Address. When entering the
server’s IP Address, be sure to enter the dots (full-stops)
dividing the numbers. Example: 192.168.1.1
2. You may enter a server name only if a DNS server has been
configured.
DNS Server’s IP Address
This setting is not required if the POP server has been specified
by its IP ADDRESS. A DNS server can convert a server name
into an IP ADDRESS.
POP Server User Name
Enter the user name assigned to this machine for accessing the
POP server.
POP Server Password
Enter the password assigned to this machine for accessing the
POP server.
Network Settings List
List of Settings
1. “IP Address” on page 88
2. “Subnetmask” on page 89
3. “Default Gateway” on page 89
4. “SMTP Server Name” on page 89
5. “POP Server Name” on page 89
6. “Pop User Id” on page 90
7. “Pop Password” on page 90
8. “DNS P.SRV Address” on page 91
9. “DNS S.SRV Address” on page 91
10. “FAX Email Address” on page 91
Components of an Internet Fax
A fax sent over the Internet has three components.
• Header
•Email
• TIFF attachment(s)
Your ability to receive, view, or print these components will vary
according to the settings of different functions.
81
Page 88

Header
The header includes all routing information for the path your
Internet Fax followed from the time it was sent to the time it was
received.
The header is automatically generated as part of the Internet
Faxing process.
Email
The email includes the To, From, and Date information. It may
include RE: (Subject) and body text (email message).
The To, From, and Date information are automatically generated
as part of the Internet Faxing process. However, they are based
on information programmed by the user.
The subject and message (if used) can be determined by the user.
Attachment(s): TIFF or PDF
The TIFF or PDF attachment(s) are the “fax” part of the Internet
Fax. The content of the TIFF attachments is determined by the
end user. The conversion to TIFF or PDF and file handling are
part of the Internet Faxing process.
Note: If the receiver is another OKI I-Fax device, the format must
be TIFF as the OKI devices cannot receive PDF.
Helpful Hints (I-Fax)
Your fax machine has many features and capabilities that will
help you
• Operate the machine
• Save money
• Save time
PSTN Faxing vs. Internet Faxing
PSTN Faxing is fax communication conducted via telephone
lines, with which you are probably familiar. PSTN Faxing
requires telephone numbers and telephone lines.
Internet Faxing is fax communication conducted via the Internet
which resembles email communications more than it does PSTN
faxing. Internet Faxing requires email addresses, mail servers,
Internet connections, and fax machines capable of Internet
Faxing.
Internet Fax
Internet Fax is a term with several meanings, depending on
context. Internet Fax can mean
• Fax communication conducted via the Internet.
• A fax machine capable of Internet Faxing.
• Τhe document (fax) sent via the Internet.
Email Addresses vs. PSTN (Phone) Numbers
You can combine email addresses and telephone numbers in one
communication session.
You can send a fax to several email addresses or several
telephone numbers, or a combination of email addresses and
telephone numbers.
82
Page 89

Status of Server
Internet Faxing is conducted over the Internet via network
servers. If the servers are down, running slowly, or experiencing
other problems, Internet Faxing will be adversely affected.
Backup/Archive (Email Scanning)
You can use your fax machine to create digital versions of
documents you only have in hardcopy form.
1. To do this, send the document as an Internet Fax to your
email address.
2. When the document is scanned, a TIFF version of the
document is created. By sending it to yourself, you will
have a digital version of the hardcopy document.
3. You can then use various software packages to work with the
digital (TIFF) version, such as an Optical Character
Recognition (OCR) software package.
I-Fax Network Set Up
Settings for the machine are located in two places.
• Settings stored on the fax machine
• Settings recorded on the network card
Each section below is categorized by the Menu listings found in
the fax machine. They are as follows:
• “I-Fax NIC Settings” on page 85
• “POP Interval” on page 87
• “Network Settings” on page 88
• “I-Fax NIC Initialize” on page 91
Identifying Current Settings on Fax Machine
The Configuration Report lists the current settings of the
facsimile machine and the network card.
Print the Configuration Report
SELECT
FUNCTION
1. Press the Select Function key.
2. Press the
1:ACTIVITY REPORT.
show
6/IJ
REPORT
PRINT
JKL
5:CONFIGURATION
5
YES( ) NO( /1-6)
6/Report Print One-Touch key. The display will
83
Page 90

3. Using the numeric keypad, press 5. The display will show
5:CONFIGURATION.
4. Press . The report will print.
YES
I-Fax NIC Options
The following lists the available options for setting up and
adjusting the Network Interface Card (NIC) functions.
To access:
SELECT
FUNCTION
1. Press Select Function to enter the menu.
2. Press
then press keypad
YES
9/OP
USER
PROG.
TUV
8
8:I-FAX NIC OPTIONS
YES ( ) NO( /1-9)
9/USER PROG to enter the programming menu and
8 for I-FAX NIC OPTIONS and press
to enter the menu.
3. Press to scroll through the features available for
NO
NIC Options.
I-Fax NIC
Settings
POP Interval
Network
Settings
I-Fax NIC
Initialize
Text Print
Header Print
Coding Mode
Ex.Fine Mode
Sender ID (Email)
Send File Format
Send Notification
I-Fax NIC Update
On/Off
IP Address
Subnet Mask
Default Gateway
SMTP Server Name
POP Server Name
POP User ID
POP Password
DNS P.SRV Addr.
DNS S.SRV Addr.
Fax Email Addr.
Ye s/ N o
84
Page 91

I-Fax NIC Settings
The I-Fax NIC settings can be accessed using the following:
SELECT
FUNCTION
1. Press Select Function to enter the menu.
2. Press
then press keypad
3. Press to enter
Explanations of each function follow this list.
• Text Print
•Header Print
• Coding Mode
• Ex.Fine Mode
• Sender ID (Email)
• Send File Format
• Send Notification
• I-Fax NIC Update
Text Pri nt
• Settings: ON or OFF
• Default: ON
9/OP
USER
PROG.
TUV
8
8:I-FAX NIC OPTIONS
YES ( ) NO( /1-9)
9/USER PROG to enter the programming menu and
8 for I-FAX NIC OPTIONS.
YES
I-FAX NIC SETTINGS.
Whether or not to print the body text of email. If this setting is
ON, the text in an email message is printed out. Please note that
only US-ASCII characters in the text can be printed as shown in
the following table. Any characters that cannot be printed will
be shown as spaces. Depending on the email client used, text
may not be printed or come out garbled.
Note: Text is not generally base64 encoded and coded text is not
supported (coded text is received, where the text in a coded
condition is printed.)
- Two or more sections of text are all printed. A line (98
hyphen characters) is added between text files (including body
copy) and a linefeed is created before and after the line.
Between a header and a text file (including body copy), no line
is added and one linefeed is inserted.
- The MIME header of the attached file is not printed.
- A blank line in the top of TEXT is eliminated in print and will
not be printed.
- In Microsoft Outlook or Lotus Notes, there is a setting to
send an Email body using HTML format. When set, the body
will be sent in both TEXT and HTML. If both are received,
Internet Fax will print only the TEXT portion. However, if the
setting is HTML format and there is an attached HTML file,
then the HTML portion will be printed, albeit with extra
characters associated with HTML. When Outlook is used,
please use TEXT as the sending format for printing.
85
Page 92

0 1 2 3 4 5 6 7 8 9 A B C D E F
0 SP 0 @ P ‘ p
1 ! 1 A Q a q
2 2BRb r
3 # 3 C S c s
4 $4DTdt Ä ä
5 % 5 E U e u
6 &6FVf v Ö ö
7 7 G W g w
8 (8HXhx
9 ) 9 I Y i y
A *:JZjz
B + ; K [ k {
C ,<L\ l | Ü ü
D - = M ] m }
E .>N^n~
F / ? O _ o ß
Header Print
• Settings: TYPE 1, TYPE 2, or OFF
• Default: TYPE 1
• OFF: Do not print header
• TYPE1: Print SUBJECT/FROM/TO
• TYPE2: Print all header information
This setting is only valid when the TEXT Print setting is ON.
Coding Mode
• Settings: MH, MR, MMR
• Default: MH
This is the coding mode for TIFF file images sent by Internet
Fax. Select the option desired.
Compression Rates:
MH low
MR medium
MMR high
The default setting is MH.
Often, other manufacturers’ Internet Fax products support
!
only MH.
Ex.Fine Mode
• Settings: 300 dpi or 600 dpi
• Default: 300 dpi
Scan resolution of EX.FINE mode for Internet Fax is 300 dpi or
600 dpi: 300 dpi is faster while 600 dpi is higher quality.
Sender ID (Email)
• Settings: ON or OFF
86
Page 93

• Default: ON
Adds the sender ID to the main body of images scanned by
Internet Fax.
This setting will always apply when using Internet Fax, regardless of the setting for 4:SYSTEM DATA PRG. When using
Internet Fax as an email scanner, turn this setting OFF to prevent the sender ID data from appearing in scanned images.
Send File Format
• Settings: TIFF or PDF
• Default: TIFF
This determines whether the format sent is either PDF or TIFF.
Note: Oki facsimile machines cannot receive PDF faxes.
Send Notification
• Settings: ON or OFF.
• Default: ON
When sending an email from the I-Fax device, the body of the
email has a message which indicates that an attachment is
included. The message varies, depending on the setting of Send
File Format (TIFF or PDF).
I-Fax NIC Update
• Settings: YES or NO.
• Default: YES
This setting allows updates to the firmware when YES is
enabled. Usually this option is not required except when a
firmware update is released and run from a client machine.
POP Interval
• Settings: Off/1min/5min/10min/30min/60min/Daily
• Default: OFF
POP Interval can be accessed using the following:
SELECT
FUNCTION
1. Press Select Function to enter the menu.
2. Press
then press keypad
3. Press to enter
4. Press until
5. Press to enter POP Interval.
6. Select either
This determines how often the machine will check for incoming
transmissions from the POP mailbox. Select the option desired.
OFF sets the machine to not check for incoming transmissions.
9/OP
USER
PROG.
8:I-FAX NIC OPTIONS
TUV
YES ( ) NO( /1-9)
8
YES
9/USER PROG to enter the programming menu and
8 for I-FAX NIC OPTIONS.
YES
NO
I-FAX NIC OPTIONS.
POP INTERVAL appears.
YES
YES or NO to select the interval time desired.
NO
87
Page 94

Daily
Daily sets the machine to check the mail server once a day.
Thus, it is required that the time of day is set for this option.
POP INTERVAL
[DAILY] YES ( ) NO( )
POP INTERVALTIME
[__:__] PRG. TIME 0-9
POP INTERVALTIME
YES
[TIME1] YES ( ) NO( )
YES
– When the DAILY setting is selected, the time of day when the
mailbox is polled requires setting. There are four different time
settings available.
– If the
POP INTERVAL TIME is not registered, then the auto POP
receiving action will not occur.
– After
POP INTERVAL TIME is registered, even if the setting is
changed from
DAILY to another one, the POP INTERVAL TIME
setting will not be lost.
Network Settings
This function modifies these network settings. The I-Fax Network settings can be accessed using the following:
SELECT
FUNCTION
1. Press
2. Press
then press keypad
9/OP
USER
PROG.
8:I-FAX NIC OPTIONS
TUV
YES ( ) NO( /1-9)
8
YES
NO
Select Function to enter the menu.
9/USER PROG to enter the programming menu and
8 for I-FAX NIC OPTIONS.
3. Press to enter
4. Press until
5. Press to enter
YES
YES
NO
I-FAX NIC OPTIONS.
NETWORK SETTINGS appears.
NETWORK SETTINGS.
6. To advance to each function within Network Settings, use
Start key.
the
7. To set each function, utilize both the numeric keypad and the
one-touch keys for easy access to commonly used symbols.
An explanation for each option listed below follows.
– “IP Address” on page 88
– “Subnetmask” on page 89
– “Default Gateway” on page 89
– “SMTP Server Name” on page 89
– “POP Server Name” on page 89
– “Pop User Id” on page 90
– “Pop Password” on page 90
– “DNS P.SRV Address” on page 91
– “DNS S.SRV Address” on page 91
– “FAX Email Address” on page 91
IP Address
Sets the IP address.
88
Page 95

• When 0.0.0.0 is set as the IP address, the DHCP function
automatically starts. If a DHCP server is found, an IP
address is obtained from the DHCP server.
• From then on, an IP address is obtained from the DHCP
server each time the power is turned OFF and ON; therefore,
it is not necessary to change the IP address. When an IP
address is obtained from the DHCP server, the address is
displayed and an asterisk (*) appears at the end.
• If you wish to set a fixed IP address, input the IP address
(numbers). Other than the IP address, a SUBNET MASK,
DEFAULT, GATEWAY, and DNS SERVER address are also
obtained from the DHCP server automatically. Sometimes
they cannot be obtained depending upon the setup of the
DHCP server. In such a scenario, set each address one at a
time.
Subnetmask
Sets the subnet mask.
Default Gateway
Sets the default gateway address.
1. Press the Number keys to insert either text or numbers.
Press them repeatedly to enter the character desired.
2. To jump to the next field, use the or
key.
3. Press the
Restrictions
• If DNS has not been set, enter the IP address of the server.
The address must include the “.” (period) dividers (e.g.,
192.168.4.123).
• Up to 64 characters may be entered.
• You may use Latin letters, numbers and symbols.
• To enter symbols, use either one-touch keys or key “0” of the
numeric ten-key pad.
• The symbols that can be used are: ! # & ’ ( ) * + , - . / : ; = ?
· @ ? ” _ % ~
• The “~” (tilde) symbol shows on the display as “
• The ” and ’ symbols cannot be used.
• Both uppercase and lowercase letters can be used. To
change the case, press the
Start key to enter your settings.
1/CAPS key.
YES
NO
-1
”.
SMTP Server Name
Enter either the IP address or the host name of the SMTP mail
server.
If the DNS name of the SMTP server does not work, try
!
entering the IP address of the SMTP server.
POP Server Name
Enter either the IP address or the host name of the POP mail
server.
If the DNS name of the POP server does not work, try entering
!
the IP address of the POP server.
89
Page 96

1. Press the Number keys to insert either text or numbers.
Press them repeatedly to enter the character desired.
2. To jump to the next field, use the or
YES
NO
key.
3. Press the
Start key to enter your settings.
Restrictions
• If DNS has not been set, enter the IP address of the server.
The address must include the “.” (period) dividers (e.g.,
192.168.4.123).
• Up to 64 characters may be entered.
• You may use Latin letters, numbers and symbols.
• To enter symbols, use either one-touch keys or key “0” of the
numeric ten-key pad.
• The symbols that can be used are: ! # & ’ ( ) * + , - . / : ; = ?
· @ ? ” _ % ~
-1
• The “~” (tilde) symbol shows on the display as “
”.
• The ” and ’ symbols cannot be used.
• Both uppercase and lowercase letters can be used. To
change the case, press the
1/CAPS key.
Pop User Id
Enter the user ID registered on the POP3 server.
1. Press the Number keys to insert either text or numbers.
Press them repeatedly to enter the character desired.
2. To jump to the next field, use the or
YES
NO
key.
3. Press the
Start key to enter your settings.
Restrictions
• Up to 16 characters may be entered.
• You may use Latin letters, numbers and symbols.
• To enter symbols, use either one-touch key 20 or key “0” of
the numeric ten-key pad.
• The symbols that can be used are: ! # & ’ ( ) * + , - . / : ; = ?
· @ ? ” _ % ~
-1
• The “~” (tilde) symbol shows on the display as “
”.
• Both uppercase and lowercase letters can be used. To
change the case, press the
1/CAPS key.
Pop Password
1. Enter the password registered on the POP3 server, which
must be alphanumerical characters of no more than 16
characters long.
2. If a password has already been entered, it is shown as
XXXXXXXXXXXXXXXX (sixteen Xs).
3. Press the Number keys to insert either text or numbers.
Press them repeatedly to enter the character desired.
4. To jump to the next field, use the or
YES
NO
keys.
90
Page 97

5. Press the Start key to enter your settings.
Restrictions
• Up to 16 characters may be entered.
• POP USER ID and POP PASSWORD settings in the fax
machine must match the POP3 user name already entered in
the server.
• You may use Latin letters, numbers and symbols.
• To enter symbols, use either one-touch keys or key “0” of the
numeric ten-key pad.
• The symbols that can be used are: ! # & ’ ( ) * + , - . / : ; = ?
· @ ? ” _ % ~
-1
• The “~” (tilde) symbol shows on the display as “
”.
• The ” and ’ symbols cannot be used.
• Both uppercase and lowercase letters can be used. To
change the case, press the
1/CAPS key.
DNS P.SRV Address
DNS = Domain Name Service.
P.SRV = Primary Server.
• Sets the IP address of the DNS primary server.
• Do not change this setting if the server is connected directly
using its IP address.
DNS S.SRV Address
DNS = Domain Name Service.
S.Serv = Secondary Server.
• Sets the IP address of the DNS secondary server.
• Change this setting only when a secondary server has been
set up.
FAX Email Address
1. Enter the email address assigned to your machine. Press the
Number keys to insert either text or numbers. Press them
repeatedly to enter the character desired.
2. To jump to the next field, use the or
YES
NO
key.
3. Press the
Start key to enter your settings.
Restrictions
• Up to 64 characters may be entered.
• You may use Latin letters, numbers and symbols.
• To enter symbols, use either one-touch keys or key “0” of the
numeric ten-key pad.
• The symbols that can be used are: ! # & ’ ( ) * + , - . / : ; = ? ·
@ ? ” _ % ~
-1
• The “~” (tilde) symbol shows on the display as “
”.
• The ” and ’ symbols cannot be used.
• Both uppercase and lowercase letters can be used. To
change the case, press the
1/CAPS key.
I-Fax NIC Initialize
This resets the Network Card to its original factory settings.
Verify that you want to do this before proceeding because when
91
Page 98

resetting the Network Card to factory settings, all current settings are lost.
1. Press
2. Press
3. Press to enter
4. Press until
5. Press twice to reset the network card.
Select Function to enter the menu.
9/USER PROG to enter the programming menu and
then press keypad
YES
8 for I-FAX NIC OPTIONS.
I-FAX NIC OPTIONS.
NO
I-FAX NIC INITIALIZE appears.
YES
Note: The message “ARE YOU SURE?” will appear on the
display. You must confirm your choice before the unit will
reset to factory defaults.
Email Settings
Registering Addresses
Email addresses up to 64 characters long can only be assigned to
one-touch keys 01 to 10. It is also possible to program a group of
email addresses and assign the group to a one-touch dial number.
However, one-touch dial numbers for both email addresses and
telephone numbers cannot be assigned to a single group.
Restrictions
• Up to 64 characters may be entered.
• You may use Latin letters, numbers and symbols.
• To enter symbols, use either one-touch keys or key “0” of the
numeric ten-key pad.
• The symbols that can be used are: ! # & ’ ( ) * + , - . / : ; = ? ·
@ ? ” _ % ~
-1
• The “~” (tilde) symbol shows on the display as “
”.
• The ” and ’ symbols cannot be used.
• Both uppercase and lowercase letters can be used. To
change the case, press the
1/CAPS key.
Program OT Email Addresses
Programming Email addresses can be accomplished using the
following procedures:
SELECT
FUNCTION
EMAIL: CAPS OFF
_
SENDER ID (EMAIL)
[ ON ] YES( ) NO ( )
1. Press
2. Press
8/MN
LOCATION
PROG.
Select Function to enter the menu.
8/LOCATION PROG to enter the programming menu.
LOCATION PROGRAMING
ENTER(SRCH,OT,A/D,#)
START START
SEND FILE FORMAT
[TIFF] YES( ) NO ( )
PDF
OT
If
NO
YES
If
Then press OT (One-Touch) key where you wish to program
the email address.
92
Page 99

3. If the display does not read EMAIL, press . Then
YES
press to begin entering the email address. Use
NO
the 1/CAPS key to turn on/off caps.
4. When finished, press the
Start key to enter your settings.
5. Select either TIFF or PDF for the default send format for the
email address entered by pressing or
NO
.
YES
6. Select if you would like the Sender ID to appear in the image
as the default for the email address entered by pressing
YES
or .
7. Press another OT key to program or press the
NO
Stop key until
you have exited programming.
Program Group Email Addresses
Email Groups are clusters of email addresses tied together to a
Group setting, allowing you to send a document to multiple
email addresses. Once you have programmed multiple email
addresses to OT keys, then you are able to program email
groups. Telephone Fax numbers can also be programmed into
the same Group setting as well.
Programming email groups can be accomplished using the following procedure:
1. Press
Select Function to enter the menu.
2. Press
8/LOCATION PROG to enter the programming menu
and then press # key to enter Group programming.
3. Using the numeric keypad, enter the group location desired,
1-10. Example: To enter location 2, press 02.
4. The display will show the number of your current group and
SELECT LOC.(S). You can now add a location to your group
(or delete a location from it). Refer to the instructions below.
To do this Do this
Add a One-Touch
location
Delete a previously
added email
Search for a location
by name to add or
delete
Press the One-Touch key. Press the Start key to enter the
location. Repeat as necessary.
Press the programmed One-Touch key. Press the Start key to
delete it. Repeat as necessary.
Press the Search key continuously (or use the numeric
keypad) until the location you want appears. Press the
START key to add or delete it.
5. Each group can contain up to a maximum of all of the OneTouch locations available on your fax machine.
6. When you are finished programming, press . The
display will show
LOCATION PROGRAMMING.
NO
7. To program another group, return to Step 3. If you are
finished, press the
Select Function key.
93
Page 100

I-Fax User Interaction
Sending Email
Sending emails can be accomplished in the following ways:
1. Manually entering an email with the Email key.
2. Using a preprogrammed One-Touch key.
3. Using the Group Email setting.
4. Using the Broadcast feature.
Email Using Email Key
A document can be sent to an email address by manually
entering the address using the numeric keypad.
1. Place a document in the machine.
2. Press the
3. Either begin entering an email address directly using the
numeric keypad, or press the
options for this email.
Email key.
Email key again to setup the
Email Key Options
Setting Description
1: To The email address you are sending to.
2: From The email address you would like to appear as the return
address. The default is the fax machine’s own
programmed email.
3: Subject Enter the subject of the email. If no subject is entered,
4: Send File Format TIFF or PDF encoding. Normally TIFF is best.
5: Sender ID Yes, to have the Sender ID appear on the email.
6: Confirm Report Prints a report on the email addresses entered.
7: Display (To): Displays the email address entered.
8: Display (From): Displays the email address entered.
then “Internet FAX Message from [Sender ID]” appears.
4. Press the number key for the setting desired from the choices
listed above. Press to enter the setting; press
NO
to advance in the list. Enter the information
YES
required.
5. Depending upon the setting, press either or the
Start key to save and exit.
the
6. Select another email setting (1-8) or press the
YES
Start key
again to email the document.
7. Press the
press
Stop key to exit without emailing the document,
Stop key again to remove the document.
94
 Loading...