

Okamura Arco 865JAT Assembly Manual
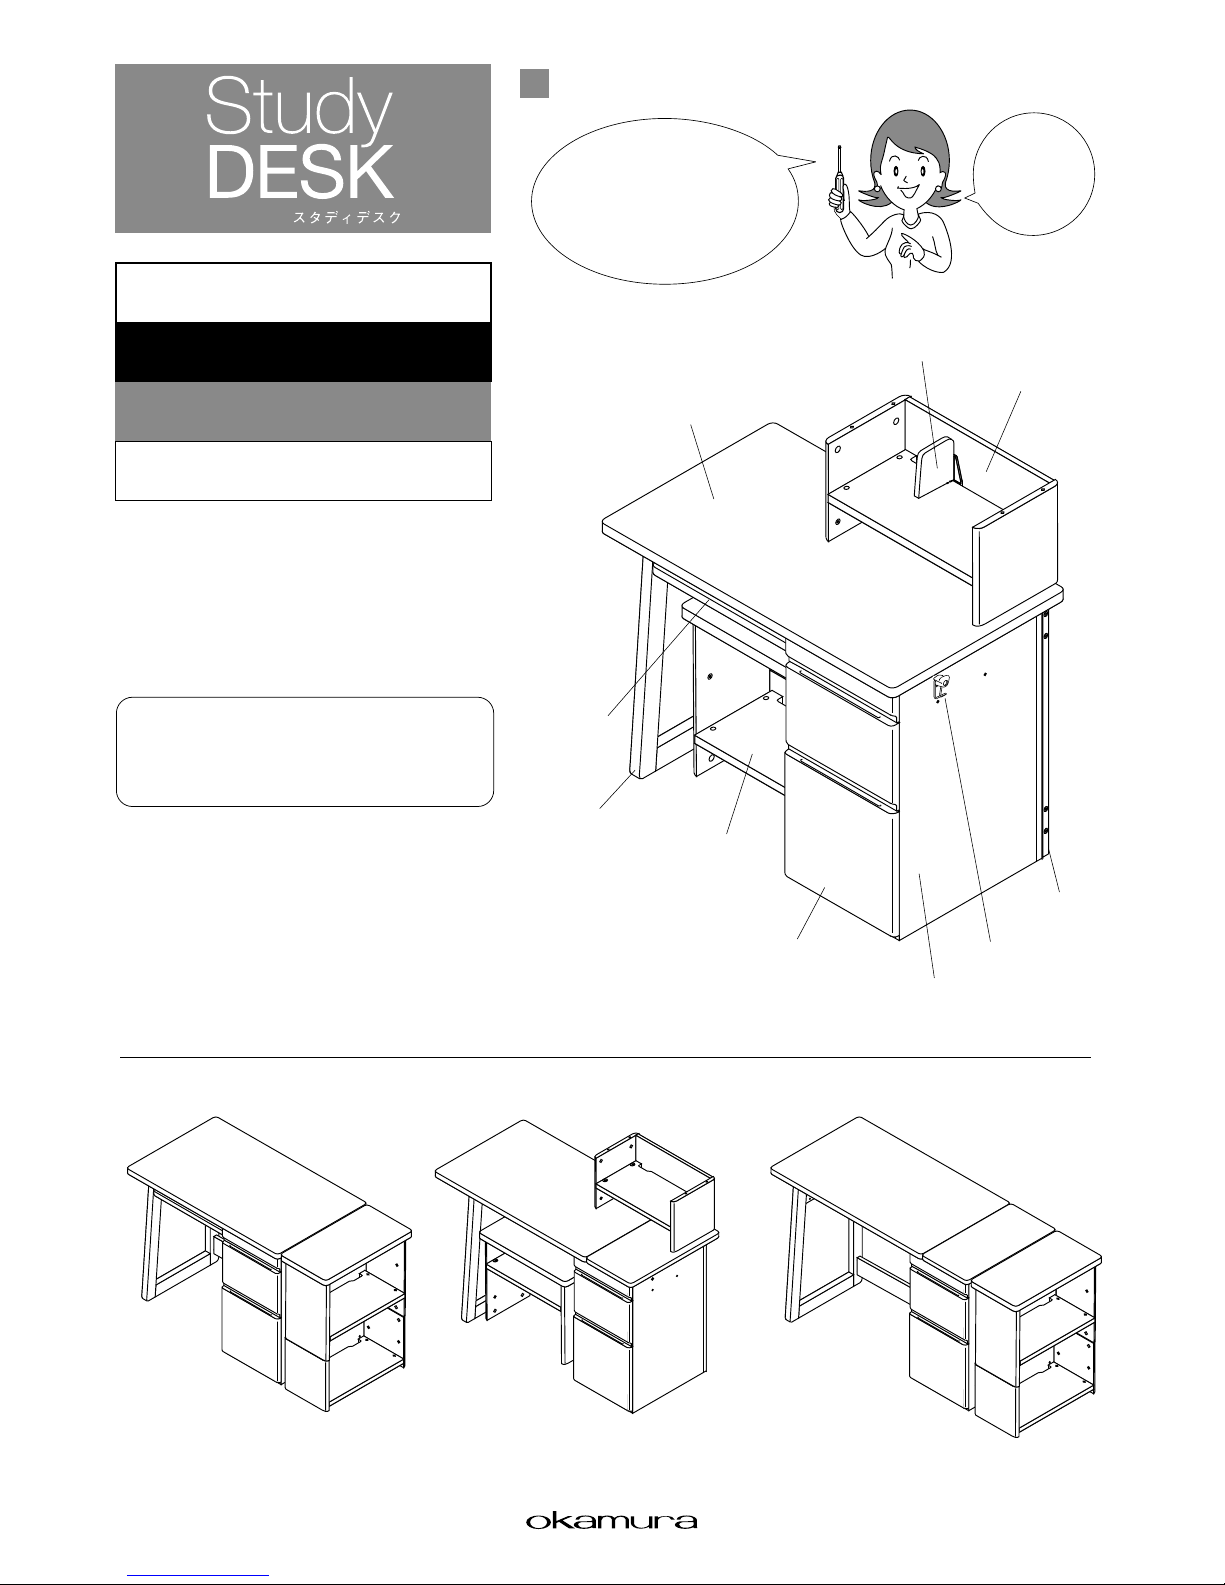
865JAT
【W1280mm】 【W1350mm】 【W1600mm】
【W1030mm】
Assembly Final Drawing
(Name of each part)
A cross slot
screwdriver is required for
assembly. Please have one available.
* Do not use an electric screwdriver
because it may damage the
product.
Two
persons should
assemble this
product.
Swing hook
Support leg
Drawer
Side cabinet
Shelf unit (upper)
Shelf unit (lower)
Leg
Movable divider
Desktop
Desktop
lower shelf
(expanded
desktop)
Assembly Instruction Manual
Special Edition
Thank you very much for purchasing the
OKAMURA Study DESK. Before using this
product, care fully read this Assembly
Instruction Manual in order to fully understand and correctly assemble the product.
Desk
This desk can be re-combined. Therefore, make sure to store the Assembly
Instruction Manual.
■ Desk layout example
2
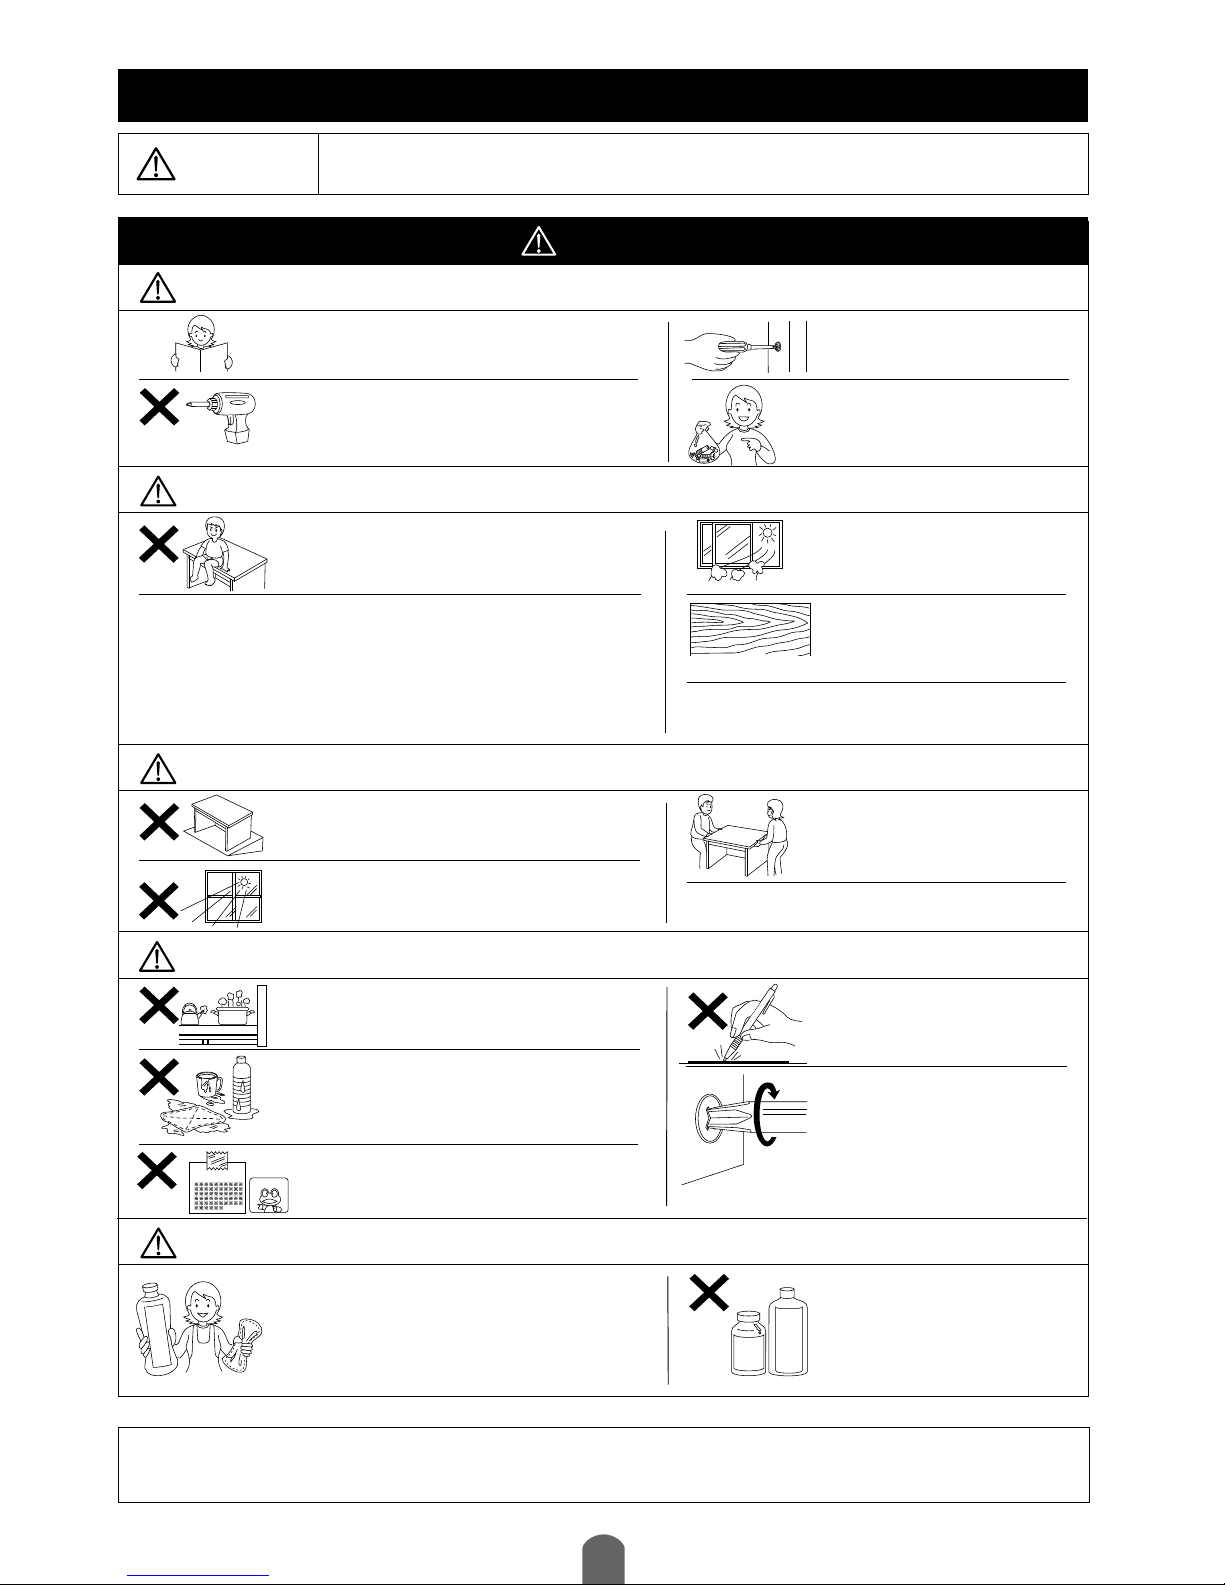
Check before assembling
To Use Safely
This indicates that improper handling due to disregard of this warning may result in injury or
damage to property.
Fully read the instruction manual before assembly, securely tighten the bolts
with a screwd river, and us e all o f the assembly parts w ithout leaving any
parts unused to assemble correctly.
When assembling, do not use an electric screwdriver. When any force more
than necessary is applied, the product may be broken or the bolt may not be
removed.
After assembling, fully tighten the product on a flat
surface, an d mak e sur e tha t eac h part is secure ly
installed.
This product uses natural wood.
Each prod uct will ha ve a slightly different appearance and may differ in wood grain and color from
the catalog and sample products.
There may be som e parts and members wh ich are not
used depending on the assembling pattern. Store them in
a s afe plac e as the se par ts w ill al ways be ne cess ary
when re-combining. Purchase parts again when they are
lost.
Immed iatel y a fter pu rcha se, th is prod uct may em it
adh esive or p aint odors . In such a case, suf ficiently
ventilate and aerate. Periodically allow for ventilation.
Do not instal l the assembled upper and lower shel f units onto the desktop. It
may result in turnover or breakage.
When installing and moving this product, make sure two
persons carry the product without dragging it.
(Dragging the product may result in damage to floors.)
When the product is installed in a high humidity location, mold, etc., may grow.
Periodically allow for ventilation.
CAUTIONCAUTION
CAUTION
Cautions for assembly
Do not handle this product roughly or use for any other purpose than specified. Never app ly body weigh t to an y point on the produ ct, or ri de on i t. It
may result in turnover or breakage, and is extremely dangerous.
Cautions for handling
Sele ct a horiz ontal and stab le lo cation for ins talla tion. Use in a locat ion
where the floor is inclined or unstable may result in turnover or an accident,
and is dangerous.
Avo id us ing th is product in a loca tion sub jec t to direc t sun light , hi gh
tempe ratures or high hu midity or in a loc ation subject to direct heat and
wind from a h eati ng st ove or ai r co nditi oner. It may resu lt i n alt erat ion,
deformation or discoloration.
Do not place any hot object directly on the product.
It may result in alteration, deformation or discoloration.
Do not rub the product with hard material, and do not
write with a writing instrument s uch as a ball- point
pen with a hard tip without using a desk mat.
It may result in deformation or flaws.
Periodicall y inspect f or loosenes s of t he bolts an d
con necti ng pa rts o f the memb ers, and securely
re-tighten them when there is any looseness.
Use while th ere is loosen ess may result in ri sks of
deformation, breakage and turnover.
Do not allow the product to become wet and remain wet and do not leave a
wet cloth on th e pro duct. It ma y res ult i n def ormat ion, c racks , swel ling,
stains or corrosion of the surface material. When the surface becomes wet,
immediately wipe so that no moisture is left.
Do not attach any seals or cellophane tape, etc., to the product.
It may result in removal of the surface material.
Cautions for installation
To ensure long-term use
Make sure to wipe with a dr y and soft cloth along the wood grain. Use with
a wet clot h may result in crack s and swel ling. Wh en th e pro duct is very
dirty, moisten a soft cloth with a di luted neutral agent (dishwashing soap),
and tig htly squeeze it t o wipe a way dirt complete ly. And then, wipe with a
soft dry cl oth so that no soa py residue remains. When a large amount of
moisture remains, deformation and discoloration may result.
Natural wood is natural material, therefore, the material will have its own unique grain and color. In other words, each product may differ slightly in color
due to the characteristics of natural wood. In addition, natural wood is a material which breathes. Therefore, warpage or distortion may occur depending
on use environment. These features give natural wood its attractive quality. The longer the product is used, the greater these features will be enhanced.
* Natural wood means solid wood, back piece, laminated wood and sliced veneer, etc.
Do n ot u se alc oho l- ba se d or t hin ne r- bas ed
solvent/chemical waste cloth or commercial cleaner
since i t wi ll d amag e th e surf ace. It m ay r esul t in
discoloration, etc.
About care
Characteristics of
natural woods
Make sure to only place an object on the product within the maximum loading mass. Placing an object on
the produc t heavi er th an t he maximu m loadi ng mass m ay resu lt in t urnover o r break age, a nd i s
extremely dangerous.
Desktop maximum loading mass = 40kg (Uniformly distributed mass)
* Uniformly distributed mass means placing a mass uniformly on the desktop and shelf plate.
Diluted
solvent
Alcohol-based
solvent
Neutral agent
(dishwashing soap)
Memo
Seal
Assembly
Instruction
Manual
3
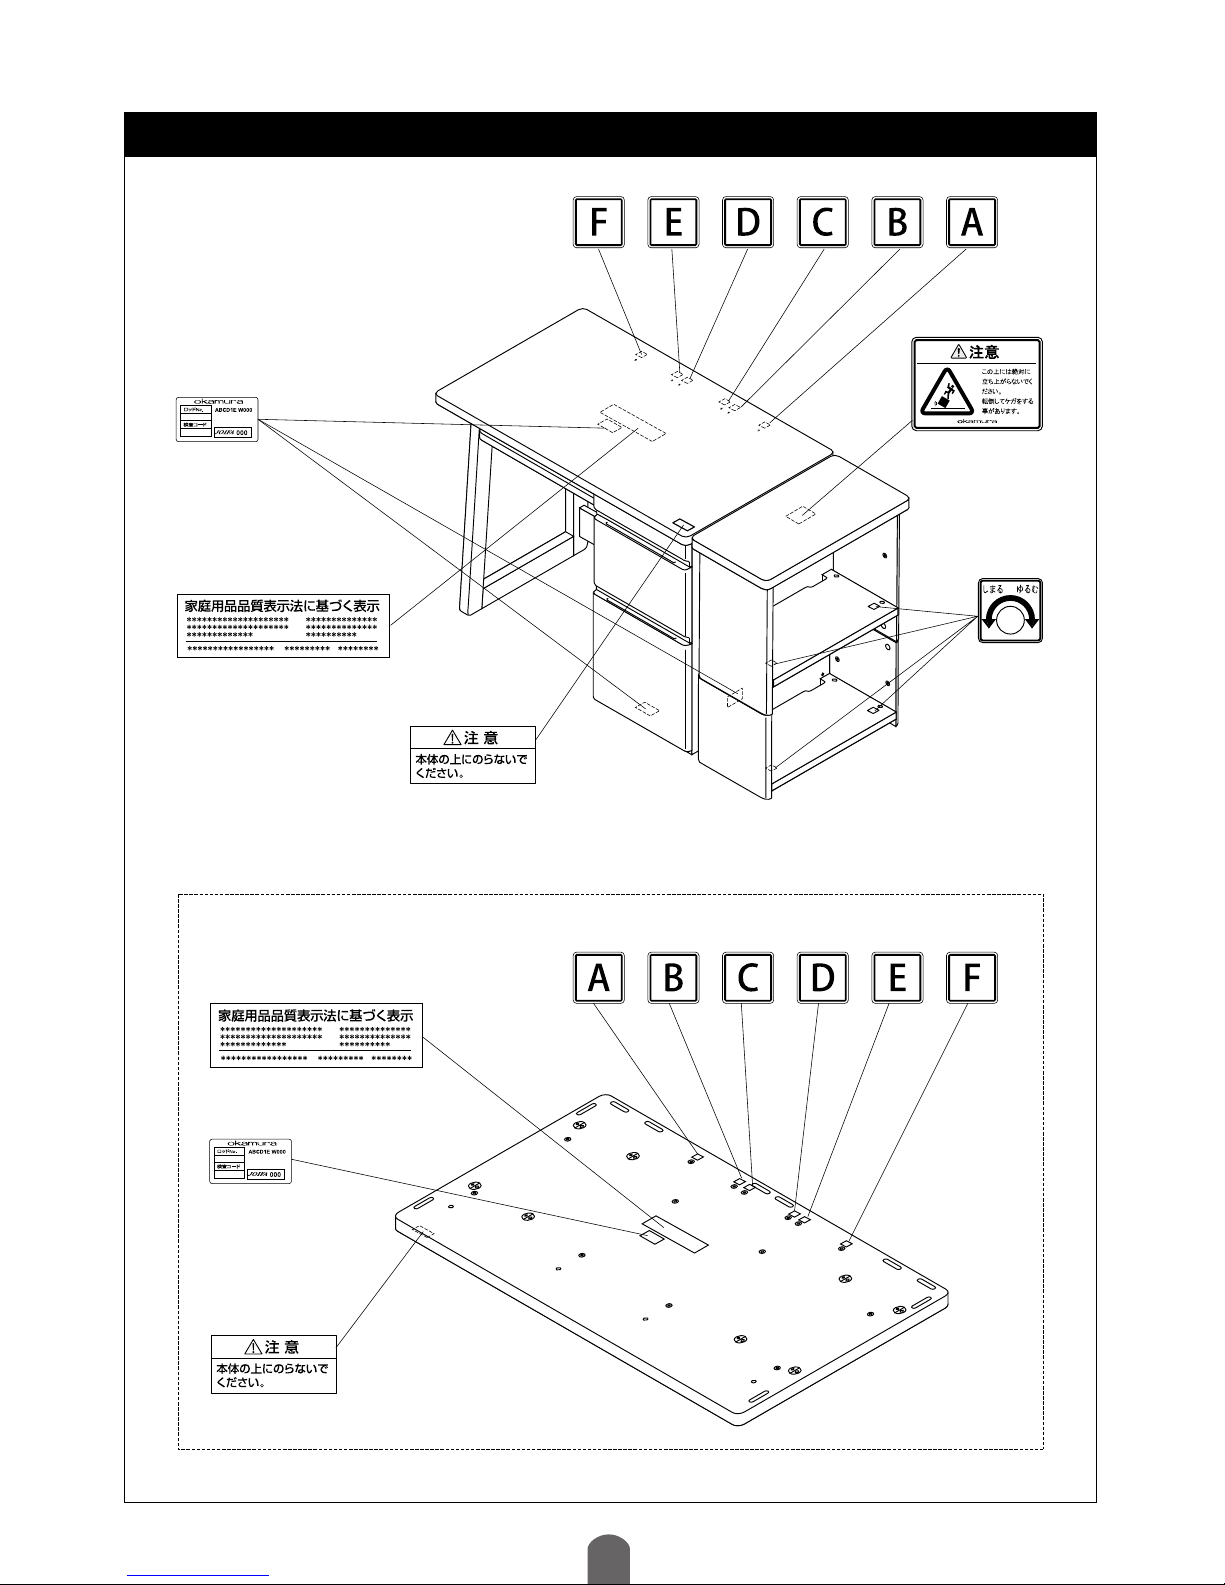
■ Viewed from desktop back face
Check before assembling
Locations of Caution Seals
Quality labeling seal
(Attached to the
desktop
back side)
Product No. seal
(Attached to the
desktop back side)
Warning label
(Attached to the desktop surface)
Warning label
(Attached to the surface)
Quality labeling seal
(Attached to the desktop back side)
Product No. seal
(Attached to the
desktop back side)
Warning label
(Attached to the desktop surface)
4
×
9
×
4
×
10
×
4
×
2
×
2
×
2
×
1
×
2
×
1
×1
×1
×2
×
4
×
1
×
4
×
1
×
8
×
2
×
4
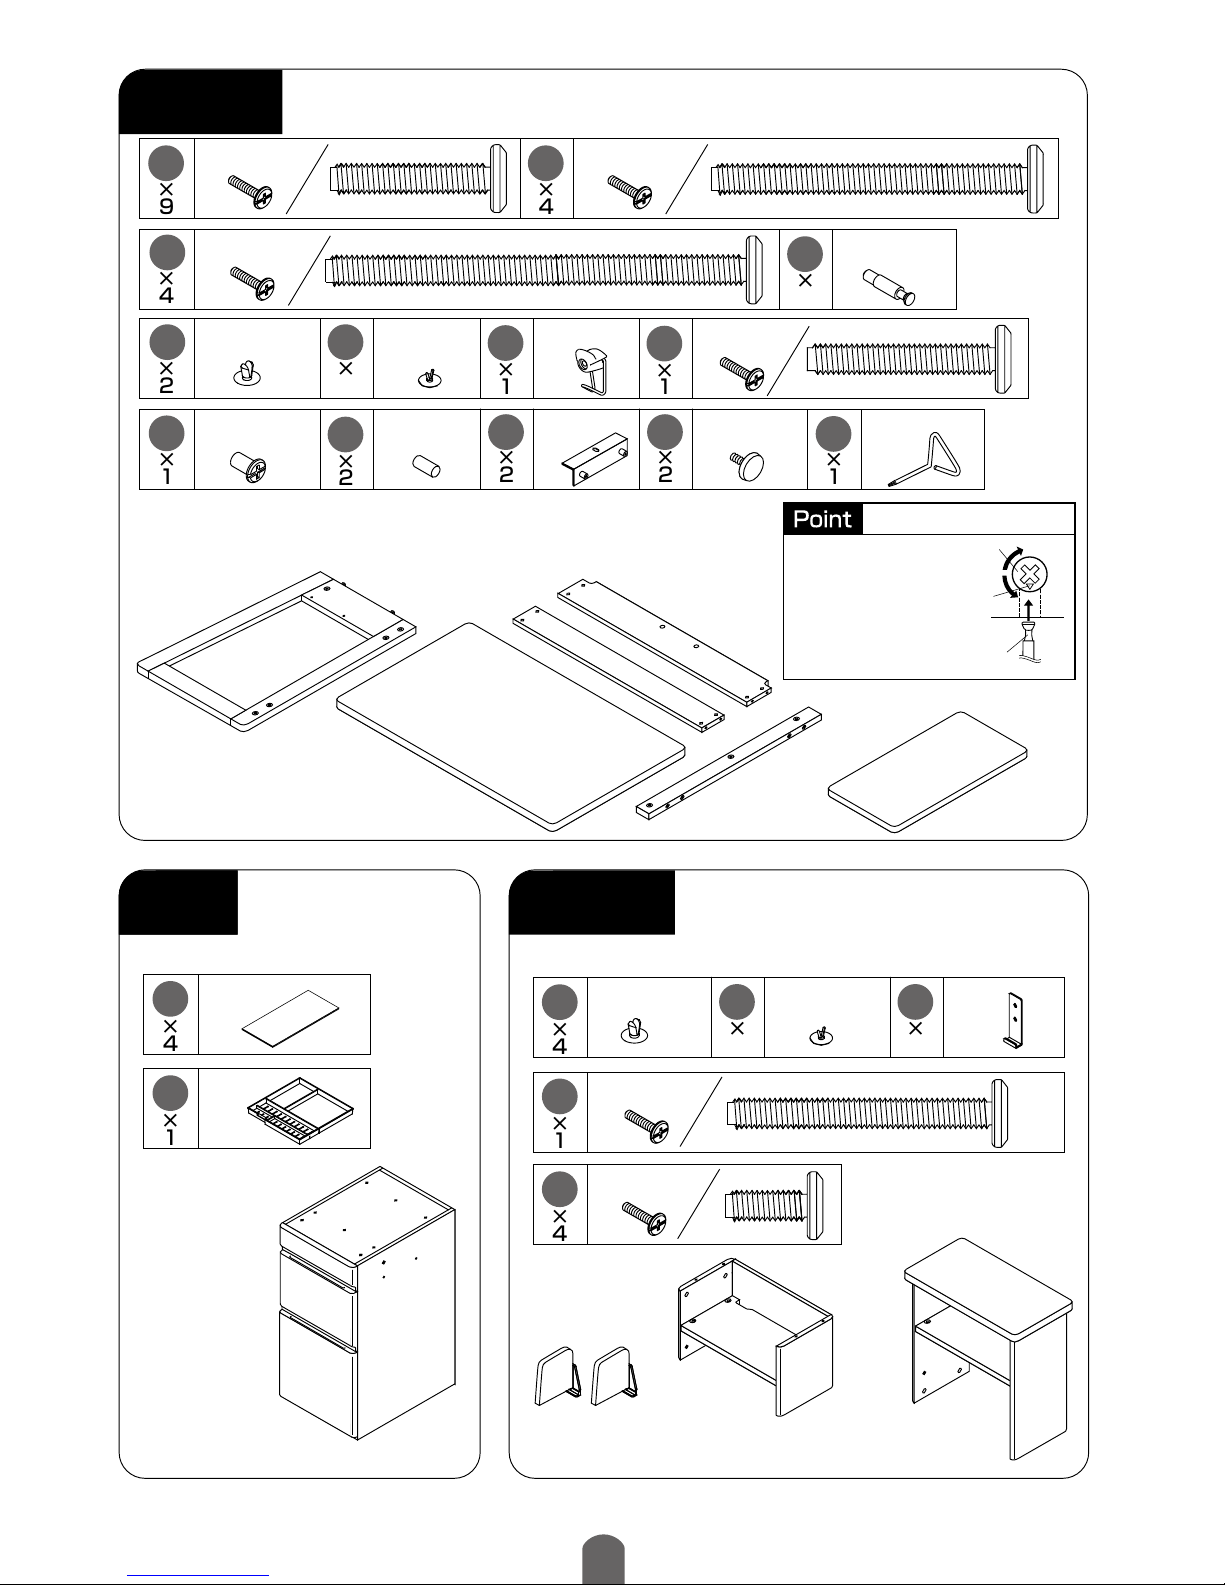
1
Desk
Details of Parts (make sure to check before assembly)
Actual sizeConnecting bolt
(M6 × 30mm)
a
Plug cap
(8mm)
f
c
Actual sizeConnecting bolt
(M6 × 80mm)
Positioning
guide dowel
e
Cap for insert
nut
Connecting nut
(M16 × 12mm)
i
j
Actual sizeConnecting bolt
(M6 × 60mm)
b
Single-end
connection bolt
(24mm)
d
k l
m
Swing hook
g
Actual size
Connecting bolt
(M6 × 35mm)
h
Desktop L-shape
fitting
Urea screw
(M6 × 15mm)
Simplified screwdriver
Leg ×1
Rear panel
(upper) ×1
Rear panel
(lower) ×1
Support leg ×1
Desktop ×1
Extension
desktop ×1
Side
cabinet
Parts breakdown
(Make sure to check before assembly)
Shelf unit
Parts breakdown
(Make sure to check before assembly)
Divider
n
Organizer
tray
o
Side cabinet ×1
* The parts are packaged in an assembled state.
Shelf unit (upper) ×1Shelf unit (lower) ×1
Movable divider
×2
e
Plug cap
(8mm)
q
f
Cap for insert nut
p
Upper
fixing
fitting
Actual sizeConnecting bolt
(M6 × 50mm)
r
Actual sizeConnecting bolt
(M6 × 15mm)
* Set the protective material on the floor and carry out parts installation work on the material so as not to damage the members.
Common
❶ Install the leg, rear panel (upper) and
❷ Install the support leg, rear panel (upper)
* When assembling the side cabinet on the
* Select the type which you want to assemble from the following, and proceed to the page of the appropriate assembling method.
* This section introduces assemblies in which the side cabinet is on the right side. However, each type can be assembled with the side cabinet
placed on the left side.
Use a cross slot screwdriver for assembly.
* An electric screwdriver or electric tool may damage the product,
therefore, use a manual screwdriver.
[About screw-type connector]
Screw-type connector
The screw-type connector is
tightened by turning clockwise.
The screw-type connector is
loosened by turning counterclockwise.
Screw-type
connector
Single-end
connection bolt
(Embedded into the members)
When the a rrow is set to the singleend co nnection bolt, the c onnecting
bolt is inserted (removed).
Arrow
5
1
【W1030mm】 【W1280mm】 【W1350mm】 【W1600mm】
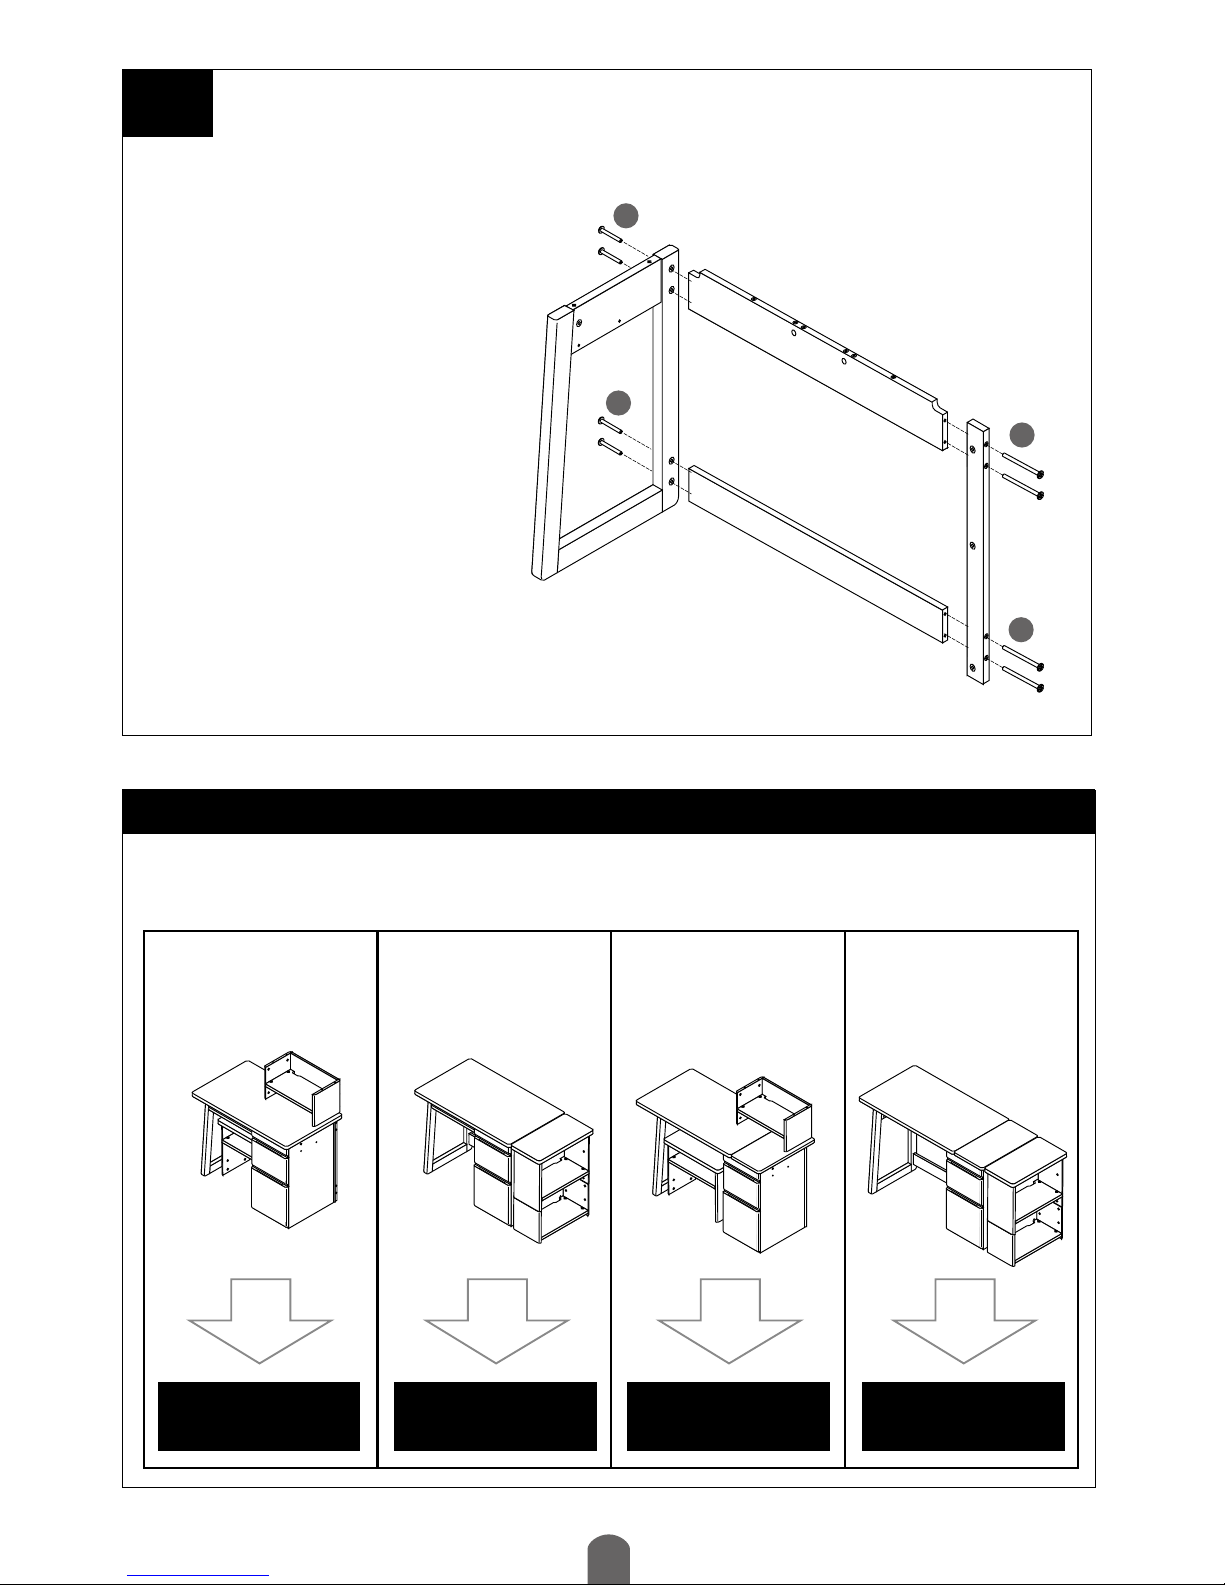
Assembly of leg, rear panel and support leg
* Set the protective material on the floor and carry out parts installation work on the material so as not to damage the members.
Common
(When the side cabinet is on the right side)
❶ Install the leg, rear panel (upper) and
rear panel (lower) with the connecting
bolts of
. (4 locations)
❷ Install the support leg, rear panel (upper)
and rear panel (lower) with the connecting bolts of
. (4 locations)
* When assembling the side cabinet on the
left side, assemble it from right-left
reverse.
c
c
b
b
Leg
Rear panel (upper)
Rear panel (lower)
Support leg
* Select the type which you want to assemble from the following, and proceed to the page of the appropriate assembling method.
* This section introduces assemblies in which the side cabinet is on the right side. However, each type can be assembled with the side cabinet
placed on the left side.
Go to page 6. Go to page 8. Go to page 10. Go to page 12.
Check the type to be assembled.
 Loading...