

Okamura 865SCC Assembly Manual
Assembly/
Instruction Manual
Important Document
Thank you for purchasing an Okamura Chair. Carefully read and understand the contents of this
Assembly/Instruction Manual to ensure proper assembly and use.
Chair
865SCC
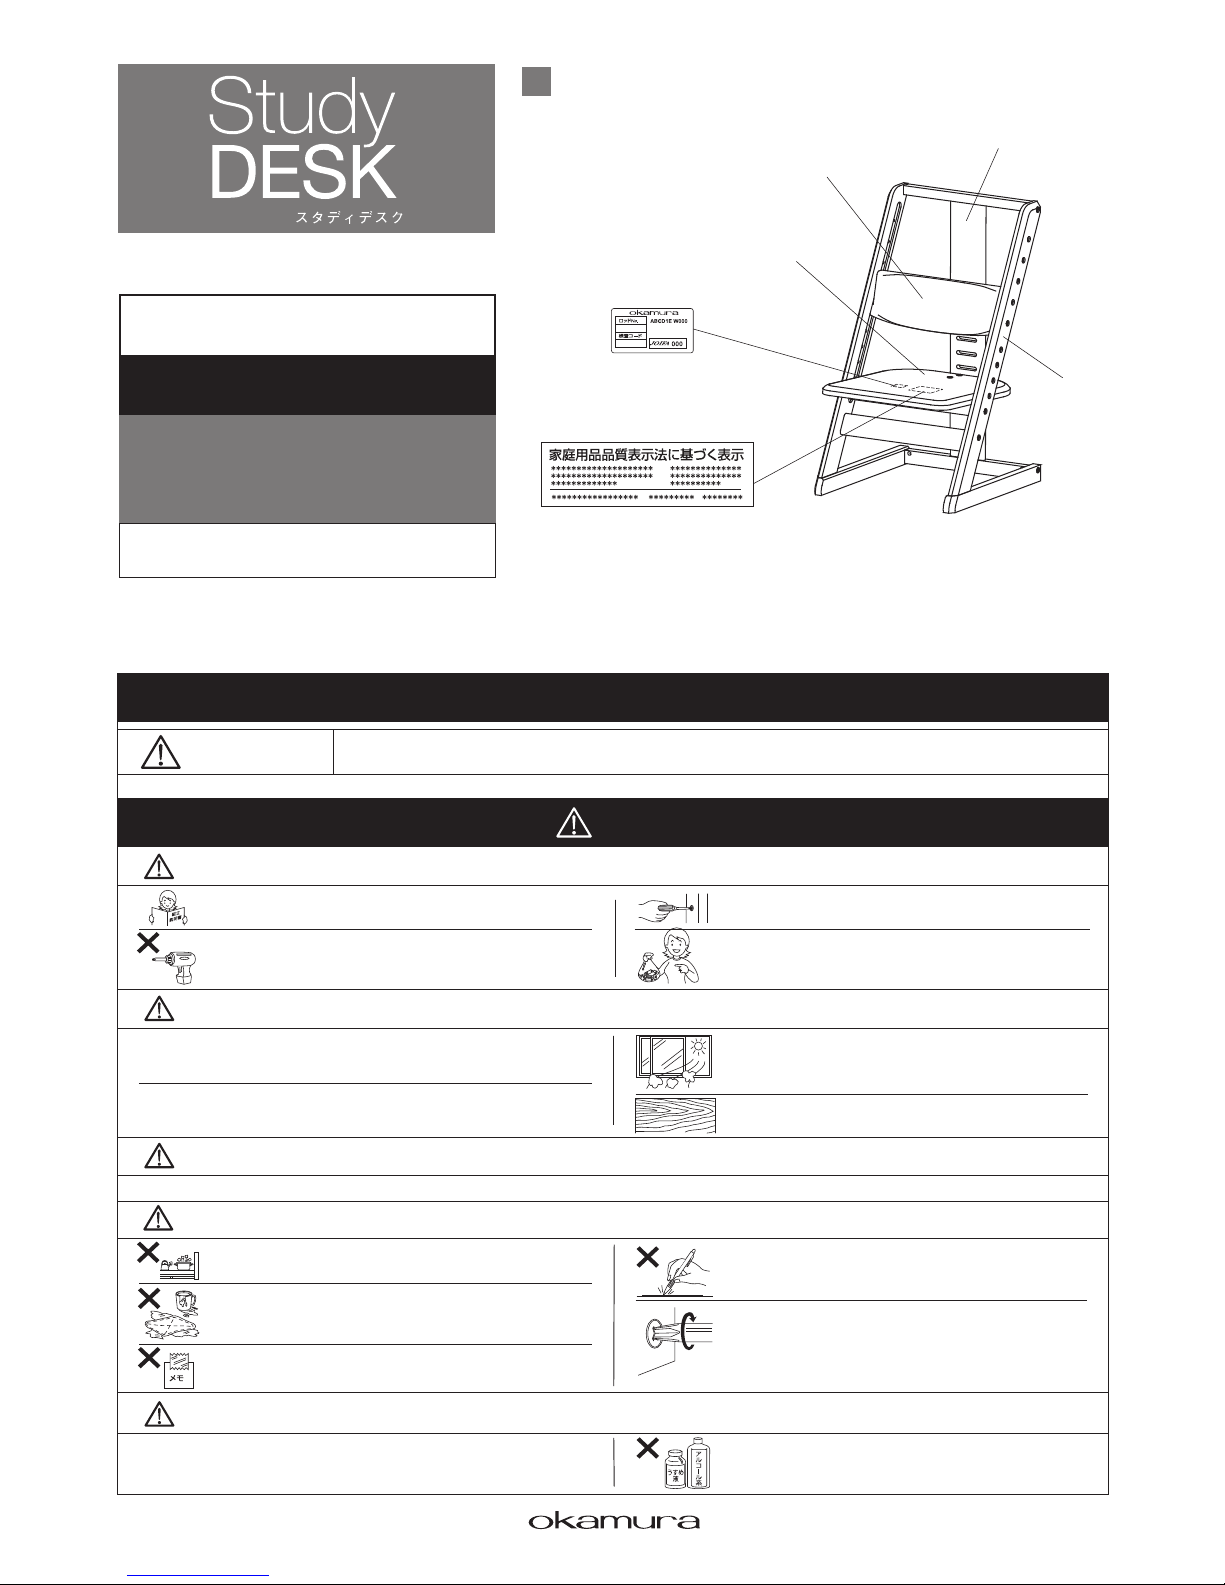
Diagram of assembled chair
(names of parts)
Seat back
Seat board
Frame
Leg
(Attached to bottom
side of seat)
Quality label
(Attached to bottom side
of seat)
Caution
Caution
For Your Safety
(Please observe the safety precautions)
This denotes information about a situation that may result in injury or physical damage
if the caution is ignored or the product is used improperly.
Assembly precautions
Handling precautions
Installation precautions
Ensuring long-term use
Cleaning precautions
To ensure proper assembly, carefully read and understand this
manual beforehand, use a screwdriver to securely tighten all bolts,
and make sure to use all of the specified parts.
Do not use an electric screwdriver for assembly. If too much force
is applied, it could damage the product or make it impossible to
remove the bolts later.
After assembly, place the product on a level surface, securely
tighten all bolts, and make sure that all parts are securely attached.
Depending on the type of assembly, there may be some unused
parts or materials left over. Store these items carefully, as they
may be required when reconfiguring the product. If any parts
become lost, they will need to be repurchased.
Do not handle the product roughly, and do not use it for any purpose other
than the intended use. Never climb or lean heavily on the product. Doing so
may damage the product or cause it to fall over.
When placing objects on the product, make sure not to exceed the maximum
load weight. If the maximum load weight is exceeded, it may damage the
product or cause it to fall over.
A newly purchased product may smell of the substances used
in the adhesives and coating. Periodically ventilate the room
until the smell subsides.
The color or wood grain of the product may differ slightly from
the catalog or sample product.
Avoid using the product in places exposed to direct sunlight, high temperatures, or high humidity, as it may cause deterioration, deformation, or discoloration.
Do not place hot objects directly on the product. Doing so may
cause deterioration, deformation, or discoloration.
Do not allow the product to remain wet for long periods of time,
and do not leave wet items such as a damp cloth on it. Doing so
may deform, stain, or corrode the surface. If the product becomes
wet, immediately wipe it dry.
Do not apply stickers, tape, or other adhesive materials to
the product. Doing so may cause the surface to peel.
Do not scrape the product with hard objects, and do not use
sharp writing instruments without placing a writing mat or
other protection under the paper. Doing so may deform or
scratch the surface.
Periodically check for loose bolts and parts, and retighten as
necessary. Using the product with loose bolts or parts could
damage or deform the product, or cause it to fall over.
Wipe with a well-wrung cloth. If the product is extremely dirty, wipe it with a
small amount of mild detergent mixed with water, then wipe it with a well-wrung
cloth to thoroughly remove all water and detergent. If a significant amount of
water remains on the product, it may deform or discolor the surface.
Never use alcohol or thinner to clean the product, as they may
damage the surface.
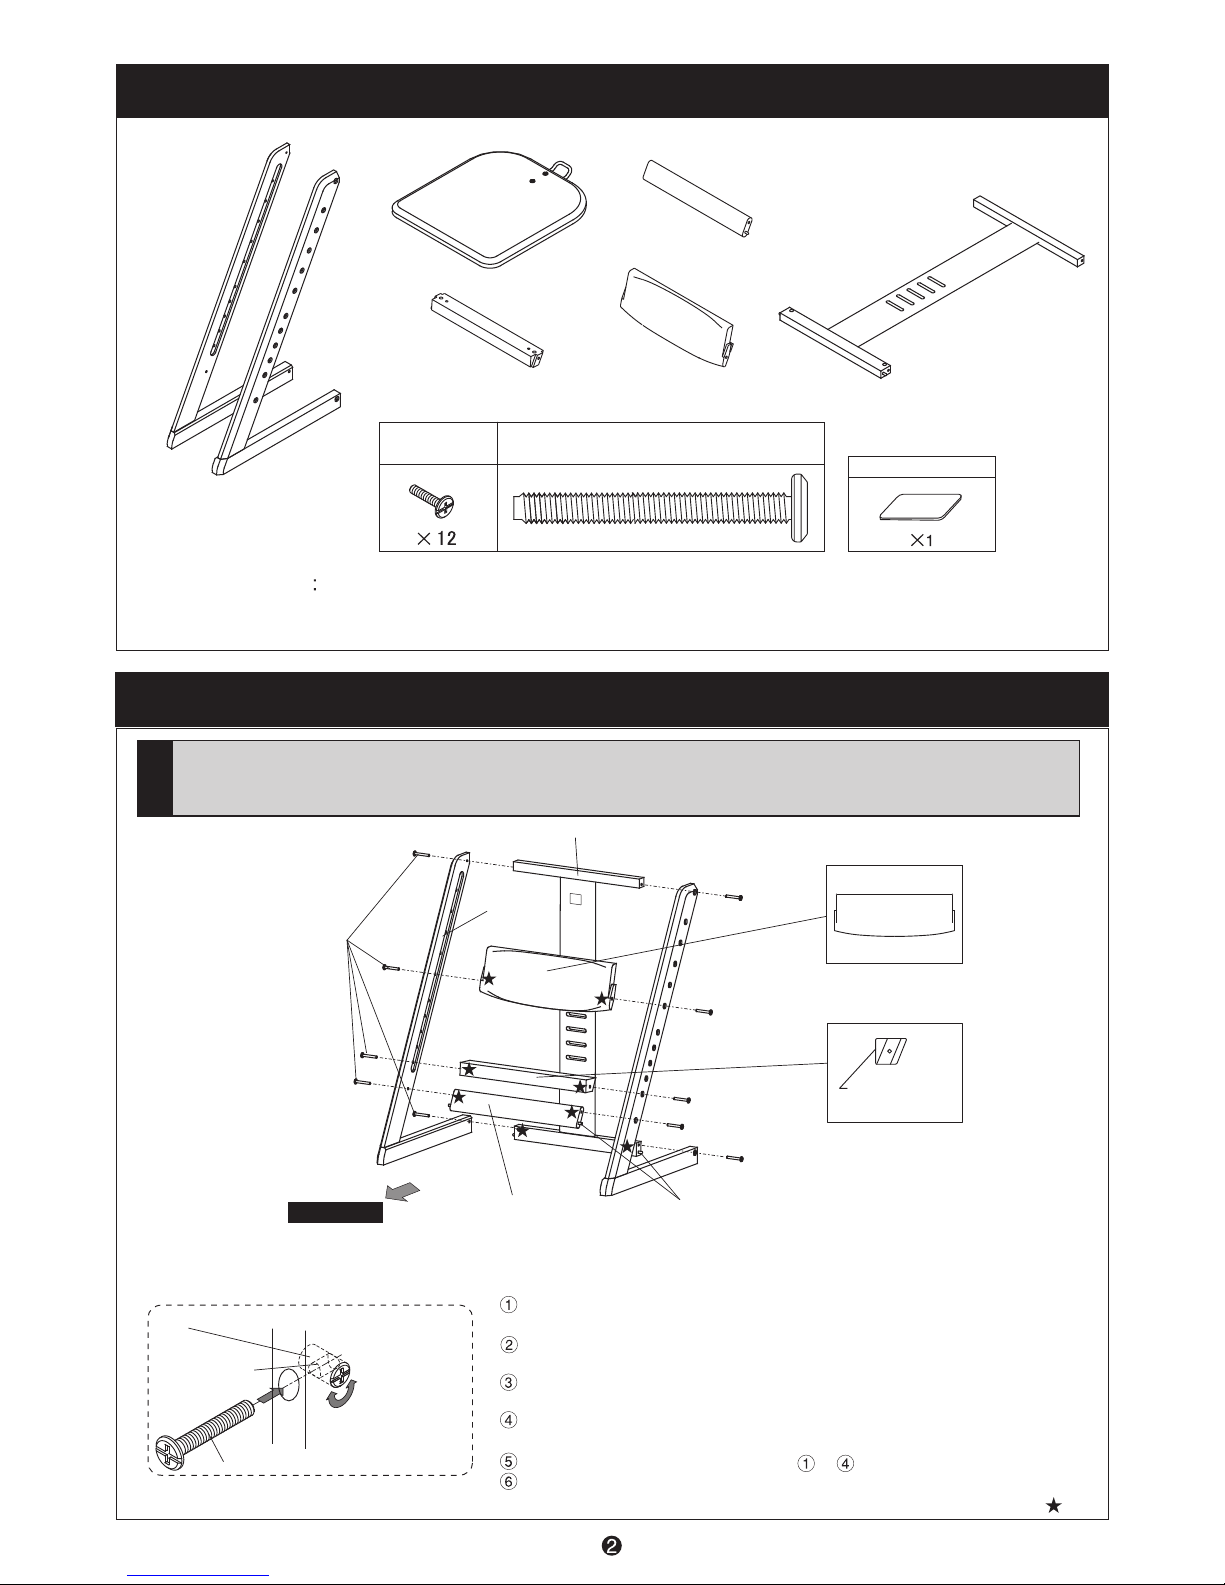
Parts list (Make sure to check the information below before you start assembling.)
Legs
Seat board
Seat support
Reinforcement bar
Seat back
(Sticker is attached to
front surface)
Frame
Connecting bolt
(M6 × 50 mm)
Actual size
Protective sticker
Note
Use a cross-head screwdriver for assembly.
Do not use an electric screwdriver or power tools, as they may damage the product.
Use a manual screwdriver instead.
Assembling the Chair
1
Attaching the legs, frame, seat back, seat support, and
reinforcement bar
Connecting bolt (50 mm)
Frame
Leg
Seat back
Top
Top
Bottom
Bottom
Seat support
Attach so that
this flat side is
facing forward.
Front surface
Reinforcement bar
(Attach so that the side without
the nut holes is facing forward.)
Dowel
(Note about round nuts)
Round nut (embedded in various parts)
Screw hole
Connecting bolt
Turn the
head of the
round nut to
align the
opening with
the screw
hole.
Complete the assembly procedure on one side (right or left) before
proceeding to the other side.
Insert the dowel at the bottom of the frame into the dowel hole at the
bottom of the leg, and use a connecting bolt to secure them together.
Use connecting bolts to secure legs and the top of the frame as
shown in the figure above.
Insert the seat back and seat support into the slot in the leg, and
hand-tighten the connecting bolts.
Insert the dowel at the end of the reinforcement into the dowel hole in
the leg, and use a connecting bolt to secure them together.
Attach the other leg. (Repeat steps to above to attach the other leg.)
Fully tighten the connecting bolts for all parts.
* The locations of each round nut are indicated with a star ( ).
 Loading...