

Page 1

1
© 2012 OJ Electronics A/S
Type OCC4/OCD4
English
67181 05/12 (MBC)
© 2012 OJ Electronics A/S
USER MANUAL
Contents
Menu overview ........................................................ 1
Introduction ............................................................. 2
First time settings ................................................... 2
General operation ................................................... 2
Back...................................................................... 2
Exit ........................................................................ 2
Operation mode ...................................................... 2
Auto mode ........................................................... 2
Manual mode ....................................................... 2
Comfort mode ......................................................2
Thermostat setup menus ....................................... 2
Event settings ......................................................... 2
User settings ........................................................... 3
Time and date ...................................................... 3
Child lock ............................................................. 3
Display settings ...................................................3
Event schedule .................................................... 3
Energy monitor .................................................... 3
Engineer settings .................................................... 3
Oset temperature ................................................3
Adaptive function.................................................. 3
Application ............................................................ 4
Temperature scale ................................................4
Language .............................................................. 4
Factory reset ......................................................... 4
Information ........................................................... 4
Back...................................................................... 4
Exit ........................................................................ 4
Error messages ......................................................4
Factory settings ...................................................... 4
Preset schedule .................................................... 4
(YHQWVHWWLQJV
8VHUVHWWLQJV
&RPIRUW0HQX0DQXDO
:HG
&
2IIVHWWHPS
$GDSWLYHIXQFWLRQ
$SSOLFDWLRQ
7HPSVFDOH
%DFNOLJKW
7LPHDQGGDWH
&KLOGORFN
'LVSOD\VHWWLQJV
(YHQWVFKHGXOH
(QHUJ\PRQLWRU
%DFN
([LW
/DQJXDJH
)DFWRU\UHVHW
,QIRUPDWLRQ
%DFN
([LW
(QJLQHHUVHWWLQJV
([LW
Menu
Page 2
2
© 2012 OJ Electronics A/S
Type OCC4/OCD4 English
Introduction
The thermostat can switch on your heating system at predetermined
times on dierent days of the week. For each day of the week, you
can set individual temperatures for 4 or 6 separate periods, called
events. Lowering the temperature when the home is unoccupied will
reduce your energy costs without reducing comfort.
The thermostat comes with a default schedule suitable for most
homes. Unless you change the settings, the thermostat will operate
in compliance with the default schedule.
Furthermore, the thermostat also features an adaptive function that
determines how long the floor takes to heat up and cool down as
the seasons change, and takes this into account when turning the
heating on or o. This ensures that the room is always up to temperature at the desired time. The adaptive function’s fuzzy logic takes
three days to determine the heat characteristics of the room before it
operates eciently.
First time settings
The first time you switch the interrupter ON “I”, language, time and
date must be set. The menu will automatically guide you through the
process.
• Choose your language with the Up and Down buttons and
confirm with OK.
• Set the actual hour and press the OK button. Then set the minutes. Press OK.
• Set the actual date: year, month and day. Confirm the settings
with the OK button.
The next menu allows you to select the application you want the
thermostat to control. If the thermostat is in the room to be heated,
select Room/limit. If the thermostat is outside of the room to be
heated, select Floor. Once you have chosen the required setting,
press OK.
You now need to select the actual floor covering so that the thermostat can take this into account during operation. Select the actual
floor covering and press OK.
You now need to enter the system load, i.e. the kW output of the
heating system powered by the thermostat. Select the appropriate
load and press OK.
The thermostat is now ready for use and your underfloor heating will
operate in accordance with the pre-programmed Event schedule.
See Factory Settings for full details of this.
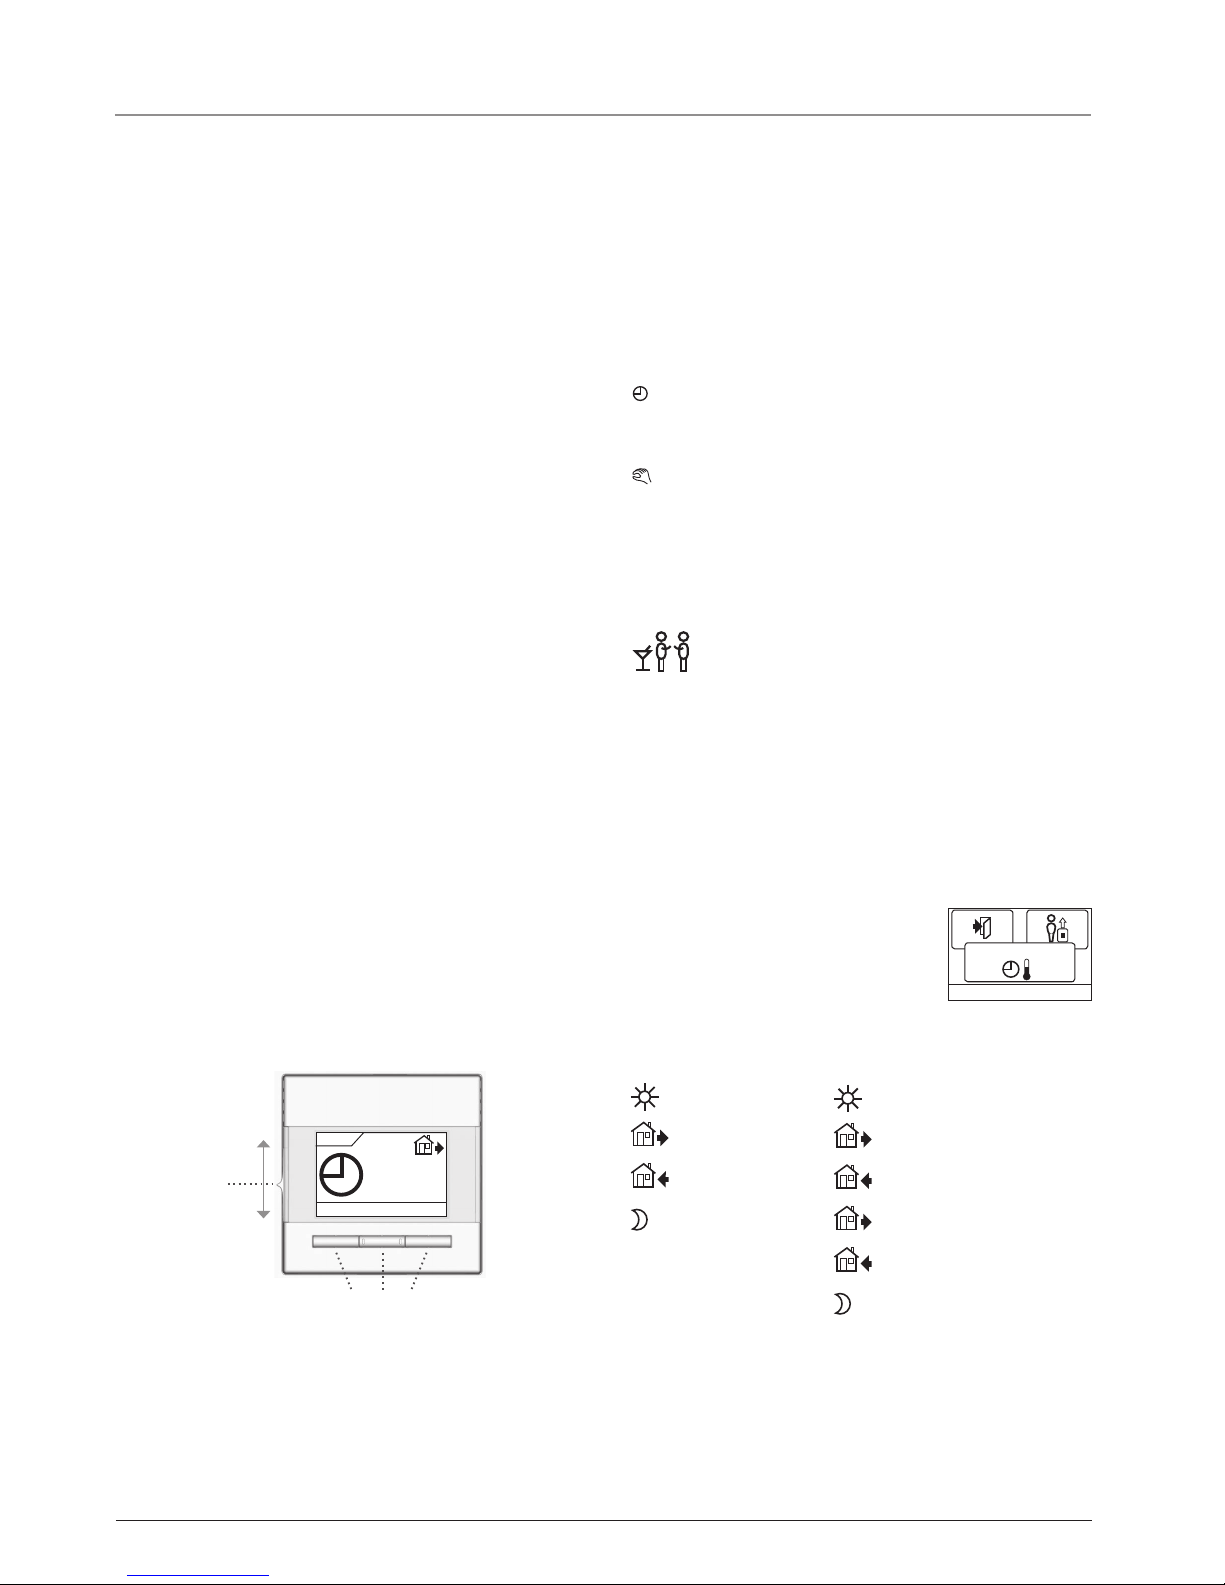
Navigation buttons
Power interrupter
&RPIRUW0HQX0DQXDO
:HG
&
General operation
The interrupter button allows you to turn the thermostat on “I” and
o “0” by sliding the button up and down. When the thermostat is
switched o “0”, the relay disengages. All settings, including time
and date, will be remembered.
The thermostat is intuitively operated using the navigation buttons.
The function of each button is indicated above the button in the
display.
Back
In various parts of the menus and submenus you will find the Back
menu item.
Use Back to return to the last step.
Exit
Returns to initial dispay.
Operation mode
The thermostat features three dierent modes of temperature control:
Auto mode
Select Auto if you want the temperature to be controlled automa-
tically via the 4 or 6-event schedule.
Manual mode
Select Manual to cancel the programmed Event schedule (e.g.
during holidays) and to set the required temperature manually. You
may, for example, want to adjust the temperature to 5°C for frost
protection while you are away.
• Press Manual, confirm with OK and choose the required tempera-
ture.
Comfort mode
Select Comfort to set a temporary comfort temperature
(so-called party mode) for a single event.
• Press Comfort, confirm with OK and choose the required tempe-
rature. Then enter the required duration of comfort mode.
After the set time has elapsed, the thermostat will automatically
revert to Auto mode.
Please note: Comfort mode is a temporary manual setting that will
be automatically cancelled by the next event in the programmed
Event schedule.
Thermostat setup menus
The menu allows you to select the following options:
2.
(YHQWVHWWLQJV
Event settings
Allows you to have the temperature controlled automatically in accordance with a
program of your own choice. You can select
temperature settings for 4 or 6 dierent
events during the day:
4-Events* 6-Events*
Morning Morning
Daytime Daytime
Evening Daytime 2
Night Evening
Evening 2
Night
* Depending on the chosen schedule, see User Settings/Event
schedule.
The thermostat is pre-programmed with a Event schedule for easy
and economic heating control, see Preset schedule under Factory
settings. The schedule can be easily changed in the following way:
Page 3

3
© 2012 OJ Electronics A/S
1. Press the OK button to activate the Event settings display.
2. Choose the days for which you want to change the settings,
Mon-Fri or Sat-Sun using the up or down button. Press OK.
3. Now select the time and temperature for each daily event in the
program. Press OK and set the start time for the event concerned.
Confirm with OK. Set the temperature for this event and confirm
with OK.
4. After setting the required events, select Exit in the menu to return
to the initial display.
7HPS
2.
&
& &
7LPH
2.
0D[
0LQ
2.
8VHUVHWWLQJV
User settings
In the user settings menu you can change the
following items:
• Time and date
• Child lock
• Display settings
• Event schedule
• Energy monitor
2.
7LPHDQGGDWH
Time and date
Press OK and set the actual time in hours
and minutes.
The date will then be displayed. Set the date
and confirm with OK.
2.
&KLOGORFN
Child lock
Allows you to lock the thermostat settings,
e.g. in public or other places where you do
not want the settings changed.
Press OK and set the child lock to On using
the down button. Confirm with OK.
The child lock can be unlocked by pressing both the Comfort and
Manual buttons simultaneously for 5 seconds.
2.
'LVSOD\VHWWLQJV
Display settings
Allows you to select what is shown on the
initial display.
Time/day: Shows the actual time and day at
the top of the display.
Set temp.: Shows the current temperature
setting.
Act. temp*.:Shows the actual measured temperature.
Scr. saver: Switches o the display after 30 seconds if no button is
pressed. Any subsequent press of a button reactivates
the display. The thermostat remains on and runs the
selected program.
Press the OK button to select or deselect the display options. Then
select Exit in the menu to return to the initial display and view your
chosen settings.
* Only with floor application.
2.
(YHQWVFKHGXOH
Event schedule
Allows you to choose the type of weekly
Event schedule you require.
5:2 : Monday to Friday with 4 events
and Saturday to Sunday with 2
events.
Typically used if you work from Monday to Friday.
6:1 : Monday to Saturday with 4 events and Sunday with
2 events. Typically used if you work from Monday to
Saturday.
7:0 : Monday to Sunday with 4 individual events. Allows
you to choose individual programs for each of the 7
days of week.
5:2 6-event : Monday to Friday with 6 events and Saturday and
Sunday with 2 events. Typically used if you work
from Monday to Friday.
6:1 6-event : Monday to Saturday with 6 events and Sunday with
2 events. Typically used if you work from Monday to
Saturday.
7:0 6-event: Monday to Sunday with 6 events. This allows you
to choose individual programs for each day of the
week.
0:7 6-event: Monday to Sunday with 6 events and the same
program for all days of the week.
Select the required 4 or 6 event schedule and confirm with OK.
For instructions on programming the time and temperature for the
Event schedule, see Event settings.
2.
(QHUJ\PRQLWRU
Energy monitor
Allows you to view energy consumption for
the past 2 days, 30 days or 365 days.
Press OK for the chosen period. The value
in per cent (%) shows the relative amount of
time the heating has been on. The following
figure is the cost for the selected period. To ensure correct calculation, check the settings for currency, price per kWh and load.
Currency: Press OK and chose the required currency.
Confirm with OK.
Cost/unit: Press OK and set the actual cost of electricity.
The cost must be entered per kWh. Press OK.
Load: Press OK and enter the connected heating power.
The value must be in watt (W). Press OK.
Leave the menu by pressing Exit.
2.
(QJLQHHUVHWWLQJV
Engineer settings
The Engineer settings menu contains the
following options:
• Oset temperature
• Adaptive function
• Application
• Temperature scale
• Language
• Factory reset
• Information
2.
2IIVHWWHPS
Offset temperature
If the actual measured temperature does not
corresponding to the thermostat value, you
can adjust the thermostat by osetting the
temperature.
Press OK and enter the value of the measured temperature. Confirm with OK.
2.
$GDSWLYHIXQFWLRQ
Adaptive function
Ensures that the required temperature has
already been reached when you get up in the
morning or come home from work. After just
a few days, the adaptive function will have
automatically calculated when the heating
must be turned on.
Press OK and set the function to On. Confirm with OK.
Type OCC4/OCD4 English
Page 4
4
OJ ELECTRONICS A/S
Stenager 13B · DK-6400 Sønderborg
Tel.: +45 73 12 13 14 · Fax +45 73 12 13 13
oj@ojelectronics.com · www.ojelectronics.com
2.
$SSOLFDWLRQ
Application
Set the type of regulation used.
There are 4 options:
Floor reg. : The thermostat regulates floor
temperature only. A floor sensor must be connected.
Room reg. : The thermostat regulates room temperature only.
Room/limit : The thermostat regulates room temperature with min.
and max. limits for floor temperature. A floor sensor
must be connected.
Regulator : The thermostat functions as a simple regulator and no
sensors are used. The setting is a percentage.
Press OK and select the required application. Confirm with OK.
2.
7HPSVFDOH
Temperature scale
Allows you to set the temperature range
within which the thermostat can be set. It is
then only possible to set a temperature within
this range in auto, comfort and manual mode.
Press OK to highlight Min temperature. Use
the up or down button to select the minimum permissible temperature. Press OK and select the maximum permissible temperature.
Confirm the settings with OK.
2.
%DFNOLJKW
Display illumination
There are three settings for the display backlighting:
• Auto: Backlighting is activated whenever a
key is pressed and goes out automatically
30 seconds after the last key press.
• On: Backlighting continuously on.
• Heating active: Backlighting comes on when heat is called for by
the thermostat.
Select the desired backlighting setting and confirm with OK.
2.
/DQJXDJH
Language
Allows the language used on the display to
be changed.
Press OK and select the required language.
Confirm with OK.
2.
)DFWRU\UHVHW
Factory reset
Allows factory settings to be restored. Your
personal settings will be lost, see Factory
settings.
Press OK and choose Reset in the menu.
Confirm with OK.
2.
,QIRUPDWLRQ
Information
Displays the thermostat software version.
Back
In various parts of the menus and submenus
you will find the Back menu item.
Use Back to return to the last step.
Exit
Returns to initial dispay.
Error messages
If a fault or error occurs, the thermostat will display an error code as
follows:
E0: Internal failure. The thermostat is defective. Replace thermostat.
E1: Internal sensor defective or short-circuited.
E2: External sensor defective or short-circuited.
E5: Internal overheating. Inspect the installation.
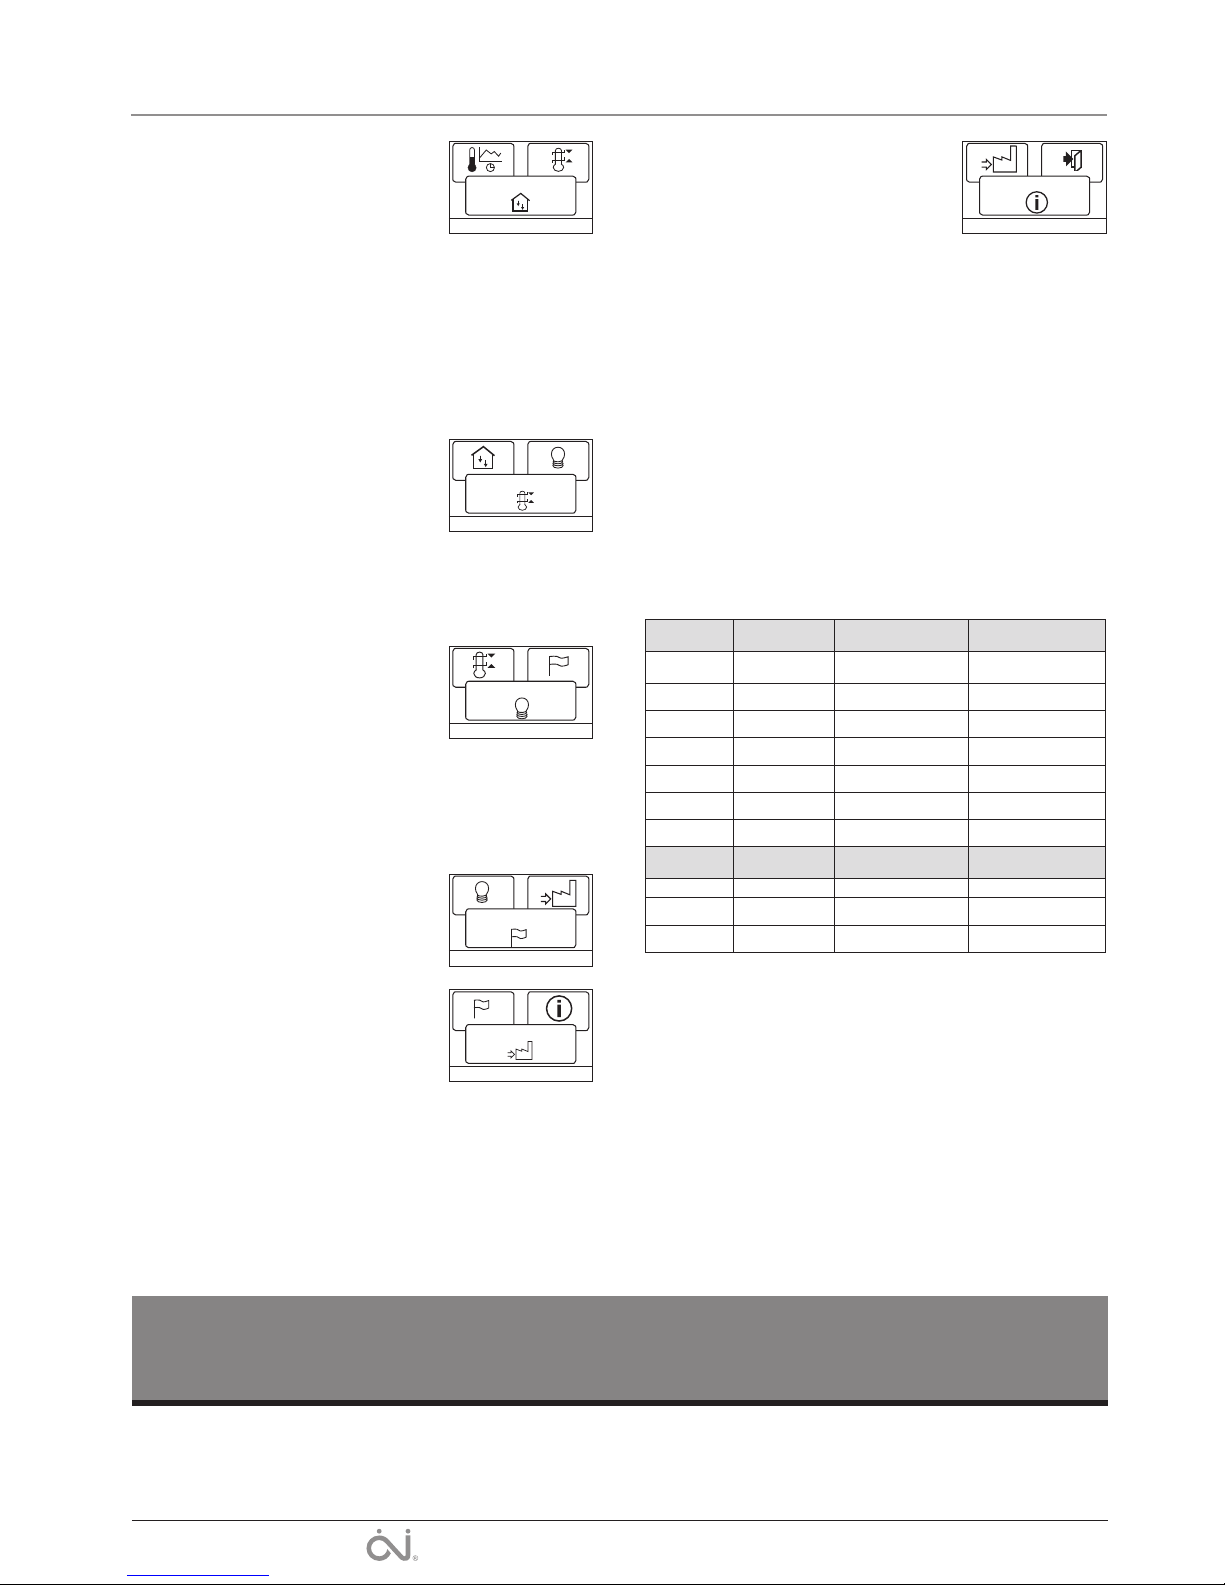
Factory settings
Preset schedule
Type OCC4/OCD4 English
The trademark is registered and belongs to OJ Electronics A/S · © 2012 OJ Electronics A/S
Day 1-5
Event Time With floor sensor With room sensor
Morning 06:00-08:00 25°C 20°C
Daytime 08:00-16:00 20°C 15°C
Daytime 2 08:00-16:00 20°C 15°C
Evening 16:00-23:00 25°C 20°C
Evening 2 16:00-23:00 25°C 20°C
Night 23:00-06:00 20°C 15°C
Day 6-7
Event Time With floor sensor With room sensor
Day 08:00-23:00 25°C 20°C
Night 23:00-08:00 20°C 15°C
Page 5

5
© 2012 OJ Electronics A/S
BENUTZERHANDBUCH
Inhalt
Menu overview ...........................5
Einführung .............................. 6
Erste Einstellungen .......................6
Allgemeiner Betrieb .......................6
Zurück ................................6
Beenden ..............................6
Betriebsart ..............................6
Auto-Modus ...........................6
Manueller Modus .......................6
Komfortmodus ..........................6
Thermostat-Konfigurationsmenüs ...........6
Uhrenbetrieb ............................6
Benutzer-Einstellungen ....................7
Uhrzeit und Datum ......................7
Kindersicherung ........................7
Display-Einstellungen ....................7
Wochenprogramm ...................... 7
Energieverbrauch .......................7
Service-Einstellungen ..................... 7
Oset-Temperatur .......................7
Selbstlernfunktion .......................8
Einstellung der Regelungsart ...............8
Temperaturskala ........................8
Display-Beleuchtung ....................8
Sprache ...............................8
Rückstellung auf die Werkseinstellungen .....8
Information ............................8
Zurück ................................8
Beenden ..............................8
Fehlermeldungen .........................8
Werkseinstellungen ....................... 8
Voreingestellter Zeitplan ..................8
8KUHQEHWULHE
%HQXW]HU(LQVWHOO
7HPS$EJOHLFK
6HOEVWOHUQIXQNWLRQ
$QZHQGXQJ
7HPS6NDOD
%HOHXFKWXQJ
8KU]HLW'DWXP
.LQGHUVLFKHU
'LVSOD\(LQVWHOO
:RFKHQSURJ
(QHUJLHYHUEUDXFK
=XUFN
%HHQGHQ
6SUDFKH
:HUNHLQVWHOOXQJ
,QIRUPDWLRQ
=XUFN
%HHQGHQ
6HUYLFH(LQVWHOO
%HHQGHQ
.RPIRUW0HQ0DQXHOO
0L
&
Menü
Modell OCC4/OCD4
Deutsch
Page 6

6
© 2012 OJ Electronics A/S
Einführung
Mit dem Thermostat FRTD 903 (Fußbodentemperaturregler mit
Bodenfühler / Raumtemperaturregler mit Begrenzungsfühler)
kann das Heizsystem zu vorgegebenen Zeiten an verschiedenen
Wochentagen ein- bzw. ausgeschaltet werden. Mit 28 Programmplätzen ermöglicht der Thermostat bis zu 4 oder 6 separaten
Schaltvorgänge pro Tag mit verschiedenen Tages-und Absenktemperaturen. Ab Werk enthält der Thermostat eine Standardprogrammierung (Werkseinstellung), die für die viele Heizsysteme und
Kundenwünsche geeignet ist. Wenn diese Programmierung nicht
geändert wird, arbeitet der Thermostat mit der Standardprogrammierung (siehe Werkseinstellungen).
Darüber hinaus verfügt der Thermostat auch über eine Lernfunktion, die festhält, wie lange es dauert, den Fußboden im Wandel der
Jahreszeiten zu erwärmen und abzukühlen, und dies beim Ein- und
Ausschalten der Heizung berücksichtigt. Damit wird sichergestellt,
dass der Raum zum gewünschten Zeitpunkt auf Temperatur ist.
Nach drei Tagen hat die Fuzzy-Logik der Lernfunktion die Heizcharakteristik des Raums erfasst und arbeitet ezient.
Erste Einstellungen
Beim ersten Einschalten, Schalter auf EIN „I“, sind Sprache,
Uhrzeit und Datum einzustellen. Das Menü führt Sie automatisch
durch diesen Prozess.
• Mit den Pfeiltasten wählen Sie Ihre Sprache und mit OK bestäti gen Sie diese.
• Die aktuelle Stunde einstellen und mit OK betätigen. Dann die
Minuten einstellen. Mit der OK-Taste betätigen.
• Aktuelles Datum: Jahr, Monat und Tag einstellen. Die Einstellungen mit der OK-Taste bestätigen.
Das nächste Menü ermöglicht Ihnen, die für die Thermostatsteuerung gewünschte Anwendung festzulegen. Befindet sich
der Thermostat im zu beheizenden Raum, Raum/Grenze wählen.
Befindet sich der Thermostat außerhalb des zu beheizenden Raums,
Fußboden wählen. Nach Wahl der gewünschten Einstellung, OK
betätigen.
Jetzt ist der eigentliche Bodenbelag zu wählen, damit der Thermostat dies für den Betrieb berücksichtigen kann. Bitte den Fußbodenbelag wählen und OK betätigen.
Als nächster Schritt ist die Anlagenleistung einzugeben, d. h. der
Bedarf an kW der vom Thermostat gesteuerten Heizanlage. Bitte die
entsprechende Lastgröße wählen und OK betätigen.
Der Thermostat ist jetzt einsatzbereit und Ihre Fußbodenheizung
wird übereinstimmend mit dem vorprogrammierten Phasen-Zeitablauf betrieben. Siehe Werkseinstellungen für weitere Einzelheiten.
Navigationstasten
Betriebsschalter
.RPIRUW0HQ0DQXHOO
0L
&
Allgemeiner Betrieb
Aktivieren und Deaktivieren des Thermostats erfolgen durch hinauf- oder herunterschieben des Schalters auf Ein „I“ und Aus „0“.
Bei ausgeschaltetem Thermostat, Aus „0“, ist das Relais inaktiv.
Alle Einstellungen, einschließlich Uhrzeit und Datum, werden
gespeichert.
Der Thermostat lässt sich intuitiv mittels der Navigationstasten
bedienen.
Die Funktion jeder Taste wird über ihr am Display angezeigt.
Zurück
Dadurch gelangen Sie zurück zur vorherigen Ebene.
Beenden
Kehrt zum Startdisplay zurück.
Betriebsart
Der Thermostat hat drei unterschiedliche Temperaturregelungsmodi zu bieten:
Auto-Modus
Wählen Sie Auto, wenn die Temperatur automatisch mit Hilfe
des Phasen-Programms geregelt werden soll.
Manueller Modus
Wählen Sie Manuell, um den Phasen-Zeitablauf zu übersteuern
(z. B. während des Urlaubs) und um die gewünschte Temperatur
manuell einzustellen. Gegebenenfalls kann die Temperatur während Ihrer Abwesenheit zum Frostschutz z. B. auf 5°C festgelegt
werden.
• Manuell betätigen, mit OK bestätigen und die gewünschte
Temperatur einstellen.
Komfortmodus
Wählen Sie Komfort, um vorübergehend eine Komfort-
Temperatur für ein besonderes Ereignis (den so genannten Party-Modus) einzustellen.
• Komfort betätigen, mit OK bestätigen und die gewünschte Tem-
peratur einstellen. Dann die gewünschte Dauer des Komfortmo-
dus‘ eingeben.
Nach Ablauf der eingestellten Zeit kehrt der Thermostat automatisch zum Auto-Modus zurück.
Bitte beachten: Der Komfortmodus ist eine zwischenzeitliche, manuelle Einstellung, die automatisch mit Beginn der nächsten Phase
im Phasen-Programm aufgehoben wird.
Thermostat-Konfigurationsmenüs
Mit dem Menü lassen sich folgende Optionen auswählen:
2.
8KUHQEHWULHE
Uhrenbetrieb
Ermöglicht Ihnen eine automatische Temperaturregelung mit einem Programm Ihrer
Wahl. Sie können die Temperaturen für 4 oder
6 verschiedene Phasen während des Tages
einstellen:
4-Phasen* 6-Phasen*
Tag Tag
Abwesend Abwesend
Abwesend Abwesend 2
Nacht Abwesend
Abwesend 2
Nacht
* Abhängig vom gewählten Zeitablauf, siehe Benutzer-Einstellungen/Phasen-Zeitablauf.
Modell OCC4/OCD4 Deutsch
Page 7

7
© 2012 OJ Electronics A/S
Der Thermostat ist mit einem Phasen-Zeitplan für einfache und
wirtschaftliche Heizungsregelung vorprogrammiert, siehe Vorein-
gestellter Zeitplan unter Werkseinstellungen. Der Zeitplan lässt
sich einfach wie folgt ändern:
1. Die OK-Taste betätigen, um das Display zu den Phasen-Einstellungen zu aktivieren.
2. Wählen Sie mit den Pfeiltasten, für welche Tage, Mo-Fr oder Sa-
So, die Einstellungen geändert werden sollen. Mit OK betätigen.
3. Jetzt die Uhrzeit und Temperatur für jede tägliche Phase im
Programm auswählen. Mit OK betätigen und den Startzeitpunkt
für die betreende Phase einstellen. Mit OK bestätigen. Die
Temperatur für diese Phase einstellen und mit OK bestätigen.
4. Nach Einstellung der gewünschten Phasen Beenden taste im
Menü betätigen, um zum Startdisplay zurückzukehren.
7HPS
2.
&
& &
7LPH
2.
0D[
0LQ
2.
%HQXW]HU(LQVWHOO
Benutzer-Einstellungen
In den Benutzer-Einstellungen lassen sich
folgende Punkte ändern:
• Uhrzeit und Datum
• Kindersicherung
• Display-Einstellungen
• Wochenprogramm
• Energieverbrauch
2.
8KU]HLW'DWXP
Uhrzeit und Datum
OK betätigen und die aktuelle Uhrzeit in
Stunden und Minuten einstellen.
Danach wird das Datum angezeigt. Das Datum einstellen und mit OK bestätigen.
2.
.LQGHUVLFKHU
Kindersicherung
Ermöglicht Ihnen die Thermostateinstellungen
zu verriegeln, z. B. an öentlichen Orten oder
Standorten, wo Sie ein Ändern der Einstellungen verhindern möchten.
OK betätigen und die Kindersicherung mit
der Pfeiltaste auf Ein stellen. Mit OK bestätigen.
Die Kindersicherung lässt sich durch gleichzeitiges 5 Sekunden
langes Betätigen der Komfort- und Manuell-Tasten aufheben.
2.
'LVSOD\(LQVWHOO
Display-Einstellungen
Erlaubt Ihnen die Anzeigen am Startdisplay
auszuwählen.
Uhrzeit/Tag: Zeigt im Display oben
aktuelle Uhrzeit und Tag an.
Temp.Sollwert: Zeigt die aktuelle Tempera-
tureinstellung an.
Aktuelle Temp.* Zeigt die aktuell gemessene Temperatur an.
Anzeigedauer: Schaltet das Display aus, wenn 30 Sekunden lang
keine Taste betätigt wurde. Jede Tastenbetätigung
reaktiviert das Display. Der Thermostat bleibt aktiv
und arbeitet nach dem gewählten Programm.
OK-Taste betätigen, um die Anzeigeoptionen auszuwählen oder die
Auswahl aufzuheben. Danach im Menü Beenden wählen, um zum
Startbildschirm zurückzukehren und die gewählten Einstellungen
zu betrachten.
* Nur bei Fußbodenanwendung.
2.
:RFKHQSURJ
Wochenprogramm
Ermöglicht Ihnen den passenden PhasenWochenprogramm auszuwählen.
5:2 : Montag bis Freitag mit 4
Phasen und Samstag bis
Sonntag mit 2 Phasen
z.B. wenn Sie Montag bis Freitag arbeiten.
6:1 : Montag bis Samstag mit 4 Phasen und Sonntag
mit 2 Phasen z.B. wenn Sie Montag bis Samstag
arbeiten.
7:0 : Montag bis Sonntag mit 4 individuellen Phasen.
Ermöglicht Ihnen für jeden der 7 Wochentage
individuelle Programme zu wählen.
5:2 6-Phasen: Montag bis Freitag mit 6 Phasen und Samstag bis
Sonntag mit 2 Phasen. Typisch angewandt, wenn
Sie Montag bis Freitag arbeiten.
6:1 6-Phasen: Montag bis Samstag mit 6 Phasen und Sonntag
mit 2 Phasen. Typisch angewandt, wenn Sie Montag bis Samstag arbeiten.
7:0 6-Phasen: Montag bis Sonntag mit 6 Phasen. Das ermöglicht
Ihnen die Wahl von individuellen Programmen für
jeden Tag der Woche.
0:7 6-Phasen: Montag bis Sonntag mit 6 Phasen und das gleiche
Programm für alle Tage der Woche.
Wählen Sie den gewünschten 4 oder 6 Wochenprogramm und
bestätigen Sie mit OK.
Anleitung zur Programmierung von Uhrzeit und Temperatur für den
Phasen-Zeitplan, siehe Uhrenbetrieb.
2.
(QHUJLHYHUEUDXFK
Energieverbrauch
Ermöglicht Ihnen den Energieverbrauch für
die letzen 2 Tage, 30 Tage oder 365 Tage
anzuzeigen.
Den gewünschten Zeitraum mit OK bestätigen. Angezeigt wird die relative Einschaltzeit
der Heizung in Prozent (%). Und daneben die Kosten für den
gewählten Zeitraum. Um eine korrekte Berechnung zu gewährleisten, sind die Einstellungen für Währung, Preis je kWh und Leistung
zu kontrollieren.
Währung: OK betätigen und die gewünschte Währung wählen.
Mit OK bestätigen.
Strompreis: Mit OK betätigen und den aktuellen Strompreis einge-
ben.
Die Kosten sind je kWh anzugeben. OK betätigen.
Leistung: OK betätigen und die angeschlossene Heizleistung
eingeben.
Der Wert ist in Watt (W) anzugeben. OK betätigen.
Das Menü durch Betätigen von Beenden verlassen.
2.
6HUYLFH(LQVWHOO
Service-Einstellungen
Das Service-Menü umfasst folgende Optionen:
• Oset-Temperatur
• Lernfunktion
• Anwendung
• Temperaturskala
• Sprache
• Rückstellung auf die Werkseinstellungen
• Information
2.
7HPS$EJOHLFK
Offset-Temperatur
Entspricht die aktuell gemessene Temperatur
nicht dem angezeigten Wert am Thermostat,
lässt sich der Thermostat durch Ausgleich der
Temperatur justieren.
Modell OCC4/OCD4 Deutsch
Page 8

8
OJ ELECTRONICS A/S
Stenager 13B · DK-6400 Sønderborg
Tel.: +45 73 12 13 14 · Fax +45 73 12 13 13
oj@ojelectronics.com · www.ojelectronics.com
2.
6SUDFKH
Sprache
Ermöglicht es die Sprache am Display zu
ändern.
OK betätigen und die gewünschte Sprache
wählen. Mit OK bestätigen.
2.
:HUNHLQVWHOOXQJ
Rückstellung auf die
Werkseinstellungen
Ermöglicht es die Werkseinstellungen wieder
herzustellen. Ihre persönlichen Einstellungen
gehen dabei verloren, siehe Werkseinstel-
lungen.
OK betätigen und im Menü Werkeinstellung wählen. Mit OK
bestätigen.
2.
,QIRUPDWLRQ
Information
Zeigt die Softwareversion des Thermostats
an.
Zurück
Dadurch gelangen Sie zurück zur vorherigen Ebene.
Beenden
Kehrt zum Startdisplay zurück.
Fehlermeldungen
Beim Auftreten eines Fehlers oder einer Störung wird am Thermo stat
ein Fehlercode angezeigt, der folgende Bedeutung haben kann:
E0: Interne Störung. Der Thermostat ist defekt.
Thermostat austauschen.
E1: Interner Fühler defekt oder kurzgeschlossen.
Thermostat tauschen.
E2: Externer Fühler defekt oder kurzgeschlossen. Fühler überprüfen.
Gegenfalls tauschen.
E5: Interne Überhitzung. Installation kontrollieren.
Werkseinstellungen
Voreingestellter Zeitplan
Modell OCC4/OCD4 Deutsch
Die Marke ist eine eingetragene Marke der OJ Electronics A/S · © 2012 OJ Electronics A/S
OK betätigen und den Wert der gemessenen Temperatur eingeben. Mit OK bestätigen.
2.
6HOEVWOHUQIXQNWLRQ
Selbstlernfunktion
Diese Funktion gewährleistet, dass die
gewünschte Temperatur beim Aufstehen am
Morgen oder bei der Rückkehr nach Hause
bereits erreicht ist. Schon nach wenigen
Tagen hat die Lernfunktion automatisch berechnet, wann der Thermostat die Heizung zuschalten muß.
OK betätigen und die Funktion auf Ein stellen. Mit OK bestätigen.
2.
$QZHQGXQJ
Einstellung der Regelungsart
Benutzten Regelungstyp einstellen.
4 Optionen sind verfügbar:
Fußboden: Der Thermostat regelt aus-
schließlich die Bodentemperatur. Ein Bodenfühler ist
anzuschließen.
Raumreg. : Der Thermostat regelt ausschließlich die Raum-
temperatur.
Raum/Bgr: Der Thermostat regelt die Raumtemperatur mit
min. und max. Grenzen für die Bodentemperatur.
Ein Bodenfühler ist anzuschließen.
Regler: Der Thermostat wirkt als einfacher Regler und es
werden keine Fühler angewandt. Die Einstellung ist
ein Prozentwert.
OK betätigen und die gewünschte Anwendung wählen. Mit OK
bestätigen.
2.
7HPS6NDOD
Temperaturskala
Ermöglicht Ihnen die Einstellung des Temperaturbereichs, in welchem der Thermostat
eingestellt werden kann. Danach ist es im
Auto-, Komfort- und manuellen Modus nur
möglich die Temperatur innerhalb dieses
Bereichs einzustellen.
OK betätigen um die Min. Temperatur zu markieren. Mit den Pfeiltasten die zulässige minimale Temperatur einstellen. OK betätigen
und die zulässige maximale Temperatur einstellen. Die Einstellungen mit OK bestätigen.
2.
%HOHXFKWXQJ
(&2
Display-Beleuchtung
Für die Hintergrundbeleuchtung gibt es drei
Einstellungsmöglichkeiten:
• Auto: Die Beleuchtung wird auf Knopfdruck
aktiviert und erlischt automatisch 30
Sekunden nach der letzten Tastenbetätigung.
• Ein: Leuchtet ständig.
• Heizbetrieb: Die Beleuchtung schaltet bei Wärmebedarfsmeldung
durch den Thermostat ein.
Die gewünschte Hintergrundbeleuchtung wählen, und mit OK
bestätigen.
Tag 1-5
Phase Uhrzeit Mit Bodenfühler Mit Raumfühler
Tag 06:00-08:00 25°C 20°C
Abwesend 08:00-16:00 20°C 15°C
Abwesend 2 08:00-16:00 20°C 15°C
Anwesend 16:00-23:00 25°C 20°C
Anwesend 2 16:00-23:00 25°C 20°C
Nacht 23:00-06:00 20°C 15°C
Tag 6-7
Phase Uhrzeit Mit Bodenfühler Mit Raumfühler
Tag 08:00-23:00 25°C 20°C
Nacht 23:00-08:00 20°C 15°C
Page 9

9
© 2012 OJ Electronics A/S
GEBRUIKSHANDLEIDING
Inhoud
Inleiding ................................. 9
De allereerste instellingen ................. 10
Algemene bediening ...................... 10
Terug .................................10
Exit ................................... 10
In werking ............................... 10
Auto stand ............................ 10
Handbediening .........................10
Comfort stand ..........................10
Instelmenu’s thermostaat ................. 10
Standen instellingen ...................... 10
Instellingen gebruiker .....................11
Tijd en datum .......................... 11
Kinderslot .............................11
Scherminstellingen ...................... 11
Standen schema ........................ 11
Energiebewaking ....................... 11
Constructie-instellingen ...................11
Oset temperatuur. . . . . . . . . . . . . . . . . . . . . . . 11
Aanpasfunctie .......................... 12
Toepassing ............................ 12
Temperatuurschaal ......................12
Display verlichting .......................12
Taal ..................................12
Fabrieksreset ........................... 12
Informatie ..............................12
Terug .................................12
Exit ................................... 12
Foutmeldingen ........................... 12
Fabrieksinstellingen ...................... 12
Schema voorinstelling ...................12
6WDQGLQVWHOO
,QVWHOOJHEUXLNHU
&RPIRUW0HQX0DQ
:R
&
2IIVHWWHPS
$DQSDVIXQFWLH
7RHSDVVLQJ
7HPSVFKDDO
7LMGHQGDWXP
.LQGHUVORW
6FKHUPLQVWHOO
6WDQGVFKHPD
(QHUJLHEHZDNLQJ
7HUXJ
([LW
%DFNOLJKW
7DDO
)DEULHNVUHVHW
,QIRUPDWLH
7HUXJ
([LW
&RQVWULQVWHOO ([LW
Menu
Model OCC4/OCD4
Nederlands
Page 10

10
© 2012 OJ Electronics A/S
Inleiding
De thermostaat kan uw verwarmingssysteem op vooringestelde tijdstippen op verschillende dagen van de week inschakelen. Voor elke
dag van de week kunt u afzonderlijke temperaturen instellen voor 4
of 6 aparte verschillende perioden, die standen worden genoemd.
Door de temperatuur te verlagen als u niet thuis bent, verlaagt u de
stookkosten zonder het comfort te verminderen.
De thermostaat wordt geleverd met een standaardschema dat voor
de meeste woningen geschikt is. Tenzij u deze instellingen wijzigt,
zal de thermostaat op dit standaardprogramma werken.
Bovendien beschikt de thermostaat ook over een aanpasfunctie die
bepaalt hoeveel tijd de vloer nodig heeft om op te warmen en af te
koelen bij de wisseling van de seizoenen. Hiermee wordt rekening
gehouden tijdens het in- en uitschakelen van de verwarming. Dit
zorgt ervoor dat de kamer altijd op het gewenste moment op de
juiste temperatuur is. De fuzzy logic van de aanpasfunctie heeft drie
dagen nodig om de warmte-eigenschappen van de kamer vast te
stellen alvorens ze eciënt functioneert.
De allereerste instellingen
De eerste keer dat u de thermostaat met de onderbreker Aan “I”
inschakelt, moet u de taal, tijd en datum instellen. Het menu zal u
automatisch door het proces voeren.
• Kies uw taal met de knoppen Omhoog en Omlaag en bevestig
met OK.
• Stel het actuele uur in en druk op de OK knop. Stel dan de minuten in. Druk op OK.
• Stel de actuele datum in: jaar, maand en dag. Bevestig de instellingen met de OK knop.
Met het volgende menu kunt u kiezen welke toepassing u door de
thermostaat wilt laten beheren. Is de thermostaat in de kamer die
u wilt verwarmen, selecteer dan Ruimte/limiet. Is de thermostaat
buiten de kamer die u wilt verwarmen, selecteer dan de Vloer. Hebt
u de gewenste instelling gekozen, druk dan op OK.
U dient nu de vloerbedekking te kiezen, zodat de thermostaat hier
tijdens haar werking rekening mee kan houden. Selecteer de vloerbedekking en druk op OK.
U dient nu de systeembelasting, d.w.z. de uitvoer in kW van het
verwarmingssysteem dat door de thermostaat wordt aangedreven,
te kiezen. Selecteer de juiste belasting en druk op OK.
De thermostaat is nu gereed voor gebruik en de verwarming van uw
ondervloer zal werken in overeenstemming met het voorgeprogrammeerde standen schema. Zie Fabrieksinstellingen voor de volledige
gegevens over deze functie.
Navigatieknoppen
Stroomonderbreker
&RPIRUW0HQX0DQ
:R
&
Algemene bediening
Met de onderbrekerknop kunt u de thermostaat aan “I” en uit “0”
zetten door de knop omhoog en omlaag te schuiven. Wanneer de
thermostaat is uitgeschakeld “0”, wordt het relais uitgeschakeld. Alle
instellingen, incl. tijd en datum zullen worden opgeslagen.
De thermostaat wordt bediend met de navigatieknoppen. De functie
van elke knop wordt aangegeven in het scherm boven de knop.
Terug
In verschillende delen van de menu’s en submenu’s zult u het
Terug menu item vinden.
Gebruik Terug om naar de voorgaande stap terug te gaan.
Exit
Gaat terug naar het beginscherm.
In werking
De thermostaat bezit drie verschillende manieren van temperatuur
regelen.
Auto stand
Selecteer Auto als u wilt dat de temperatuur automatisch wordt
bewaakt via het Standensysteem.
Handbediening
Kies handbediening om het ingestelde Standen programma te
annuleren (bv. tijdens de vakantie) en de gewenste temperatuur
handmatig in te stellen. U kunt de temperatuur bv. op 5°C zetten
voor bescherming tegen vorst terwijl u afwezig bent.
• Druk op Handbediening, bevestig met OK en kies de gewenste
temperatuur.
Comfort stand
Kies Comfort om een tijdelijke Comfort temperatuur
voor een speciale gelegenheid in te stellen (de zogenaam-
de feeststand).
• Druk op Comfort, bevestig met OK en kies de gewenste tempe-
ratuur. Voer daarna de gewenste duur van de comfort stand in.
Nadat de ingestelde tijd is verlopen, zal de thermostaat automatisch
teruggaan naar de Auto stand.
NB: de Comfort stand is een tijdelijke, met de hand ingestelde stand
die automatisch wordt geannuleerd als de volgende stand in het
Standen systeem start.
Instelmenu’s thermostaat
Het menu biedt keus uit de volgende mogelijkheden
2.
6WDQGLQVWHOO
Standen instellingen
Hiermee kunt u de temperatuur automatisch
regelen volgens een programma van uw
eigen keus. U kunt temperatuurinstellingen
voor 4 of 6 verschillende standen per dag
selecteren
4-Standen* 6-Standen*
Dag Dag
Uit Uit
Thuis Uit 2
Nacht Thuis
Thuis 2
Nacht
* Zie Gebruikersinstellingen/standen schema, afhankelijk van het
gekozen schema.
De thermostaat is ingesteld op een Standen schema voor een eenvoudige en zuinige verwarmingsregeling, zie Vooringesteld schema
Model OCC4/OCD4 Nederlands
Page 11

11
© 2012 OJ Electronics A/S
onder Fabrieksinstellingen. Het schema kan gemakkelijk als volgt
worden veranderd
1. Druk op de OK knop om het scherm met de Standen instelling te
activeren.
2. Kies de dagen die u in de instellingen wilt wijzigen Ma-vr of Za-zo
met de knop omhoog of omlaag. Druk op OK.
3. Kies nu de tijd en temperatuur voor elk van de dagelijkse standen
in het programma. Druk op OK en stel de starttijd in voor de
gewenste stand. Bevestig met OK. Stel de temperatuur voor deze
stand in en bevestig met OK.
4. Kies Exit in het menu nadat de gewenste standen zijn ingesteld,
om terug te gaan naar het beginscherm.
7HPS
2.
&
& &
2.
0D[
0LQ
7LMG
2.
,QVWHOOJHEUXLNHU
Instellingen gebruiker
In het gebruikersmenu kunt u voor de volgende items veranderen:
• Tijd en datum
• Kinderslot
• Scherminstellingen
• Standen schema
• Energiebewaking
2.
7LMGHQGDWXP
Tijd en datum
Druk op OK en stel de actuele tijd in uren en
minuten in.
Daarna zal de datum verschijnen. Stel de
datum in en bevestig met OK.
2.
.LQGHUVORW
Kinderslot
Hiermee kunt u de thermostaatinstellingen vergrendelen, bv. in openbare ruimtes waar u niet
wenst dat de instellingen worden gewijzigd.
Druk op OK en zet het kinderslot op Aan met
de omlaag knop. Bevestig met OK.
Het kinderslot kan worden ontgrendeld door 5 seconden tegelijk op
de knoppen Comfort en Handbediening te drukken.
2.
6FKHUPLQVWHOO
Scherminstellingen
Hier kunt u selecteren uit wat er op het beginscherm wordt getoond.
Tijd/dag: Geeft de actuele tijd en dag
weer bovenin het scherm.
Ingest. temp. Geeft de huidige temperatuur weer.
Act. temp.* Geeft de actueel gemeten temperatuur weer.
Scr. saver
Schakelt het scherm na 30 seconden uit als er niet op
een knop wordt gedrukt. Door weer op een knop te
drukken wordt het scherm geactiveerd. De thermostaat blijft aanstaan en loopt het geselecteerde
programma door.
Druk op de OK knop om de schermopties te kiezen of over te slaan.
Kies dan Exit in het menu om terug te gaan naar het beginscherm
waar u de gekozen instellingen kunt zien.
* Alleen bij toepassing ’Vloer’.
2.
6WDQGVFKHPD
Standen schema
Hier kunt u kiezen welk type wekelijks Standen schema u wenst.
5:2 : Maandag tot vrijdag met
4 standen en zaterdag
tot zondag met 2 standen. Deze wordt typisch
gebruikt als u van maandag tot vrijdag werkt.
6:1 : Maandag tot zaterdag met 4 standen en zondag
met 2 standen. Deze wordt typisch gebruikt als u
van maandag tot zaterdag werkt.
7:0 : Maandag tot zondag met 4 verschillende standen.
Hier kunt u voor elk van de 7 dagen per week een
afzonderlijk programma kiezen.
5:2 6-standen: Maandag tot vrijdag met 6 standen en zaterdag
en zondag met 2 standen. Deze wordt typisch
gebruikt als u van maandag tot vrijdag werkt.
6:1 6-standen: Maandag tot zaterdag met 6 standen en zondag
met 2 standen. Deze wordt typisch gebruikt als u
van maandag tot zaterdag werkt.
7:0 6-standen: Maandag tot zondag met 6 standen. Hiermee
kunt u individuele programma’s voor iedere
weekdag selecteren.
0:7 6-standen: Maandag tot zondag met 6 standen en hetzelfde
programma voor iedere weekdag.
Selecteer het gewenste 4 of 6 Standen schema en bevestig met OK.
Voor aanwijzingen over het programmeren van tijd en temperatuur
voor het Standen schema, zie Standen instellingen.
2.
(QHUJLHEHZDNLQJ
Energiebewaking
Hier kunt u het energieverbruik aflezen voor de
afgelopen 2 dagen, 30 dagen of 365 dagen.
Druk op OK voor de gekozen periode. De
waarde in procenten (%) geeft de relatieve
tijd aan waarin de verwarming aan heeft gestaan. De volgende figuur toont de kosten voor de gekozen periode.
Controleer de instellingen voor valuta, prijs per kWh en belasting om
zeker te zijn van een juiste berekening.
Valuta: Druk op OK en kies de gewenste valuta.
Bevestig met OK.
Kosten/
eenheid: Druk op OK en voer de actuele kosten voor elektriciteit
in. De kosten moeten worden ingevoerd per kWh. Druk
op OK.
Belasting: Druk op OK en voer de aangesloten verwarmingsbron in.
De waarde moet in Watt (W) worden aangegeven. Druk
op OK. Verlaat het menu door op Exit te drukken.
2.
&RQVWULQVWHOO
Constructie-instellingen
Het menu constructie-instellingen bevat de
volgende opties
• Oset temperatuur
• Aanpasfunctie
• Toepassing
• Temperatuurschaal
• Taal
• Fabrieksreset
• Informatie
2.
2IIVHWWHPS
Offset temperatuur
Als de actueel gemeten temperatuur niet overeenkomt met de thermostaatwaarden, kunt u
de thermostaat bijstellen door de temperatuur
in evenwicht te brengen.
Druk op OK en voer de waarde van de gemeten temperatuur in. Bevestig met OK.
Model OCC4/OCD4 Nederlands
Page 12

12
OJ ELECTRONICS A/S
Stenager 13B · DK-6400 Sønderborg
Tel.: +45 73 12 13 14 · Fax +45 73 12 13 13
oj@ojelectronics.com · www.ojelectronics.com
2.
$DQSDVIXQFWLH
Aanpasfunctie
Zorgt ervoor dat de gewenste temperatuur al
is bereikt wanneer u ’s ochtends opstaat of
van uw werk thuiskomt. Na enkele dagen zal
de aanpasfunctie automatisch berekend hebben wanneer de verwarming moet worden
aangezet. Druk op OK en zet de functie op Aan. Bevestig met OK.
2.
7RHSDVVLQJ
Toepassing
Stel het gebruikte type regeling in.
Er zijn 4 opties
Vloerreg.: De thermostaat regelt alleen
de vloertemperatuur. Er
moet een vloersensor zijn
aangesloten.
Ruimtereg.: De thermostaat regelt alleen de kamertemperatuur.
Ruimte/grens:
De thermostaat regelt de kamertemperatuur met min.
en max. grenzen voor de vloertemperatuur. Er moet
een vloersensor zijn aangesloten.
Regelaar: De thermostaat werkt als een gewone regelaar
zonder gebruik van sensoren. De instelling is een
percentage.
Druk op OK en kies de gewenste toepassing. Bevestig met OK.
2.
7HPSVFKDDO
Temperatuurschaal
Hiermee kunt u het temperatuurbereik afstellen
waarbinnen de thermostaat instelbaar is. Dan
kunt u alleen een temperatuur in auto, comfort
en handbediening instellen binnen dit bereik.
Druk op OK om te markeren Min. temperatuur. Gebruik de omhoog/omlaag knop om de minimum toegestane
temperatuur te selecteren. Druk op OK en selecteer de maximum
toegestane temperatuur. Bevestig de instellingen met OK.
2.
%DFNOLJKW
Display verlichting
Er zijn drie instellingen voor achtergrondverlichting van het display:
• Auto: De achtergrondverlichting wordt
geactiveerd als een toets wordt ingedrukt,
en gaat automatisch uit 30 seconden na de
laatste keer indrukken van een toets.
• Aan: Achtergrondverlichting onafgebroken aan.
• Verwarming actief: De achtergrondverlichting slaat aan als de
thermostaat om warmte vraagt.
Selecteer de gewenste achtergrondverlichting en bevestig met OK.
2.
7DDO
Taal
Hier kunt u de gebruikte taal op het scherm
wijzigen.
Druk op OK en selecteer de gewenste taal.
Bevestig met OK.
2.
)DEULHNVUHVHW
Fabrieksreset
Hiermee kunnen de fabrieksinstellingen weer
worden teruggebracht. Uw persoonlijke instellingen zullen worden gewist, zie Fabriekin-
stellingen.
Druk op OK en kies Reset in het menu. Bevestig met OK.
2.
,QIRUPDWLH
Informatie
Toont de softwareversie van de thermostaat.
Terug
In verschillende delen van de menu’s en
submenu’s zult u het Terug menu item vinden.
Gebruik Terug om naar de voorgaande stap terug te gaan.
Exit
Gaat terug naar het beginscherm.
Foutmeldingen
Indien een fout of vergissing verschijnt, zal de thermostaat als volgt
een foutcode aangeven
E0: Interne fout. De thermostaat is defect. Vervang de thermostaat.
E1: De interne sensor is defect of kortgesloten.
E2: De externe sensor is defect of kortgesloten.
E5: Interne oververhitting. Controleer de installatie.
Fabrieksinstellingen
Schema voorinstelling
Model OCC4/OCD4 Nederlands
Het OJ warenmerk is een geregistreerd warenmerk van OJ Electronics A/S · © 2012 OJ Electronics A/S
Dag 1-5
Stand Duur Met vloersensor Met ruimtesensor
Dag 06:00-08:00 25°C 20°C
Uit 08:00-16:00 20°C 15°C
Uit 2 08:00-16:00 20°C 15°C
Thuis 16:00-23:00 25°C 20°C
Thuis 2 16:00-23:00 25°C 20°C
Nacht 23:00-06:00 20°C 15°C
Dag 6-7
Stand Duur Met vloersensor Met ruimtesensor
Dag 08:00-23:00 25°C 20°C
Nacht 23:00-08:00 20°C 15°C
Page 13

13
© 2012 OJ Electronics A/S
INSTRUKCJA OBSŁUGI
Spis treści
Menu ................................................................... 13
Wprowadzenie ................................................... 14
Pierwsze uruchomienie..................................... 14
Ogólne zasady działania ................................... 14
Powrót .............................................................14
Wyjście ...........................................................14
Tryby działania ................................................... 14
Tryb automatyczny ......................................... 14
Tryb ręczny ..................................................... 14
Tryb komfortowy .............................................. 14
Menu ustawień termostatu ............................... 14
Sekwencja przedziałów
(pór dnia) ............................................................14
Ustawienia użytkownika ................................... 15
Godzina i data ................................................15
Zabezpieczenie przed dziećmi ....................... 15
Ustawienia wyświetlacza ................................ 15
Sekwencja przedziałów (pór dnia) ................... 15
Monitorowanie zużycia energii .......................15
Ustawienia techniczne ...................................... 15
Przesunięcie temperatury ................................ 16
Funkcja adaptacyjna ........................................16
Rodzaj regulacji ............................................... 16
Skala temperatury............................................16
Podświetlenie wyświetlacza ............................ 16
Język ................................................................16
Reset do ustawień fabrycznych ......................16
Informacje ........................................................ 16
Powrót .............................................................16
Wyjście ...........................................................16
Sygnalizacja błędów.......................................... 16
Ustawienia fabryczne ........................................ 16
Fabryczny harmonogram .................................16
Sekw. pór dnia
Ustaw. użytkown.
Komfort Menu T. ręczny
Śr
&
Przes. temp.
Funkcja adapt.
Rodzaj regulacji
Skala temp.
Godzina i data
Zab. prz. dzie.
Ustaw. wyświetl.
Sekw. pór dnia
Monit. zuż. en.
3RZUyW
:\MĞFLH
%DFNOLJKW
Język
Reset do ust. fabr.
Informacje
3RZUyW
:\MĞFLH
Ustaw. techn.
:\MĞFLH
Menu
Model OCC4/OCD4
Polski
Page 14

14
© 2012 OJ Electronics A/S
Wprowadzenie
Termostat umożliwia włączanie układu grzewczego w ustalonych
porach w określone dni tygodnia. Dla każdego dnia tygodnia można ustawić różne wartości temperatury w 4 lub 6 oddzielny przedziałach czasowych, zwanych porami dnia. Obniżenie temperatury
w czasie nieobecności domowników zmniejsza koszty ogrzewania
bez uszczerbku dla komfortu.
Urządzenie posiada zaprogramowany, domyślny harmonogram
pracy, który jest odpowiedni dla większości instalacji. Jeśli użytkownik nie wprowadzi nowych ustawień, termostat będzie działał
zgodnie z ustawieniami fabrycznymi.
Ponadto termostat jest wyposażony w funkcję adaptacyjną, która
pozwala urządzeniu ustalać, jak długi czas jest potrzebny na ogrzanie i ochłodzenie podłogi w różnych porach roku, i uwzględniać
go przy włączaniu i wyłączaniu ogrzewania. Dzięki temu termostat
zawsze zapewnia uzyskanie wymaganej temperatury pomieszczenia
o ustawionej godzinie. Proces poznawania przez urządzenie charakterystyki cieplnej pomieszczenia i dochodzenia do właściwych
ustawień trwa 3 dni.
Pierwsze uruchomienie
Po pierwszym włączeniu termostatu, tj. przesunięciu przycisku
zasilania do pozycji "I", należy wprowadzić ustawienia języka,
godziny i daty. Menu automatycznie prowadzi użytkownika przez
kolejne etapy tej operacji.
• Wybierz język przyciskami "w górę" i "w dół" i potwierdź przyciskiem OK.
• Ustaw aktualną godzinę i potwierdź przyciskiem OK. Następnie
ustaw minutę. Naciśnij OK.
• Ustaw aktualną datę: rok, miesiąc i dzień. Potwierdź ustawienie
przyciskiem OK.
Kolejne menu pozwala użytkownikowi wybrać stosowany rodzaj
regulacji temperatury. Jeśli termostat znajduje się w pomieszczeniu,
którego temperaturą ma sterować, należy wybrać „Reg. czujn. t.
pow./czujn. ogr. t. podł.”. Jeśli termostat jest zainstalowany poza
pomieszczeniem, wybierz „Reg. czujn. t. podł.”. Potwierdź właściwe
ustawienie naciskając OK.
Teraz trzeba wybrać rodzaj pokrycia podłogi, by termostat mógł je
uwzględniać przy regulowaniu temperatury. Wybierz odpowiednią
opcję i naciśnij OK.
Następnie należy wprowadzić obciążenie systemu, tj. moc układu
grzewczego kontrolowanego przez termostat w kW. Wybierz
właściwą wartość i naciśnij OK.
Teraz termostat jest gotowy do użytku i może sterować ogrzewaniem podłogowym zgodnie z fabrycznie wprowadzoną sekwencją
pór dnia (przedziałów czasowych). Sekwencja ta jest przedstawiona
w punkcie „Ustawienia fabryczne”.
Przyciski nawigacyjne
Przycisk zasilający
Komfort Menu T. ręczny
Śr
&
Ogólne zasady działania
Przesuwny (w górę i w dół) przycisk zasilający pozwala na włączenie "I" i wyłączenie "0" termostatu. Po przesunięciu przycisku
do pozycji "0", przekaźnik rozłącza się i następuje wyłączenie.
Wszystkie ustawienia, w tym czasu i daty, pozostają w pamięci
urządzenia.
Termostat jest obsługiwany intuicyjnie za pomocą przycisków
nawigacyjnych.
Na wyświetlaczu, nad każdym przyciskiem, znajduje się oznaczenie jego funkcji.
Powrót
Poszczególne menu i podmenu posiadają opcję Powrót.
Opcja ta pozwala na powrót do poprzedniego kroku.
Wyjście
Powrót do ekranu początkowego.
Tryby działania
Termostat jest wyposażony w trzy tryby sterowania temperaturą:
Tryb automatyczny
Wybierz tryb automatyczny, jeśli chcesz, by sterowanie temperaturą odbywało się automatycznie, zgodnie z ustawioną sekwencją 4 lub 6 pór dnia.
Tryb ręczny
Wybierz tryb ręczny, by anulować zaprogramowaną sekwencję
pór dnia (np. na czas urlopu) i ręcznie ustawić żądaną temperaturę.
Możesz np. na czas wyjazdu ustawić temperaturę 5°C dla ochrony
przed mrozem.
• Naciśnij Tryb ręczny, potwierdź OK i wybierz żądaną temperaturę.
Tryb komfortowy
Ten tryb służy do jednorazowego ustawienia tymczaso-
wej temperatury komfortowej (tzw. tryb imprezowy) dla
danej pory dnia.
• Naciśnij Tryb komfortowy, potwierdź OK i wybierz żądaną
temperaturę. Następnie wprowadź żądany czas trwania trybu
komfortowego.
Po upływie tego czasu termostat automatycznie powróci do Trybu
automatycznego.
Uwaga: Tryb komfortowy to tymczasowe ręczne ustawienie, które
jest kasowane automatycznie z chwilą nadejścia następnej pory
w zaprogramowanej sekwencji 4 lub 6 pór dnia.
Menu ustawień termostatu
Menu pozwala na wybór następujących opcji:
OK
Sekw. pór dnia
Sekwencja przedziałów
(pór dnia)
Pozwalaja na automatyczne sterowanie
temperaturą zgodnie z wybranym przez
użytkownika programem. Temperaturę można
ustawiać oddzielnie dla 4 lub 6 pór dnia:
4 pór dnia* 6 pór dnia*
Dzień Dzień
Poza domem Poza domem
W domu Poza domem 2
Noc W domu
W domu 2
Noc
* Zależnie od wybranej konfiguracji, patrz Ustawienia użytkownika/
Sekwencja pór dnia.
Model OCC4/OCD4 Polski
Page 15

15
© 2012 OJ Electronics A/S
Termostat posiada fabrycznie zaprogramowaną sekwencję 4 pór
dnia, by sterowanie temperaturą odbywało się w sposób łatwy i
ekonomiczny, patrz Fabryczny harmonogram pod Ustawienia fa-
bryczne. Fabryczny harmonogram można łatwo zmieniać w poniżej
opisany sposób:
1. Naciśnij OK, aby otworzyć menu sekwencji 4 pór dnia.
2. Przyciskami „ w górę i „w dół” wybierz dni, dla których chcesz
zmienić ustawienia: Pon-Pt lub Sob-Nie. Naciśnij OK.
3. Teraz wybierz czas i temperaturę dla każdej pory dnia. Naciśnij
OK i ustaw czas rozpoczęcia danej pory. Potwierdź za pomocą
OK. Ustaw temperaturę dla danej pory dnia i potwierdź za pomo-
cą OK.
4. Po ustawieniu wszystkich pór, naciśnij Wyjście, aby powrócić
do ekranu początkowego.
MaksMin
Godzina
OK
08:00
06:00 05:00
Temp.
OK
40.0°C
5.0°C 25°C
OK
Ustaw. użytkown.
Ustawienia użytkownika
W menu ustawień użytkownika można
zmieniać następujące pozycje:
• Godzina i data
• Zabezpieczenie przed dziećmi
• Ustawienia wyświetlacza
• Sekwencja 4 pór dnia
• Monitorowanie zużycia energii
OK
Godzina i data
Godzina i data
Naciśnij OK i ustaw aktualny czas w godzinach i minutach.
Następnie wyświetli się data. Ustaw datę i
potwierdź za pomocą OK.
OK
Zab. prz. dzie.
Zabezpieczenie przed dziećmi
Pozwala na wprowadzenie blokady ustawień
termostatu, np. w miejscach publicznych
lub innych, w których modyfikacja ustawień
przez osoby niepowołane byłaby niepożądana.
Naciśnij OK i uruchom zabezpieczenie przez dziećmi wybierając
Włącz. przyciskiem "w dół". Potwierdź za pomocą OK.
Zdjęcie blokady odbywa się poprzez jednoczesne naciśnięcie
przycisków Tryb komfortowy i Tryb ręczny i przytrzymaniu ich
przez 5 sekund.
OK
Ustaw. wyświetl.
Ustawienia wyświetlacza
Opcja ta pozwala użytkownikowi na zmianę
zawartości wyświetlanej na ekranie początkowym.
Godzina/dzień: U góry wyświetlacza poka-
zywany jest aktualny czas i data.
Ustaw temp.: Wyświetlacz pokazuje aktualnie obowiązującą
wartość ustawionej temperatury
Akt. temp.*: Wyświetlacz pokazuje faktyczną aktualną tempe-
raturę.
Wygaszacz
ekranu: Wyłącza wyświetlacz, jeśli od naciśnięcia na
przycisk upłynęło 30 sekund. Kolejne naciśnięcie dowolnego przycisku ponownie uruchamia
wyświetlacz. Termostat pozostaje włączony i
realizuje wybrany program.
Naciskaj przycisk OK, aby zaznaczyć lub odznaczyć opcje wyświetlacza. Następnie wybierz Wyjście, by powrócić do ekranu
początkowego i zobaczyć wybrane ustawienia.
* Tylko przy regulacji za pomocą czujnika temperatury podłogi.
OK
Sekw. 4 pór dnia
Sekwencja przedziałów (pór dnia)
Pozwala na wybór żądanej opcji sekwencji
przedziałów (pór dnia).
5:2 : 4 zmiany temperatury w
ciągu dnia od poniedziałku
do piątku i 2 zmiany temperatury w ciągu dnia w
soboty i niedziele. Używany zwykle, jeśli domownicy pracują od poniedziałku do piątku.
6:1 : 4 zmiany temperatury w ciągu dnia od ponie-
działku do soboty i 2 zmiany temperatury w ciągu
dnia w niedziele. Używany zwykle, jeśli domownicy pracują od poniedziałku do soboty.
7:0 : 4 zmiany temperatury w ciągu dnia od ponie-
działku do niedzieli. Pozwala na wybór indywidualnej sekwencji dla każdego dnia tygodnia.
5:2 6 pór dnia 6 zmian temperatury w ciągu dnia od poniedziałku
do piątku i 2 zmiany temperatury w ciągu dnia w
soboty i niedziele. Używany zwykle, jeśli domownicy pracują od poniedziałku do piątku.
6:1 6 epór dnia: 6 zmian temperatury w ciągu dnia od
poniedziałku do soboty i 2 zmiany temperatury
w ciągu dnia w niedziele. Używany zwykle, jeśli
domownicy pracują od poniedziałku do soboty.
7:0 6 epór dnia: 6 zmian temperatury w ciągu dnia od poniedziałku
do niedzieli. Ta opcja pozwala na wybór indywidualnej sekwencji dla każdego dnia tygodnia.
0:7 6 epór dnia: 6 zmian temperatury w ciągu dnia od
poniedziałku do niedzieli – ta sama sekwencja dla
wszystkich dni tygodnia.
Wybierz żądaną opcję sekwencji 4 lub 6 przedziałów i potwierdź za
pomocą OK.
Wskazówki w zakresie programowania czasu i temperatury dla
poszczególnych przedziałów czasowych znajdują się w rozdziale
Ustawienia sekwencji przedziałów (pór dnia).
OK
Monit. zuż. en.
Monitorowanie zużycia energii
Pozwala na monitorowanie zużycia energii w
ciągu ostatnich 2, 30 lub 365 dni.
Wybierz żądany okres i naciśnij OK. Wartość
w procentach (%) oznacza czas, w jakim
ogrzewanie było włączone. Umieszczona obok liczba to koszt
energii w wybranym okresie. Aby zapewnić prawidłowość pomiaru,
sprawdź ustawienia waluty, ceny kWh i obciążenia.
Waluta: Naciśnij OK i wybierz żądaną walutę.
Potwierdź za pomocą OK.
Koszt jedn.: Naciśnij OK i ustaw koszt energii elektrycznej.
Wielkość ta powinna być podana w przeliczeniu na
1 kWh. Naciśnij OK.
Obciążenie: Naciśnij OK i wprowadź wartość podłączonej mocy
grzewczej.
Wartość ta musi być wyrażona w Wat (W). Naciśnij OK.
Wyjdź z menu naciskając Wyjście.
2.
8VWDZWHFKQ
Ustawienia techniczne
Menu ustawień technicznych zawiera
następujące funkcje:
• Przesunięcie temperatury
• Funkcja adaptacyjna
• Rodzaj regulacji
• Skala temperatury
• Język
• Reset do ustawień fabrycznych
• Informacje
Model OCC4/OCD4 Polski
Page 16

16
OJ ELECTRONICS A/S
Stenager 13B · DK-6400 Sønderborg
Tel.: +45 73 12 13 14 · Fax +45 73 12 13 13
oj@ojelectronics.com · www.ojelectronics.com
OK
Przes. temp.
Przesunięcie temperatury
Jeśli faktyczna zmierzona wartość temperatury
nie jest zgodna z wartością na termostacie,
można dokonać przesunięcia temperatury na
termostacie.
Naciśnij OK i wprowadź wartość pomiaru
temperatury. Potwierdź za pomocą OK.
OK
Funkcja adapt.
Funkcja adaptacyjna
Dzięki tej funkcji żądana temperatura jest
osiągana z chwilą rozpoczęcia danego przedziału czasowego (pory). W ciągu kilku dni
urządzenie uczy się, kiedy powinno włączyć
ogrzewanie.
Naciśnij OK i uruchom funkcję wybierając Włącz. Potwierdź za
pomocą OK.
OK
Rodzaj regulacji
Rodzaj regulacji
Ustaw stosowany rodzaj kontroli temperatury.
Dostępne są trzy opcje:
Reg. czujn. t. podł. : Termostat reguluje
wyłącznie temperaturę
podłogi. Konieczne jest podłączenie czujnika
temperatury podłogi.
Reg. czujn. t. pow. : Termostat reguluje wyłącznie temperaturę
powietrza w pomieszczeniu.
Reg. czujn. t. pow./
czujn. ogr. t. podł. Termostat reguluje temperaturę powietrza
w pomieszczeniu oraz minimalną i maksymalną temperaturę podłogi. Konieczne jest
podłączenie czujnika temperatury podłogi.
Regulator: Termostat działa jako zwykły regulator bez
żadnych czujników. Ustawienie jest procentowe.
Naciśnij OK i wybierz żądaną opcję. Potwierdź za pomocą OK.
OK
Skala temp.
Skala temperatury
Pozwala na wyznaczenie zakresu temperatur, w ramach którego można wprowadzać
ustawienia dla termostatu. Następnie można
wprowadzać wartości temperatury mieszczące się w tym zakresie w trybach automatycznym, komfortowym i ręcznym.
Naciśnij OK, aby podświetlić temperaturę Min. Za pomocą przycisków "w górę" i "w dół" ustaw żądaną wartość najniższej dopuszczalnej temperatury. Naciśnij OK i wybierz wartość maksymalnej
dopuszczalnej temperatury. Potwierdź ustawienia za pomocą OK.
2.
Podświetlenie
(&2
Podświetlenie wyświetlacza
Istnieją trzy opcje ustawień dla podświetlenia
wyświetlacza:
• Automatyczne: Podświetlenie włącza
się przy każdym naciśnięciu dowolnego
przycisku i wyłącza automatycznie po 30
sekundach od ostatniego naciśnięcia przycisku.
• Włączone: Podświetlenie jest włączone przez cały czas.
• Gdy włączone jest ogrzewanie: Podświetlenie włącza się, gdy
termostat aktywuje ogrzewanie.
• Wybierz żądaną opcję podświetlenia wyświetlacza i potwierdź
naciskając OK.
OK
Język
Język
Pozwala na zmianę języka wyświetlacza.
Naciśnij OK i wybierz żądany język.
Potwierdź za pomocą OK.
OK
Reset do ust. fabr.
Reset do ustawień fabrycznych
Pozwala na powrót termostatu do ustawień
fabrycznych. Ustawienia wprowadzone przez
użytkownika ulegają skasowaniu.
Naciśnij OK, z menu wybierz Reset.
Potwierdź za pomocą OK.
OK
Informacje
Informacje
Wyświetla dane wersji oprogramowania
termostatu.
Powrót
Poszczególne menu i podmenu posiadają opcję Powrót.
Opcja ta pozwala na powrót do poprzedniego kroku.
Wyjście
Powrót do ekranu początkowego.
Sygnalizacja błędów
W razie wystąpienia błędu lub usterki, termostat wyświetla jeden
z następujących kodów:
E0: Błąd wewnętrzny. Termostat jest uszkodzony. Konieczna jest
wymiana termostatu.
E1: Wewnętrzny czujnik uszkodzony lub zwarty.
E2: Zewnętrzny czujnik uszkodzony lub zwarty.
E5: Wewnętrzne przegrzanie. Sprawdź instalację.
Ustawienia fabryczne
Fabryczny harmonogram
Dzień 1-5
Zdarzenie Godzina
Z czujnikiem
temp. podłogi
Z czujnikiem
temp. powietrza
Dzień 06:00-08:00 25°C 20°C
Poza domem 08:00-16:00 20°C 15°C
Poza domem 2 08:00-16:00 20°C 15°C
W domu 16:00-23:00 25°C 20°C
W domu 2 16:00-23:00 25°C 20°C
Noc 23:00-06:00 20°C 15°C
Dzień 6-7
Zdarzenie Godzina
Z czujnikiem
temp. podłogi
Z czujnikiem
temp. powietrza
Dzień 08:00-23:00 25°C 20°C
Noc 23:00-08:00 20°C 15°C
Model OCC4/OCD4 Polski
Znak towarowy jest zarejestrowany i stanowi własność OJ Electronics A/S· © 2012 OJ Electronics A/S
 Loading...