

OHM CRED Mark 2 2-4, CRED Mark 2 2-6 User Manual
USER MANUAL
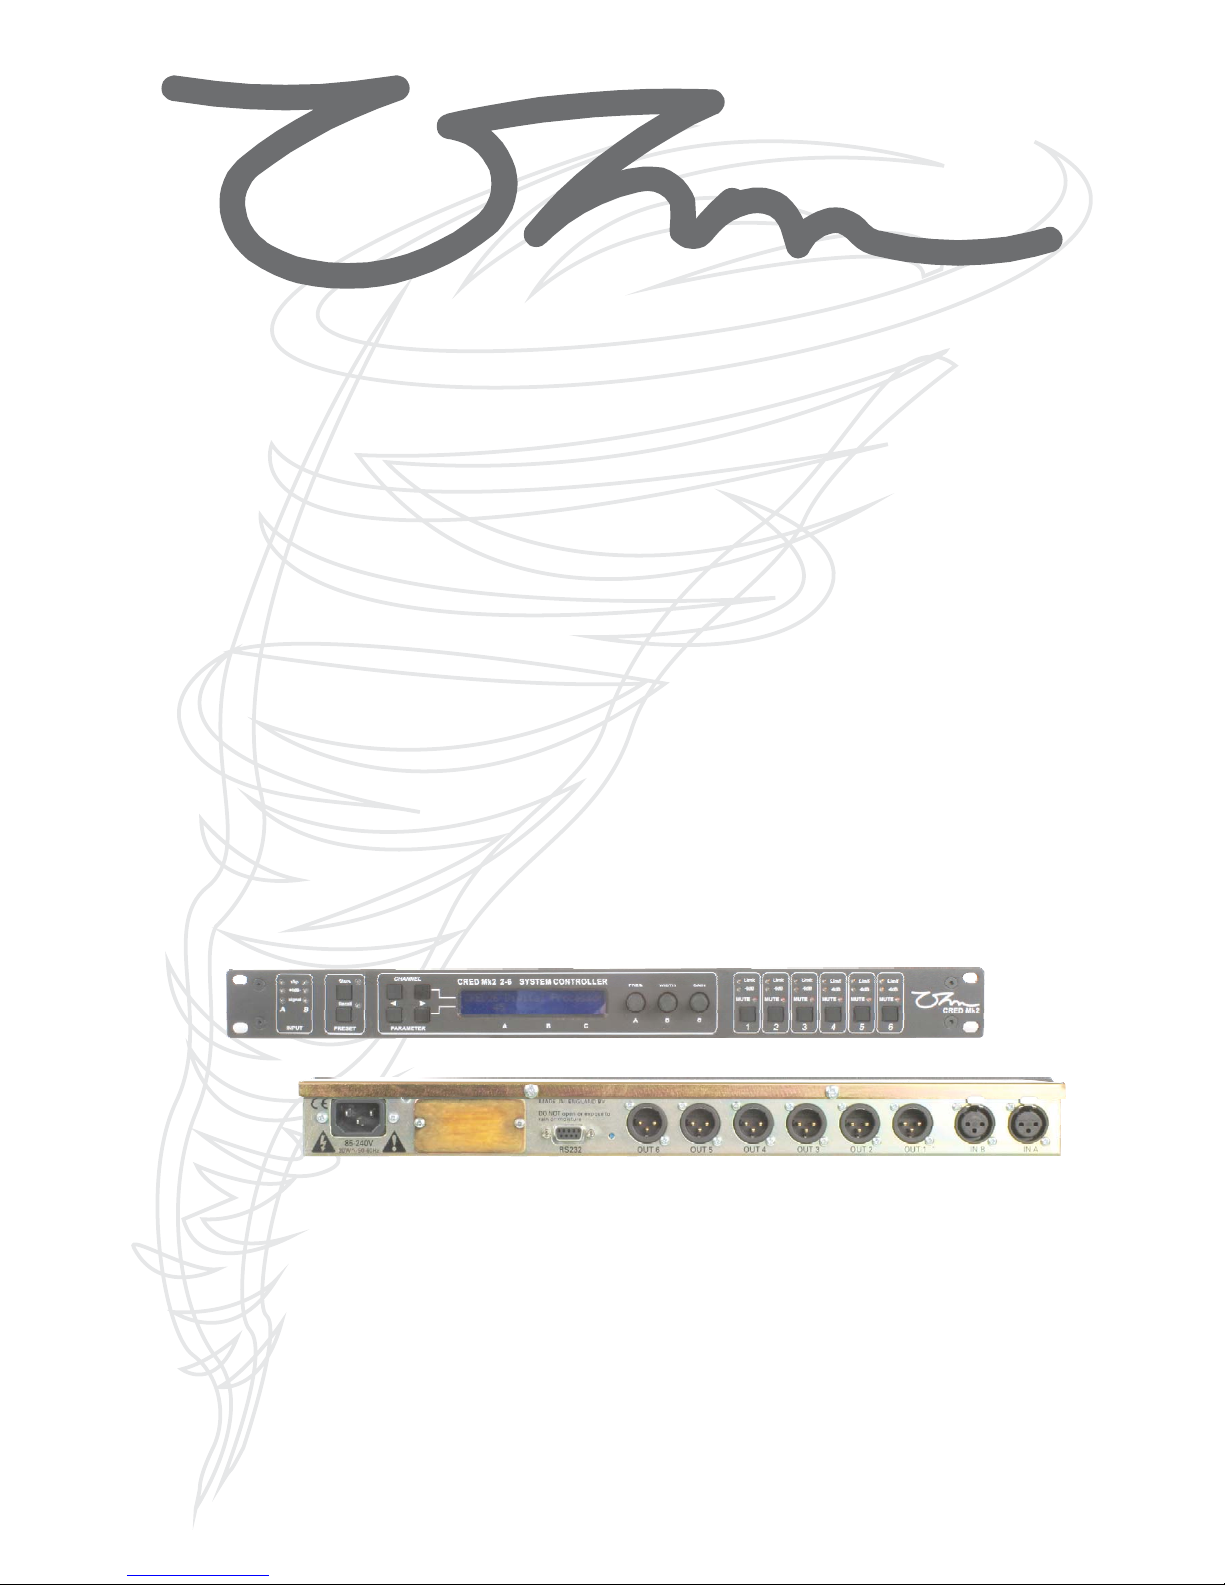
CRED MARK 2
2-4 & 2-6
2
WARNING! RISK OF HAZARDOUS ENERGY!
TO REDUCE RISK OF ELECTRIC SHOCK OR FIRE DO NOT
EXPOSE TO RAIN OR MOISTURE.
NO USER SERVICEABLE PARTS INSIDE.
REFER SERVICING TO QUALIFIED SERVICE PERSONNEL.
UNIT MUST BE EARTHED AND CORRECTLY FUSED.
Magnetic Field - Caution
If an equipment rack is to be used, we would
recommend mounting the amplifiers in the bottom of
the rack and mounting pre-amplifier and other
sensitive equipment such as the Cred Mk2 at the top
of the rack.
Do not locate sensitive high-gain equipment such as
pre- amplifier or tape decks directly above or below
amplifiers.
Because amplifiers have a high power density there is
a strong magnetic field which can induce hum into
unshielded devices that are located nearby. The field
is strongest just above and below the unit.
Features
!
!
!
!
Linea Research minimal signal path design
Sonically superb ADC/DAC combination; a
carefully matched pairing of the best devices from
Burr Brown and Wolfson
Newly released family of Analogue Devices SHARC
DSP
Extended bandwidth; 96kHz sampling frequency
provides for a nominally flat response to 40kHz.
USER MANUAL
CRED MARK 2
The information contained within this manual does not include all of the details of design, production or
variations of the equipment. Nor does it cover every possible situation that may arise during installation,
operation or maintenance. If you need particular assistance beyond the scope of this manual please contact our
technical staff.
Wellington Close • Parkgate • Knutsford
Cheshire • WA16 8XL • England
Tel: +44 (0)1565 654641 • Fax: +44 (0)1565 755641
Email: info@ohm.co.uk • Website: www.ohm.co.uk
CE Conformity
This equipment has been tested and found to conform
to the requirements of the EMC Directive 89/336/EEC,
the requirements of the Low Voltage Directive
73/23/EEC, amended by 93/68/EEC and to the
following standards:
EMC Emission EN55103-1 (1996)
EMC Immunity EN55103-2 (1996)
Electrical Safety EN60065 (1998)
The lightning bolt triangle is used to alert
the user to the presence of un-insulated
“dangerous voltage” within the unit that
may constitute a risk of electric shock.
The exclamation mark triangle is used to
alert the user to important operating or
maintenance instructions in the
literature accompanying the product.
RISK OF ELECTRIC SHOCK
DO NOT OPEN
CAUTION

CRED Mark 2 2-4/2-6
3
Quick Reference Guide
Display
Channel Select Buttons
Edit Select Buttons
Parameter Knobs
Mute Buttons
Store Buttons
Recall Button
The User Guide
Front Panel
Input Signal Indicators
Preset Store and Recall
Channel Select Buttons
Edit Select Buttons
Text Display
Parameter Knobs
Output Signal and Limiter Indication
Mute Buttons and Status LED’s
Secure Button (on the Rear)
Rear Panel
Power Inlet
Network Expansion Port
Audio Input Connectors
Output Connectors
Communications Port Connector
Operation
Starting Up
Selecting a Factory Preset
Creating a Crossover
Navigation and Viewing Parameters
Navigation
Preset Store and Recall
Preset Recall
Preset Store
Output DSP block diagram
Stereo / Mono Formats
DSP processin
Input Channels
Output Channels
Utilities
Factory Presets
EQ and Filter Response Graphs
Technical Specification
General
Processing
Connectors
5
5
5
5
5
5
5
6
6
6
6
6
6
6
7
7
7
8
8
8
8
8
8
9
9
9
9
9
10
10
10
5
11
12
12
13
13
15
17
18
19
20
20
20
20

Congratulations on having purchased an
Please read this manual and familiarize yourself with the operation of your
before you attempt to power up the unit. For your own safety we recommend you take the time to
read all the warnings and precautions on the page opposite and study the connection details to
ensure correct usage and avoid any misuse which may invalidate your warranty.
Every has been rigorously tested and inspected before being carefully packaged,
prior to shipping. If any damage has occurred to the packaging or the unit during transit, please
notify the delivery company as soon as possible. Only the consignee can file a claim against the
carrier for shipping damage. Be sure to save the carton and all packing materials for the carriers
inspection.
We recommend that you retain the original carton and packing materials for use should you transport
or ship the unit in future.
OHM CRED Mark 2
OHM CRED Mark 2
OHM CRED Mark 2
Record the serial number, found on the back of the unit, in the spaces designated on the warranty
card, and in the space provided below. Refer to the model and serial numbers whenever you call
your dealer for information or service on this product.
The OHM CRED mark 2 series of loudspeaker management systems represent the current state-ofthe-art. Taking advantages of the latest advances in analogue to digital conversion and digital signal
processing technologies the units achieve performance levels that have only recently been made
possible.
This modern design is combined with OHM Factory Presets to deliver the optimal match for OHM
cabinets and systems. These presets allow the user to simply achieve the best possible
Carefully open the shipping carton and check for any noticeable damage.
Unpacking
INTRODUCTION
Model Serial Number
Precautions
!
!
!
!
!
!
!
!
!
!
Retain this manual for future reference.
Do not stand the unit vertically on it’s rear.
Always check the correctly rated power is supplied to your unit.
Avoid direct contact of your with water or other liquids.
Do not operate while standing in liquid.
When cleaning the unit, wipe with a soft, dry cloth. If more heavy duty cleaning is required,
disconnect from the mains and use a damp cloth, ensuring the unit is completely dry before
reconnecting to the mains.
Do not use solvents or chemicals on the exterior of the unit as they cause the surface to discolour
or peel.
Do not use if the power cord is frayed or broken.
If you experience continuous problems disconnect from the mains and refer to a qualified service
engineer.
This unit is only intended for qualified personnel to operate and install. Do not attempt to repair or
service yourself. Please refer to qualified technical service department. The user must have
sufficent electrical contact to earth. Electrostatic charges may effect the operation of the .
CRED
CRED
4
CRED Mark 2 2-4/2-6
Channel Select Buttons
The currently selected input or output channel is shown in the top left corner of the display. Pressing
the channel select buttons scrolls through the available inputs and outputs. If operating stereo linked
the channel pair is shown. For example ‘CH A+B’ means both input A and B parameters.
Display
The LCD Displays preset and parameter information. The default screen is shown after start up and
displays the number of the current preset on the lower line of text. When navigating around the
adjustable parameters, other information is shown.
Edit Select Buttons
The name of the edit parameter page is displayed in the bottom left portion of the LCD. Pressing the
edit select buttons moves through the available parameter pages for the current input or output.
Mute Buttons
The LEDs next to the mute buttons indicate their current status. Pressing a mute button toggles
between the mute on and off.
Parameter Knobs
Up to three parameters are shown on the display. The parameter name is shown with its' current
value below. Where appropriate, parameters are grouped according to function. For example the
parametric equalisation page shows centre frequency, width and gain. Turning a parameter knob
clockwise will increase the value of a parameter, turning anti-clockwise will decrease it. Turning a
knob rapidly will cause the action to 'accelerate', so the value changes more rapidly.
Store Button
The unit has 45 preset locations. To store a preset in a location, press the store button and use the
parameter knobs to select the preset location and name the preset. Pressing the store button again
completes the task. Pressing any button other than store during the process cancels the procedure.
Recall Button
To recall a preset, press the recall button and use parameter knob A to select the required preset.
Pressing the recall button again will activate the preset. You will then be asked to confirm by pressing
recall once more. As with the store function, pressing any button other will cancel the process.
Quick Reference
5
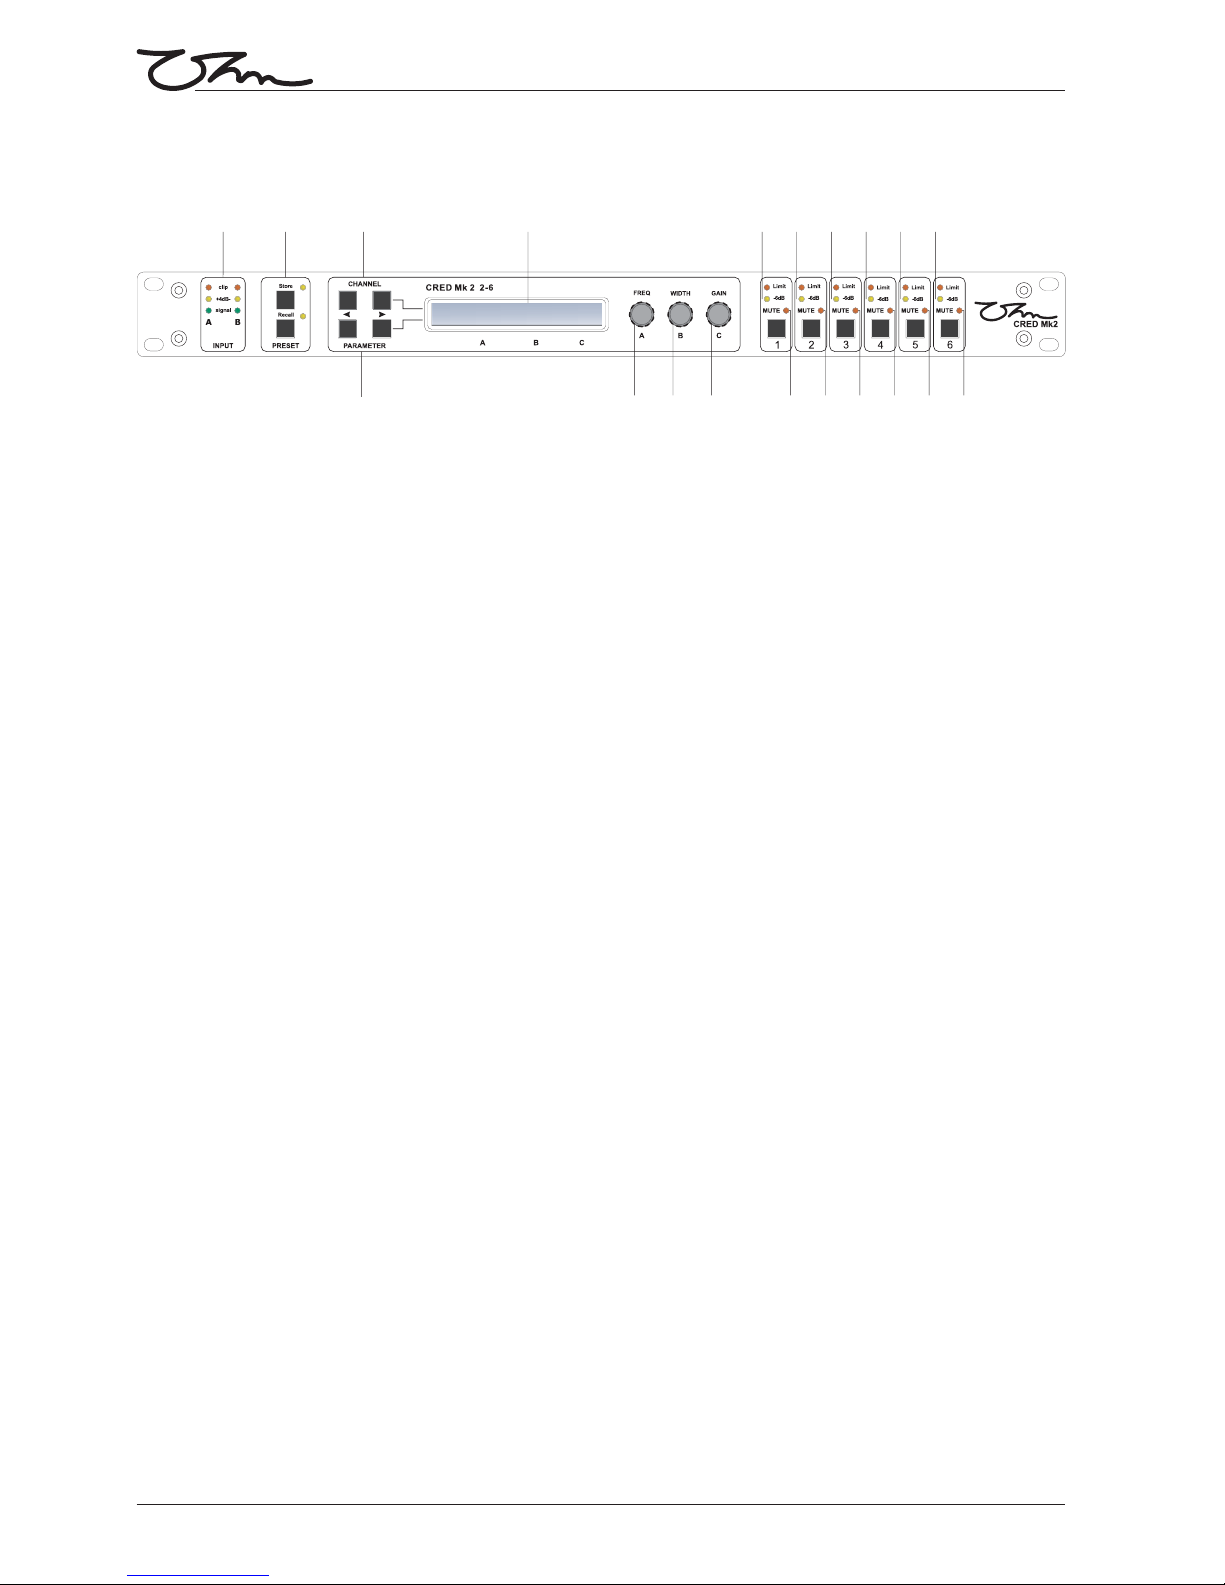
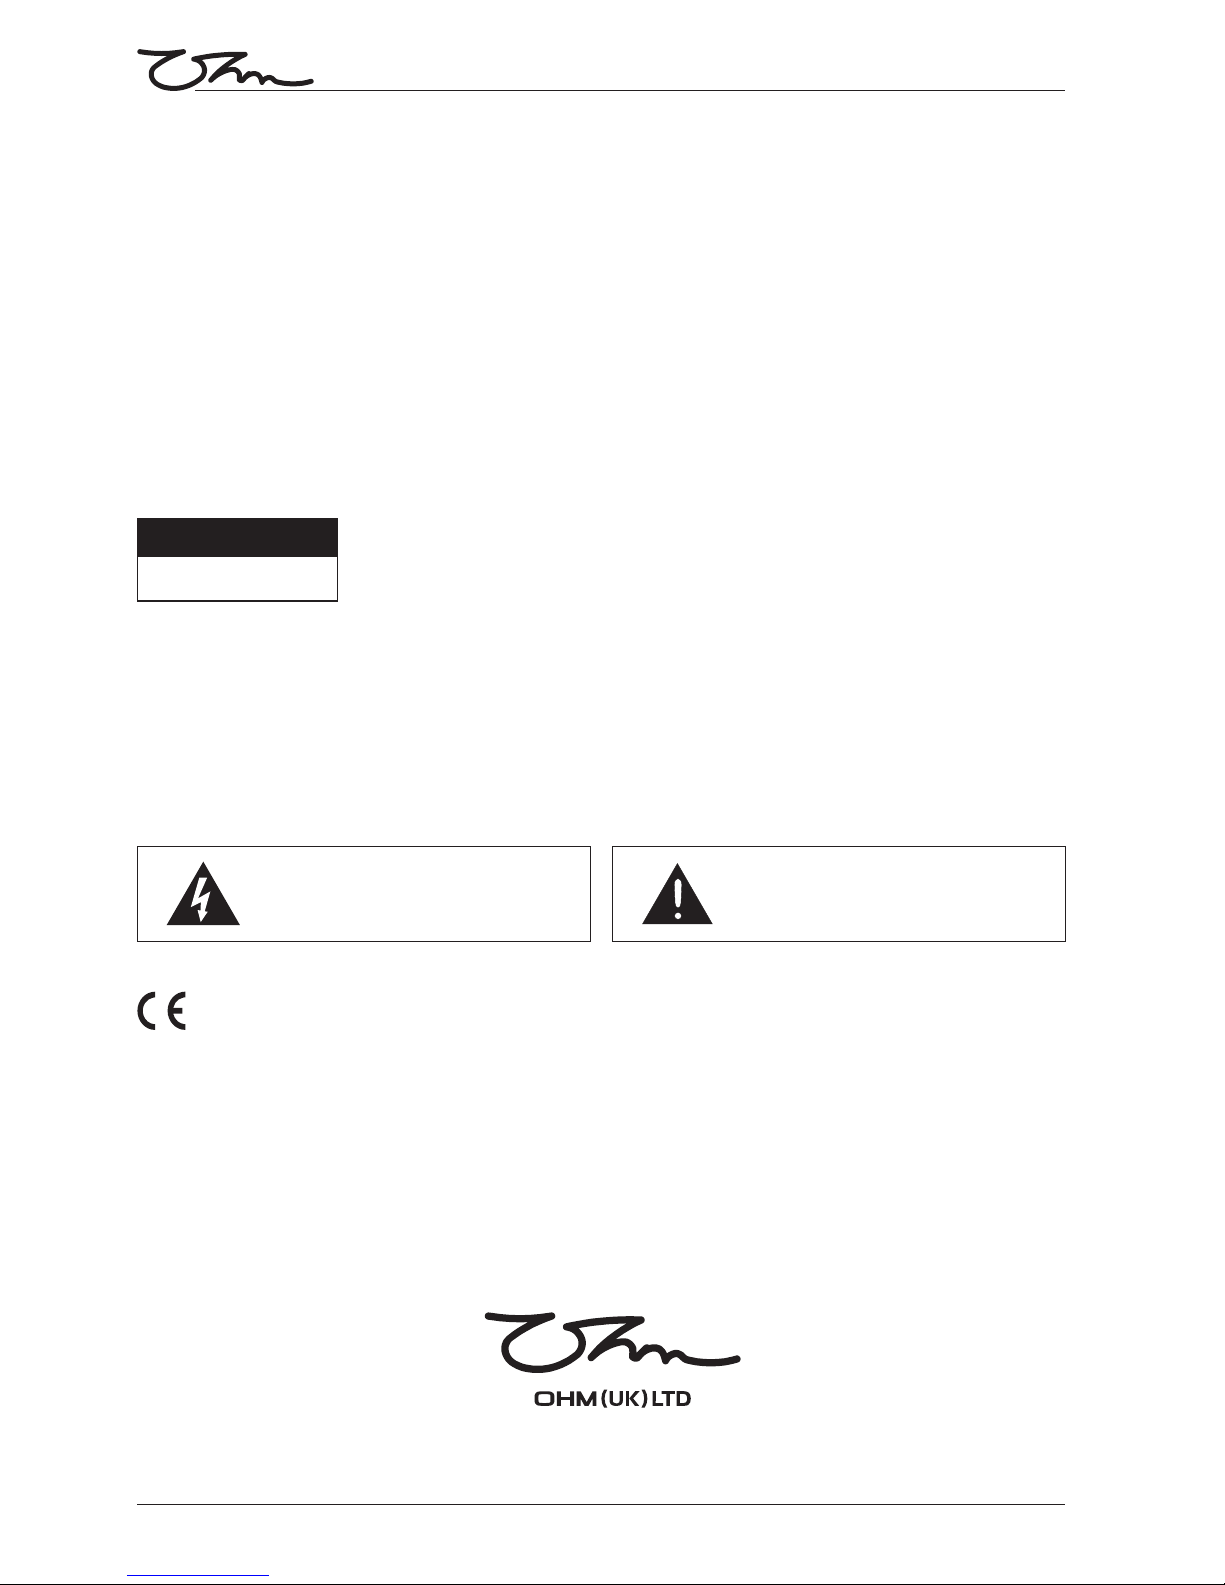
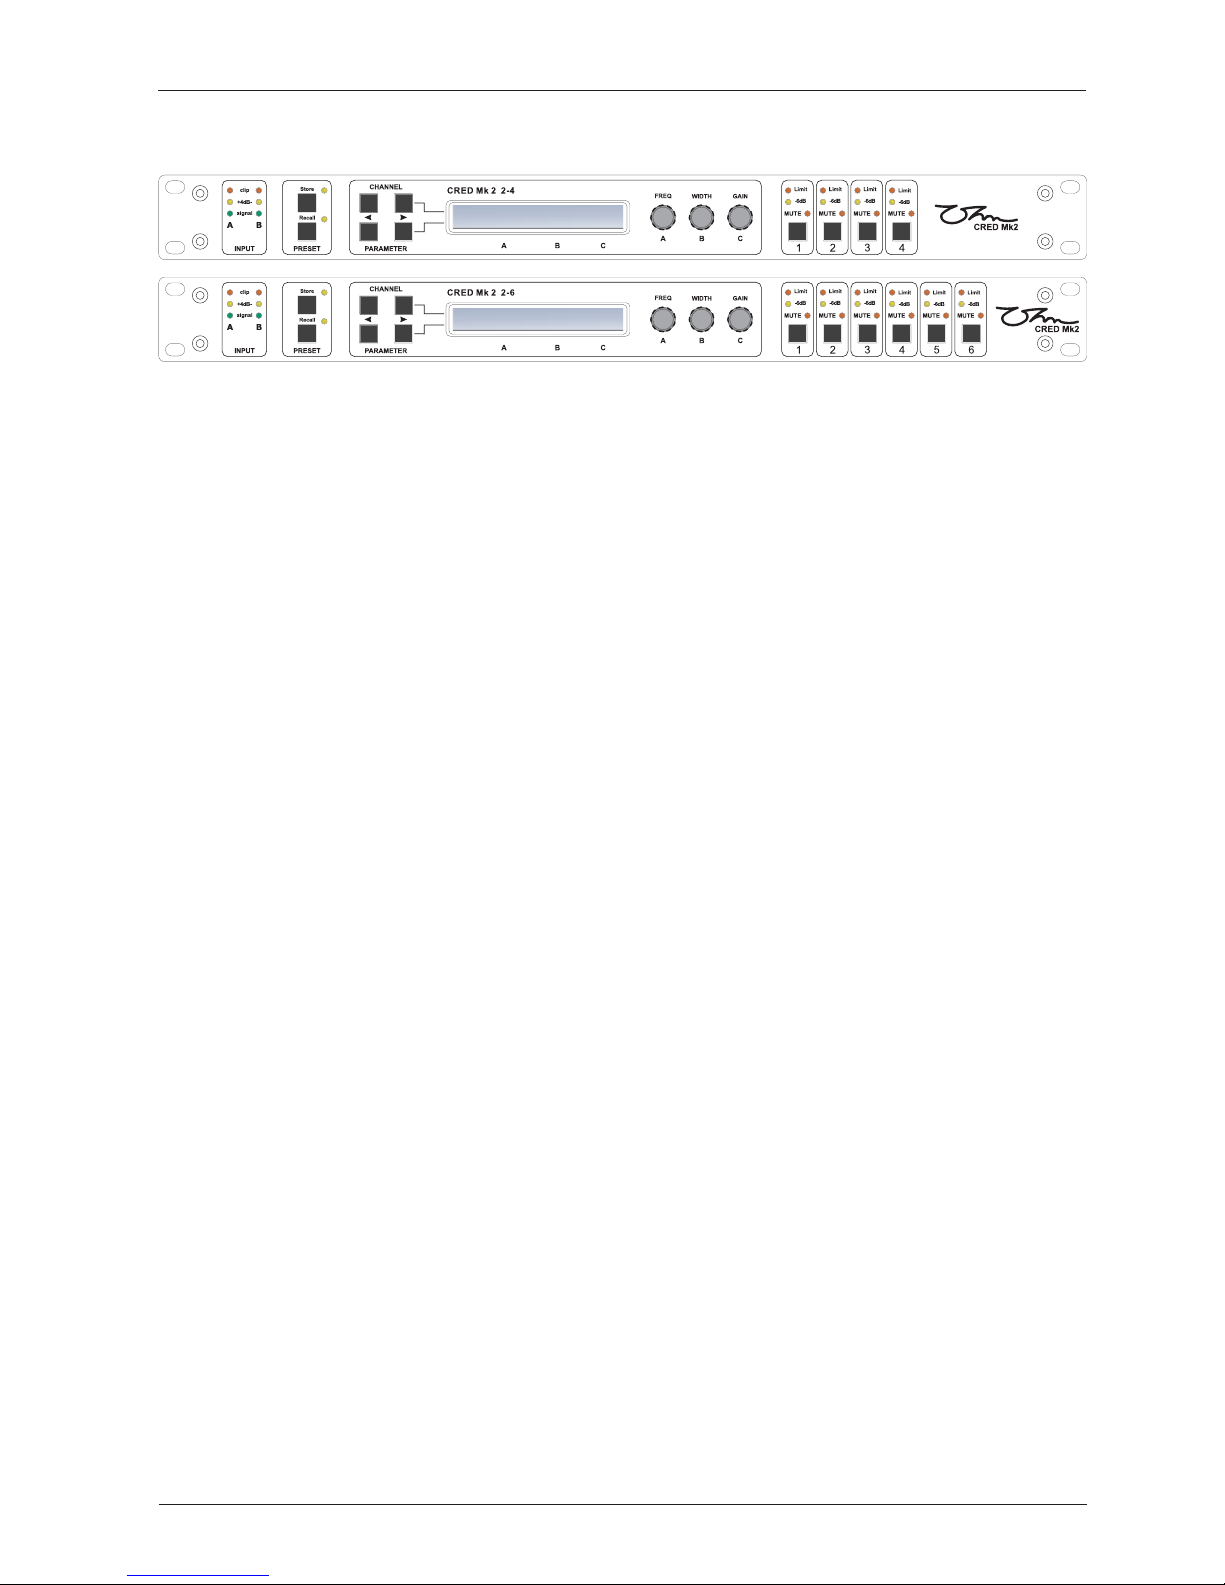
Front Panel
1 Input Signal Indicators
A set of three pairs of LEDs indicate signal present, +4dBu and input clip for each channel. The signal
present LEDs operate at approximately 40 dBu, giving a useful indication of even relatively low input
signal levels. The +4 dBu LEDs are intended to show nominal operating level and can also be useful
for setting system gain structure. Clip LEDs warn the user of input overload and operate at +19 dBu.
2 Preset Store and Recall
These controls provide access to the 45 presets stored within the device. Pressing the store button
allows the user to name a preset and choose which memory location it will be held in. Pressing store
button again completes the process. The Recall function operates in a similar way, pressing the recall
button allows the user to select which preset they require, pressing the button for a second time, then
confirming, recalls the new DSP settings.
Note that presets cannot be stored or recalled when Secure mode is activated.
3 Channel Select Buttons
The currently selected channel is displayed on the top left hand corner of the LCD. Pressing the
channel buttons scrolls through the available input and output channels and finally through the utility
functions and back to the default screen. If operating a stereo linked preset, the channel name will
indicate the channel pairing. For example 'A+B' means both input A and B parameters. The name of
the output will be shown briefly at the top of the display when stepping onto an output.
4 Edit Select Buttons
The currently selected edit parameter page is displayed on the bottom left corner of the LCD.
Pressing the edit select buttons moves through the available parameters for the current input or
output.
5 Text Display
Preset, channel, parameter and status information is shown on the 2x 24-character text display. In
most screens the currently selected channel is displayed on the upper line and the edit parameter on
the lower line. To simplify the display and enhance security, some parameters or parameter pages
are omitted when not relevant.
666
1
23
4
57777
88 88
77
88
6 Parameter Knobs
Three velocity sensitive parameter knobs are used to adjust parameters shown on the display. Up to
three parameters at a time are displayed on the screen. The parameter name is shown above the
parameter value in each of the three screen sections. The parameter knobs have a fixed association
with the screen sections; the rightmost parameter knob adjusts the rightmost parameter and so on.
6
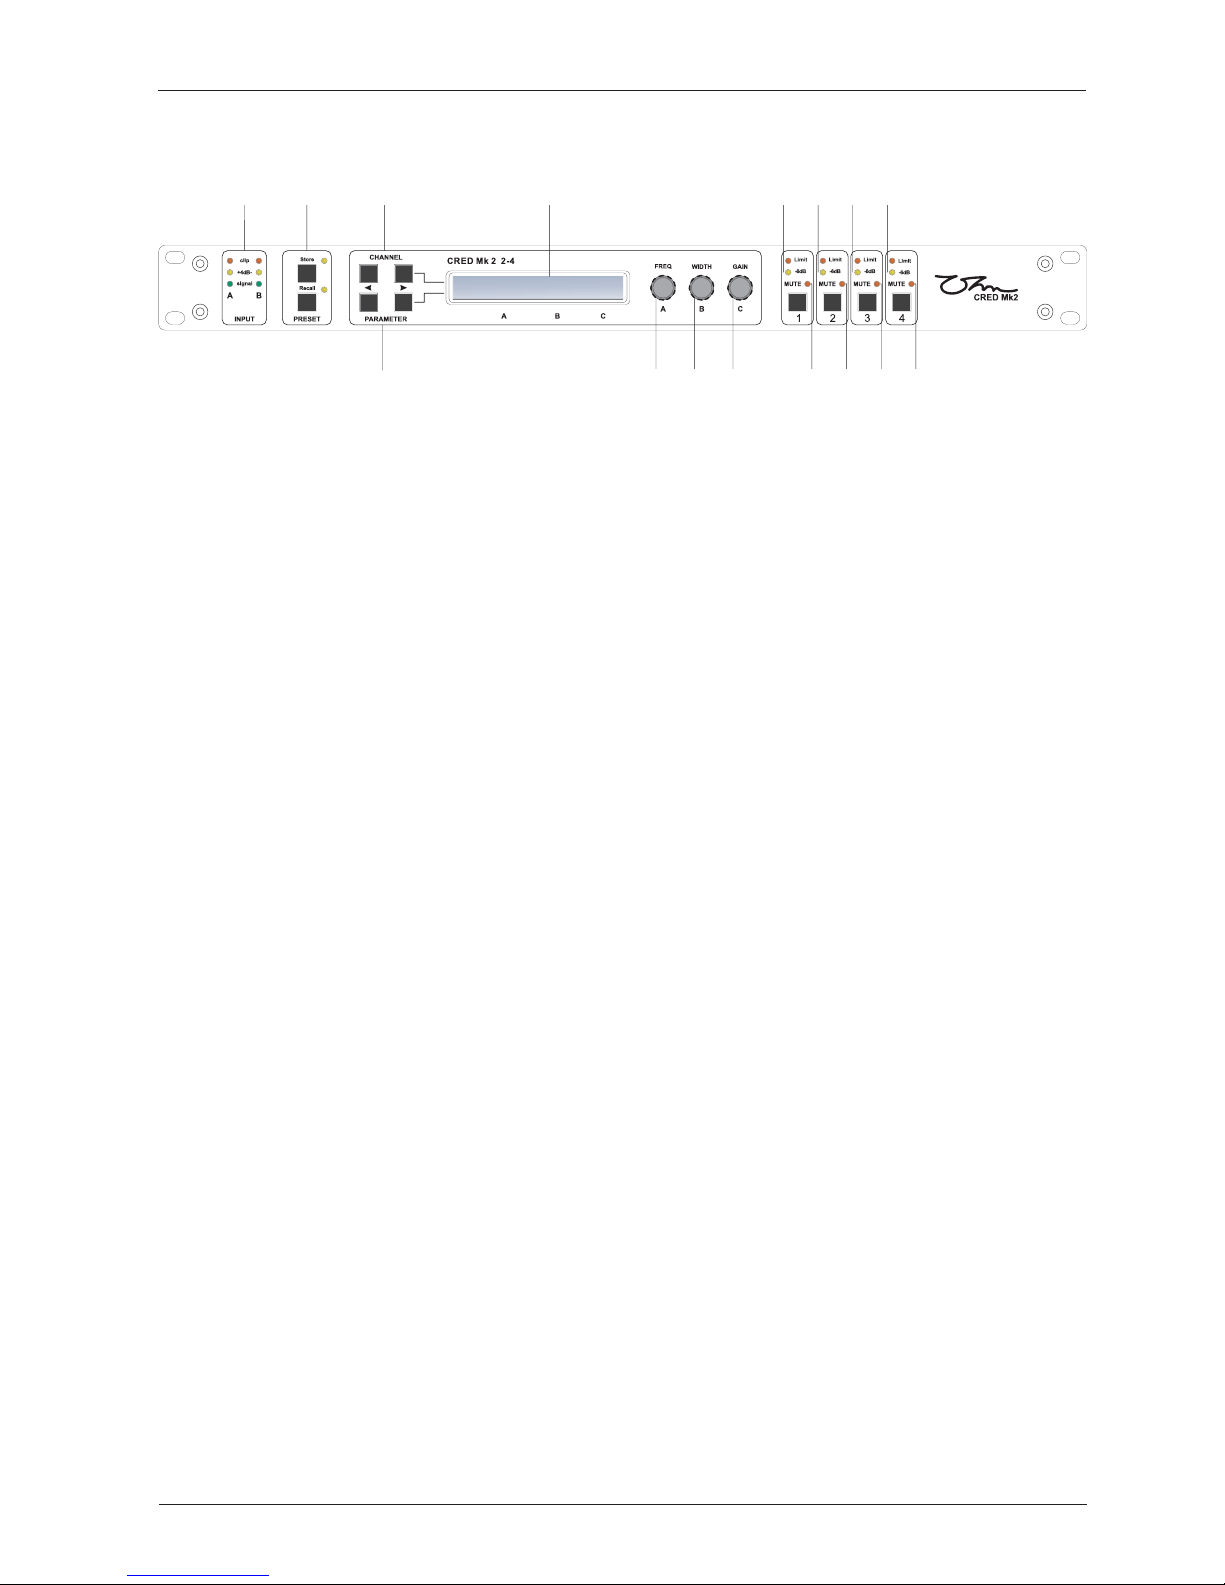
7 Output Signal / Limiter Indication
Two LEDs are provided for each output channel. These show the signal level relative to the limiter
threshold. The yellow LED will light when the signal is 6dB below the threshold and the red
8 Mute Buttons and Status LEDs
Each output has a mute button and associated status LED. Pressing the button toggles the mute on
and off. Note that the mute buttons do not function when the Secure mode is activated.
9 Secure Button (on the rear)
A momentary button is fitted behind the rear panel, between the output XLRs and the RS232 port.
When activated, this will disable all the front panel controls so they cannot affect the signal path,
making the unit secure against tampering. When in secure mode, the indicators still operate
normally. Note that the communications port is still active in secure mode.
666
1
23
4
5 7777
8888
7
CRED Mark 2 2-4/2-6
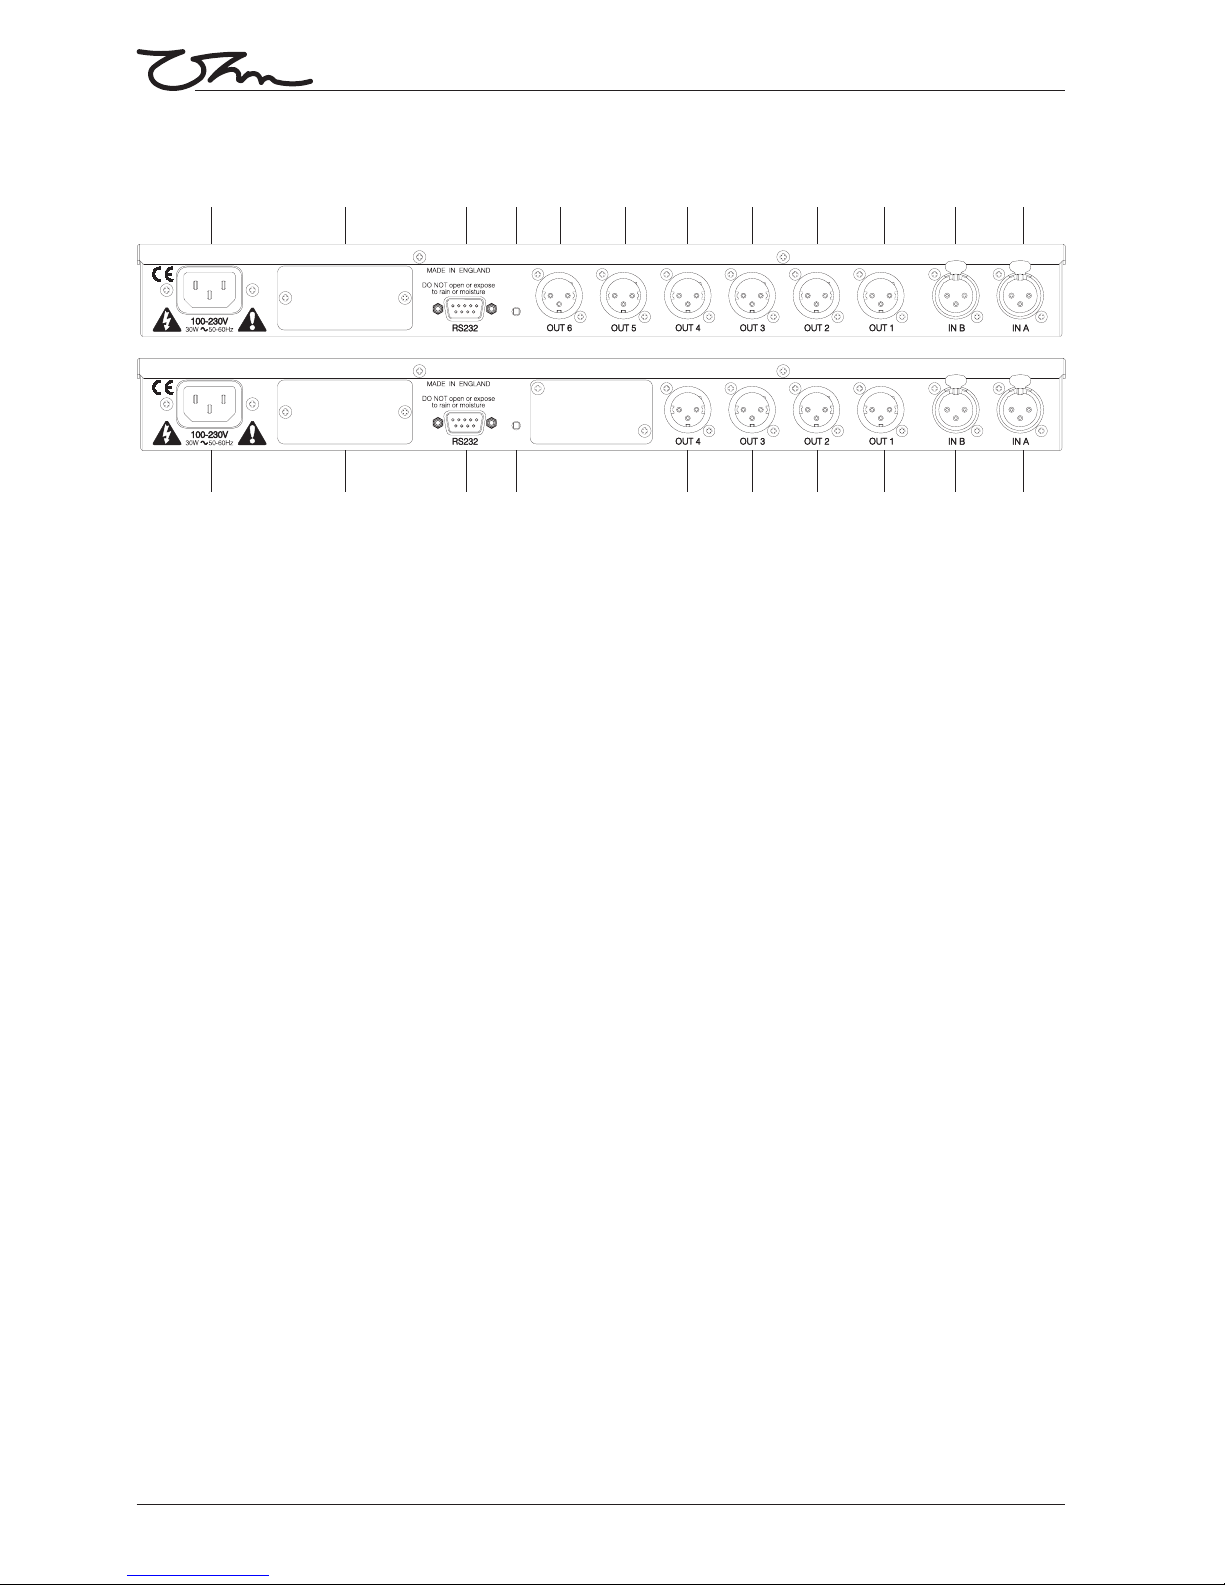
1 Power Inlet
The OHM CRED series unit should be connected to a suitable mains electricity supply using the cable
supplied. The processor has a switch mode power supply that is capable of operating with a nominal
mains voltage of 85V to 240V, 50/60Hz without re-configuration.
2 Network Expansion Port
This allows for a network card to be fitted.
3 Audio Input Connectors
All audio connections are fully balanced and wired pin-1 ground, pin-2 hot & pin-3 cold. The two
inputs have pin-1 connected directly to the chassis and feed the signal processing chains. If an
unbalanced source is used, a connection should be made between the pin-3 'cold' signal and the
4 Audio Output Connectors
The processed outputs are impedance balanced, and wired pin-1 ground, pin-2 hot and pin-3 cold. An
unbalanced input may be driven by connecting pin-3 'cold' signal to the ground connection of the
unbalanced destination input. Note that output pin-1's are ground lifted at audio frequencies but
connected to ground at RF for good EMC performance. The intention being that the amplifiers the
processor is driving should be responsible for the grounding of their input cable shields.
5 Communications Port Connector
A CRED processor may be controlled entirely from another controller, typically a Personal Computer,
running an application that is compliant with the ObCom standard. Connection will normally be made
to the controller via this serial port connector. This port is also used for updating the firmware in the
unit.
Note that the communications port is NOT disabled when the front panel is made secure using the
secure button.
8
1
5
3
4
1
53
4 44444
3
444
3
PUSH PUSH
PUSH PUSH
2
2
9
9
Rear Panel

CRED Mark 2 2-4/2-6
Operation
Starting up
The unit will energise as soon as power is applied to the IEC inlet; there is no power switch. During the
start up process the firmware application model number and version numbers are displayed and the
outputs are muted until the unit has completed its internal checks. Once the start-up routines are
complete and the unit is ready to pass audio. The DSP signal path will be restored to the current
settings when it was last powered down and the audio signal is gradually ramped up to its correct
level.
Selecting a Factory Preset
The CRED series processors have a library of designed to suit a range of OHM
enclosures.
contain some parameters that are fixed and hidden from view; the remainder of the
DSP parameters are available for user manipulation. The number and type of hidden parameters is
dependant on the , typically crossover frequencies, output delay and some EQ's are
hidden; those settings that are a function of the loudspeaker cabinet design and should not require
adjustment for different applications.
To recall a for a particular cabinet or system, press Recall and use the left hand
parameter knob A to scroll through the available factory preset locations (as indicated by a box
symbol after the preset number). Once the appropriate preset has been selected press recall again,
at which point you will be asked to confirm the action by pressing recall for a third time. This is to
guard against accidental recall of Presets.
Factory Presets are locked so they cannot be over-written. The user can, however, store an edited
version of a Factory Preset in any free preset location.
Factory Presets
Factory Presets
Factory Preset
Factory Preset
Details of all the Factory Presets including output designations can be found in Appendix A.
Creating a Crossover
In addition to the the unit has two further ; mono and stereo. These
are stored in locations 1 and 2 respectively, they can be used to develop settings for any
loudspeaker combination and are recalled in the same way as the described above.
These Presets are also locked but the user can name and store their own edited versions in any free
preset location.
Factory Presets 'Base Presets'
Base Presets
Factory Presets
Navigation and Viewing Parameters
Many of the processing elements in each input and output path have features that may be controlled
by the user, such as gain, frequency or limiter threshold. We call these adjustable features
parameters
ABC
A
B
C
Gain
0.0dB
12dB
Slope
Freq
100HzEQ1
A
In
39
 Loading...