

Page 1
© Öhlins Racing AB. All rights reserved. Any reprinting or unauthorized use without the written
permission of Öhlins Racing AB is prohibited.
Printed in Sweden.
Mounting Instructions BM606_1 Issued 20090602
These instructions and other documents
can be downloaded from
www.ohlins.com
Mounting Instructions
Kit Contents:
Part no. Pcs.
Shock absorber BM 606 1
Screw MC6S 6x16 01046-01 2
Screw MC6S 8x16 01046-22 1
Bracket 02267-05 1
Bracket 02267-06 1
Öhlins Sticker 00192-01 2
Memo Notes 01180-01 1
Owner’s Manual 1
Before installing this shock absorber,
check the contents of the kit listed
below. If anything is missing, please
contact your nearest Öhlins dealer.
SHOCK ABSORBER BM606
for BMW R1200 GS Adventure
During storage and transportation, especially at high ambient temperature, the
oil and grease used for assembling may
leak inside the packing and damage the
expanded polystyrene packing material. This is not unusual and is in no
way detrimental to the shock absorber.
Before installing this product, read the Öhlins Owner’s Manu al!
I
n
s
t
a
l
l
i
n
g
a
s
h
o
c
k
a
b
s
o
r
b
e
r
t
h
a
t
i
s
n
o
t
a
p
p
r
o
v
e
d
b
y
t
h
e
v
e
h
i
c
l
e
m
a
n
u
f
a
c
t
u
r
e
r
m
a
y
a
f
f
e
c
t
t
h
e
s
t
a
b
i
l
i
t
y
o
f
y
o
u
r
v
e
h
i
c
l
e
.
I
n
s
t
a
l
l
i
n
g
a
s
h
o
c
k
a
b
s
o
r
b
e
r
t
h
a
t
i
s
n
o
t
a
p
p
r
o
v
e
d
b
y
t
h
e
v
e
h
i
c
l
e
m
a
n
u
f
a
c
t
u
r
e
r
m
a
y
a
f
f
e
c
t
t
h
e
s
t
a
b
i
l
i
t
y
o
f
y
o
u
r
v
e
h
i
c
l
e
.
I
n
s
t
a
l
l
i
n
g
a
s
h
o
c
k
a
b
s
o
r
b
e
r
t
h
a
t
i
s
n
o
t
a
p
p
r
o
v
e
d
b
y
t
h
e
v
e
h
i
c
l
e
m
a
n
u
f
a
c
t
u
r
e
r
m
a
y
a
f
f
e
c
t
t
h
e
s
t
a
b
i
l
i
t
y
o
f
y
o
u
r
v
e
h
i
c
l
e
.
I
n
s
t
a
l
l
i
n
g
a
s
h
o
c
k
a
b
s
o
r
b
e
r
t
h
a
t
i
s
n
o
t
a
p
p
r
o
v
e
d
b
y
t
h
e
v
e
h
i
c
l
e
m
a
n
u
f
a
c
t
u
r
e
r
m
a
y
a
f
f
e
c
t
t
h
e
s
t
a
b
i
l
i
t
y
o
f
y
o
u
r
v
e
h
i
c
l
e
.
Öhlins Racing AB, Box 722, S-194 27 Upplands Väsby, Sweden.
Phone +46 8 590 025 00 Fax +46 8 590 025 80
www.ohlins.com
with set-up data
Always ensure that the basic settings made by
Öhlins are intact.
ADJUSTMENTS
SET-UP DATA
Recommended Sag and Ride Height
F1 - F2: 25 - 35 mm
F1 - F3: 35 - 45 mm
R1 - R2: 30 - 40 mm
R1 - R3: 65 - 75 mm
Read more about sag and ride height in the
Öhlins Owner’s Manual.
Data
Total length 410 mm
Stroke 83
Recommendations
Spring preload 14 mm
Rebound damping 14 clicks
Compression damping 14 clicks
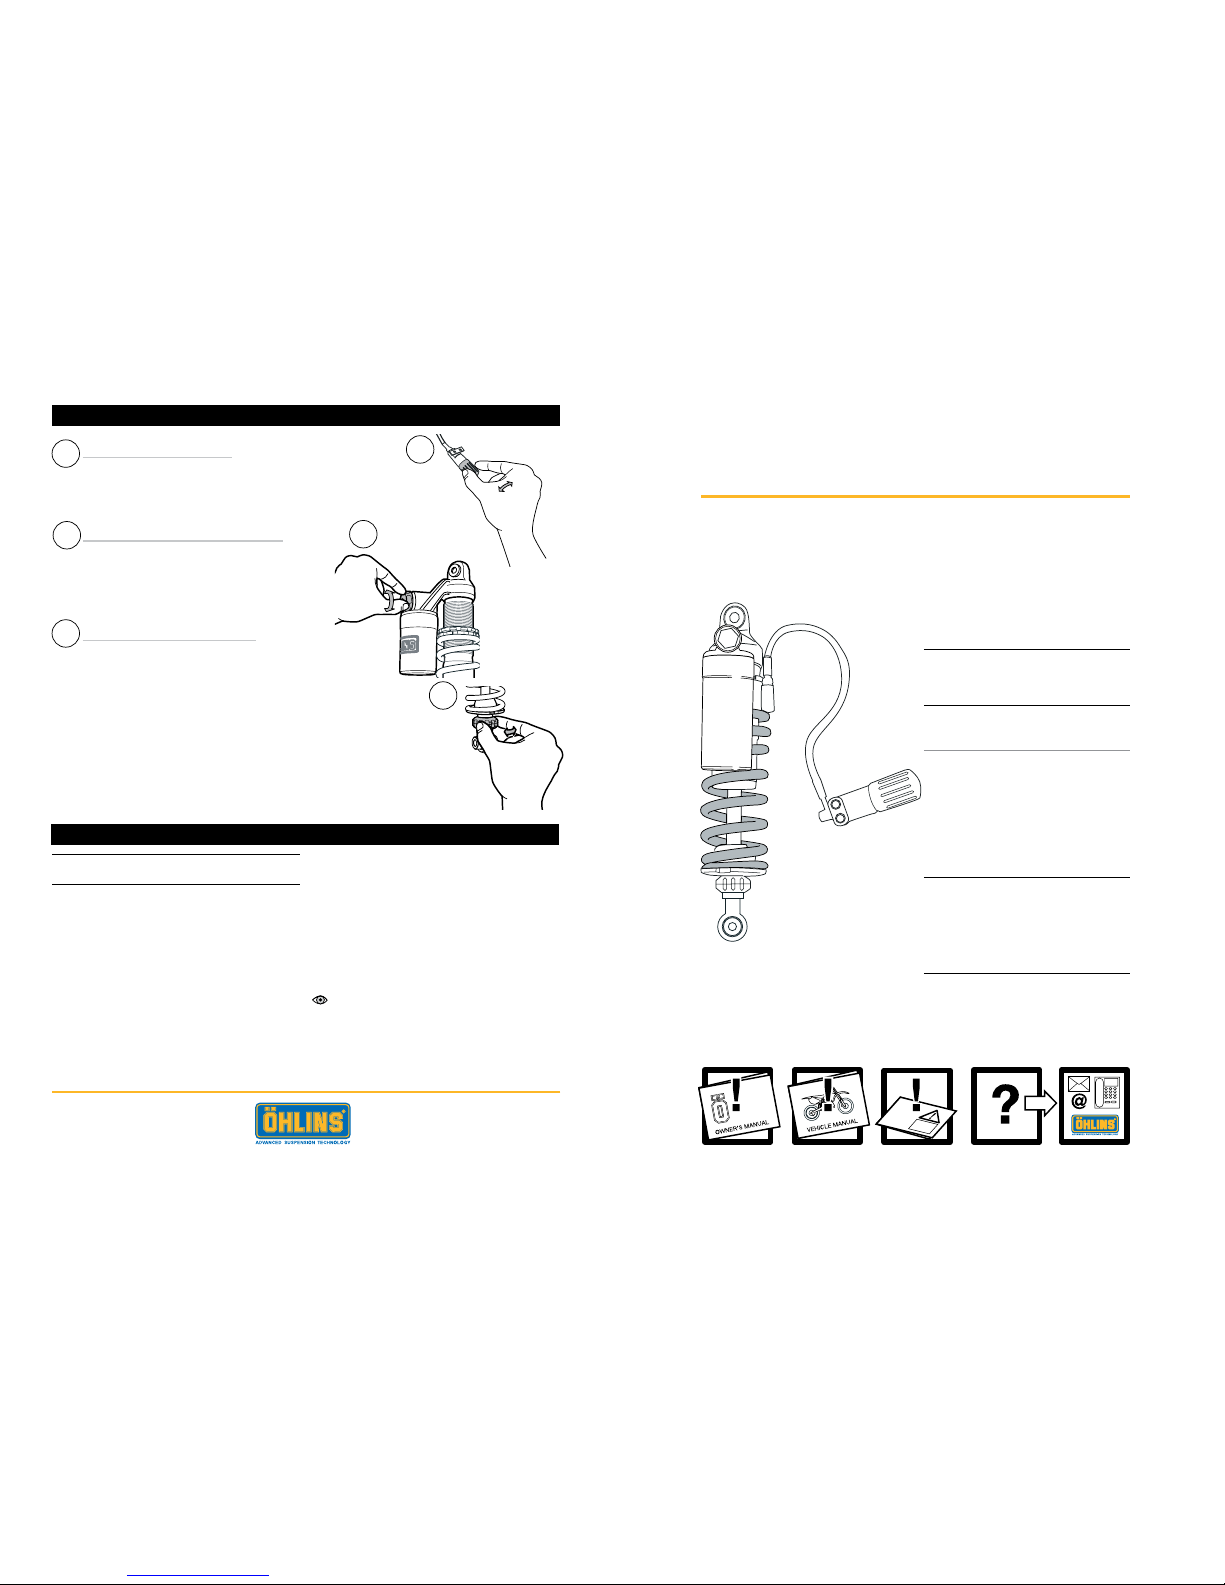
Spring Preload Adjuster
Turn the knob on the hydraulic adjuster to
set the spring preload. Turn clockwise to
set, turn counter clockwise to release.
Compression Damping Adjuster
Adjust by turning the knob on top of
the reservoir. Turn clockwise to increase
damping, turn counter clockwise to
decrease.
Rebound Damping Adjuster
Turn the wheel on the piston shaft above
the end eye/ bracket. Turn clockwise to
increase damping, turn counter clockwise to decrease.
1
2
3
1
2
3
Page 2
HOW TO INSTALL
WARNING!
It is advisable to have an Öhlins dealer install the
shock absorber.
1
Put the motorcycle on a workstand so that the
rear wheel barely touches the ground.
WARNING!
Make sure the vehicle is securely supported so
that it will not tip.
2
Remove the driver and the passengers seats.
3
Remove the silencer.
4
Remove the upper and the lower attachments
of the original shock absorber and remove it.
5
Install the Öhlins shock absorber. Fasten the
upper and the lower attachments, but do not
tighten yet.
6
Tighten the upper and the lower attachments.
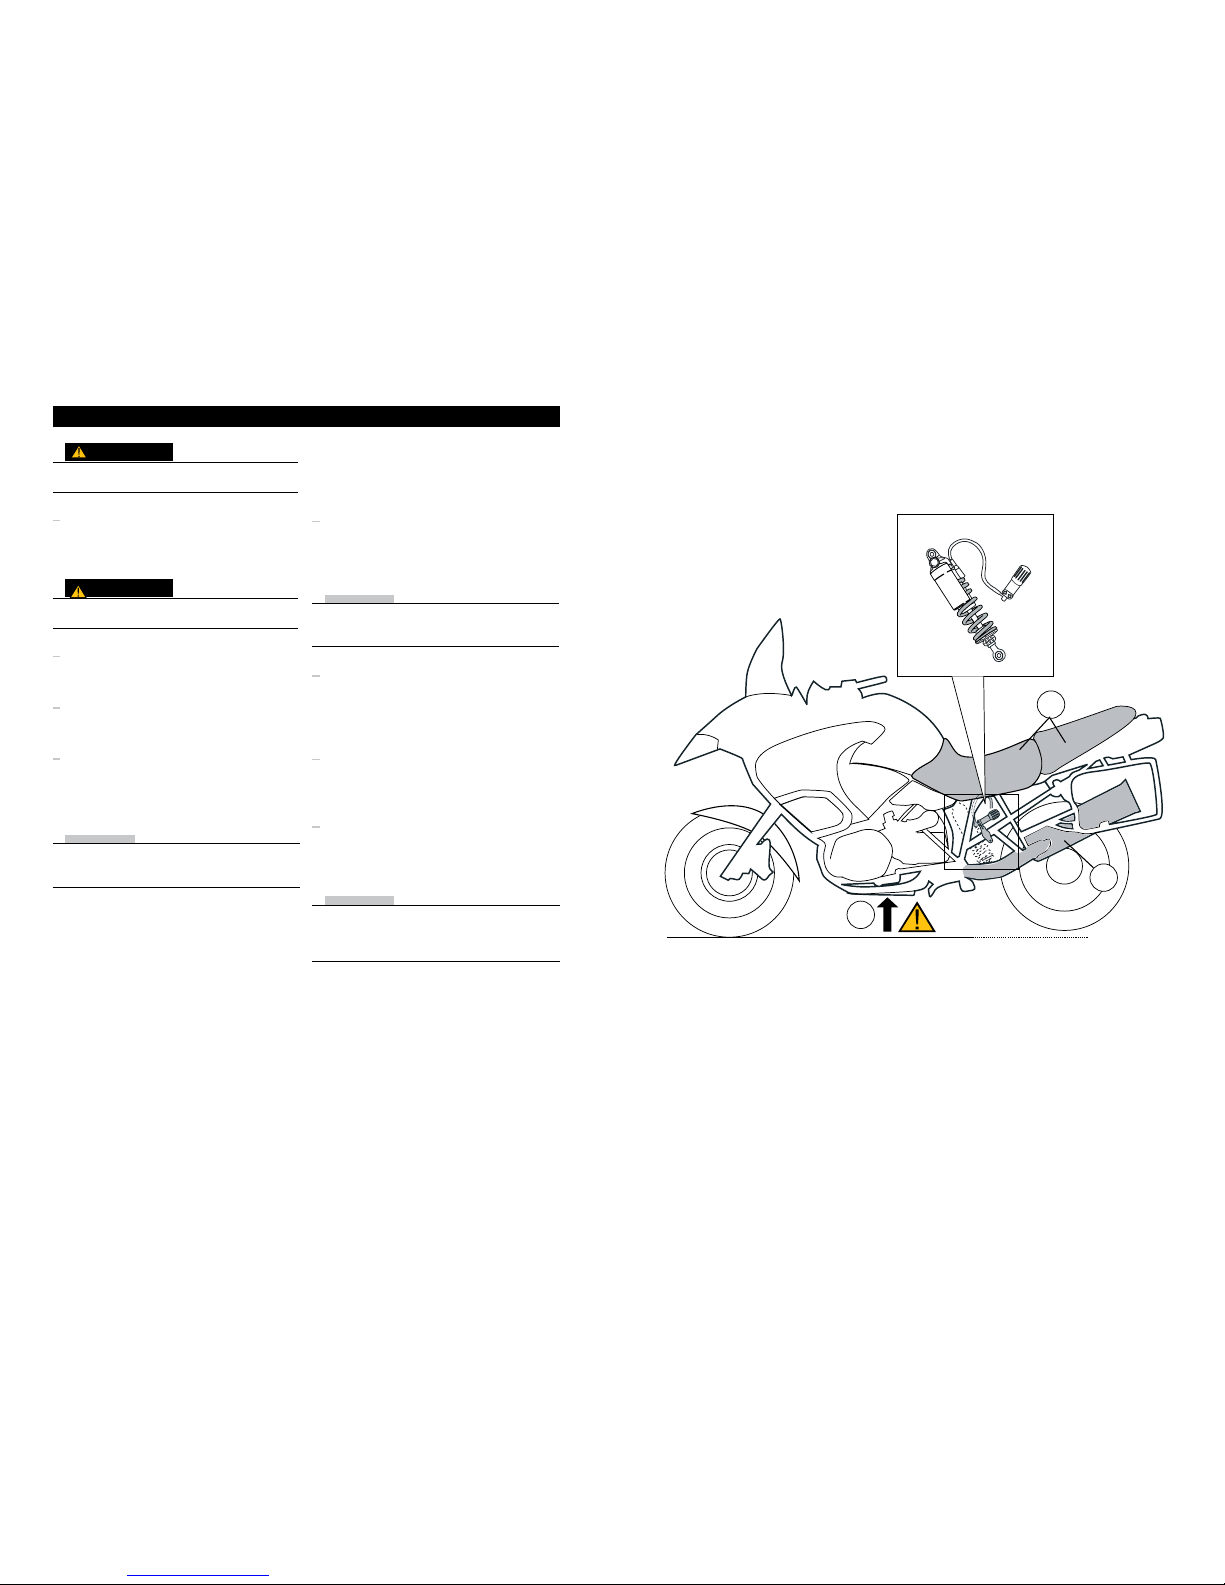
Fasten the bracket, provided in this kit, to the
hydraulic preload adjuster.
7
Fasten the bracket and the hydraulic preload
adjuster to the frame. See gure.
8
Reattach the silencer and the seats. Make sure
that all parts are installed in the same way as
they were before the installation.
NOTE!
Make sure that all screws are tightened to the
correct torque and that nothing fouls or restricts
movement of the shock absorber when the suspension is being fully compressed or extended.
NOTE!
Lower the motorcycle so that the shock
absorber is compressed 1 mm, before tightening the screws.
NOTE!
Recommendation! Before installing the Öhlins
shock absorber:
• clean the vehicle thoroughly
1
3
2
 Loading...