

Page 1
Mounting Instructions
Öhlins shock absorber kit BM 504
for BMW R 1200 RT, rear
© Öhlins Racing AB. All rights reserved. Any reprinting or unauthorized use without the
written permission of Öhlins Racing AB is prohibited. Printed in Sweden.
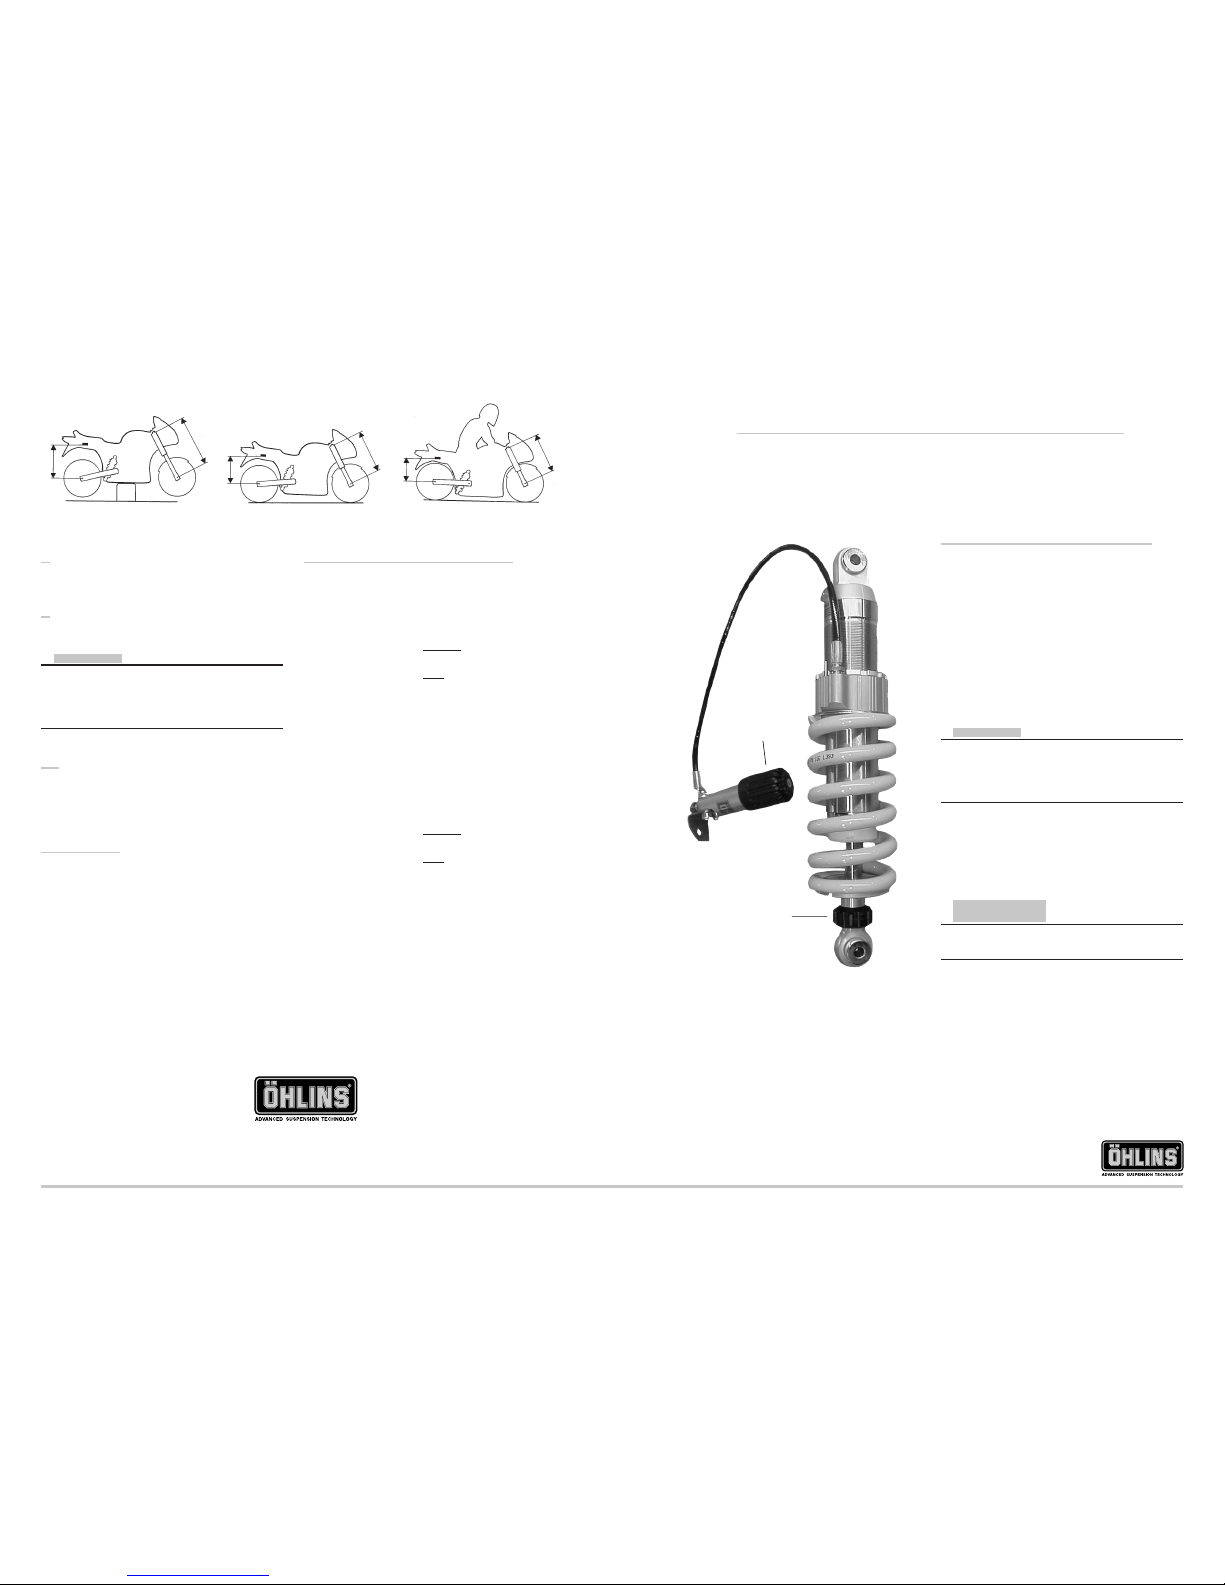
Öhlins shock absorber 46 DRS
Your Öhlins shock absorber type 46 PRS features
the following adjusters:
Rebound damping adjuster
Adjuster wheel on the piston shaft above the end
bracket.
Spring pre-load adjuster
Adjustments are made by turning the knob on the
hydraulic adjuster. Clockwise for harder adjustment,
counter clockwise to release the pre-load.
NOTE!
When delivered the Öhlins shock absorber is
dialed to recommended settings for the specific
brand and make of the vehicle. If you have
changed the settings, check like this:
The adjusters have a normal right hand thread. Turn
the damping adjusters clockwise to fully closed (pos.
zero [0]). Turn counter clockwise to open and count
the clicks until you reach the recommended number
of clicks. See Setup data at last page.
CAUTION!
Do not use too much force, delicate sealing surfaces can be damaged.
Spring
pre-load
adjuster
Rebound
damping
adjuster
Öhlins Racing AB, Box 722, S-194 27 Upplands Väsby, Sweden.
Phone +46 8 590 025 00. Fax +46 8 590 025 80.
www.ohlins.com
Part No. BM 504. Issued 05 04 19
Setup data
Shock absorber length 376 mm
Shock absorber stroke 54 mm
Spring pre-load 15 mm
Rebound damping adjuster 16 clicks
Checking sag and ride height
Front suspension
F1. Bike on a stand with the
suspension fully extended = ............
F2. Bike on the ground without rider = ............
F3. Bike on the ground with rider = ............
Free sag
F1 - F2 = ............
Ride height
F1 - F3 = ............
Rear suspension
R1.Bike on a stand with the
suspension fully extended = ............
R2.Bike on the ground without rider = ........... .
R3.Bike on the ground with rider = ............
Free sag
R1 - R2 = ............
Ride height
R1 - R3 = ............
Bike on a stand.
F1
R1
Bike on the ground.
F2
R2
Bike with rider on.
F3
R3
8
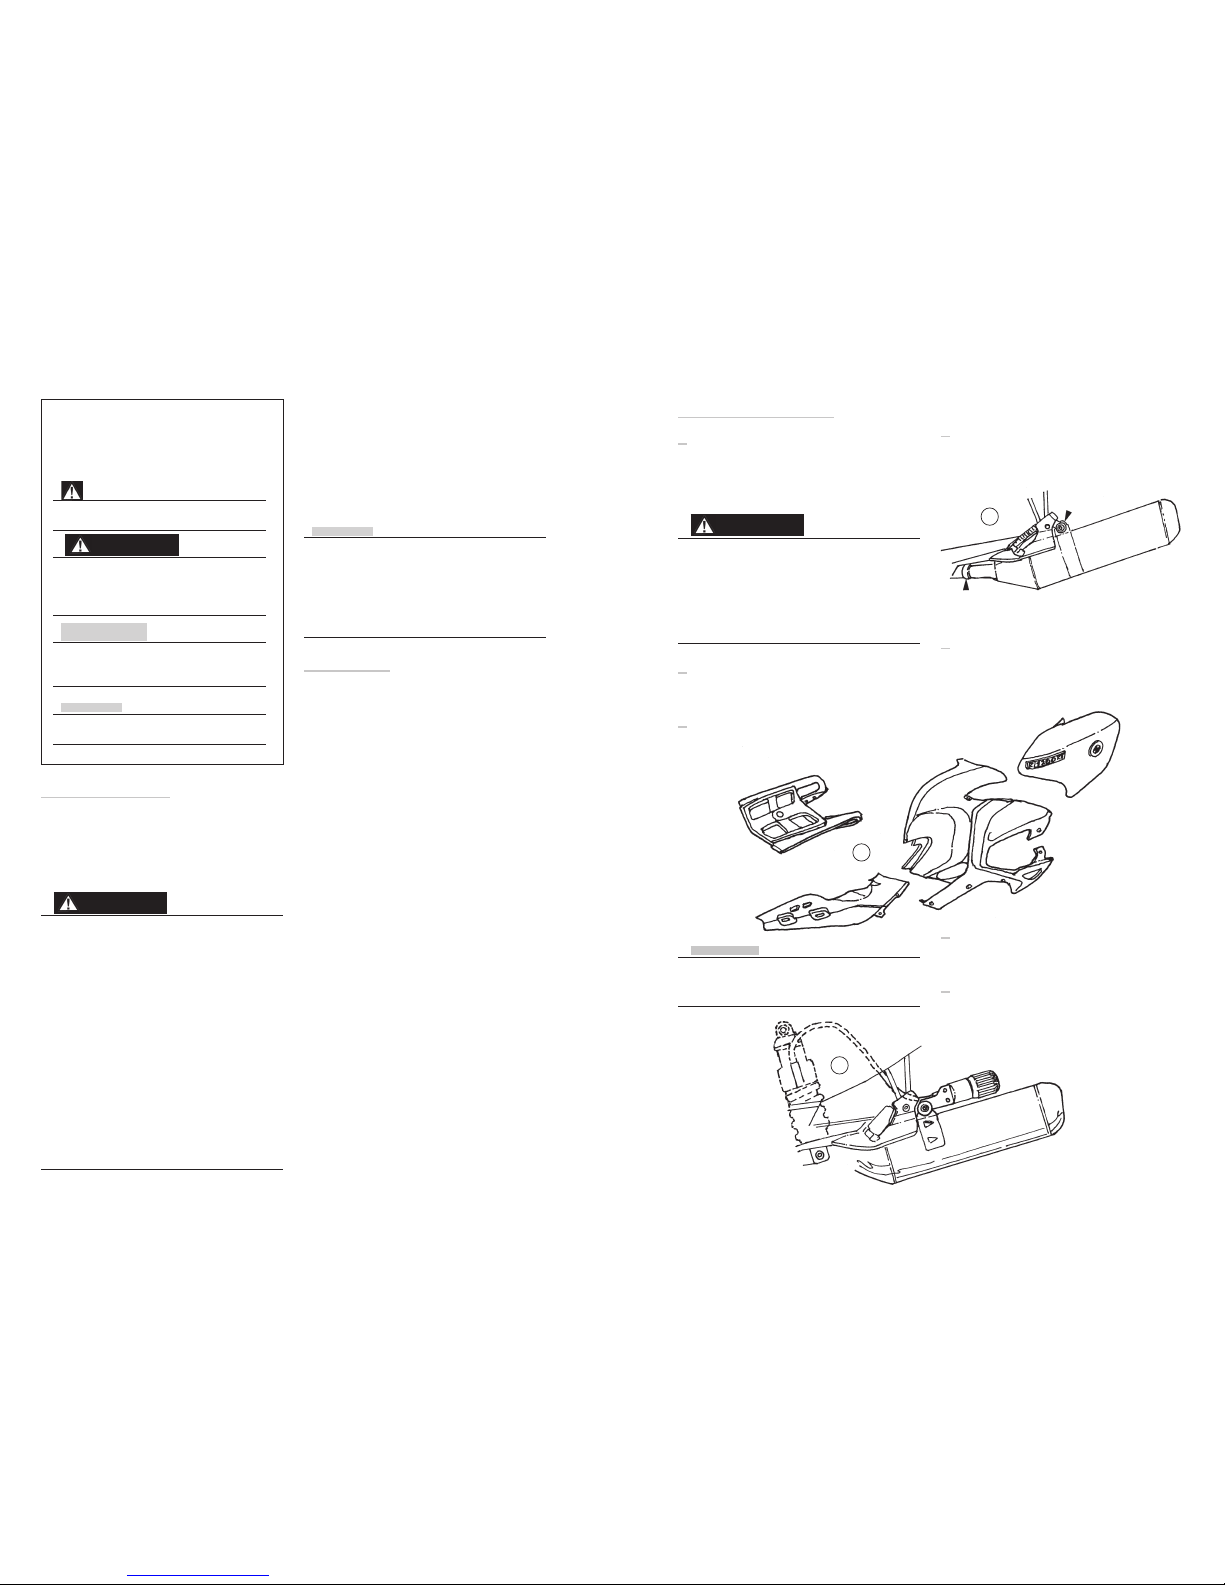
Let the hose run in soft turns and fix it with the
tie-raps (231-01) provided.
9
Refit the fairings, the carrier and the seat.
NOTE!
Make sure that all bolts are tightened to the correct
torque and that nothing fouls or restricts movement
of the shock absorber when the suspension is
being fully compressed or extended.
10
Continue your work according to the Owners
Manual, section Adjustments.
Page 2
Before installation
Öhlins Racing AB can not be held responsible for
any damage whatsoever to shock absorber or
vehicle, or injury to persons, if the instructions for
fitting and maintenance are not followed exactly.
Similarly, the warranty will become null and void
if the instructions are not adhered to.
WARNING!
1. Installing a shock absorber, that is not
approved by the vehicle manufacturer, may
affect the stability of your vehicle. Öhlins
Racing AB cannot be held responsible for
any personal injury or damage whatsoever
that may occur after fitting the shock
absorber. Contact an Öhlins dealer or other
qualified person for advice.
2. Please study and make certain that you
fully understand all the mounting instructions
and the owners manuals before handling this
shock absorber kit. If you have any questions
regarding proper installation procedures,
contact an Öhlins dealer or other qualified
person.
3. The vehicle service manual must be referred
to when installing the Öhlins shock absorber
Safety signals
Important information concerning safety is
distinguished in this manual by the
following notations:
The Safety alert symbol means:
Caution! Your safety is involved.
WARNING!
Failure to follow warning instructions
could result in severe or fatal injury
to anyone working with, inspecting or
using the suspension, or to bystanders.
CAUTION!
Caution indicates that special precautions must be taken to avoid damage to the suspension.
NOTE!
This indicates information that is of
importance with regard to procedures.
Öhlins products are subject to continual improvement and development. Consequently, although
these instructions include the most up-to-date
information available at the time of printing, there
may be minor differences between your suspension and this manual. Please consult your Öhlins
dealer if you have any questions with regard to
the contents of the manual.
NOTE!
During storage and transportation, especially
at high ambient temperature, the oil and
grease used for assembling may run out
inside the packing and damage the expanded
polystyrene packing material. This is not
unusual and is in no way detrimental to the
shock absorber.
Kit contents
Before installing the shock absorber, please
check the contents of the kit. If anything is
missing, contact your Öhlins dealer.
Description Pcs. Part No.
Shock absorber 46 DRS 1 BM 504
Tie-rap 2 00231-01
Screw MC6S 8x50 1 01046-25
Sticker memo notes 1 01180-01
Sticker Öhlins 2 00192-01
Owners manual 1
WARNING!
1. It’s advisable to have an Öhlins dealer or other
qualified person to fit your shock absorber.
2. Instructions in the vehicle service manual are
to be followed when changing the shock
absorber.
3. When working on a lifted vehicle it must be
securely supported to prevent it from falling.
Mounting instructions
1
Put the motorcycle on a stand so the rear wheel
is clear of the ground. The swing arm must be
free, so the suspension is unloaded. Make sure
it’s steadily fixed so it will not fall over.
2
Remove the silencer by loosening the clamp and
the rear attachment.
3
Loosen and remove the seat. Remove the carrier rack and all side fairings, first the front then
the rear ones.
4
If the motorcycle is equipped with ESA the electrical plugs must be disconnected from the shock
absorber.
NOTE!
The screws holding the fairings are of different
lengths. Make sure to return them to the correct
position.
3
4
5
Loosen first the lower shock absorber bracket,
then the upper and take the original shock absorber out.
6
Mount the Öhlins shock absorber in reverse order, first the upper attachment then the lower one.
7
Fit the hydraulic adjuster device to the silencer
bracket. Simultaneosly fit the silencer. Use the
screw provided and fit the bracket between the
foot rest bracket and the silencer.
7
 Loading...