

Page 1

Quick Start Guide Scout SKX Balances
Balance
Pan
Quick Start Guide
Stacking & Storage Cover (not applicable for 1mg model)
Warranty Card
Calibration Mass* (only for models up to 620g capacity)
AC Adapter & Plug
Density Kits* (Up Hook & Beaker Stand)
* Only available for certain regions.
PREPARATION FOR USE
Step-1
Release the red Transportation
Lock on the subplatform of the
balance
Turn the pointer 90 counterclockwise.
Step-2
Install the Pan
Rectangular pan: Place diagonally
on sub-platform and rotate counterclockwise until it locks.
Round pan: Set straight down on
subplatform.
Step-3
Connect Power
Connect the AC Adapter to the
balance input jack.
Battery Installation
Install the Four “AA” (LR6) batteries
(not included) with polarity as shown
in the battery compartment.
CAUTION: Read all safety warnings before installing, making
connections, or servicing this equipment. Failure to comply with these
warnings could result in personal injury and/or property damage. Retain
all instructions for future reference.
AC Adapter Jack
Battery
Compartment
Subplatform
Transportation
Lock Pointer
Locked Position
Unlocked
Position
UNPACKING
Carefully remove your Scout balance and each of its components from the
package. Store the packaging material to ensure safe storage and future transport.
Included Components:
SELECTING THE LOCATION
Place on a firm, steady surface with sufficient space. Avoid excessive air current,
vibrations, heat sources, or rapid temperature changes.
SAFETY PRECAUTIONS
Visit us at www.TestEquipmentDepot.com
99 Washington Street
Melrose, MA 02176
Phone 781-665-1400
Toll Free 1-800-517-8431
Scout
SKX Balances
Page 2

Scout SKX Balances Quick Start Guide
Button
Functions:
Button
Short Press
Zero/On
Turns the balance
on;
If balance is On,
sets Zero
Print
Initiates print
Function
Initiates an
application mode
Tare
Tare
Long Press
Off
Turns the balance
Off
Units
Changes the
weighing unit
Mode
Changes the
application mode
Menu
Enters the User
menu
Short Press
(Menu Function)
Yes
Accepts the
current setting
No
Advances to the
next menu or
setting
Back
Moves to previous
menu item
Exit
Exits the User
menu
Verify that the local AC power supply voltage is within the input voltage range
printed on the AC adapter’s ratings label.
Only connect the AC adapter to a compatible grounded socket.
Position the instrument such that the AC adapter can be easily disconnected
from the socket.
Position the power cord so that it does not pose a potential obstacle or tripping
hazard.
Operate the equipment only under ambient conditions specified in the user
instructions.
Do not operate the equipment in hazardous or explosive environments.
Disconnect the equipment from mains power before cleaning or servicing.
Service should only be performed by authorized personnel.
CONTROLS
Scout
SKX Balances ii
Page 3
Quick Start Guide Scout SKX Balances
Step-1
Press and hold Menu until [mMeNU] (Menu) is displayed.
Step-2
Release the button, the display will show [C.A.L].
Step-3
Press Yes to accept. [SpaN] will then be shown.
Step-4
Press Yes to begin the span calibration. Zero reading is stored
automatically.
Step-5
The specified mass blinks on the display.
Place the specified span calibration mass on the pan or press No to
select an alternate weight.
[--C--] will blink while the reading is stored.
The display will show [done] if the calibration was successful. The
balance returns to the previous application mode and is ready for use.
The balance can be configured to operate in various Application modes.
Press and hold Mode key to select your Application mode.
The Scout SKX balance
incorporates the following
Applications shown on the
right:
[wWeIGH]
[SPEC.Gr]
[mMoLE]
Weighing
Density
Determination
Mole
Weighing
Weighing [wWeIGH]
1. Press the Zero/On button to turn the balance on.
2. Select Weighing (this application is the default) by pressing & holding Mode key.
3. Press Tare or Zero if necessary to begin.
4. Place objects on the pan to display the weight. When stable, the * appears.
The display shows the resulting value of the sample.
Density Determination [SPEC.Gr]
This mode allows the user to calculate the specific
gravity of a sample when using the density kit. Density
mode has been initiated when “G” and the current unit is
displayed.
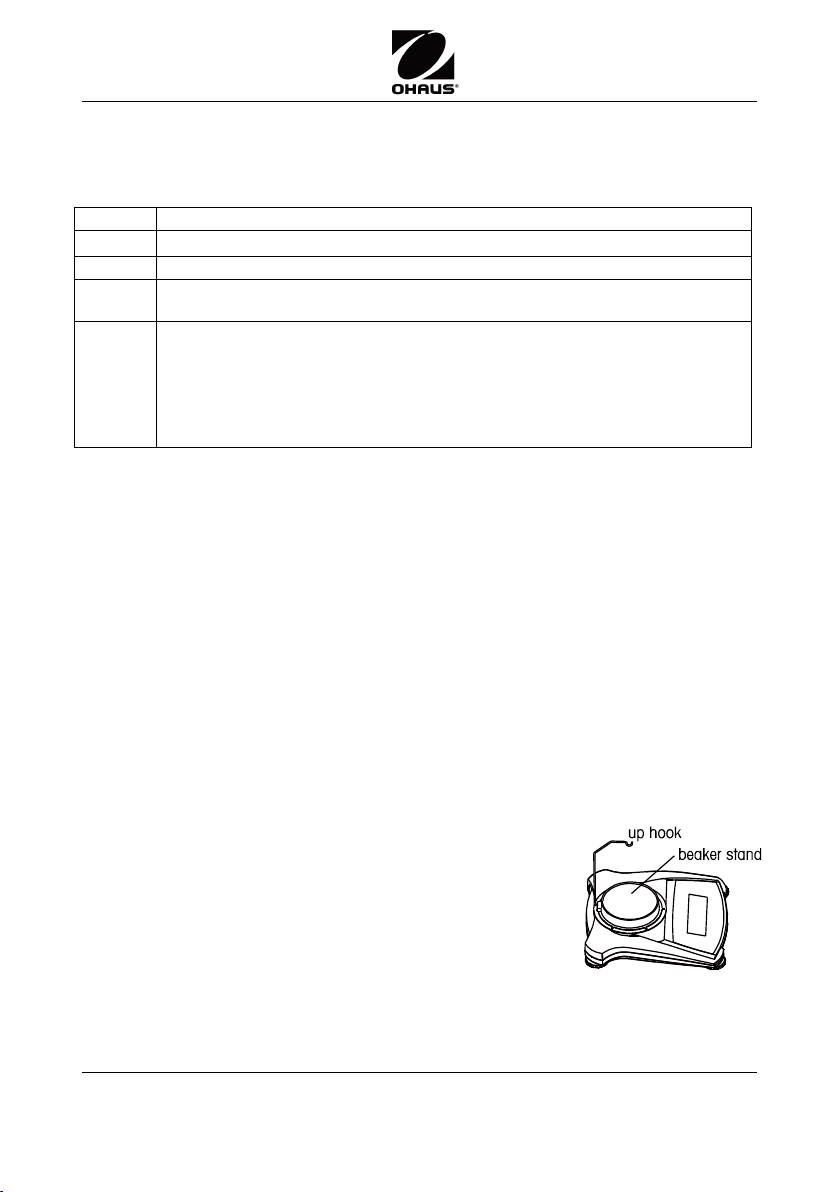
1. Prepare the balance as shown right. Remove the
balance platform, insert the up hook and install the
beaker stand (beaker is not supplied).
2. Press the Zero/On button to turn the balance on.
CALIBRATION
When the balance is operated for the first time, a span calibration is
recommended to ensure accurate weighing results. With balance turned on:
OPERATION & APPLICATIONS
iii Scout
SKX Balances
Page 4
Scout SKX Balances Quick Start Guide
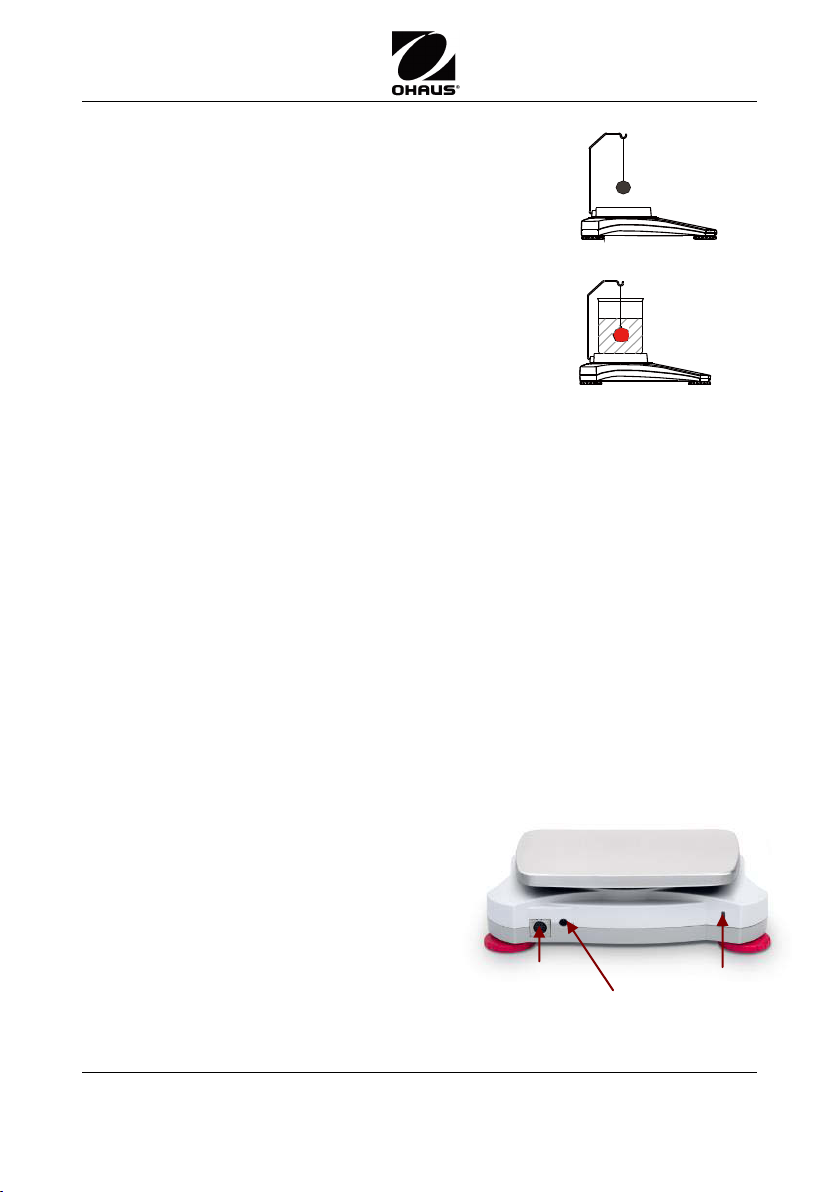
3. If needed, press & hold Mode key until [SPEC.Gr] is
displayed, then release.
4. [Air.wWt] (Air weight) is displayed, place weight on the
hook
5. Press Yes to store the dry weight value.
6. [wW.wWt] (Wet weight) is displayed, place weight in the
water.
7. Press Yes to get the final specifiec gravity value.
Note: "G" indicates a specific gravity value; and has no
unit of measure.
For large samples it is recommended to use the weigh
below feature (weigh below hook located in battery
compartment).
Mole Weighing Mode [mMoLE]
1. If needed, press and hold the Mode key until [mMoLE] is displayed, then release.
2. [Clr.mMS] is displayed.
2. Press the Yes key to clear the stored Molar Mass. Press the No key to recall the
existing Molar Mass. If no Molar Mass was stored, the [Clr.mMS] display is skipped
and inputting a Molar Mass is required.
3. If there is a Molar Mass stored, the current Molar Mass will be displayed and
flashing.
4. Press the No key to begin editing the Molar Mass.
5. Press the No/Back key to increment/decrement the flashing digit.
7. Press the Yes key to accept the value and move one digit to the right.
Notes: If the setting exceeds the limit, the display returns to the previously stored
value. The available settings are from 0.01 to 999.99. The Molar Mass unit is g/mol.
Use an optional interface connectivity kit to
connect the balance either to a computer,
printer or OHAUS auxiliary display.
Below Interface kit accessories are available:
RS232, USB Host, USB Device, Ethernet,
Bluetooth*.
Interface connection on the rear of
the balance:
* Interface kits may vary according to local regulations
Air Weight
Wet Weight
Interface
connection
AC Adapter
Jack
Security Slot
ADDITIONAL FEATURES
Connecting the Interface
Scout
SKX Balances iv
Page 5
Quick Start Guide Scout SKX Balances
Sub-Menus
C.a.l
S.e.t.u.p
M.o.d.e
U.n.i.t
E.n.d
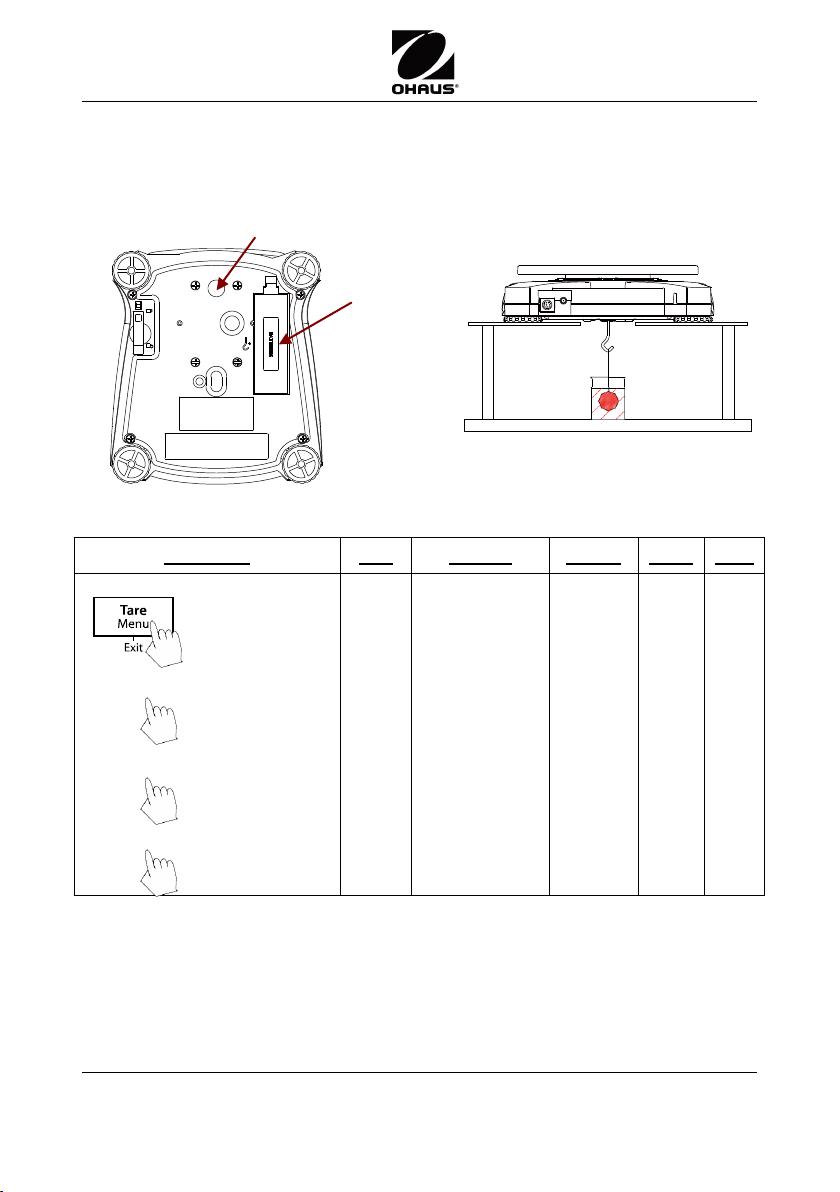
User Menu Items:
Span
Lin
Reset
Yes/No
Filter
Low/Med/High
AZT
0.5/1/3/Off
StableRange
0.5/1/2//5
Backlight
Off/On/Auto
Auto Tare
Off/On/On-acc
Auto Off
Off/1/5/10
Reset
Yes/No
Weighing
On/Off
Density
On/Off
Mole
On/Off
Reset
g
kg
N
oz
lb
lb:oz
End
End
End
End
Note: Bold fonts are default setting in the menu.
No/Back
Long press -Enter
menu
Short press -
Accept
Short press –
Go Next/Prev.
menu
Yes
Exit
Short press –
Exit menu
Weigh below protective cover
Weigh
below
hook
Weigh Below Hook
The weigh below hook is located at the reverse side of the battery cover as shown.
To use this feature, remove the red protective cover underneath for the weigh below
opening.
MENU STRUCTURE
v Scout
SKX Balances
Page 6
Scout SKX Balances Quick Start Guide
Mark
Standard
This product complies with the EU Directives 2014/30/EU (EMC),
2014/35/EU (LVD) and 2014/31/EU (NAWI). The EU Declaration of
Conformity is available online at www.ohaus.com/ce.
This product complies with the EU Directive 2002/96/EC (WEEE).
Please dispose of this product in accordance with local regulations at
the collecting point specified for electrical and electronic equipment.
For disposal instructions in Europe, refer to www.ohaus.com/weee.
AS/NZS 61000.6.1, AS/NZS 61000.6.3
CAN/CSA-C22.2 No. 61010-1
UL Std. No. 61010-1
For more detailed information about the balance,
please refer to the product instruction manual. The
instruction manual can be obtained either by
scanning the QR code or by going to the product
page and from there download it.
QR Code:
COMPLIANCE
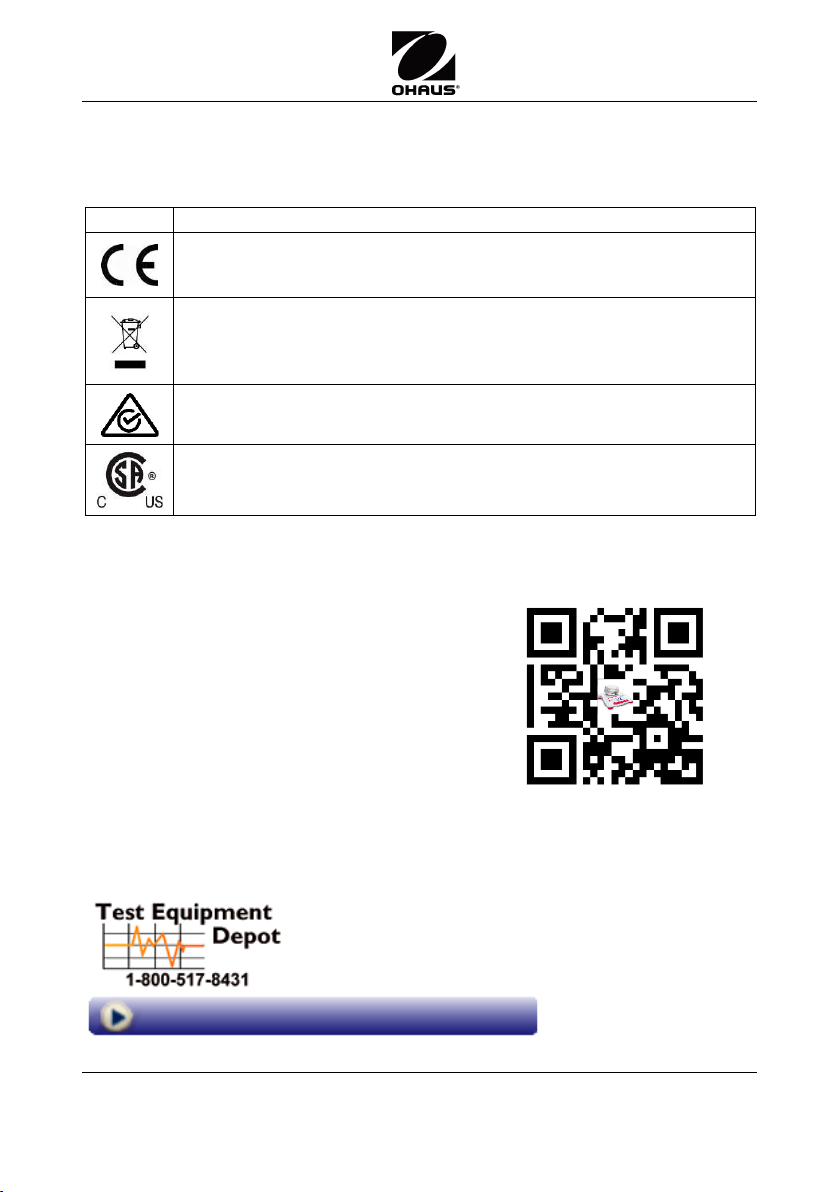
Compliance to the following standards is indicated by the corresponding mark on
the product.
INSTRUCTION MANUAL
99 Washington Street
Scout
Visit us at www.TestEquipmentDepot.com
SKX Balances vi
Melrose, MA 02176
Phone 781-665-1400
Toll Free 1-800-517-8431
 Loading...