

Page 1
i
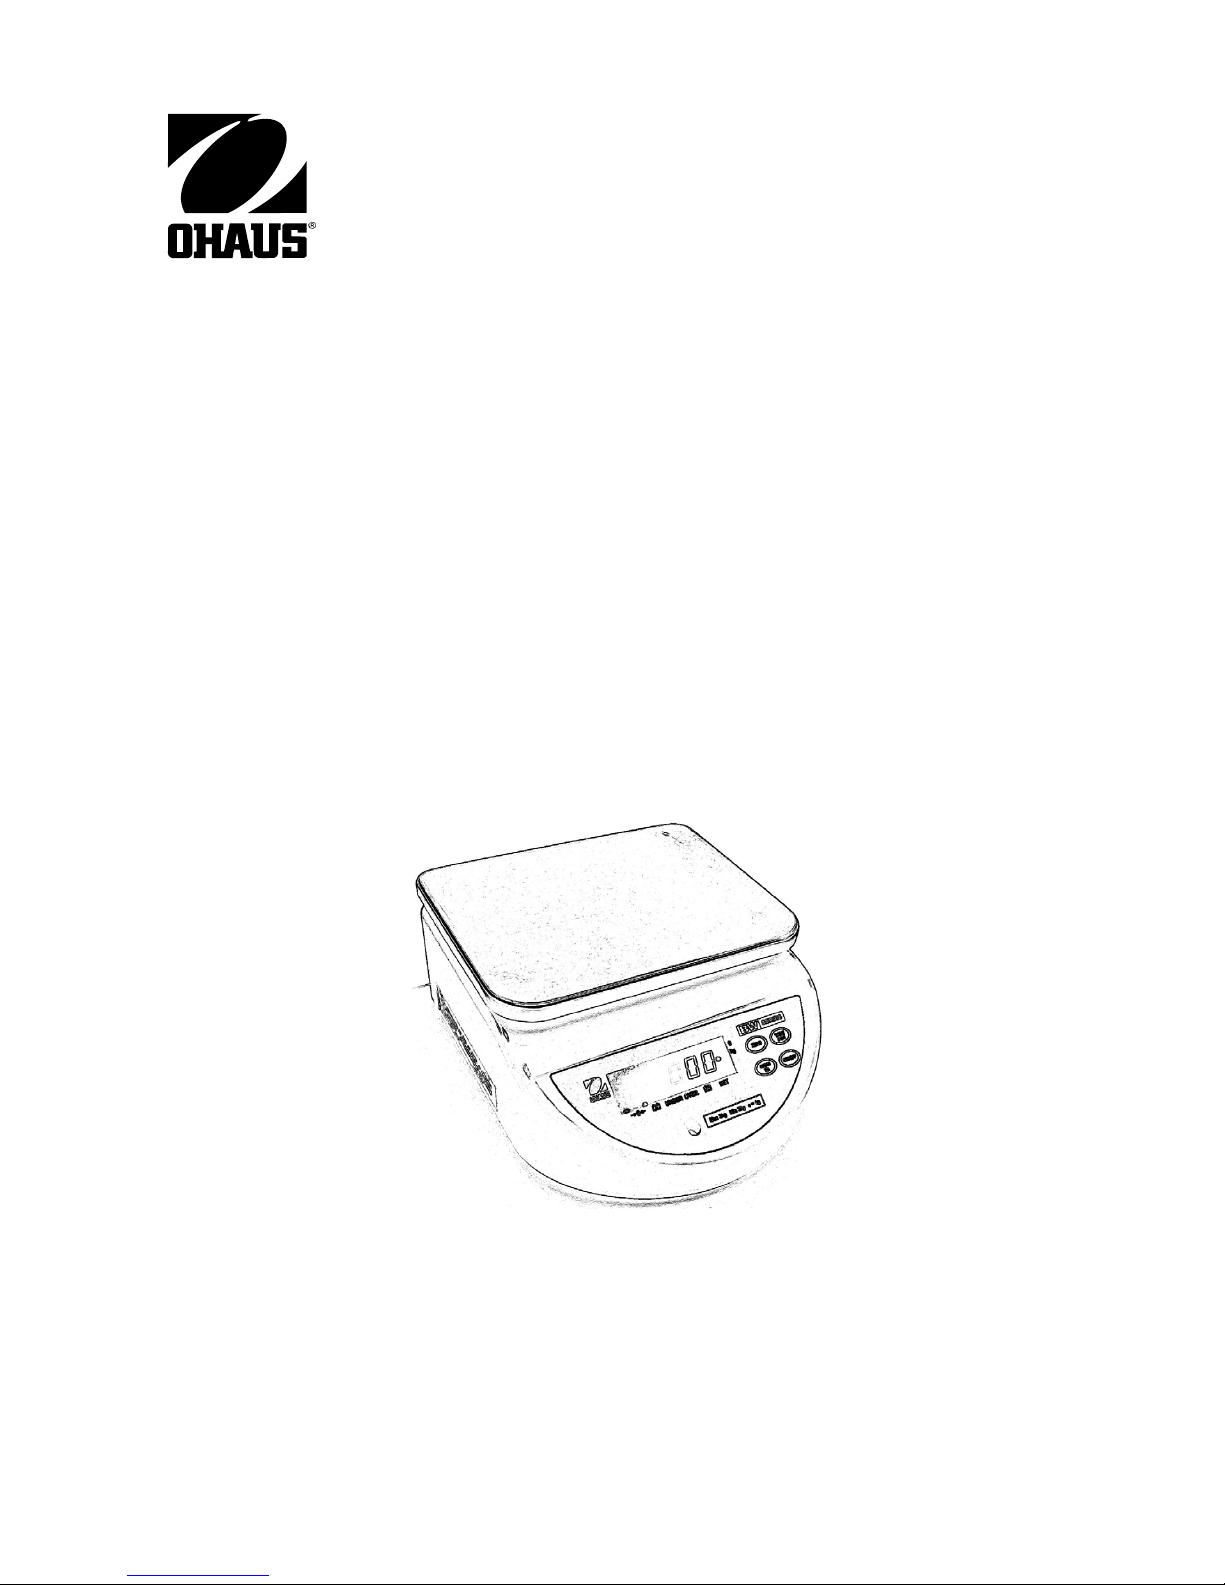
BW Series Compact Bench Scale
Báscula compacta de mesa de la Serie BW
Balance de table compacte, série BW
Kompakte Tischwaage der BW-Serie
Bilancia da banco Compact serie BW
Page 2

ii
Page 3
iii
Ted Xia
President
Ohaus Corporation
Pine Brook, NJ USA
Date: October 28, 2005
Urs Müller
General Manager
Ohaus Europe
Greifensee, Switzerland
Ohaus Corporation,19A Chapin Road, PO Box 2033, Pine Brook, NJ 07058 USA
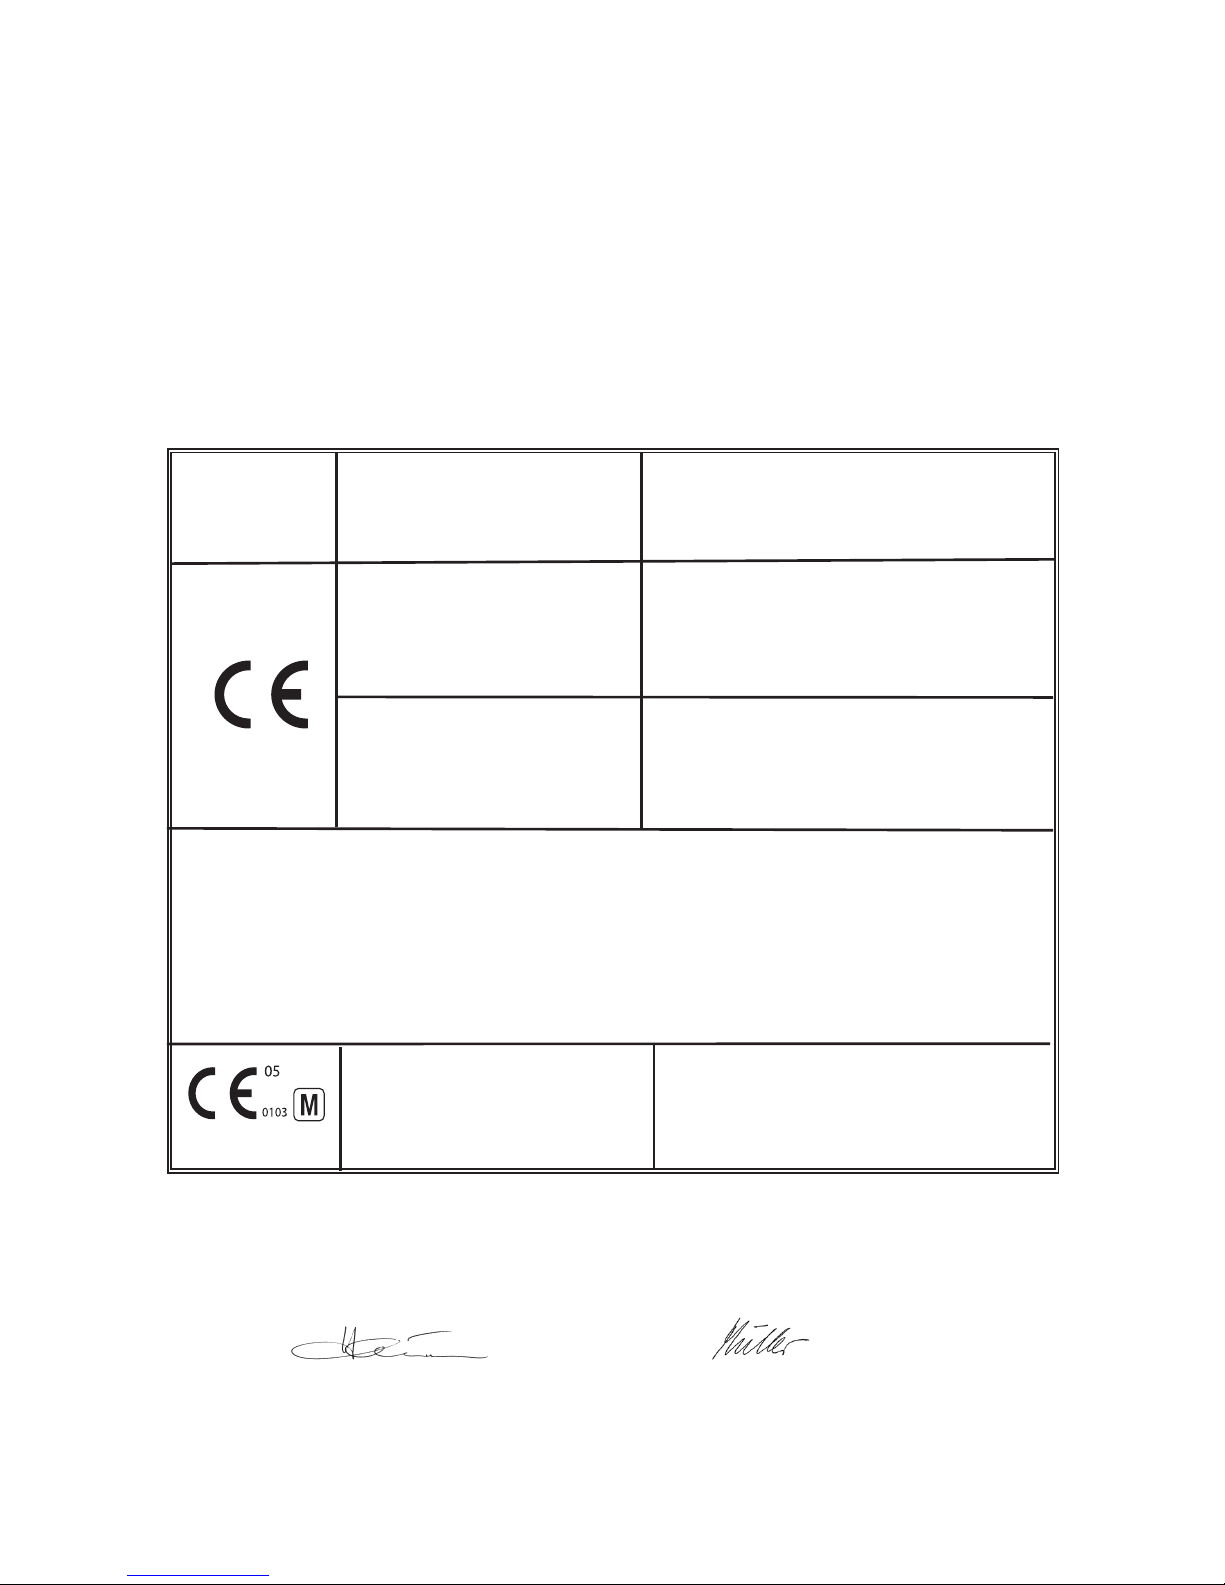
Declaration of Conformity We, Ohaus Corporation, declare under our sole responsibility, that the scale models listed below marked with
“CE” are in conformity with the directives and standards mentioned.
Declaración de Conformidad Nosotros, Ohaus Corporation, declaramos bajo responsabilidad exclusiva que los modelos de bascules
indicados a continuación – con el distintivo ‘CE’ – están conformes con las directivas y normas citadas.
Déclaration de conformité Nous, Ohaus Corporation, déclarons sous notre seule responsibilité, que les types de blance ci-dessous cité
– munis de la mention “CE” – sont conformes aus directives et aux norms mentionnées ci-après
Konformitätserkärung Wir, die Ohaus Corporation, erklären in alleiniger Verantwortung, dass die untenstehenden Waagentypen - mit den
genannten Richtlinien und Normen übereinstimmen.
Dichiarazione di conformità Noi, Ohaus Corporation, dichiariamo sotto nostra unica responsabilità, che i tipi di bilance specificati di
seguito - sono conformi alle direttive e norme citate..
Models/Type BW Series: BW1.5, BW3 BW6, BW15
Modelo/Tipo BW Serie: BW1.5, BW3 BW6, BW15
Modèle/Type BW Série: BW1.5, BW3 BW6, BW15
Modell/Typ BW Reihe: BW1.5, BW3 BW6, BW15
Modello/Tipo BW Serie: BW1.5, BW3 BW6, BW15
EC Marking: EC Directive Applicable Standards
Marcado EC Directiva EC Normas aplicables
Marquage CE Directive CE Normes applicables
EC-Markierung EC Richtlinie Geltende Standards
Marcature EC Direttiva EC Standard applicabili
73/23/EEC EN60950-1:2001
Low Voltage
Baja tensión
Basse tension
Niederspannung
Bassa tensione
89/336/EEC EN61326-1: +A1:1998 +A2: 2001
Electromagnetic compatibility
Compatibilidad electromagnética
Compatibilite électromagnetique
Elektromagnetische Verträglichkeit
Compatibilità elettromagnetica
For non-automatic weighing instruments used in an Article 1, 2.(a) application, additional metrological marking according to Annex IV of
Council directive 90/384/EEC must be attached to the instrument
Para instrumentos de pesaje no automático usados en una aplicación descrita en el Artículo 1, 2.(a), se debe colocar sobre el instru
mento una marcación metrológica adicional de acuerdo con el Anexo IV de la Directriz del Consejo 90/384/EEC.
Pour les instruments de pesage non-automatiques utilisés dans une application Article 1, 2.(a), un repérage métrologique additionnel
conforme à l’Annexe IV de la Directive 90/384/EEC du Conseil doit être présent sur l’instrument.
Für nicht selbsttätige Waagen, die in einer Anwendung gemäß Artikel 1, 2.(a) verwendet werden, muss eine zusätzliche messtechnische
Markierung gemäß Anhang IV der Richtlinie 90/384/EEC des europäischen Rats am Instrument befestigt werden.
Per gli strumenti di pesa non automatici usati nelle applicazioni elencate nell’Articolo 1, 2.(a), è necessario incollare allo strumento delle
marcature metrologiche secondo quanto descritto nell’allegato IV della Direttiva del Consiglio 90/384/EEC
90/384/EEC EN45501:1992 1)
Non-Automatic Weighing Instruments
Para balanzas no automátäcas
Balances à fonctionnement non automatique
Für nicht selbsttätige Waagen
Per bilance a funzionamento non automatics
1) Applies only to certified non-automatic weighing instruments
Applicabile solamente a strumenti di pesatura a funzionamento non automatico
S’applique uniquement aux instruments de pesage à fonctionnement non automatique approuvés
Betrifft nur zertifizierte nicht selbsttätige Waagen
Applicabile solamente a strumenti di pesatura a funzionamento non automatico
Page 4
iv
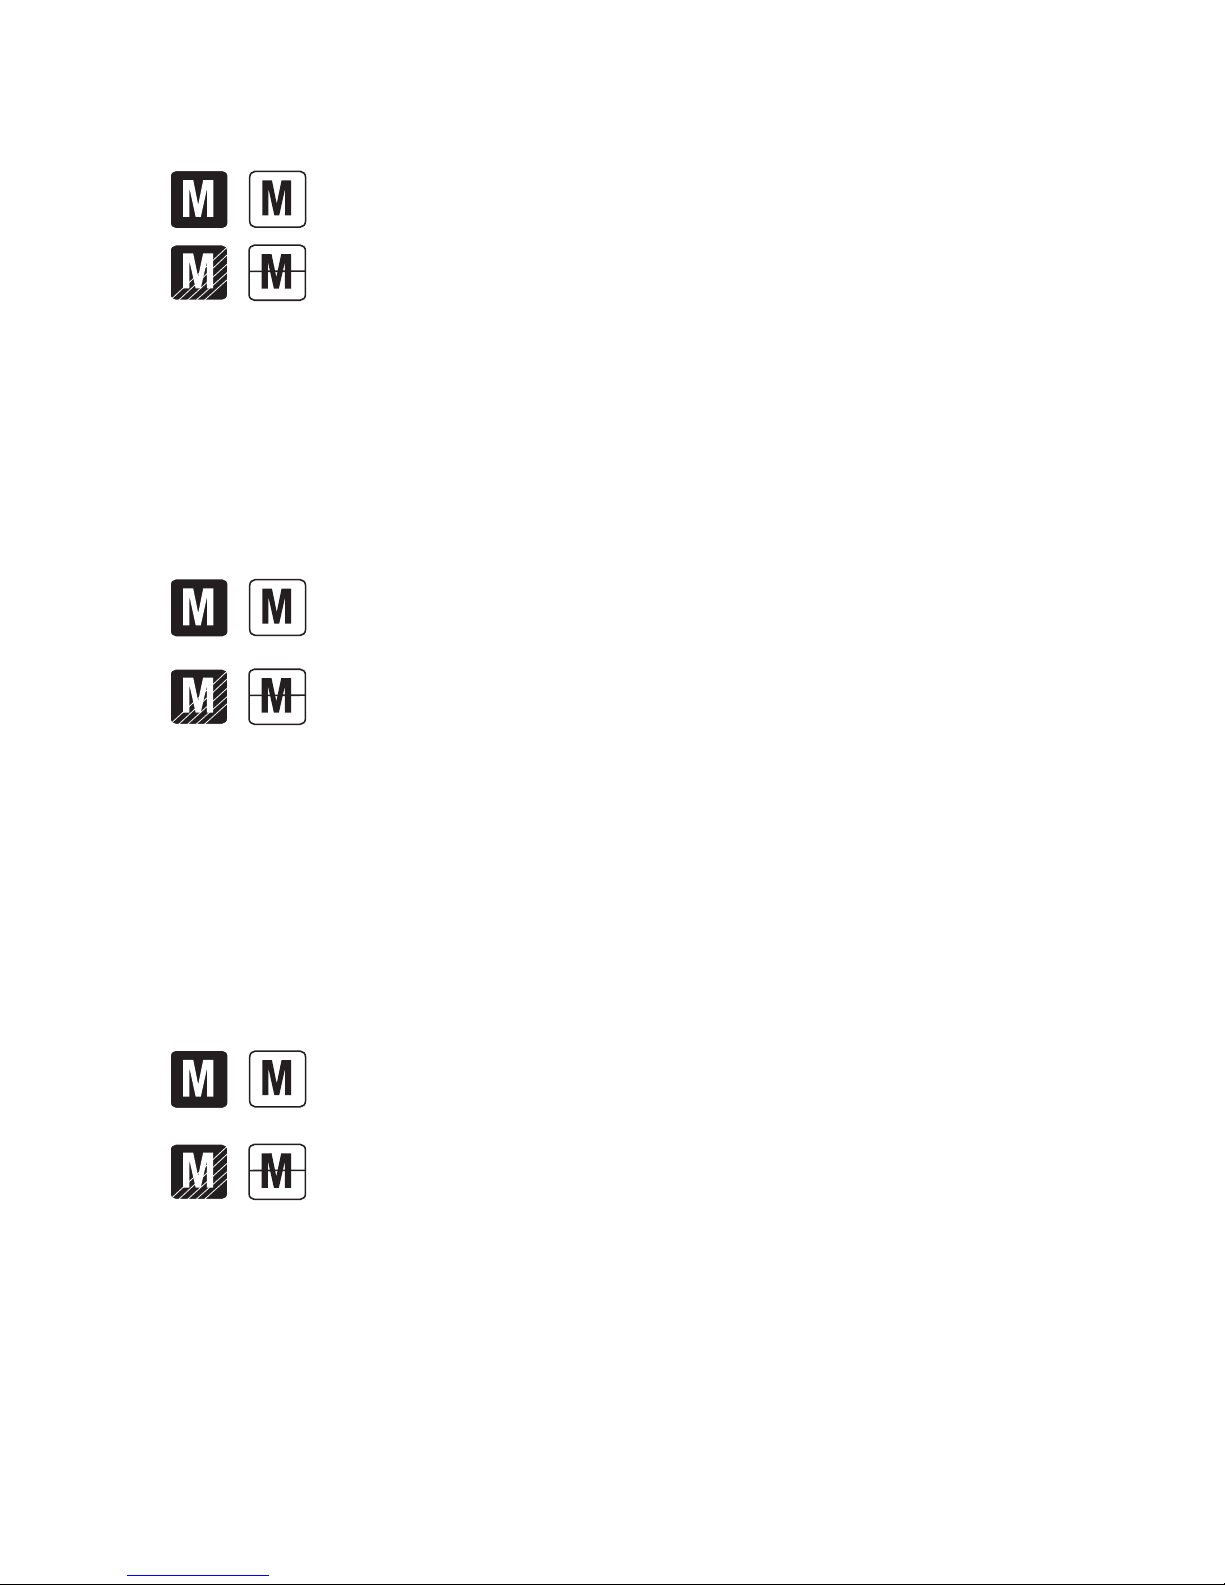
Weighing Instruments verified at the place of manufacture bear one of the
preceding mark on the packing label and the green ‘M’ (metrology) sticker on the
descriptive plate. They may be put into service immediately.
Important notice for verified weighing instruments
Weighing Instruments to be verified in two stages have no green ‘M’ (metrology)
on the descriptive plate and bear one of the preceding identification mark on the
packing label. The second stage of the initial verification must be carried out by
the approved service organzation of the authorized representative within the EC or
by the national weight & measures (W+M) authorities.
The first stage of the initial verification has been carried out at the manufacturers work. It comprises
all tests according to the adopted European standard EN 45501:1992, paragraph 8.2.2.
If national regulations limit the validity period of the verification, the user of the weighing instrument
must strictly observe the re-verification period and inform
the respective W+M authorities.
Los instrumentos de pesaje verificados en el sitio de fabricación llevan una de
las marcas precedentes en el rótulo del empaque y la etiqueta de la ‘M’ verde
(metrología) en la placa descriptiva. Estos instrumentos se pueden poner en
funcionamiento inmediatamente.
Notificación importante para instrumentos de pesaje verificados
Los instrumentos de pesaje a ser verificados en dos etapas no tienen ninguna
‘M’ verde (metrología) en la placa descriptiva, y presentan una de las marcas
de identificación precedentes sobre el rótulo del empaque. La segunda etapa
de la verificación inicial debe
ser llevada a cabo por la organización de servicio aprobada del representante autorizado dentro de la CE o por las autoridades nacionales de pesos y
medidas.
La primera etapa de la verificación inicial ha sido llevada a cabo en el sitio de fabricación. Ésta
comprende todas las pruebas estipuladas por el estándar europeo adoptado: EN 45501:1992,
párrafo 8.2.2.
Si las normas nacionales limitan el periodo de validez de la verificación, el usuario del instrumento
de pesaje debe seguir estrictamente el periodo de re-verificación e informar a las correspondientes
autoridades de pesos y medidas.
Les instruments de pesage vérifiés sur le site de fabrication portent l’une des
marques précédentes sur l’étiquette de l’emballage avec un autocollant M (pour
Métrologie) en vert sur la plaque descriptive. Ces instruments peuvent être immédiatement mis en service.
Avis important pour les instruments de pesage vérifiés
Les instruments de pesage à vérifier en deux étapes ne portent pas d’autocollant
M (pour Métrologie) en vert sur la plaque descriptive et portent l’une des marques
d’identification précédentes sur l’étiquette de l’emballage. La deuxième étape de
la vérification initiale doit être exécutée par l’organisation de service homologuée
du représentant agréé au sein de la CE ou par les autorités nationales de poids et
mesures.
La première étape de la vérification initiale a été exécutée sur le site du fabricant. Elle se compose des
tests requis par la norme européenne EN45501:1992, paragraphe 8.2.2.
Si des règlements nationaux limitent la durée de validité de la vérification, il incombe à l’utilisateur dudit instrument de pesage de respecter strictement la période de re-vérification et d’informer les autorités
de poids et mesures respectives.
Page 5
v
Wägeinstrumente, die am Herstellungsort verifiziert werden, tragen eine der oben
angeführten Marken auf dem Verpackungsetikett sowie einen grünen „M“-Aufkleber (Messtechnik) auf dem Schild mit der Beschreibung. Sie können sofort in
Betrieb genommen werden.
Bei Wägeinstrumenten, die in zwei Phasen verifiziert werden müssen, befindet
sich auf dem Schild mit der Beschreibung kein grüner „M“-Aufkleber (Messtechnik) und sie tragen eine der oben aufgeführten Identifikationsmarkierungen auf
dem Verpackungsetikett. Die zweite Phase der anfänglichen Verifizierung muss
von der zugelassenen Servicebehörde des Vertragshändlers innerhalb der EU
oder durch nationale Behörden für Maße u. Gewichte durchgeführt werden.
Die erste Phase der anfänglichen Verifizierung wurde am Arbeitsort des Herstellers durchgeführt. Sie
umfasst alle Tests gemäß dem verabschiedeten europäischen Standard EN 45501:1992, Absatz
8.2.2.
Falls der Gültigkeitszeitraum der Verifizierung durch nationale Vorschriften eingeschränkt wird, muss
der Benutzer des Wägeinstruments die Neuverifizierungsfrist streng einhalten und die entsprechenden
Behörden für Maße und Gewichte informieren.
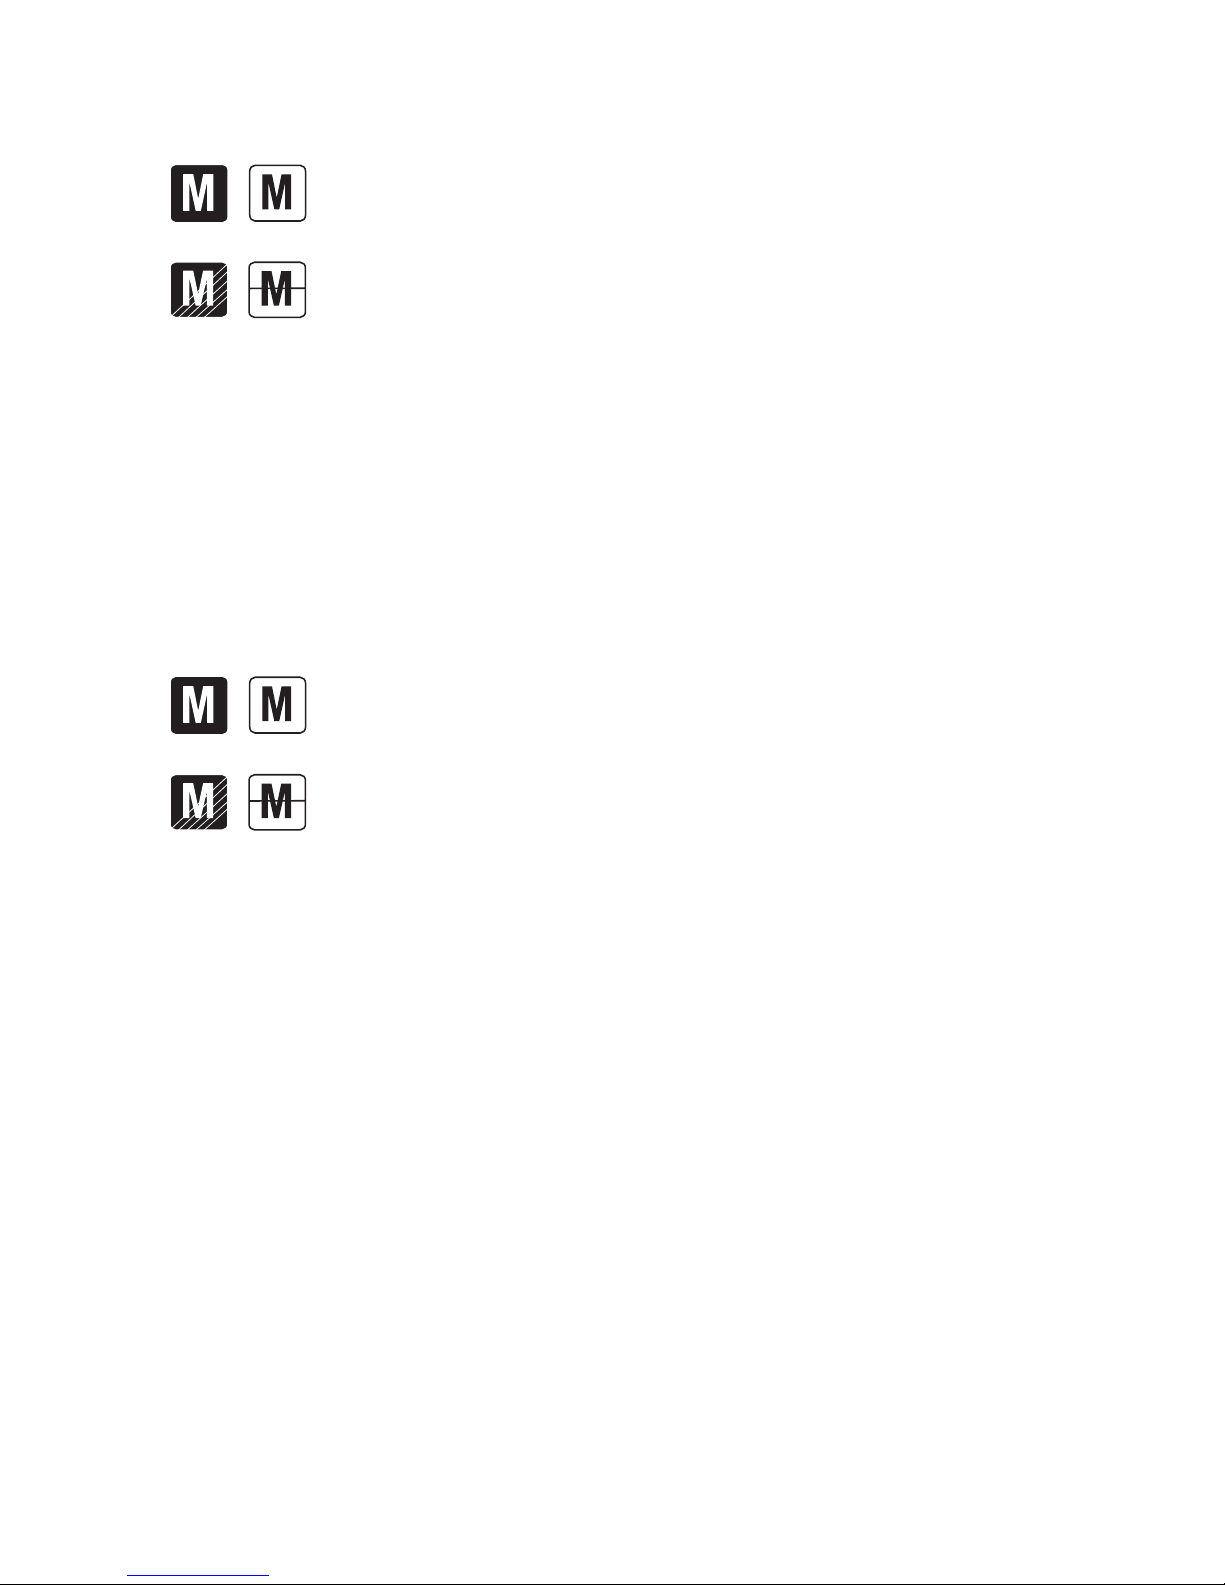
Gli strumenti di pesa certificati sul luogo di fabbricazione recano sull’etichetta
della confezione uno dei marchi mostrati qui accanto e l’adesivo con la ‘M’
verde (metrologia) sulla targa descrittiva. Possono essere messi immediatamente in funzione.
Nota importante per gli strumenti di pesa certificati
Gli strumenti di pesa che devono essere certificati in due momenti non recano la
‘M’ verde (metrologia) sulla targa descrittiva, ma solo il marchio di identificazione mostrato qui accanto sull’etichetta della confezione. La seconda fase della
certificazione iniziale deve essere condotta da un centro di assistenza approvato
dal rappresentante autorizzato nell’ambito della CE o dalle autorità nazionali per
i pesi e le misure.
La prima fase della certificazione iniziale è stata condotta presso gli stabilimenti di produzione.
Durante questa fase vengono eseguiti tutti i test previsti dallo standard europeo adottato EN
45501:1992, paragrafo 8.2.2.
Se la normativa nazionale limita il periodo di validità della certificazione, l’utente dello strumento
di pesa deve rigorosamente osservare il periodo di ulteriore certificazione e informare le rispettive
autorità per i pesi e le misure.
Wichtiger Hinweis für verifizierte Wägeinstrumente
Page 6

vi
In conformance with the European Directive 2002/96/ EC on Waste Electrical and Electronic Equipment (WEEE) this device may not be disposed of in domestic waste. This
also applies to countries outside the EU, per their specific requirements.
Please dispose of this product in accordance with local regulations at the collecting point
specified for electrical and electronic equipment.
If you have any questions, please contact the responsible authority or the distributor
from which you purchased this device.
Should this device be passed on to other parties (for private or professional use), the
content of this regulation must also be related.
Thank you for your contribution to environmental protection.
De conformidad con la directriz europea 2002/96/CE respecto al desecho de
equipos eléctricos y electrónicos (WEEE, por su sigla en inglés), este dispositivo no puede ser desechado junto con las basuras domésticas. Esto también se aplica a países
fuera de la Comunidad Europea, con base en sus requerimientos
específicos.
Por favor disponga de este producto de acuerdo con las normas locales en el punto de
recolección especificado para equipos eléctricos y electrónicos.
Si tiene alguna pregunta, sírvase consultar a la autoridad responsable o al
distribuidor a quien usted compró este dispositivo.
En caso de que este dispositivo sea pasado a otra entidad o persona (para uso privado
o profesional), el contenido de esta norma también aplica.
Gracias por contribuir a la protección del ambiente.
Conformément à la directive européenne 2002/96/ EC sur l’équipement électronique et
électrique des déchets (WEEE), cet appareil ne peut pas être éliminé dans des déchets
ménagers. Cette consigne est également valable pour les pays en dehors de l’UE, selon
les conditions spécifiques aux pays.
Prière d’éliminer ce produit conformément à la réglementation locale au point de collecte spécifié pour les équipements électriques et électroniques.
Pour de plus amples informations, contactez l’autorité responsable ou le distributeur
auprès duquel vous avez acheté cet appareil.
Si cet appareil change de propriétaire (pour des raisons personnelles ou professionnelles), cette consigne doit être communiquée à l’autre partie.
Nous vous remercions de votre contribution à la protection de l’environnement..
Page 7

vii
In Übereinstimmung mit der europäischen Richtlinie 2002/96/ EC über Elektro- und
Elektronik-Altgeräte (Waste Electrical and Electronic Equipment - WEEE) darf dieses
Gerät nicht als Hausmüll entsorgt werden. Dies gilt laut spezifischer Anforderungen auch
für Länder außerhalb der EU.
Entsorgen Sie dieses Produkt bitte gemäß den örtlichen Vorschriften an der Entsorgungsstelle, die für Elektro- und Elektronikgeräte vorgegeben ist.
Falls Sie irgendwelche Fragen haben, wenden Sie sich bitte an die zuständige Behörde
oder den Vertriebshändler, von dem Sie dieses Gerät erworben haben.
Sollte dieses Gerät an Drittparteien abgegeben werden (zum privaten oder gewerblichen
Gebrauch), muss der Inhalt dieser Vorschrift ebenfalls übermittelt werden.
Vielen Dank für Ihren Betrag zum Umweltschutz.
In base alla direttiva europea WEEE 2002/96/CE sui rifiuti di apparecchiature elettriche
ed elettroniche (Waste Electrical and Electronic Equipment ), questo dispositivo non
deve essere smaltito assieme agli altri rifiuti domestici. La direttiva è applicabile anche
ai paesi non facenti parte dell’Unione Europea, in base agli specifici requisiti.
Smaltire questo prodotto conformemente alla normativa locale, portandolo presso il
punto di raccolta specifico per le apparecchiature elettriche ed elettroniche.
Per eventuali altre domande, si prega di contattare l’autorità responsabile o il distributore presso il quale l’apparecchio è stato acquistato.
Qualora questo apparecchio passi ad altre persone (per uso privato o professionale),
anche per queste varrà il contenuto della presente normativa.
Grazie per il contributo alla salvaguardia dell’ambiente.
Page 8

viii
ISO 9001 Registration
In 1994, Ohaus Corporation, USA, was awarded a certificate of registration to ISO
9001 by Bureau Veritus Quality International (BVQI), confirming that the Ohaus
quality management system is compliant with the ISO 9001 standard’s requirements. On May 15, 2003, Ohaus Corporation, USA, was re-registered to the ISO
9001:2000 standard.
Registro ISO 9001
En 1994, Bureau Veritus Quality International (BVQI) le otorgó a Ohaus Corporation, EE.UU., un certificado de registro ISO 9001 el cual confirma que el sistema
administrativo de calidad de Ohaus cumple con los requerimientos del estándar ISO
9001. En mayo 15 del 2003, Ohaus Corporation, EE.UU., fue registrada nuevamente al estándar ISO 9001:2000.
Enregistrement ISO 9001
En 1994, le Bureau Veritus Quality International (BVQI) a octroyé la certification
d’enregistrement ISO 9001 à Ohaus Corporation, États-Unis d’Amérique, confirmant que le système de gestion de la qualité Ohaus était conforme aux conditions normalisées de l’ISO 9001. Le 15 mai 2003, Ohaus Corporation, États-Unis
d’Amérique, a été ré-enregistrée à la norme ISO 9001:2000.
Registrierung nach ISO 9001
Im Jahr 1994 wurde der Ohaus Corporation, USA, ein Zertifikat der Registrierung
nach ISO 9001 vom Bureau Veritus Quality International (BVQI) verliehen, in dem
bestätigt wird, dass das Ohaus-Qualitätsmanagementsystem den Anforderungen der
Norm ISO 9001 entspricht. Am 15. Mai 2003 wurde die Ohaus Corporation, USA,
gemäß der Norm ISO 9001:2000 neu registriert.
Registrazione ISO 9001
Nel 1994, Ohaus Corporation, USA, ha ricevuto il certificato di registrazione ISO
9001 da Bureau Veritus Quality International (BVQI), come conferma che il sistema
di gestione della qualità Ohaus risponde alle caratteristiche standard di ISO 9001. Il
15 Maggio 2003, Ohaus Corporation, USA, è stata riregistrata per la normativa ISO
9001:2000.
Page 9

BW SERIES COMPACT BENCH SCALE EN-1
1. INTRODUCTION ............................................................................... EN-2
1.1 Product Description ................................................................. EN-2
1.2 General Features ..................................................................... EN-2
1.3 Safety Precautions .................................................................. EN-2
2. INSTALLATION ................................................................................. EN-3
2.1 Unpacking ............................................................................. EN-3
2.2 Installing Components ............................................................. EN-3
2.3 Selecting the Location ............................................................. EN-3
2.4 Leveling the Scale ................................................................... EN-3
2.5 Connecting Power ................................................................... EN-4
2.5.1 AC Power ...................................................................... EN-4
2.5.2 Battery Power ................................................................ EN-4
2.6 Initial Calibration .................................................................... EN-4
3. OVERVIEW OF CONTROLS AND FUNCTIONS ........................................ EN-5
4. OPERATIONS ................................................................................... EN-6
4.1 Switching the Unit On and Off ................................................... EN-6
4.2 Manual Tare ........................................................................... EN-6
4.3 Zero Operation ........................................................................ EN-6
4.4 Changing Weighing Units ........................................................ EN-6
5. SCALE SETTINGS ............................................................................. EN-7
5.1 Scale Increment ...................................................................... EN-7
5.2 Backlight ............................................................................... EN-7
6. CALIBRATION AND SEALING ............................................................. EN-8
6.1 Calibration ............................................................................. EN-8
6.2 Type Approval Sealing ............................................................ EN-10
7. CLEANING AND MAINTENANCE ......................................................... EN-11
8. TROUBLESHOOTING ........................................................................ EN-12
9. TECHNICAL DATA ............................................................................ EN-13
9.1 Drawings..................................................................................EN-13
9.2 Specifications........................................................................... EN-14
WARRANTY.......................................................................................... EN-15
Page 10

EN-2 BW SERIES COMPACT BENCH SCALE
1. INTRODUCTION
This manual contains installation, operation and maintenance instructions for the BW
Series Compact Bench Scale. Please read the manual completely before installation
and operation.
1.1 Product Description
The BW Series Compact Bench Scale is an economical portioning, packing and
general weighing scale designed to provide fast and accurate weighing performance
in washdown environments. With an internal sealed rechargeable lead-acid battery,
IP65 housing and high-speed display update, the BW Series Compact Bench Scale
offers portability, durability and productivity in one practical design.
1.2 General Features
• Capacity models: 1.5kg, 3kg, 6kg, 15kg
• Maximum displayed resolutions from 1:6,000-7,500
• Type approved resolution 1:3,000
• High-profile ABS housing, stainless steel pan (pan is dishwasher-safe)
• IP65 dust and water jet protection
• 4-adjustable leveling feet with integrated front-panel leveling indicator
•
Bright red LED weight display: 6-digit, 7-segment, 14 mm high characters
• 4-button control panel: On/Off, Check, Tare, Zero
• 2-weighing units: kg, g
• Battery charge indication
• AC power or 15-hour rechargeable lead-acid battery
• Over-Under checkweighing function with audible alarm
1.3 Safety Precautions
For safe and dependable operation of this scale, please comply with the
following safety precautions:
• Verify that the input voltage printed on the AC Adapter and the plug type
matches the local AC power supply.
•
Make sure that the power cord does not pose an obstacle or tripping hazard.
• Disconnect the scale from the power supply when cleaning the scale.
• Do not operate the scale in hazardous or unstable environments.
• Do not drop loads on the platform.
• Use only approved accessories and peripherals, as available.
•
Operate the scale only under ambient conditions specified in these instructions.
• Service should be performed by authorized personnel only.
Page 11
BW SERIES COMPACT BENCH SCALE EN-3
2. INSTALLATION
2.1 Unpacking
Unpack and verify that the following components have been included:
• BW Scale Unit
• Weighing Pan
• AC-DC Adapter
• Instruction Manual
Save the packaging material. This packaging ensures the ideal protection for the
storage or transport of the product.
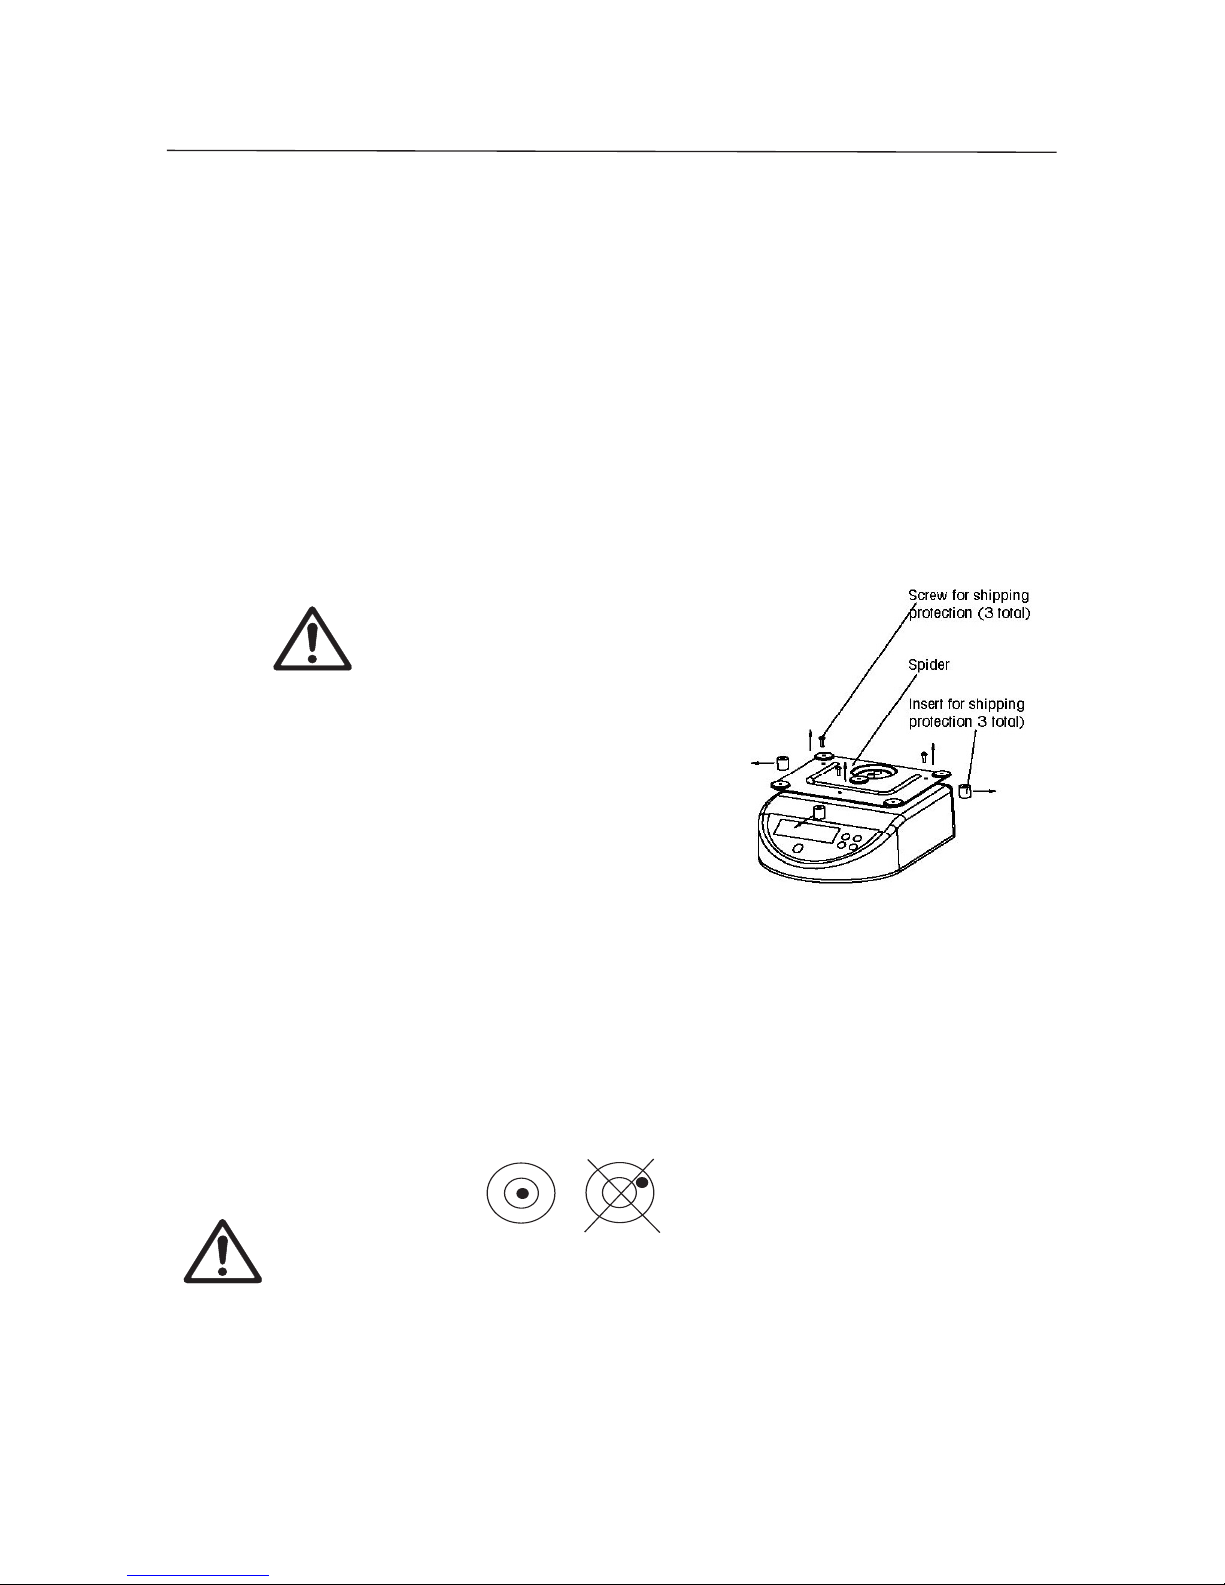
2.2 Transport Protection
BEFORE USING THE SCALE:
Remove the 3 shipping protection screws on
the spider sub-platform, then remove the 3 plastic
column inserts under the spider. Re-install the
protective components if shipping the scale to
ensure proper transport protection.
2.3 Selecting the Location
Operate the scale on a firm, level surface. Avoid locations with rapid temperature
changes, excessive air currents, vibrations, electromagnetic fields, heat or direct
sunlight.
2.4 Leveling the Scale
Adjust the leveling feet* until the bubble is centered in the circle of the level indicator
(located on the front panel). Ensure that the scale is level each time its location is
changed.
* IMPORTANT: To allow proper air flow and minimize condensation inside
the scale, unscrew the 2 rear leveling feet slightly, then level the scale accordingly
for normal operation. However, when cleaning the scale, all 4 leveling feet must be
screwed in tightly to avoid entry of water inside the scale.
Page 12
EN-4 BW SERIES COMPACT BENCH SCALE
2.5 Connecting Power
2.5.1 AC Power
Verify that the intended AC power source matches the AC adapter rating. Unplug* the
rubber access cap underneath the scale, connect the adapter to the power receptacle
through the cut-out, then plug the AC adapter into a power outlet.
* NOTE: When cleaning the scale, turn off the unit, remove the AC adapter and plug
the rubber access cap securely to avoid entry of water inside the scale.
2.5.2 Battery Power
The scale will begin charging with the AC adapter connected accordingly, and automatically switches to battery operation if there is a loss of power. Normal operating
time on a full charge is 50 hours on a 15-hour charge cycle. D0 NOT continuously
charge the scale longer than 24 hours.
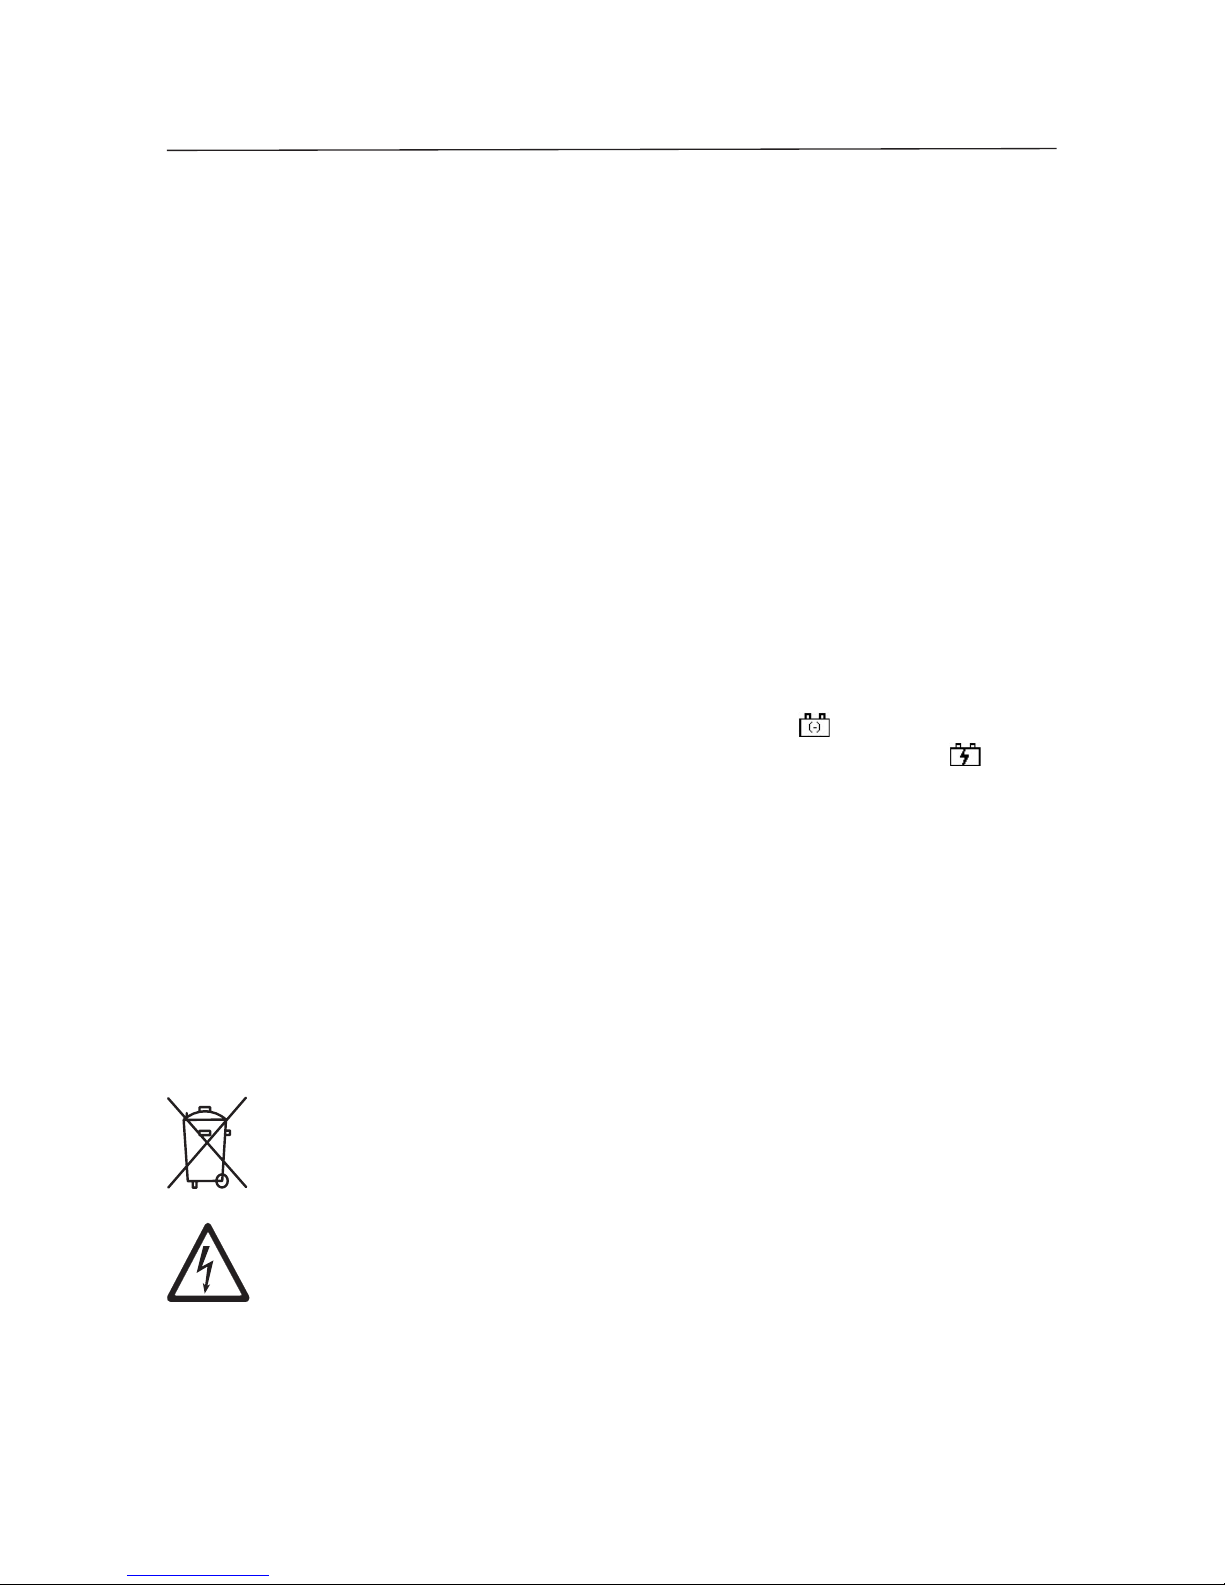
Low battery charge is indicated by the flashing LED over the indicator.
AC power or a charged battery is indicated by the illuminated LED over the indicator.
NOTES:
• To maximize battery power, the scale can be set up to enter Sleep mode
(only decimal points are displayed) after 2 minutes of inactivity, or auto matically turn off after 15 minutes of inactivity (Section 5.2).
• Charging the scale must be performed in a dry environment.
• Plug the rubber access cap to the adapter receptacle to ensure the scale
is protected when operated in a wet environment.
• If the scale is not used within 3 months, recharge and discharge the bat tery fully 3 times to maximize the battery condition.
• Dispose of the lead-acid battery according to local laws and regulations.
CAUTION
BATTERY IS TO BE REPLACED ONLY BY AN AUTHORIZED OHAUS
SERVICE DEALER. RISK OF EXPLOSION CAN OCCUR IF REPLACED
WITH THE WRONG TYPE OR CONNECTED IMPROPERLY.
2.6 Initial Calibration
When the scale is operated for the first time, a Span Calibration is recommended to
ensure accurate weighing results. Before performing the calibration, be sure to have
the appropriate calibration weights.
Refer to Section 6 for Span Calibration procedures.
Page 13
BW SERIES COMPACT BENCH SCALE EN-5
3. OVERVIEW OF CONTROLS AND FUNCTIONS
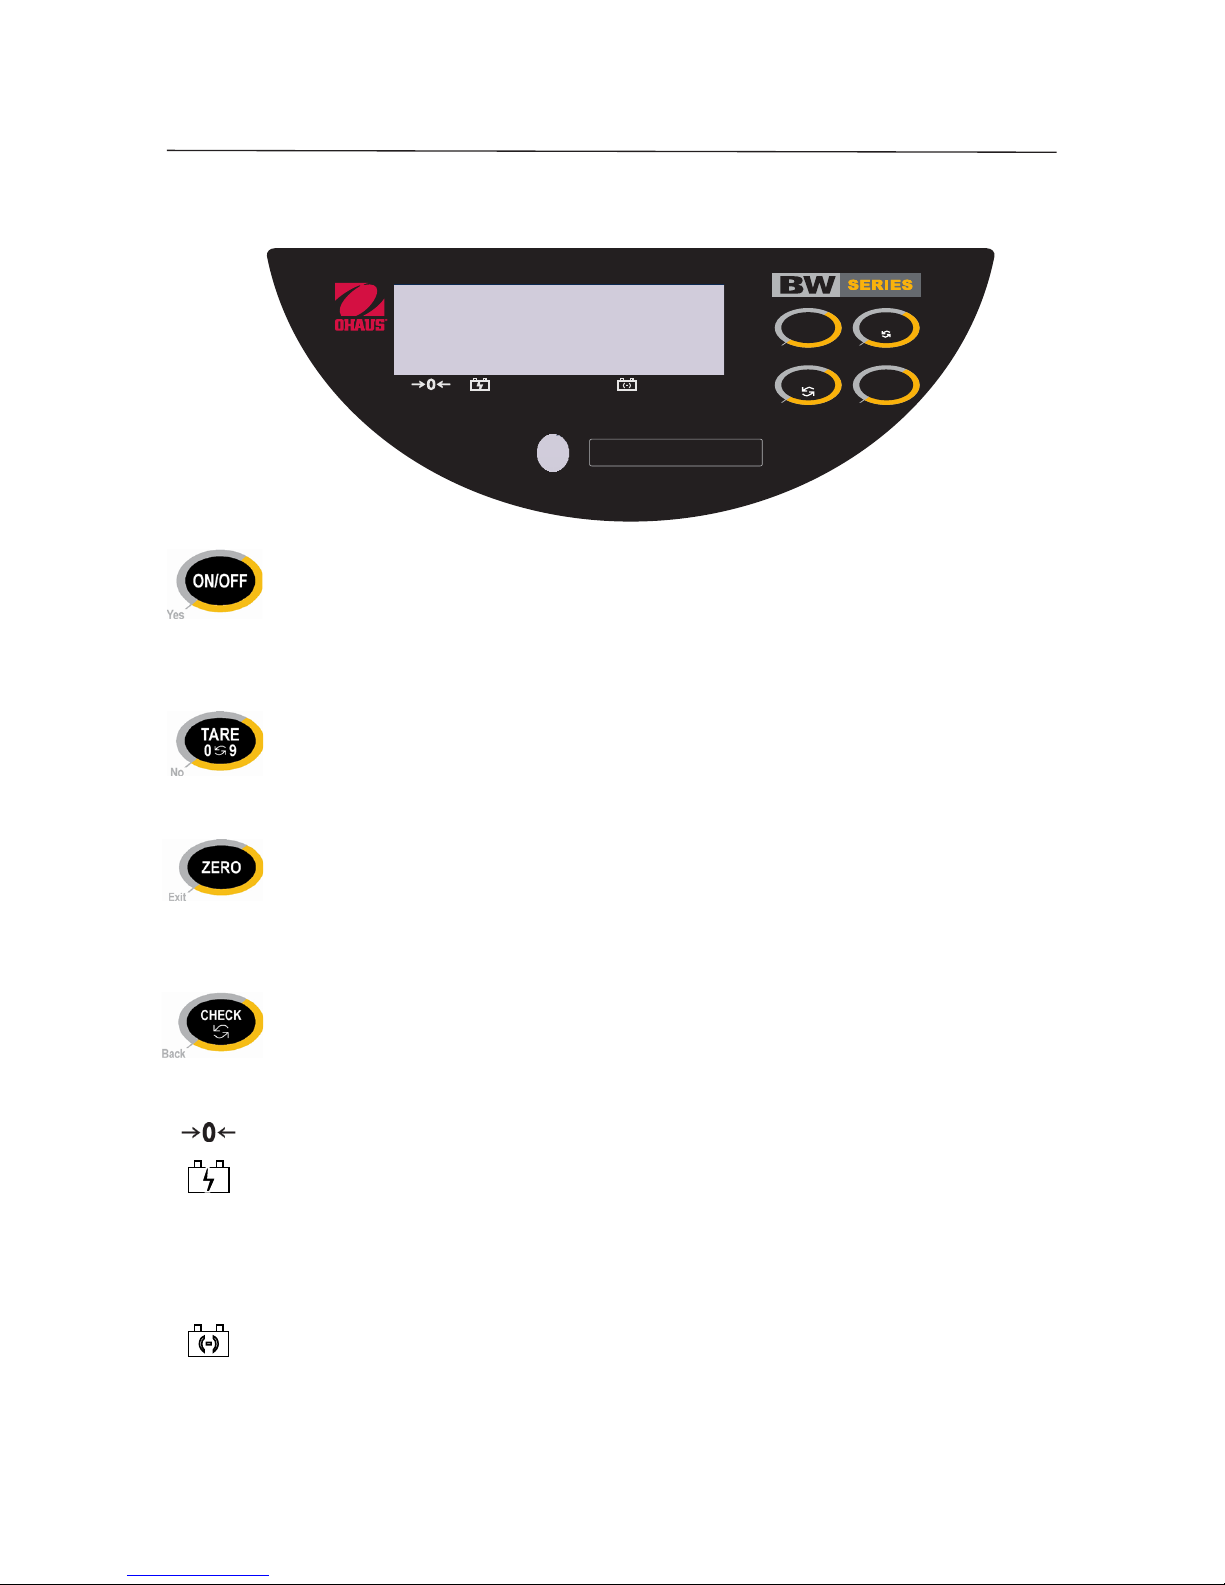
• Turns the scale on
• Long-press turns the scale off
• In SETUP Mode, “Yes” accepts/confirms the displayed setting
• In CHECK Mode, accepts/confirms the displayed value
•
Inputs the weight of the object on the weighing pan as a Tare value
• In SETUP Mode, “No” toggles through the available settings
• In CHECK Mode, increments the value of the selected digit
• Zeros the display
•
With the scale off, long-press together with ON/OFF enters User Setup Mode
• In SETUP Mode, “Exit” ends setup and exits to “Save”
• In CHECK Mode, ends Over/Under setup and exits to weighing mode
• Initiates CHECK Over/Under setup
• In SETUP Mode, “Back” reverts to the previous parameter
• In CHECK Mode, shifts to the next digit
• LED annunciator indicates Center of Zero
• LED annunciator indicates power is AC or battery is fully charged
UNDER •
LED annunciator indicates displayed weight is less than the preset Under value
OVER •
LED annunciator indicates displayed weight is more than the preset Over value
• LED annunciator blinks to indicate the battery voltage is low
NET • LED annunciator indicates Net (Gross minus Tare) value
g, kg • LED annunciator indicates the active weighing unit
kg
g
UNDER OVER NET
Max 3kg Min 20g e = 1g
CHECK
ON/OFF
ZERO
90
TARE
Yes
Exit
Back
No
Page 14

EN-6 BW SERIES COMPACT BENCH SCALE
4. OPERATIONS
4.1 Turning the Unit On and Off
With the scale off, press ON/OFF to turn on. Make sure the weighing pan is empty
before turning the scale on. Allow 15-30 minutes for the scale to warm up before
use. With the scale on, long-press ON/OFF to turn off.
4.2 Manual Tare
Place a container on the weighing pan, then press TARE. The display will show
a net value of “0” as the Tare weight is registered. Remove the container, and the
resulting negative value displayed will be equivalent to the Tare weight. To clear the
Tare value, press TARE with the pan empty.
4.3 Zero Operation
Press ZERO to zero the stable weight display (the weight must be within ±2% of
scale capacity). Center of Zero is indicated by the LED annunciator.
4.4 Checkweigh Target Setting
Compares the weight of an item against a pre-set Over-Under range.
To activate Checkweighing Mode, refer to user setup (Section 5.2).
• Press CHECK to initiate entering Over-Under parameters.
• The value of the “OVER” target limit will be displayed first, with the active
digit flashing (the “OVER” LED annunciator is lit).
• Enter the desired “OVER” limit value by pressing TARE 0 9 to increment
the active digit or CHECK to shift to the next digit.
• Press ON/OFF to accept the displayed value and proceed to the “UNDER”
target limit (the “UNDER” LED annunciator is lit).
• Enter the desired “UNDER” limit value by pressing TARE 0 9 to increment
the active digit or CHECK to shift to the next digit.
• Press ZERO to accept the displayed value and exit into checkweighing
mode.
NOTES:
• “OVER” or “UNDER” LED annunciators will light if the weight of an item
placed on the pan is over or under the pre-set limits, respectively. “OVER”
and “UNDER” LED annunciators will light simultaneously if the weight is
within the pre-set limits.
Page 15

BW SERIES COMPACT BENCH SCALE EN-7
• The LED indication is complemented by an audible alert feature (Section
5.2).
• Over-Under values are retained when the unit is turned off.
• Over-Under values are not retained when the weighing unit or resolution
setup are changed.
5. SCALE SETTINGS
5.1 Accessing the User Setup Mode
With the scale off, press ON/OFF and ZERO simultaneously. Once the scale turns on,
release ON/OFF while continuously pressing ZERO until “SETUP” is displayed. To
navigate in the User Setup Mode:
• Press ON/OFF-Yes to accept the displayed setting
• Press TARE-N`o to toggle through available settings
• Press ZERO-Exit to end setup and proceed to “Save”
• Press CHECK-Back to revert to the previous parameter
5.2 User Setup Parameters
Parameters Description Settings
S1 Scale automatically turns off after 15
minutes of inactivity.
ON - enables this function.
OFF -disables this function.
S2 Scale enters sleep mode after 2
minutes of inactivity.
ON - enables this function.
OFF -disables this function.
S3 CHECK activation and Alert Range 0 - Check mode is off.
Scale beeps when displayed weight is:
1-...within the preset Over and Under values
2-...outside the preset Over and Under range
3-...within the preset Over and Under values (Over-Under LED’s do not
light within preset range)
4-...outside the preset Over and Under range (Over-Under LED’s do not
light within preset range)
5- Alarm is off (Over-Under LED’s do not light within preset range)
6- Alarm is off
S4 Averaging Level 0, 1, 2, 3 (most filtering, longer stabilization time)
4, 5, 6, 7 (corresponds to 0, 1, 2, 3 but with slower display update)
S5 Weighing Unit kg, g
S6 LED Brightness Level 0,1,2,3 (dimmest).
S7 Display Type OFF - displays weight continuously.
ON - displays first stable weight.
S8 Resolution OFF - 3000 scale divisions
ON - 6000/7500 scale divisions
Note: Bold settings are defaults.
Page 16
EN-8 BW SERIES COMPACT BENCH SCALE
6. CALIBRATION AND SEALING
6.1 Calibration
For best results, calibrate the scale at regular intervals. Temperature changes,
geographic gravity variations, altitude changes and abuse are few reasons why a
scale may need recalibration.
Note: The following procedure requires the use of hand tools and calibration
weights. If unable to perform the calibration, contact an authorized Ohaus service
organization.
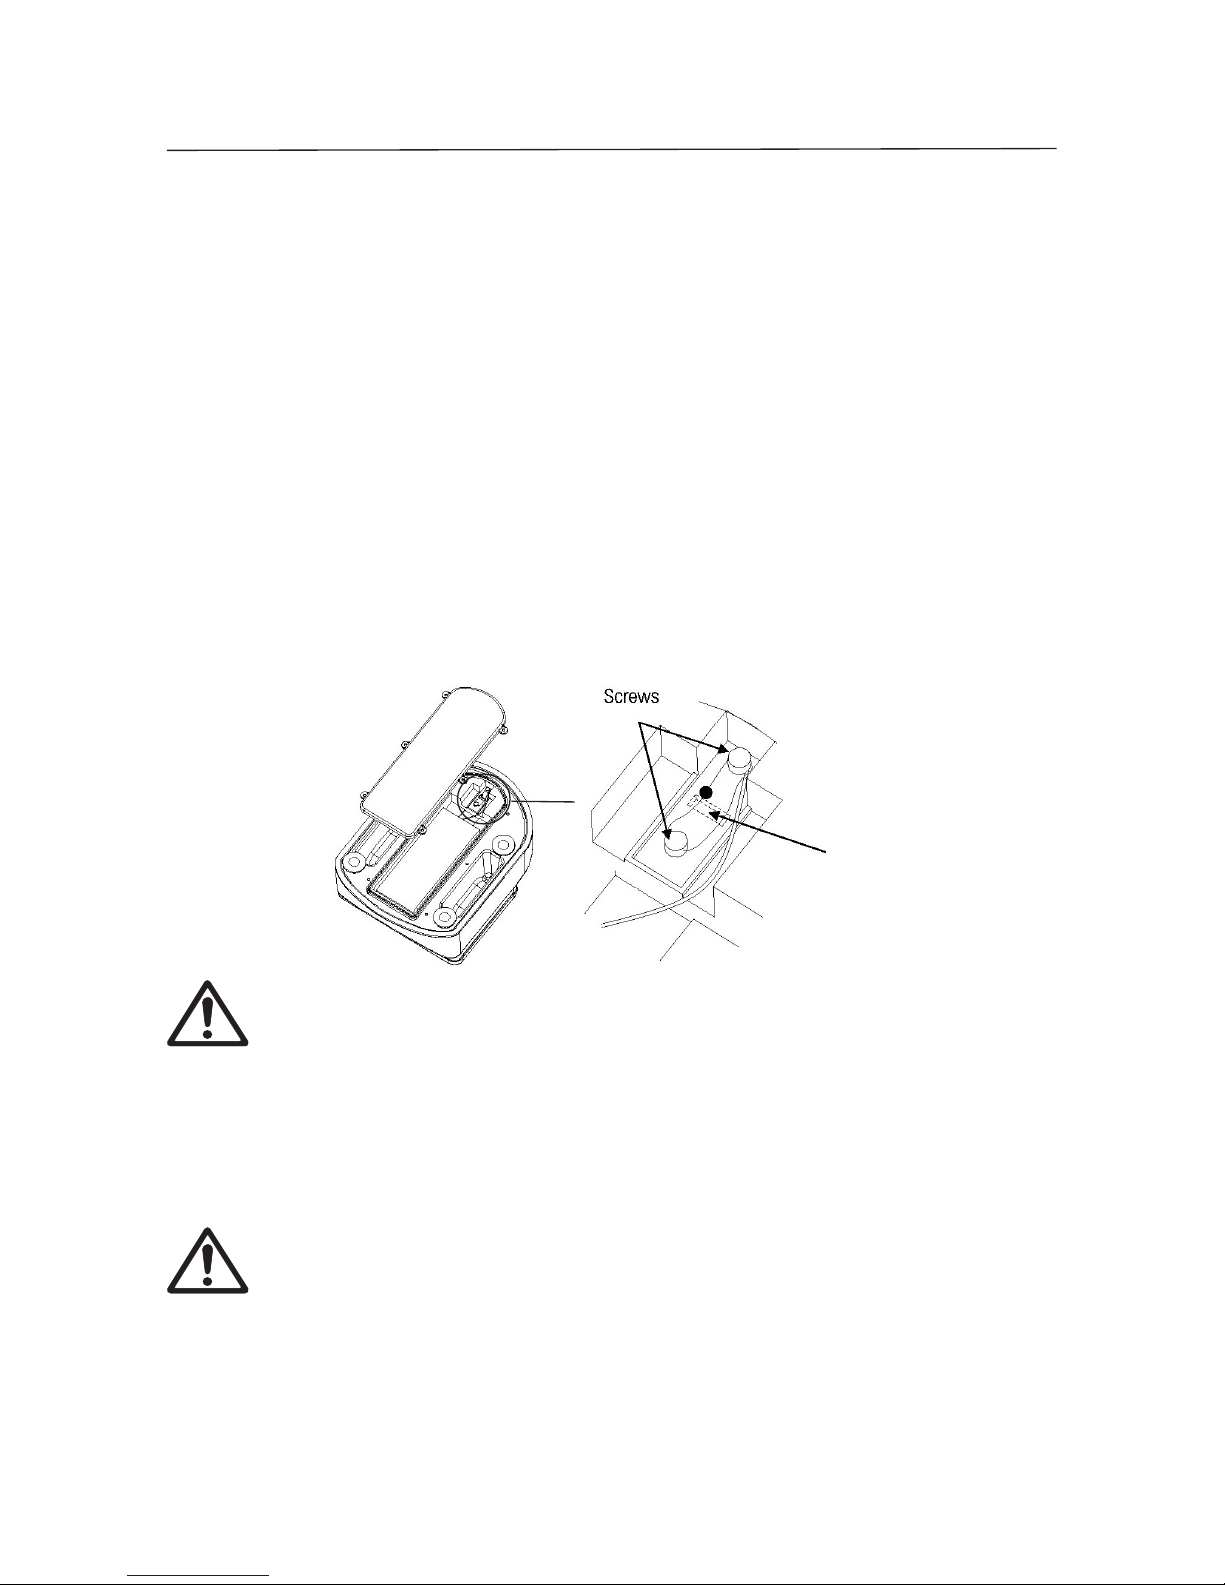
1. Remove the battery cover to access the two calibration pins located in
a slot at the bottom of the scale, then short the calibration pins (a small
slotted screwdriver may be used).
Note: When accessing the bottom of the scale, avoid placing the scale
upside down on the pan or sub-platform. Place the scale on its side.
2. “SEtUP” then the first parameter “CtY” is displayed.
3. Press ON/OFF-Yes successively to move through the succeeding
parameters: “dEF NO” “S1”, “S2”, “S3”, “S4”, “S5”, “S6”, “dSP”, “S8”, “S9”,
“S10”, “S11”, “S12”, “bAt”, “GEO”.
Note: Do not change the settings of these parameters. These are service
setup parameters intended for authorized servicing use only.
4. After “GEO”, “CAL NO” is displayed. Press TARE-No to switch the setting
to “CAL YES”.
5. “CAL YES” is displayed. Press ON/OFF-Yes to enter calibration sequence.
Calibration Switch
Page 17

BW SERIES COMPACT BENCH SCALE EN-9
6. “kg” is displayed. This is the Calibration Weight Unit. Press ON/OFF-Yes to
accept and move on to the next parameter.
7. “xxxx” is displayed. This is the Full Scale Capacity of the scale, where:
“1500” = 1.5kg, “3000” = 3kg, “6000” = 6kg, “15000” = 15kg. Make
sure the displayed value matches the scale model capacity then press ON/
OFF-Yes to accept and move on to the next parameter.
8. “- - - - - -” is displayed. Make sure the pan is empty and stable at this time
then press ON/OFF-Yes. The display will count down from 5 to 1 as the
scale zero is registered.
9. “xxxx” is displayed. This is the Calibration Point corresponding to 2/3 of
the Full Scale Capacity value. Place the indicated calibration weight on
the center of the pan. With the scale stable, press ON/OFF-Yes. The display
will count down from 5 to 1 as the scale registers the calibration weight.
10. “xxxx” is displayed. This is the Calibration Point corresponding to the Full
Scale Capacity value. Place the indicated calibration weight on the center
of the pan. With the scale stable, press ON/OFF-Yes. The display will
count down from 5 to 1 as the scale registers the calibration weight.
11. “SAVE” is displayed when calibration was registered. Remove the
calibration weight, then press ON/OFF-Yes. The scale will display a self-
test then return to normal weighing mode.
Note: At any time during the calibration process, press CHECK-Back to revert to the
previous parameter, or long-press ON/OFF to turn off the scale and abort the process
without saving any changes.
Page 18
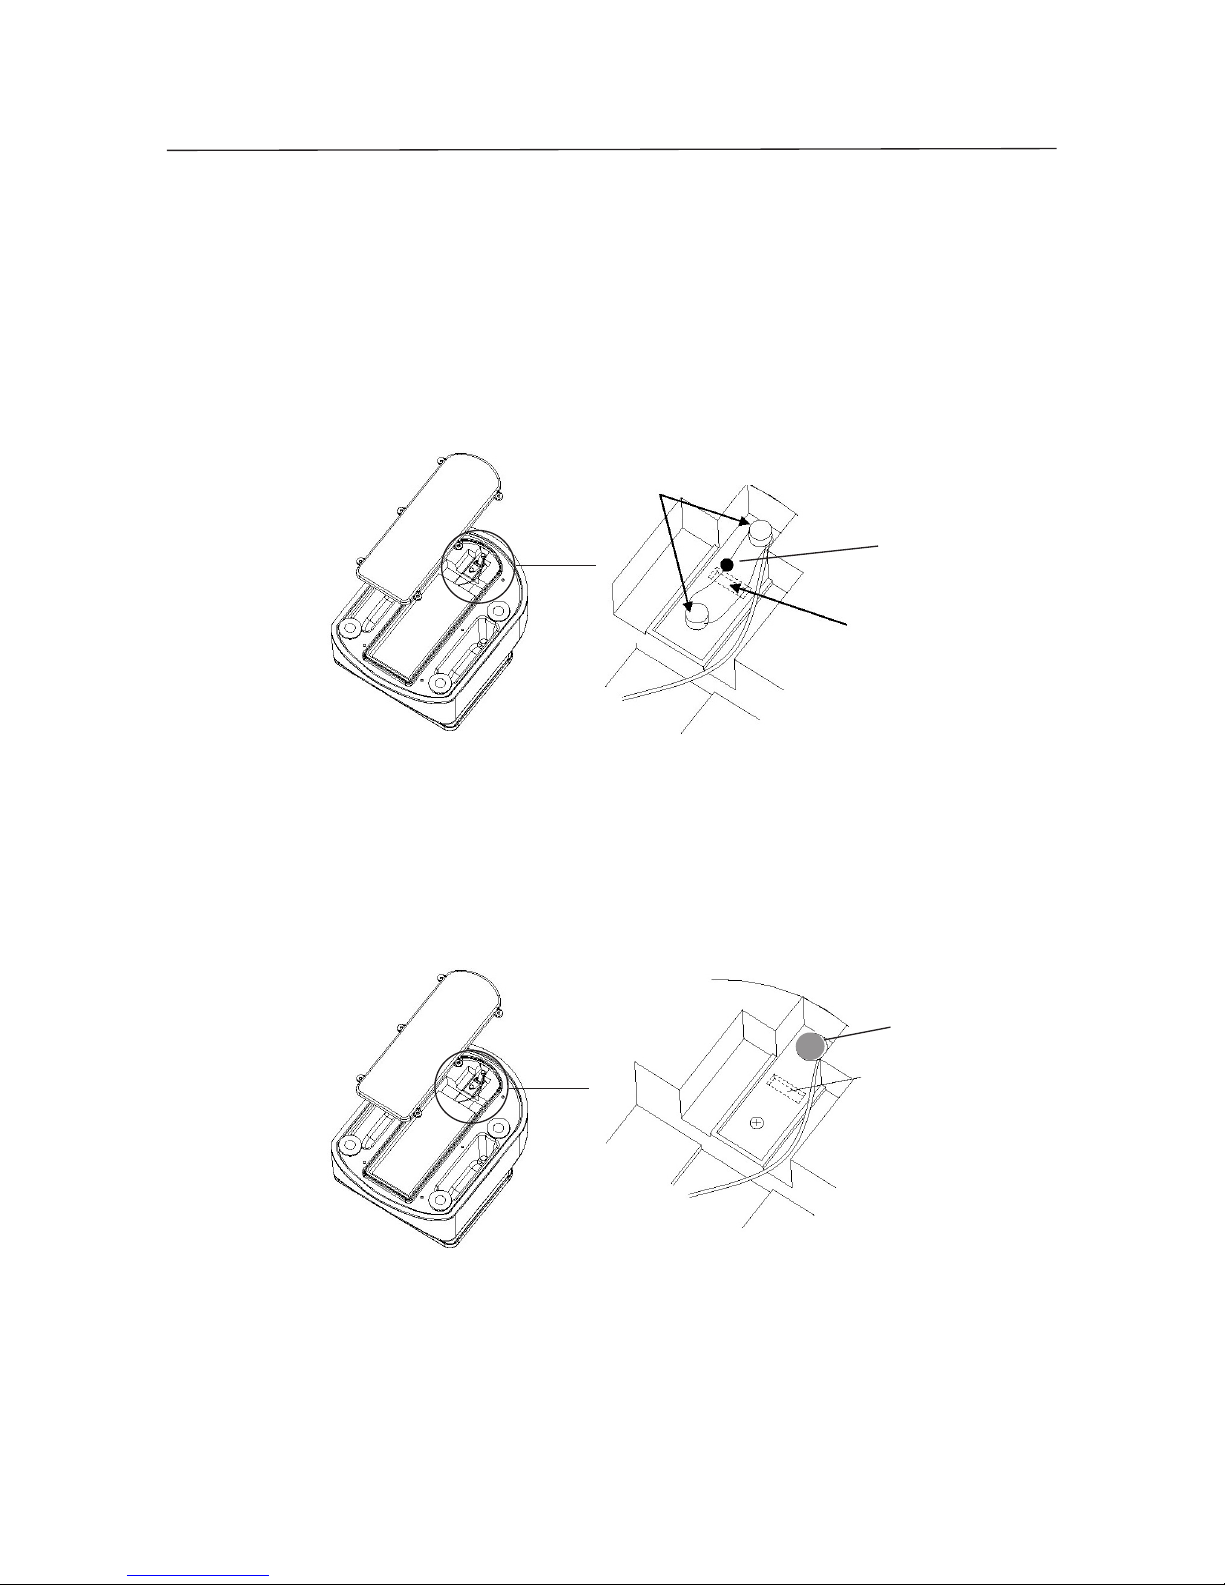
EN-10 BW SERIES COMPACT BENCH SCALE
6.2 Type Approval Sealing
After the scale has been found to comply with local regulations by relevant approving
authorities, the scale may be sealed in the following manner:
Lead and Wire Seal.
Secure sealing plate with through-hole screws. Run the wire seal into the throughholes then press the lead seal in place.
Sticker Seal.
Secure sealing plate with regular pan-head screws then apply the sticker over one of
the screws.
Through-hole Screws
Lead Seal
Sealing Plate
Sticker Seal
Sealing Plate
Page 19

BW SERIES COMPACT BENCH SCALE EN-11
7. CLEANING AND MAINTENANCE
Comply with safety precautions when cleaning and maintaining the scale
• Turn off and disconnect the scale from the power supply during cleaning.
• DO NOT open the scale; no user repairable components inside. Service
should be performed by authorized personnel only.
• DO NOT place the scale upside down. If accessing the bottom, place the
scale on its side.
• DO NOT carry the scale by the pan or sub-platform. Use the handholds on
the sides of the scale housing.
• DO NOT allow liquids to enter the scale.
• DO NOT use high pressure when cleaning the scale.
• Inspect the scale regularly. Ensure that the housing, pan and sub-platform
are clean and free from foreign material.
• Wipe the exterior components of the scale using a soft cloth dampened with
water and a mild detergent (DO NOT use acids, alkalis, strong solvents or
abrasive cleaning agents).
• Screw in all 4 leveling feet tightly to avoid entry of water inside the scale
during cleaning. However, when the scale is put back into operation,
remember to loosen the two rear feet (and adjust leveling accordingly) to
allow proper air flow and minimize condensation inside the scale.
• Plug the rubber cap to the adapter receptacle underneath the scale to avoid
entry of water inside the scale.
• The pan is dishwasher safe and may be placed with normal loads. All other
parts must not be placed in a dishwasher.
Page 20
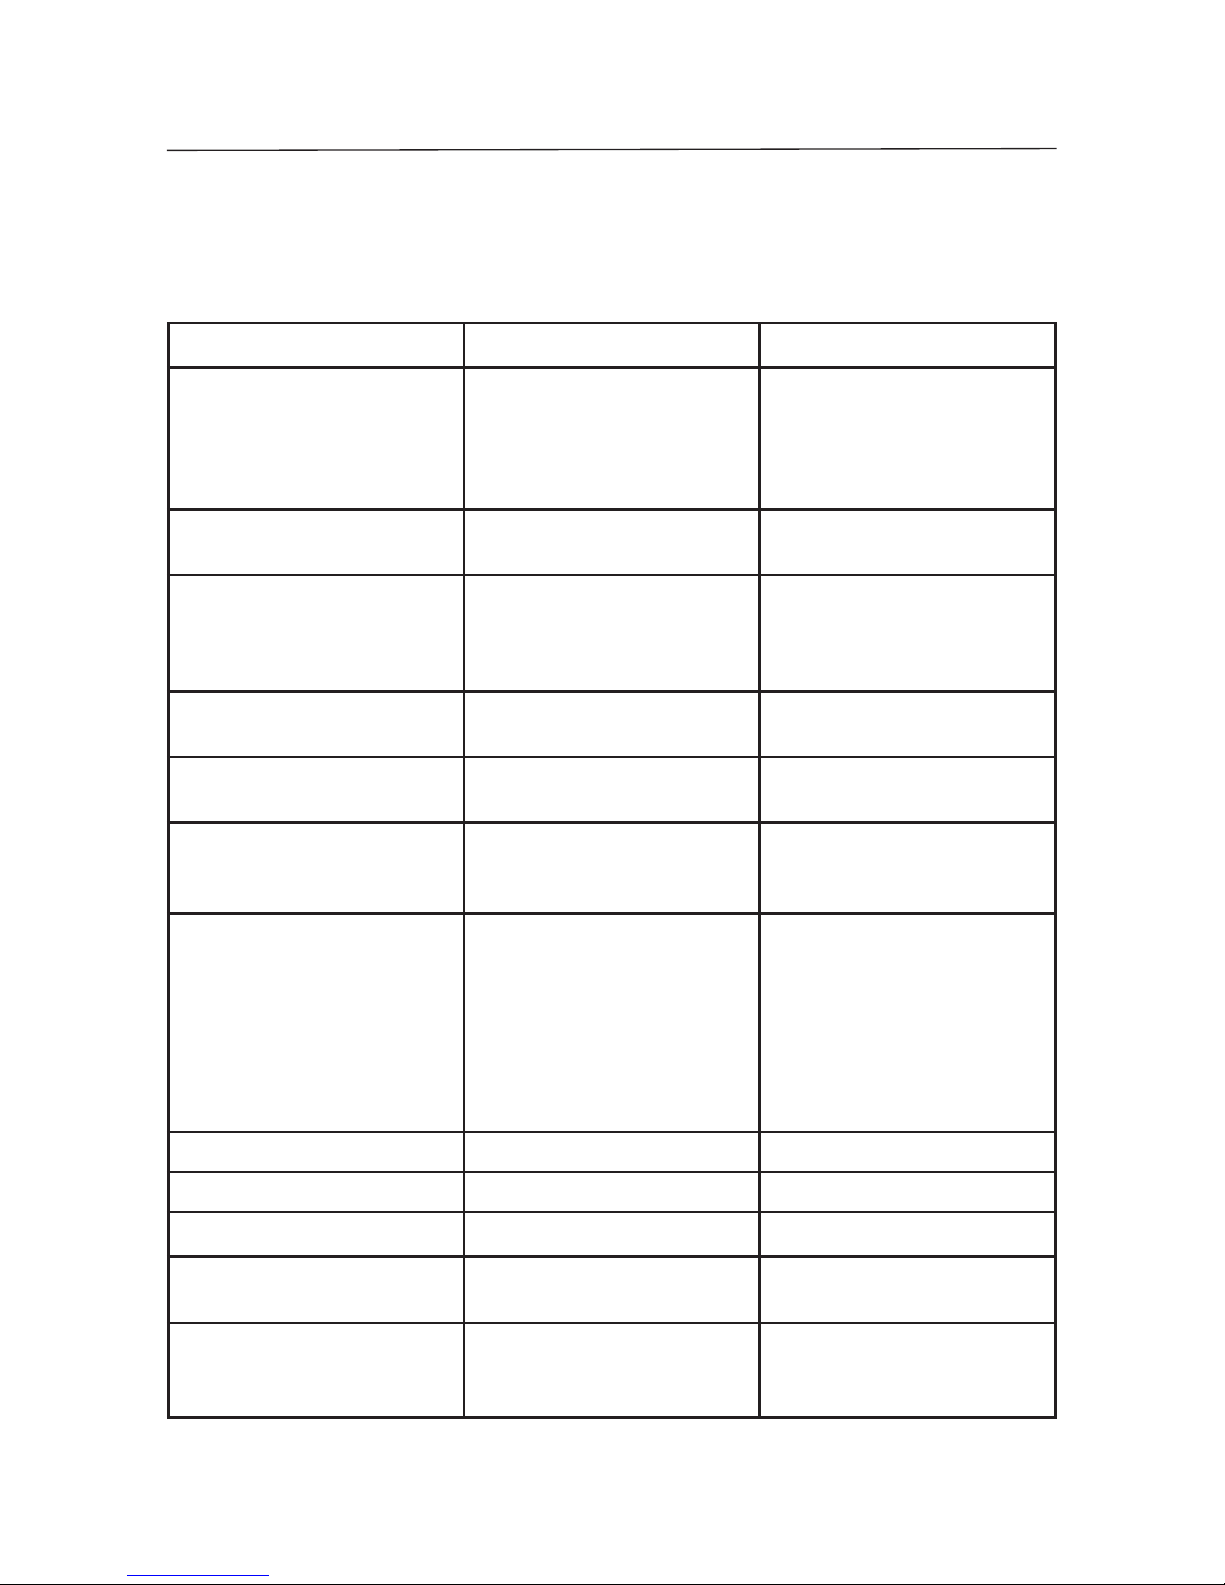
EN-12 BW SERIES COMPACT BENCH SCALE
8. TROUBLESHOOTING
The following table lists common problems, possible causes and remedies. If the
problem persists, contact Ohaus or your authorized Ohaus dealer.
Symptom Possible Causes Remedy
Scale will not turn on AC power not connected to scale
or to outlet.
No power in outlet.
Battery discharged.
Connect scale to power.
Connect scale to power and
charge battery.
Connect to different power outlet.
Replace battery.
Battery fails to charge fully. Battery is defective or past its
useful life.
Have the battery replaced by an
authorized Ohaus service dealer.
Weight reading does not
stabilize.
Unstable environment.
Interference under pan or subplatform.
Ensure a stable environment.
Ensure that the weighing
pan and sub-platform are
unobstructed.
Scale does not display
accurately.
Improper calibration Calibrate the scale using proper
calibration weights.
“nnnnnn“ displayed Overload condition: Load on the
pan exceeds scale capacity +9d
Reduce the load on the pan.
“uuuuuu“ displayed Underload condition: No load on
the pan, exceeds scale zero -9d
Install the pan on the subplatform.
Re-zero the scale.
”- - - - - -” displayed Unstable condition.
Cannot establish zero.
Situate in a stable environment.
Relieve internal pressure from
the scale by loosening the
leveling feet.
Remove the weight on the pan
that may exceed the power-on
zero range.
”E 11“ displayed RAM error Turn the scale off and on again.
”E 16“ displayed ROM error Recalibrate the scale.
”E 18“ displayed EEPROM error Return scale for service
”E 48“ displayed Checkweigh target setting error Review setup and re-enter
correct Over-Under values
“Error” displayed Software running error Turn the scale off and on again.
Replace battery.
Page 21
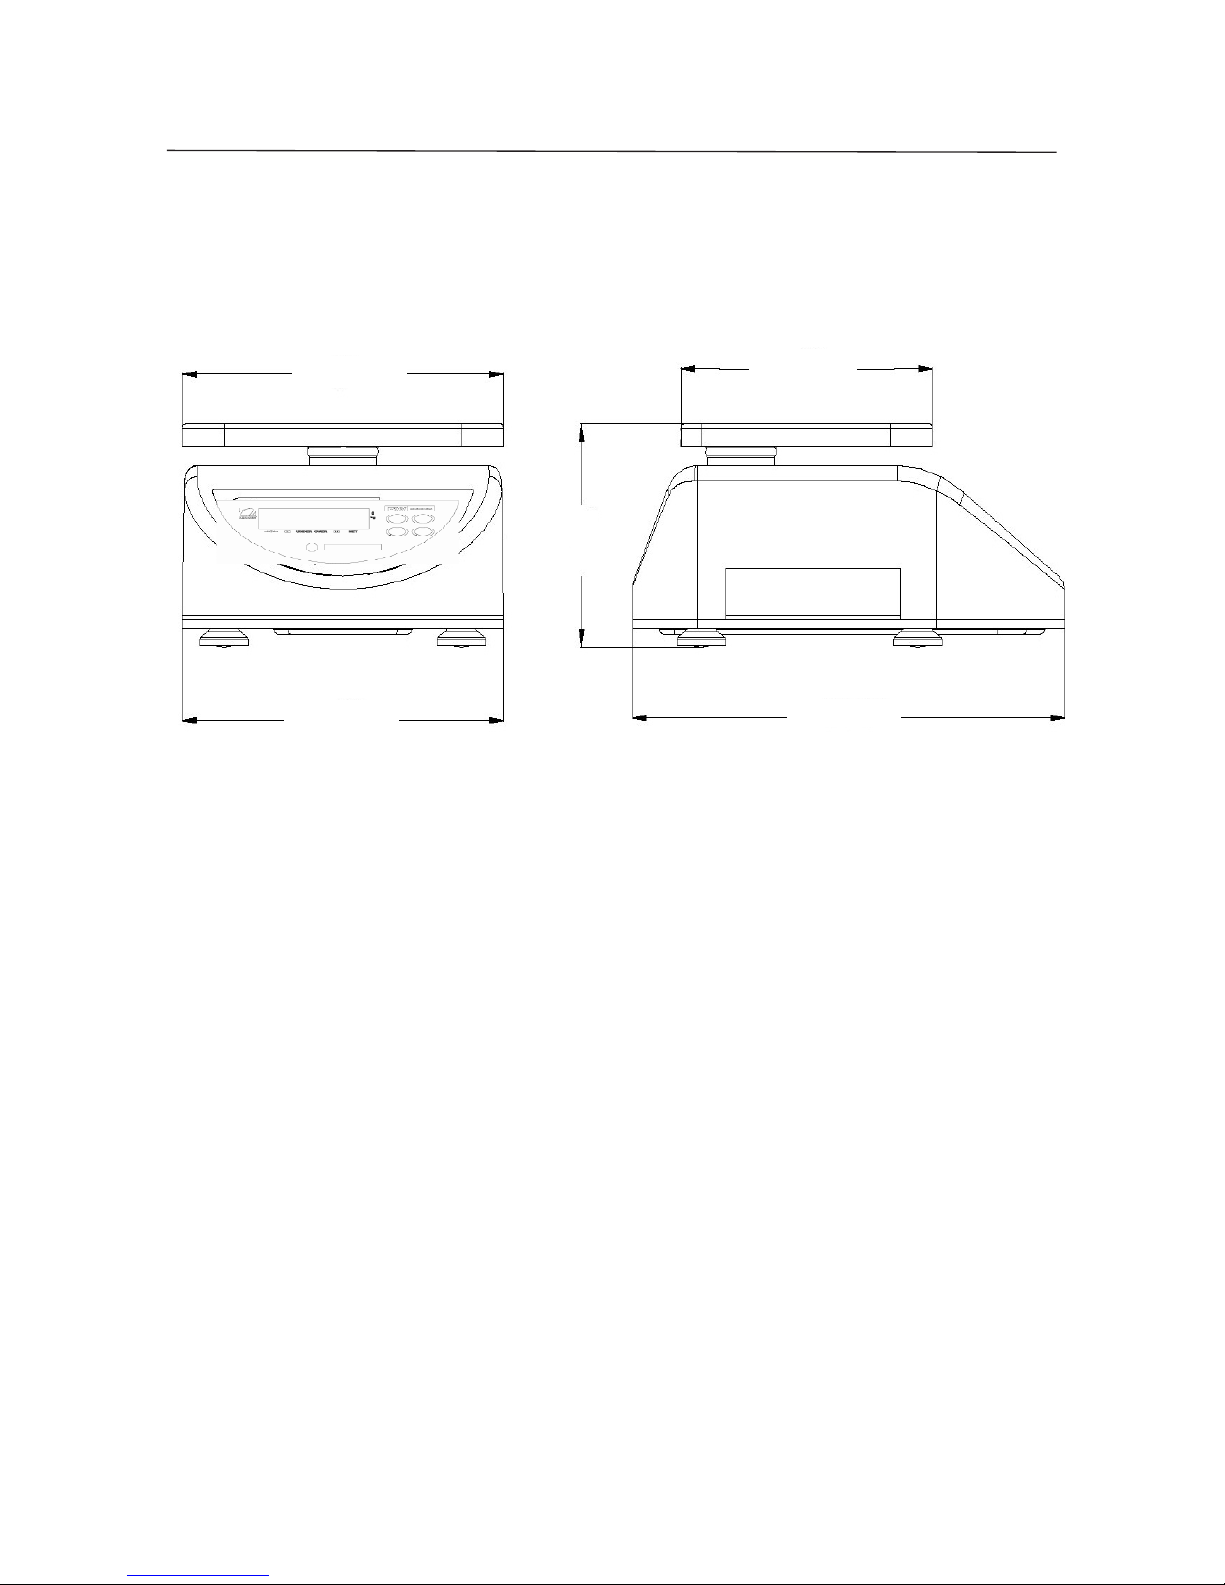
BW SERIES COMPACT BENCH SCALE EN-13
9. TECHNICAL DATA
9.1 Drawings
230 mm
180 mm
230 mm
127 mm
310 mm
Page 22
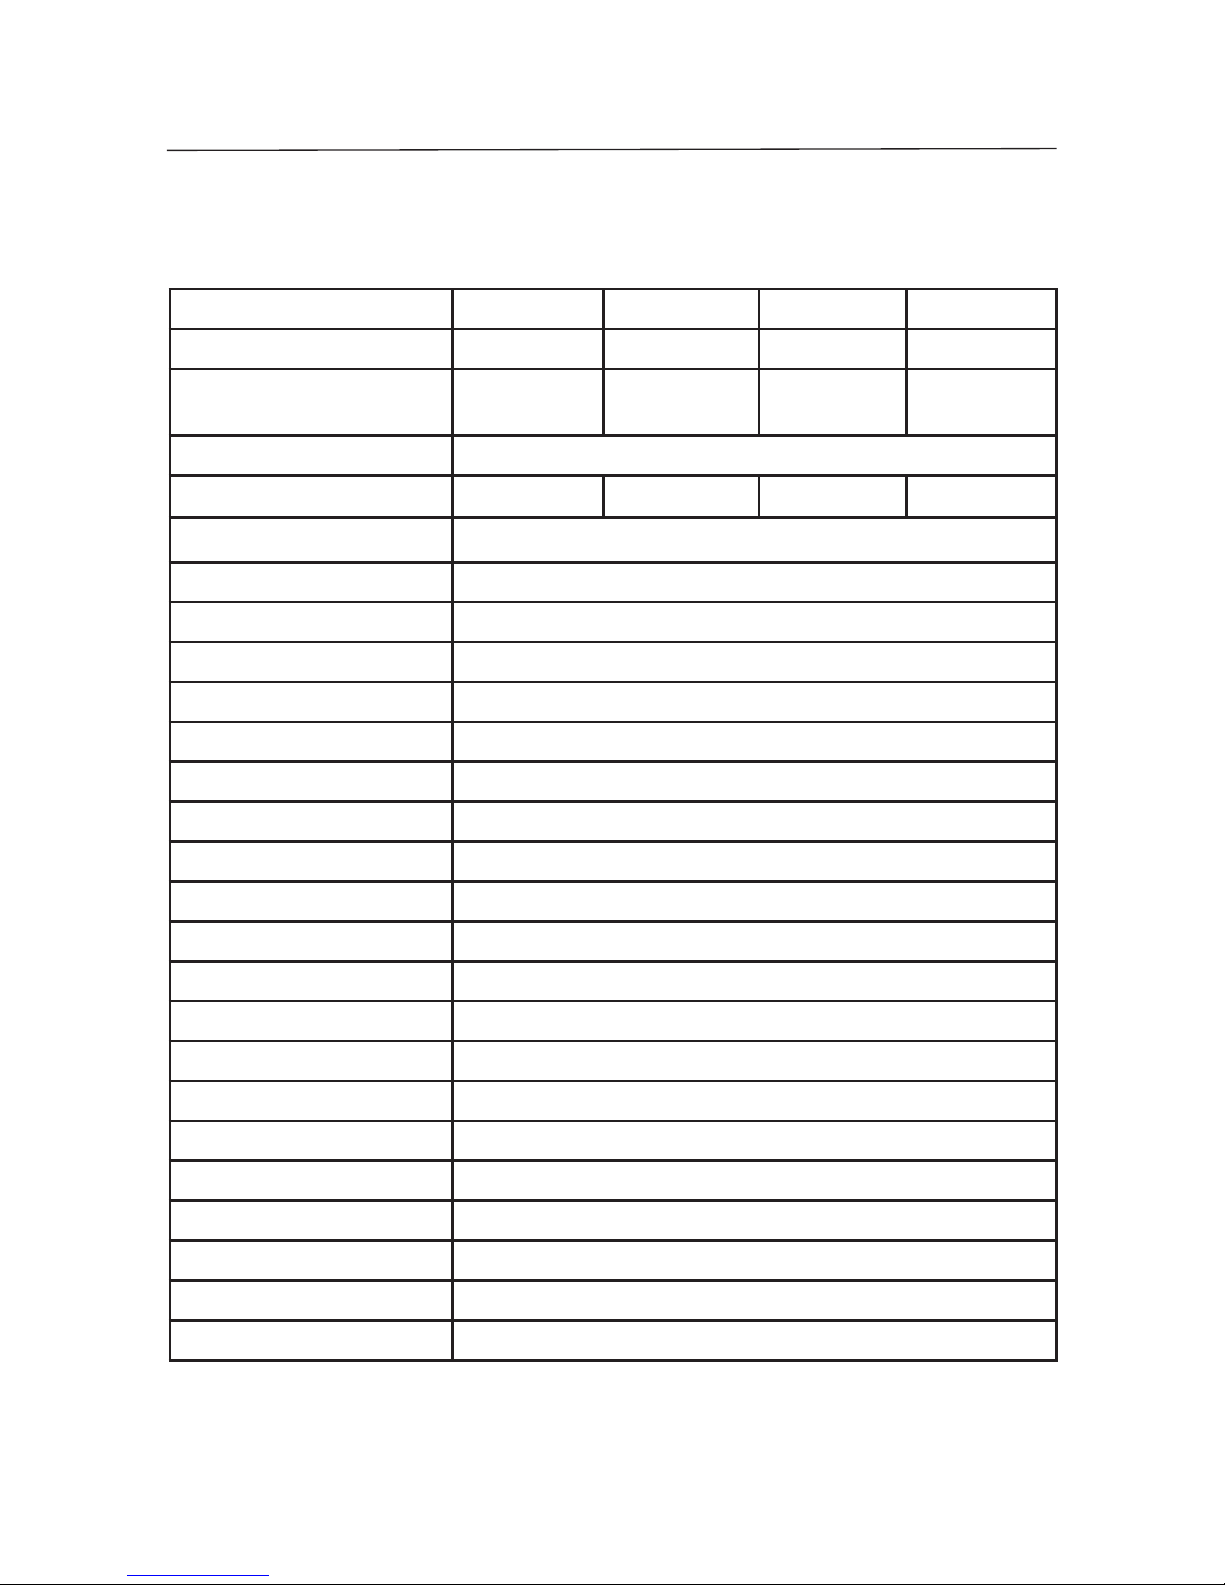
EN-14 BW SERIES COMPACT BENCH SCALE
Model BW1.5 BW3 BW6 BW15
Capacity x Readability 1.5 kg x 0.2 g 3 kg x 0.5 g 6 kg x 1 g 15 kg x 2 g
Maximum Displayed
Resolution
1:7,500 1:6,000 1:6,000 1:7,500
Type Approval Resolution * 1:3,000
Load Cell Capacity 3.5kg 6.5kg 15kg 30kg
Construction ABS plastic housing with stainless steel pan
Protection IP65
Pan Dimensions 230W x 180D mm
Leveling Components 4 x adjustable feet with integral panel mounted level bubble indicator
Display 1 x red LED; 6-digit, 7-segment, 14H mm characters
Weighing Units kg, g
Keyboard 4 x tactile mechanical keys: ON/OFF, CHECK, TARE, ZERO
Calibration Weight 2/3 and Full Scale Capacity
Over Range Capacity Full Scale Capacity +9d
Tare Range Full Capacity by Subtraction
Zero Range Power-on: ±10% / Keyboard: ±2% Full Scale Capacity
Stabilization Time within 2 seconds
Power 9VDC 500mA AC Adapter / 6V 5Ah rechargeable lead acid battery
Battery Life 50 hours continuous use with 15 hour recharge time
Safe Overload 150% Full Scale Capacity
Operating Temperature Range -10 ° C to +40 ° C, 10% to 85% humidity, non-condensing
Storage Temperature Range -25 ° C to +50 ° C, 10% to 85% humidity, non-condensing
Scale Dimensions 230W x 310D x 127H mm
Shipping Dimensions 295W x 381D x 190H mm
Scale Unit Weight 4.4 kg
Shipping Weight 5.7 kg
9.2 Specifications
* OIML 3000e: R76/1992-NL 1-03.49
Page 23

BW SERIES COMPACT BENCH SCALE EN-15
LIMITED WARRANTY
Ohaus products are warranted against defects in materials and workmanship from
the date of delivery through the duration of the warranty period. During the warranty
period, Ohaus will repair, or, at its option, replace any component(s) that proves to
be defective at no charge, provided that the product is returned, freight prepaid, to
Ohaus.
This warranty does not apply if the product has been damaged by accident
or misuse, exposed to radioactive or corrosive materials, has foreign material
penetrating to the inside of the product, or as a result of service or modification
by other than Ohaus. In lieu of a properly returned warranty registration card,
the warranty period shall begin on the date of shipment to the authorized dealer.
No other express or implied warranty is given by Ohaus Corporation. Ohaus
Corporation shall not be liable for any consequential damages.
As warranty legislation differs from state to state and country to country, please
contact Ohaus or your local Ohaus dealer for further details.
Page 24

BW SERIES COMPACT BENCH SCALE EN-i
Ohaus Corporation
19A Chapin Road
P.O. Box 2033
Pine Brook, NJ 07058-2033, USA
Tel: (973) 377-9000,
Fax: (973) 944-7177
With offices worldwide / Con oficinas alrededor del mundo / Avec des bureaux
dans le monde entier / Weltweite Geshäftsstellen / Con uffici in tutto il mondo.
www.ohaus.com
P/N 80251077 A © Ohaus Corporation 2006, all rights reserved / todos los
derechos reservados / tous droits réservés / Alle Rechte vorbehalten / tutti i diritti
riservati.
*80251077*
Printed in China / Impreso en la China / Imprimé en Chine / Gedruckt in China /
Stampato in Cina
 Loading...