

Ohaus 2000 User Manual [en, de, es, fr, it]
TM
Valor 2000 Series
Instruction Manual
Serie Valor 2000
TM
Manual de instrucciones
Valor série 2000
TM
Manuel d’instructions
Valor 2000-Serie
TM
Bedienungsanleitung
Serie Valor 2000
TM
Manuale di istruzioni

EN-1Valor 2000 Series Scales
1. INTRODUCTION
This manual contains installation, operation and maintenance instructions for the
TM
Valor 2000 Series Scales. Please read the manual completely before using the
scale.
1.1 Safety Precautions
Please follow these safety precautions:
• Verify that the AC Adapter input voltage matches the local AC power supply.
• Do not immerse the scale in water or other liquids.
• Do not operate the scale i
• Do not drop loads on the platform.
• Do not place the scale upside down on the pan.
• Service should only be performed by authorized personnel.
• Disconnect the scale from the power suppl
n hostile environments.
y when cleaning.
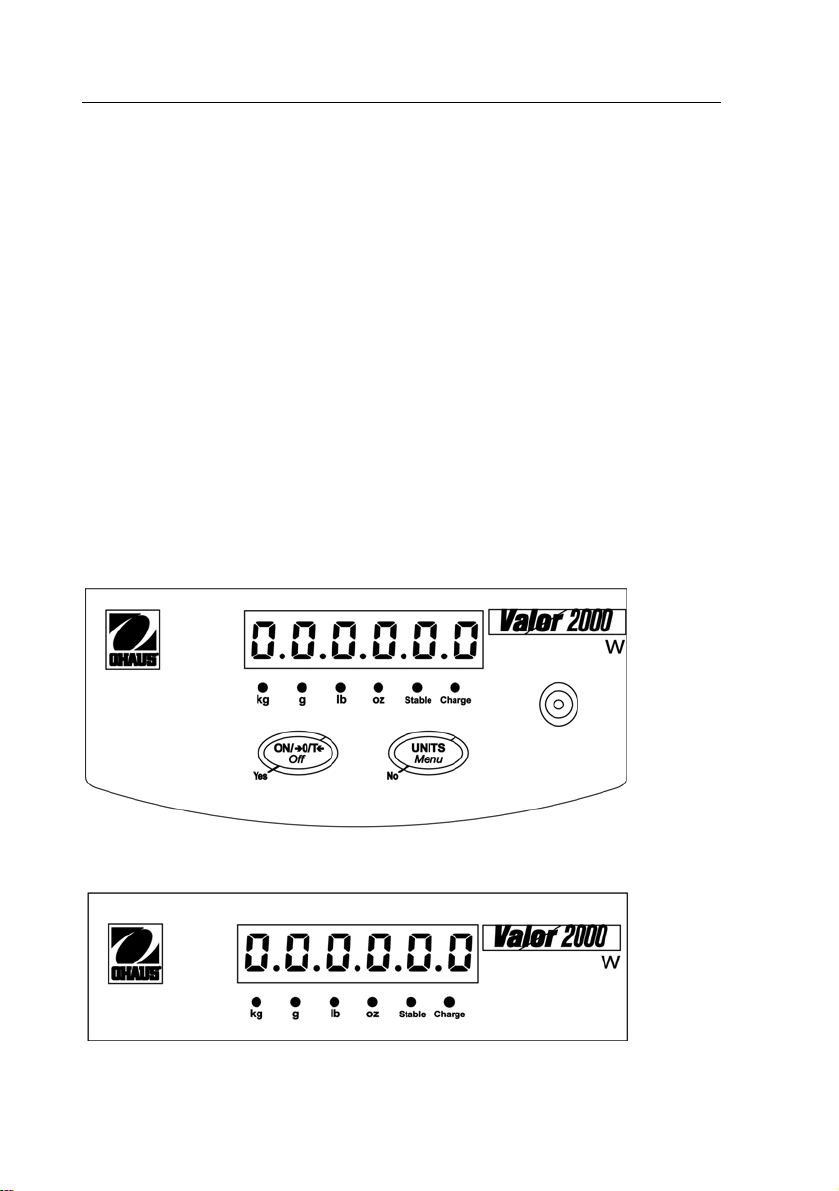
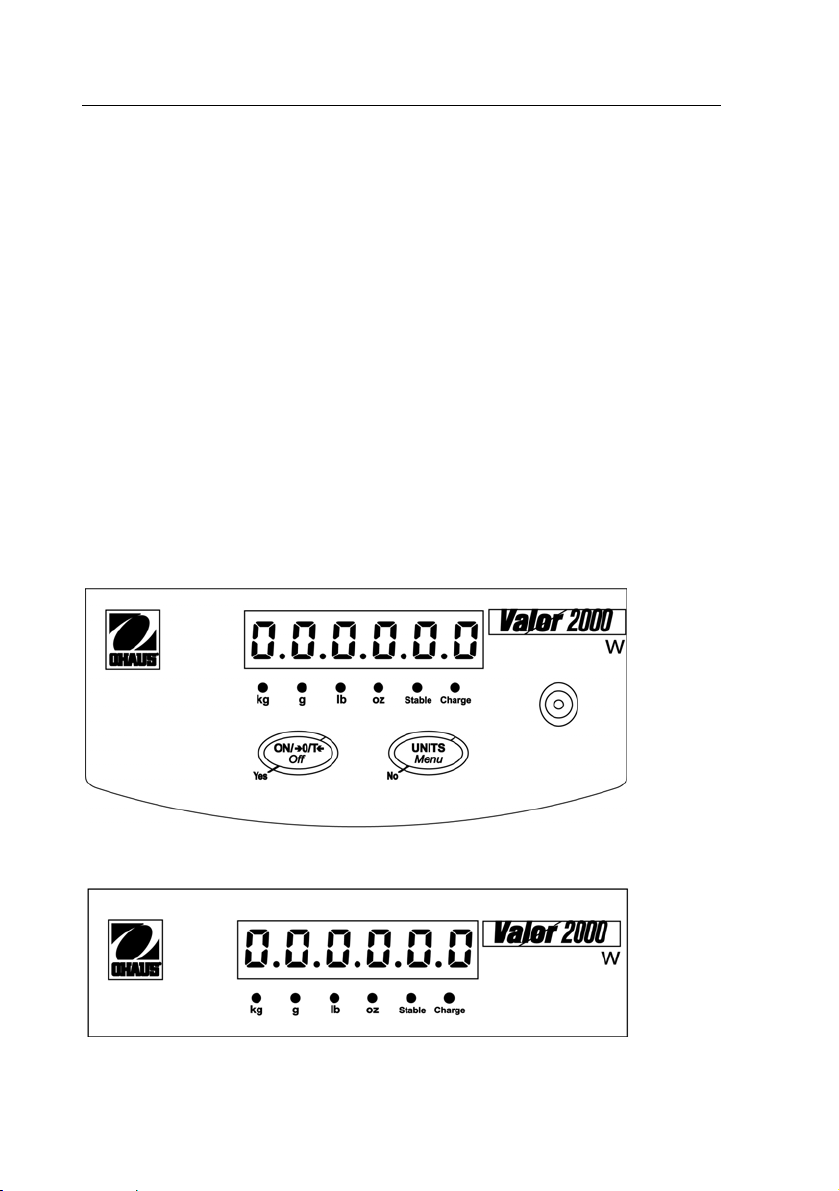
1.2 Controls
Figure 1-1. Controls.
Figure 1-2. Rear Display.

EN-2 Valor 2000 Series Scales
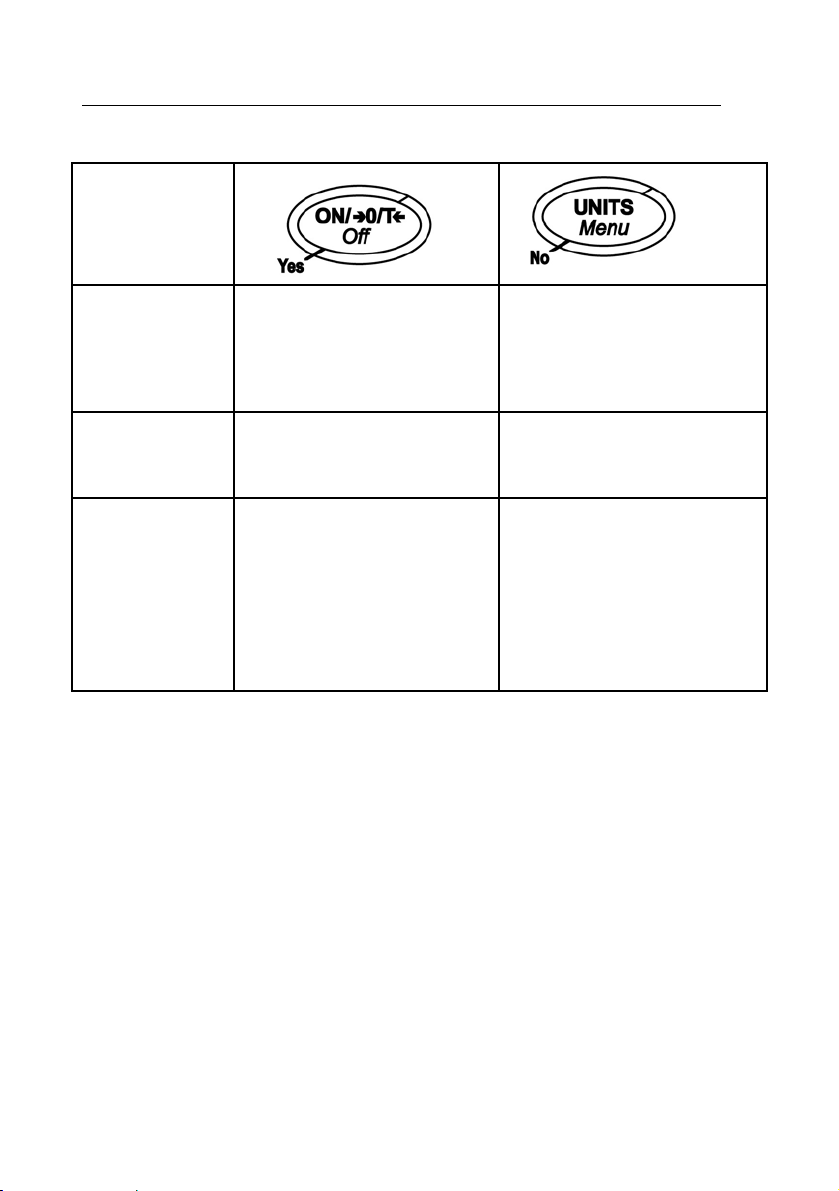
TABLE 1-1. CONTROL FUNCTIONS.
Button
Primary Function
(Short Press)
Secondary
Function
(Long Press)
Menu Function
(Short Press)
ON/ 0/T
Turns scale ON.
If scale is On:
Sets zero.
Performs a tare operation.
Off
Turns scale off.
Yes
Accepts the current setting on
play.
the dis
UNITS
Changes the weighing Unit.
Menu
Enter the User menu.
No
Advances to the next menu or
menu item.
Rejects the current setting on
the dis
play and advances to
the next available setting.
2. INSTALLATION
2.1 Package Contents
• Scale
• Pan
• Power Adapter
• Instruction Manual
• Warranty Card
2.2 Location
Use the scale on a firm, steady surface. Avoid locations with excessive air current,
vibrations, heat sources, or rapid temperature changes.
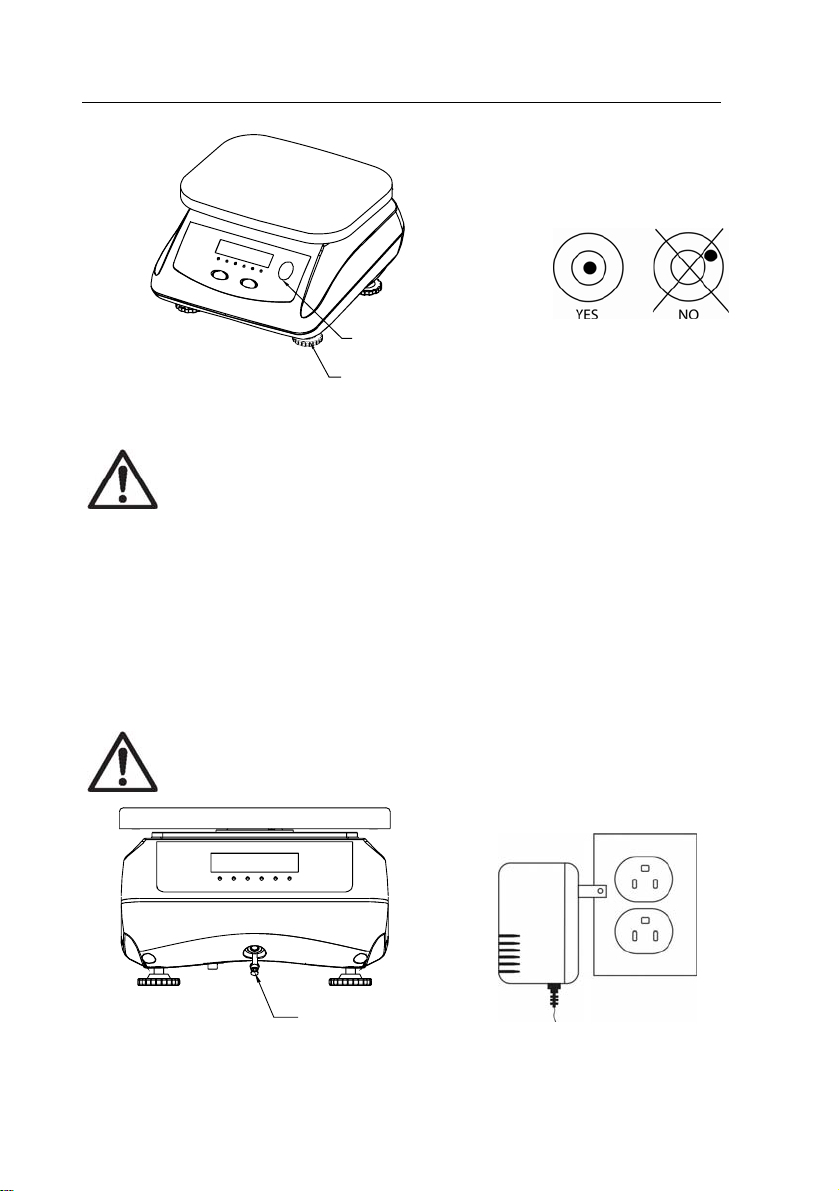
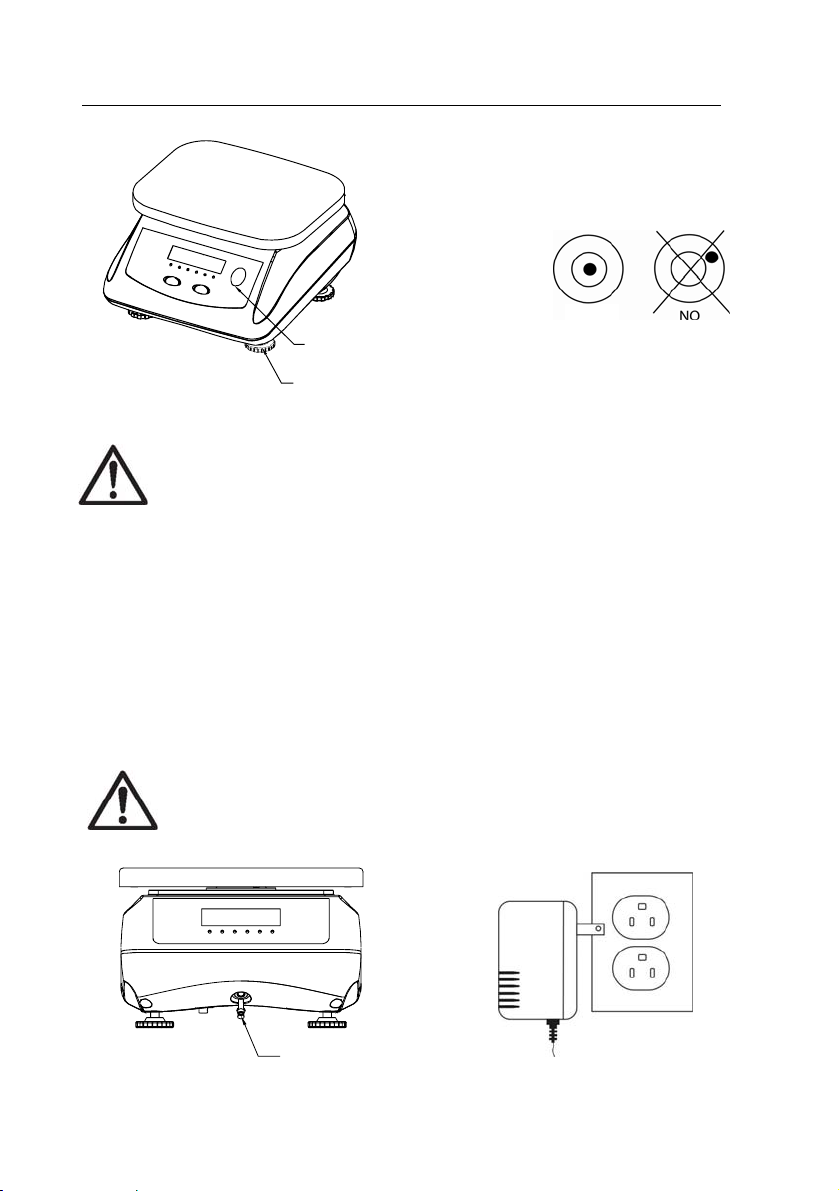
2.3 Leveling the Scale
Adjust the leveling feet so the bubble is centered in the circle.
EN-3Valor 2000 Series Scales
Level Bubble
Adjustable Feet
Figure 2-1. Leveling the Scale.
IMPORTANT: To relieve any internal pressure and allow proper airflow
inside the scale, unscrew the two rear leveling feet slightly, then level
the scale accordingly. When cleaning the scale, the rear leveling feet
must be screwed in tightly to avoid entry of water inside the scale.
2.4 Power
2.4.1 AC Power
The AC adapter (included) may be used to power the scale when battery power is
not available. Remove the rubber seal in the back. Connect the AC adapter plug to
the input jack. Then plug the AC adapter into a properly grounded power outlet.
NOTE: To prevent water ingress during use, insert rubber Seal into
the input jack recess.
Seal
Figure 2-2. Power Connection and Sealing
.
EN-4 Valor 2000 Series Scales
2.4.2 Battery Power
The scale can be operated on the internal rechargeable battery when AC power is not
available. The scale will automatically switch to battery operation if there is a power
failure or the power cord is removed.
Before using the scale for the first time, the battery should be fully
ged for up to 12 hours. During charging, the battery Indicator
char
displays the charge level (see Table 2-1), and the scale can be operated
during charging. The battery is protected against over charging and the
scale can remain connected to the AC power line.
TABLE 2-1. BATTERY CHARGE STATUS.
Charge Status Indication Light Charge level
Off Fully Charged
Flashing Green 70 – 100 %
Flashing Yellow 40 – 70 %
Flashing Red 0 – 40 %
The scale can operate for approximately 60 hours on a fully charged battery.
During battery operation, the battery Indicator displays the battery status (see Table
2-2).
TABLE 2-2. BATTERY CAPACITY STATUS.
Charge Status Indication Light Capacity Remaining
Solid Green 70 – 100 %
Solid Yellow 40 – 70 %
Solid Red 10 – 40 %
Flashing Red 0 – 10 %
Flashing Red, Lo bAt Requires recharge;
Accuracy not guaranteed
NOTE:
• Charging the scale must only be performed in a dry environment.
• Install the rubber seal securely to ensure the scale is prote
operating in a wet environment.
CAUTION: Batt
ery is to be replaced only by an authorized Ohaus service
dealer.
Risk of explosion can occur if replaced with the wrong type or connected
improperly.
Dispose of the lead acid battery according to local laws and regulations.
cted when

EN-5Valor 2000 Series Scales
2.5 Initial Calibration
When the scale is operated for the first time, a Span calibration is recommended to
ensure accurate weighing results. Before performing the calibration, be sure to have
the appropriate calibration weight.
Refer to section 4.2 for Span calibration procedures.
3. OPERATION
3.1 Turning Scale On/Off
To turn the scale on, press the ON/ 0/T Off button. The scale performs a display test,
momentarily displays the model/software version, and then enters the active
weighing mode.
To turn the scale off, press and hold ON/ 0/T Off button until OFF is displayed.
3.2 Zero Operation
Press the ON/ 0/T Off button to zero the weight display. The scale must be stable to
accept zero operation.
3.3 Manual Tare
Place a container on the weighing pan, then press ON/ 0/T Off. The display will
show a net value of “0”. To clear the Tare value, press
empty.
ON/ 0/T Off with the pan
3.4 Changing Units of Measure
Press the UNITS/Menu button to display the next available measuring unit. Only
measuring units enabled in the Unit Menu will be displayed (refer to Section 4.4).
4. SETTINGS
The Menu allows the user to customize scale settings.
4.1 Menu Navigation
Press and hold UNITS/Menu button until MENU is displayed, then release it.
Press Yes to enter the displayed menu or press No to advance to the next menu.
When viewing the menu setting, press Yes to accept the setting, or press No to
press
change it, then
End is dis
played, press
Yes to accept the setting and move to the next menu. When
Yes to exit the menu.
EN-6 Valor 2000 Series Scales
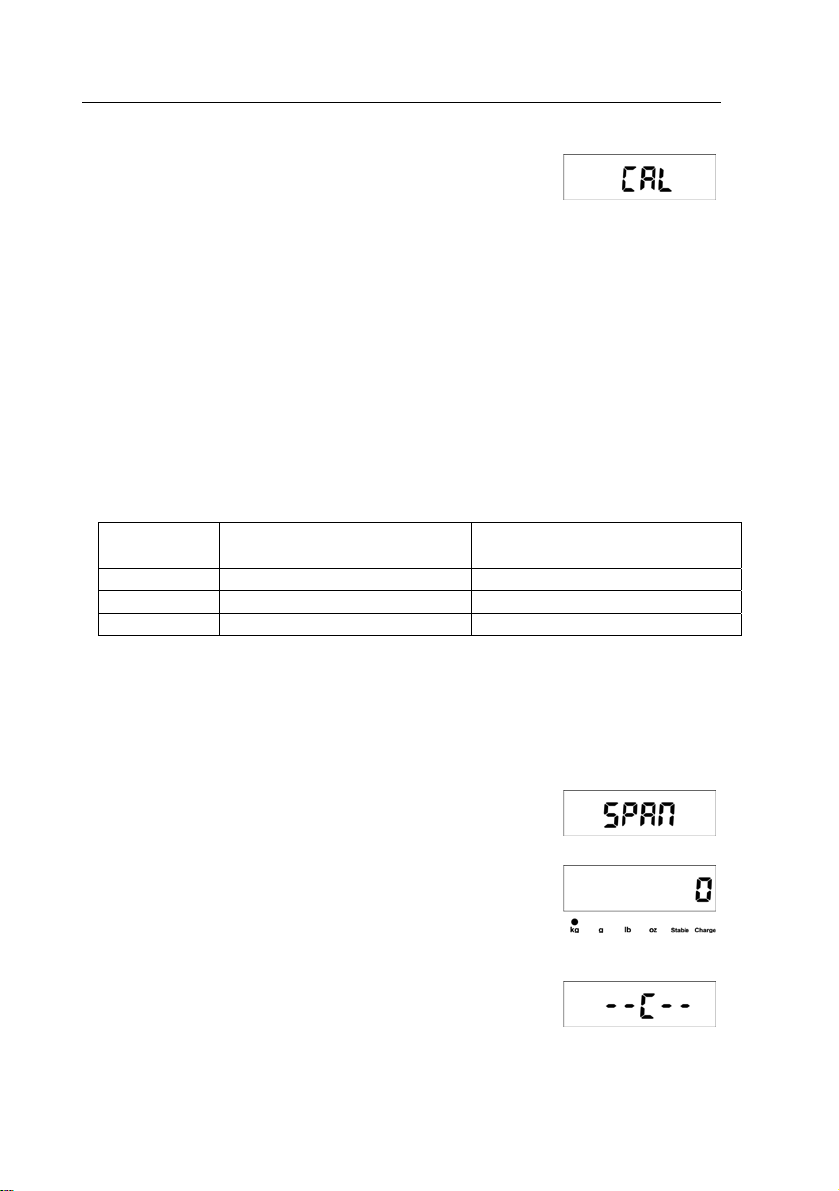
4.2 CAL Menu
SPAN Perform Span calibration Yes or No.
LIN Perform Linearity calibration Yes or No.
NOTE:
• Ensure the appropriate calibration masses are available before beginning
calibration (see Table 4-1).
• Ensure that the scale is level and stable during the e
process.
• Calibration is unavailable with LFT set to On.
• Allow the scale to warm up for approxim
to room temperature.
• To abort calibration, power off the scale.
ately 5 minutes after stabilizing
ntire calibration
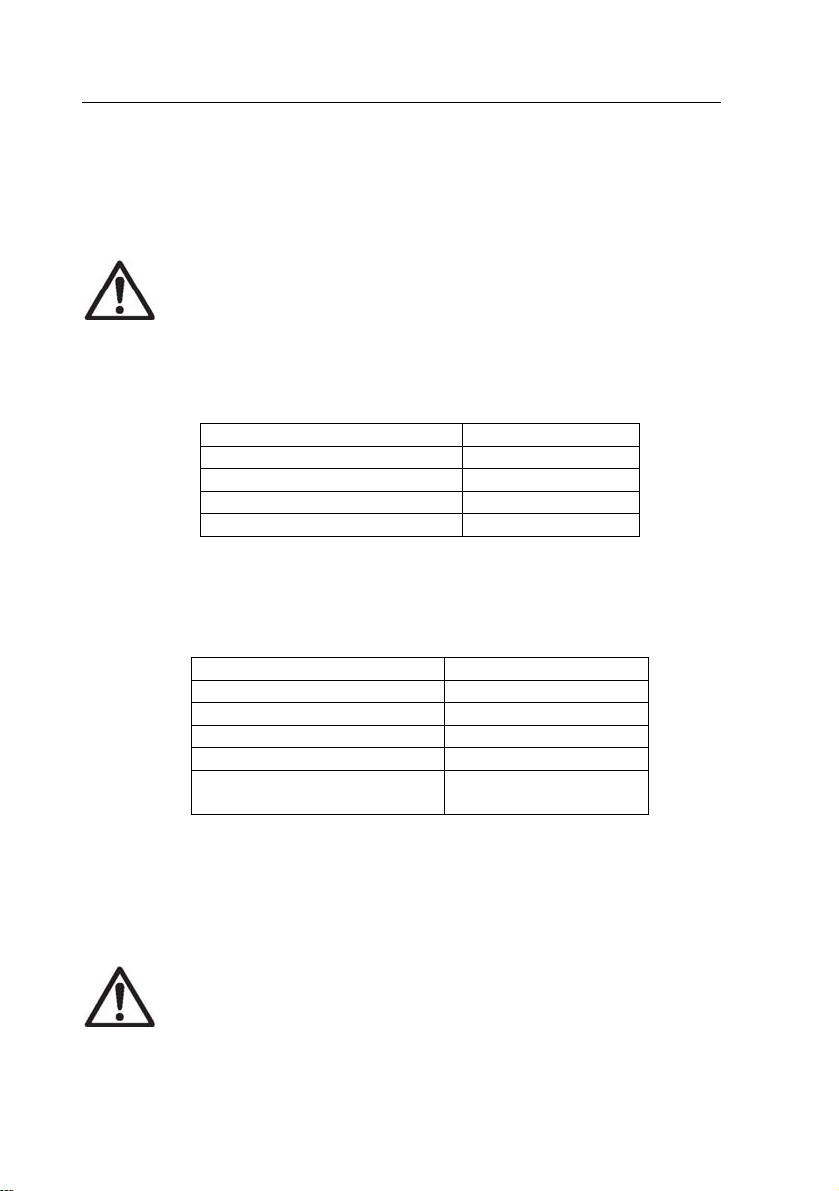
TABLE 4-1. CALIBRATION WEIGHTS.
Model Span Calibration weight (kg)
User selectable
V21PW3 1, 2, 3 2, 3
V21PW6 2, 4, 6 4, 6
V21PW15 5, 10, 15 10, 15
Linearity Calibration weight (kg)
Fixed
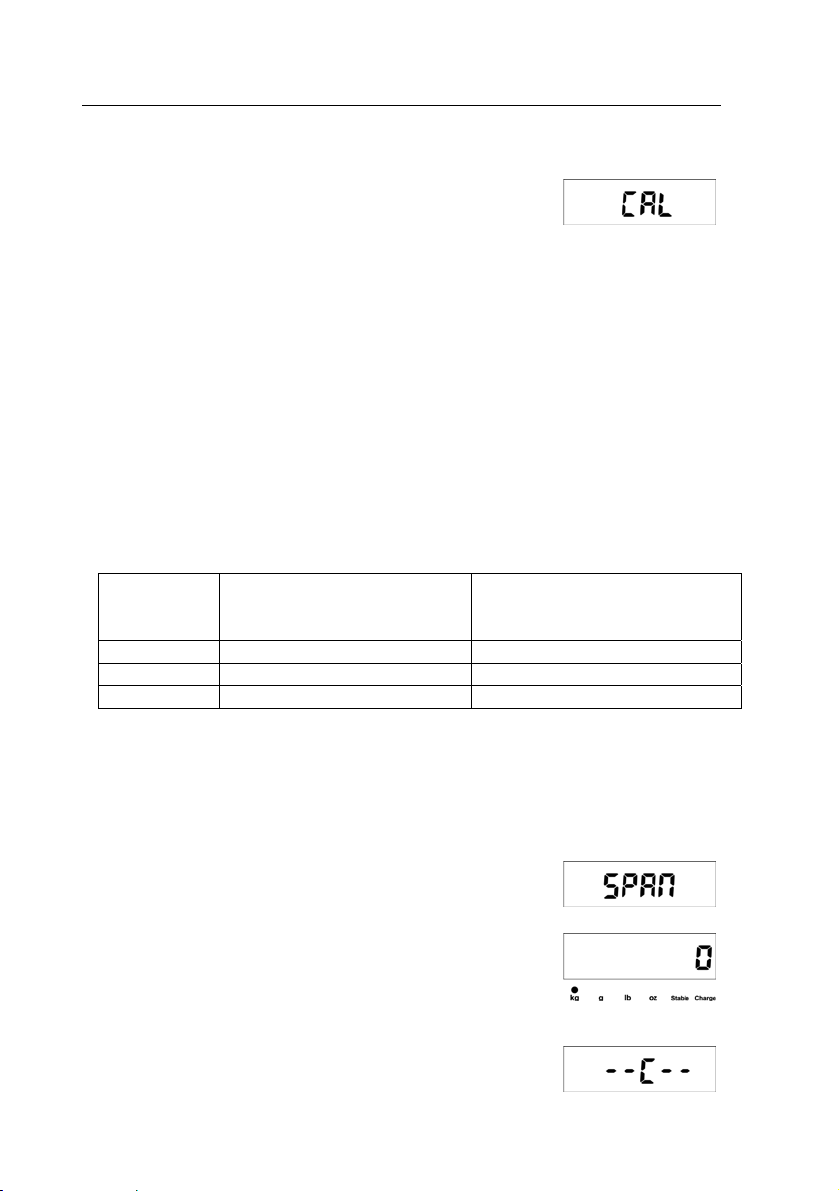
4.2.1 Span Calibration
Span Calibration uses two points to adjust the scale. The first point is the zero value
where there is no weight on the scale. The second point is the Span value where a
calibration mass is placed on the scale.
When SPAN is displayed, press the Yes
the Span Calibration menu item.
The display flashes 0.
With no weight on the scale, press the Yes b
establish the zero point.
The display shows --C-- while the zero point is
establis
hed.
button to access
utton to
EN-7Valor 2000 Series Scales
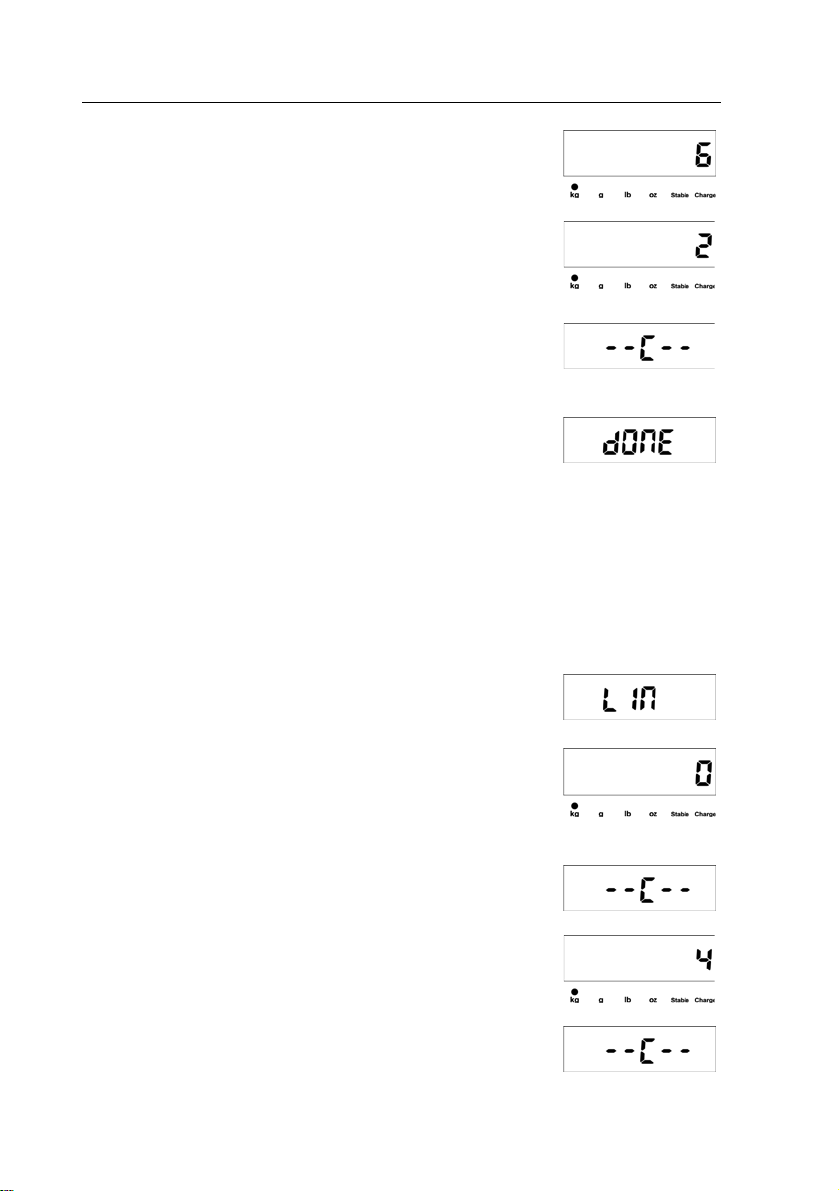
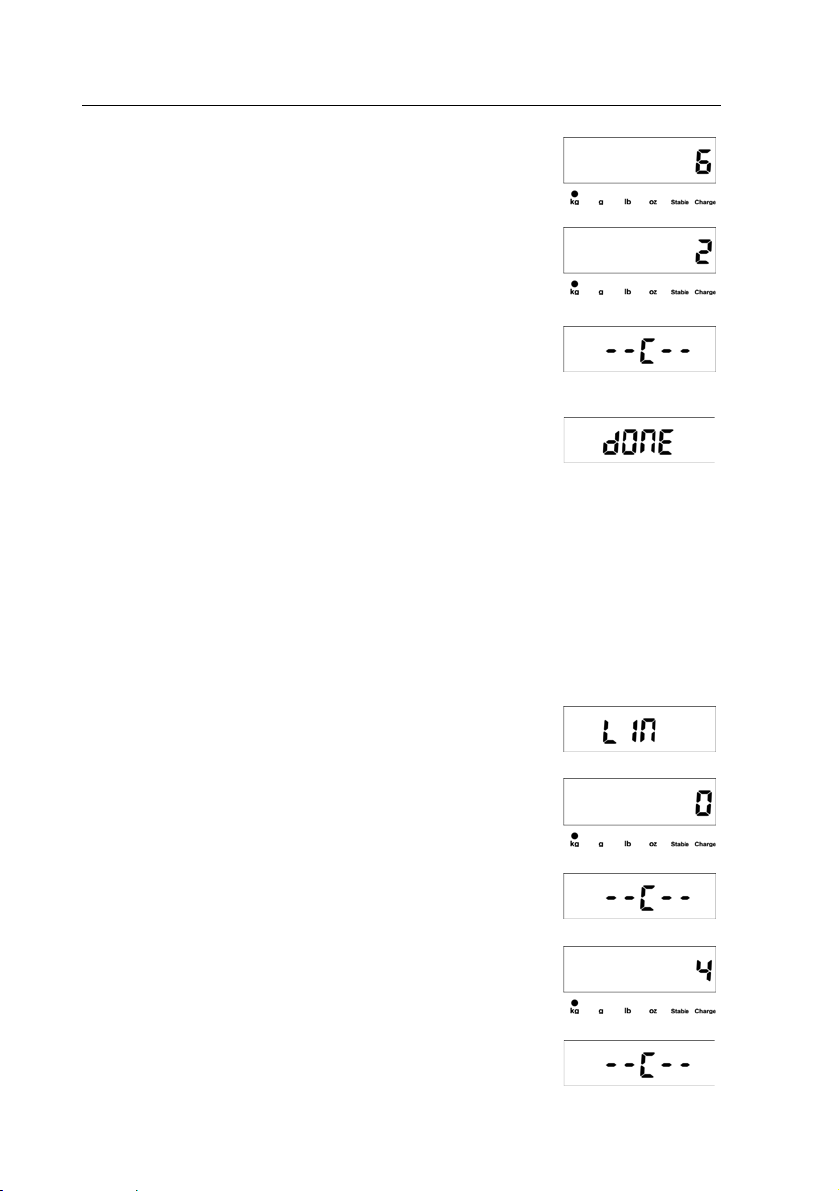
The display flashes the span calibr
specified weight on the scale and press the Yes button.
To choose a different span poi
button to increment the selections. When the desired
value is displayed, place the specified weight on the scale
and press the Yes button.
The display shows --C-- while
established.
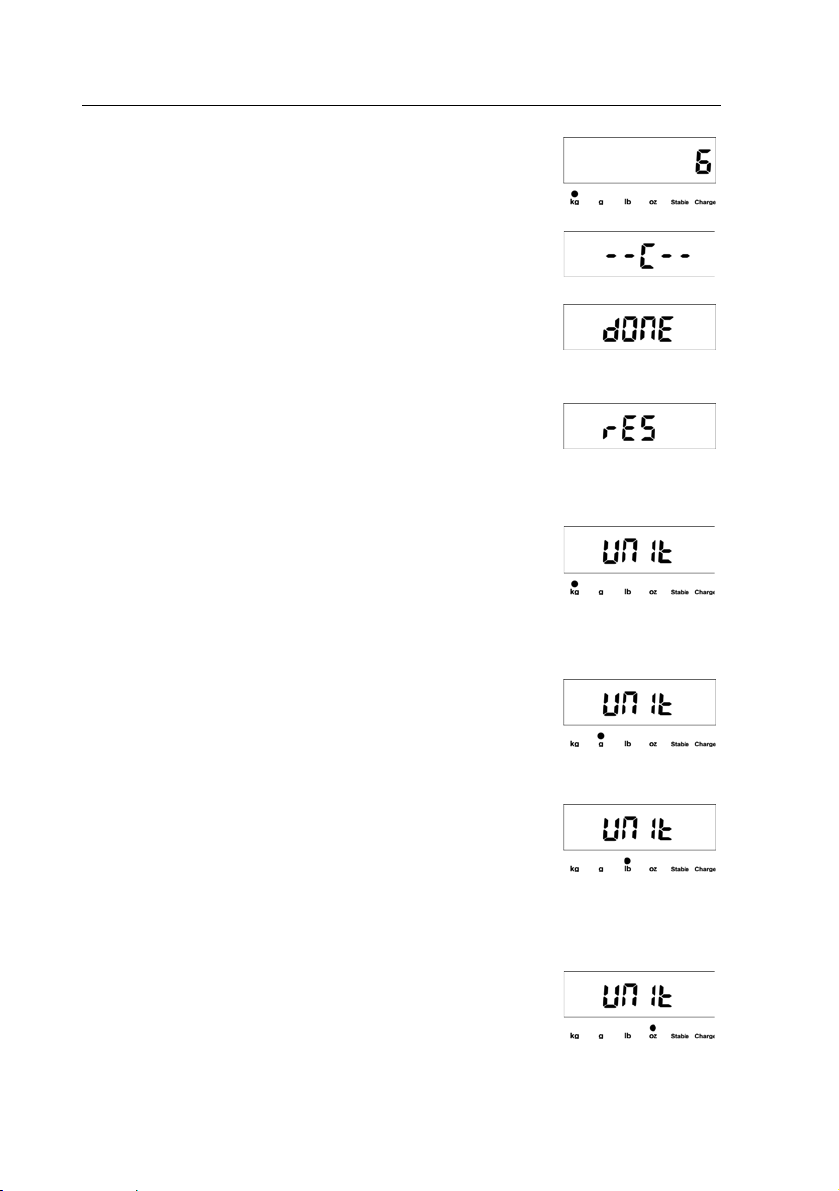
If span calibration was successful, dONE is displayed
d the scale exits to the active weighing mode and
an
displays the actual weight value.
ation point. Place the
nt, repeatedly press the No
the span point is
4.2.2 Linearity Calibration
Linearity calibration uses 3 calibration points. The first calibration point is
established with no weight on the scale. The second calibration point is established
at approximately half capacity. The third calibration point is established at capacity.
The Linearity calibration points are fixed and cannot be altered by the user during the
calibration procedure.
When LIN is displayed, press the Yes button to access the
Linearity Calibration menu item.
The display flashes 0.
With no weight on the scale, press the Yes b
establish the zero point.
The display shows --C-- while the zero point is
establis
The display flashes the mid calibr
specified weight on the scale and press the Yes button.
hed.
ation point. Place the
utton to
The display shows --C-- while the mid point is
established.
EN-8 Valor 2000 Series Scales
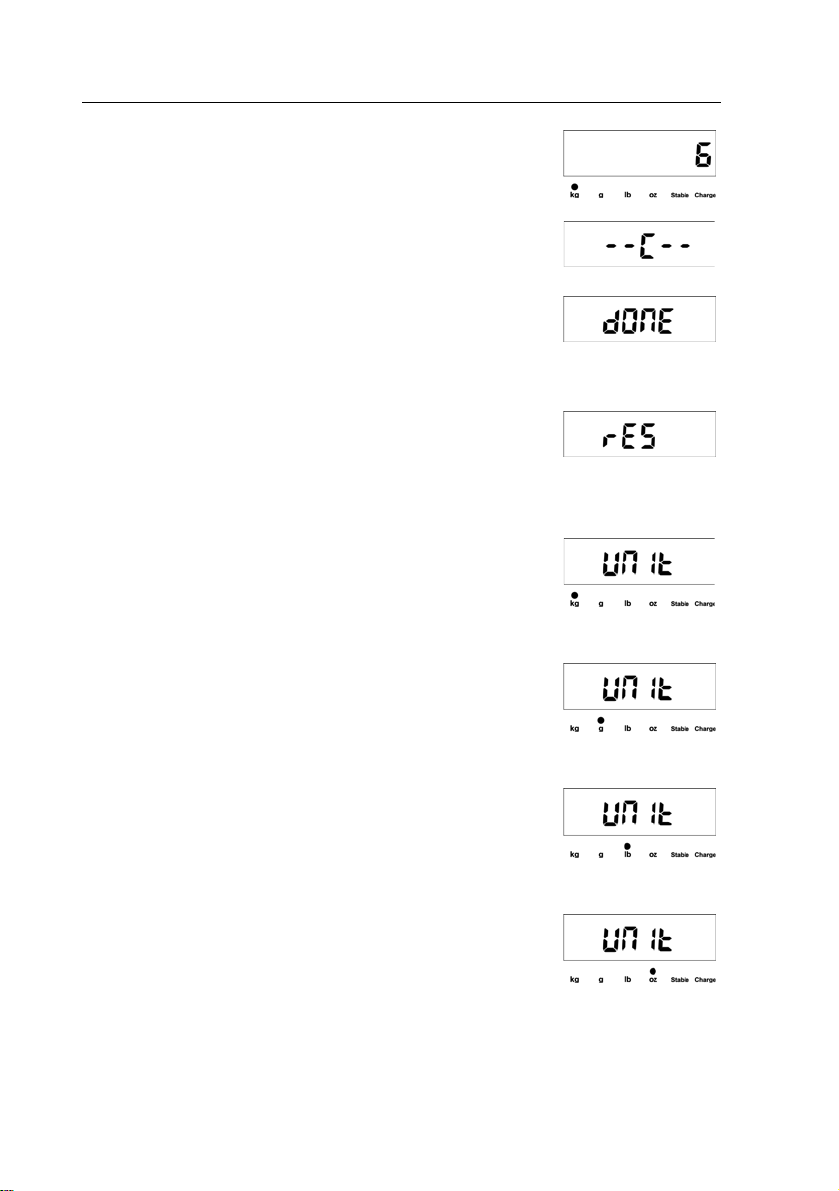
The display flashes the full c
specified weight on the scale and press the Yes button.
The display shows --C-- while the full calibration point is
established.
If linearity calibration was successful, dONE is displayed
d the scale exits to the active weighing mode and
an
displays the actual weight value.
alibration point. Place the
4.3 RES Menu
RESOLUTION
Set the resolution to LO (low) or HI (high).
4.4 UNIT Menu
KILOGRAM UNIT
Set kilograms ON or OFF. When kg is lit, press the Yes
on to access the
butt
choose ON or
GRAM UNIT
Set grams ON or OFF. When g is lit, press the Yes b
to access the
ON or OFF, then
POUND UNIT
Set pounds ON or OFF. When lb is lit, press the Ye
button to access the
choose ON or
OUNCE UNIT
Set ounces ON or OFF. When oz is lit, press t
button to access the ON or OFF setting, then press No to
choose ON or OFF, then Yes to accept the setting.
ON or OFF setting, then press No to
OFF, then
ON or OFF setting, then press No to choose
Yes to accept the setting.
OFF, then
Yes to accept the setting.
utton
s
ON or OFF setting, then press No to
Yes to accept the setting.
he Yes
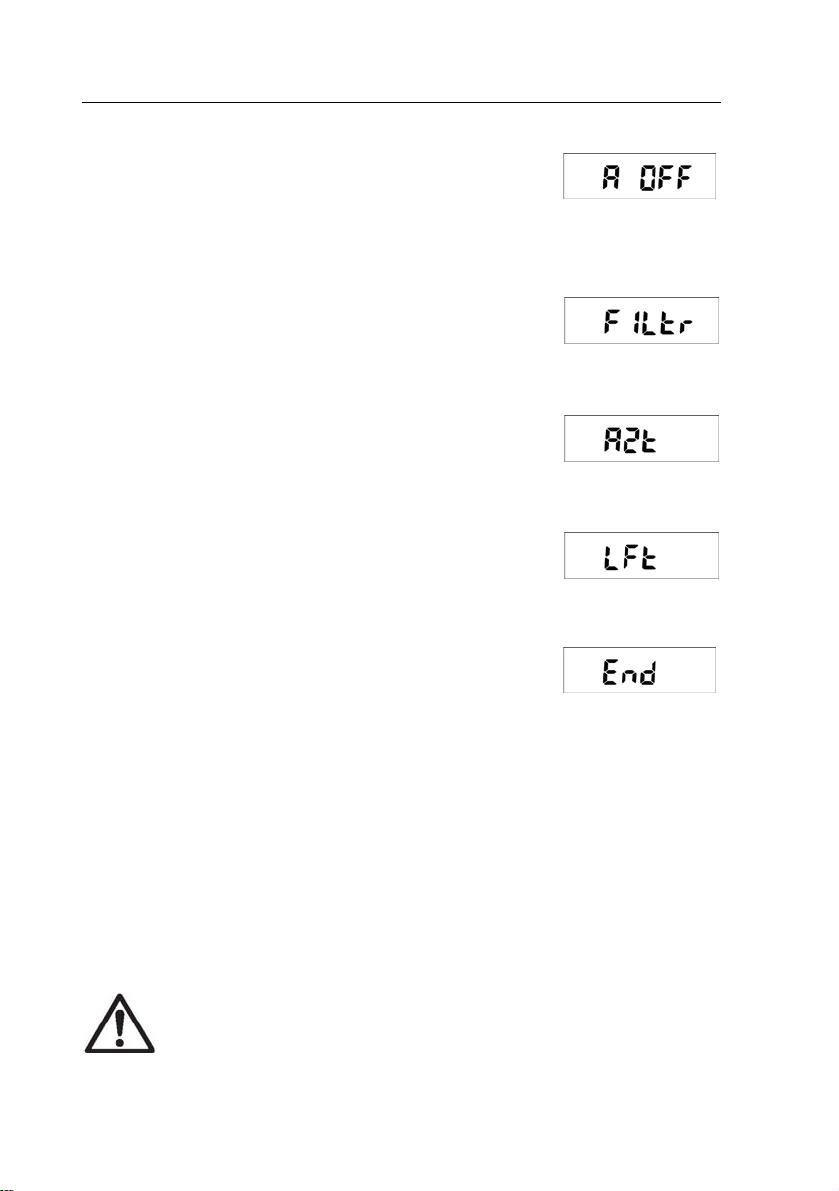
4.5 A OFF Menu
AUTO SHUT OFF
Set the automatic shut off to 5, 10, 15 minutes (shut off
after 5 minutes
, etc.) or OFF (scale stays on).
EN-9Valor 2000 Series Scales
4.6 FILTR Menu
FILTERING LEVEL
Set the filter level to LO (low), MEd (medium), or HI
gh).
(hi
4.7 AZT Menu
AUTO ZERO TRACKING RANGE
Set the automatic zero tracking range to OFF, 0.5d, 1d,
divisions).
3d (
4.8 LFT Menu
LEGAL FOR TRADE (LFT) MODE
Set the legal for trade status to ON or OFF.
4.9 END
End menu item.
5. LEGAL FOR TRADE
5.1 Settings
Enter the menu to verify the settings and perform a calibration as explained in
Section 4.2. Set the LFT menu to ON.
NOTE: Whe
accessed/changed: Calibration, Resolution, Unit, AZT, LFT.
n LFT is set to ON, the following menu settings cannot be
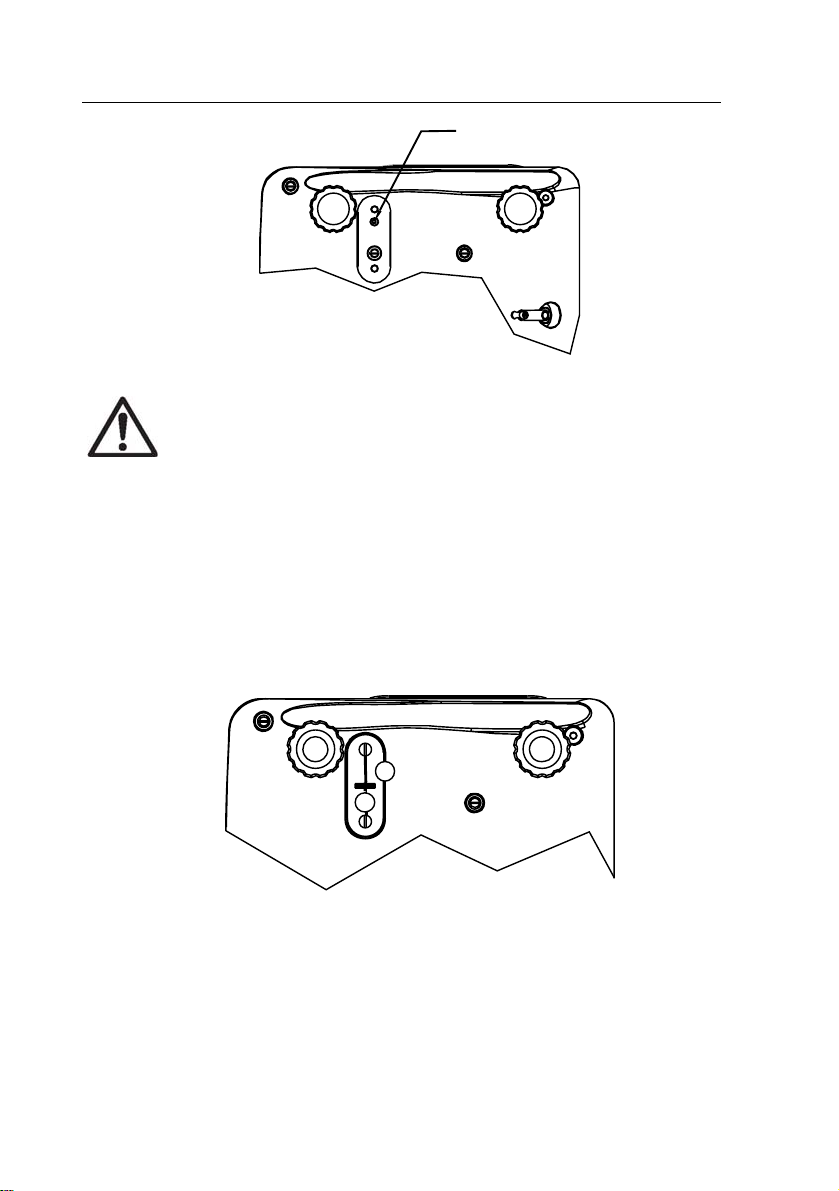
To regain access to the locked menu settings, remove the small cover on
the bottom of t
recessed lock switch momentarily until zero is displayed.
he scale. Then during power up press and hold the
EN-10 Valor 2000 Series Scales
Lock Switch
Figure 5-1. Lock Switch.
When accessing the bottom of the scale, avoid placing the scale upside
down on the pan or sub-platform. Place the scale on its side.
5.2 Verification
Before this product can be used in a trade approved application, it must be inspected
in accordance with local weights and measures regulations. It is the responsibility
of the purchaser to ensure that all pertinent legal requirements are met. Please
contact your local weights and measures office for further details.
5.3 Sealing
The weights and measures official can apply a wire or paper security seal as shown
below.
SEAL
SEAL
Figure 5-2. Sealing.
6. MAINTENANCE
CAUTION: to avoid possible water entry, before cleaning the scale:
• Turn off the scale, remove the AC
• Screw in the two rear leveling feet tightly. W
operation, remember to loosen the two rear feet to allow proper airflow inside the
scale.
adapter and install the rubber seal securely.
hen the scale is put back into
EN-11Valor 2000 Series Scales
6.1 Cleaning
The housing may be cleaned with a cloth dampened with a mild detergent if
necessary. Do not use solvents, chemicals, alcohol, ammonia or abrasives to clean
ousing or control panels.
the h
6.2 Troubleshooting
The following table lists common problems and possible causes and remedies. If
the problem persists, contact Ohaus or your authorized dealer.
TABLE 6-1. TROU
Symptom Possible Cause(s) Remedy
BLESHOOTING.
Scale will not turn on No power to scale
Poor accuracy Improper calibration • Unstable
Unable to calibrate LFT Menu set to ON
Cannot display weight in
desired weighing unit
Cannot change menu
settings
Scale displays Lo bAt Battery is discharged Connect power and charge the battery
Battery fails to charge
fully
Err 1 Weight on pan exceeds capacity Remove weight from the pan
Err 2 Underload limit exceeded • Pan
Err 9, Err 21 Factory data corrupted Contact Ohaus or an authorized service
Battery power used up
environment • Internal pressure
build-up
Unstable environment
Incorrect calibration mass
Weighing unit not enabled Enter menu and enable unit
LFT Menu set to ON Set LFT menu to OFF (see section 5.1)
Battery is defective Have battery replaced by authorized
was removed prior to power on
Verify connections and voltage.
Connect power and charge the battery
Perform calibration • Move scale to
suitable location • Relieve internal
pressure by loosening rear leveling feet
Set LFT menu to OFF (see section 5.1)
Move the scale to suitable location
Use correct calibration mass
service dealer
Install pan and re-zero
agent
EN-12 Valor 2000 Series Scales
6.3 Service Information
If the troubleshooting section does not resolve or describe your problem, contact
your authorized Ohaus service agent. For service assistance or technical support in
the United States call toll-free 1-800-526-0659 between 8.00 AM and 5:00 PM
EST. An Ohaus product service specialist will be available to provide assistance.
Outside the USA, please visit our web site,
www.ohaus.com to locate the Ohaus
office nearest you.
7. TECHNICAL DATA
The technical data is valid under the following ambient conditions:
Ambient temperature: 0°C to 40°C
Relative humidity: 10% to 95% relative humidity, non-condensing
Height above sea level: Up to 2000 m
Operability is assured at ambient temper
7.1 Specifications
TABLE 7-1. SPECIFICATIONS.
Model V21PW3 V21PW6 V21PW15
Capacity x Readability
(max x d non-approved)
Maximum displayed resolution 1:6000 1:6000 1:7500
Capacity x Readability
(max x e approved)
Approved resolution 1:3000 1:3000 1:3000
Repeatability +0.001 kg +0.002 kg +0.005 kg
Linearity +0.001 kg +0.002 kg +0.005 kg
Weighing Units kg, g, lb, oz
Tare range To capacity by subtraction
Stabilization Time
Power Requirements
Display
Keypad 2-button mechanical keys
Ingress Protection IP65
Pan Size (mm / in) 233 x 184 / 9.2 x 7.2
Typical Battery life 60 hours with 12 hour recharge time
Operating temperature range 0°C to 40°C
Net Weight (kg / lb) 3.5 / 7.8
Shipping Weight (kg / lb) 4.3/ 9.3
3 kg x 0.0005 kg
96 oz x 0.02 oz
3 kg x 0.001 kg
96 oz x 0.05 oz
atures between 0°C and 40°C
6 kg x 0.001 kg
3000 g x 0.5 g
6 lb x 0.001 lb
3000 g x 1 g
6 lb x 0.002 lb
9-12 VDC 0.7A AC Adapter (supplied)
Internal rechargeable sealed lead-acid battery
6-digit 7-segment, 15mm / 0.6 in characters
6000 g x 1 g
15 lb x 0.002 lb
240 oz x 0.05 oz
6 kg x 0.002 kg
6000 g x 2 g
15 lb x 0.005 lb
240 oz x 0.1 oz
≤ 2 seconds
2x red LED (front and rear)
15 kg x 0.002 kg
15000 g x 2 g
30 lb x 0.005 lb
480 oz x 0.1 oz
15 kg x 0.005 kg
15000 g x 5 g
30 lb x 0.01 lb
480 oz x 0.2 oz
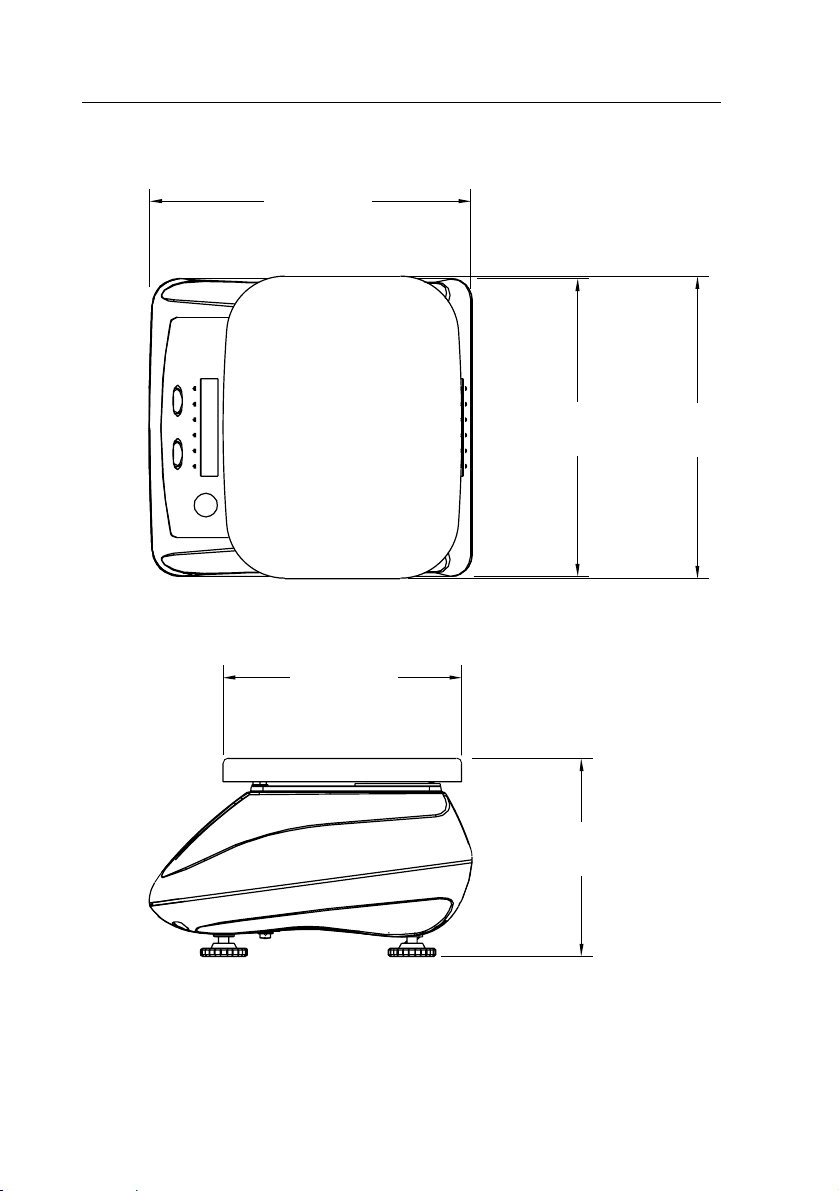
7.2. Drawings and Dimensions
249 mm
(9.8 in.)
EN-13Valor 2000 Series Scales
229 mm
(9.0 in.)
184 mm
(7.2 in.)
142 mm
(5.6 in.)
233 mm
(9.2 in.)
Figure 7-1. Valor 2000 Series Overall Dimensions.
EN-14 Valor 2000 Series Scales
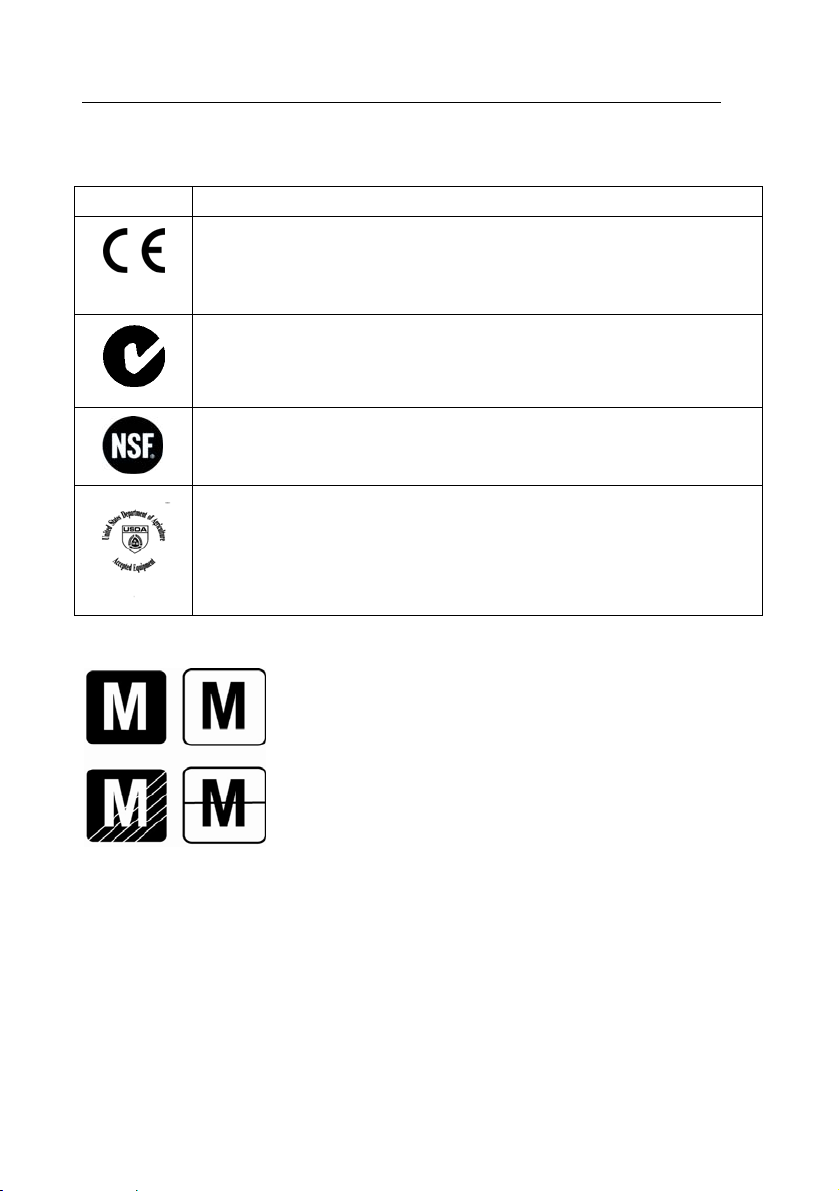
7.3. Compliance
Compliance to the following standards is indicated by the corresponding mark on the product
Mark Standard
.
This product conforms to the EMC directive 2
Low Voltage Directive 2006/95/EC. The complete declaration of
Conformity is available from Ohaus Corporation
AS/NZS4251.1 Emission; AS/NZS4252.1 Immunity
NSF/ANSI 169 – 2005
NSF/ANSI /3-A 14159-1 - 2002
Important notice for verified weighing instruments
Weighing Instruments verified at the place of manufacture
bear one of the preceding mark on the packing label and
the green ‘M’ (metrology) sticker on the descriptive plate.
They may be put into service immediately.
Weighing Instruments to be verified in two stages have no
green ‘M’ (metrol
one of the preceding identification mark on the packing
label. The second stage of the initial verification must be
carried out by the approved service organization of the
authorized representative within the EC or by the national
weight & measures (W+M) authorities.
ogy) on the descriptive plate and bear
004/108/EC and the
The first stage of the initial verification has been carried out at the manufacturers work. It
comprises all tests according to the adopted European standard EN 45501:1992,
paragraph 8.2.2.
If national regulations limit the validity period of the verification, the
instrument must strictly observe the re-verification period and inform the respective W+M
authorities
.
user of the weighing
Disposal
In conformance with the European Directive 2002/96 EC on Waste Electrical
and Electronic Equipment (WEEE) this device may not be disposed of in
domestic waste. This also applies to countries outside the EU, per their
specific requirements.
Please dispose of this product in accordance with local regulations at the
collecting point specified for electrical and electronic equipment.
If you have any questions, please contact the responsible authority or the
distributor from which you purchased this device.
Should this device be passed on to other parties (for private or professional
use), the
EN-15Valor 2000 Series Scales
content of this regulation must also be related.
Thank you for your contribution to environmental protection.
FCC Note
This equipment has been tested and found to comply with the limits for a Class B digital device,
pursuant to Part 15 of the FCC Rules. These limits are designed to provide reasonable protection
against harmful interference in a residential installation. This equipment generates, uses and can
radiate radio frequency energy and, if not installed and used in accordance with the instructions,
may cause harmful interference to radio communications. However, there is no guarantee that
interference will not occur in a particular installation. If this equipment does cause harmful
interference to radio or television reception, which can be determined by turning the equipment off
and on, the user is encouraged to try to correct the interference by one or more of the following
measures:
• Reorient or relocate the receiving antenna.
• Increase the separation between the equipment and receiver.
• Connect the equipment into an outlet on a circuit d
is connected.
• Consult the dealer or an experienced radio/TV technician for help.
This Class B digital apparatus complies with
Cet appareil numérique de la classe B est conforme à la norme NMB-00
ifferent from that to which the receiver
Canadian ICES-003.
3 du Canada.
ISO 9001 Registration
In 1994, Ohaus Corporation, USA, was awarded a certificate of registration to ISO 9001 by Bureau
Veritus Quality International (BVQI), confirming that the Ohaus quality management system is
compliant with the ISO 9001 standard’s requirements. On May 15, 2003, Ohaus Corporation,
USA, was re-registered to the ISO 9001:2000 standard.

EN-16 Valor 2000 Series Scales
LIMITED WARRANTY
Ohaus products are warranted against defects in materials and workmanship from
ate of delivery through the duration of the warranty period. During the warranty
the d
period Ohaus will repair, or, at its option, replace any component(s) that proves to
be defective at no charge, provided that the product is returned, freight prepaid, to
Ohaus. This warranty does not apply if the product has been damaged by accident
or misuse, exposed to radioactive or corrosive materials, has foreign material
penetrating to the inside of the product, or as a result of service or modification by
other than Ohaus. In lieu of a properly returned warranty registration card, the
warranty period shall begin on the date of shipment to the authorized dealer. No
other express or implied warranty is given by Ohaus Corporation. Ohaus Corporation
shall not be liable for any consequential damages.
As warranty legislation differs from state to state and country to country, please
act Ohaus or your local Ohaus dealer for further details.
cont
ES-1Básculas serie Valor 2000
1. INTRODUCCIÓN
Este manual contiene instrucciones de instalación, operación y mantenimiento para
las básculas de la serie Valor 2000. Por favor lea completamente el manual antes
de usar la báscula.
1.1 Precauciones de seguridad
Por favor siga estas precauciones de seguridad:
• Verifique que el voltaje de entrada del adaptador de
voltaje del suministro de eléctrico CA local.
• No sumerja la báscula en agua u otros líquidos.
• No opere la báscula en ambientes hostiles.
• No deje caer objetos en la plataforma.
• No coloque la báscula al revés sobre el plato de pesaje.
• El mantenimiento debe ser reali
• Desconecte la báscula de la fuente de alimentación cuando la esté limpiando.
1.2 Controles
TM
corriente alterna (CA) coincida con el
zado solamente por personal autorizado.
Figura 1-1. Controles.
Figura 1-2. Pantalla posterior.
ES-2 Básculas serie Valor 2000
TABLA 1-1. FUNCIONES DE CONTROL.
Botón
Función primaria
(Pulsación corta)
Función
secundaria
(Pulsación larga)
Función del
menú:
(Pulsación corta)
ON/ 0/T
Enciende la báscula.
Si la báscula está encendida:
Establece cero.
Realiza una operación de
Off
Apaga la báscula.
Yes
Acepta la configuración que
está act
pantalla.
ualmente en la
tara.
UNITS (UNIDADES)
Cambia la unidad de peso.
Menu
Accede al menú de usuario.
No
Avanza al siguiente menú o
ítem del menú.
Rechaza la configuración que
está act
pantalla y avanza a la
siguiente configuración
disponible.
ualmente en la
2. INSTALACIÓN
2.1 Contenido del paquete
• Báscula
• Plato de pesaje
• Adaptador de corriente
• Manual de instrucciones
• Tarjeta de garantía
2.2 Ubicación
Use la báscula en una superficie firme y segura. Evite lugares con corrientes de aire
excesivas, vibraciones, fuentes de calor o cambios bruscos de temperatura.
2.3 Nivelación de la báscula
Ajuste las patas niveladoras para que la burbuja esté centrada en el círculo.
ES-3Básculas serie Valor 2000
Burbuja de nivelación
Patas ajustables
Figura 2-1. Nivelación de la báscula.
IMPORTANTE: Para liberar cualquier presión interna y permitir el flujo de
aire adecuado dentro de la báscula, destornille ligeramente las dos
patas de nivelación posteriores y nivele la báscula según sea necesario.
Cuando limpie la báscula, las patas de nivelación posteriores deben
atornillarse con fuerza para evitar que ingrese agua en la báscula.
Sì
2.4 Alimentación
2.4.1 Corriente CA
El adaptador de corriente (incluido) puede usarse para alimentar la báscula cuando
la energía de la batería no esté disponible. Retire el sello de goma de la parte
trasera.
co
Conecte el adaptador de corriente alterna al enchufe de entrada. Después
necte el adaptador de corriente a una salida de energía con conexión a tierra.
NOTA: Para evitar la entrada de agua durante su uso, coloque un
sello de g
oma en la ranura del enchufe de entrada.
Sello
Figura 2-2. Conexión de corriente y sello.
ES-4 Básculas serie Valor 2000
2.4.2 Alimentación por corriente de batería
La báscula puede ser usada con la batería interna recargable cuando la energía de la
corriente CA no esté disponible. La báscula cambiará automáticamente a la operación por
batería su hay una falla de corriente o si el cable de corriente es removido.
Antes de usar la báscula por primera vez, la batería debe ser cargada
completamente hasta por 12 horas. Durante la carga, el indicador de batería
muestra
mientras se está cargando.
báscula pued
La báscula puede operar durante aproximadamente 60 horas con la batería
completamente cargada.
Durante el funcionamiento con batería, el indicador muestra el estado de la batería
(con
sulte la tabla 2-2).
NOTA:
• La carga de la báscula solo debe realizarse en un ambiente seco.
• Instale el sello de goma correctamente para
se use en un ambiente húmedo.
PRECAUCIÓN: La batería solo debe ser reemplazada por un distribuidor de Ohaus
autorizado.
Puede producirse un riesgo de explosión si se reemplaza con un tipo equivocado
o si se conecta de forma inapropiada.
La eliminación de la batería de ácido conductor debe hacerse de acuerdo a las
leyes y regulaciones locales.
el nivel de carga (consulte la tabla 2-1). La báscula puede ser usada
La batería está protegida contra sobre cargas y la
e permanecer conectada al cable de corriente CA.
TABLA 2-1. ESTADO DE CARGA DE LA BATERÍA.
Luz indicadora de estado de
carga
Off Cargada
Verde parpadeando 70 – 100 %
Amarillo parpadeando 40 – 70 %
Rojo parpadeando 0 – 40 %
Nivel de carga
completamente
TABLA 2-2. ESTADO DE CAPACIDAD DE LA BATERÍA.
Luz indicadora de estado de
carga
Verde fijo 70 – 100 %
Amarillo fijo 40 – 70 %
Rojo fijo 10 – 40 %
Rojo parpadeando 0 – 10 %
Rojo parpadeando, Lo bAt Requiere carga; Exactitud
Capacidad restante
no garantizada
asegurar que la báscula esté protegida cuando

ES-5Básculas serie Valor 2000
2.5 Calibración inicial
Cuando la báscula es utilizada por primera vez, se recomienda hacer una calibración de
rango para asegurar resultados de pesaje exactos. Antes de realizar la calibración, asegúrese
de tener el peso de calibración apropiado.
Diríjase a la sección 4.2 para los procedimientos de calibración de rango.
3. OPERACIÓN
3.1 Apagado y encendido de la báscula
Para encender la báscula, presione el botón ON/ 0/T Off. La báscula realiza una
prueba de pantalla, muestra momentáneamente el modelo y la versión del software,
después entra al modo de pesaje activo.
Para apagar la báscula, presione el botón ON/ 0/T Off hasta que se muestre OFF.
3.2 Operación de puesta a cero
Presione el botón ON/ 0/T Off para establecer cero en la pantalla de peso. La
báscula debe estar estable para aceptar la operación de cero.
3.3 Tara manual
Coloque un recipiente en la bandeja de pesaje, después presione ON/ 0/T Off. La
pantalla mostrará un valor neto de “0”. Para borrar el valor de tara, presione ON/
0/T Off con la bandeja vacía.
3.4 Cambio de unidades de medida
Presione el botón UNITS/Menu para mostrar la siguiente unidad de medida
disponible. Solo se mostrarán las unidades habilitadas en el menú de unidades
(consulte l
a sección 4.4).
4. CONFIGURACIONES
El menú permite al usuario personalizar las configuraciones de la báscula.
4.1 Menú de navegación
Mantenga presionado el botón UNITS/Menu hasta que se muestre MENU, después suéltelo.
Presione Ye
menú.
Cuando consulte la configuración del menú, presione Yes para aceptar la
configuración, o presione No para cambiarla, después presione Yes para aceptar la
configuración y moverse al siguiente menú. Cuando se muestre End, presione Yes
para salir del menú.
s (Sí) para entrar al menú mostrado o presione No para avanzar al siguiente
ES-6 Básculas serie Valor 2000
4.2 Menú de calibración (CAL Menu)
SPAN Realizar calibración de rango Si o No (Yes o No).
SPAN Realizar calibración de linealidad Si o No (Yes o
No).
NOTA:
• Asegúrese de tener disponibles las masas
empezar
la calibración (cons
• Asegúrese de que la báscula esté nivelada y estable durante todo el pr
calibración.
• La calibración no está disponible cuando LFT está activado (On).
• Permita que la báscula se caliente durante aproximadamente 5 minutos después
de estabilizarse
• Para cancelar la calibración, apague la báscula.
ulte la tabla 4-1).
a la temperatura ambiente.
de calibración correctas antes de
oceso de
TABLA 4-1. PESOS DE CALIBRACIÓN.
Modelo Peso de calibración de rango
(kg)
Seleccionable por el usuario
V21PW3 1, 2, 3 2, 3
V21PW6 2, 4, 6 4, 6
V21PW15 5, 10, 15 10, 15
Peso de calibración de linealidad
(kg)
Fijo
4.2.1 Calibración de rango
La calibración de rango usa dos puntos para ajustar la báscula. El primer punto es
el valor cero donde no hay peso en la báscula. El segundo punto es el valor de
ango donde se coloca una masa de calibración en la báscula.
r
Cuando no se muestre SPAN, presione el botón Yes para
acceder al ítem del menú de c
La pantalla destella 0.
Presione el botón Yes si
establecer el punto cero.
La pantalla muestra --C-- mientras se establece el punto
cero.
alibración de rango.
n peso en la báscula para
ES-7Básculas serie Valor 2000
En la pantalla destella el p
Coloque el peso especificado en la báscula y luego
esione el botón Yes.
pr
Para elegir un punto de rango diferente, presione el botón
No varias veces para incrementar las selecciones.
Cuando se muestre el valor deseado, coloque el peso
especificado en la báscula y luego presione el botón Yes.
La pantalla muestra --C-- mientras se establece el punto
de rango.
Si la calibración de rango fue exitosa, aparece dONE y la
báscula sale al modo de pesaje activo y muestra el valor
del peso actual.
unto de calibración de rango.
4.2.2 Calibración de linealidad
La calibración de linealidad usa 3 puntos de calibración. El primer punto de
calibración se establece sin peso en la báscula. El segundo punto de calibración se
establece con aproximadamente la mitad de la capacidad. El tercer punto de
calibración se establece con toda la capacidad.
dad son fijos y no pueden ser modificados por el usuario durante el
lineali
procedimiento de calibración.
Cuando se muestre LIN, presione el botón Yes para
acceder al ítem del menú de calibración de linealidad.
La pantalla destella 0.
Presione el botón Yes sin peso en la báscula para
establecer el punto cero.
La pantalla muestra --C-- mientras se establece el punto
cero.
La pantalla destella el punto medio de calibración.
Coloque el peso especificado en la báscula y presione el
botón Yes
La pantalla muestra --C-- mientras se establece el punto
medio.
.
Los puntos de calibración de
ES-8 Básculas serie Valor 2000
La pantalla destella el punto máximo de calibración. Coloque el
peso especificado en la báscula y presione el botón Yes.
La pantalla muestra --C-- mientras se establece el punto
máximo.
Si la calibración de linealidad fué exitosa, aparece dONE y la
báscula sale al
modo de pesaje activo y muestra el valor
del peso actual.
4.3 Menú de resolución (RES Menu)
RESOLUCIÓN
Establece la resolución en LO (baja) o HI (alta)
4.4 Menú de unidades (UNIT Menu)
UNIDAD DE KILOGRAMO
Establece los kilogramos en ON (encendido) u OFF (apagado).
Cuando kg está encendido, presione el botón Yes para acceder
a la configuració
ON u OFF, finalmente presione
configuración.
UNIDAD DE GRAMO
Establece los gramos en ON (encendido) u OFF (apagado).
Cuando g está encendido, presione el botón Yes para ingresar a
la configuración
u OFF, finalmente presione
UNIDAD DE LIBRA
Establece las libras en ON (encendido) u OFF (apagado).
Cuando lb está encendido, presione el botón Yes para ingresar
a la configuració
ON u OFF, finalmente presione Yes para aceptar la
configuración.
UNIDAD DE ONZA
Establece las onzas en ON (encendido) u OFF (apagado).
Cuando oz está encendido, presione el botón
ingresar a la configuración ON u OFF, después presione No
para elegir ON u OFF, finalmente presione Yes para aceptar la
configuración.
n ON u OFF, después presione No para elegir
Yes para aceptar la
ON u OFF, después presione No para elegir ON
Yes para aceptar la configuración.
n ON u OFF, después presione No para elegir
Yes para
 Loading...