

OHASHI ES72G Operation Manual

ORIGINAL INSTRUCTIONS
WOOD CHIPPER
ES72G
OHASHI INC.
401 Sakimura, Chiyoda, Kanzaki
Saga 842-0065, Japan
EUROPE TEL : +44 20 3286 2252
JAPAN TEL : +81 952 44 3135
WEB : www.ohashi-inc.com
E-mail : global@ohashi-inc.com
is separately provided by the engine manufacturer.
safety instructions, controls, servicing and maintenance of the
OPERATION MANUAL
Before attempting to operate this machine, read and fully understand
the contents of this Operation Manual. Make yourself familiar with
machine. Operators must also read through the engine manual which

INTRODUCTION
To operate this machine most comfortably and effectively, it is essential for you to perform daily checks
and regular inspection, servicing and maintenance jobs. This can be likened to your medical check-up.
To keep the machine in optimum condition at all times and prevent accident and injury, carry out daily
checks and servicing on a routine basis.
Take care of detecting even a small problem in the early stage before it becomes a big problem. If you have
some problem with the machine, do not put the machine into operation. Please feel free to contact and
consult the dealer from whom you purchased the machine to solve the problem.
When notifying the dealer, please report MODEL NUMBER and SERIAL NUMBER of the machine,
For the purpose of product improvement, specifications including spare parts may change without prior notice.

CONTENTS
SAFETY INSTRUCTIONS
・・・・ ・・・・・・・・・・・ ・・・・・・・ ・・・・・・・ ・・・・ ・・・・・・・・ ・・・・・・・ ・・・・ ・・・・・・・ ・・・・・・・ ・・・・・・・・・・・ ・・・・ ・・・・・・・ ・・・・ ・・・・・・・ ・・
1
DECALS
・・・・ ・・・・・・・・・・・ ・・・・・・・ ・・・・・・・ ・・・・ ・・・・ ・・・ ・・・・ ・・・・・・・・ ・・・・・・・ ・・・・・・・ ・・・・・・・・・・・ ・・・・ ・・・・・・・ ・・・・ ・・・・・・・ ・・・・・・・ ・・・・ ・・・・・
2
USE OF THIS MACHINE AND SPECIFICATIONS
・・・・・・・ ・・・・・・・・ ・・・・・・・ ・・・・ ・・・・・・・ ・・・・・・・ ・・・・ ・・・・・・・ ・・・・・・・
11
NAME OF THE COMPONENT PARTS
・・・・ ・・・・・・・・・・・ ・・・・・・・・ ・・・・・・・ ・・・・ ・・・・・・・ ・・・・・・・ ・・・・ ・・・・・・・ ・・・・・・・ ・・・・ ・・・・ ・・・・・・・ ・・・・・・・ ・・・・ ・・・・・
12
PRE-OPERATING CHECKLISTS
・・・・ ・・・・・・・・・・・ ・・・・・・・ ・・・・ ・・・・ ・・・・ ・・・・・・・ ・・・・・・・ ・・・・ ・・・・・・・ ・・・・・・・ ・・・・ ・・・・ ・・・・・・・ ・・・・・・・ ・・・・ ・・・・・・・ ・・
13
HOW TO OPERATE MACHINE
・・・・ ・・・・・・・・・・・ ・・・・・・・ ・・・・・・・・ ・・・・ ・・・・・・・ ・・・・・・・ ・・・・ ・・・・・・・ ・・・・・・・ ・・・・・・・・・・・ ・・・・ ・・・・・・・ ・・・・
15
STARTING THE ENGINE
・・・・・・・ ・・・・・・・ ・・・・ ・・・・・・・・
15
DISPATCH UNIT ANGLE
・・・・ ・・・・・・・・・・・ ・・・・・・・ ・・・・ ・・・・・・・・・・・ ・・・・・・・ ・・
19
HOW TO DRIVE THE MACHINE
・・・・ ・・・・・・・・・・・ ・・
16
ROTOR CLUTCH
・・・・ ・・・・・・・・・・・ ・・・・・・・ ・・・・ ・・・・・・・・・・・ ・
19
HOW TO STOP THE MACHINE
・・・・ ・・・・・・・・・・・ ・・
16
FEED ROLLER OPERATION
・・・・ ・・・・・・・・・・・ ・・・・・・・ ・・・・・・・ ・・・・ ・・・・
20
ADJUSTING THE THROTTLE
・・・・ ・・・・・・・・・・・ ・・・・・・・ ・・・・ ・
17
FEED ROLLER SAFETY BAR
・・・・ ・・・・・・・・・・・ ・・・・・・・ ・・・・ ・・・ ・・・・ ・
20
TURNING THE MACHINE
・・・・・・・ ・・・・・・・ ・・・・ ・・・・・・・ ・・・
17
FEED ROLLER CLOGGING PREVENTION
・・・・ ・・・・・・
21
LOADING, UNLOADING & SLOPES
・・・・ ・・・・・・・・・・・ ・・・・・
18
FEED ROLLER CLOGGING RELEASE
・・・・ ・・・・・・・・・・・ ・・・・・・・ ・・・・・・・ ・・・・ ・・・
22
REGULAR MAINTENANCE
・・・・ ・・・・・・・・・・・ ・・・・・・・ ・・・・ ・・・・ ・・・・ ・・・・・・・ ・・・・・・・ ・・・・ ・・・・・・・ ・・・・・・・ ・・・・ ・・・・ ・・・・・・・ ・・・・・・
23
KNIFE BASICS
・・・・ ・・・・・・・・・・・ ・・・・・・・ ・・・・ ・・
23
PARKING BRAKE
・・・・ ・・・・・・・・・・・ ・・・・・・・ ・・・・ ・・・
28
REMOVE & AFFIX KNIVES
・・・・ ・・・・・・・・・・・ ・・・・・・・ ・・・・ ・・
24
ROTOR CLUTCH
・・・・ ・・・・・・・・・・・ ・・・・・・・ ・・・・ ・・・・・・・・・・・ ・・・・・・・ ・・・・・・・・・・・ ・・・・・・・
29
KNIFE ADJUSTMENT
・・・・ ・・・・・・・・・・・ ・・・・・・・ ・・・・
25
FEED ROLLER CHAIN
・・・・ ・・・・・・・・・・・ ・・・・・・・ ・・・・ ・・・
30
RE-FUELING
・・・・ ・・・・・・・・・・・ ・・・・・・・ ・・・・ ・・・・・・・・・・・ ・・・・・・・・・・・ ・・・・ ・・・・・・・ ・・・
26
RUBBER CRAWLER
・・・・ ・・・・・・・・・・・ ・・・・・・・ ・・・・・・・
31
TRANSPORT CLUTCH ADJUSTMENT
・・・・ ・・・・・・・・・・・ ・・・・・・・・ ・・・・・・
27
ENGINE
・・・・ ・・・・・・・・・・・ ・・・・・・・ ・・・・・・・ ・・・・ ・・・・ ・・・ ・・・・ ・・・・・
32
TURNING CONTROL LEVER ADJUSTMENT
・・・・・・・・・・・ ・・・・・・・・・・・・・・・・ ・・
27
LUBRICATION CHART
・・・・・・・ ・・・・ ・・・ ・・・・ ・・・・・・・・・・・ ・・・・・・・・・・・ ・・・・ ・・・・・・・ ・・・・ ・・・・・・・ ・・・・ ・・・・・・・ ・・・・・・・ ・・・・ ・
35
TIGHTENING NUTS & BOLTS
・・・・・・・ ・・・・ ・・・ ・・・・ ・・・・・・・・・・・・・・・ ・・・・・・・ ・・・・ ・・・・・・・ ・・・・ ・・・・・・・ ・・・・ ・・・・・・・ ・・・・・・・ ・・・・ ・・・・・・・ ・・・・・・
36
SERVICING AFTER OPERATION/LONG TERM STORAGE
・・・・・・・ ・・・・・・・・・・・ ・・・・・・・ ・・・・・・・ ・・・・ ・・・・・・・ ・・・・・・・ ・・・・ ・・・・ ・・・・・・・ ・・・・・・・ ・・・
37
SERVICING AFTER OPERATION
・・・ ・・・・・・・ ・・・・・・・・・・・ ・・・・・
37
ACCESSORY TOOL LIST
・・・・ ・・・・・・・・・・・ ・・・・・・・ ・・・・ ・・・・・・・・・・・ ・・・・・・・ ・・・・・・・・・・・ ・
38
LONG TERM STORAGE
・・・・・・・ ・・・・ ・・・ ・・・・ ・・・
38
LIST OF THE CONSUMABLE PARTS
・・・・ ・・・・・・・・・・・ ・・・・・・・・ ・・・・・・・ ・・・・ ・・・・・・・ ・・・・・・・ ・・・・ ・・・・・・・ ・・・・・・・ ・・・・ ・・・・ ・・・・・・・ ・・・・・・・ ・・・
39
TROUBLESHOOTING
・・・・ ・・・・・・・・・・・ ・・・・・・・ ・・・・ ・・・・・・・ ・・・・・・・・ ・・・・・・・ ・・・・ ・・・・・・・ ・・・・・・・ ・・・・ ・・・・ ・・・・・・・ ・・・・・・・ ・・・・ ・・・・・・・ ・・・・・
40
MAINTENANCE SCHEDULE
・・・・ ・・・・・・・・・・・ ・・・・・・・ ・・・・ ・・・・ ・・・・ ・・・・・・・ ・・・・・・・ ・・・・ ・・・・・・・ ・・・・ ・・・・・・・ ・・・・ ・・・・・・・ ・・・・・・・ ・・・・ ・・・・・・・ ・・・・・
42
NOISE TEST
・・・・ ・・・・・・・・・・・ ・・・・・・・ ・・・・・・・ ・・・・ ・・・・ ・
43
ELECTRONIC WIRING DIAGRAM
・・・・ ・・・・・・・・・・・ ・・・・・・・ ・・・・ ・・・・・・・・・・・ ・
45
MACHINE DIMENSIONS
・・・・ ・・・・・・・・・・・ ・・・・・・・ ・・・・ ・・・・・・・・・・・・
44
CE DECLARATION OF CONFORMITY
・・・・・・ ・・・・ ・・・・・・・・ ・・・・・・・ ・・・・・・・ ・・・・ ・・・・・・・ ・・・・ ・・・ ・・・・ ・・・・ ・・・・・・・ ・・・・・・・ ・・・・ ・・・・
46
WARRANTY STATEMENT
・・・・ ・・・・・・・・・・・ ・・・・・・・ ・・・・ ・・・・・・・・・・・・・・・ ・・・・・・・ ・・・・ ・・・・・・・ ・・・・・・・ ・・・・ ・・・・ ・・・・・・
47
JUST IN CASE OF EMERGENCY
・・・・ ・・・・・・・・・・・ ・・・・・・・ ・・・・・・・・ ・・・・ ・・・・・・・ ・・・・・・・ ・・・・ ・・・・・・・ ・・・・・・・ ・・・・・・・・・・・ ・・・・
48

SAFETY INSTRUCTIONS
7. Never operate the machine alone. This
machine must be operated by two or more
operators.
1. This operation manual must be retained within
easy access of operators. Operators must be 8. Never attempt to touch the muffler and
careful not to lose or damage the operation
surroundings during operation because it
manual. becomes very hot.
2. If the operation manual is missing or illegible
due to damage, obtain new one from our 9. Don't directly touch the feed roller or
dealers and retain it within easy access. its attaching portions.
3. If the machine discussed in this operation
manual is rented, be sure to provide the manual 10. Do not insert your fingers into the shooter
with the machine. Let the renter read and or low dispatch unit. Your hands might be
understand the manual. Give new operators caught in the rotor and this could cause
proper instructions and training before they serious injury.
start operating the machine.
4. If the machine is transferred to other people, 11. Gasoline is extremely flammable.
make sure that this operation manual is Extreme caution must be taken when handling
provided with the machine. the fuel.
(1) Use only fresh, clean gasoline.
(2) Use an approved fuel container for the fuel
tank. Fuel container's outlet must fit the
fuel tank's inlet. Check to see if these
1. Operators of this machine must read and ports fit. If not, use a suitable fuel pump.
understand the contents of this operation (3) Do not remove the fuel tank cap or add fuel
manual before attempting to operate it.
while the engine is running or hot.
2. If safety decals are torn and illegible, obtain (4) Do not fill the fuel tank indoors.
new ones from our dealers and replace them. (5) Wipe off any spilled fuel.
(6) Do not use gasoline as a cleaning fluid.
1. Read through this operation manual and make (7) Never smoke while handling gasoline.
yourself familiar with the operation, servicing and
(8) Do not handle fuel near a naked flame or
maintenance of this machine before use. uncovered electric light.
(9) Keep the fuel container away from open
2. Never operate the machines without repairing or flames and equipment that may spark.
replacing the deformed or defective parts.
12. Wait until the machine has cooled before
3. Never alter or modify this machine. storing indoors and remove key.
4. The machine cannot be towed on crawlers on 13. When performing maintenance with two or
a public road. Extended towing on crawlers more people stay aware of each others
will damage machine. location by talking to avoid accidents.
5. If towing very short distances on crawlers 14. Remove chips or other material in and around
at no more than allowable top speed of the crawlers as this could cause
gear in use, always tow using a vehicle transmission troubles.
with enough driving and braking force. Be
very careful on slopes. 15. Never perform chipping operations inside
a building.
6. When a machine is loaded/unloaded on/from
truck or trailer for transport, stop the truck on
a level surface, engage the truck's parking
brake, and position it securely with
wheel stoppers. Extreme caution must
be taken not to topple the machine from
the ramps or truck. (refer "
Loading, Unloading &
Slopes
")
CAUTION
CAUTION
-1-

DECALS
Before attempting to operate the machine, read these decals and fully understand the instructions
and meaning. If any decal is worn, damaged, illegible or missing, obtain new one from our dealers.
Safety decals must be placed to their proper location as indicated below.
For locations of other decals, see the following photographs and illustrations and affix them
to their respective places. Keep all decals always legible.
Location of SAFETY decals
SAFETY BAR
1
SAFE AREA
OF OPERATION
5
4
CRAWLER
FEED ROLLER
20
I
NSTRUCTION
DECAL
SAFETY
DECAL
IDENTIFICATION
PLATE
2
BEFORE
STARTING ENGINE
3
6
OIL
24
SHIFT LEVER
CUTTING & CHIP
PROJECTILE
23
-2-

DECALS
Before attempting to operate the machine, read these decals and fully understand the instructions
and meaning. If any decal is worn, damaged, illegible or missing, obtain new one from our dealers.
Safety decals must be placed to their proper location as indicated below.
For locations of other decals, see the following photographs and illustrations and affix them
to their respective places. Keep all decals always legible.
Location of SAFETY decals
I
NSTRUCTION
DECAL
SAFETY
DECAL
FEED BOX
9
CUTTING PARTS
11
MUFFLER
12
18
BRAKE HANDLE
SAFETY BAR
1
FEED ROLLER
20
SAFETY WEAR
21
22
FEED MATERIALS
19
SOUND LABELS
MOVING PARTS
7
FEED ROLLER
RELEASE LEVER
8
ROTOR
CLUTCH LEVER
10
MOVING PARTS
7
CRUSHING
RISK
13
LOADING &
UNLOADING
14
SLOPE
STABILITY 1
15
SLOPE
STABILITY 2
16
17
FEED SWITCH
-3-
DECALS
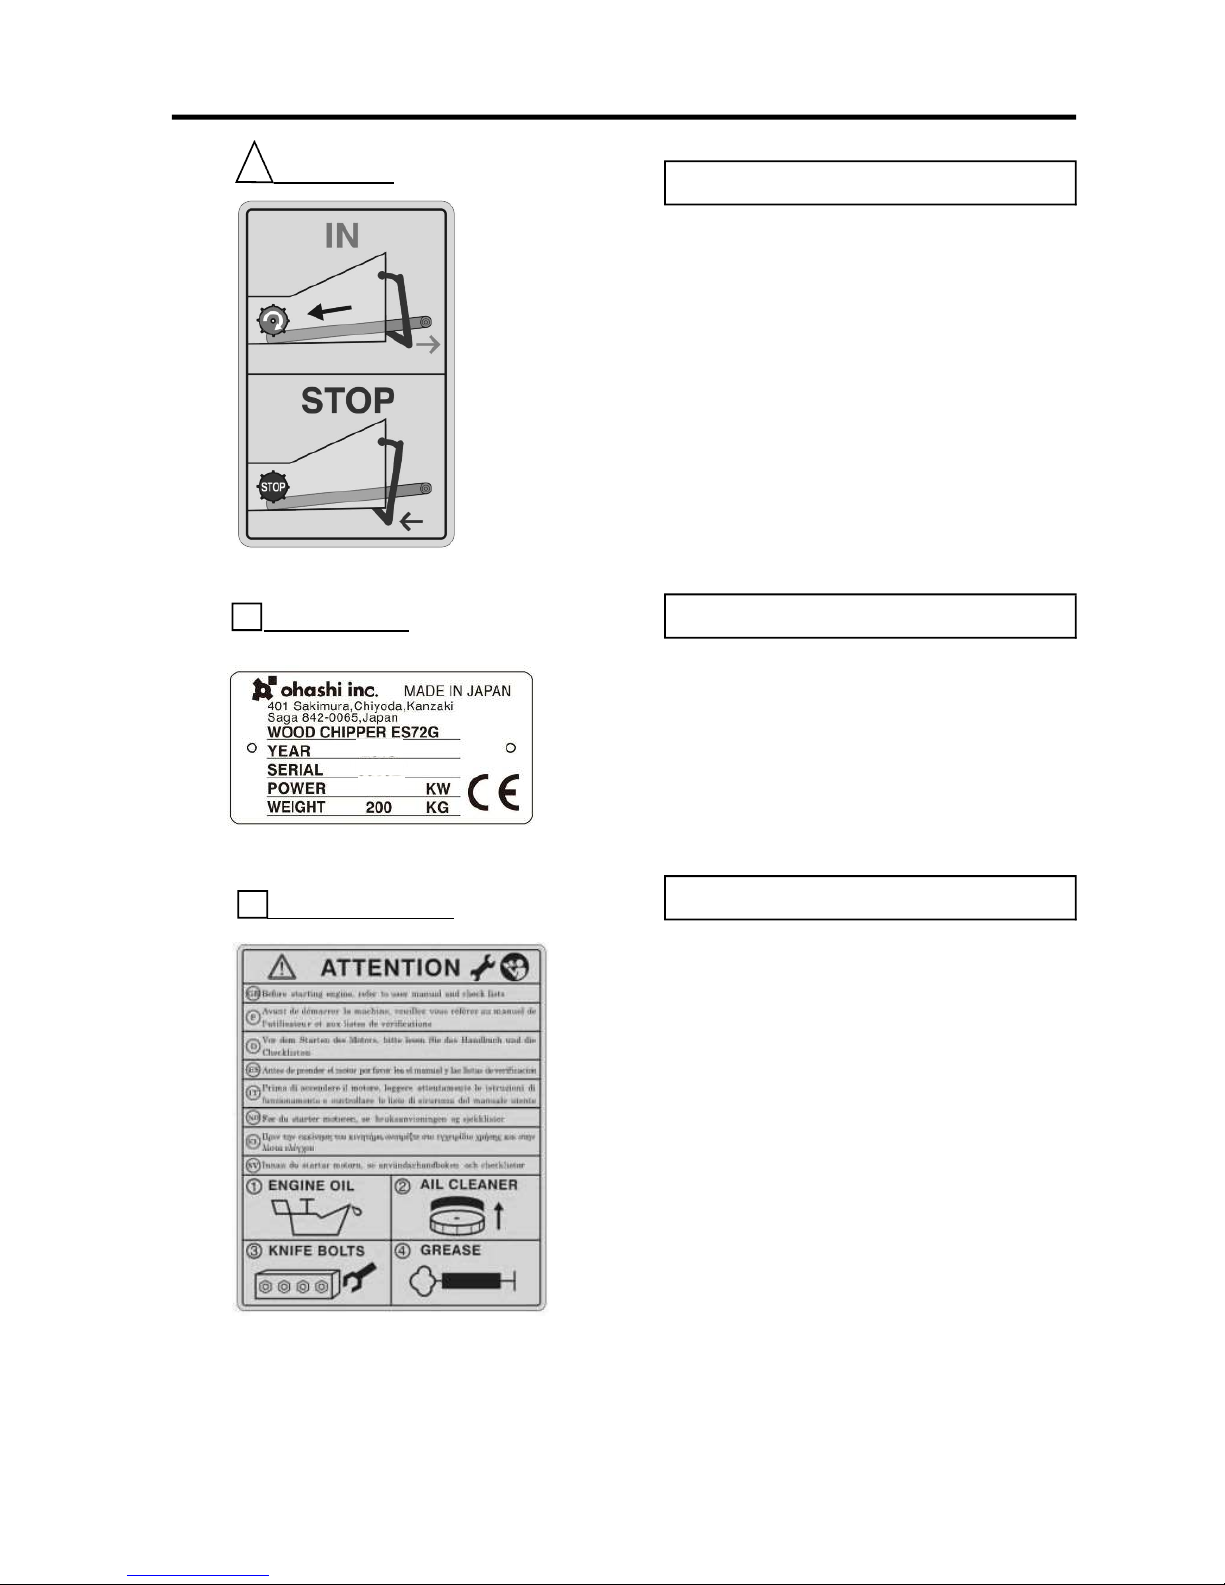
The safety bar operates to stop the feed roller in
the case of an emergency.
Pull the safety bar out to activate the feed roller
so that feed material is pulled into the machine.
Push the safety bar in to de-activate the feed roller
so that the feed roller no longer move.
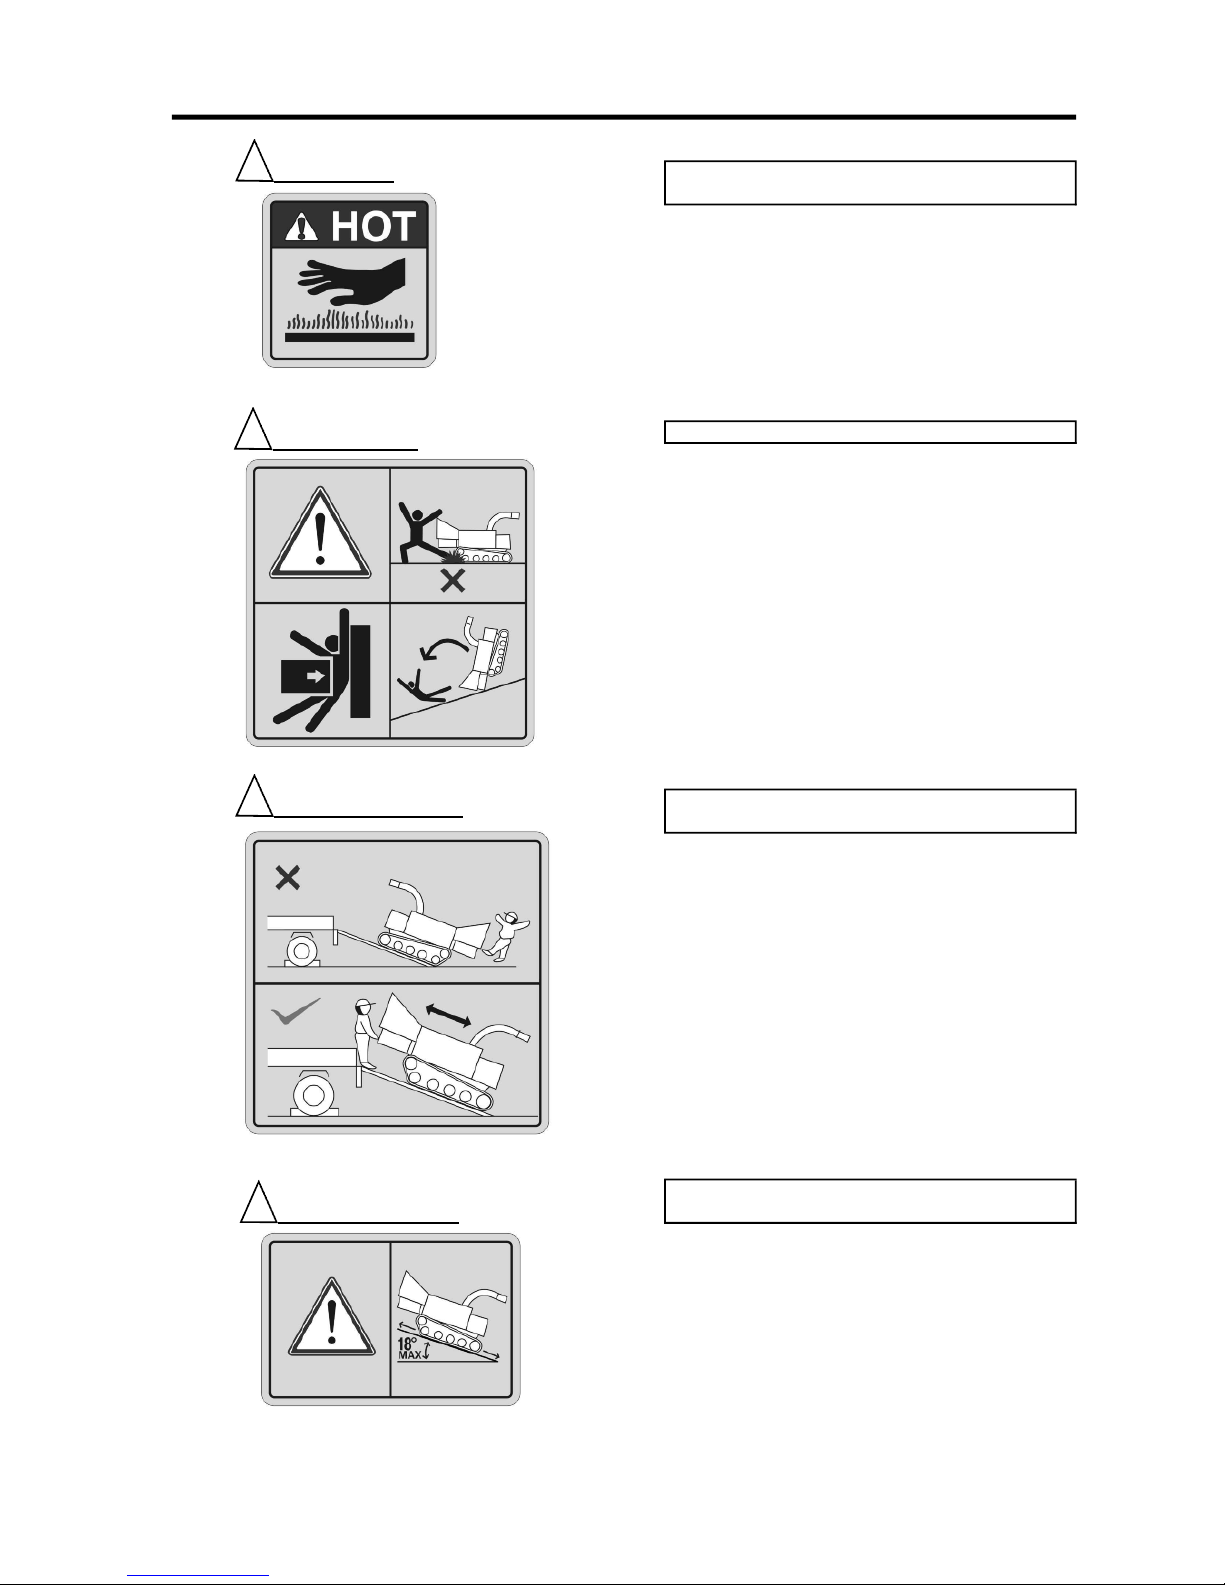
The details of Ohashi inc., the CE mark and
the specific details of the machine purchased.
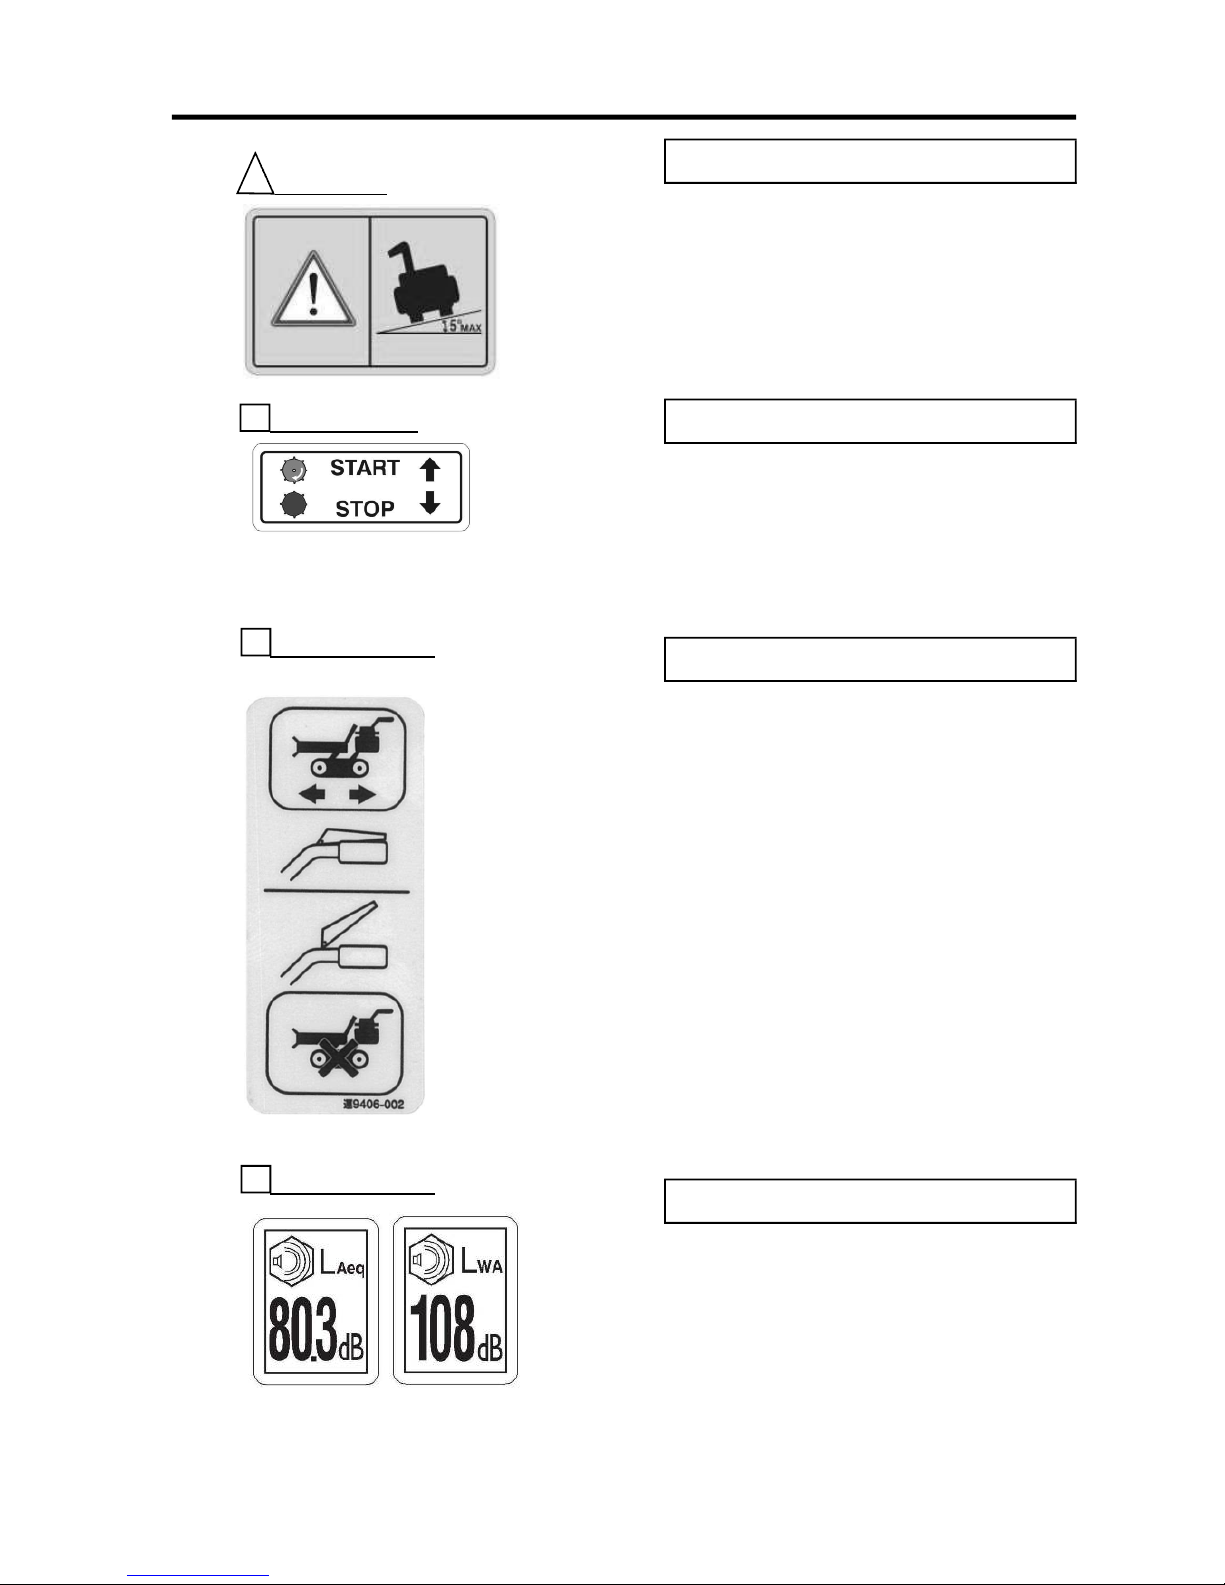
Before starting the engine perform the following
to maintain the machine in good condition.
As well as reading the user manual and
checklists before starting the engine users
must especially take care of the following
4 points to maintain the machine in good
condition and prevent damage to the machine.
SAFETY BAR
1
IDENTIFICATION
PLATE
2
BEFORE
STARTING ENGINE
3
5.1
-4-

DECALS
The crawlers and the area between the crawler
wheels should be kept clean and free of
materials.
Be sure to clear the crawlers from any materials
as this may damage the transmission.
The area around the machine should be checked
thoroughly before operating the machine.
Check around the machine before use. Check
for things you may not see from the operators
control area.
Be careful not to damage the crawlers or the
transmission by driving into holes or over
obstacles.
Oil lubrication points.
Refer to "
Lubrication Chart
" in this
user manual for further instructions.
Moving parts of the engine and machine are
dangerous and may cause injury.
Engine belts and other moving parts of the engine
and machine can cause injury if touched during
motion.
Do not attempt to remove covers while the
machine is running or moving parts are moving.
4
CRAWLER
SAFE AREA
OF OPERATION
5
6
OIL
MOVING PARTS
7
-5-

DECALS
The feed roller can be rotated manually if it
becomes clogged.
Refer to "
Feed Roller Clogging Release
" section
in this user manual for further instructions.
The feed box when in motion can be dangerous
and cause injury.
The feed roller when activated can move up and
down creating movement of the feed box. This
movement can cause injury so therefore do not
approach or put your hands or body near the
feed box when the machine is operating.
The rotor clutch lever activates the rotor.
Pull the rotor clutch lever from OFF to ON slowly.
Ensure the throttle is at full.
Pause between OFF and ON so that the rotor
clutch engages.
Moving parts here will cut flesh and cause
serious injury if touched by a persons hands
or other body parts.
Do not remove safety covers while the engine is
on or moving parts have not yet stopped.
FEED ROLLER RELEASE
8
FEED BOX
9
ROTOR CLUTCH LEVER
10
CUTTING PARTS
11
-6-
DECALS
The muffler is hot during and after operation. Do
not touch or a burn injury may occur.
Even after use the muffler may remain hot.
Wait until the machine cools down before making
any contact with the muffler.
Be careful to avoid being crushed by the machine.
Be careful not to have your feet or other body parts
crushed under the moving crawlers.
Be careful not to be crushed while driving the
machine between the machine and another object.
Be careful not to drive the machine at a dangerous
speed on a slope or on a slope which is too steep
or the machine may tip and crush you.
Load and unload the machine in the correct
manner or injury may occur.
When loading or unloading the machine onto a
truck, trailer, van or higher platform using ramps
do not stand on the downward side of the machine.
Always stand upward from the machine in the
higher position so that if the machine rolls or
tumbles you are in a safe position.
Only drive the machine up/down a slope of
18° or less.
When unloading or loading or when driving the
machine anywhere do not drive the machine on
a slope of more than 18° in a straight up or down
direction on the slope.
MUFFLER
12
CRUSHING RISK
13
LOADING & UNLOADING
14
SLOPE STABILITY 1
15
-7-
DECALS
Only drive the machine across a slope of 5°
or less.
When unloading or loading or when driving the
machine anywhere do not drive the machine on
a slope of more than 5° in a horizontal across
direction along the slope.
The feed switch controls the movement of the
feed roller.
Move the switch to START to activate the feed
roller to pull materials into the rotor.
Move the switch to the STOP area to stop the
feed roller movement.
The brake handle activates the transmission
and initiates the movement of the machine.
To initiate the movement of the machine hold down
the brake handle.
To stop the movement of the machine let go of
the brake handle and let it rise to the up
position.
Sound labels display the sound levels which
users are likely to be exposed to.
Users must use ear protection equipment
when operating this machine and must insist
other people close to the machine also wear
ear protectors.
18
BRAKE HANDLE
SLOPE
STABILITY 2
16
17
FEED SWITCH
19
SOUND LABELS
-8-
DECALS
If caught in the feed roller serious injury will
occur.
Do not place your hands, feet or any other body
part near the feed rollers.
Do not attempt to climb into or on the lower edge
of the hopper or you may be caught in the feed
roller.
Read the user manual, and wear helmet, ear
protectors, eye protectors, gloves and non-snag
clothing before using the machine.
The machine is only designed to chip organic
material like wood.
Do not place sand, dirt, metal, stones, plastic,
rope, clothing, cardboard, books, newspapers
rubber, glass or any other non-wood material
into the hopper to be chipped or damage will
occur to the machine.
Moving parts may cut flesh and cause serious
injury. Feed material occasionally projected out
of the hopper can cause injury.
Do no place hands or body parts near the area
where moving parts may cut flesh and cause
injury. Do not remove covers while the machine
is on or moving parts have not stopped.
Do not stand in front of the hopper while the
machine is processing feed material. Stand to
the side to avoid being struck by feed material
that occasionally projects out of the hopper.
SAFETY WEAR
21
FEED ROLLER
20
22
FEED MATERIALS
CUTTING & CHIP PROJECTILE
23
-9-

DECALS
The shift lever allows the machine to move
forward or in reverse.
To initiate the movement of the machine, move
the shift lever to FORWARD or REVERSE and
hold down the brake handle.
24
SHIFT LEVER
-10-

USE OF THIS MACHINE AND SPECIFICATIONS
This operating machine is designed to chip / shred wood and other similar organic materials.
Make sure before chipping that no materials such as soil, sand, stones, metals, bottles etc.
are contained in the woods.
Do not use the machine in any other way than its intended use.
Description Wood chipper / shredder
Model No. ES72G
Overall LengthxWidthxHeight (mm) In use - 1690x660x1370 In transport - 1280x660x1455
Weight (kg) 200
Drive Belt clutch, V-belt
Max. diameter of wood treated (mm) 70
Cutting 2 chipper knives and a counter knife
Infeed dimensions (mm) 180x90
Feeding system
Electromagnetic clutch with automatic no stress system
Discharge system
Forced by air
Height of duct (mm) 540
Discharge angle
Adjustable
Transport system Rubber crawler
Forward : 1.9 Km/h
Reverse : 1.9 Km/h
EX21D Subaru Gasoline Engine
Max. output 7 HP / 5.1 kW
Fuel tank capacity (
) Approx. 3.2, Unleaded gasoline
Note: As product improvement takes place, specifications may change without prior notice.
For engine and battery, refer to respective manufacturer handling manuals.
USE OF THIS MACHINE
SPECIFICATIONS
Transport speed
Engine Model
-11-

NAME OF THE COMPONENT PARTS
See the machine with your own eyes and identify each component.
Right Turning Control Lever
Rotor Clutch Lever
Hopper
Rotor Cover
Left Side Cover
Shift Lever
Transmission
Throttle Lever
Idle Wheel
Sprocket &
Wheel
Right Side Cover
Right Side Cover
Engine
Left Turning Control Lever
Crawler Tracks
Feed Roller Release
Track Roller
Recoil Start Cord
Feed Box
S
afety Bar Release Lever
Feed Roller Safety Bar
Feed
S
witch
D
ispatch Unit
Safety Guard
Brake Handle
Balance Stand
-12-

PRE-OPERATING SAFETY CHECKLIST
To prevent injuries and fire hazards, comply strictly with the following instructions.
BEFORE STARTING ENGINE AND ACTIVATING TRACK CRAWLERS
1. All safety and operating sections of User Manual
MUST
have been read, understood and applied where
applicable.
2.
CHECK
all machine safety covers, guards and housing are closed and fitted securely with securing
devices, bolts, locks etc and if engine is running
DO NOT REMOVE
. Do not lose covers' nuts and bolts.
3. Walk at least once around machine to
ENSURE
there are no obstacles, people or small children
near machine and Track Crawlers and maintain your visibility of surrounding areas at all times.
4.
ENSURE
Rotor Clutch Lever is in OFF position, Shift Lever in N Position, Feed Switch in STOP
position and that Brake Handle is in the up position.
5.
ENSURE
machine is in a well ventilated, open area. Exhaust fumes are very dangerous when breathed.
6.
ENSURE
machine is located on a flat, stable area.
7.
CHECK
for fluid leaks. If found
CONSULT
User Manual or dealer to locate the source and apply a remedy.
8.
WEAR
appropriate clothing, helmet, protectors for eyes, ears and gloves for hands. Clothing
MUST
fit
operator tightly. Loose clothing
MUST
be avoided as it may get caught and pull operator into
machine, causing serious injury or death.
9.
NEVER
smoke while operating machine or when handling fuel for refueling or transport.
NEVER
refuel
or handle fuel near open flames or uncovered electric lighting.
BEFORE OPERATING THE CHIPPING FUNCTIONS (Feed Roller and Rotor)
1.
TEST
Feed Roller Safety Bar is working properly in Emergency Stop Position and Forward Feed Roller
Position. If it is not working contact your dealer to repair the bar and / or it's sensor immediately.
2. This machine is designed to chip / shred wood and similar organic material.
ENSURE
soil, sand, stones,
metals, rope, glass, wires and other such non-organic man-made materials are
NOT
contained in
material to be inserted for chipping / shredding.
3.
DO NOT
operate machine's chipping / shredding functions on slopes and / or inside a building.
4.
ENSURE
that no person is located close enough to Dispatch Unit to be struck by wood chips
and that Dispatch Unit is securely fixed in position so as not to move during operation.
5.
ENSURE
before chipping and switching the Rotor Clutch Lever ON, that the engine is at full throttle.
6.
SET
the Balance Stand so that the machine is stable.
BASICS
1.
NEVER
have safety covers off or refuel with engine on, parts still moving or machine still hot.
2.
PERFORM
inspections or tests of machine in an open, flat area free of obstacles and hazards.
3.
REPLACE
all covers, guards and housing parts after any inspection is performed.
4. If you feel any strange noise / vibration in machine,
STOP
the engine and
AFTER
moving parts have
stopped consult your User Manual, inspect machine and if necessary contact your dealer.
5. Before leaving machine unattended,
CONFIRM
that engine is off, and all moving parts stop,
and the Rotor Clutch Lever and Feed Switch are in the OFF/STOP position and the Brake Handle is up.
6.
INSPECT
and clean machine parts after use.
7.
NEVER
drive up / down a slope slanting more than 18 ° or drive sideways on a slope slanting more
than 5° and always stand up slope from the machine when driving.
8.
DO NOT
operate in insufficient lighting or in a situation where visibility is poor.
9.
DO NOT
operate machine if tired, sick or under the influence of drugs or alcohol.
10.
DO NOT
allow a child and / or untrained person to operate machine.
11. Where materials become caught in Feed Roller
DO NOT
remove directly with hands.
USE
a
wooden broom or other such long wooden object to remove stuck material.
12.
STAND
to the side of Hopper during operation to avoid being hit by infeed materials returning irregularly.
13.
DO NOT
place hands near the Feed Box while the Feed Roller is in operation.
-13-

PRE-OPERATING MACHINE CHECKLIST
To keep machine in top working condition, comply strictly with the following instructions.
1.
CLEAN
air cleaner
2.
CHECK
engine oil level, cleanliness and for any spillage (SE grade or above)
※
1
3.
CHECK
for cracks and / or wear on the chipper knives
4.
CHECK
for cracks and / or wear on the counter knife
5.
CHECK
for cracks and / or wear on the shredder knives and that the knives axle is secure
※
2
6.
RETIGHTEN
the bolts of chipper knives and counter knife
7.
GREASE
Lubrication Points as per the User Manual Lubrication Chart using a lithium grease
8.
LUBRICATE
machine parts as per the User Manual Lubrication Chart and ensure machine
has sufficient transmission oil, and gasoline
※
3
9.
CLEAN
engine and track crawlers.
10.
CHECK
for incorrect tension, cracks and / or wear of belts and chains
11.
LUBRICATE
with Shell Spirax S3 T 15W-40 oil, WD-40 or its equivalent all wire and lever
supporting points and any friction and sliding sections
12.
RECORD
the hours indicated on the Hour Metre.
13.
CHECK
that the tension of the wires engaging the parking brake, side clutch, transport clutch
and rotor clutch is appropriate and effective.
Notes:
※
1 Engine oil must be replaced in first 25 hours and then every 50 hours.
※
2 Shredder knives are optional
※
3 Shell Spirax S3 T 15W-40; Gasoline unleaded
Refer to the User Manual List of Consumable Parts and the Regular Service and Maintenance
sections for parts details and instructions for regular service and maintenance.
-14-
 Loading...