


Riff Tables
WO RK TA BLE
ASSEMBLY INSTRUCTIONS
Work Table Assembly Instructions
RIFF WORK TABLE ASSEMBLY
QTY.
2
2
1
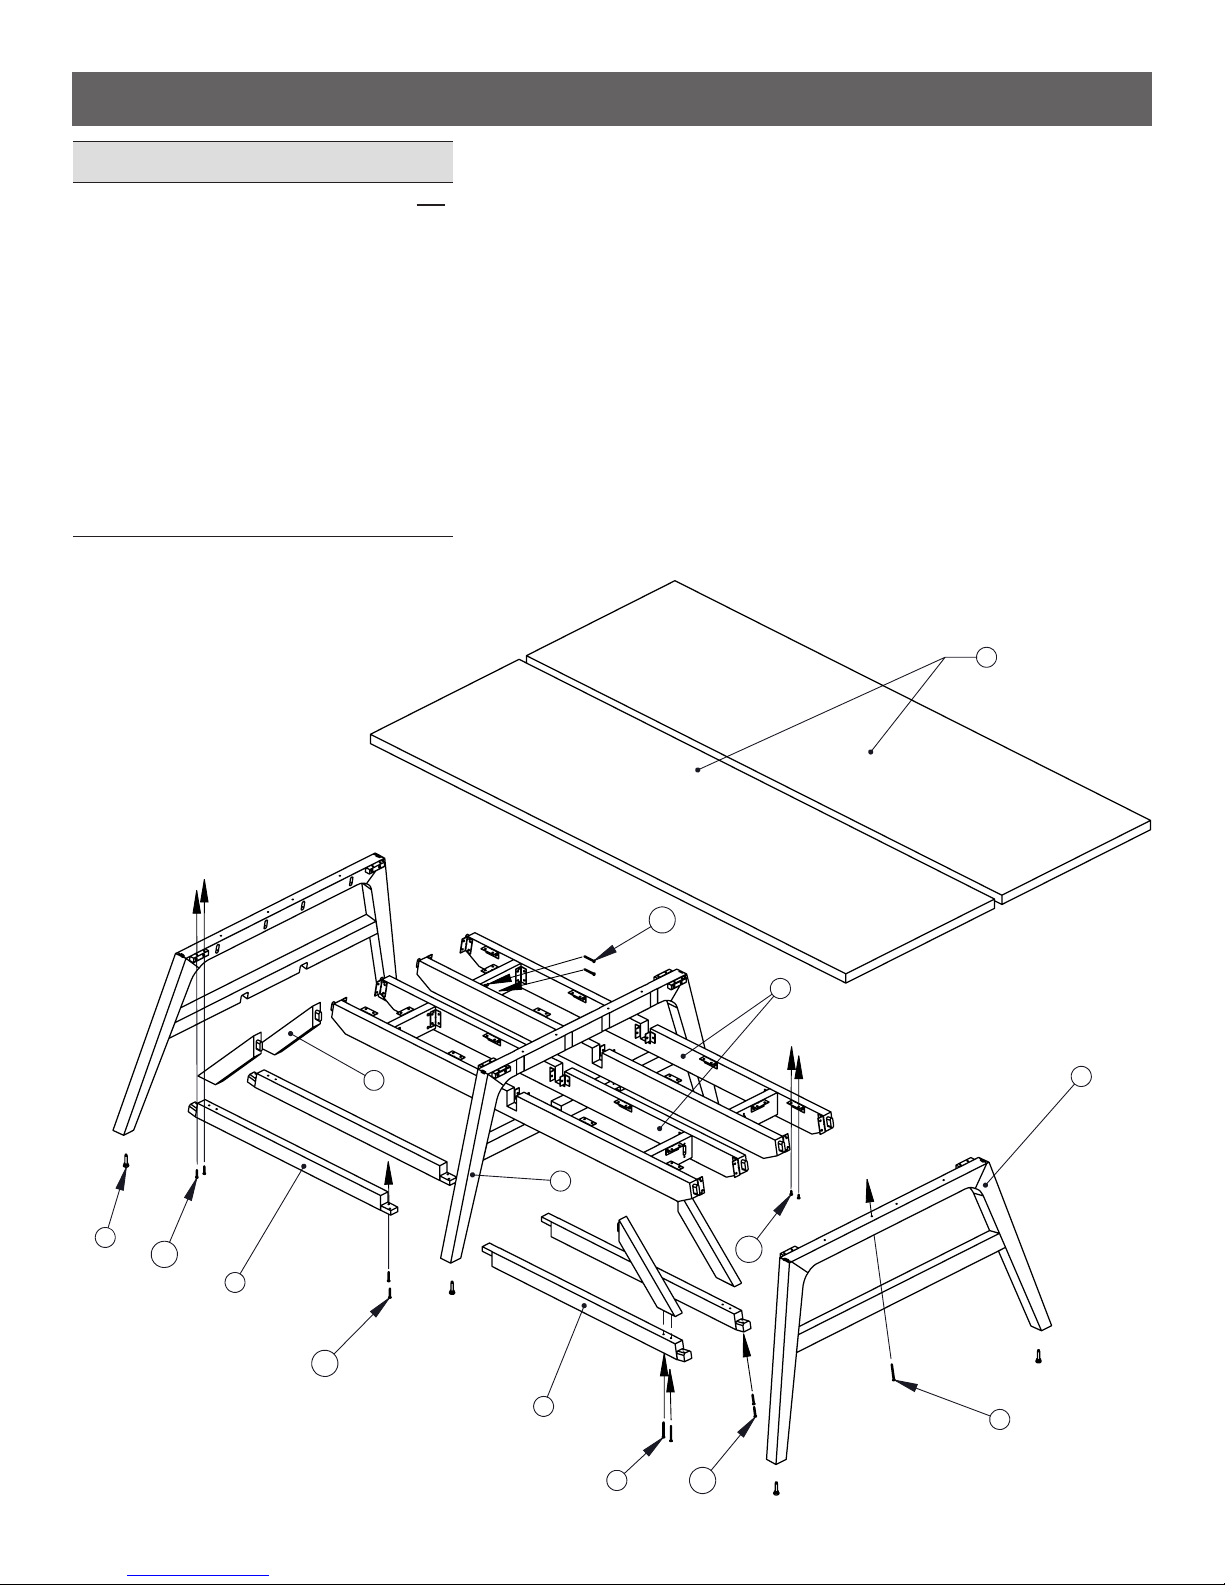
RIFF TABLE COMPONENTS
1 Top
2 Leg Assembly 2
3 Center Leg Assembly 1
4 Support Assembly 2
5 Cross Rail-Under 2
6 Cross Rail-Over 2
7 Brace 4
8 1000599/Leveler 6
9 #8 x 2 ½" Pan Head Screws (HK-101) 16
10 #8 x 2" Pan Head Screws (HK-102) 12
11 #8 x 1 ½" Pan Head Screws (HK-103) 8
12 #8 x ¼” Pan Head Screws (HK-104) 16
13 #8 x /” Pan Head Screws (HK-105) 56
2
2
2
4
6
QTY
2
1
1
16
12
8
16
56
7
7
3
3
8
8
12
12
5
5
10
13
13
4
4
2
2
10
10
Riff Tables by OFS | Assembly Instructions
6
6
9
9
11
11
9
Page 2 of 7
Work Table Assembly Instructions
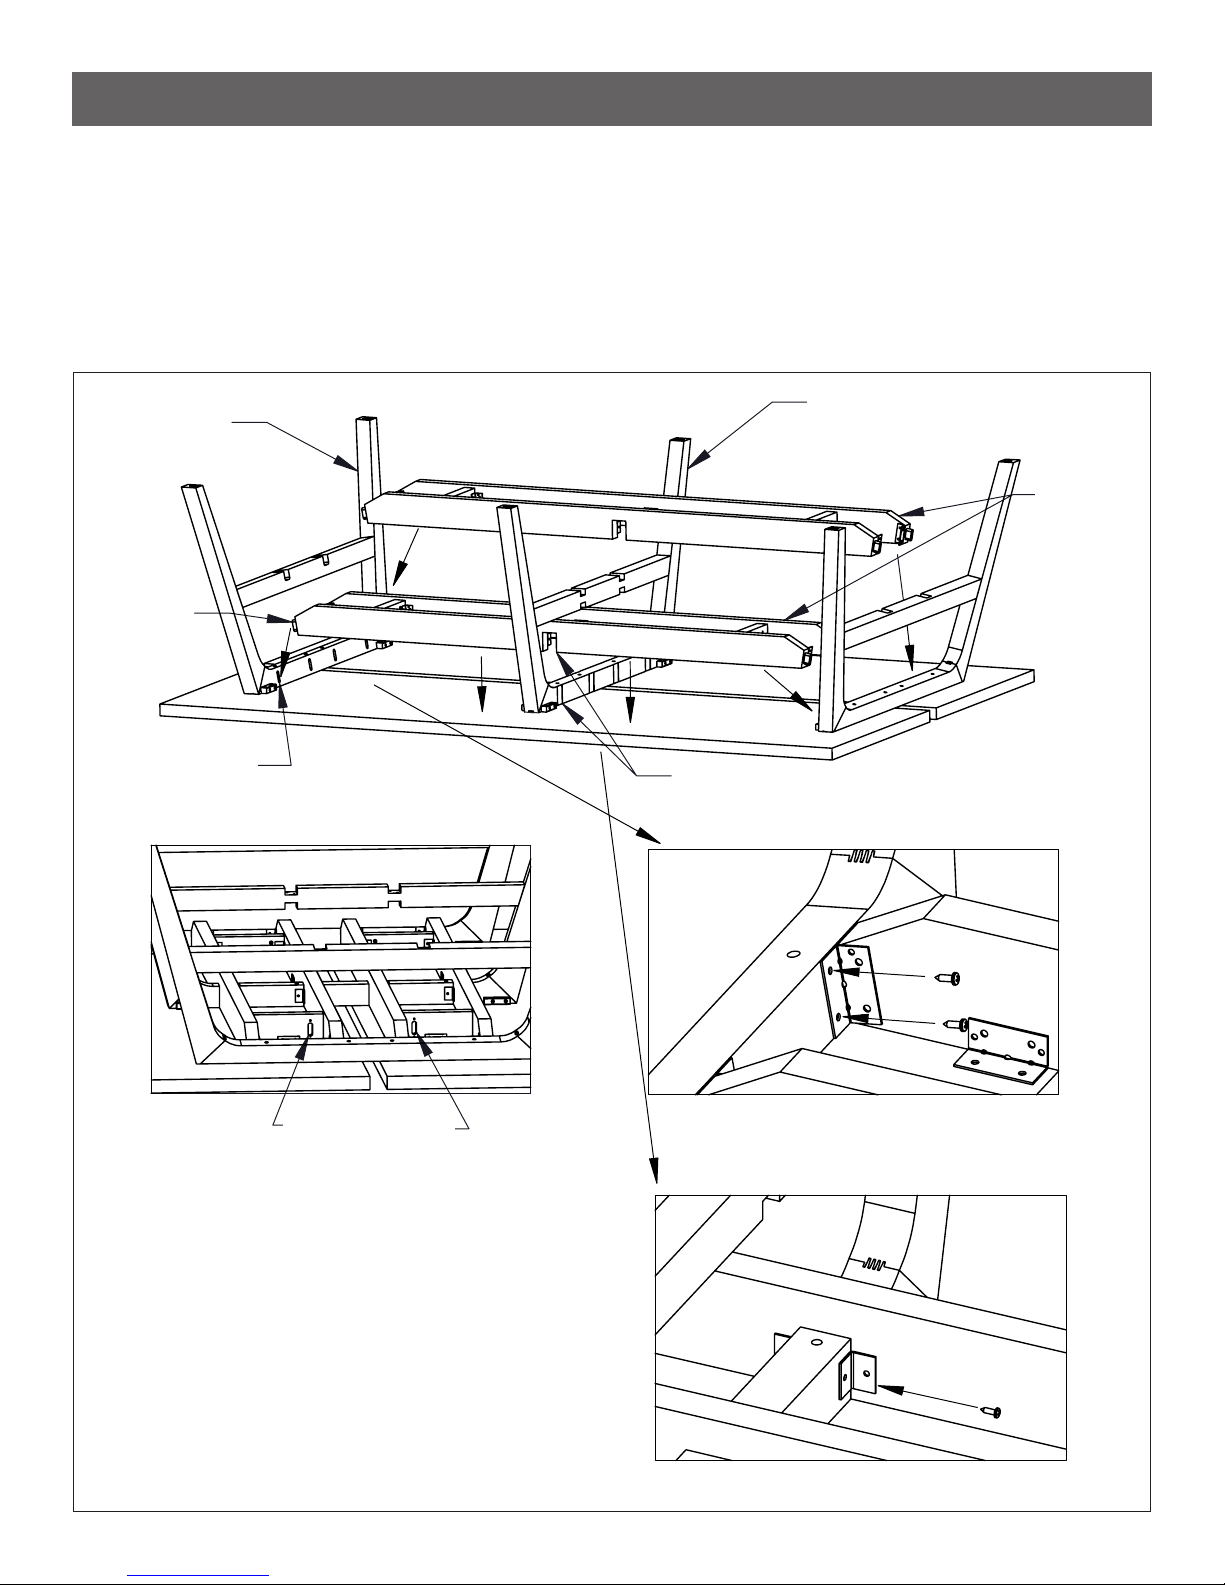
Place work surfaces, bottom side up, on a non-marring surface.
•
Align notches and slide Under top assemblies onto Center base (96" long tops only).
•
Connect End bases to Under top assemblies by inserting tennons into mortises.
•
STEP 1
1. Place Worksurfaces, bottom side up, on a non-marring surface.
2. Align Notches and slide Under Top Assemblies onto Center Base
(96" long tops only).
3. Connect End Bases to Under Top Assemblies by inserting Tennons
into Mortises.
End base
End Base
Tennon
Tennon
4. Secure Bases to Under Top Assembly with #8 x 5/8" Pan Head
Screws (HK-105).
Center base (96" tops)
Center Base (96" tops)
Under Top
Under top
assemblies
Assemblies
Mortise
Mortise
IMPORTANT!
IMPORTANT!
Mortises must be
Mortises must be
toward table center
toward table center
Secure bases to Under top assembly with #8 x 5/8"
•
pan head screws (HK-105).
Notches
Notches
Page 3 of 7
96" long tops only
96" long tops only
Riff Tables by OFS | Assembly Instructions
 Loading...