

Ofs ELEVEN WOOD Installation Instructions Manual
ELEVEN WOOD
CORNER LEGS
INSTALLATION INSTRUCTIONS
NOTE: Views shown without the
worksurface for clarity purposes.
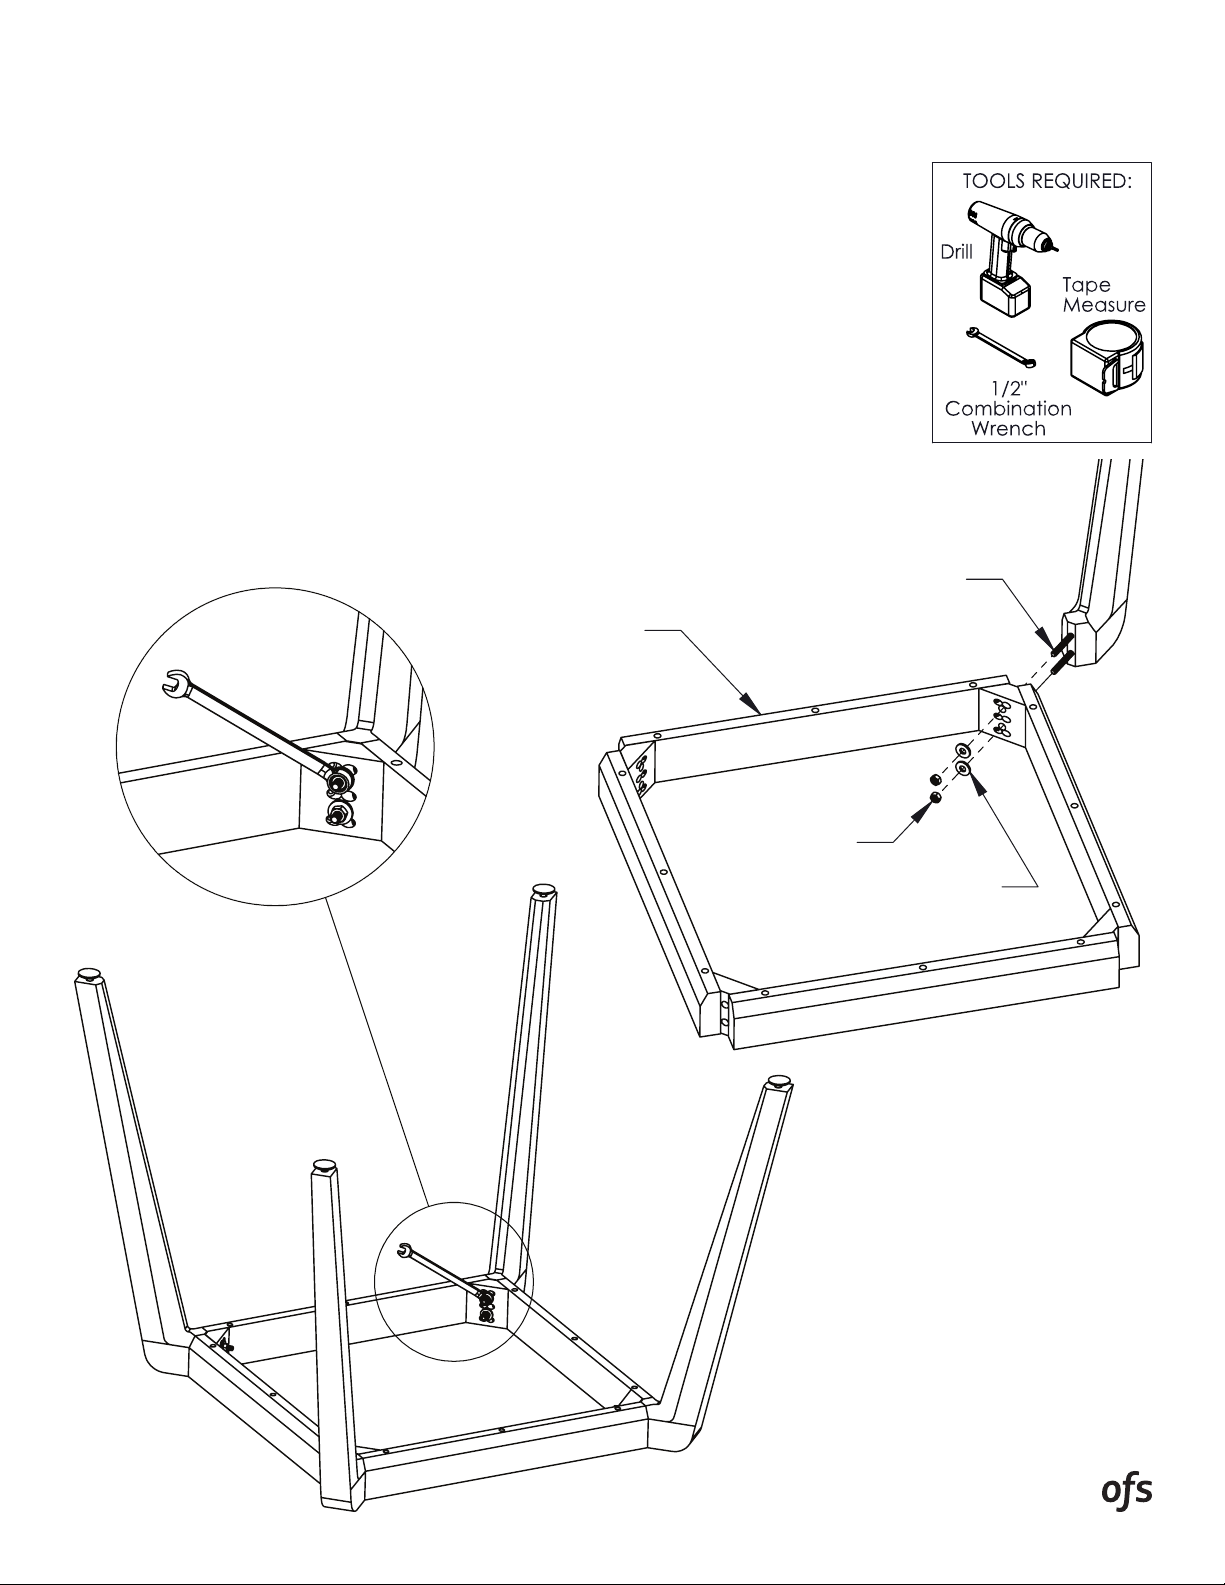
1. Begin by removing the hex nuts and flat washers from the threaded studs
on each of the table legs. Attach the leg to the frame assembly by inserting
the threaded studs into the corresponding holes in the frame as shown in
the view above.
2. Next, re-attach the flat washer and hand tighten the hex nut onto the
threaded stud. Repeat the previous steps for the remaining table legs. To
complete the assembly, fully tighten all the hex nuts using a 1/2" wrench.
FRAME
PA RT # 16 09141
THREADED STUD
HEX NUT
FLAT WASHER
ELEVEN WOOD
66" ROUND AND SQUARE TABLES (66RT & 66SQT)
INSTALLATION INSTRUCTIONS
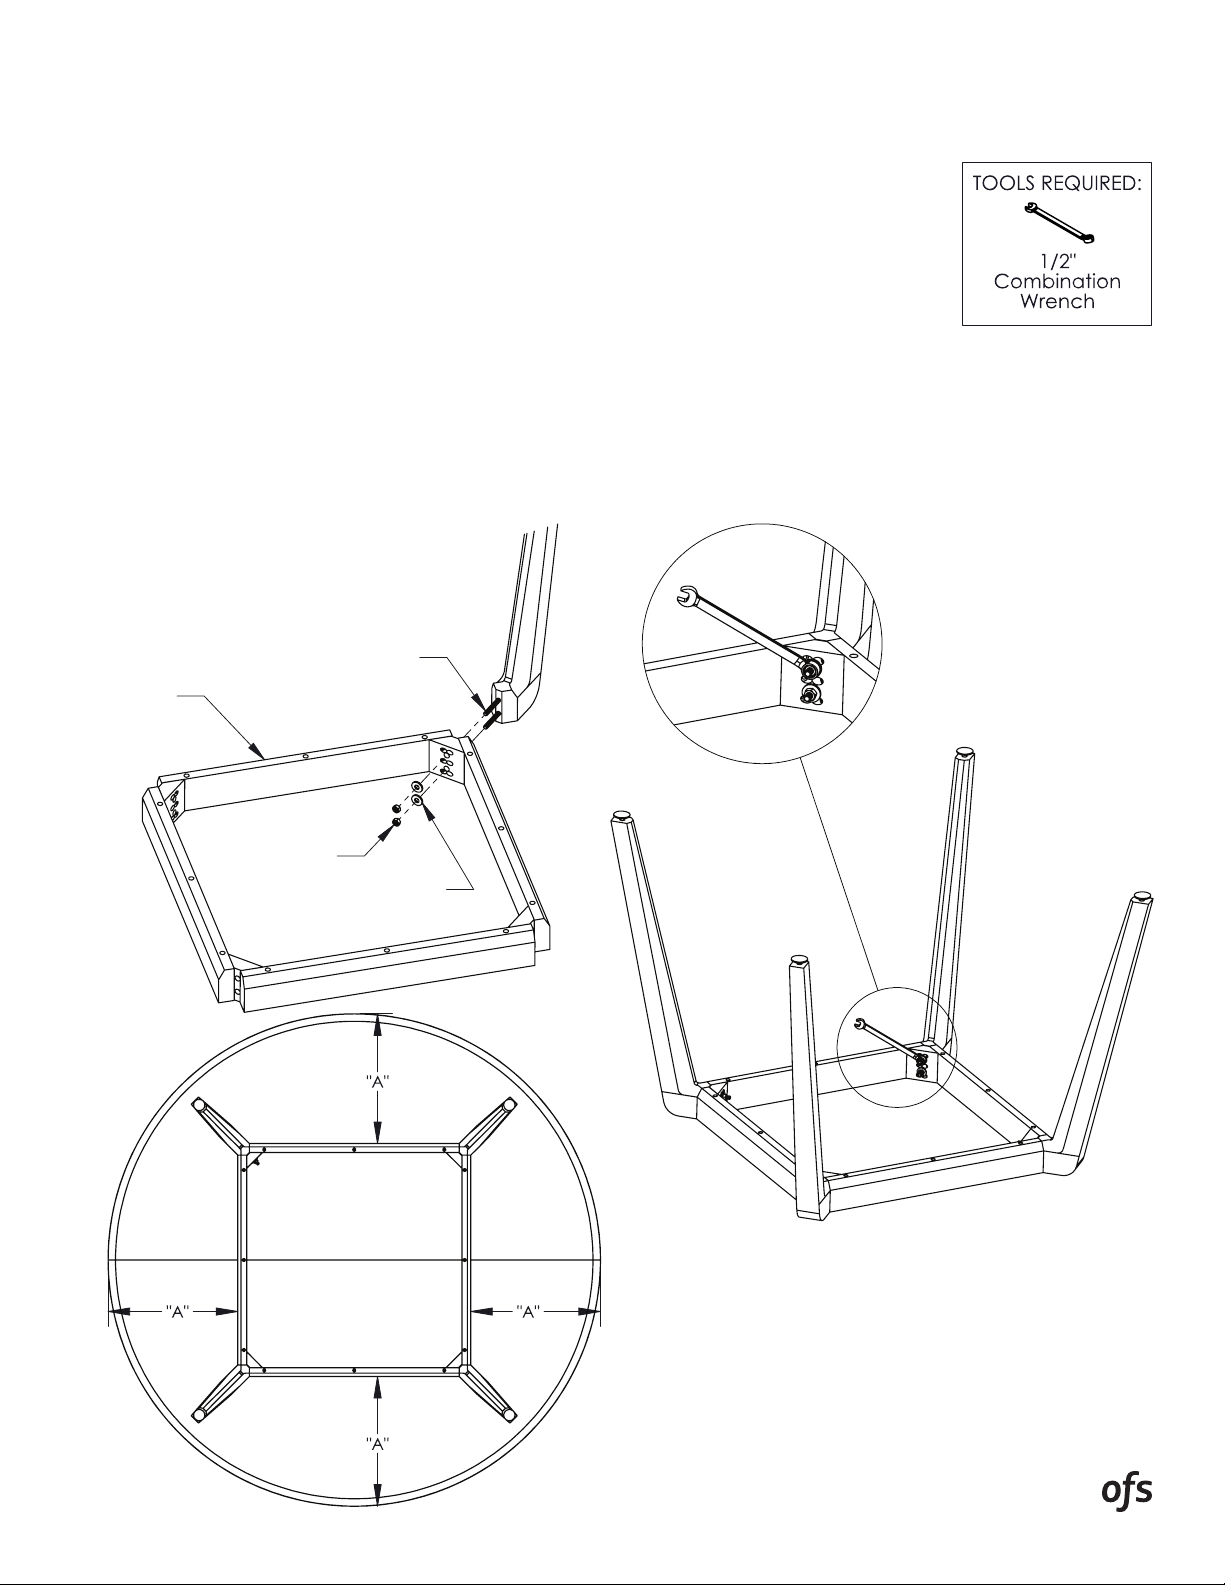
1. Begin by removing the hex nuts and flat washers from the threaded studs on each of the table legs.
Attach the leg to the frame assembly by inserting the threaded studs into the corresponding holes in
the frame as shown in the view in the upper right corner.
2. Next, re-attach the flat washer and hand tighten the hex nut onto the threaded stud. Repeat the
previous steps for the remaining table legs. To complete the assembly, fully tighten all the hex
nuts using a 1/2" wrench.
3. Once the frame has been fully assembled, place the frame onto the bottom of the worksurface.
Position the frame so that it is completely centered onto the worksurface, making sure that
“dimension A” is the same value on all four sides. Secure the frame to the worksurface by
fastening the supplied screws through the mounting holes in the frame and into the worksurface.
THREADED STUD
PART # 16 0914 2
FRAME
HEX NUT
FLAT WASHER

ELEVEN WOOD
END LEG
INSTALLATION INSTRUCTIONS
NOTE: If your table has intermediate legs, they should be assembled
prior to installing the end legs.
1. Begin by locating the large diameter hole on top of the end legs. Next, drop the threaded cross dowel
into the hole, making sure the slotted end is facing up. Then insert the threaded rods into the clearance
hole in the leg and fasten it halfway into the cross dowel.
2. Next, attach the legs to the frame rails making sure the holes in the leg align with the dowel pins in
the frame rail and that the threaded rod in the leg can be inserted into the frame rail. Locate the “D”
shape pockets inside the frame rails and attach the rectangular washer, followed by the flange nut.
Tighten the nut using a 1/2" wrench.
3. The frame is now fully assembled and can be mounted to the worksurface. Verify the frame is
centered completely and fasten it to the worksurface using the supplied screws.
PART # 16 0913 8
FRAME RAIL
DOWEL
PIN
CROSS DOWEL
THREADED ROD
 Loading...