

Page 1
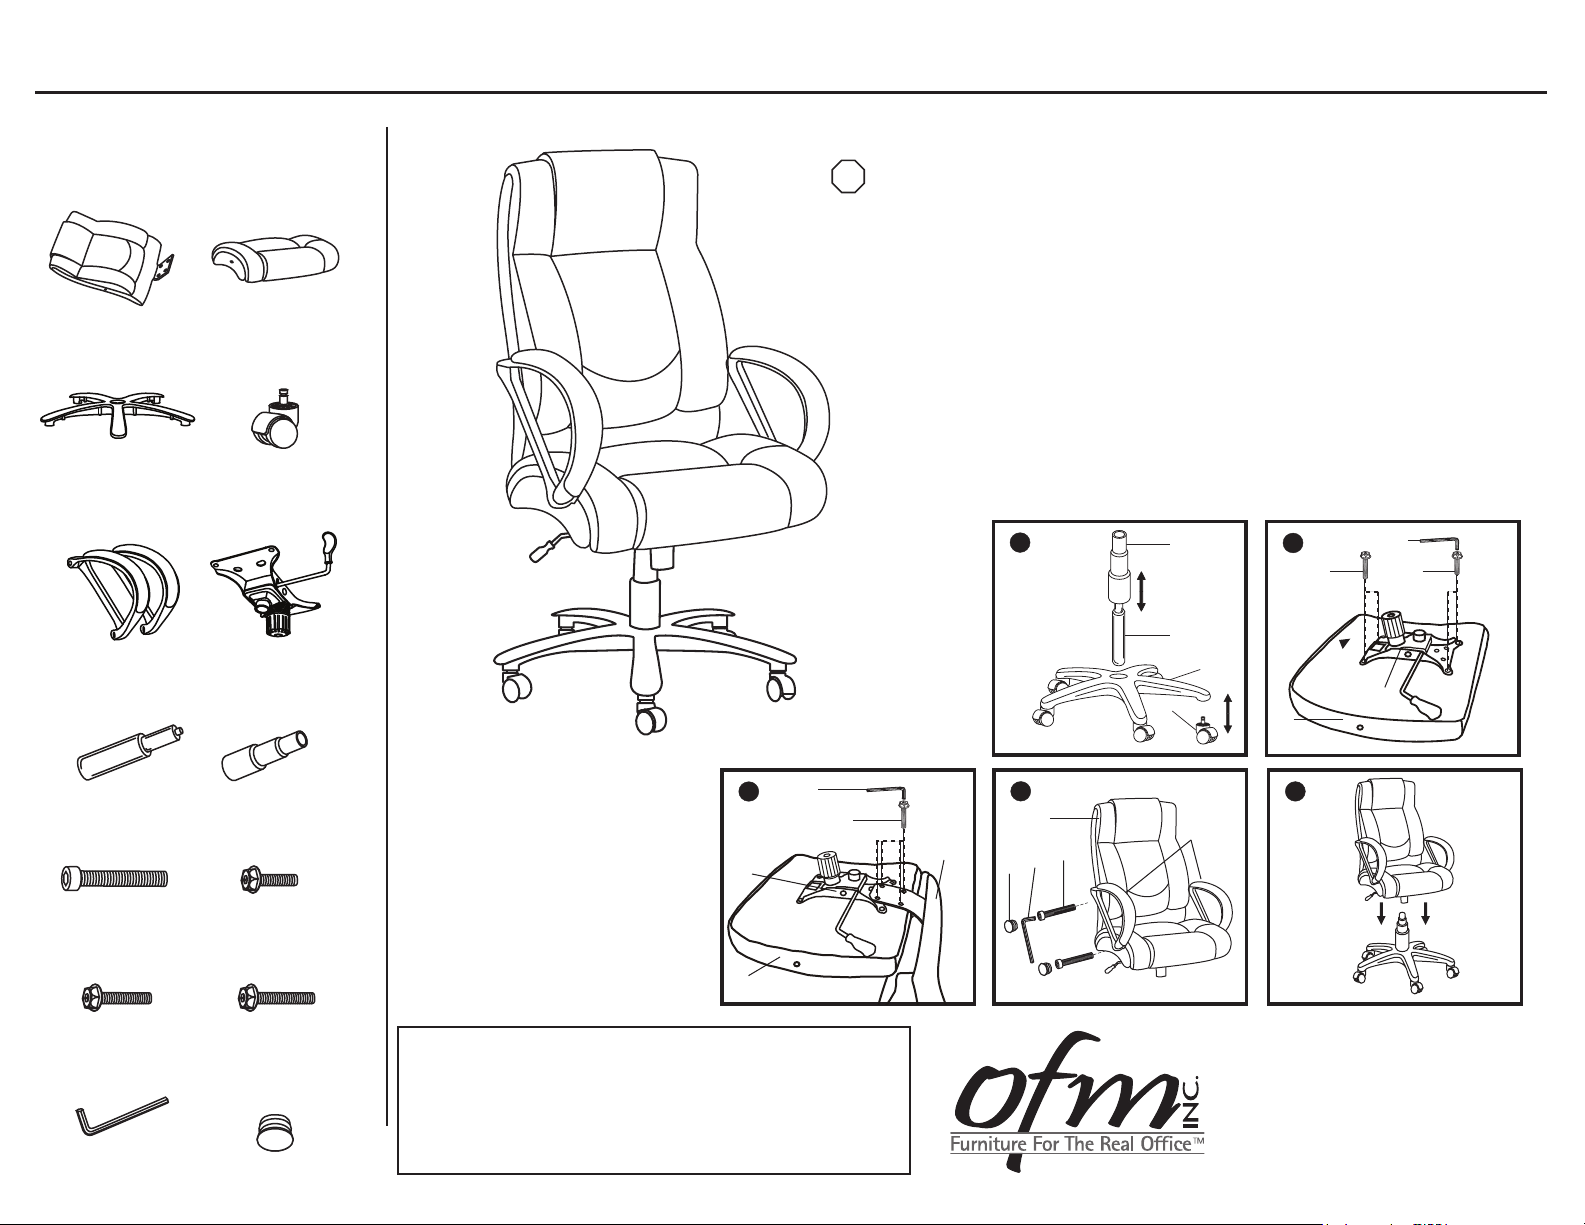
Model 810-LX Avenger Series Executive High-Back Chair
Parts Listing
A
Chair Back
1 Unit
C
Chair Base
1 Unit
E
Chair Arms
2 Units
G
Gas Lift
1 Unit
B
Chair Seat
1 Unit
D
Casters
5 Units
F
Seat Mechanism
1 Unit
H
Telescopic Bellows
1 Unit
Assembly Instructions
Tools Needed: Allen Wrench
STOP
Please read all instructions before assembly.
Step 1: Insert Casters (D) into Chair Base (C). Insert Gas Lift (G) into Chair
Base (C) and cover with Telescopic Bellows (H).
Step 2: Attach Seat Mechanism (F) to the Chair Seat (B) with .75” Screws (J) at
back of seat and 1.5” Screws (L) at front of seat, using the Allen
Wrench (M) that is provided. Tension control knob should face front.
Step 3: Attach mounting plate on Chair Back (A) to Seat Mechanism (F) and Chair
Seat (B) with 1.25” Screws (K), using Allen Wrench (M) that is provided.
Step 4: Attach Chair Arms (E) to Chair Back (A) and Chair Seat (B) using Arm
Screws (I) and Allen Wrench (M). Cover screw holes with Arm Caps (N).
Support bars on arms should be on the inside.
Step 5: Take entire chair frame and place Seat Mechanism (F) onto Gas Lift (G),
and press down firmly to secure.
1
H
G
C
D
2
M
JL
F
B
I
Arm Screws
4 Units
K
1.25” Screws
4 Units
M
Allen Wrench
1 Unit
J
.75” Screws
2 Units
L
1.5” Screws
2 Units
N
Arm Caps
4 Units
M
3
K
F
B
WEIGHT CAPACITY: 500 lbs.
Assembly Notes:
During assembly, hand tighten screws only. When all screws
are in place, you may then tighten all screws completely.
CAUTION:
1. Do not use this chair as a step ladder.
2. Check for loose screws and tighten them every 6 months.
07.09.2012
4
A
A
N
M
I
E
5
161 Tradition Trail Holly Springs, NC, 27540
800-520-7471 (voice)
919- 303-6389 (voice)
[email protected]
919-362-4765 (fax)
www.ofminc.com
 Loading...