

Page 1
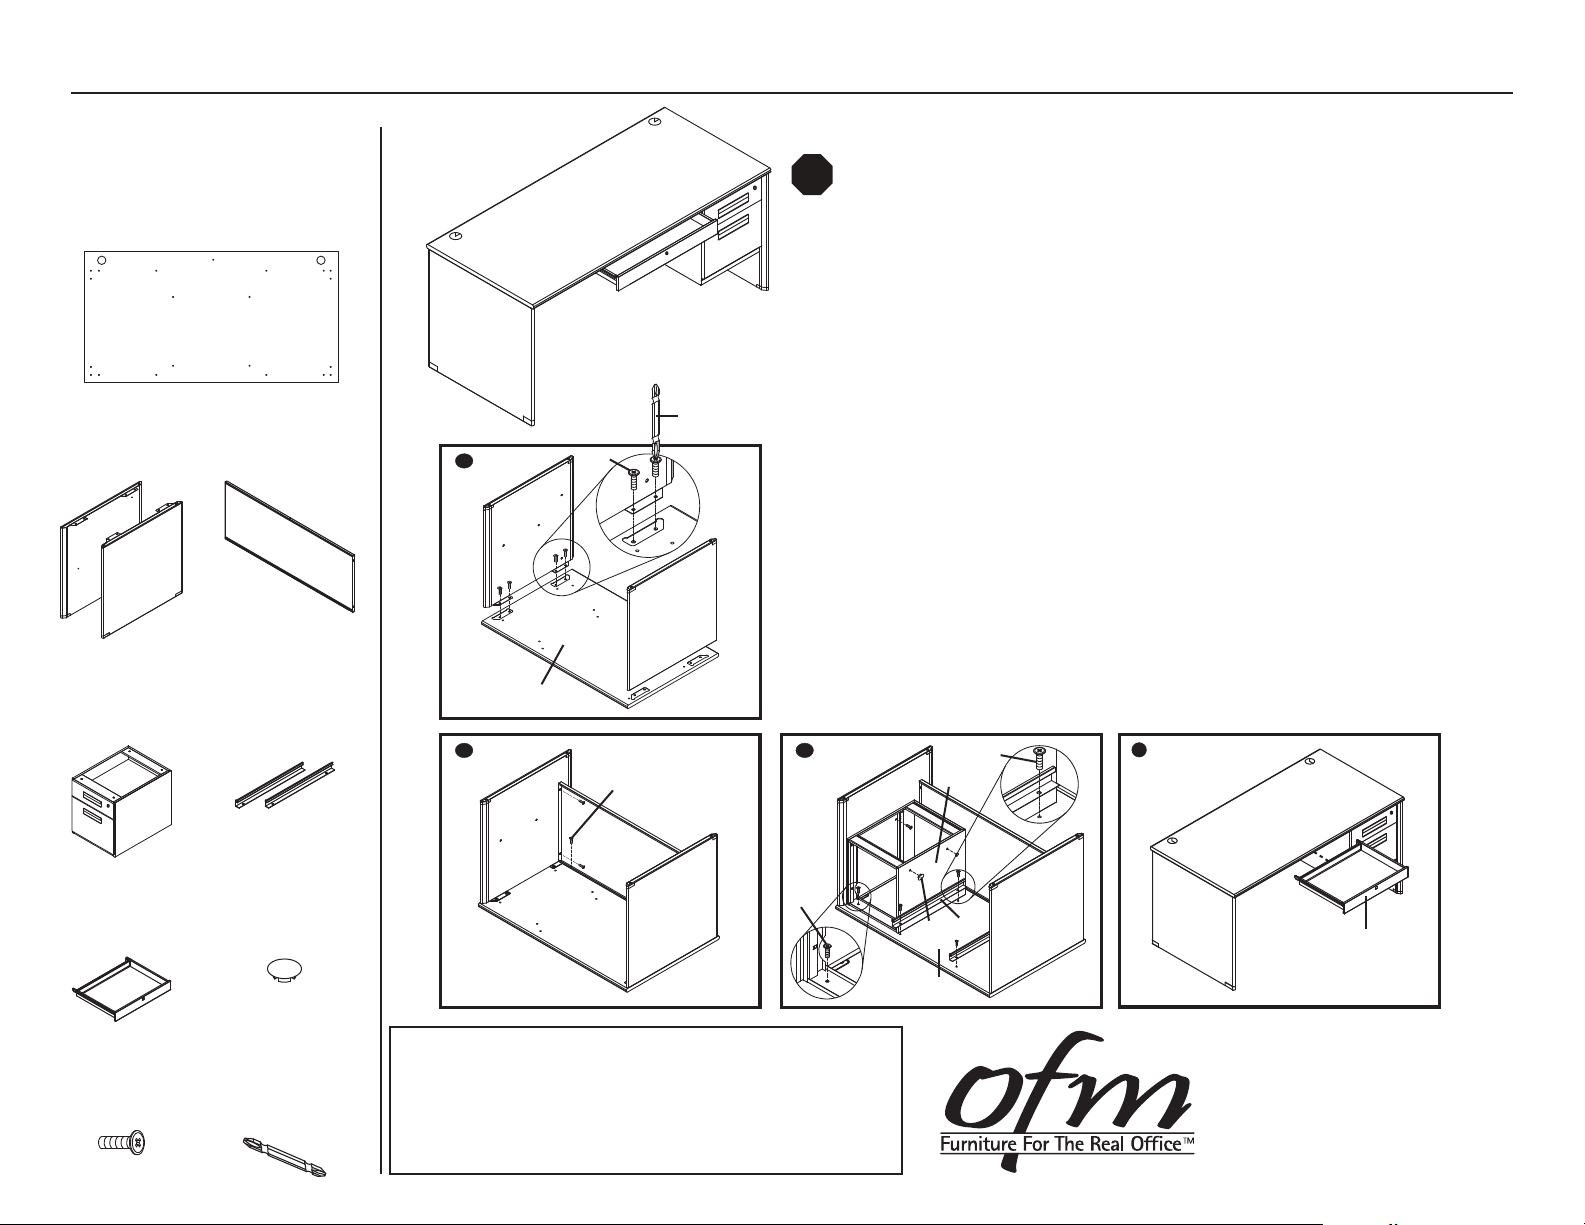
Model 77366 Executive Series Single Pedestal Panel End Desk
Parts Listing
Desk Top
1 Unit
B
Side Panel
2 Units
D
Pedestal
1 Unit
A
C
Privacy Panel
1 Unit
Drawer Runner
2 Units
E
Assembly Instructions
Please read all instructions before assembly. Assembly will require 2 people.
STOP
Tools Needed: Phillips Head Screwdriver
Tools Supplied: Phillips Head Screw Bit
Be sure to remove the Pedestal drawers prior to installation.
Step 1: Attach Side Panels (B) to underside of Desk Top (A) by aligning screw hole
brackets with holes in Desk Top (A), and inserting 6x16mm Screws (H) to
secure. Tighten using Phillips Head Screw Bit (I) or screwdriver.
Step 2: Attach Privacy Panel (C) to underside of Desk Top (A) and to Side Panels (B)
by aligning screw holes in Privacy Panel (C) with holes in Desk Top (A) and
holes in Side Panels (B). Insert 6x16mm Screws (H) to secure. Tighten all
I
1
H
B
A
2
H
screws using Phillips Head Screw Bit (I) or screwdriver.
Step 3: Attach Pedestal (D) to Side Panel (B) and Desk Top (A) by inserting
6x16mm Screws (H) through pedestal wall and into Side Panel (B) and
through screw holes in Desk Top (A). Tighten using Phillips Head Screw Bit (I)
or screwdriver. Cover exposed holes in Pedestal (D) with Screw Cap (G).
Attach Drawer Runners (E) for Center Drawer (F) to underside of Desk Top (A).
Tighten using Phillips Head Screw Bit (I) or screwdriver.
Step 4: Flip the desk right side up using at least two people. Insert the Center
Drawer (F) backwards, as shown, aligning it with the Drawer Runners (E).
Push Center Drawer (F) all the way in to secure.
Note: At this time you can insert drawers back into the Pedestal (D) and
push all the way in to secure.
3
H
4
D
F
Center Drawer
1 Unit
H
6x16mm Screw
25 Units
G
Screw Cap
2 Units
I
Phillips Head
Screw Bit
1 Unit
B
C
H
A B
Assembly Notes:
During assembly, hand tighten screws only. When all screws
are in place, you may then tighten all screws completely.
CAUTION:
1. Do not use this desk as a step ladder.
2. Check for loose screws and tighten them every 6 months.
06.30.2014
E
G
B
F
A
161 Tradition Trail, Holly Springs, NC, 27540
800-520-7471 (voice)
919 -303-6389 (voice)
support@ofminc.com
919-362-4765 (fax)
www.ofminc.com
Page 2
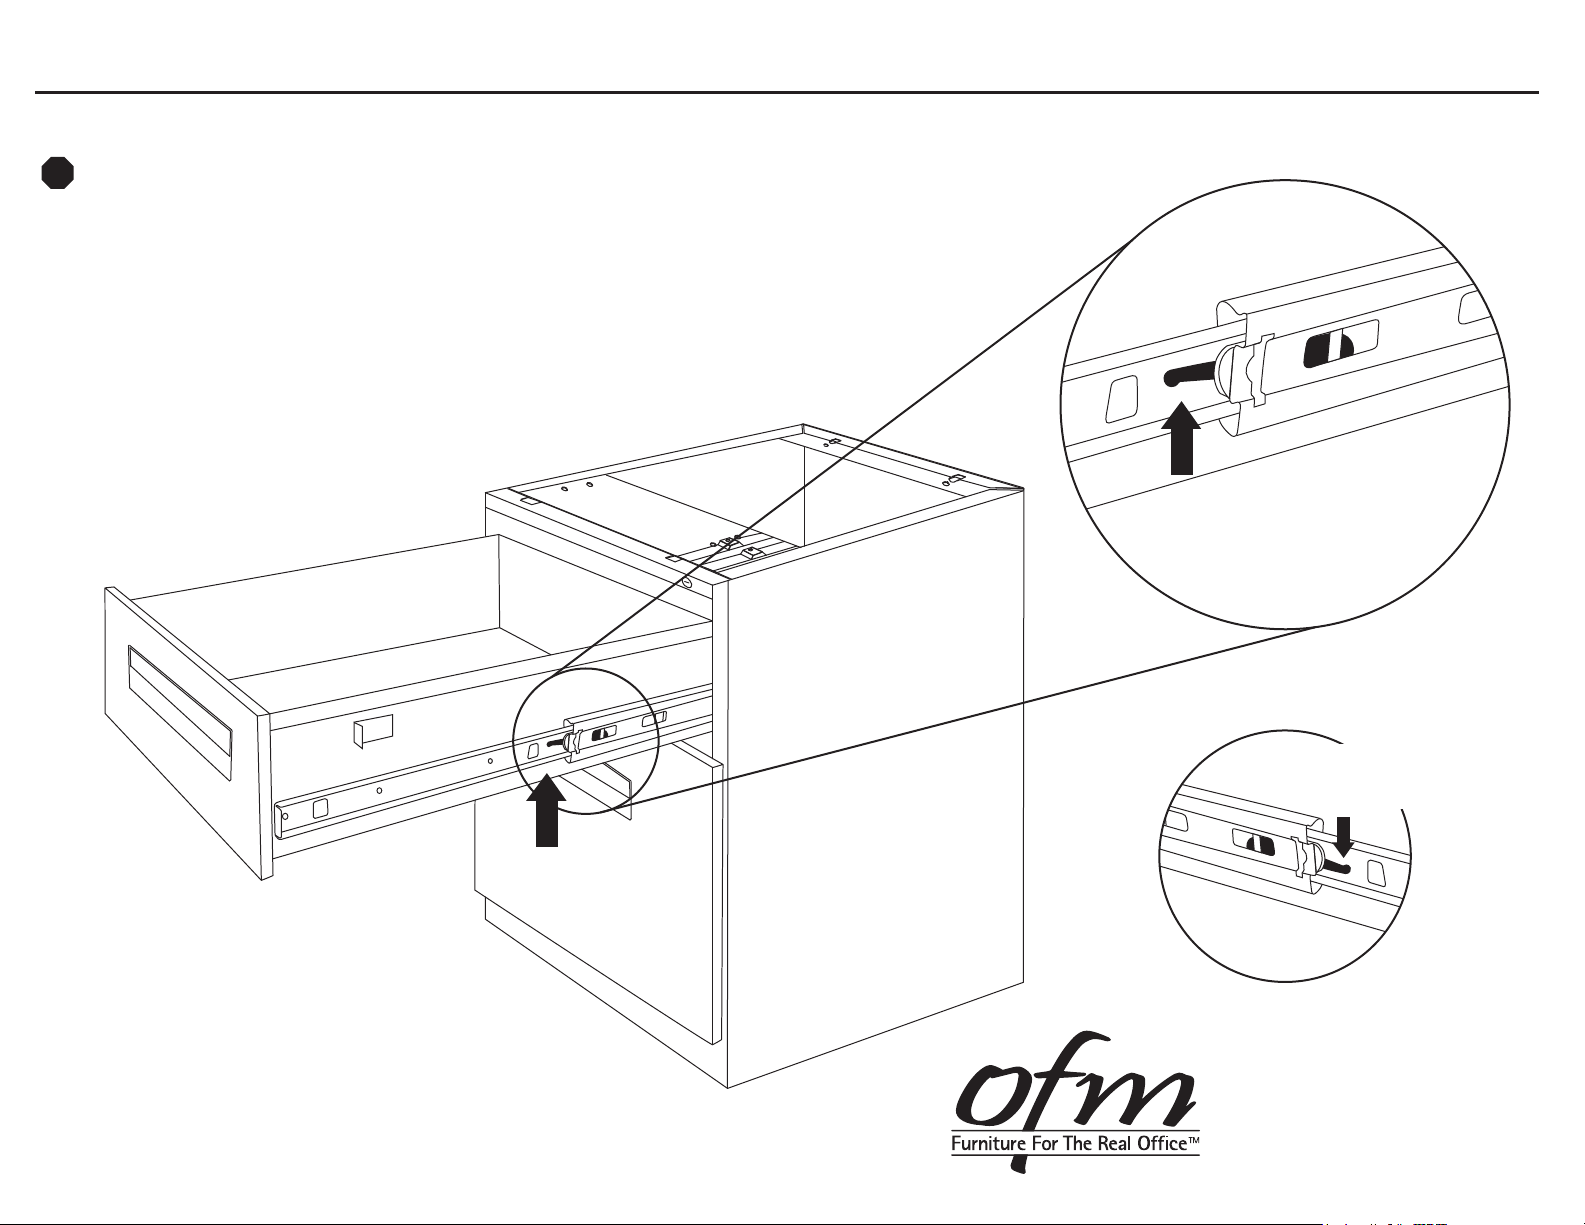
77000 Series How to Remove the Pedestal Drawers
Drawer Removal Instructions
Please read all instructions before you begin.
STOP
All Pedestal Drawers must be removed before attaching the Pedestal to a desk.
Step 1: Stand in front of the pedestal and open the drawer you wish to remove.
Pull drawer all the way out until met with resistance.
Step 2: With both hands, place fingers underneath the open drawer on each side near the
drawer release/locking lever (highlighted below) like you would be picking up the drawer.
Keep hold of the drawer and using just your pointer finger on your right hand and your
thumb on your left hand, simultaneously push the lever UP on the right side
and push DOWN on the left side. While continuing to hold both levers in
the correct pushed position, pull the drawer out.
Step 3: To put the drawer back in, simply align the
rails on the drawer with the tracks on
the pedestal unit and push in.
Push release lever UP
with index finger
on right side.
Place hands here
on each side
of drawer
Push release lever
DOWN with thumb
on left side.
161 Tradition Trail, Holly Springs, NC, 27540
800-520-7471 (voice)
919-303-6389 (voice)
support@ofminc.com
919-362-4765 (fax)
www.ofminc.com
06.18.2014
 Loading...