

Page 1
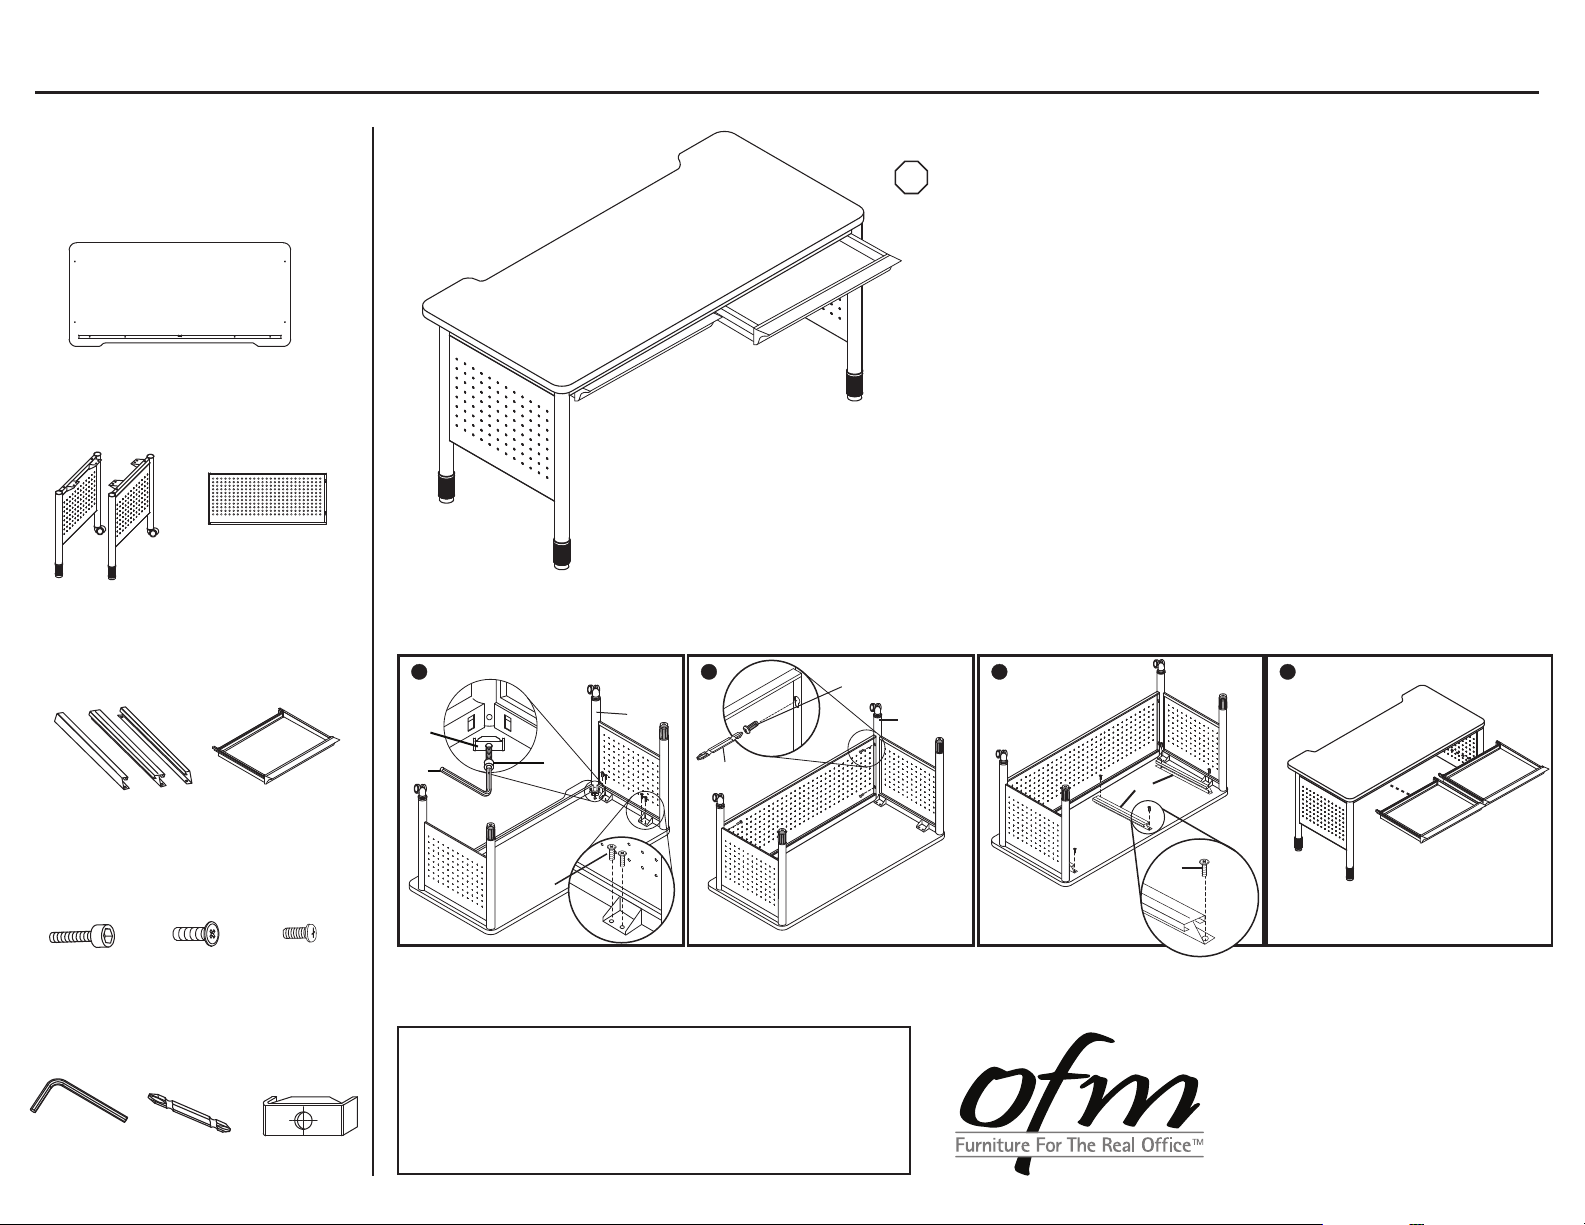
Model 66120 / 66140 / 66150 Mesa Series Training Table with Drawers
Parts Listing
B
Side Panel Legs
2 Units
D
Drawer Runners
3 Units
F
10x35mm Screw
2 Units
6x16mm Screw
A
Table Top
1 Unit
G
14 Units
C
Privacy Panel
1 Unit
E
Pencil Drawers
2 Units
H
5x10mm Screw
4 Units
Assembly Instructions
Tools Needed: Phillips Head Screwdriver
STOP
Please read all instructions before assembly.
Assembly will require 2 people.
Step 1: Align Side Panel Legs (B) with the support rail on the underside
of the Table Top (A). Place Corner Leg Bracket (K) in holes on
support rail, and insert 10x35mm Screw (F) through bracket and
into legs. Tighten using Allen Wrench (I). Align holes on Side
Panel Leg (B) bracket with holes on the underside of the Table
Top (A). Insert 6x16mm Screws (G) through bracket and into
top, and secure using Phillips Head Screw Bit (J).
Step 2: Attach Privacy Panel (C) to Side Panel Legs (B) by inserting
5x10mm Screws (H) through sides of Privacy Panel (C) and
into side of Side Panel Legs (B).
Step 3: Attach Drawer Runners (D) to underside of Table Top (A), as
shown. Make sure double-sided runner is placed in the middle
with screw holes on the right side, as shown. Secure with
6x16mm Screws (G) and tighten using Phillips Head Screw Bit (J).
Step 4: Flip the desk right side up using at least two people. Insert the
Pencil Drawers (E) backwards, as shown, aligning them with the
Drawer Runners (D). Push Pencil Drawers (E) all the way in to
secure.
1
K
I
F
B
2
H
B
J
C
A
A
G
3
D
4
E
E
A
G
I
Allen Wrench
1 Unit
J
Phillips Head
Screw Bit
1 Unit
K
Corner
Leg Bracket
2 Units
Assembly Notes:
During assembly, hand tighten screws only. When all screws
are in place, you may then tighten all screws completely.
CAUTION:
1. Do not use this table as a step ladder.
2. Check for loose screws and tighten them every 6 months.
01.16.2014
161 Tradition Trail Holly Springs, NC, 27540
800-520-7471 (voice)
919-303-6389 (voice)
[email protected]
919-362-4765 (fax)
www.ofminc.com
 Loading...