

Page 1
1
Set up:
Office Zone
1-800-543-5454
1-800-543-5454
(801) 927-3026
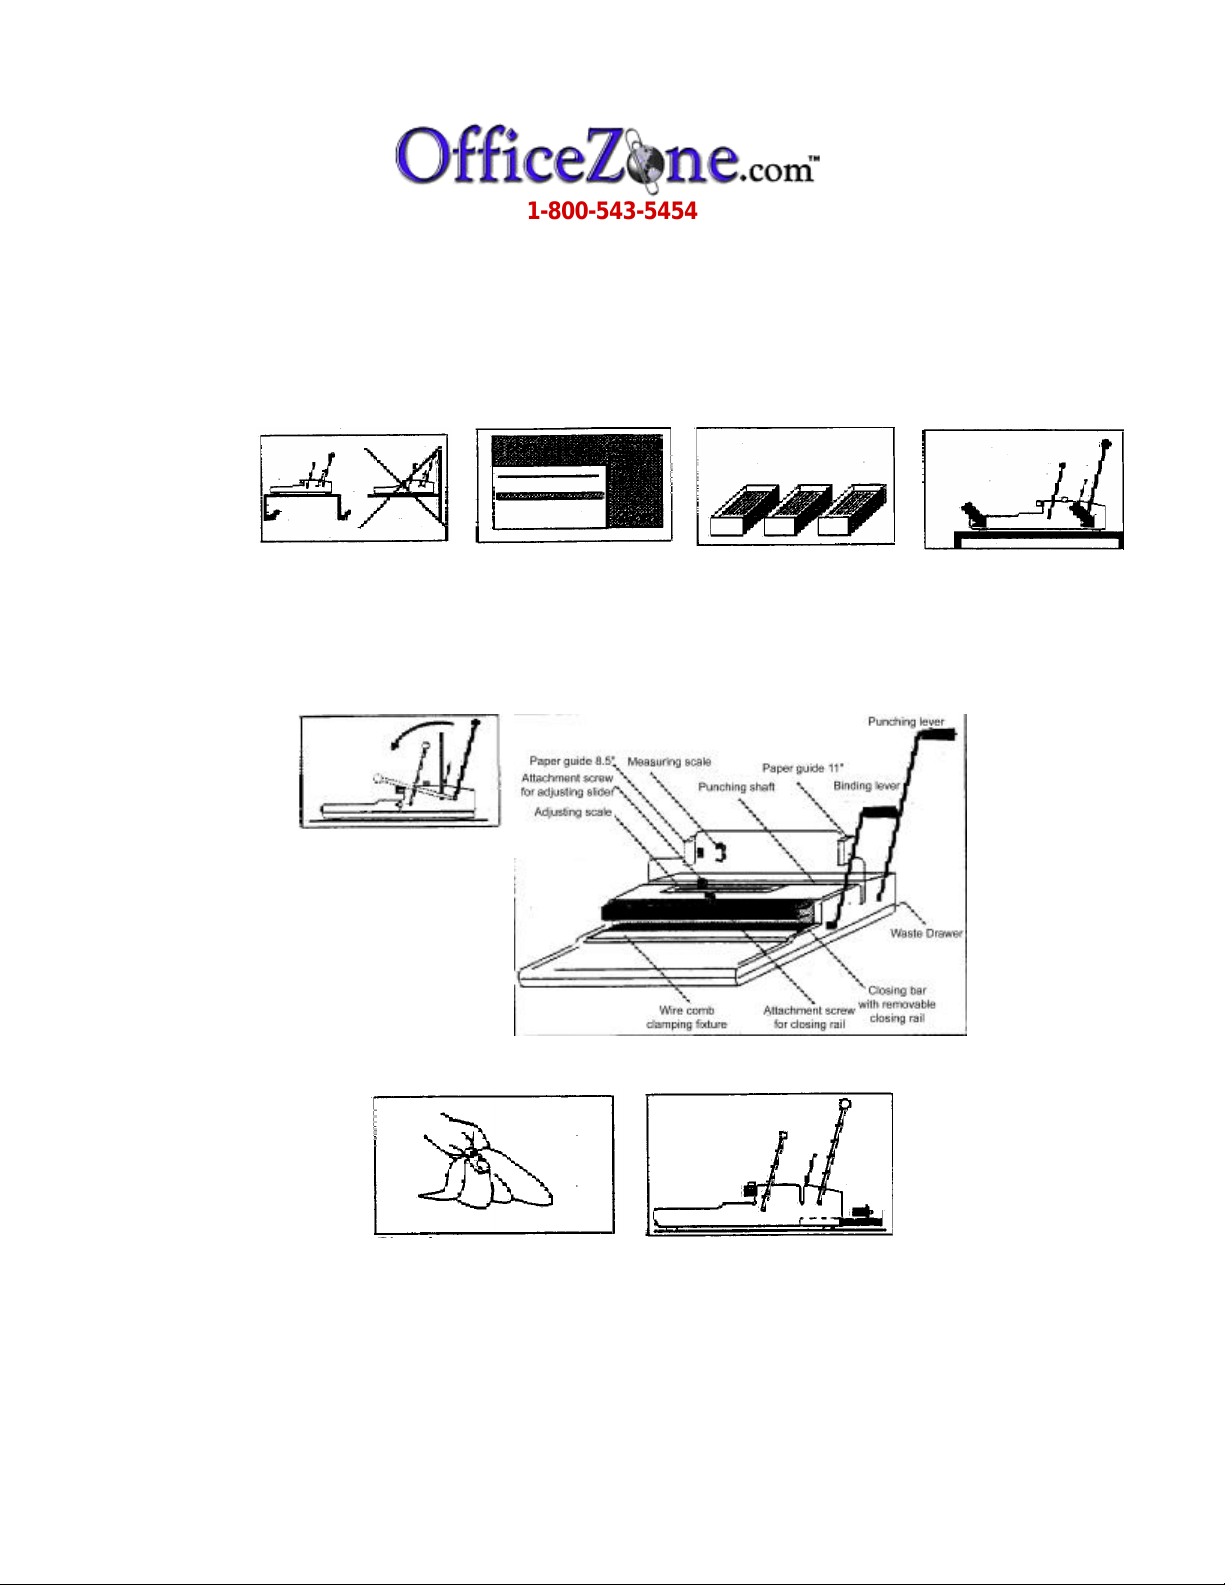
Model ECO-C Binder
2:1 Pitch
Choose stable surface
Place machine on a stable
surface.
Shelves are not recommended
Operation:
Before first use:
Punch scrap paper to clean
the rust preventative from the
punch dies.
Maintenance:
The machine
and the parts
Place requirement
Keep working space free:
Right 8” (20 cm)
Left 6” (15 cm)
Have binding elements
near work area.
Store binding elements in the
special boxes.
Size: 24 x 36 cm
9.5” x 14.2”
Protect sensitive
furniture surface.
The machine stands on soft
plastic feet. Some surfaces
may discolor after a time.
Field of application:
Punch:
Paper
Max 30 pages 20 # stock for
comfortable punching:
15-20 pages
Cardboard:
Max thickness 1.5 mm
Plastic Foil:
Max 2 pages for 0.3 mm
thickness
Max binding thickness 20
mm (1 -1/8”) approx. 280
pages 20 # stock.
Cleaning:
Wipe with a dry or moist cloth. Do
not use solvents, sticker may detach.
Empty drawer from time to
time:
Pull out drawer at the back and empty
out the paper -shavings.
Page 2
2
1
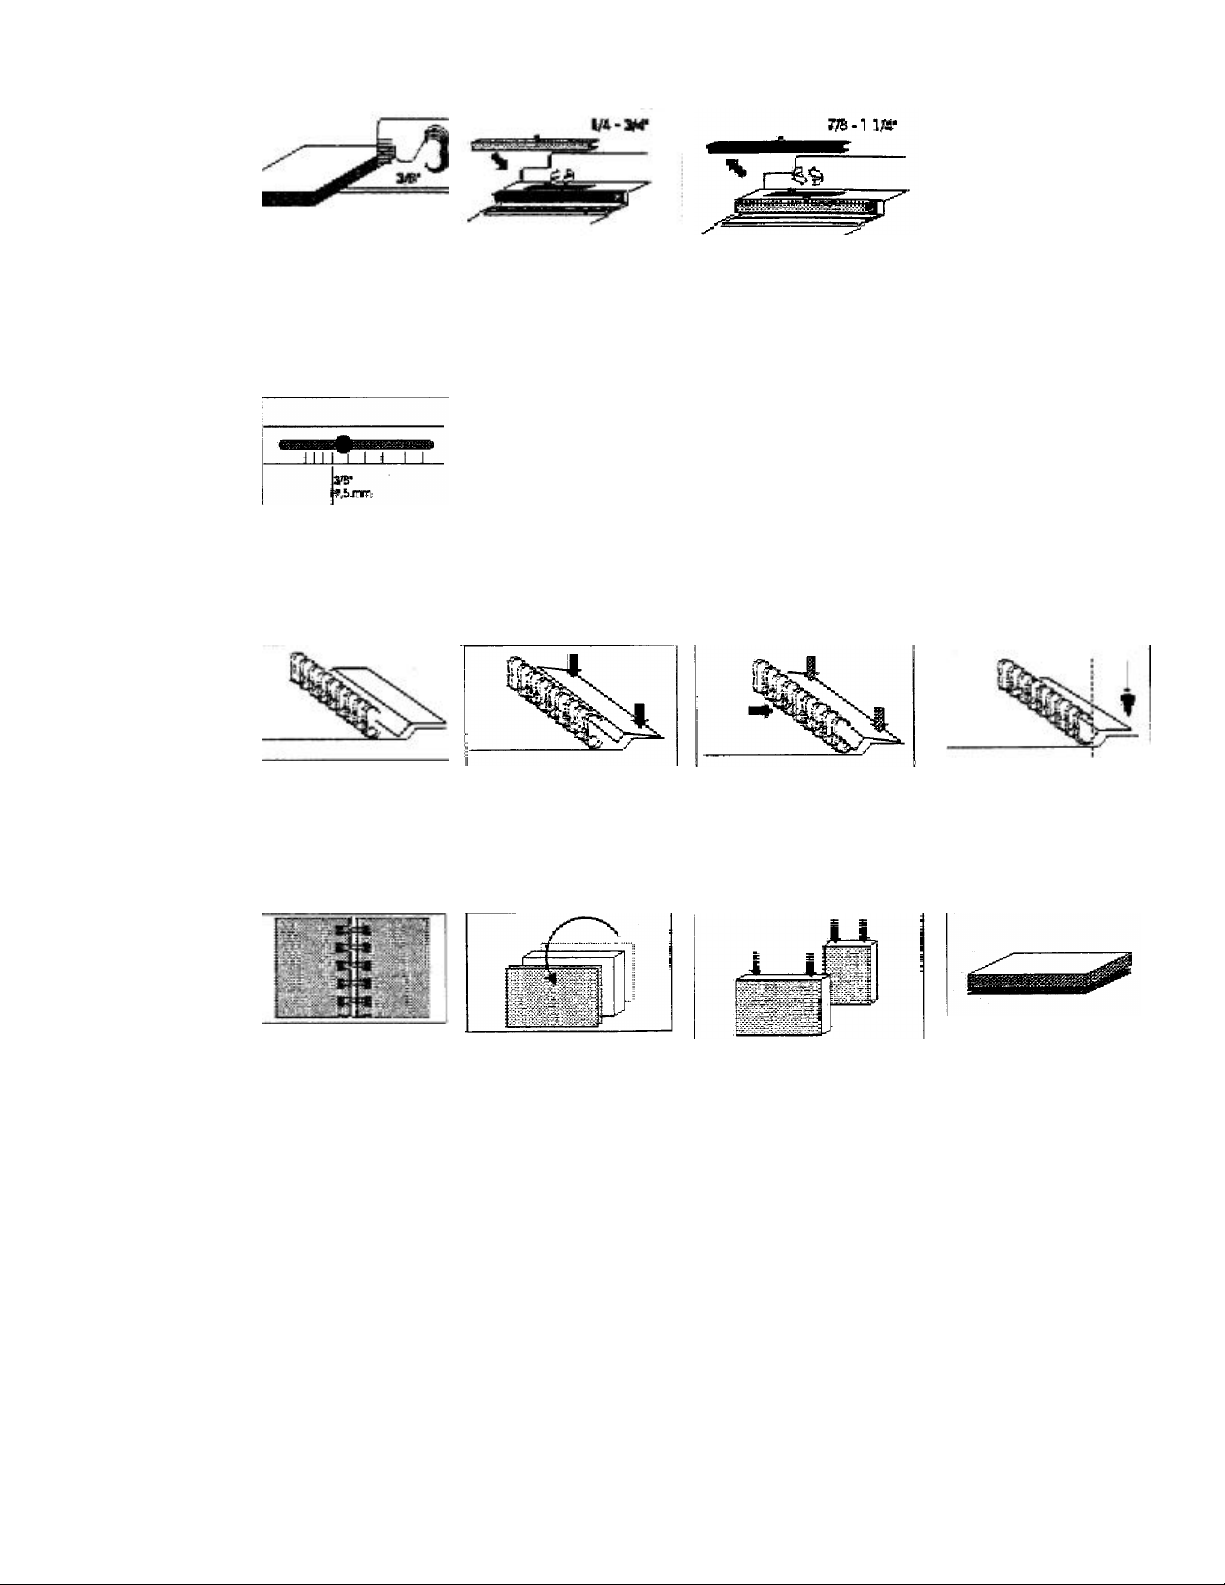
Measure
Determination of the
diameter
Pull the book on the edge
against the measuring
scale. Read the diameter
of the binding element
(e.g. 3/8”)
2
Adjust
Scale for adjusting
the diameter.
Release attachment screw
determine scale; adjust
diameter, tighten
attachment screw.
3
Insert
Lay binding element
in front of the
clamping fixture
Small loops on top, facing
rear.
4
Prepare
Removal or installation of
the closing rail
For diameters 1 / 4” to 3 / 4”
place closing rail on the closing
bar. Tighten attachment screw.
Press down clamping
fixture
Press back edge and front side
will open .
For diameters 7/8” to 1-1/4” release
attachment screw remove closing
rail from closing bar.
Push binding element under
the clamping fixture.
Clamping fixture holds binding
element during insertion of the
punched paper.
Release clamping
fixture possibly adjust
binding element
vertically.
The seam of the
closed binding
element should be
inside the book
Not outside the covers.
Set the book upright,
binding side to the top,
place the back cover in
front.
The front cover should be
behind the back cover
Jog the book Turn the book over,
covers are underneath
Take pages from the top.
Page 3

3
5
Punch
Punch max 30 pages 20
# stock, for comfortable
punching: 15-20 pages
Punch plastic and thicker
covers separately.
6
Insert
Remove punched paper
from the punching slot
7
Adjust
Press clamping fixture
8
Close
Insert paper into the
punching slot, slide the
paper against the paper
guide.
Adjust 11” format at the right
side, paper must stand evenly,
if not align it again.
Insert paper onto the
binding element.
After the paper has been
placed on the binding
element, remove the paper
with the element from the
clamping fixture.
Hold the paper that it does not
slide out of the binding
element.
Adjust 8.5” format at the left
side.
For thicker books,
repeat steps five and six
until all pages are
punched
Put binding element
under the closing bar.
Press punching lever
forward until it stops,
then return to orginal
position.
Hold the machine with the
other hand.
Binding element
must stand vertically
at the back of the
closing bar.
With opening of the
binding elem ent to the
book.
Press binding lever
forward until it stops
and back again.
For bigger diameters use
more force.
9
Proper bind.
The small loops should be
just inside the large loops.
Binding under closed:
Adjust closing bar a
little deeper.
Release attachment screw and
move it slightly to the left.
Fix attachment screw. Press
binding lever again.
Ready
Turn back cover over Ready
Binding over closed:
Adjust closing bar a
little higher.
Release attachment screw
and move it slightly to the
right. Fix attachment
screw. Close next book.
Page 4

4
Page 5

5
 Loading...