

Page 1
ITP-5121D/ITP-5114D/ITP-5107S IP Telephone User Guide
IP Telephone
User Guide
ITP-5121D / ITP-5114D / ITP-5107S
Page 2
SSAAFFEETTYY CCOONNCCEERRNNSS
For product safety and correct operation, the following information must be given to the
operator/user and shall be read before the installation and operation.
Conventions
Warning
Provides information or instructions that you should follow in order to avoid
personal injury or fatality.
Caution
Provides information or instructions that you should follow in order to avoid a
service failure or damage to your phone.
Note
Indicates additional information for reference.
Checks
Provides the operator with checkpoints for stable system operation.
Symbols
Caution
Indication of a general caution.
Restriction
Indication for prohibiting an action for a product.
Instruction
Indication for commanding a specifically required action.
2 © SAMSUNG Electronics Co., Ltd.
Page 3
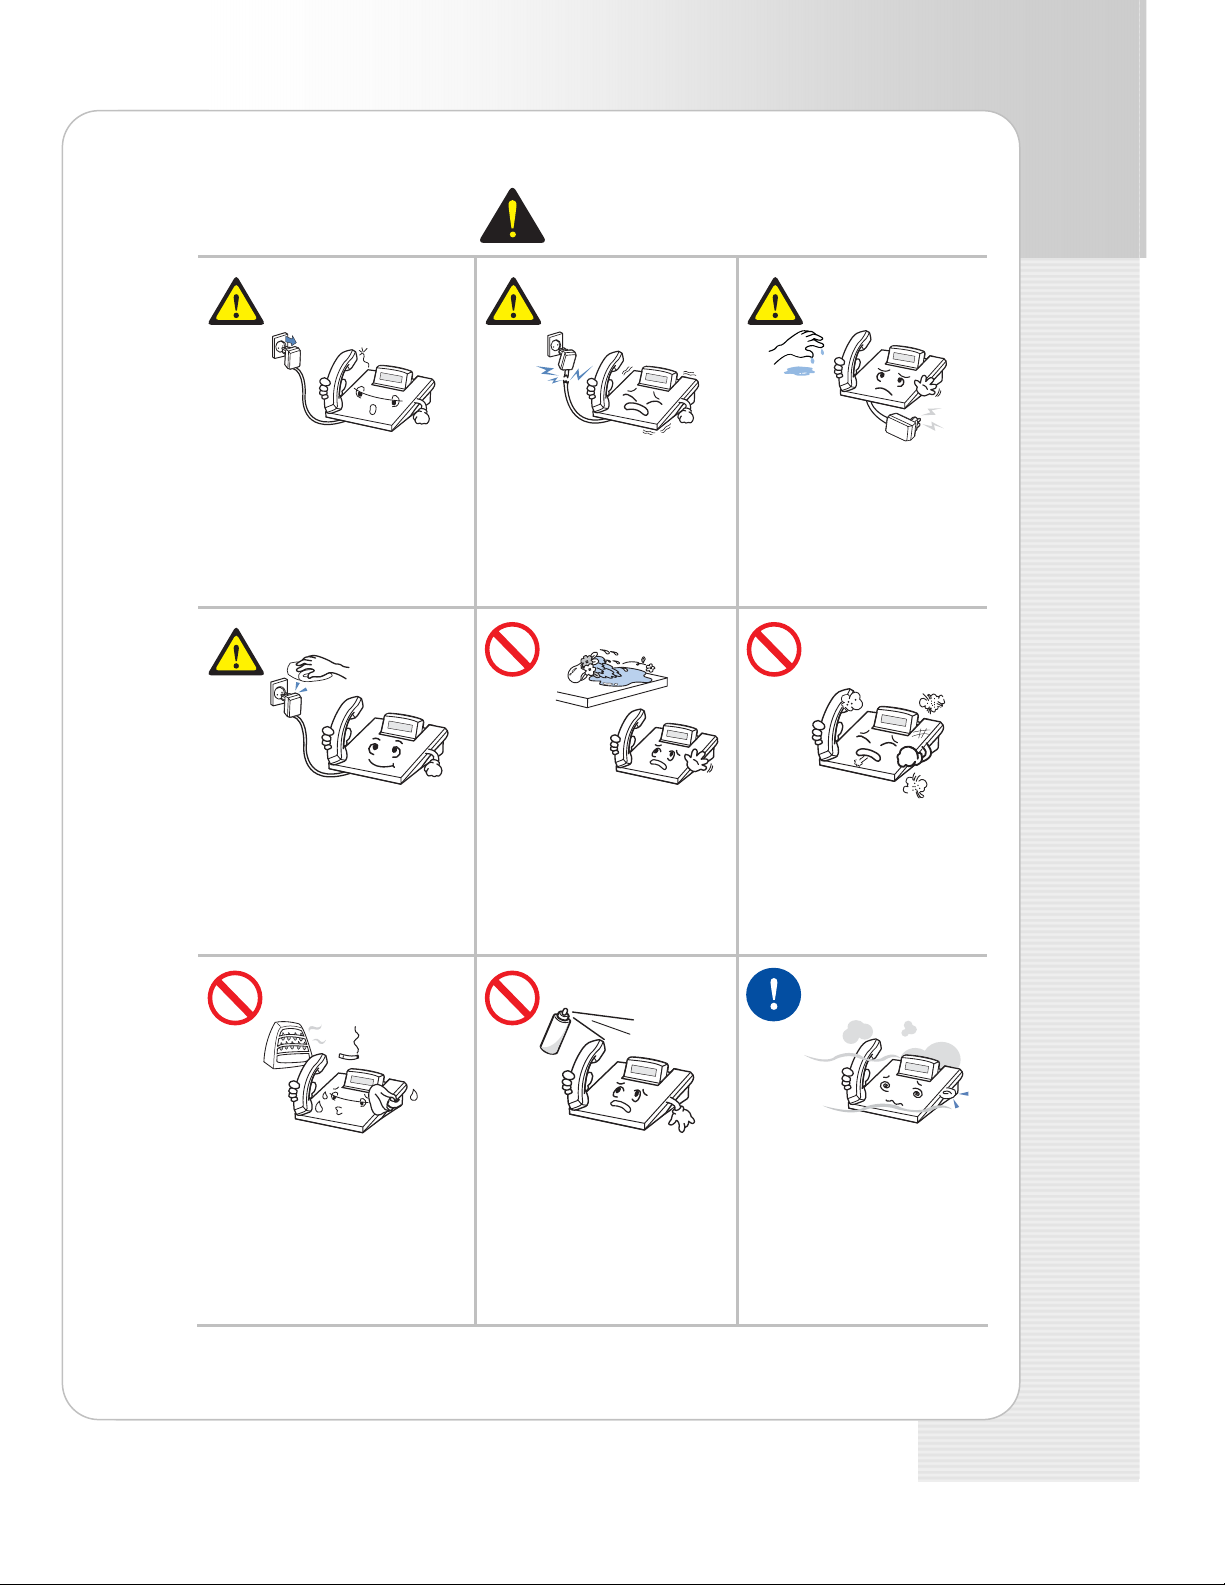
Warning
ITP-5121D/ITP-5114D/ITP-5107S IP Telephone User Guide
Pull out the power plug when
the phone is not used for a long
time.
It may cause fire or electric shock.
Pull out the power plug and
brush with a cloth it if the
contact surface with power plug
is dusty or gets wet.
Contact the service cente r i f
foreign materi als or water
It may cause fire or electric shock.
Warning
Do not use a damaged power
plug or a loose outlet.
It may cause fire or electric
shock.
Avoid placing objects
containing water such as
vases, cups, cosmetics, an d
medicines near the phone.
Moisture in the phone may cause
a fire and electric shocks.
Do not pull or bend the power
cord by force. Do not touch
the power plug with wet
hands.
It may cause the damage of the
power cord, fire or electric
shock.
Do not place the phone in a
dusty area or areas with
extreme or volatile changes
in temperature.
It may cause a fire or electric
shocks.
Do not install the phone near a
heater or flames( cigarette
lighter, heating apparatus, etc.) .
It may cause a fire or electric
shocks.
Do not use flammable solvent
or materials near the phone.
Do not store them near the
phone.
It may cause a fire or electric
shocks.
© SAMSUNG Electronics Co., Ltd. 3
If the phone makes excessive
noise, emits an odor, or
smoke, immediately unplug
the phone and call your
Authorized Samsung
Reseller.
It may cause a fire or electric
shocks.
Page 4
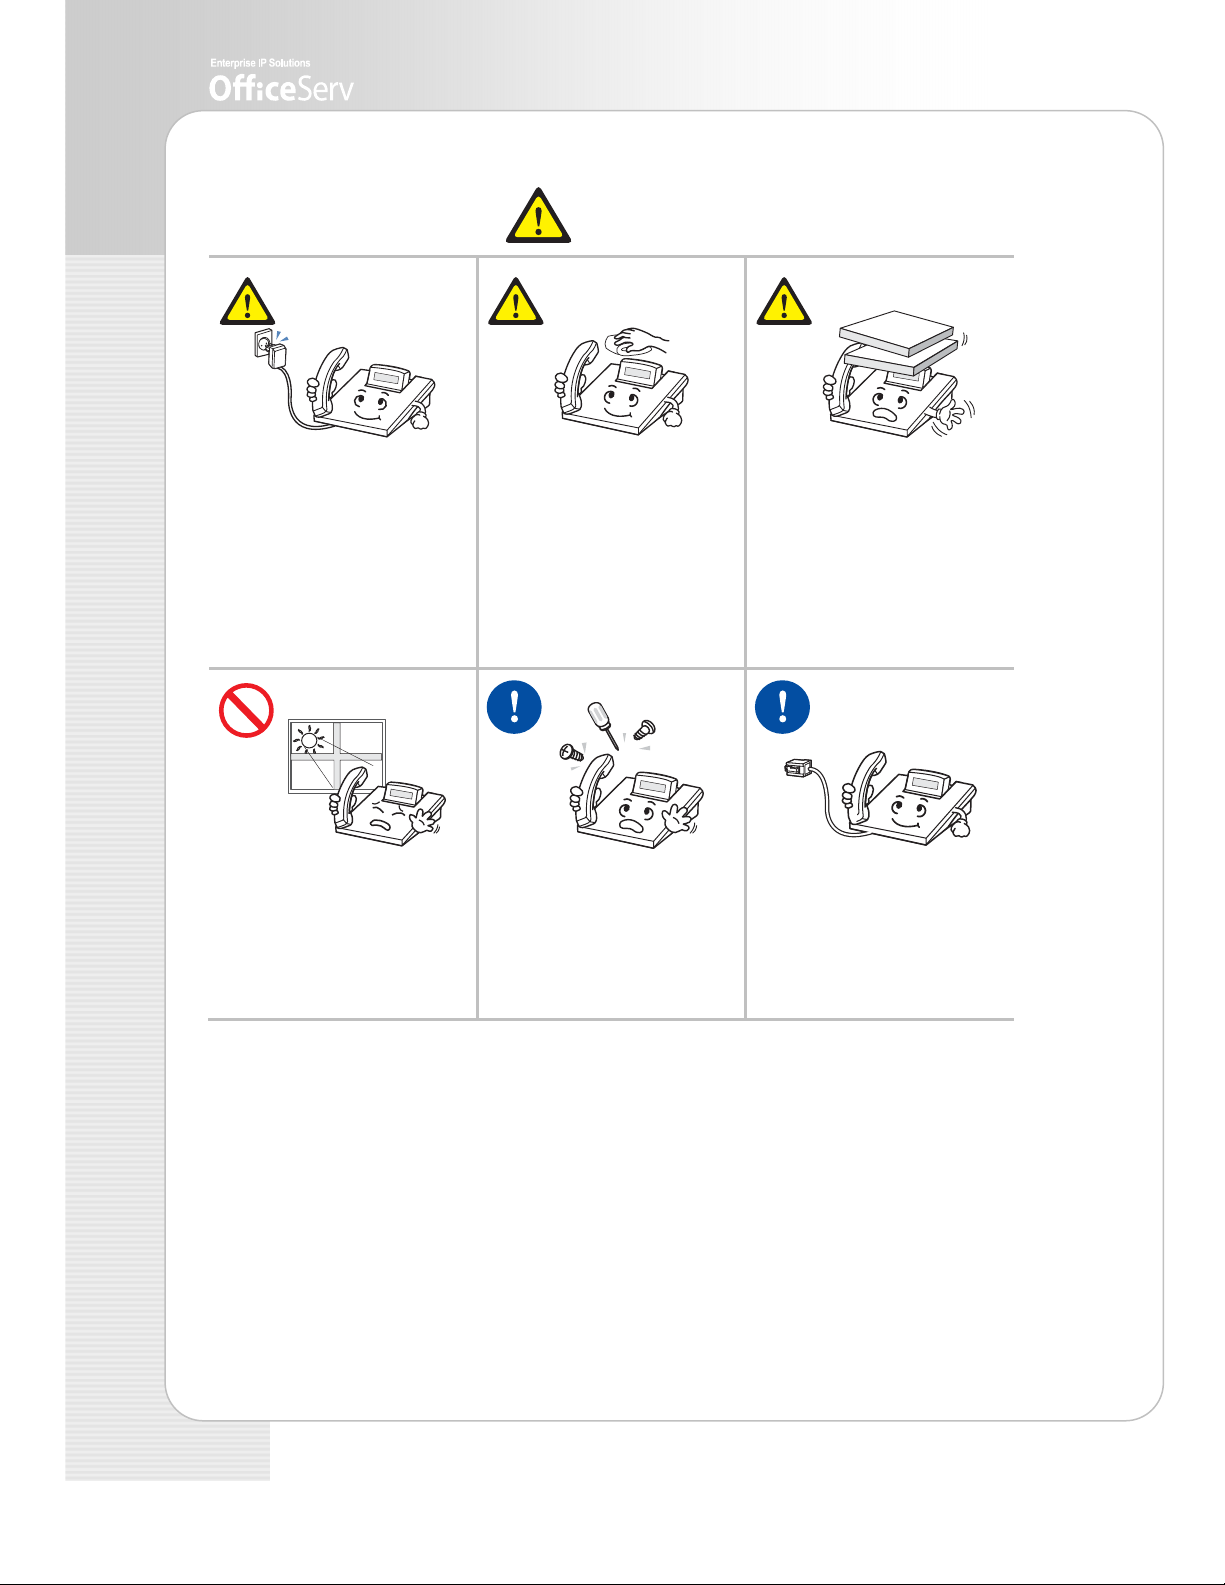
Caution
Be sure to connect the LAN
cable linked to network to the
LAN connection port of the
telephone, not to the PCconnection port of th e
telephone.
If the LAN cable is connected to
the PC connection port, both
telephone and PC communications
will be disabled.
Do not install the phone on an
unstable surface or in direct
sunlight.
It may cause severe damage to
the plastic case of the phone, and
reduced the performance of your
phone.
Caution
Use a soft dry cloth to clean the
phone. Do not use any chemical
solvents like wax, benzene,
alcohol, thinner, aerosols,
lubricant, or detergent.
The use of chemicals on the
phone may cause
fading/discoloring or damage to
the parts.
Do not separate, repair or
remodel the phone arbitrarily.
If a repair is needed, please
contact your Authorized Samsung
Reseller.
Do not place heavy things on
the phone.
It may cause damage to some
parts.
Do not turn off the power while
the telephone is upgrading its
software.
Failure to do so interrupts the
upgrades by stopping the
operation of the telephone.
4 © SAMSUNG Electronics Co., Ltd.
Page 5
ITP-5121D/ITP-5114D/ITP-5107S IP Telephone User Guide
TTAABBLLEE OOFF CCOONNTTEENNTTSS
Conventions.......................................................2
Symbols ............................................................2
Warning ............................................................3
Caution .............................................................4
Main Features....................................................6
Checking Parts in the Package ............................9
ITP-5121D/ITP-5114D (Front Side) ................................ 10
ITP-5107S (Front Side)................................................... 10
Installing the phone.........................................10
Installing the phone.........................................11
ITP-5121D/ITP-5114D.................................................... 11
ITP-5107S ......................................................................12
Installing the IP Phone Support ...................................... 13
Adjusting Volume.............................................15
Adjusting the Handset Volume........................................15
Adjusting Speaker Volume.............................................. 16
Adjusting Ring Volume ...................................................16
Entering Characters..........................................17
Special Button Used ....................................................... 17
Entering Characters........................................................ 19
Telephone Status Indicator...............................20
Button LED......................................................20
Making a Call...................................................21
Calling an Extension Number ......................................... 21
Calling an Outside number ............................................. 22
Using a Speakerphone ................................................... 23
New Call ......................................................................... 23
Redial .............................................................................24
© SAMSUNG Electronics Co., Ltd. 5
Page 6
Save Number with Redial............................................... 25
Answering a Call ..............................................26
Using a Handset............................................................. 26
Using a Speakerphone................................................... 26
Call Pickup ..................................................................... 27
Features Used During a Call..............................28
Hold an Intercom Call.....................................................28
Hold an Outside Call ...................................................... 29
Mute ............................................................................... 29
Transferring a Call.......................................................... 30
Conference Calls............................................................31
Navigation Buttons...........................................32
Menu Button................................................................... 32
Send Button.................................................................... 33
End Button...................................................................... 33
Cancel button ................................................................. 33
Enter button.................................................................... 33
Direction button .............................................................. 34
Entering Application Menus...............................35
How to Select Menu ....................................................... 35
Application Menus .......................................................... 36
Product Specifications ......................................39
Main Features
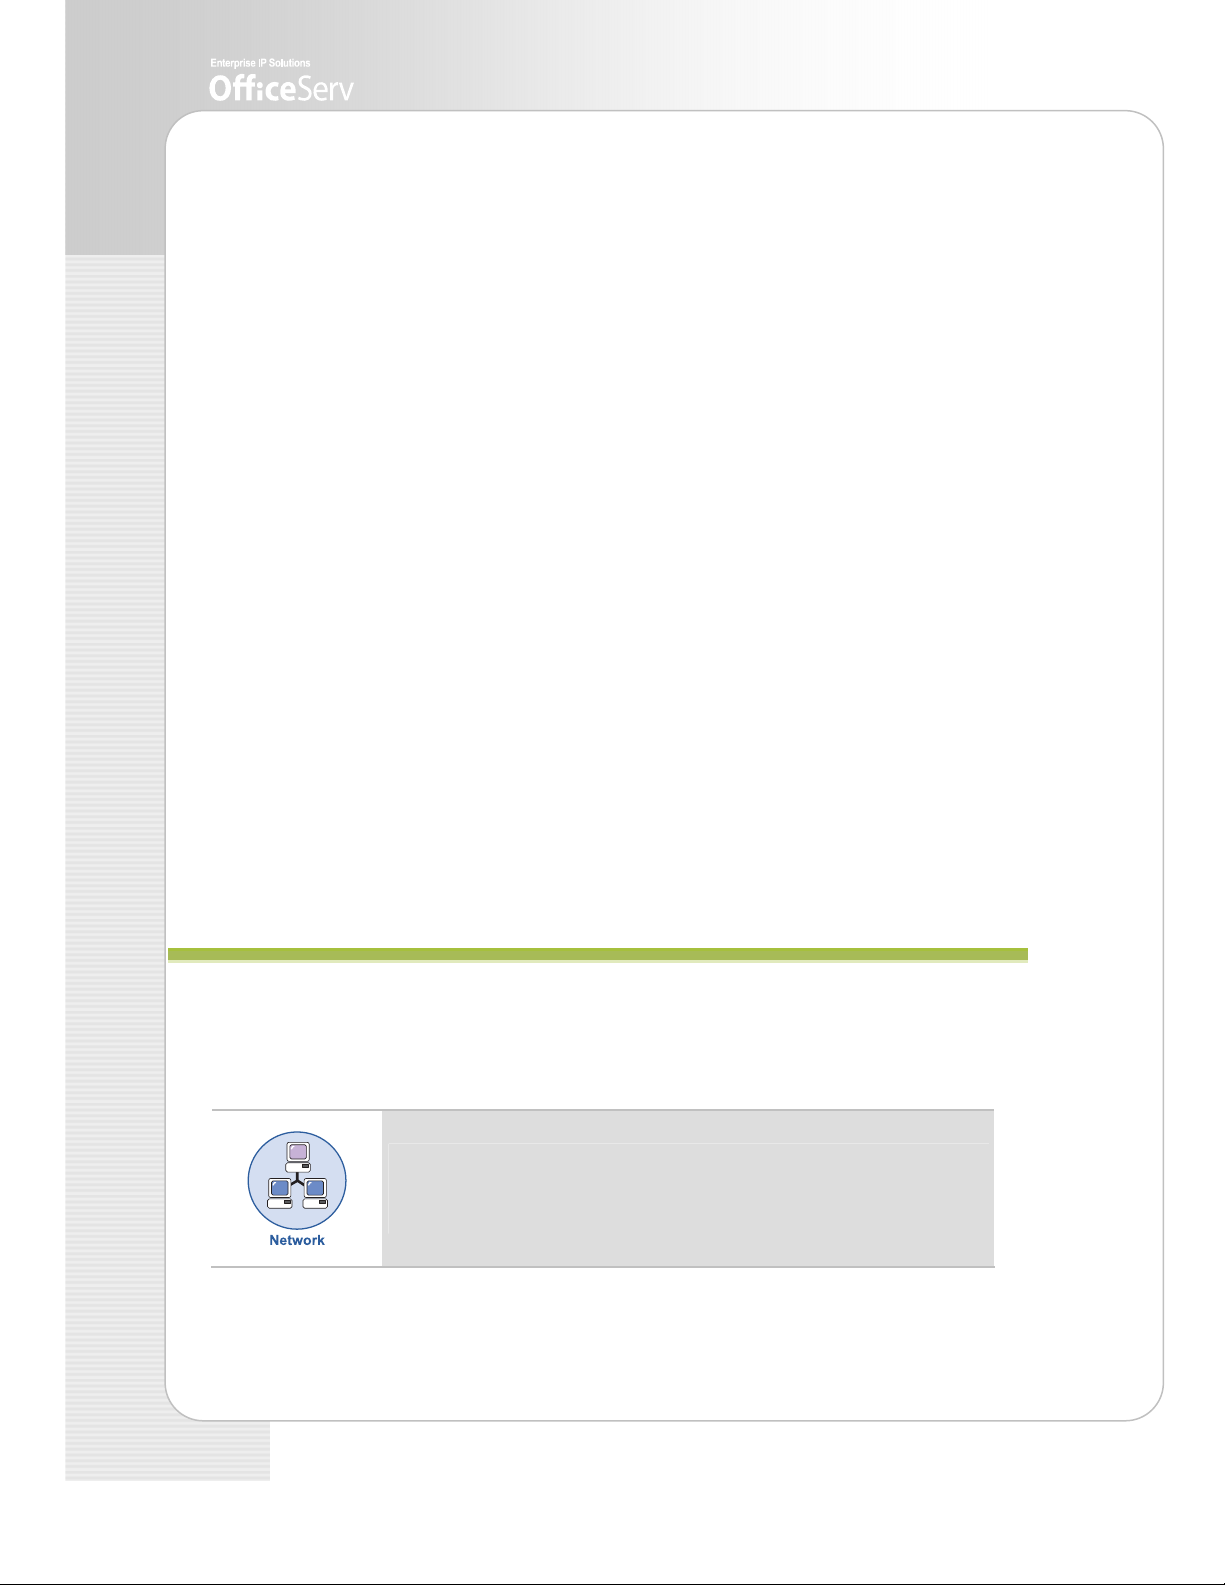
IP Network
The ITP-5121D/ITP-5114D/ITP-5107S IP phone provides voice
communication through your installed data network, making
installation of additional telephone lines unnecessary.
Application menu
PPRREEPPAARRAATTIIOONN
6 © SAMSUNG Electronics Co., Ltd.
Page 7
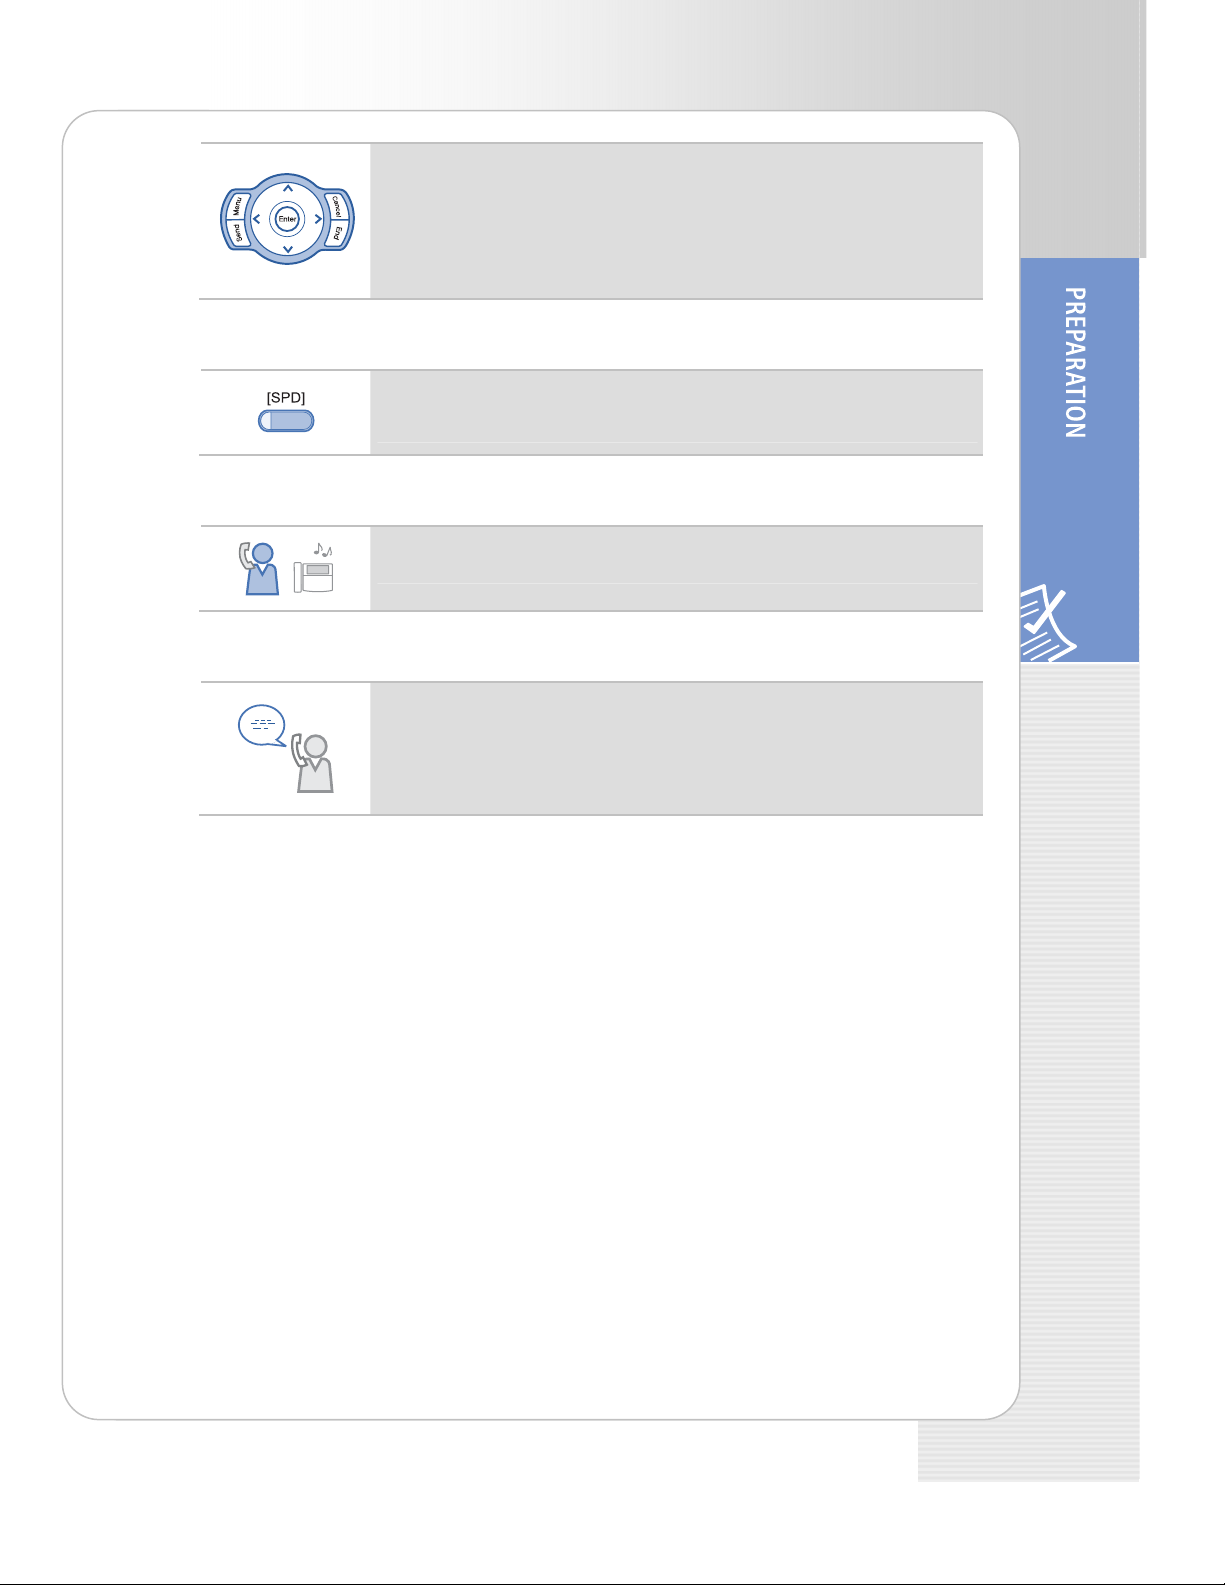
This button allows you to access the IP phone’s menu functions.
The menu functions include the recent outgoing call log, incoming
call log, system directory functions, transferring incoming calls,
inquiry of speed dial numbers, and alarm function.
Speed Dial
For frequently used phone numbers, you can press one speed
dial button to make a call to the speed dial number.
Pickup
You can answer a call at another extension.
Automatic Redial/Retry
ITP-5121D/ITP-5114D/ITP-5107S IP Telephone User Guide
When your call is important but your party is busy on another
call, you can use automatic redial/retry function. The IP phone
redials the called number automatically until your party is free to
take your call.
© SAMSUNG Electronics Co., Ltd. 7
Page 8
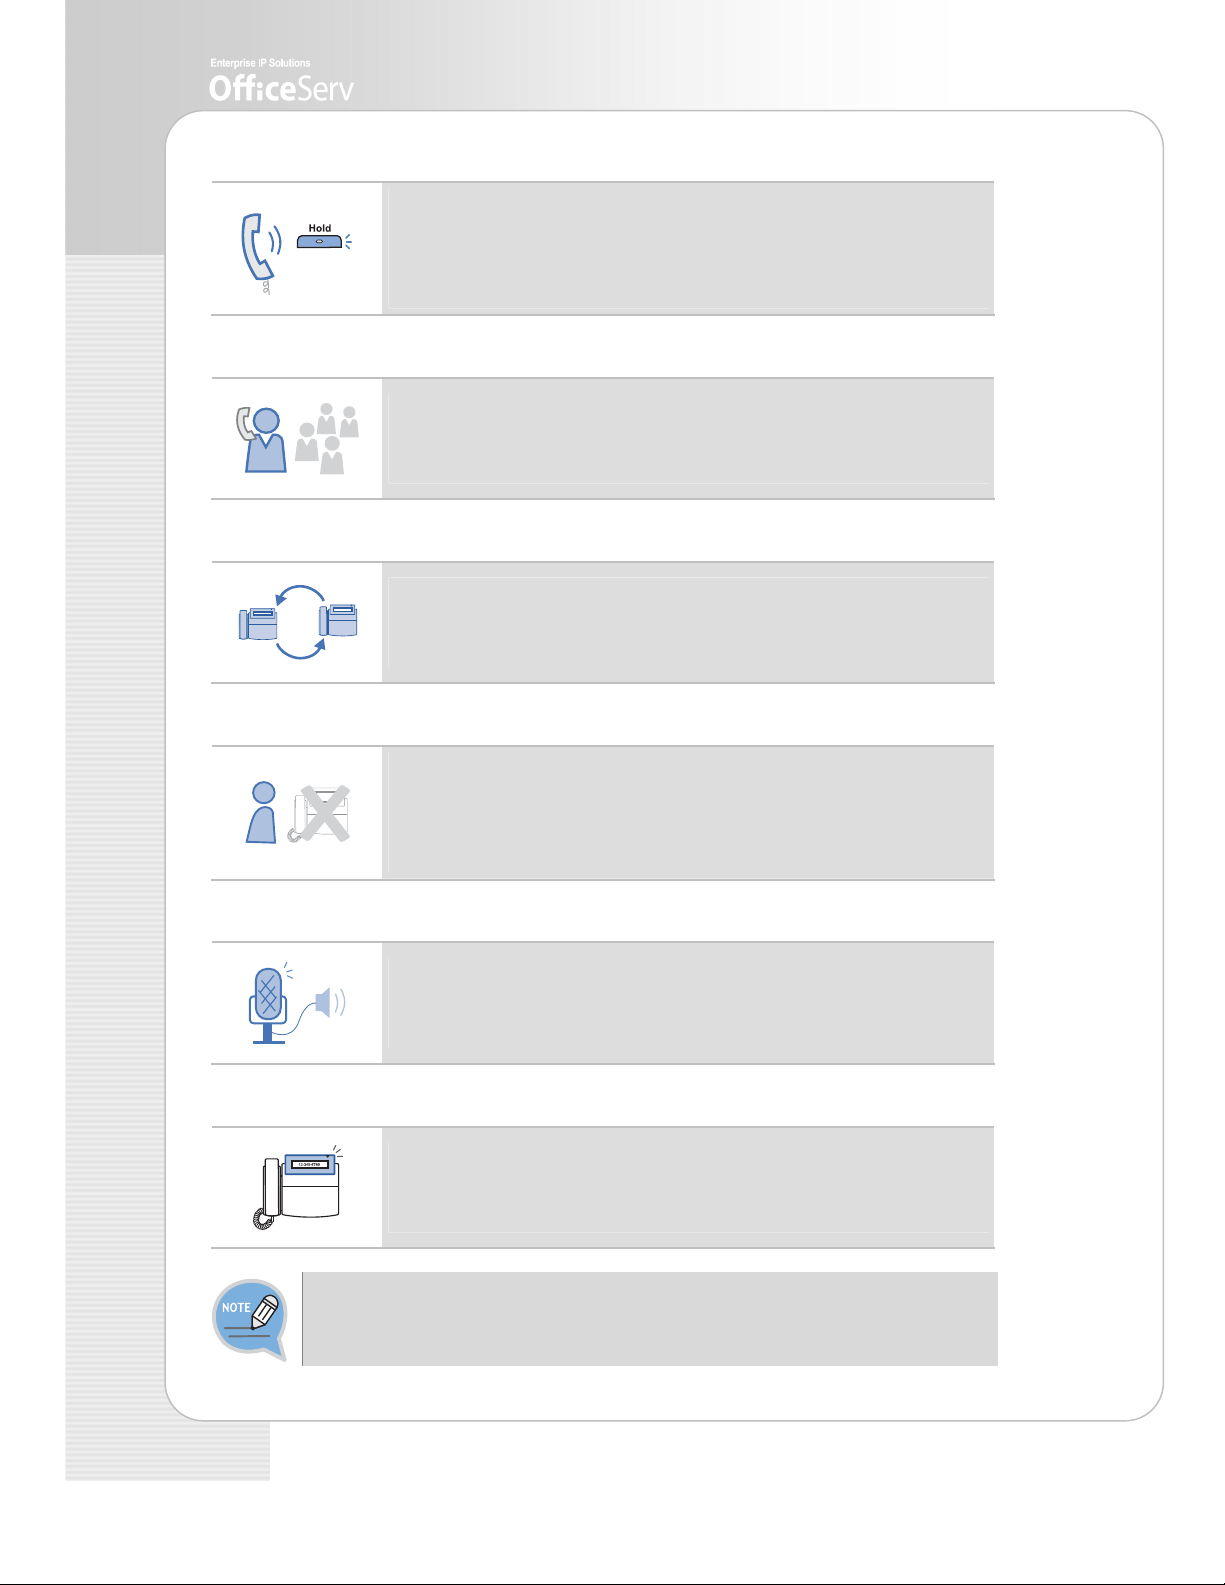
Hold
Conference Calls
Call Forwarding
Do Not Disturb
Paging
You can use the Hold feature when you need something or
another call arrives. Use this button to temporarily hold the
current call until you are ready to resume the call. You can even
pickup a held call at another station.
This button is used when multiple parties need to be connected
simultaneously during a phone conversation. Up to five parties
including you can be connected in a conference call.
If you cannot answer an incoming call, the call can be forwarded
to another extension(unconditionally, while you are busy on a
call, or when you are away from your phone).
When you do not want to be disturbed, the DND function can be
set to block incoming calls and the phone will not ring. Your calls
can be forwarded to another station when you do not wish to be
disturbed.
If you have an urgent announcement to make, or you wish to
locate a colleague, you can page through the speaker of other
stations, or through optional external speakers.
Call ID
When there is an incoming call, the caller ID or name will be
displayed on the LCD screen. You can see who is calling before
answering the call and respond accordingly.
If you have any questions or concerns regarding the features which are not
introduced in this user guide, refer to the User Guide at e-manual site
(http://www.samsungdocs.com).
8 © SAMSUNG Electronics Co., Ltd.
Page 9
ITP-5121D/ITP-5114D/ITP-5107S IP Telephone User Guide
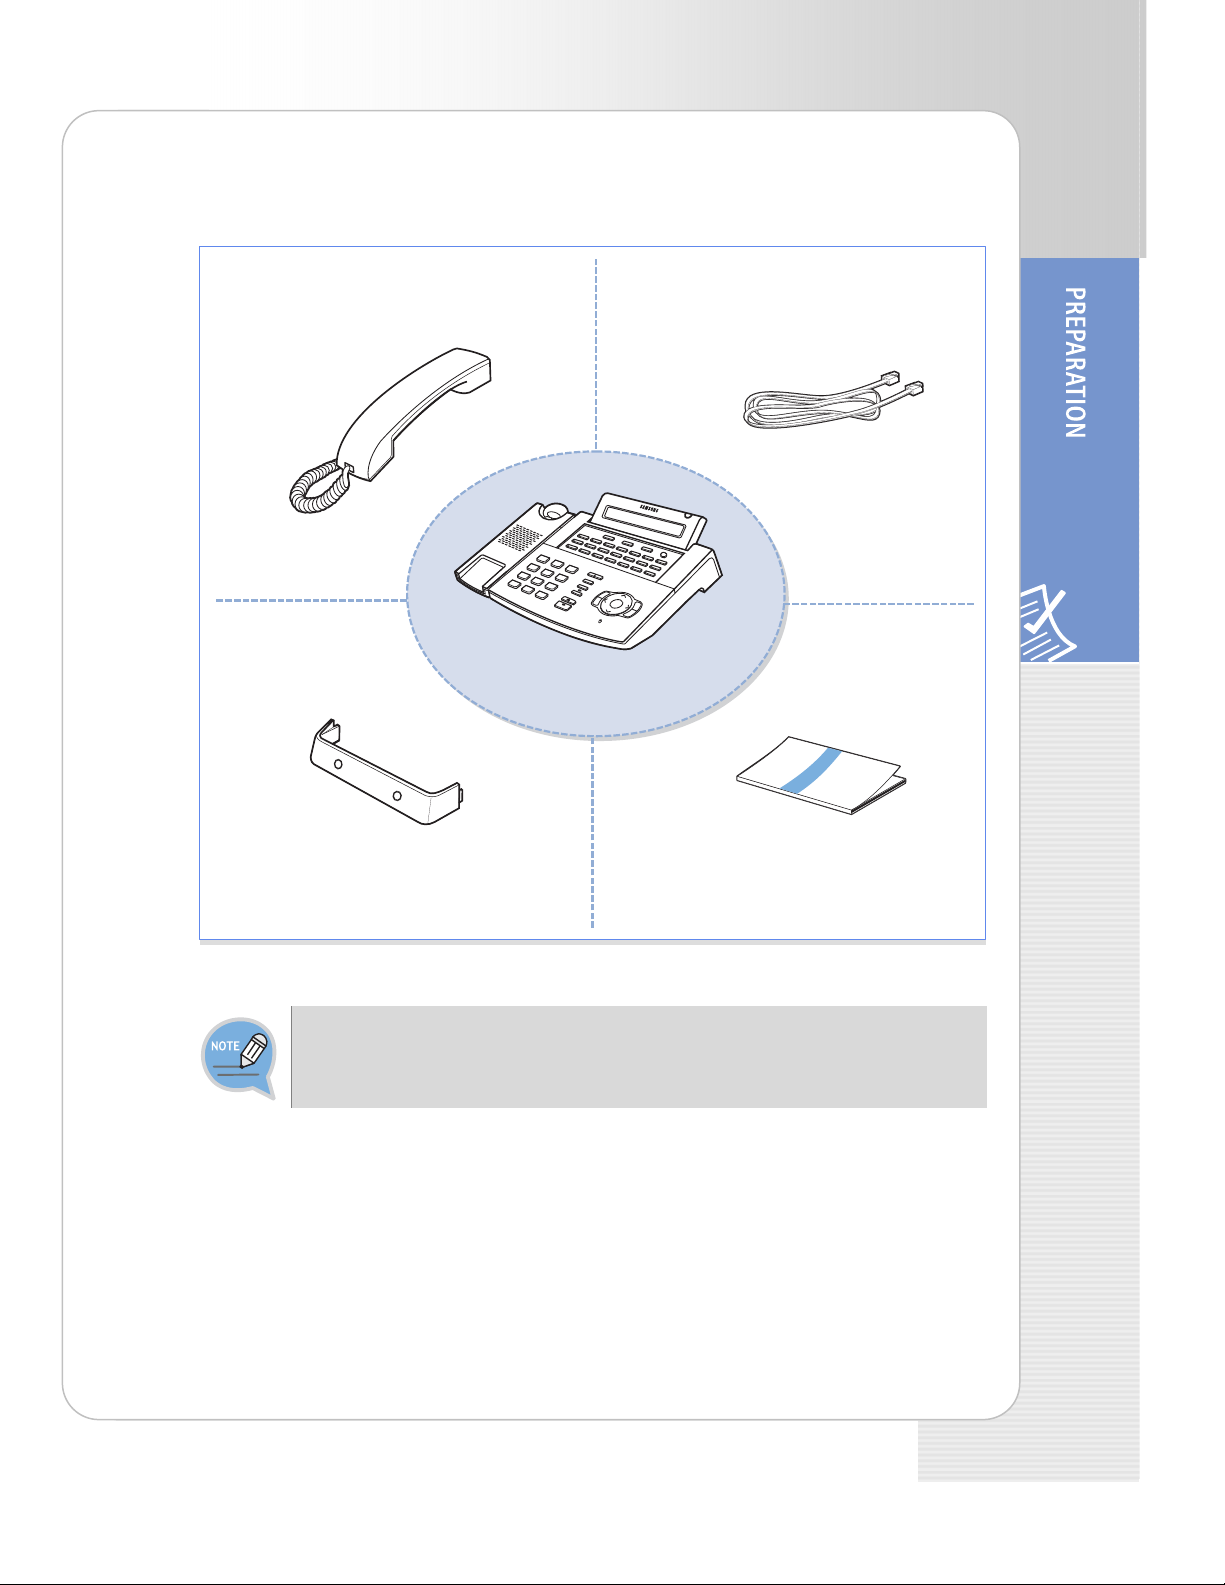
Checking Parts in the Package
Handset
LAN Cable
IP Phone(ITP-5121D)
IP phone Support
Manual
- If any item is missing or damaged, contact your dealer.
- The above figure shows ITP-5121D as a sample. If you purchase ITP-5114D/
ITP-5107S, the relevant phone is included.
© SAMSUNG Electronics Co., Ltd. 9
Page 10
r
p
r
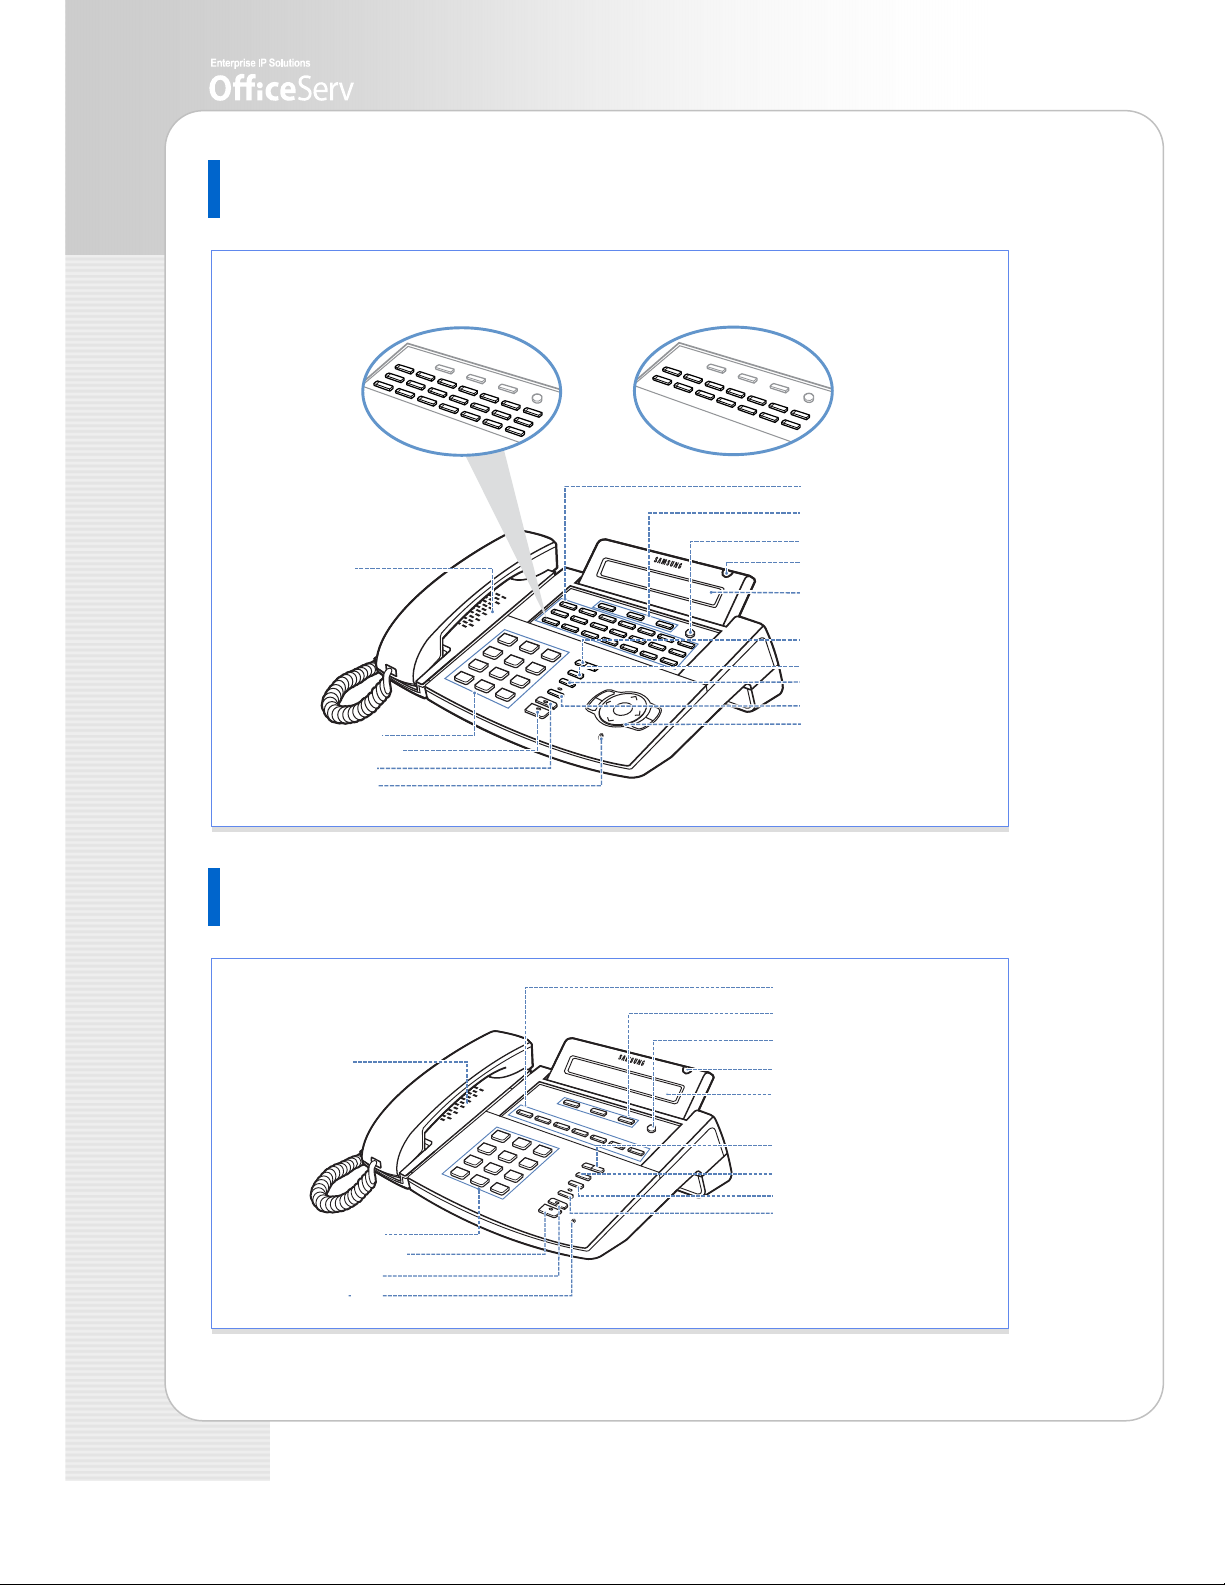
ITP-5121D/ITP-5114D (Front Side)
(Programmable Buttons: 21)
Speaker
Dial Buttons
S
eake
Hold Button
Microphone
Button
ITP-5121D
ITP-5114D
(Programmable Buttons: 14)
Programmable Buttons
Soft Buttons
Scroll Button
Status Indicato
LCD screen
Volume Button
Redial Button
Conference Button
Transfer Button
Navigation Buttons
ITP-5107S (Front Side)
Speaker
Dial Buttons
Speaker Button
Hold Button
Microphone
10 © SAMSUNG Electronics Co., Ltd.
Programmable Buttons: 7
Soft Buttons
Scroll Button
Status Indicator
LCD screen
Volume Button
Redial Button
Conference Button
Transfer Button
Page 11
ITP-5121D/ITP-5114D/ITP-5107S IP Telephone User Guide
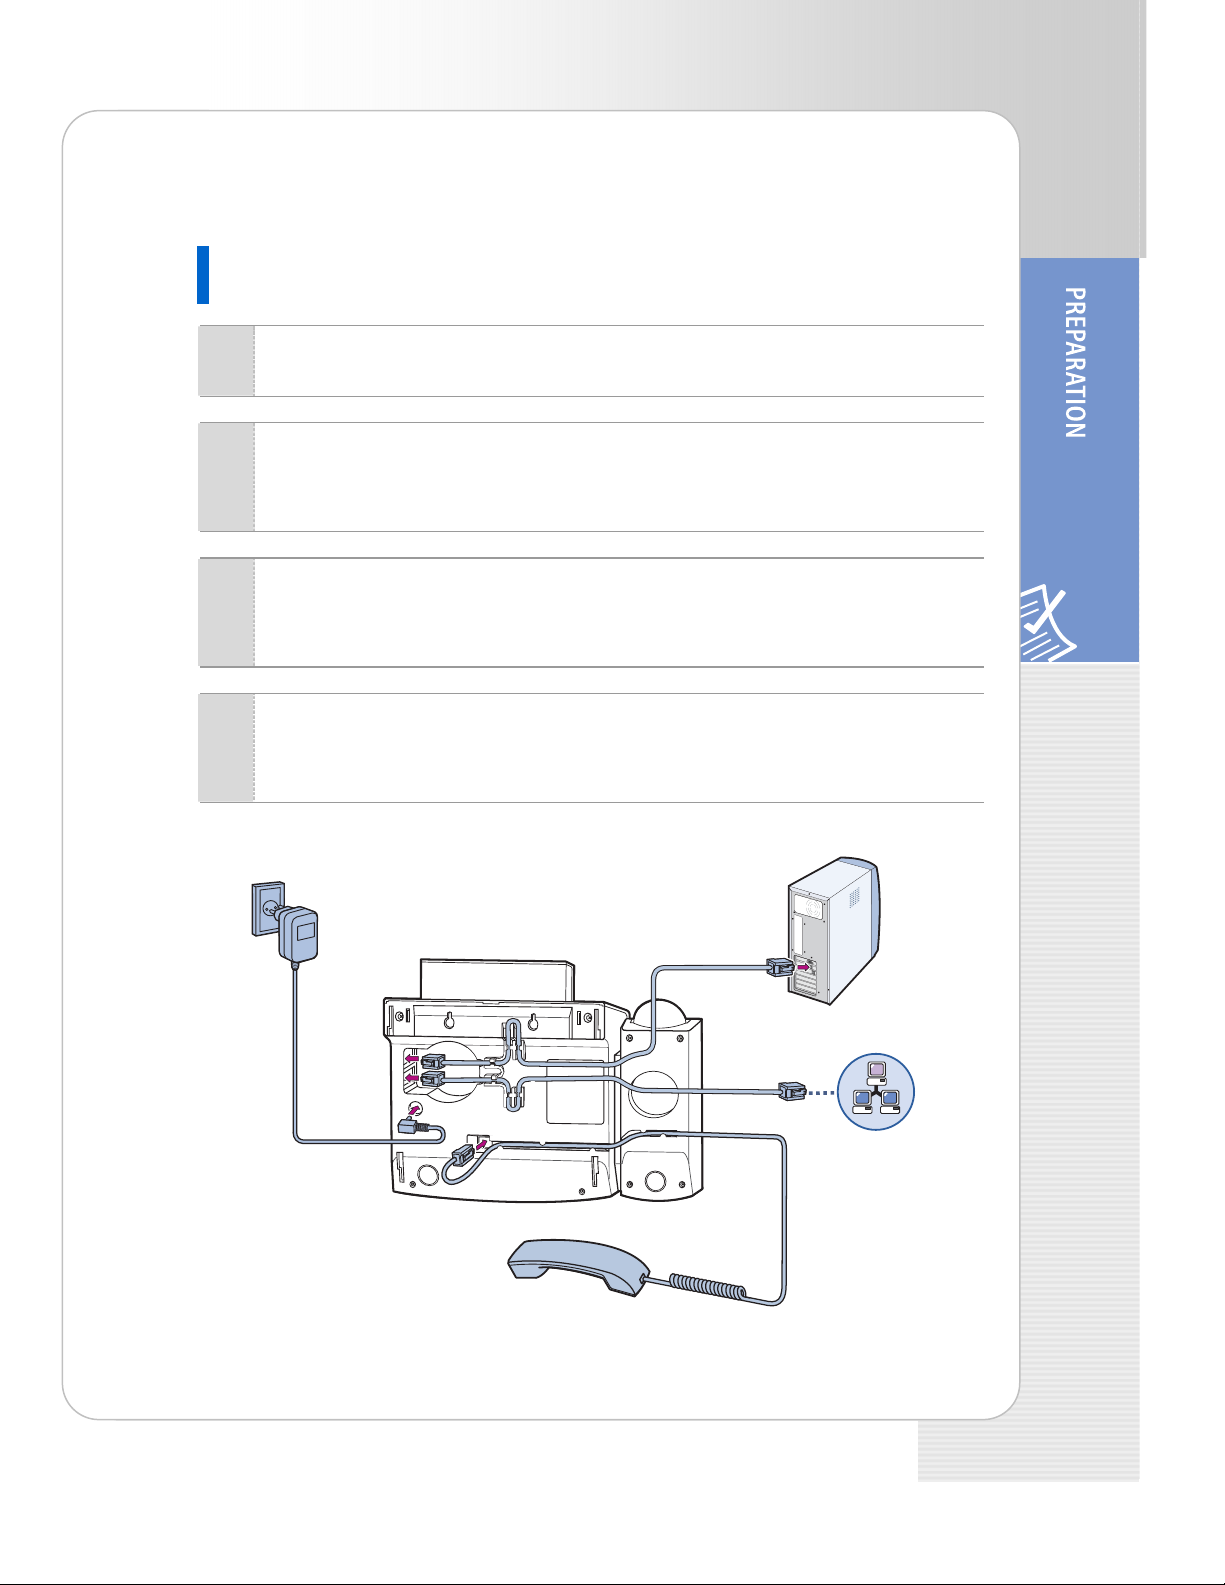
Installing the phone
ITP-5121D/ITP-5114D
Connect the handset to the handset connection port of the phone.
1
Connect the LAN cable with a network connection to the LAN connection port
2
of the phone. Make sure the LAN cable is not connected to the PC connection
port.
Connect one end of the LAN cable (provided with the phone) for PC
3
connection to the PC connection port of the phone, and the other end of the
cable to the network port of the PC.
Connect the power adapter to the power connection port of the phone.
4
Connect the plug of the power adapter to the power outlet. The phone will
boot up.
3
2
4
1
Network
© SAMSUNG Electronics Co., Ltd. 11
Page 12
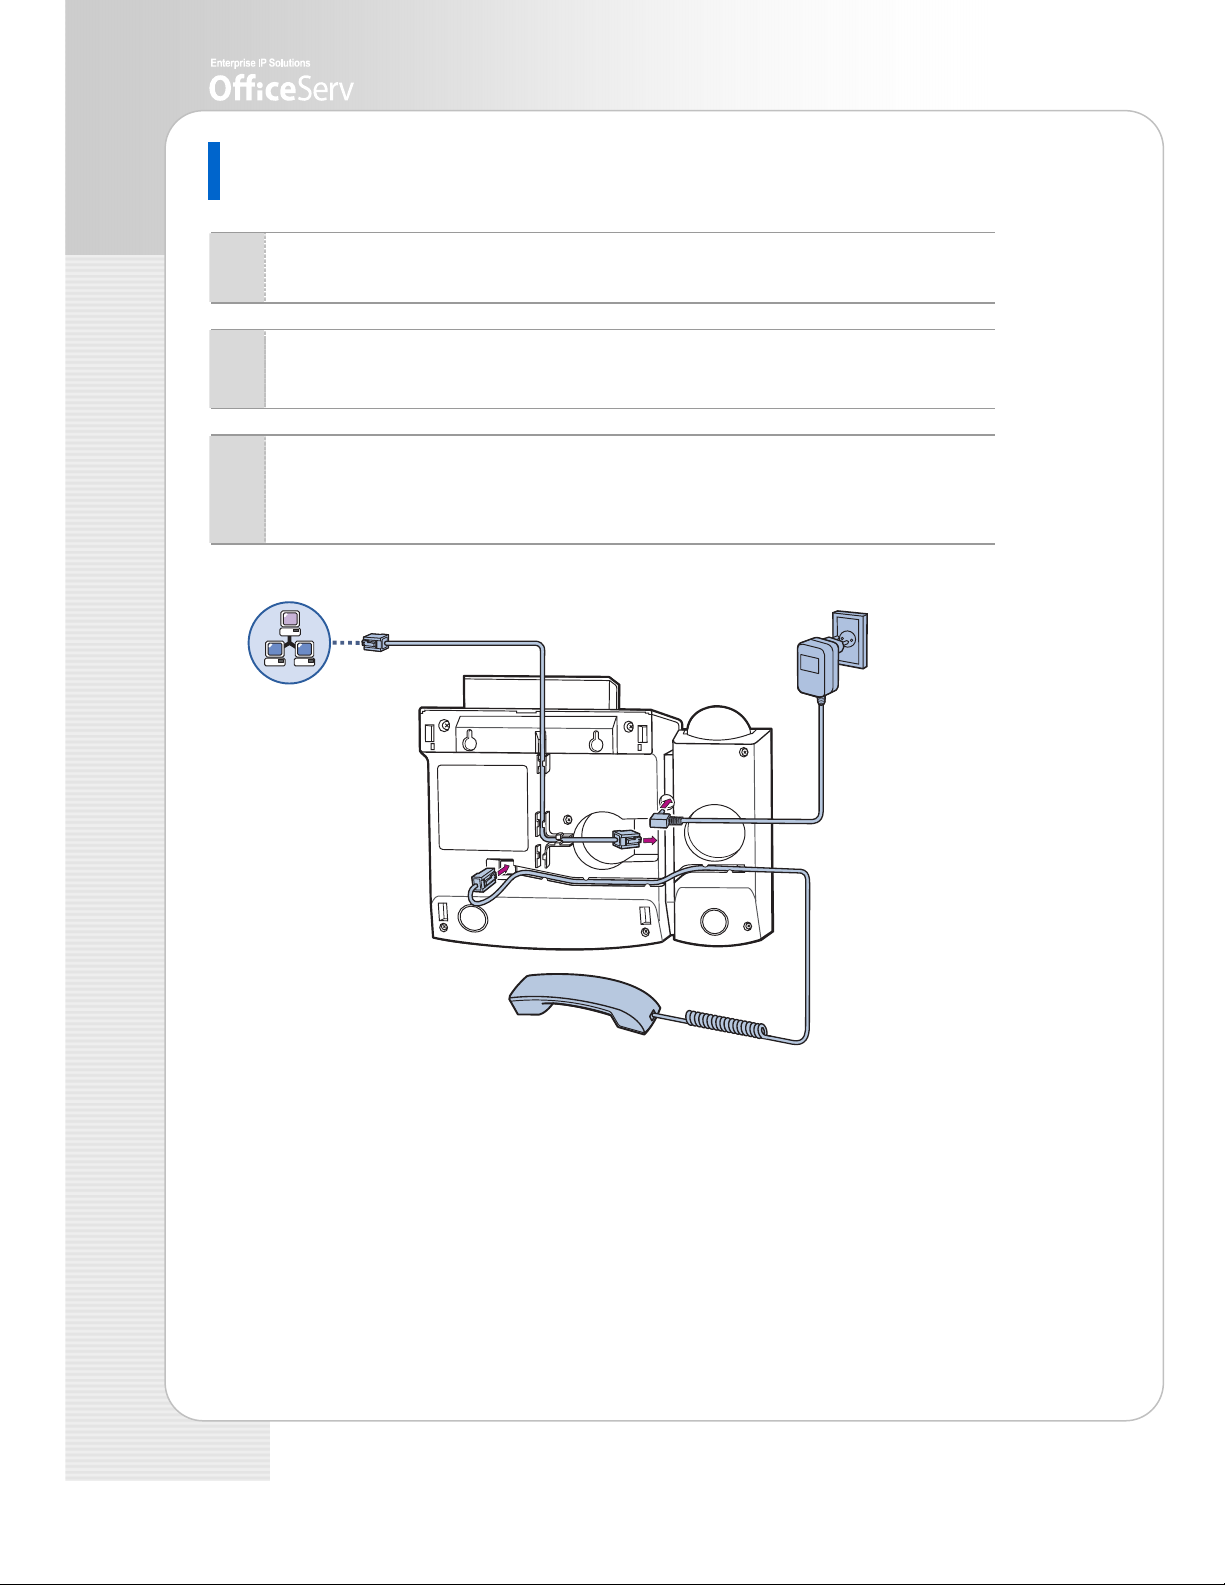
ITP-5107S
Connect the handset to the handset connection port of the phone.
1
Connect the LAN cable with a network connection to the LAN connection port
2
of the phone.
Connect the power adapter to the power connection port.
3
Connect the plug of the power adapter to the power outlet.
The phone will boot up.
2
Network
3
1
12 © SAMSUNG Electronics Co., Ltd.
Page 13
ITP-5121D/ITP-5114D/ITP-5107S IP Telephone User Guide
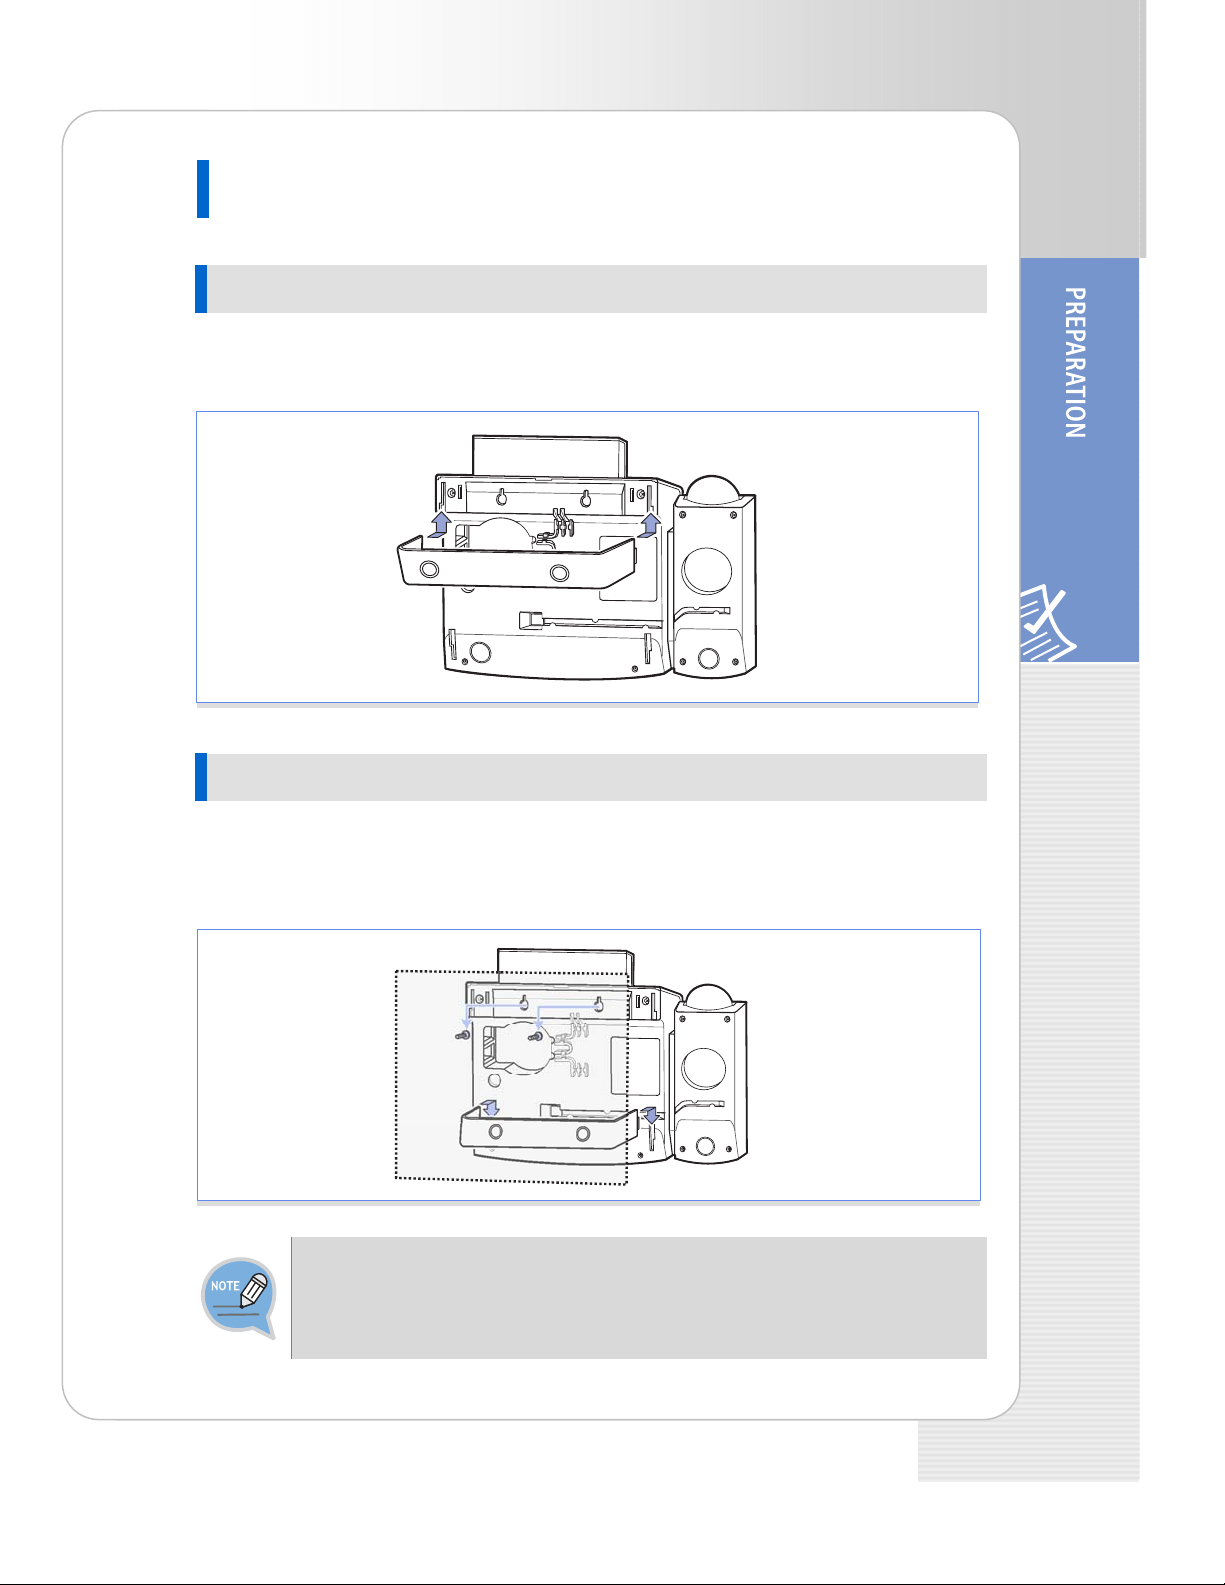
Installing the IP Phone Support
Using as Desktop Phone
Insert the both ends of the support into two upper grooves in the bottom of the phone
as shown in the figure below.
Using as Wall-Mounted Phone
Insert the both ends of the support into two lower grooves in the bottom of the phone
as shown in the figure below. Hang the two holes for wall-hanging in the upper part of
the bottom of the phone on the wall with screws attached.
- To use as a wall-mounted phone, mark the positions of the holes for screws on a
paper, apply the paper on the wall and fix screws to the correct positions.
- For the phone, ITP-5107S, push the both sides of the support lightly to insert into
the grooves.
© SAMSUNG Electronics Co., Ltd. 13
Page 14

To use as wall-mounted phone, the position of the handset hanger must be changed
to prevent the handset from being dropped. Take out the handset hanger, change the
hanger’s direction and insert again.
The above figure shows ITP-5121D as a sample. If you purchase ITP-5114D/
ITP-5107S, the relevant phone is included.
14 © SAMSUNG Electronics Co., Ltd.
Page 15

ITP-5121D/ITP-5114D/ITP-5107S IP Telephone User Guide
TTHHIINNGGSS YYOOUU SSHHOOUULLDD KKNNOOW
Adjusting Volume
The [TVolumeS] button is used for adjusting the volume of the handset, speaker,
and ringer.
Adjusting the Handset Volume
During a call using the handset, press the
1
[VolumeS] button to increase the handset
volume.
W
Press the [TVolume] button to decrease the
2
handset volume.
© SAMSUNG Electronics Co., Ltd. 15
Page 16

Adjusting Speaker Volume
During a call using the [Speaker] button, press
1
the [VolumeS] button to increase the speaker
volume.
Press the [TVolume] button to decrease the
2
speaker volume.
Adjusting Ring Volume
To increase the ring volume, press the
1
[VolumeS] button while the phone is ringing.
To decrease the ring volume, press the
2
[TVolume] button while the phone is ringing.
16 © SAMSUNG Electronics Co., Ltd.
Page 17

ITP-5121D/ITP-5114D/ITP-5107S IP Telephone User Guide
Entering Characters
Using the dial buttons of this phone, you can easily enter/edit, letters, numbers and
special characters.
Special Button Used
To enter letters of the alphabet the following special button is used.
‘A’ Button: Switch to capital/small letters when entering characters.
The ‘A’ button of the ITP-5121D/ITP-5114D/ITP-5107S phone is located on the first
button of the bottom row of the programmable buttons below the LCD screen.
ITP-5121D
An example for the ITP-5121D is shown.
‘A’ Button
© SAMSUNG Electronics Co., Ltd. 17
Page 18

ITP-5114D
An example for the ITP-5114D is shown.
‘A’ Button
ITP-5107S
An example for the ITP-5107S is shown.
‘A’ Button
18 © SAMSUNG Electronics Co., Ltd.
Page 19

ITP-5121D/ITP-5114D/ITP-5107S IP Telephone User Guide
Entering Characters
Press the [TVolumeS] button to move the cursor and insert or modify the desired
letter. Press the [TVolumeS] button and move the cursor one space to the right to
use the same dial button letters as the previous letter used.
Procedures for entering characters are described below
Enter the characters according to the table below. Press the ‘A’ button to switch
between capital and lower case letters.
Dial button
Dial frequency
1 2 3 4 5
0 < > . ) 0
1 Space ? , ! 1
2 A B C @ 2
3 D E F # 3
4 G H I $ 4
5 J K L % 5
6 M N O ^ 6
7 P Q R S 7
8 T U V * 8
9 W X Y Z 9
* : = [ ] *
# #
?
[
)
I
Space
.
<
]
_
;
&
,
>
@
+
”
!
%
/
^
{
→
:
$
=
(
}
’
Press the [#] button to enter special characters. Special characters are displayed in
the following order.
# ► space ► & ► ! ► : ► ? ► . ► , ► % ► $ ► - ► < ► > ► / ► = ►
[ ► ] ► @ ► ^ ► ( ► ) ► _ ► + ► { ► } ► | ► ; ► ” ► → ► ’
© SAMSUNG Electronics Co., Ltd. 19
Page 20
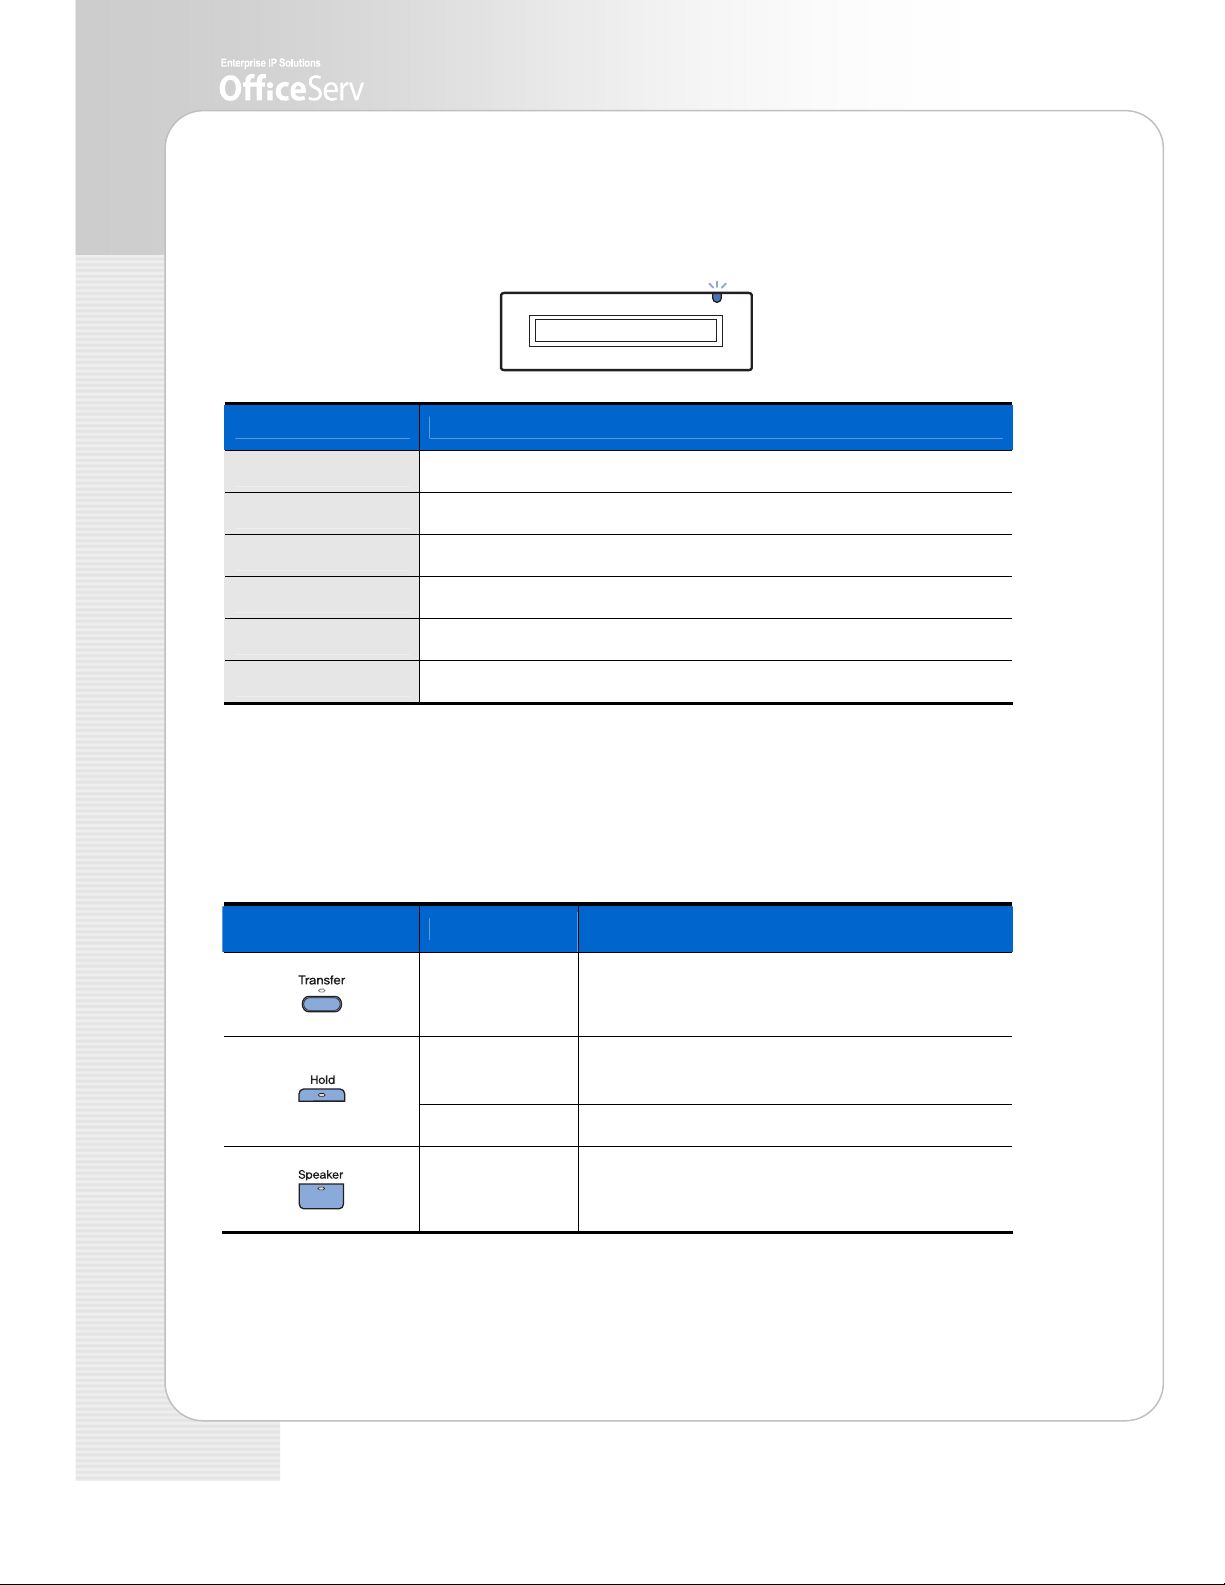
Telephone Status Indicator
The status indicator turns on or off according to the telephone status.
Button Function
Busy/Off-hook Steady red.
Extension Ring Flashing red.
Trunk Ring Flashing green.
Recalling Flashing yellow.
Message waiting Flashing red.
Calling Denied Fast flashing red within 1 second interval.
Button LED
The [Transfer] button, [Hold] button, and [Speaker] button have a LED that turns on or
off according to the phone status.
Button LED LED Status Function
Steady red When ‘Forward All Calls’ is set or a Follow me
Flashing red When the phone is locked for any outgoing
Steady red When the entire phone is locked.
Steady red When the phone is used as a speakerphone.
has been set.
Trunk call.
20 © SAMSUNG Electronics Co., Ltd.
Page 21
ITP-5121D/ITP-5114D/ITP-5107S IP Telephone User Guide
UUSSIINNGG TTHHEE FFEEAATTUURREESS
Making a Call
This function is used when you want to make a call to other stations or to make an
external call.
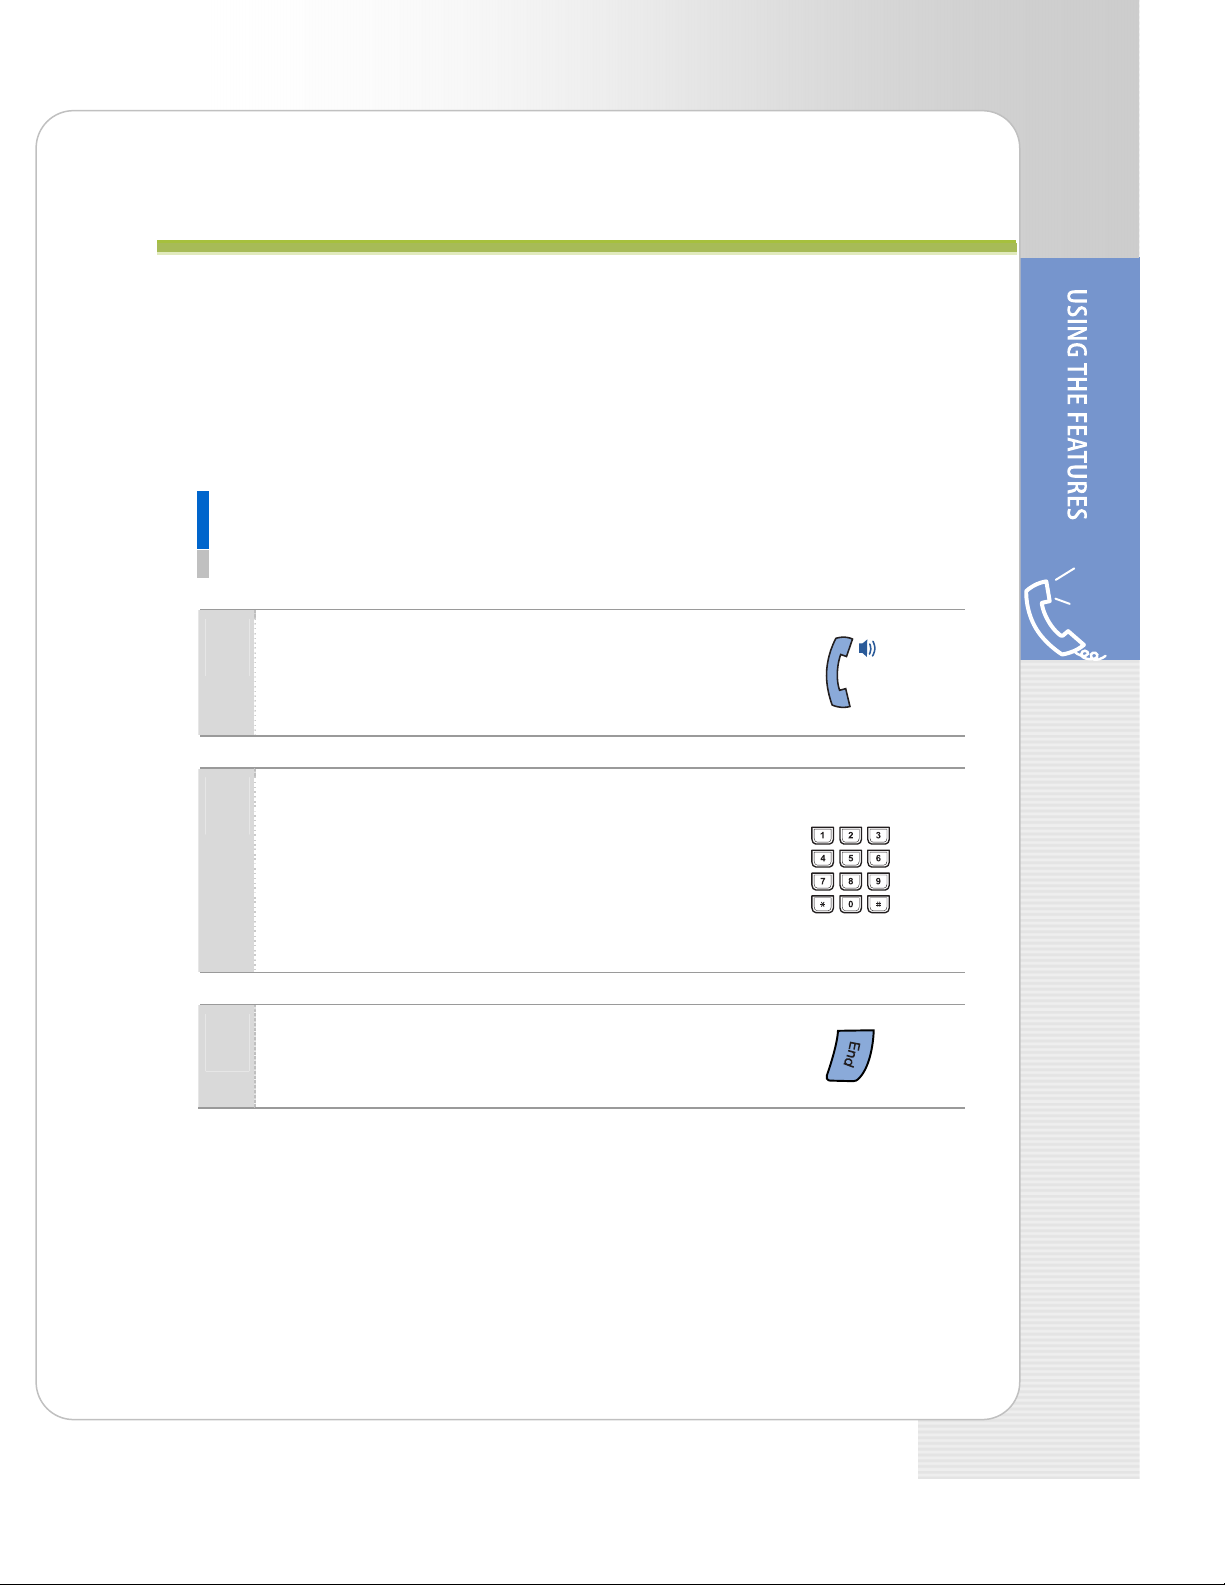
Calling an Extension Number
This function is used when you want to make a call to other stations.
Pick up the handset and check for dial tone.
1
Dial the extension number or station group
2
number.
Wait until the other party answers the call.
If a short signal tone(not a ringing tone) is heard,
the receiving extension has set up the Voice
Announce or Automatic Answer function.
Replace the handset or press the [End] button to
3
finish the call.
© SAMSUNG Electronics Co., Ltd. 21
Page 22

Calling an Outside number
This function is used when you want to make an external call.
Pick up the handset.
1
Press the trunk or trunk group button or dial the
2
trunk group access code(e.g., 0).
Dial the telephone number you want to call.
3
Finish your call by replacing the handset or
4
pressing the [End] button.
If the hot keypad feature is used, you can make an external call without picking up
a handset by dialling the trunk access code.
22 © SAMSUNG Electronics Co., Ltd.
Page 23

ITP-5121D/ITP-5114D/ITP-5107S IP Telephone User Guide
Using a Speakerphone
This function is used when you make a call with a speakerphone.
Press the [Speaker] button without lifting the
1
handset.
Dial the telephone number you want to call.
2
Or, press the trunk line call/extension call button
registered.
Once the called party answers the call, get
3
started with speaking to the called party.
- Lift the handset while speaking to turn off the speaker
and continue speaking using the handset.
Finish the call, by pressing the [Speaker] button.
4
If the LCR(Least Cost Routing) feature is enabled on the OfficeServ system, press
the [LCR] button or press the LCR access code.
New Call
This function allows you to disconnect the existing call and make a new call on the
same line.
Press the [NEW] button to disconnect your
1
existing call, wait for dial tone and then make a
new call on the same line. If this [NEW] button
does not appear on your phone, press the Soft
button corresponding to [NEW] on the LCD
screen.
© SAMSUNG Electronics Co., Ltd. 23
Page 24

Redial
This function allows you to redial the last external number dialed.
To redial the last telephone number you dialed, press the [Send] button for
approximately 2 seconds or press [1][9]. Pressing the [Redial] button will give you the
option to review up to 10 of your previously dialed external numbers.
Press the [Redial] button.
1
Use the direction buttons or the [TVolumeS]
2
button to select the required number to redial and
press the Soft button corresponding to [Dial].
To review details about the previous call prior to
3
dialling it, press the Soft button corresponding to
[NND].
To Press the [Redial] button twice to
4
automatically redial the last number you dialled.
- If the hot keypad feature is turned off, you have to lift up the handset first or
press the [Speaker] button before you begin using the redial feature.
- Redial does not apply to intercom calls.
24 © SAMSUNG Electronics Co., Ltd.
Page 25

ITP-5121D/ITP-5114D/ITP-5107S IP Telephone User Guide
Save Number with Redial
You can redial the saved number anytime.
To save the number you just dialled for later use,
1
press the [SAVE] button before hanging up.
This saved number can be redialled at any time
2
by pressing the [SNR] button or pressing [1]
The same external trunk line will be selected for
you.
- The saved telephone number will be stored in memory until you save another
number.
- Saved Number Redial does not apply to intercom calls.
►[7].
© SAMSUNG Electronics Co., Ltd. 25
Page 26
Answering a Call
This function is used when you want to answer an intercom call or external call.
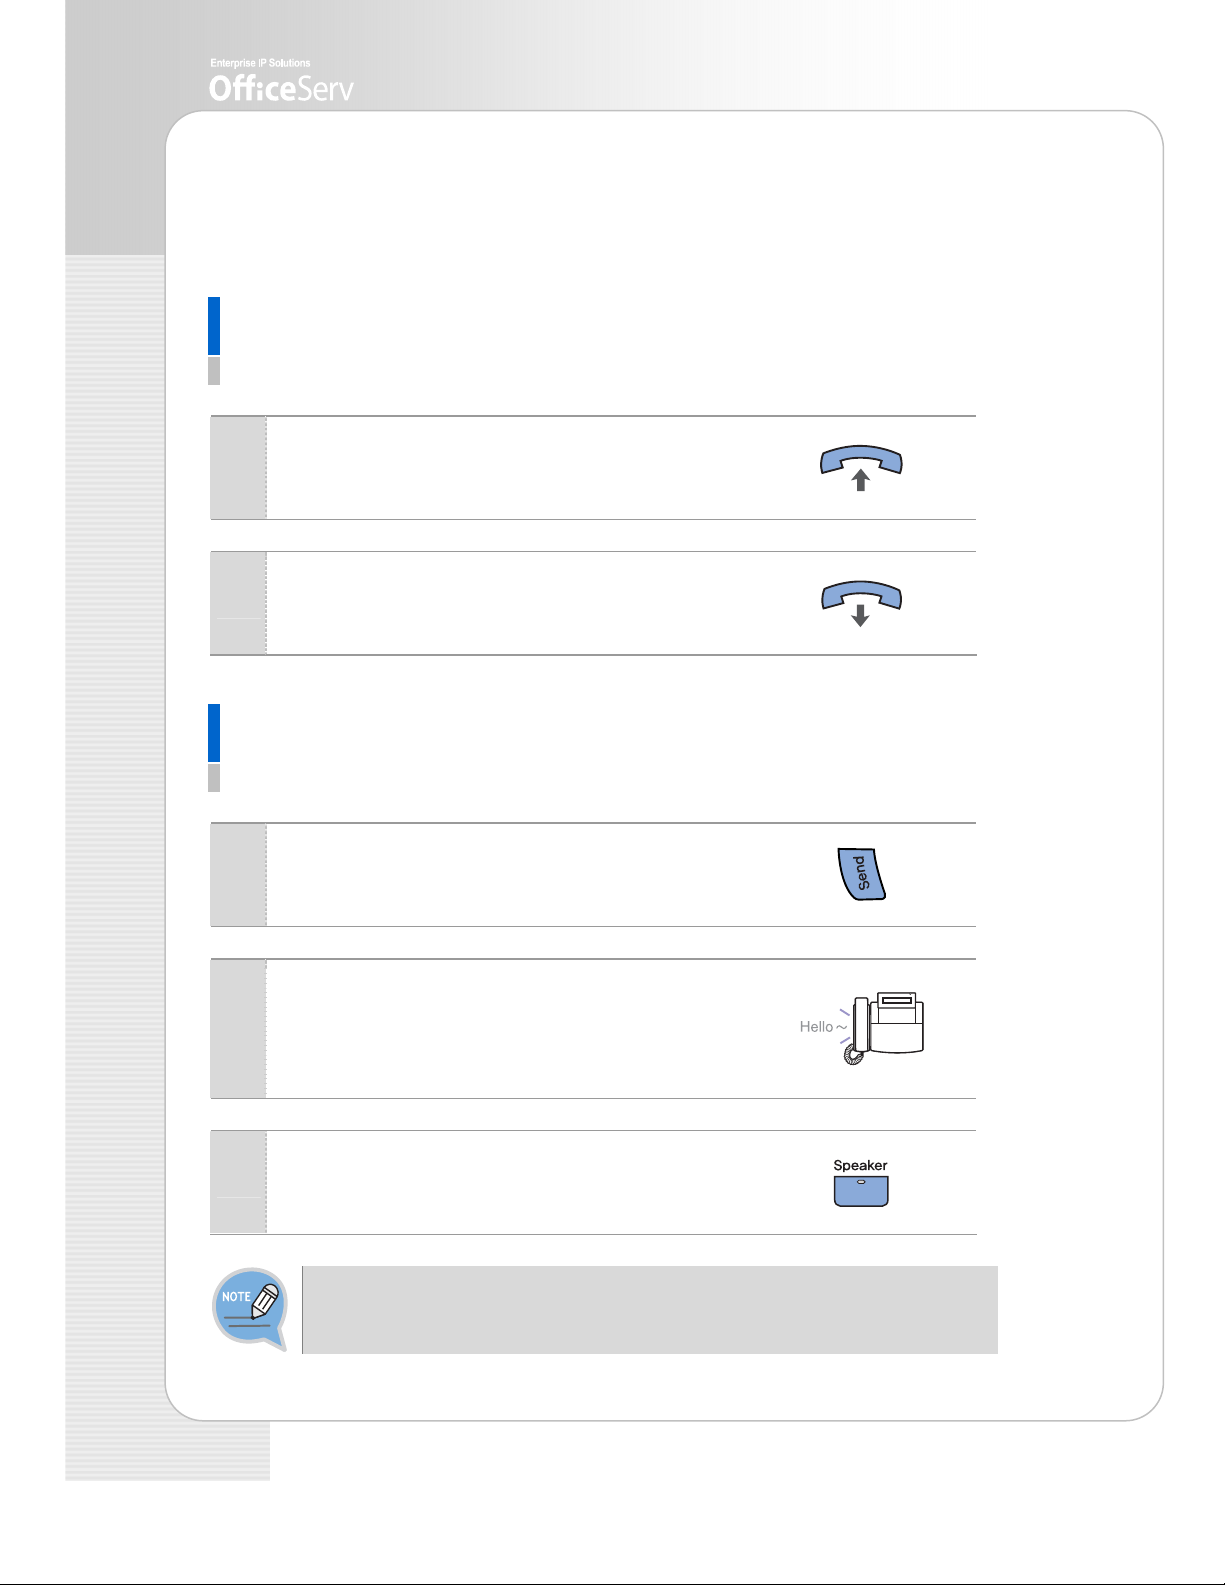
Using a Handset
This function is used when you answer a call with a handset.
When the phone rings, pick up the handset.
1
To finish the call replace the handset.
2
Using a Speakerphone
This function is used when you answer a call with a speakerphone.
Press the [Send] button without lifting the
1
handset.
Listen to the speaker to hear a voice of the other
2
party and speak through the microphone.
- You can switch from the speakerphone to the handset
by lifting the handset.
Finish the call, by pressing the [Speaker] button.
3
Press the [TVolumeS] button while the phone is ringing to adjust the ringer
volume.
26 © SAMSUNG Electronics Co., Ltd.
Page 27

ITP-5121D/ITP-5114D/ITP-5107S IP Telephone User Guide
Call Pickup
This function is used when you pickup a call that is ringing at another station.
If a call rings on another station and you know the station number, you can answer the
call on your phone.
A call is ringing on another station.
1
Pick up the handset and listen for the dial tone.
2
Press [6]►[5].
3
Dial the station number that is ringing.
4
© SAMSUNG Electronics Co., Ltd. 27
Page 28

Features Used During a Call
These convenient functions may be used during a call.
Hold an Intercom Call
You can put the other party on hold if another intercom call arrives or you wish to use
both hands for another task and resume the call later.
Press [Hold] button and replace the handset to
1
put the current call on hold.
- The intercom call is placed into exclusive hold and
cannot be retrieved at another station.
To call again, pick up the handset, and press
2
the [Hold] button.
28 © SAMSUNG Electronics Co., Ltd.
Page 29

ITP-5121D/ITP-5114D/ITP-5107S IP Telephone User Guide
Hold an Outside Call
You can put the other party on hold if another call arrives or you wish to use both
hands for another task and resume the call later.
While you are engaged in a conversation, press
1
the [Hold] button. Then the call on hold will flash
green on your phone and the call will flash red on
other stations.
To resume your conversation with the held call,
2
press the button with the flashing green LED.
Mute
During a call you can mute the handset transmitter or microphone while still listening
to the other party.
Press the [MUTE] button or the soft button
1
corresponding to [MUTE] on the LCD screen.
Then, the [MUTE] button will turn on red.
Press the blinking [MUTE] button to clear
2
the mute function.
© SAMSUNG Electronics Co., Ltd. 29
Page 30
Transferring a Call
While on an external call you can transfer the call to another internal or outside party.
You can transfer your call to another extension or return to the outside party.
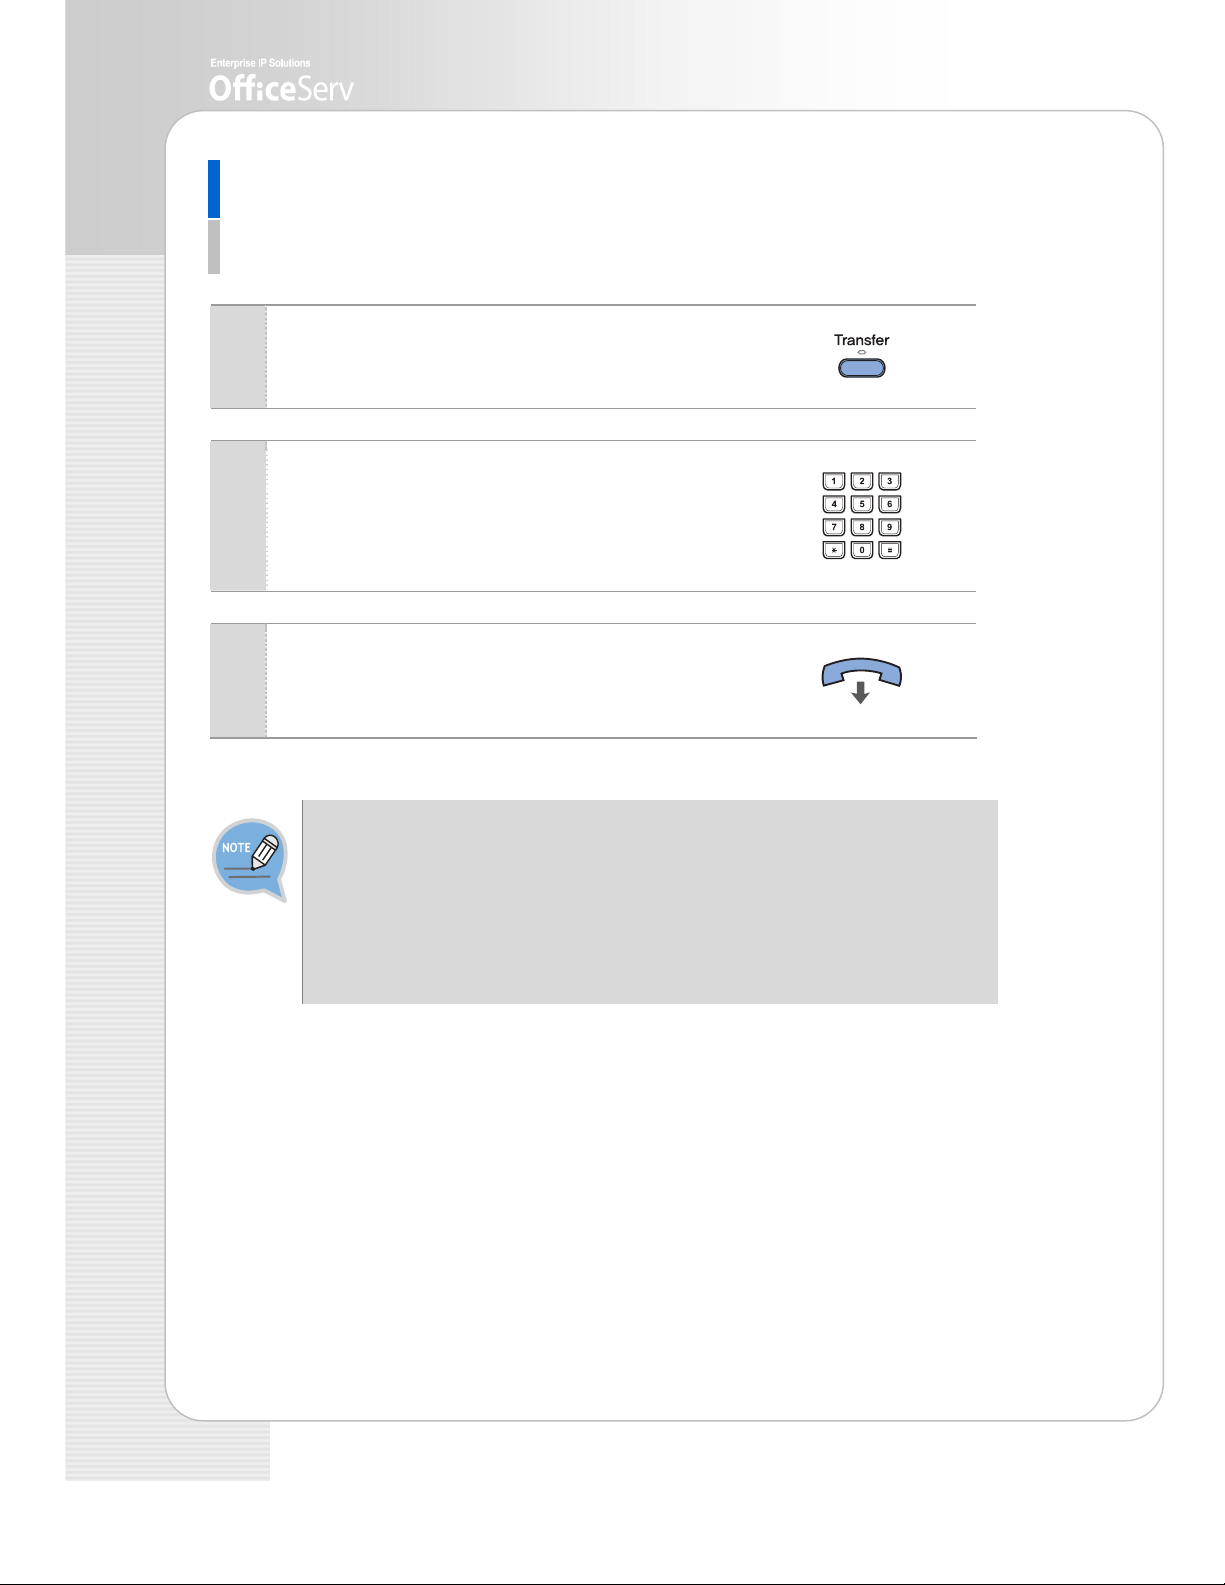
While on a call, press the [Transfer] button.
1
Your call is automatically put on transfer hold.
Dial an extension or group number. Or, press the
2
[DSS] button or station group button.
Your call will be automatically put on transfer
hold.
For blind transfer, hang up when you hear
3
ringing. Or, wait for the called party to answer
and advise him/her of the call. Then hang up.
- When you are transferring a call to a station programmed for Voice Announce or
Auto Answer, the transferred call will always ring.
- After the internal party answers, you may alternate back and forth between the
parties by pressing the [Transfer] button.
- You cannot transfer an Intercom call by pressing the [DSS] button for the station
required. You must press the [Transfer] button first and then press the [DSS]
button or dial the destination extension number.
30 © SAMSUNG Electronics Co., Ltd.
Page 31

ITP-5121D/ITP-5114D/ITP-5107S IP Telephone User Guide
Conference Calls
You can make a conference call of up to 5 parties including yourself. The OfficeServ
system also allows each station to pre assign up to 5 conference groups so you can set
up a conference call by pressing a single [Group Conference] programmable button.
Refer to your System Administrator to confirm that this option is available to you.
Press the [Conference] button while engaged in
1
a conversation. You will hear conference tone.
Make another call, either intercom or external.
2
Press the [Conference] button and you will hear
conference Tone.
Make another call to add additional parties or
3
press the [Conference] button to join all parties
into the conference. Then, Repeat the last step,
until all other parties required are connected.
To drop a person from your conference call,
4
press the [Conference] button and dial the
extension or trunk number that is to be dropped.
Press the [Conference] button again to reestablish the conference.
When attempting to add another person to the conference and you are not able to
reach the desired person, simply press the [Conference] button again.
© SAMSUNG Electronics Co., Ltd. 31
Page 32

AAPPPPLLIICCAATTIIOONN M
MEENNUUSS
Navigation Buttons
The ITP-5121D and ITP-5114D IP phones have navigation buttons for convenient use of
the IP phone functions. This chapter introduces the functions available using the
navigation buttons and procedures for using the various applications.
Menu Button
The main menu is displayed when the [Menu]
1
button is pressed in the idle state, You can select
from the presented options.
This menu is displayed when the [Menu] button
2
is pressed when dialling mode or when
transferring calls. This allows you select to select
and perform a function.
Calls will be maintained even if the [Menu] button is pressed while you are talking.
If you press the [End] button or the other buttons except the Navigation buttons in
menu mode, you will automatically exit from the menu mode and return to the idle
screen.
32 © SAMSUNG Electronics Co., Ltd.
Page 33

ITP-5121D/ITP-5114D/ITP-5107S IP Telephone User Guide
Send Button
If you press the [Send] button while the [OUTGOING LOGS], [INCOMING LOGS],
[SPEED DIAL], or [DIRECTORY DIAL] function is selected, the corresponding number
will be dialed.
- If you press the [Send] button in idle mode, you enter the [OUTGOING LOGS] menu.
- If you press the [Send] button in dial mode, you enter the [OUTGOING LOGS] menu
regardless of the numbers previously dialed.
- If you press the [Send] button while a call is arriving(ringing status), you will answer
the call on the speakerphone.
End Button
This button is used to disconnect calls or to exit the phone menus and return
to the idle display.
Cancel button
The [Cancel] button is used in menu mode to move to the previous level.
If the [Cancel] button is pressed when you first enter menu mode, the menu mode is
exited.
The [Cancel] button is also used to delete the characters previously entered when
entering numbers or characters.
Enter button
This button is used in the menu mode to select or save the item that the cursor is
indicating. This button may also be used for the [NND(Name Number Display)] button
when receiving calls.
- The [NND] button displays ‘caller number’, ‘caller name’, and ‘received time’ when
you press the button, if the caller information is available.
© SAMSUNG Electronics Co., Ltd. 33
Page 34
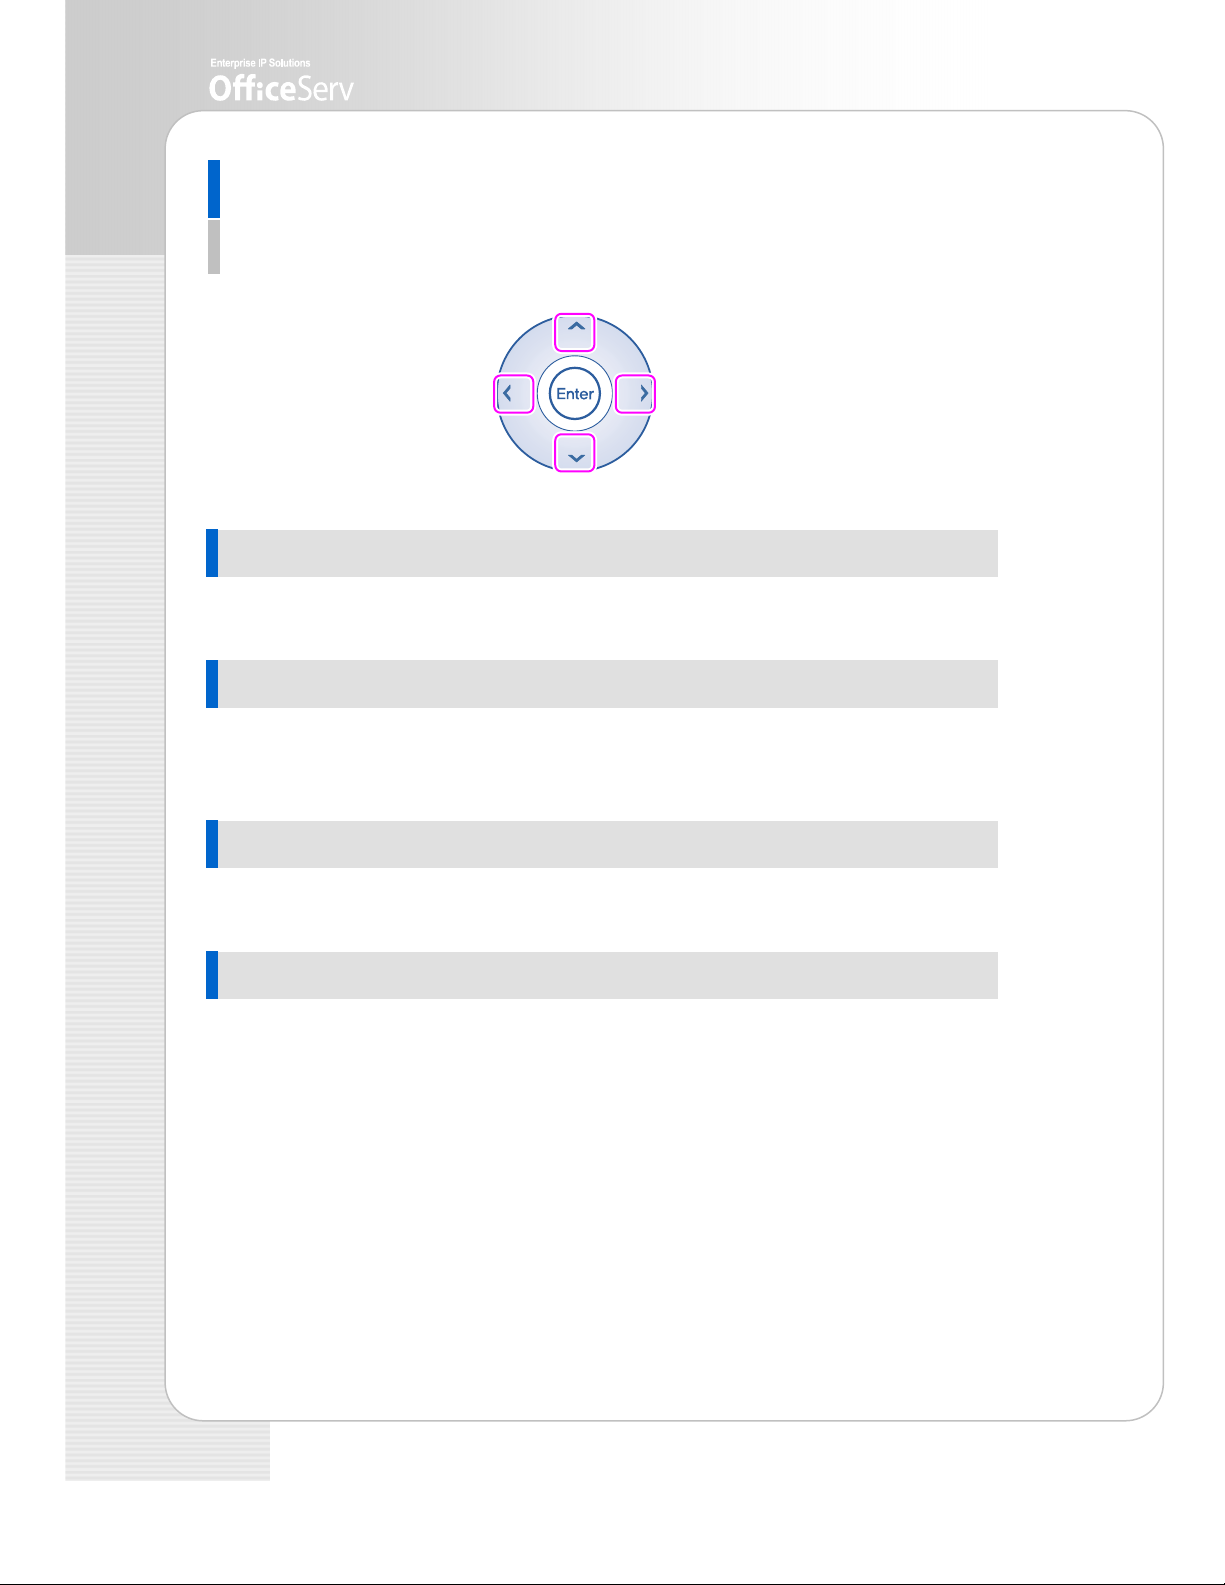
Direction button
These buttons are used when editing menu entries, or when moving between menu
items.
1 [ ∧ ] button is used
Used for moving to the previous menu.
1
24
3
2 [
>
] button is used
In cases where the phone number is long, this button is used for displaying the rear
part of the number which is not displayed on the LCD screen.
3 [ ∨ ] button is used
Used for moving to the next menu.
4 [
<
] button is used
In cases where the phone number is long, this button is used for displaying the front
part of the number which is not displayed on the LCD screen.
34 © SAMSUNG Electronics Co., Ltd.
Page 35
ITP-5121D/ITP-5114D/ITP-5107S IP Telephone User Guide
Entering Application Menus
When the phone is in the standby mode, press the [Menu] button. The main application
menu will appear on the LCD screen.
How to Select Menu
To select a menu items, you can use the navigation direction buttons, [TVolumeS]
button or the dial buttons.
- Use the [
preferred menu.
- You can select the menu directly by pressing the dial button corresponding to the
menu number.
- Press the [Enter] button to select the menu underlined by the cursor to expose sub-
menus.
- Press the [End] button to exit the menu and return to the idle screen.
- When buttons other than the navigation buttons are pressed, the menu mode will
end.
∧]/[∨] direction buttons or the [TVolumeS] button and move to the
When your station is called while in menu mode, your phone will appear as busy to
the calling party.
© SAMSUNG Electronics Co., Ltd. 35
Page 36

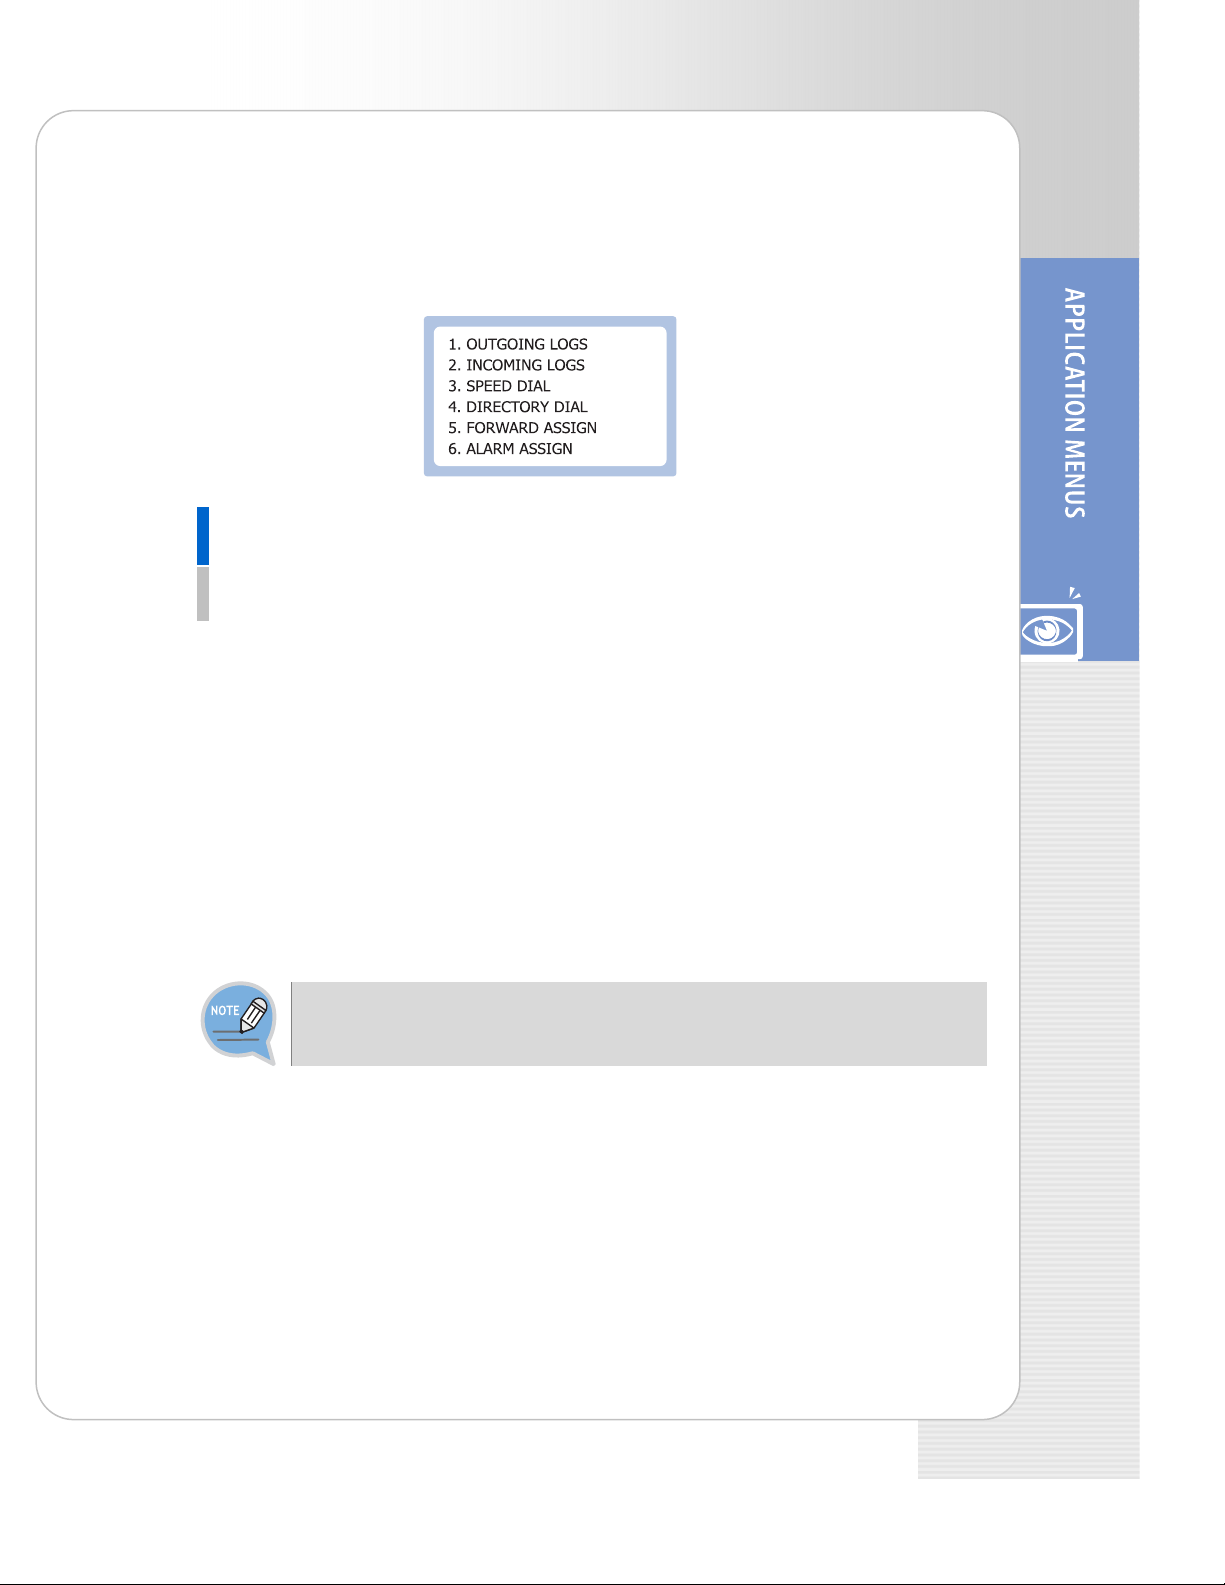
Application Menus
The main application menu will appear on the LCD screen, by pressing the [Menu]
button.
1. OUTGOING LOGS
2. INCOMING LOGS
3. SPEED DIAL ►
4. DIRECTORY DIAL ►
5. FORWARD ASSIGN ►
6. ALARM ASSIGN
- To use the ‘3. SPEED DIAL’ and ’5. FORWARD ASSIGN’ menu function you should
consult your System Administrator.
- If the [Transfer] button is pressed, the available menus are ‘1. OUTGOING LOGS’,
‘2. INCOMING LOGS’, ‘3. SPEED DIAL’ and ‘4. DIRECTORY DIAL’.
36 © SAMSUNG Electronics Co., Ltd.
Page 37

ITP-5121D/ITP-5114D/ITP-5107S IP Telephone User Guide
Possible problems and troubleshooting steps for your phone are described below.
Check the troubleshooting steps before contacting your Authorized Samsung Reseller.
The phone does not
boot when the power is
connected.
The phone does
function after booting.
TTRROOUUBBLLEESSHHOOOOTTIINNGG
- Check to confirm that the data network cable is
connected to the LAN socket on the phone
properly.
- Check to confirm that the connected power
▶
adaptor is the one supplied with the Phone.
- Disconnect the power adaptor from the phone,
and connect it again after about 10 seconds.
(Refer to ‘Connecting Lines to the Phone’
section of ‘Preparation’ in this guide.)
- If the screen of the phone displays ‘IP conflict’,
you should consult your Network
Administrator.
This indicates another network device(e.g. PC)
▶
is using the same IP address as your phone.
- If the screen of the phone displays ‘ID conflict’,
you should consult your System Administrator.
This indicates the user ID for your phone is
already in use by another phone user.
Dial tone is not heard
when you lift the
handset or press the
[Speaker] button.
Nothing appears on the
LCD screen while the
phone is being used.
- Check that the data network cable and the
data cable to your PC are connected correctly
to the LAN and PC sockets respectively.
▶
- Check that the network environment is setup
correctly in the phone.(You should consult
your System Administrator.)
Check that the data network cable is correctly
connected to the LAN socket on the phone.
▶
(Refer to ‘Connecting Lines to the Phone’
section of ‘Preparation’ in this guide.)
© SAMSUNG Electronics Co., Ltd. 37
Page 38

The Phone does not
ring and volume is too
low.
Conversation quality is
reduced due to noise
and echo.
Excessive echo is
emitted during a page
announcement or with
Auto Answer set.
An alarm does not ring
at the programmed
time.
Press the Volume [TVolumeS] button to adjust
the volume.(Refer to ‘Volume Adjustment’
▶
section of the ‘Things You Should Know’ section
in this guide.)
If you are using the speakerphone, lift the
handset and try speaking.
▶
If phones are too close to each other, sound
from one speaker might echo during a page or
▶
on auto answer call. Maintain a reasonable
distance(about 1 m) between phones.
- Check the current time is set on the Phone
correctly. If the current time setting needs to
be changed, contact your System
▶
Administrator.
- Check if an alarm is set.(You should consult
your System Administrator.)
Caller IDs are not
displayed on the LCD
screen.
- Confirm with your System Administrator that
the caller ID service is available from your
telephone company.
- If the caller blocks the sending of their caller
ID, the caller ID will not be displayed.
- If the caller makes a call from an area where
the caller ID cannot be provided
(e.g., international calls), the caller ID will not
▶
be displayed.
- If the caller makes a call from a public phone,
the caller ID will not be displayed.
- If the caller ID received from the Telephone
Company is corrupt, the caller ID will not be
displayed.
- If the Telephone Company does not send a
caller ID, the caller ID will not be displayed.
38 © SAMSUNG Electronics Co., Ltd.
Page 39

ITP-5121D/ITP-5114D/ITP-5107S IP Telephone User Guide
AANNNNEEXX
Product Specifications
The specifications and features of the ITP-5121D/ITP-5114D/ITP-5107S IP phone are
as follows.
Items Specification
Model ITP-5121D ITP-5114D ITP-5107S
Size(mm) 235(width) 206(length)
119(height)
Weight(kg) 1.0
Operating
Temperature(℃)
Operating
Humidity(%)
10~90
235(width) 206(length)
100(height)
0~45
Input Power AC 100 V~250 V/50~60 Hz
Output Power DC 5 V/3 A,
36~57 V/400 mA
Number of the
[Programmable]
buttons
Navigation Button
LCD 2 Line LCD(24 characters long: English)
21 14 7
© SAMSUNG Electronics Co., Ltd. 39
Page 40

 Loading...