

Page 1
User Manual
ODY-1719
Page 2
1
We hope you enjoy your purchase of the
T.E.D. and that this user manual helps
you get your drone off the ground and
taking photos!
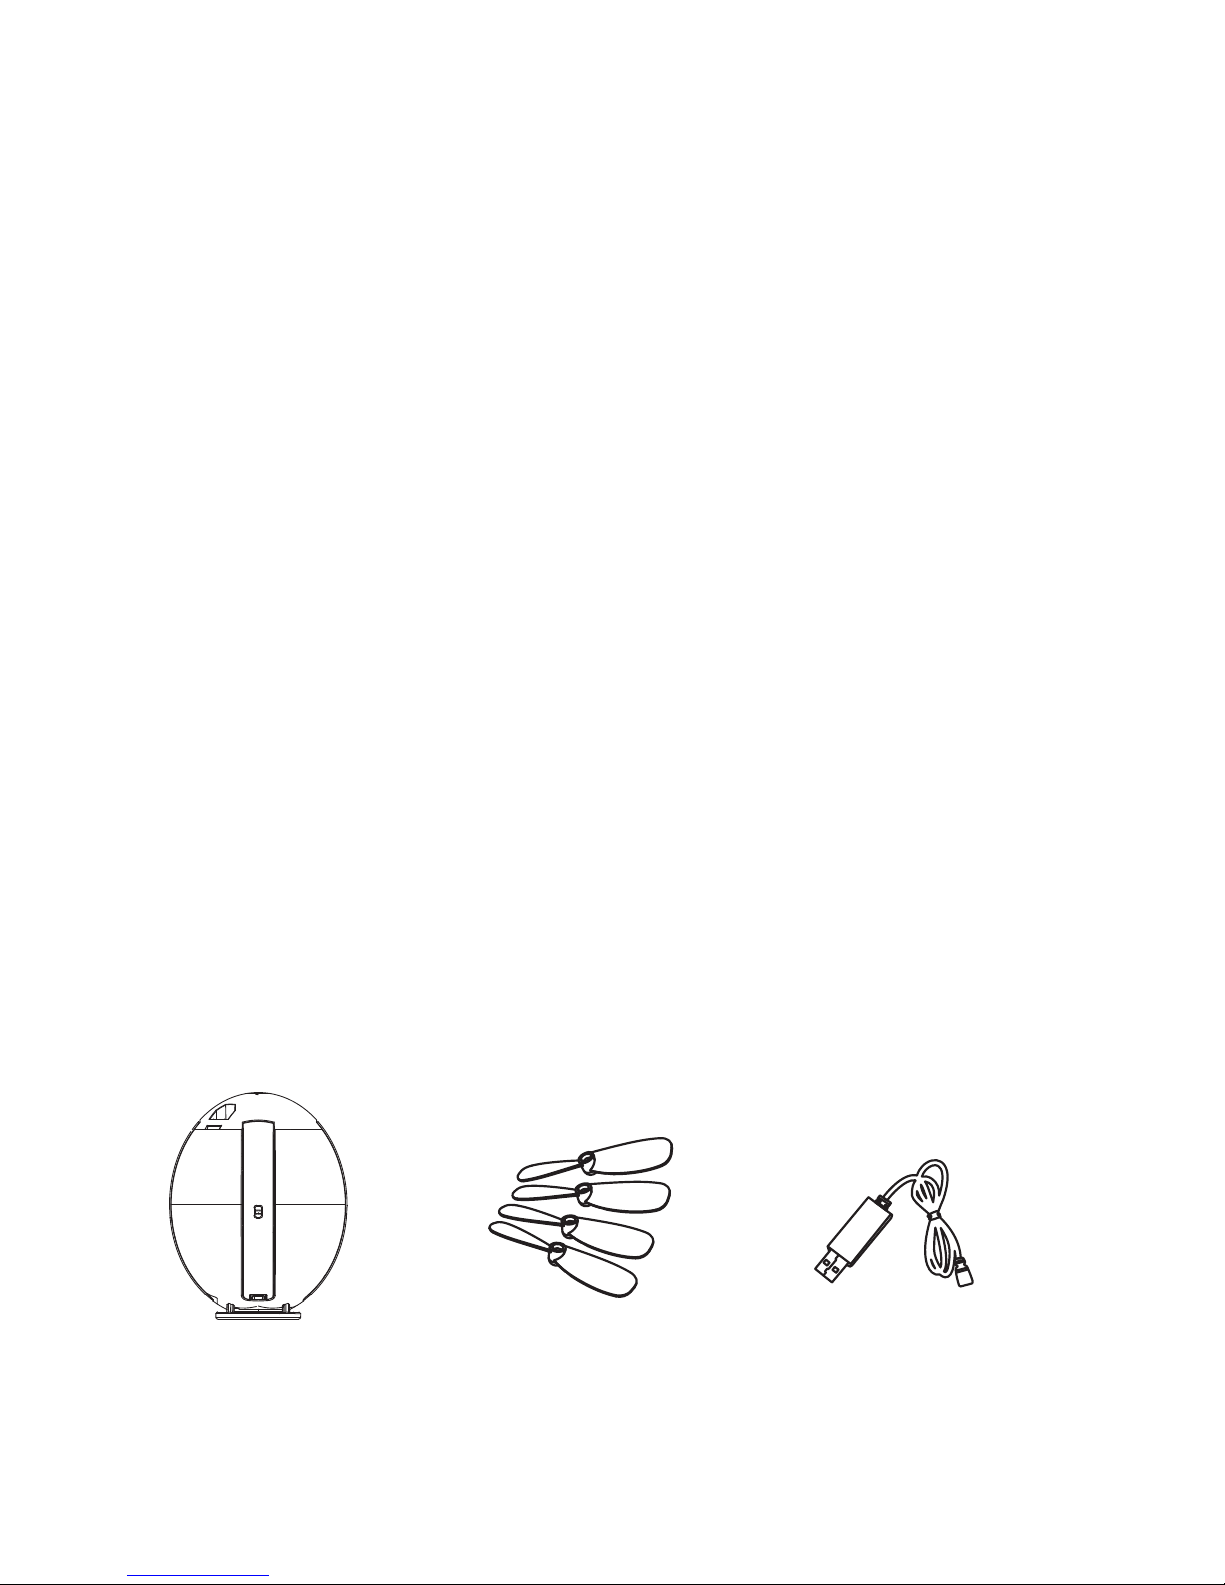
Included Contents
1. T.E.D. Unit 2.4 Ghz
2. Rechargeable 3.7v Lithium Battery
3. USB Charging Cable
4. Instruction Manual
5. Quickstart Guide
6. 4x Replacement Blades
1x Drone USB charger
4x Replacement
Blades
Page 3

2
Specifications
Charging Time: About 40 minutes
Flying Time: About 6-7 minutes
Weight: 1.1 Ounce
Controlling Distance:
About 20 meters
Battery for Quadcopter:
3.7V 200mAh
Power / Blade Release
• short press to release blades
• hold down for ON/OFF
Motor
Camera
Blade
Page 4

3
Flight Preparation
Arm Folding
Please Note: The T.E.D.’s arms and propellers are folded within the body and you must
use the bottom button on the underside the
drone to pop the arms out.
Step 1: Remove your drone from its box and
turn it over.
Step 2: You will see a small circular shaped
button. Press this button once, a short press.
Step 3: The arms of the drone will pop out.
Please Note: We suggest when putting the
drone away to align the propeller blades with
the arm and gently push each arm into place.
Propeller Installation
Please Note: There are faint letters on the
underside of the propellers which will help
you distinguish blade from blade. The top left
Page 5

4
and back right blades are A and match with
the A blades and the bottom left and top right
are B and match with the B blades.
Please ensure proper installation of the
propellers to fly the drone.
Step 1: The drone comes with four replacement propellers which should be used in
case a propeller is lost or breaks due to an
accident.
Step 2: Match your propellers to each wing
by the corresponding letter: A, B, and B, A
Step 3: Place each propeller on the small pin
on the corresponding wing.
Page 6
5
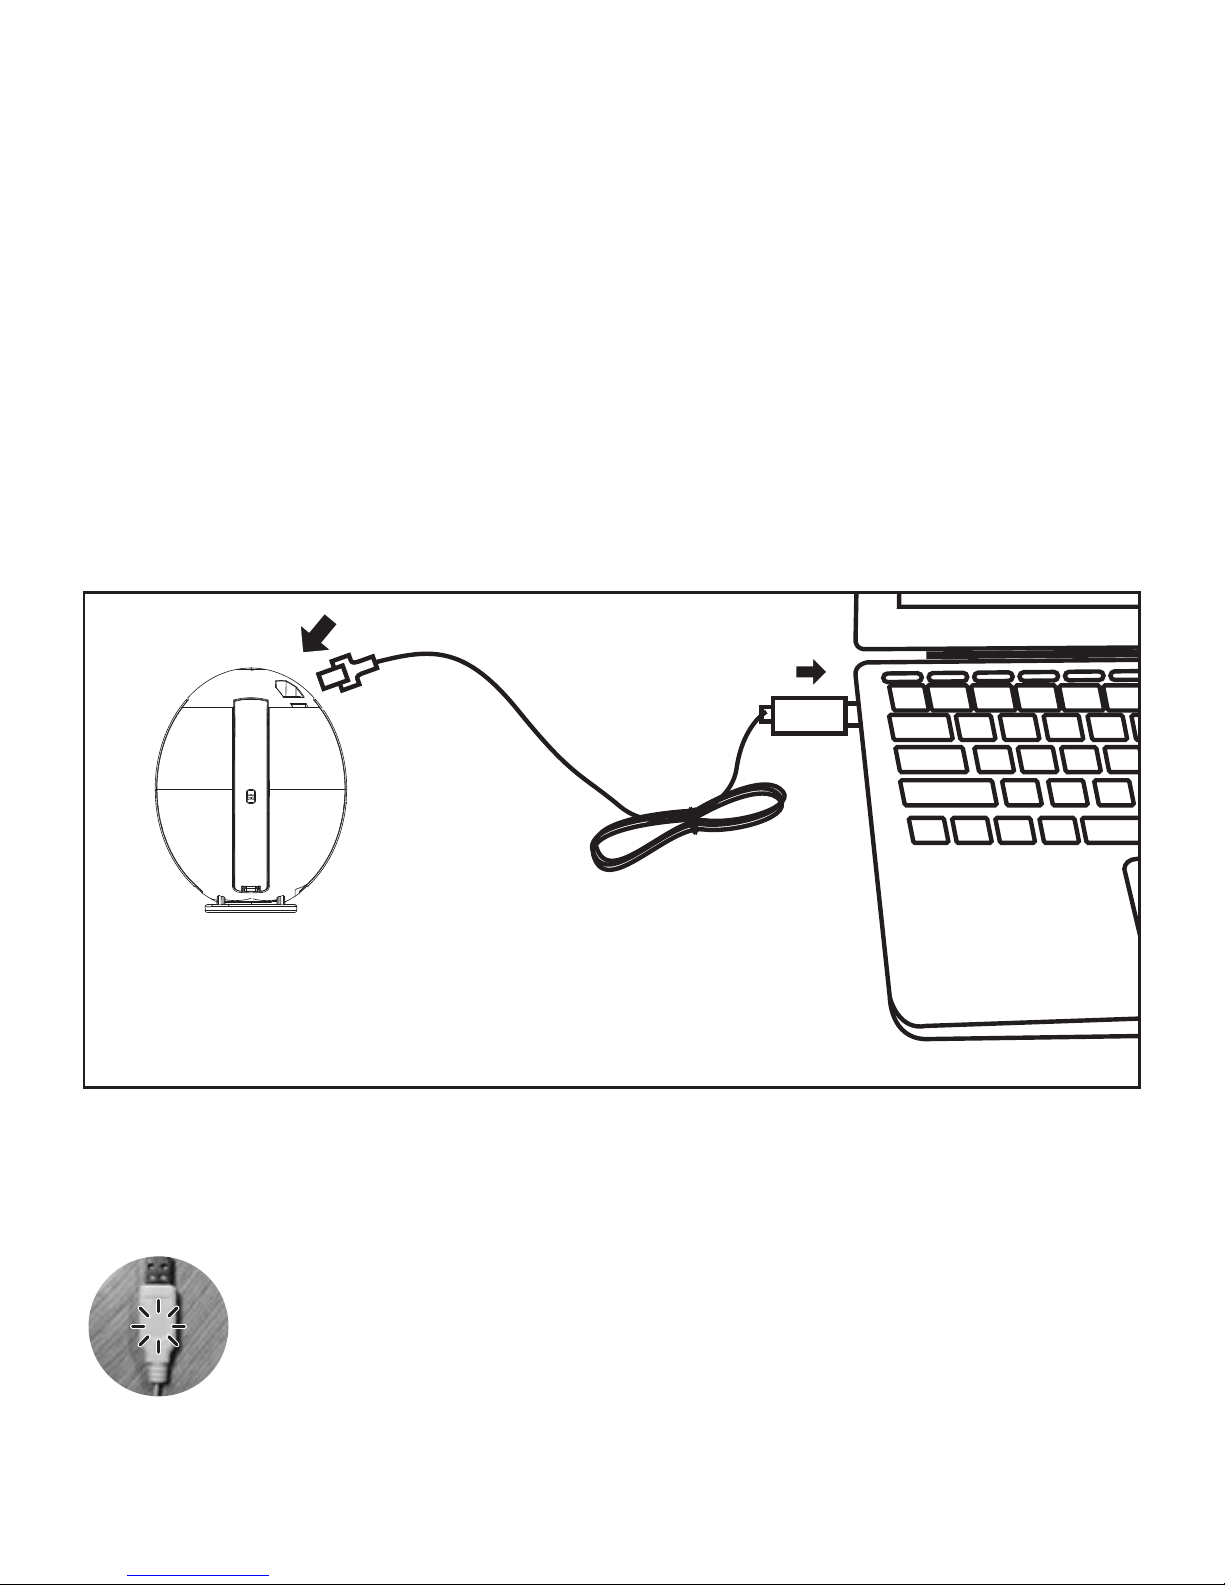
Charging the T.E.D. Battery
Please Note: The T.E.D. comes with a
partially charged battery, however in the case
that you need to charge the battery please
follow the instructions below. You do not need
to remove the battery from the drone to
charge it. Charging time may take up to 45
minutes.
Step 1: Connect the T.E.D. to a
powered USB port, such as a computer.
Step 2: A red LED light will appear
on the USB indicating the charge
has completed. Unplug once completed.
Page 7

6
Warning: Please check the batteries
regularly as potential leakage and/or corrosion of old batteries can damage the drone
and/or create a fire hazard.
Caution:
• Remove the batteries immediately if you
sense any smell or smoke.
• Do not charge the batteries if they are hot,
wait until they cool down.
• Do not charge the batteries next to inflammables or on a conductive surface.
• Do not overcharge the battery, once the red
light disappears, discontent the battery.
• Do not use non-Odyssey batteries and
battery chargers. Only use those which
come packaged with this device. If you
need additional batteries or chargers, they
are available in our Parts Shop on www.odysseytoys.com.
Page 8
7
• For safety and best practice, unplug the
battery connection from the power source
inside the drone when not in operation.
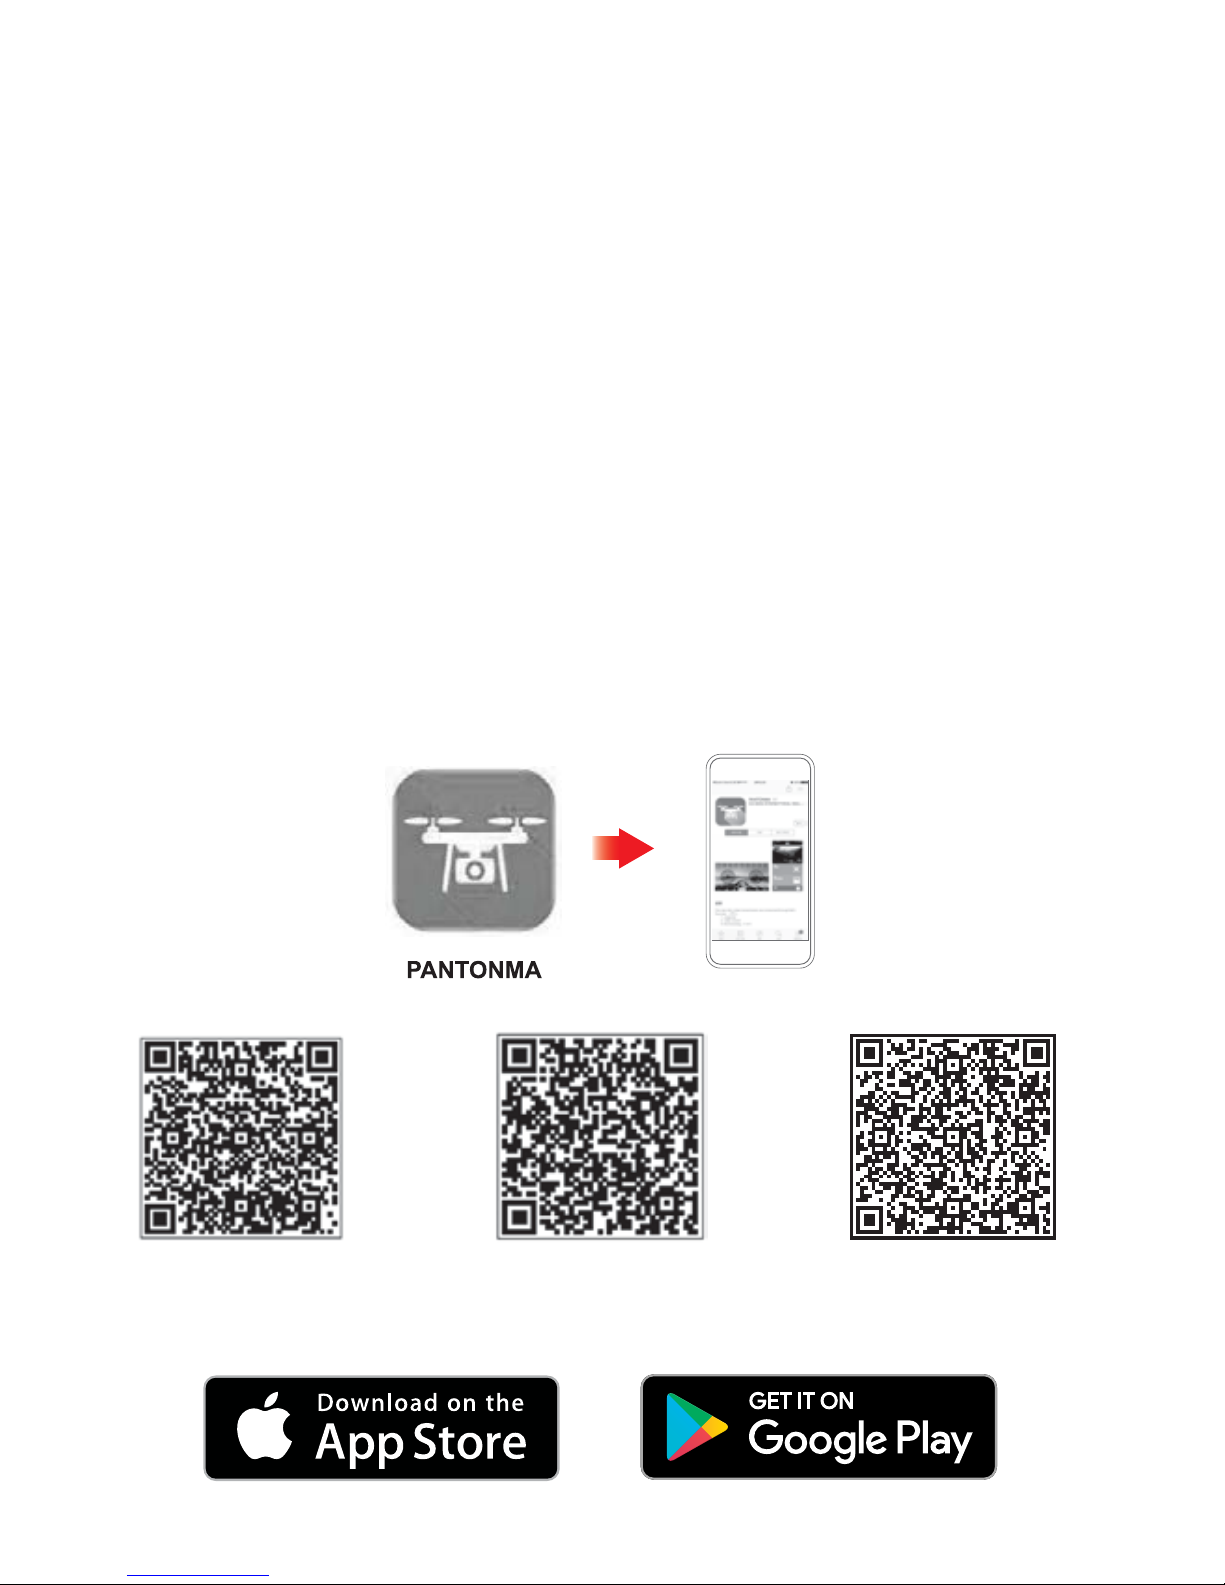
Downloading the Application and
Pairing Your Device to the Drone
Notice: The T.E.D. quadcopter’s transmitter is
application based; you must download the
free app to fly the drone. The PANTONMA
app is supported on Android and iOS
devices.
QR Code For
Google Play
QR Code
For IOS
QR Code
For 360
Page 9
8
Step 1: Use your phone to scan the QR code
or install the app by accessing the
Play/iTunes store and searching for
PANTONMA.
Step 2: Press and hold the power button, on
the bottom of the drone. The drone will turn
on and the lights will flash.
Step 3: Connect your phone to the drone’s
Wi-Fi signal named KD****.
Step 4: Open the PANTOMMA app and tap
My Drone. This will connect your drone to the
application.
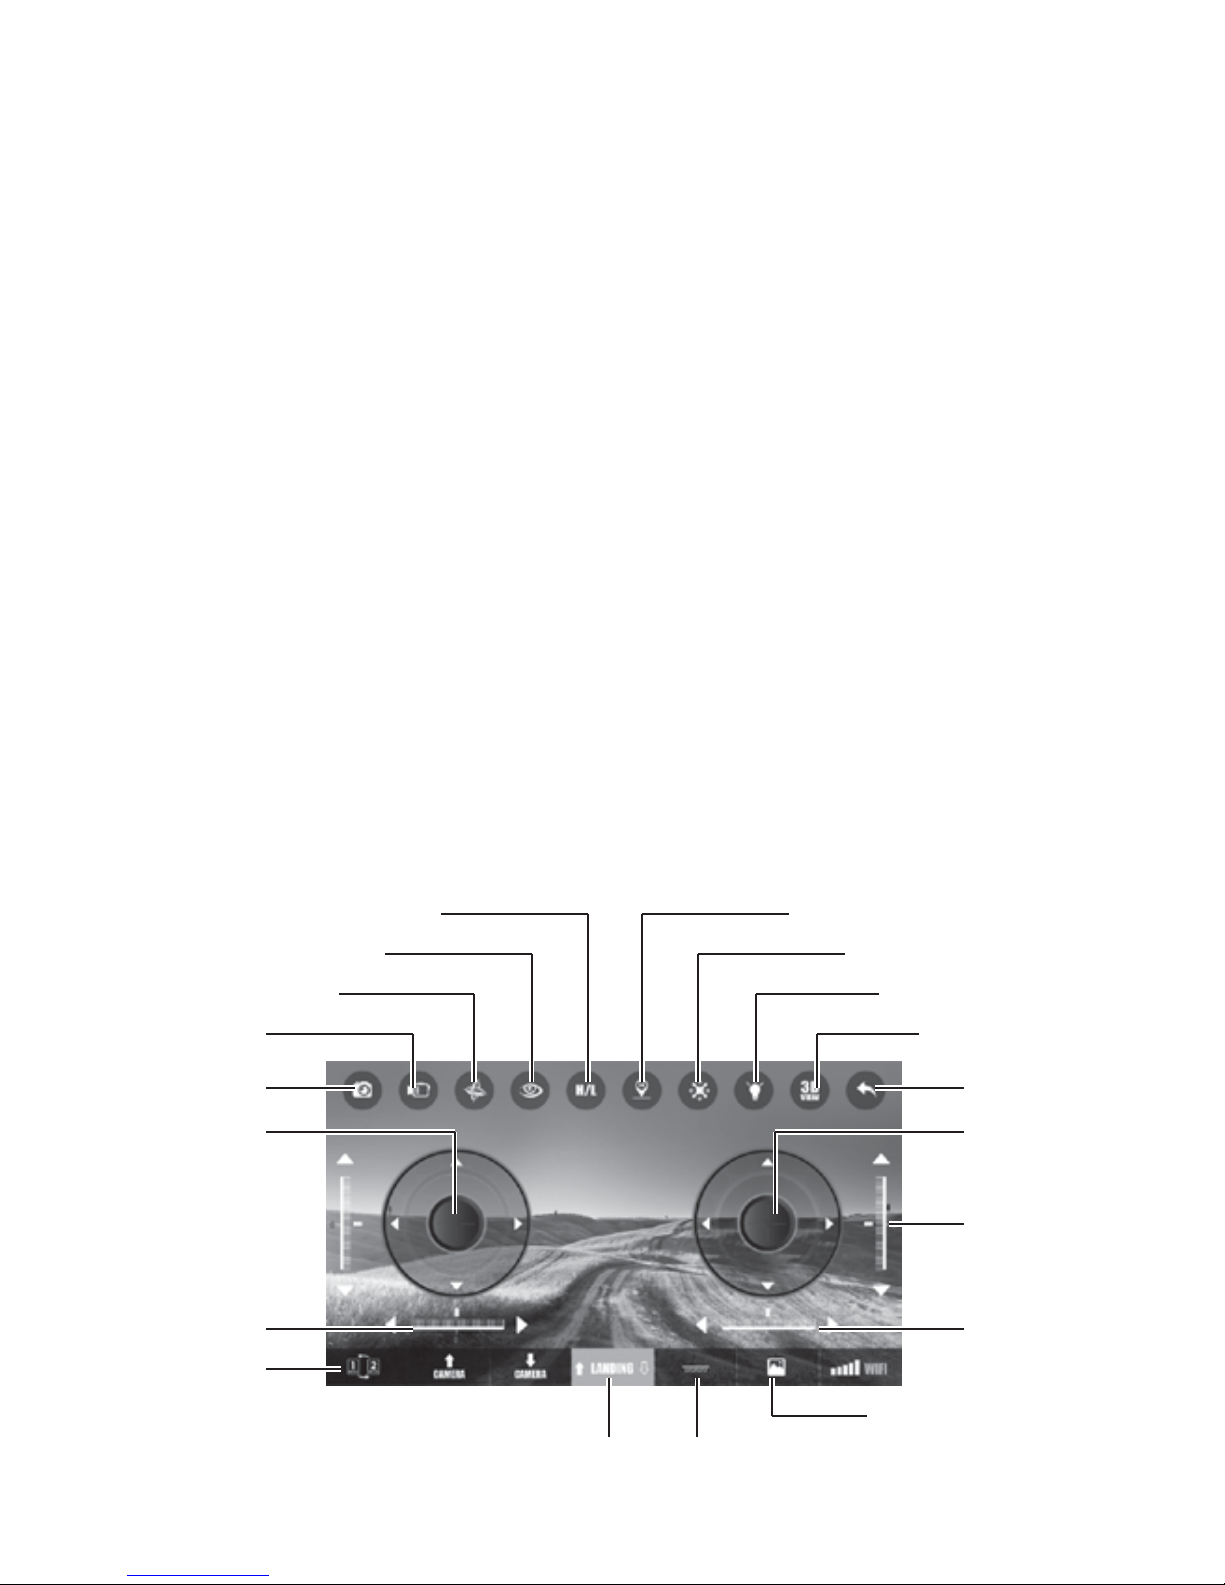
Speed
Hide/Show Display
Gravity Sensor
Video
Photo
Left Stick Right Stick
Back
3D VR
Light
Smart Fly Tech
Auto Back
Turning Trim
Side-To-Side
Trim
Forward/
Back Trim
Media
Left/Right
Hand Switch
Auto Takeoff/Auto Landing
Long Press – Emergency Stop
Auto Trim Reset
Page 10

9
Let’s Fly - Flying T.E.D.
Menu Buttons
Photo: Use the camera on your drone to
take a photo.
Video: Use the camera on your drone to
record a video.
Gravity Sensor: Fly the drone by using the
phone’s movements as the controller.
Hide/Show Display: Show or hide the
throttle and Directional Sticks from your
screen.
Speed: Change your speed from 30%, and
100%
Auto Back: Drone stabilizes and returns
home.
SmartFLY Tech: Drone responds to the
directions as if it is facing the way you’re
facing.
Page 11

10
Light: Turn light on/off on the drone
3D VR: Allows you to watch your videos in
virtual headset mode (not included).
Back: Return to the previous Menu
Right Stick: Moves the drone side to side
and forward and backwards.
Forward/Back Trim: Tap to center the drone
if drifting forward or backward.
Side-To-Side Trim: Tap to center the drone if
drifting to the left or right.
Media: Access your photos and videos and
view them.
Auto Trim Reset: Tap to reset the trim. In
most cases this will take care of drifting
without using the manual trim controls.
Auto Take Off/Auto Landing: Accelerate
immediately Auto Landing: Descend immediately. Emergency Stop: Press and hold for 3
seconds for an immediate, emergency stop.
Page 12

11
Left/Right Hand Switch: Switch the left and
right joysticks, great for lefties.
Turning Trim: Tap to center the drone if
drifting in rotation or spinning in circles.
Left Stick: Moves the drone up, down, and in
rotations.
Left Throttle Stick Right Directional Stick
Page 13

12
Flight Controls
Please Note: Before every flight, the drone
will have to be paired to the application.
There are two ways to fly the T.E.D., by
Gravity Sensor and Throttle Control.
Gravity Sensor: This setting will allow
your drone to move in any direction that
you move your phone. In this setting, you
will not need to move the Directional
Sticks, however, you will still need to
control the throttle.
Step 1. With your T.E.D. on and connected. to the Wi-Fi, tap the Auto Take Off
button.
Step 2. Keeping your phone horizontal,
tap the Gravity Sensor by the top of the
right Throttle Stick.
Step 3. Move your phone in any direction, the
drone will follow.
Page 14

13
Touch Control: The directions below are for
touch control which requires you to tap the
Throttle Sticks on the phone. This is the most
common way of flying drones.
Step 1. With your T.E.D. on and connected to the Wi-Fi, tap the Auto Take Off
button.
Step 2. Use the right Directional Stick to
move around the left Throttle Stick to change
direction.
Step 3. To land, use the left Throttle Stick
to go down or press the Auto Landing
button.
To come up on your own without the assist of
Auto Takeoff, follow the below instructions.
Step 1. With your T.E.D. on and connected to
the WiFi, take the throttle and Directional
Sticks and push them down and slightly off
center. This will initiate the blades and bring
the drone to altitude.
Page 15

14
Step 2. Use the left Throttle Stick to control
altitude and direction. Use the right Throttle
Stick to maneuver forward and backward &
left and right directions.
Ascending, Descending –
Left / Right Throttle Stick
Ease the left Throttle Stick upwards to make
the T.E.D. go higher in altitude. Ease the left
Throttle Stick downwards to lower the T.E.D.
Turning – Left Throttle Stick
Push the left Throttle Stick left or right to turn
the T.E.D. in a specific direction.
Forward, Back – Right Directional Stick
Ease the right Directional Stick up and down
to fly the T.E.D. forward and backward.
Side to Side Flight Left or Right – Right
Directional Stick
Push the right Directional Stick left or right to
fly the T.E.D. side to side.
Page 16

15
Speed
There are two speeds on the drone
which can be changed by tapping the
speed button.
Speed 1: 1 Tap Slow at 30%
Speed 2: 3 Taps Fast at 100%
Landing
Gently press the Auto Landing button
until landing on the ground. You can also
initiate an emergency STOP by pressing the
same button for 3 seconds. Please note that
emergency stopping in mid-air will result
in the drone dropping immediately and
may damage the product, please use with
caution.
Trim
For drifting issues, calibrate the drone back
to normal trim settings by use the Automatic
Trim Reset found to the right of the Auto
Page 17

16
Landing button. Please note you must reset
while drone is connected to your device AND
on a flat surface (not in flight).
You can also manually reset the trim while in
flight it. The following are a few adjustments
that you can make to the flight characteristics
if the Auto Trim does not fix drifting:
Forward/Backward Trimmer: If the
T.E.D. drifts backward or forward, press
the forward/backward trim button located
to the left of the Directional Stick until
centered.
Side to Side Trimmer: If the T.E.D. drifts
left or right, press the side to side trim
below the Right Directional Stick until
centered.
Turning Trimmer: If the T.E.D. is
spinning in circles or drifting in a rotation,
press the turning trim button located
below the left Throttle Stick until
centered.
Page 18

17
Flying in SmartFly Tech
mode and using Auto
Back
The T.E.D. features SmartFly Tech and a
Auto Back feature. Generally when you
are flying a drone, your front and back
usually change position as you rotate
and fly in different directions. This can
make it difficult to tell which direction the
drone is flying in. Therefore, SmartFly
Tech helps you take control over the
drone’s directions as forward will always
be facing the way that you are facing.
Page 19

18
SmartFly Tech Mode
In this mode, you do not need to worry
about the orientation of the drone.
Whatever position the drone’s front is in
before taking off will be your front IF you
initiate the SmartFly Tech mode. This is
useful if you would like to have to the
drone return to your general direction
(i.e. Auto Back).
Auto Back
In this mode, the drone will return back
to your general direction automatically.
However, the drone will return back to
you IF, and ONLY IF, you are looking
towards the BACK of the drone. This
means that if you are facing the backside
of the drone and you hit the Auto Back
button, the drone will fly backwards
towards your general direction.
Page 20

19
Initiating SmartFly Tech & Auto
Back
Step 1 Before taking off, place the drone
on a flat surface
Step 2 Press the SmartFly Tech button,
which is located above the right joystick.
Step 3 Take flight and fly the drone.
When you are ready to return home
ensure that the back of the drone is
facing you.
Step 4 Press the Auto Back button,
which is located at the top middle of the
app screen.
Page 21

20
Taking Photos & Videos
iPhone Users: When you connect your phone
to the WiFi, your phone will ask you if you
want to allow your camera to access photos.
Choose Yes to allow the drone to take photos
and save them to your gallery.
Taking Selfies
Step 1. When your drone is stable in flight,
aim the camera on yourself or subject.
Step 2. Tap the camera or video icon to
take a photo or video.
Step 3. To view your photos, land your
drone and tap the Image Gallery button.
You can either do this on the Home Page
or by clicking the Gallery icon.
Step 4. In the Image Gallery, you will see a
camera icon and a video icon with a list of
files. These files are your photos. Tap a photo
to view it or delete it.
Page 22

21
Step 5. Your photos/videos are also saved to
your phone’s camera roll. To view the photos,
go to your gallery and looking at the most
recent photos and/or accessing the T.E.D.
folder your phone has created for the photos.
Step 6. Share your photos with your friends!
Page 23

22
Odyssey Toys • Miami, FL 33179
For Customer Service please email:
Care@OdysseyToys.com
Please note the units model number and
name in your email.Extra Parts Available! Visit Odyssey online to order:
• Extra Batteries
• New rotor blades Model no. ODY-1719
www.OdysseyToys.com
Page 24

FCC ID: YAQKD90100130
 Loading...