

Odyssey Stellar NX, ODY-2017BF2 Installation Manual
FOR AGES
14
+
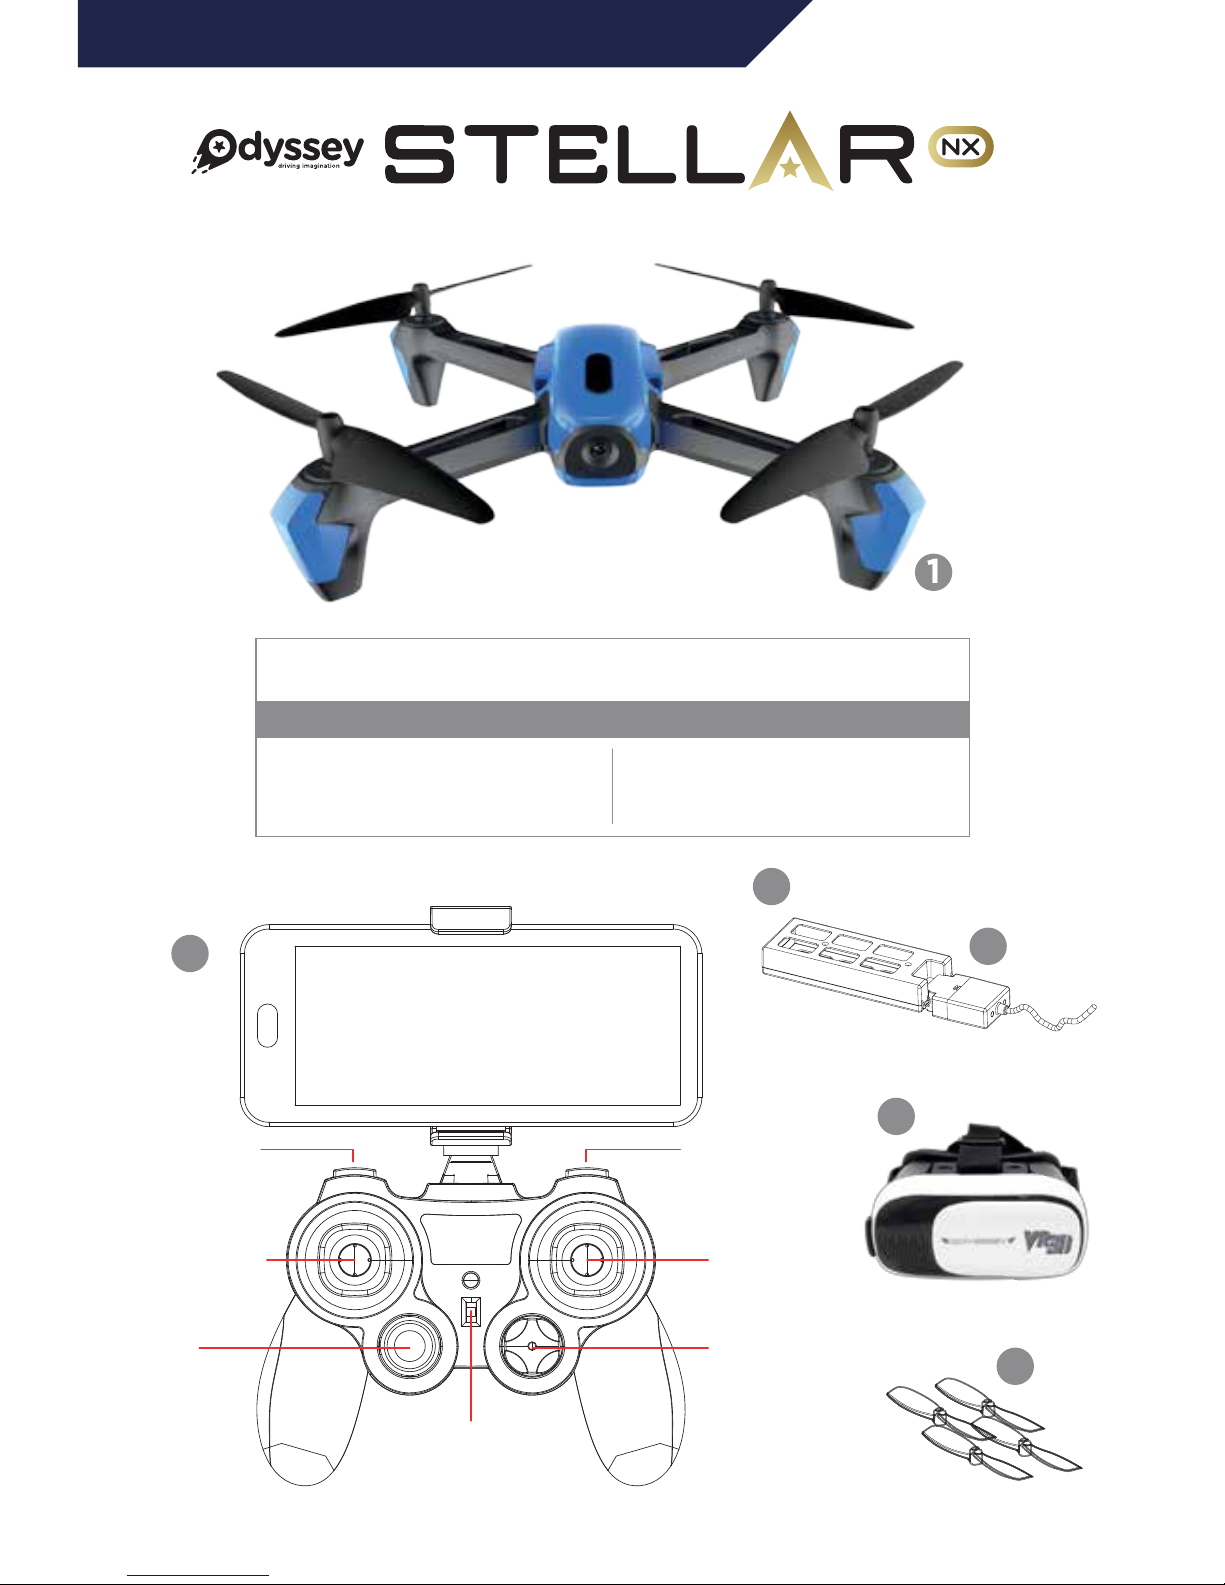
WHAT’S IN THE BOX!
Stellar NX Drone Unit
2.4 GHz Transmitter
USB Charging Cable
3.7V Rechargeable Lithium Battery
1
2
3
4
VR 3D Headset
Spare Propellers
Smartphone Holder (not shown)
5
6
7
SPEED SWITCH
LONG PRESS:
HEADLESS MODE
SHORT PRESS:
CAPTURE PHOTO
LONG PRESS:
CAPTURE VIDEO
LEFT JOYSTICK
CONTROLS
ALTITUDE &
RO TATI O N
RIGHT JOYSTICK
CONTROLS YAW,
DIRECTION & FLIPS
AUTO
TAK E-O F F/
AUTO
LANDING
TRIM
ADJUSTMENTS
POWER
SWITCH
Thank you for your purchase of the Stellar NX Camera Drone. You’re just
moments away from creating stunning aerial acrobatics!
1
2
4
3
5
6
INSTRUCTION & REFERENCE MANUAL • Model no. ODY-2017BF2
CAMERA DRONE
CHARGING THE Stellar NX DRONE
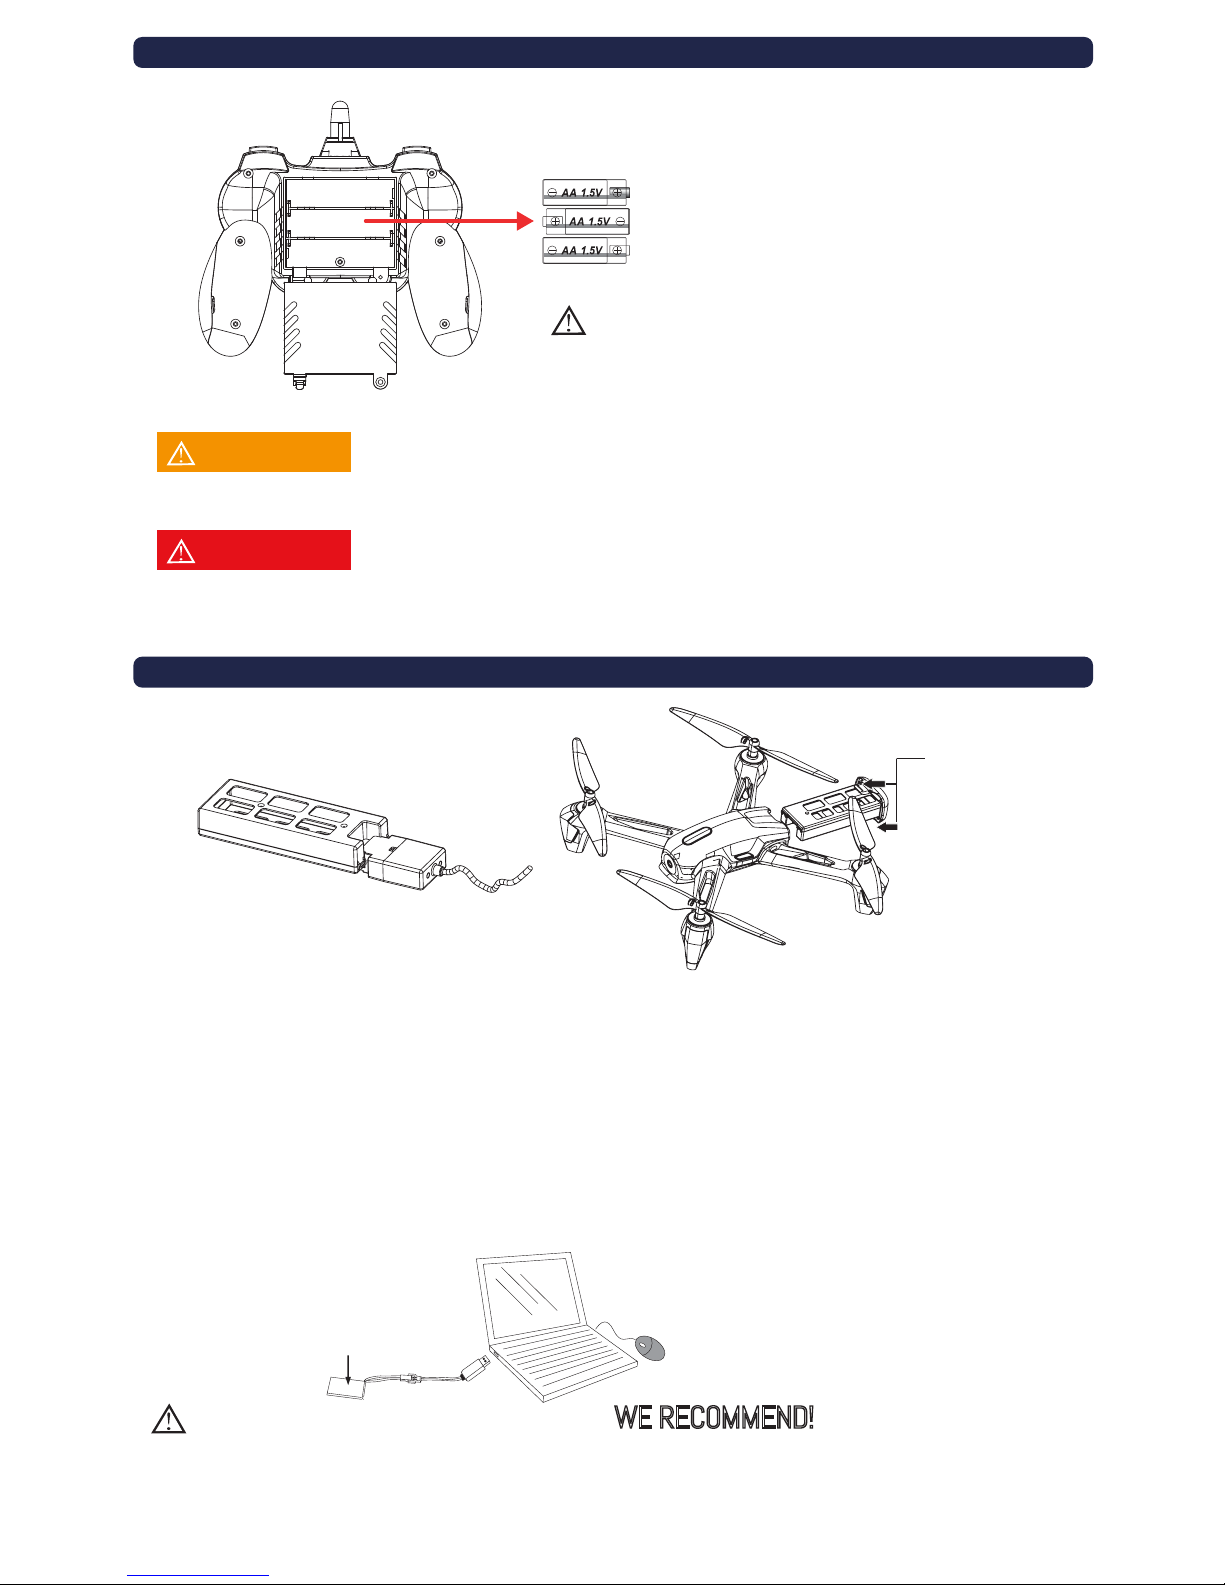
RADIO CONTOL TRANSMITTER •BATTERY INSTALLATION
If the Radio Control Transmitter will not be used for extended periods of time, please remove the batteries.
Please use 3 AA batteries. Use the polarity markings to install in the
correct orientation. Do not mix batteries of different types.
Unscrew the screw holding the battery lid to the
body. Then lightly pull the clip down to pull the lid
away from the transmitter body.
Insert 3 x AA batteries into the battery compartment,
making sure to match the polarities. Then replace the
lid and firmly tighten the screw to secure the battery
compartment.
NOTICE
NOTICE
The Stellar NX battery comes partially charged and is ready to fly.
Refer to Remote Control Battery Installation section and use your
Stellar NX now. Use this charge completely before charging the Stellar
NX battery for the first time.
WE RECOMMEND!
At the rear of the drone, pull the upper and lower battery clips away from unit. Slide out the battery.
Connect the USB charging cable and the battery.
Insert the USB connection of the charging cable into a powered USB computer port. Please note:
Not all USB ports provide power. Typically, only ports directly on a computer, and not through a
peripheral, will provide enough power for charging.
A complete charge will take approximately one hour. The LED on the battery will turn off when
charging is complete.
When the battery is fully charged, immediately disconnect the charging cable from the battery and
reinstall the battery into the Stellar NX drone.
1.
2.
3.
4.
5.
When charging with the included USB cable, the LED light will light
up red, indicating it is charging. Once charging is complete, the LED
light will turn off. Discontinue charging immediately.
Please check the AA batteries routinely. If the AA batteries are left within the Radio Control Transmitter,
potential leakage and/or corrosion may occur, which can damage the transmitter and create a fire hazard.
CAUTION
WARNING
Rechargeable Lithiu m
Polymer Battery
3.7V / 7 00 mAh
At the rear of the
drone, pull the upper
and lower battery
clips away from unit.
Slide out the battery.
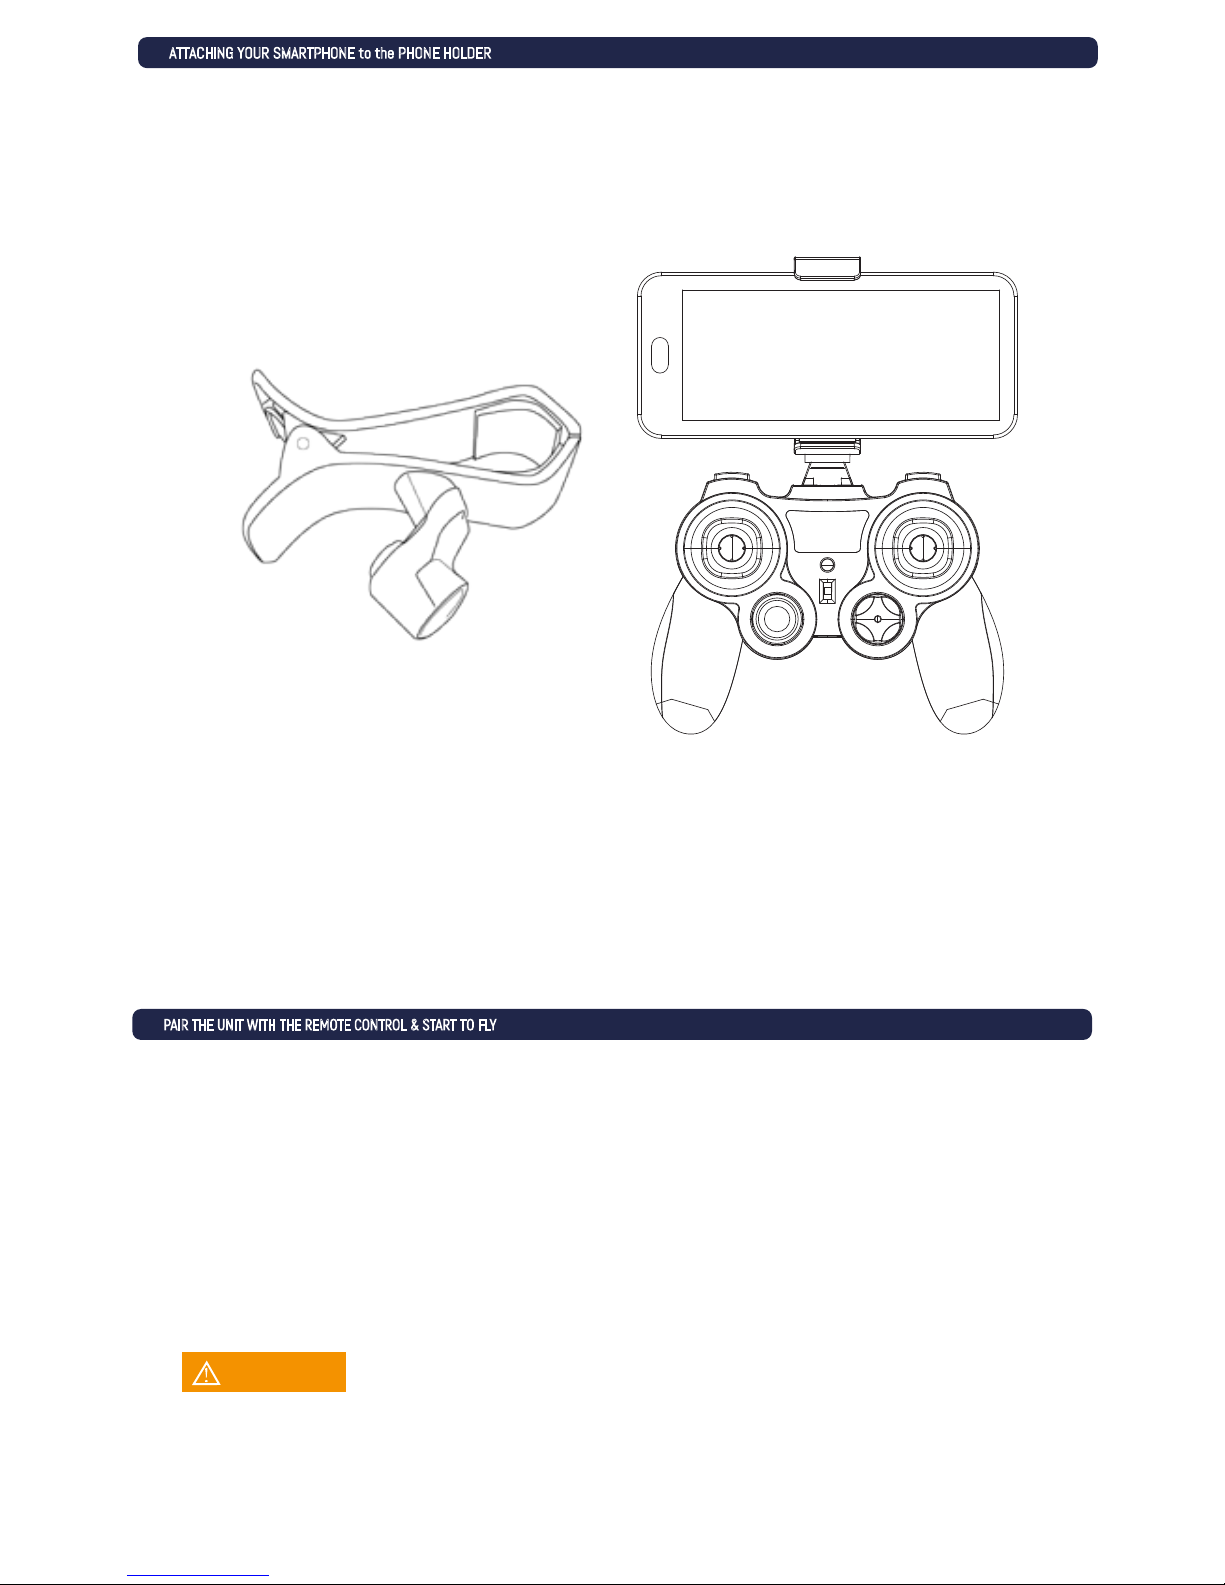
ATTACHING YOUR SMARTPHONE to the PHONE HOLDER
PAIR THE UNIT WITH THE REMOTE CONTROL & START TO FLY
Step 1: Switch on the Drone. The LED lights will start to blink.
Step 2: Turn on the Remote Transmitter. Its power light will illuminate. Wait 5-7
seconds for the electronic gyro to stabilize*.
Step 3: Push the throttle (left) stick up to the 12 o'clock position and then down to the 6
o'clock position. As the remote transmitter searches for the Drone, the power light on
the transmitter blinks rapidly.
Step 4: Connection is complete once the power light and the LEDs on the Drone stop
blinking. The video feed will also come up on the screen. You're ready to fly!
Your Stellar NX Camera Drone comes with a plastic smartphone holder equipped with a compression clip
that lets you view the Stellar NX’s footage as it flies. This is done via the ODY Stellar NX app that you can
download for free. Please refer to the ODY Stellar NX App Menu & Guide included in your package for further
instructions on how to utilize the free app with your drone.
Take your smartphone and insert it into the clip until it has a secure hold. Attach the smartphone holder
to your remote control transmitter, start up the ODY Stellar NX App and you are good to go!
*Be sure to place the quadcopter on a level surface to ensure a proper and neutral
alignment of the gyro.
NOTICE
 Loading...