

Odyssey STEALTH NX-2 ODY-1765 Instruction Manual
INSPIRING IMAGINATIONINSPIRING IMAGINATION
Instruction Manual
ODY-1765

We hope you enjoy your purchase of the Stealth NX-2 Drone and use this
Instruction Manual to get your drone to take off!
Included Contents
1. Stealth NX-2 Unit
2. Radio Control Transmitter
3. USB Charging Cable
4. 7.4 v Rechargeable Lithium Battery
5. Instruction Manual
6. Quick Guide
7. Replacement Propellers (4)
8. Sets of Attachable Wheels (2)
9. Attachable Wings (2)
Specifications
Charging Time: About 30 minutes
Flying Time: About 5 minutes
Controlling Distance: About 20 meters
Battery for Quadcopter: 3.7v 150mAh Li-Poly
Battery for Controller: 4 x AAA
USB charging cable
Spare propellers
Ignition/
auto landing
Left trim
Right trim
USB charging port
360° flip
Right directional stick
(forward / backward /
left / right side)
strafing
Low/high speed switch
Backward trim
Forward trim
Power
indicator LED
Left trottle stick
(up / down / left / right)
rotate
Auto take off
Flight Preparation
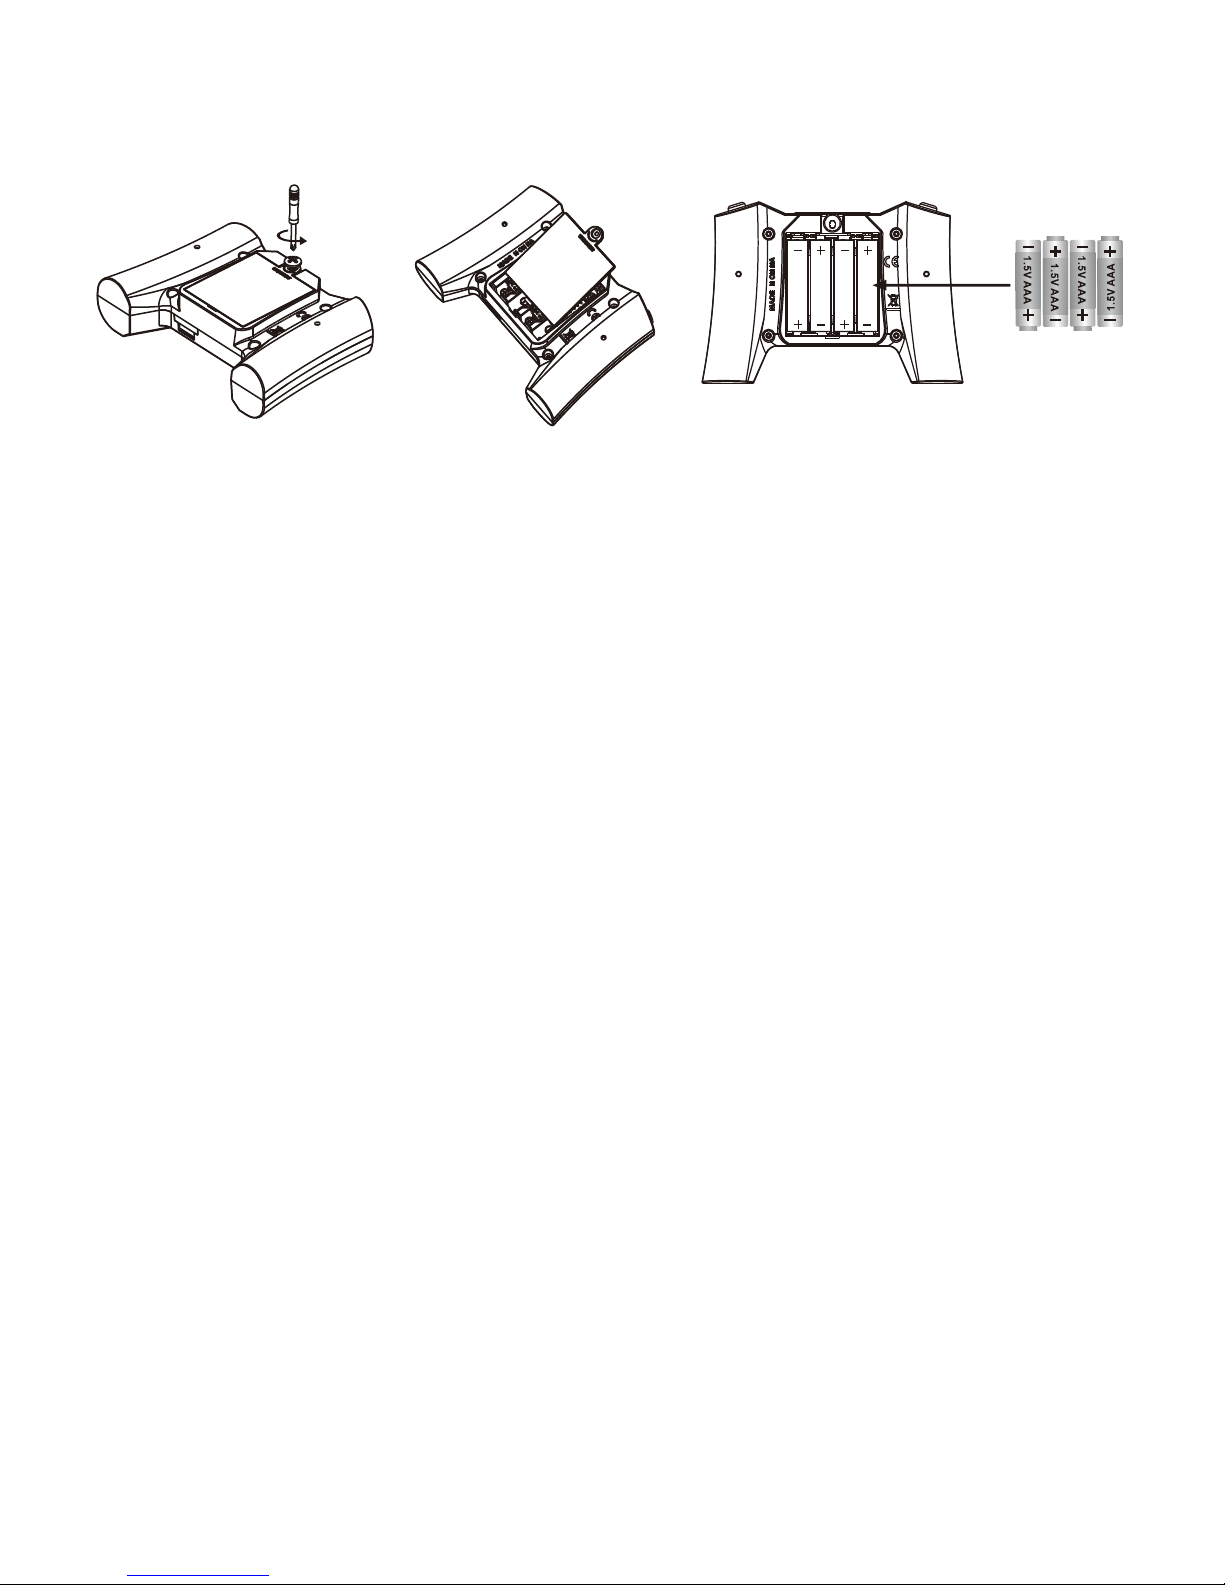
Remote Controller & Battery Installation
Step 1: On the back of the controller, unscrew the screw holding the battery lid
in place.
Step 2: Pull the clip down to remove the battery’s lid.
Step 3: Insert the 4 AAA batteries into the battery compartment according to
the polarities.
Step 4: Replace the lid and firmly tighten the screw to secure the lid.
Warning: Please check the AAA batteries regularly as potential leakage and/or
corrosion of old batteries can damage the transmitter and/or create a fire
hazard.
Caution: If the Remote Controller will be unused for an extended period of time,
please remove the batteries.
Charging the Drone Battery
Warning: The USB Charging Cable provided is the only charging unit that
should be used when charging the 7.4 Lithium battery. This is to ensure the
batteries longevity.
Warning: Please check the batteries regularly as potential leakage and/or
corrosion of old batteries can damage the drone and/or create a fire hazard.
Caution:
● Remove the batteries immediately if you sense any odd smell or smoke.
● Do not charge the batteries if they are hot, wait until they cool down.
● Do not charge the batteries next to inflammables or on a conductive
surface.
● Do not overcharge the battery- once the red light disappears, discontent
the battery.
● Do not use non-Odyssey batteries and battery chargers. Only use those
which come packaged with this device. If you need additional batteries or
chargers, they are available in our Parts Shop on www.odysseytoys.com.
● For safety and best practice, unplug the battery connection from the power
source inside the drone when not in operation.
 Loading...