

Odyssey Galaxy Seeker II, StarChaser Installation Manual

FOR AGES
14
+
WHAT’S IN THE BOX
1
2
3
4
5
Galaxy Seeker Unit
2.4 Ghz Radio Transmitter
USB Charging Cables
3.7V Rechargeable Lithium Battery
4 GB Micro SD Card
6 Spare Propellers & Micro Screwdriver
7 USB Micro SD Card Reader
LCD ON/OFF SWITCH
LCD SCREEN
360º FLIP
(see page 4)
INITIATE HOMEBEACON®
(PRESS & HOLD FOR 3 SECONDS,
see page 5 for details)
INITIATE SMARTFLY®
(PRESS & HOLD FOR 3 SECONDS,
see page 5 for details)
IGNITION
SIDE TRIM
DIRECTION CONTROL STICK
FORWARDS / BACKWARDS TRIM
SPEED
(3 SETTINGS)
DIRECTION TRIM
POWER SWITCH
THROTTLE STICK
POWER LED
Thank you for your purchase of the Galaxy Seeker II
Live Streaming HD Video Drone. You’re just moments
away from creating stunning aerial acrobatics!
LIVE STREAMING HD VIDEO DRONE
6
7
INSTRUCTION & REFERENCE MANUAL • Model no. ODY-1811FPV
CHARGING THE GALAXY SEEKER II DRONE AND MONITOR
X-GUARD INSTALLATION (if not installed from factory)
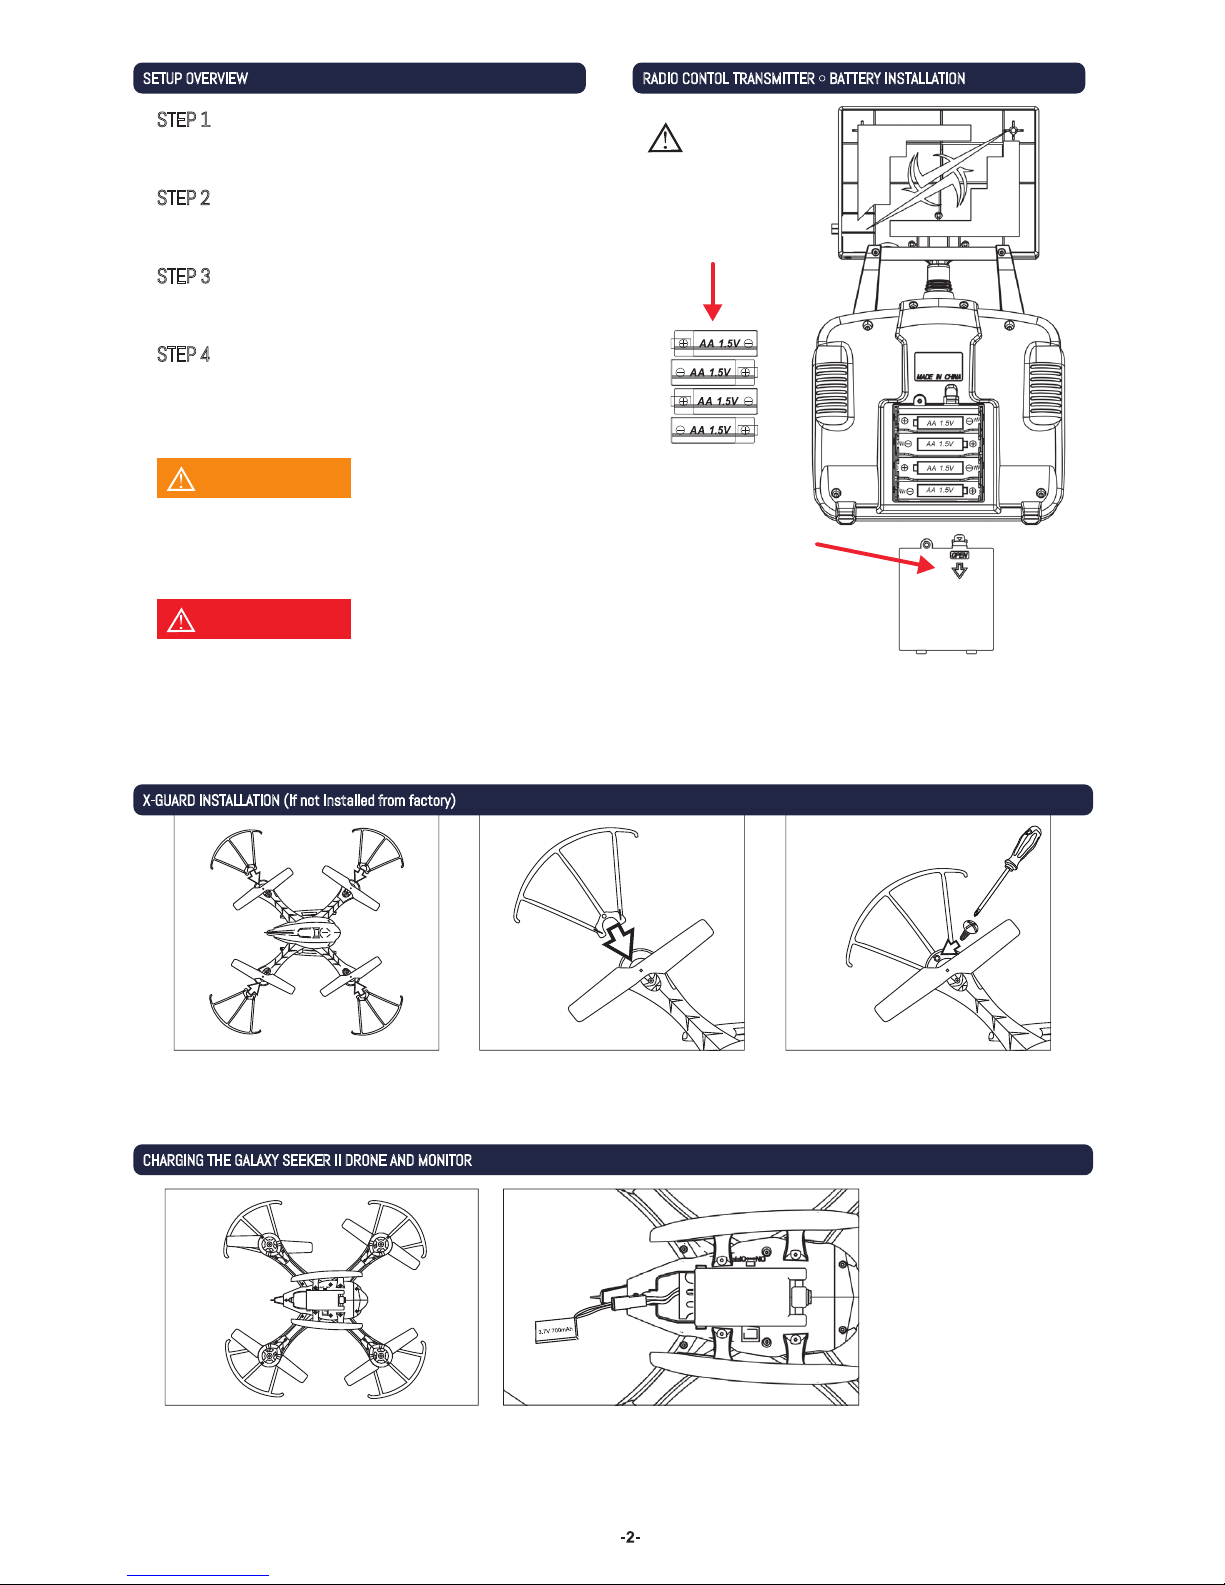
SETUP OVERVIEW RADIO CONTOL TRANSMITTER •BATTERY INSTALLATION
If the Radio Control Transmitter will not be used
for extended periods of time, please remove the
batteries.
Please use 4 AA batteries. Use
the polarity markings to install
in the correct orientation. Do
not mix batteries of different
types.
Unscrew the screw
holding the battery lid to
the body. Then lightly pull
the clip down to pull the
lid away from the
transmitter body.
Insert 4xAA batteries into
the battery compartment,
making sure to match the polarities. Then replace the lid and
firmly tighten the screw to secure the battery compartment.
NOTICE
Attack the X-Guards to th e end of each rotor using the included small screwdri ver. Place the small plastic round tabs into the holes on each ro tor arm. Firmly
tigh ten the screws. The center bar of the guard should line up with the arm of the rotor. On ce each X-guar d is installed. Turn the propeller to make su re that it
doesn't doesn't hit the X- Guard. If it does, carefully bend the rim of th e X-Guard a way from the propelle r until the propeller can spin f reely without o bstruction.
1. Locate the b atter y compartment lid under the rear fin on the bot tom of the Drone. Push the latch to open the lid.
2. Gently pull out the red-and-black connector. Grasp t he shor ter red connector while holding the larger red end of the connector.
Withou t tugging on the wir es, care fully unplug the shor ter red connector.
CAUTION: Battery may be hot if being disconnected right after use. If hot, then wait a few minutes to let the bat ter y cool do wn.
Please check the AA batteries routinely. If the AA
batteries are left within the Radio Control Transmitter,
potential leakage and/or corrosion may occur, which
can damage the transmitter and create a fire hazard.
Attach the X-Guard propeller defense system.
STEP 1
Install batteries into the radio control transmitter.
STEP 2
Charge the Galaxy Seeker II and monitor.
STEP 3
Attach the monitor to the radio control
transmitter when charging is complete.
STEP 4
CAUTION
WARNING
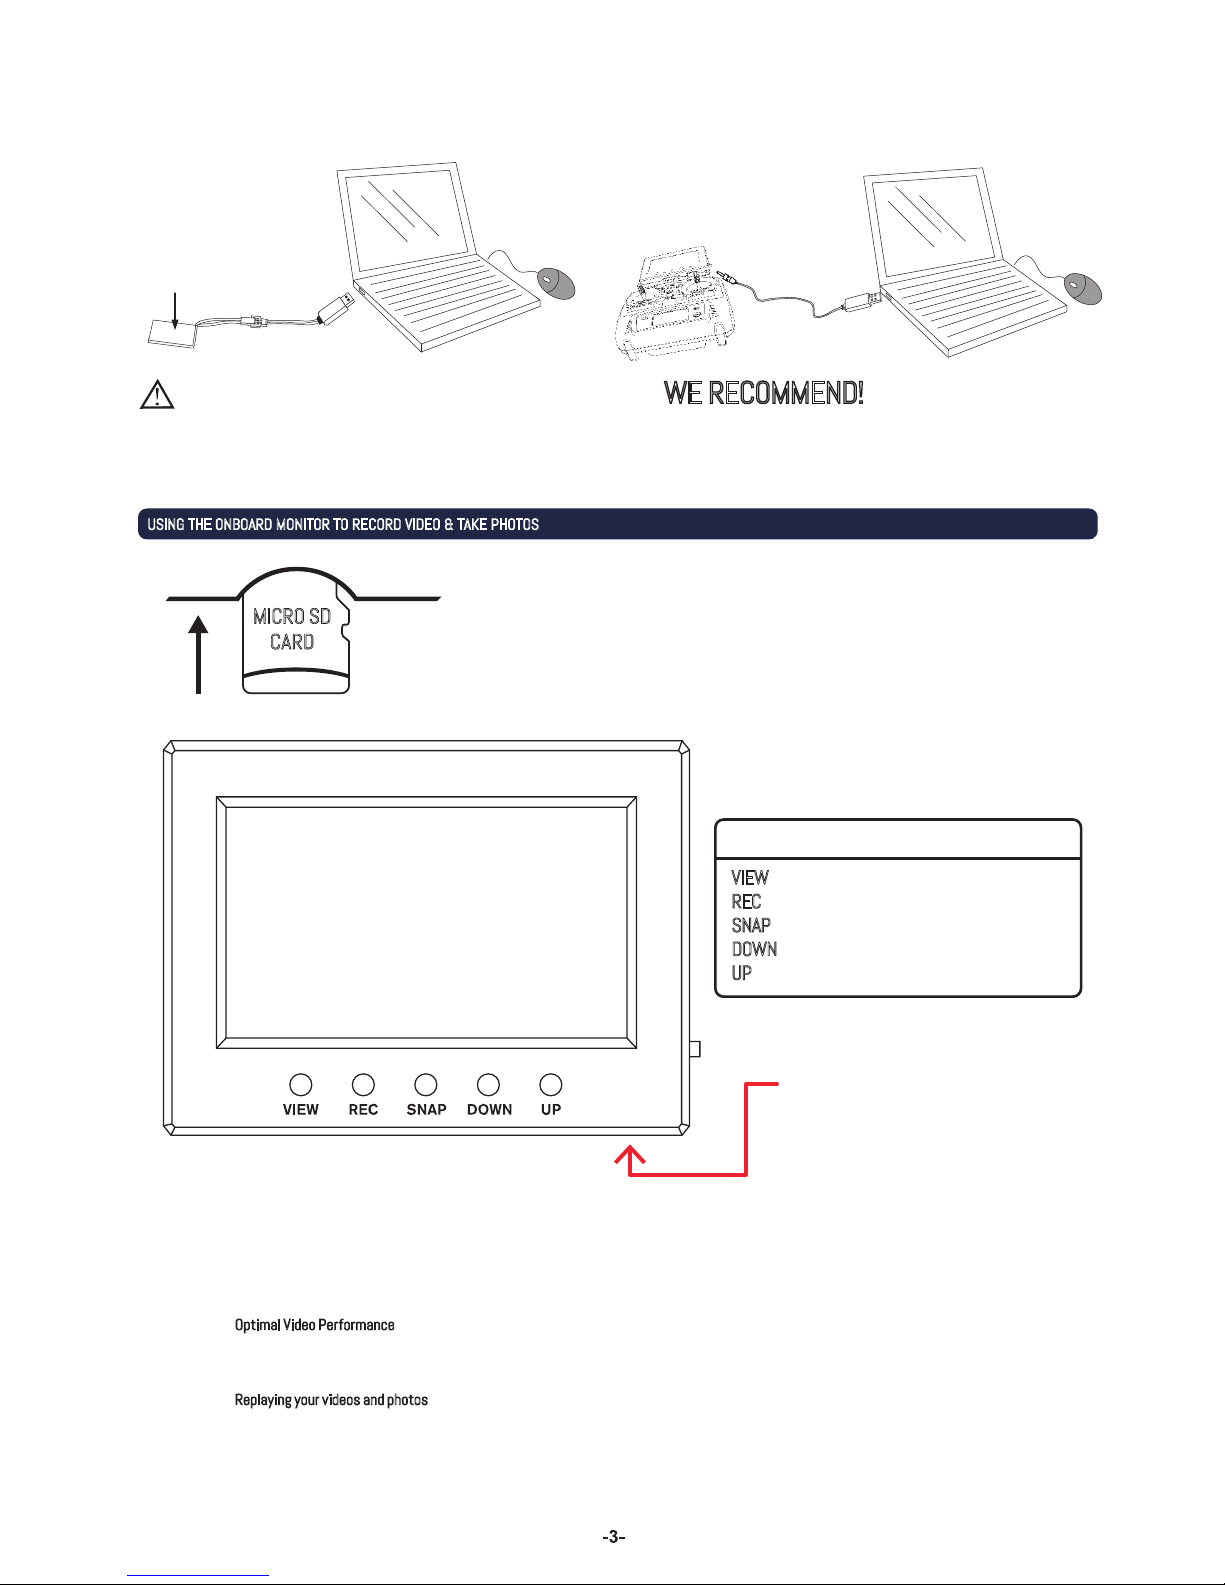
MICRO SD
CARD
LCD Screen Capabilities
VIEW
REC
SNAP
DOWN
UP
View the videos & pictures in memory
Press this button to begin recording
Press this button to take a picture
Decrease monitor brightness
Increase monitor brightness
USING THE ONBOARD MONITOR TO RECORD VIDEO & TAKE PHOTOS
NOTICE
The Galaxy Seeker II battery comes partially charged and is ready to fly.
Skip to Remote Control Battery Installation section and use your Seeker
now. Use this charge completely before charging the Galaxy Seeker
battery for the first time.
WE RECOMMEND!
Whe n char ging with the included USB cable, the LED light will light up red,
indicating it is charging. Once charging is c omplete, the LED light will turn
off. Discontinue charging immediately.
Step 3: While po wered on and in flight, use the Pho to or Video button to take pictures or create thrilling aerial f ootage.
• Press REC to begin recording and R EC again to stop recording. Note: You mus t have an SD card installe d in order to record.
• Press SN AP to take a photo. The Eclipse onboard camera requires a couple of seconds be tween photos.
Optimal Video Performance
The G alaxy Seeker II’s built-in HD camera will p rovide live video up to a r ange of 164 feet (50 meters).
Video performance may become erratic af ter 50 meters.
Replaying your videos and photos
:
You can replay your videos and photos anyw here, even in the field! Jus t remove the MicroSD card from the Drone and install the
card in the slot o n the bottom edge of the included monitor.
You can also repla y your videos a nd photo s with a compatible tablet or computer.
Step 1: Turn the Drone over and set it down on a soft, stable surface.
Step 2: Slide a MicroSD card into the monitor housing until it clicks into place.
3. Connect the bat ter y’s power cable to the end of the USB charging cable, the one with the red and black tip. Then connect the USB end of the char ging cable to a
USB charging port. Please note: Not all USB ports provide power. Typically, only por ts mounted on a computer and not throu gh a peripheral will provide enoug h
power for charging. After charging the battery, disconnect the USB co rd and carefully, withou t pulling on the in ter nal wires, reconne ct the battery cord with the
connector inside the ba ttery compar tment of the Dron e.
4. Charge the Galaxy Seeker II monitor by using the separate USB cable supplied.
Rechargeable Lithium
Polymer Bat tery
3.7V / 700 m Ah
The Galaxy Seeker II is equipped with a full 720p, wide-angle lens that will provide a great First Person View. It’s like being in the cockpit!
Micro SD Card Slot
 Loading...