

Odyssey XV-7 Microlite II, ODY-7506 Instruction Manual
INSTRUCTION MANUAL
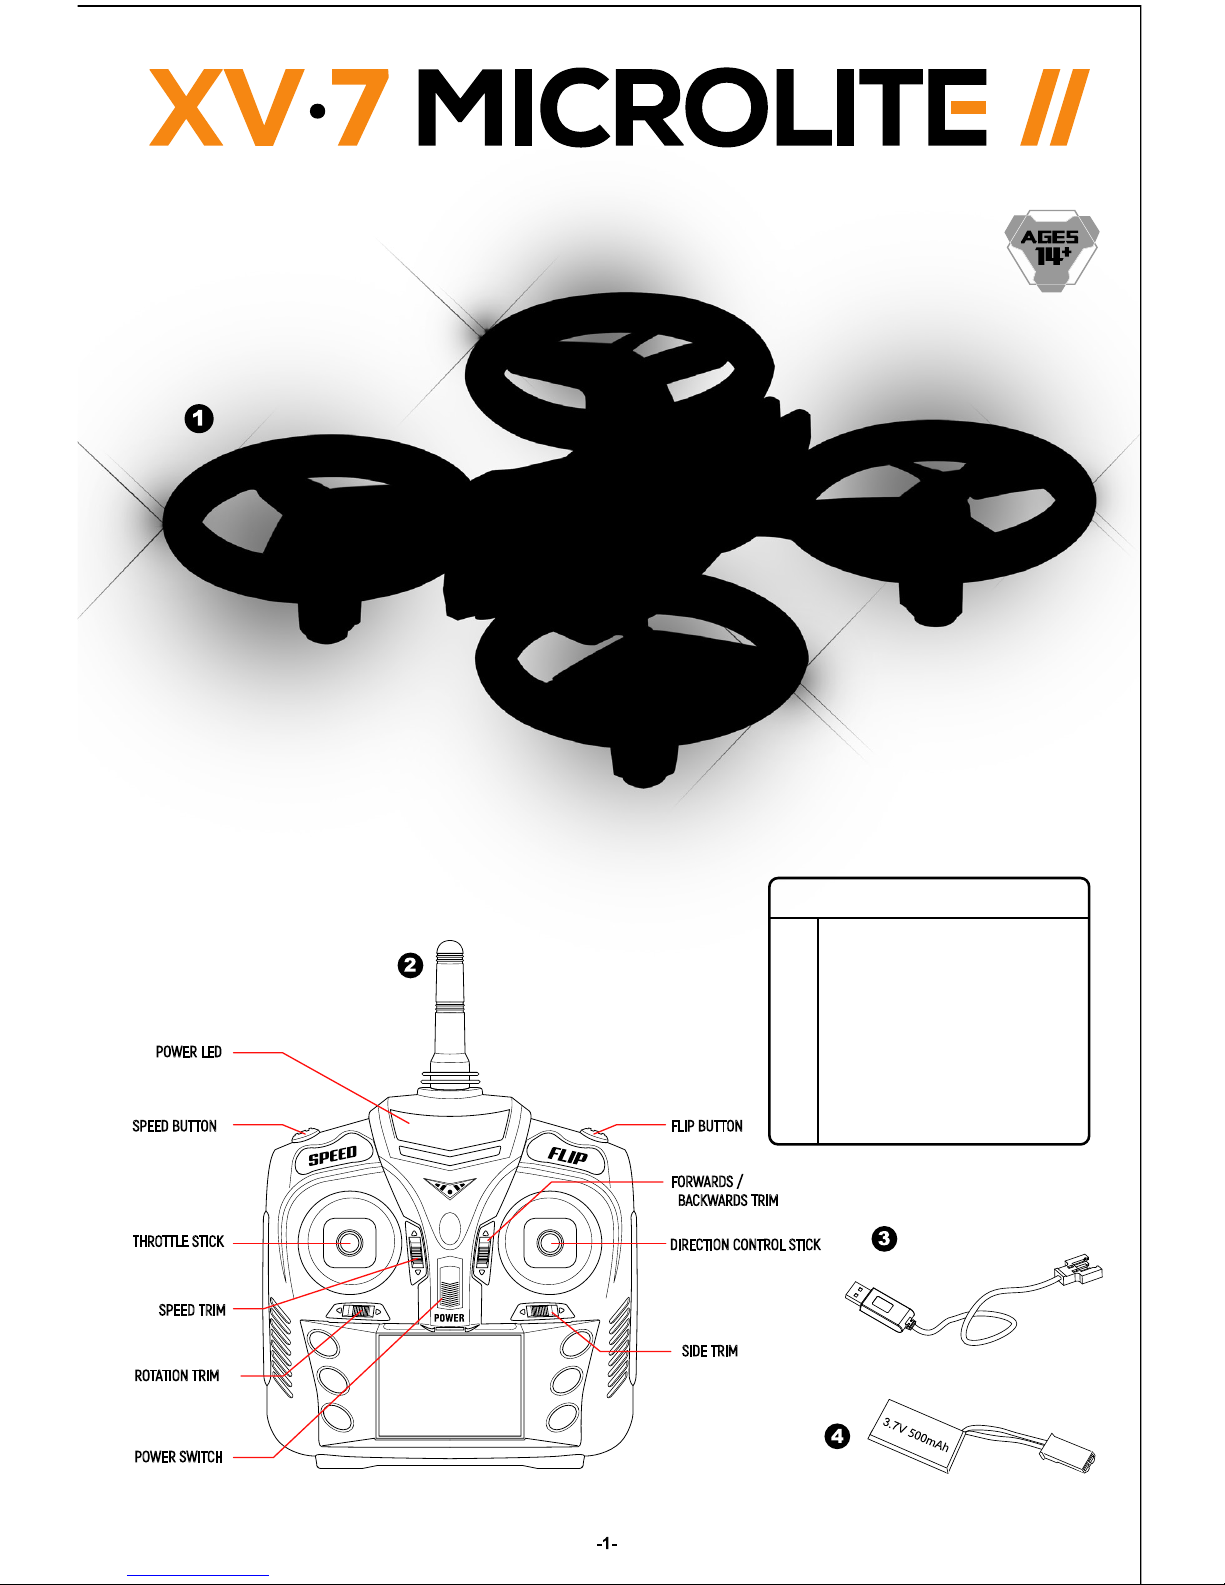
INCLUDED CONTENTS
1
2
3
4
XV-7 Microlite II Unit
Radio Control Transmitter
USB Charging Cable
3.7 Rechargeable Lithium Battery
Instruction Manual
Replacement Parts (not shown)
SPEED TRIM
ROTATION TRIM
POWER SWITCH
SIDE TRIM
DIRECTION CONTROL STICK
FORWARDS /
BACKWARDS TRIM
THROTTLE STICK
SPEED BUTTON FLIP BUTTON
POWER LED
Thank you for your purchase of
the XV-7 Microlite II Quadcopter.
You’re just moments away from
creating stunning aerial
acrobatics, leaving stunning light
trails in the dark !
CHARGING THE XV-7 Microlite II BATTERY
SETUP OVERVIEW RADIO CONTOL TRANSMITTER • BATTERY INSTALLATION
If the Radio Control Transmitter will not be used
or stored for extended periods of time, please
remove the batteries.
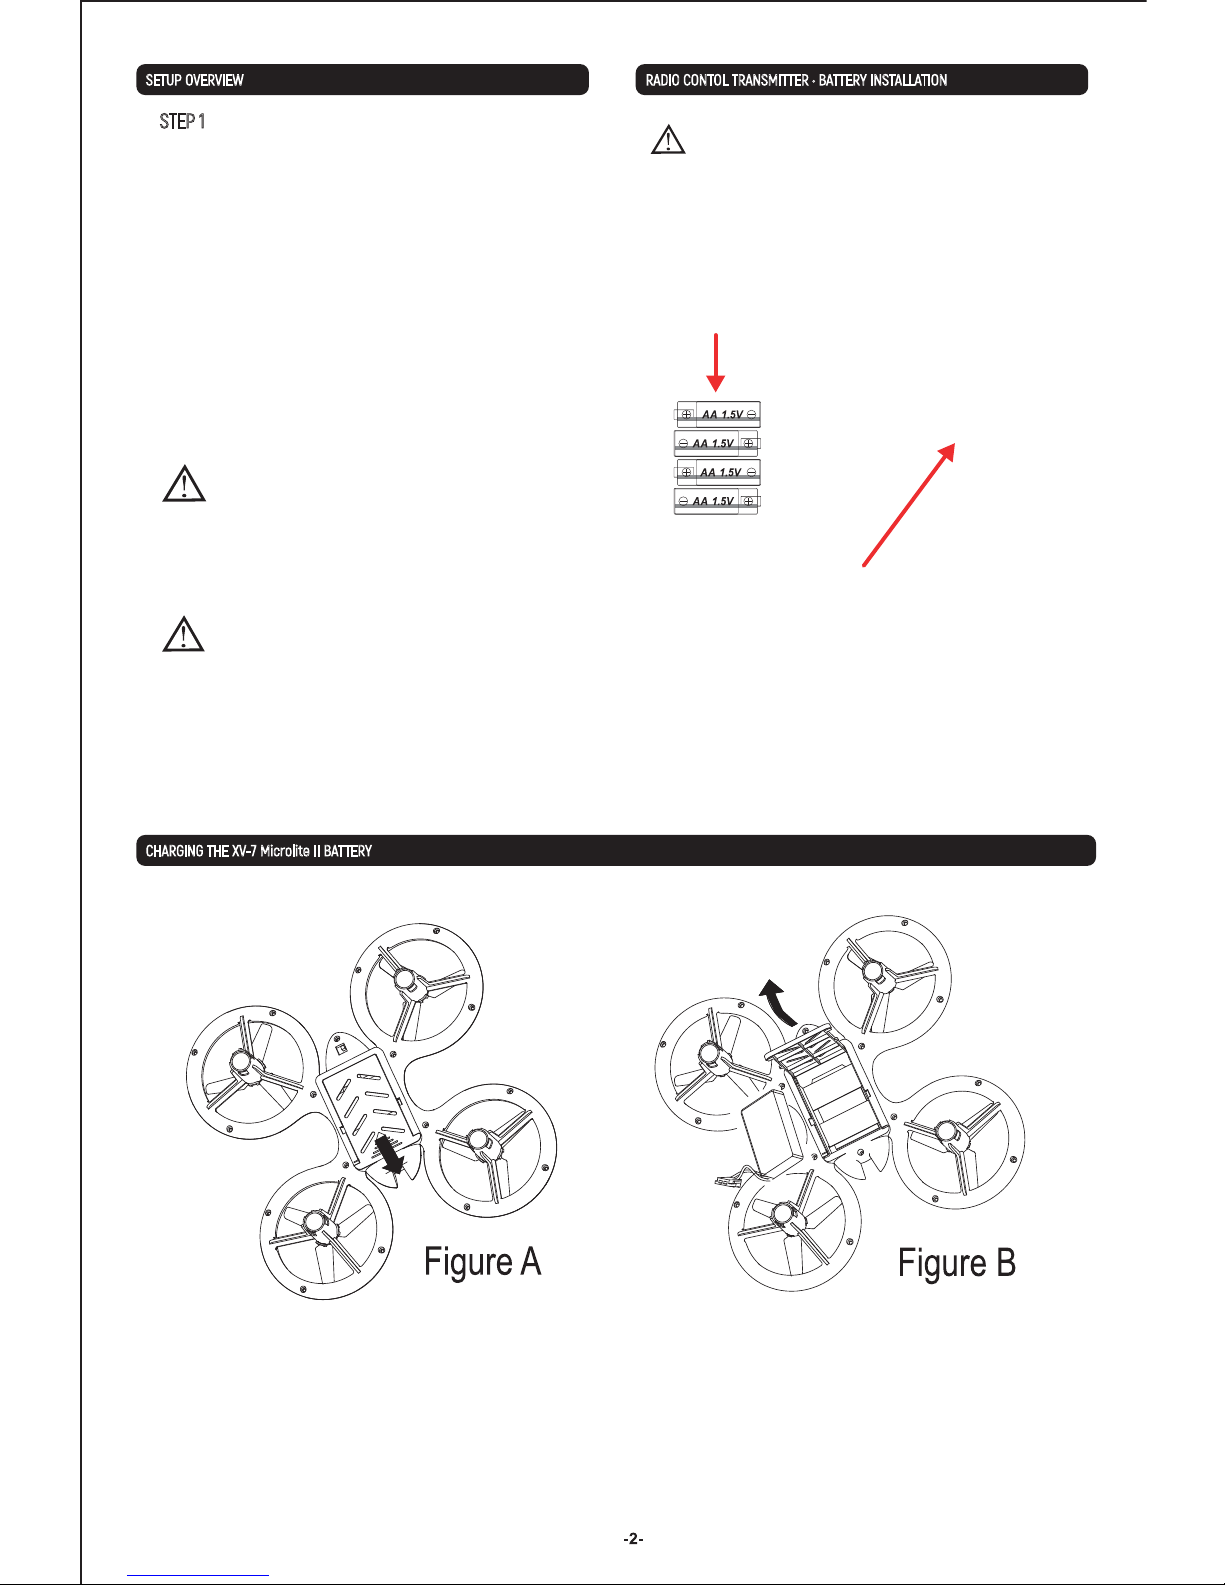
Please use 4 AA batteries.
Use the polarity markings
to install in the correct
orientation. Do not mix
different batteries or
battery types.
Unscrew the screw holding the battery lid to
the body. Then lightly pull the clip down to pull
the lid away from the transmitter body.
Insert 4xAA batteries into the battery compartment,
making sure to match the polarities. Then replace the
lid and firmly tighten the screw to secure the battery
compartment.
WARNING
CAUTION
NOTICE
1. Locate the battery compartment underneath the unit as shown in Figure A. Slide open the battery door and then
carefully disconnect the power cable underneath the XV-7 Microlite II as shown in the photo (Figure B). Do not pull the
battery by the wires as the wires may break off of the battery housing.
CAUTION: Battery may be hot if being disconnected right after use. If hot, then wait a few minutes to let the battery cool
down.
Please check the AA batteries routinely. If the AA
batteries are left within the Radio Control Transmitter,
potential leakage and/or corrosion may occur which can
damage the transmitter and create a fire hazard.
Install batteries into the radio control transmitter.
STEP 1
Set the XV-7 Microlite II unit to charge.
STEP 2
Turn on the unit then the radio control and pair them
together. Do this by pushing up the throttle stick quickly
up once, then back down again. You will know it is paired
as the unit will stop blinking and the lights will stay steady
on.
STEP 3
CHARGING THE XV-7 Microlite II BATTERY (continued)
CARE & MAINTENANCE
NOTICE
The XV-7 Microlite II battery comes partially charged and is ready to fly. Skip to Remote
Control Battery Installation section and use your Microlite now. Use this charge
completely before charging the XV-7 Microlite II battery for the first time.
WE RECOMMEND!
When charging with the included USB cable the LED light will off, indicating it is
charging. Once charging is complete, the LED light will turn on and be red. The
charging time for the battery is approximately 1.5 hours.
• Do not submerge the unit in any liquids.
• Keep the unit dry.
• Disconnect the unit and monitor from USB power sources when not in use.
• Do not place the unit near powerful, un-shielded magnets.
• Do not expose the unit to extreme hot or cold temperatures.
• Do not hit, drop, or smash the unit with extreme force.
• Do not disassemble the unit for any reason.
NOT FOLLOWING THESE PRECAUTIONS WILL VOID YOUR WARRANTY.
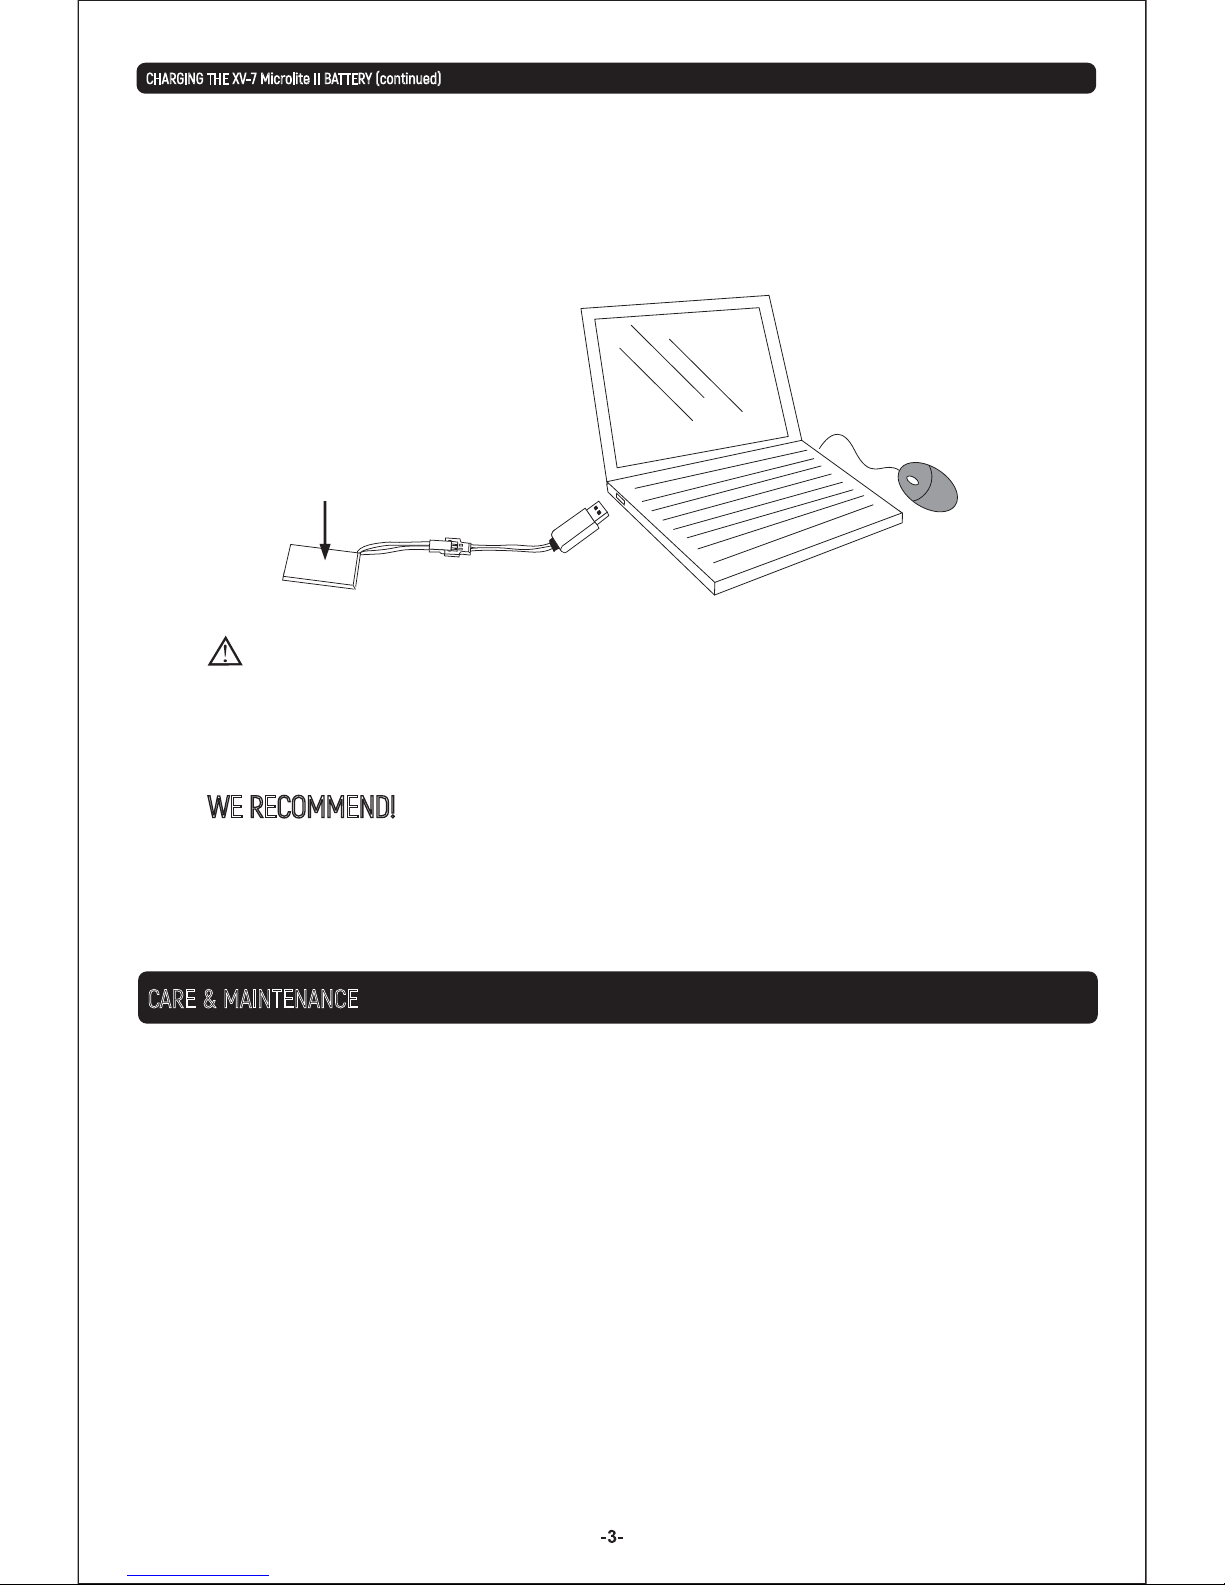
Connect the battery’s power cable to the end of the USB charging cable. Then connect the USB end of the
charging cable to a USB port like on a computer. Please note: Not all USB ports provide power. Typically,
only ports mounted on a computer and not through a peripheral will provide enough power for charging.
After charging the battery, charge the monitor in the same manner using the USB cable for the monitor.
Rechargeable Lithium
Polymer Battery
3.7V / 500 mAh
 Loading...