

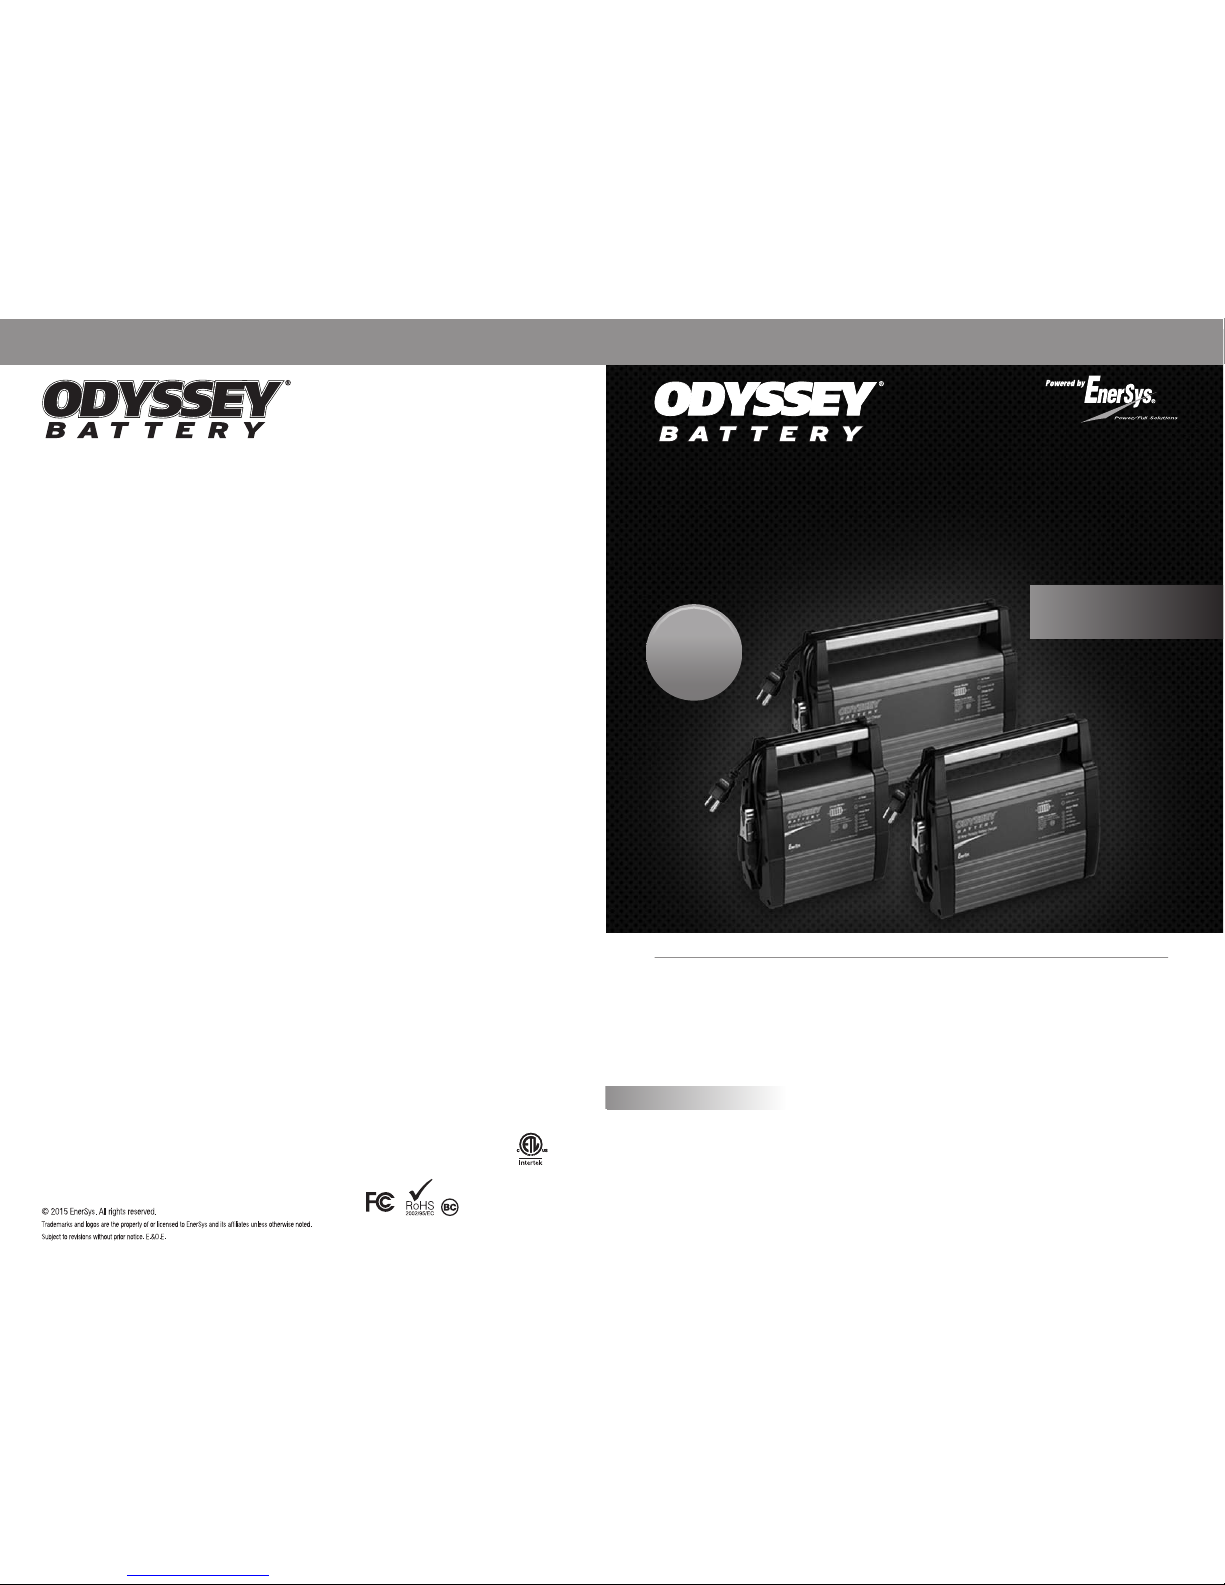
Odyssey OBC-6A, OBC-12A, OBC-20A Owner's Manual
US-ODYC-OM-01 Sept 2015
Need Assistance?
Do not return this product to a retailer or dealer for any service or warranty requirements. Please call us
at 1-660-429-2165 from 8:30 am to 5:00 pm Central Time for any technical, warranty or return assistance.
IMPORTANT NOTICE
Please save and read all safety, precautions, warning and operating instructions for the charger and
battery to be charged each time prior to using your ODYSSEY
®
Battery Portable Charger.
Certifications:
Conforms to UL STD. 1236
Certified to CSA STD. C22.2 No. 107.2
FCC Class A Part 15
CEC Listed
ODYSSEY
®
Battery 12 Amp Portable Charger OBC-12A 12 12 120VAC +/-10%6’ 9.25” x 11.25” x 3.88”
ODYSSEY
®
Battery 20 Amp Portable Charger OBC-20A 12 20 120VAC +/-10%6’ 9.25” x 13.75” x 3.88”
Model Part No. Volts Amps AC InCables Size
ODYSSEY® Battery 6 Amp Portable Charger OBC-6A 12 6 120VAC +/-10%6’ 9.25” x 8.75” x 3.88”
www.odysseybattery.com
Energy Saving
Digital Technology
Owner's Manual
RUGGEDIZED WEATHERPROOF CONSTRUCTION
Specifically Designed for 12 Volt Flooded and AGM Lead Acid Batteries. Not for Gel cell (Gelled
Electrolyte Lead Acid) or Lithium Batteries.
4007032
Portable Charger
EnerSys Energy Products Inc.
617 N. Ridgeview Drive
Warrensburg, MO 64093
1-660-429-2165
www.odysseybattery.com
Made in China
WARRANTY
2
YEAR

BATTERY CHARGER MEETS FCC CLASS A PART 15
Your battery charger has been designed and tested to comply with FCC Class A Part 15. These regulations
are to provide adequate protection against harmful interference while operated in a commercial
application. If in a residential setting, you are encountering interference with TV and radio reception,
simply remove AC power from the ODYSSEY® battery charger unit to confirm if your battery charger
is causing interference. End user can explore the following to minimize interference.
1) Chose a different AC circuit to power your Portable Battery Charger.
2) Make sure your outlet is properly grounded.
3) Re-position receiving antenna.
4) Purchase a separate AC line filter.
5) Relocate charger so that it is at the furthest point from home receiving equipment,TV, radio, etc.
Model Number Serial Number Date of Purchase
Please Record Your:
Important Charger Operation Note:
Please note the ODYSSEY
®
Battery Portable Charger Series has a built-in self-test feature
that will look at the battery connections, polarity and battery to determine if the battery
is capable of being charged correctly.
The Self-Test is automatic and will take place every time the unit is plugged into a 110VAC
outlet. The Self-Test may take up to two minutes to complete.
During the Self-Test, the blue Self-Test indicator will be illuminated. If the battery fails the
Self-Test, the charger does not go into the charge mode (red charge mode LED). A red
fault light is illuminated. This will indicate the battery has a problem; poor connection, a
blown DC cable fuse (6 amp ring terminal cable only), the DC cable is wired backwards
or the battery is under 2.5 volts. In any of these cases, refer to the troubleshooting section
on page 21 of this manual.
After the Self-Test has been successfully completed, the charger will register and illuminate
the green “System Check OK” indicator followed by a solid red charge mode LED light
indicating the battery is being charged.
• Introduction...................................................................................................1
• Important Safety Instructions...................................................................2-3
• AC Power Cord Connection..........................................................................4
• Personal Precautions....................................................................................5
• Preparing to Charge.......................................................................................6
• Charger Location...........................................................................................7
• DC Connection Precautions - In-Vehicle.......................................................8
• DC Connection Precautions - Out-of-Vehicle.................................................9
• General Overview.........................................................................................10
• Selecting a Charger.....................................................................................11
• Product Features........................................................................................12
• General Operation..................................................................................13-19
• Storage and Maintenance....................................................................................20
• Troubleshooting.........................................................................................21
• Specifications...............................................................................................22
• Product Warranty...................................................................................23-24
Table of Contents

Thank you for your recent purchase of Enersys’ newest line of portable chargers. Our
ruggedized weatherproof portable battery chargers incorporate all-digital microprocessor
control with AC power on self testing, including “System Check OK” and “Battery Fault
Trouble” LED indicators. Our new series also includes a battery charge monitor to show
relative charge status and an energy saving mode that activates after fully charging and
conditioning batteries. This charger will monitor and Auto Maintain batteries only when
needed to maintain a full state of charge, resulting in maximum reserve power performance
and lower AC power consumption and operating costs.
Designed for 12 Volt Flooded and AGM Lead Acid Batteries
ODYSSEY® Battery Next Generation Portable Charger features:
All Digital Technology Microprocessor and software controlled pulse charging technology
delivering a lightweight design, cooler charger operation and faster charging.
LED Battery Charge Monitor Innovative LED Battery Charge Monitor to provide relative
charge level status at a glance during operation.
System OK and Battery Fault Trouble Status Indicator Advanced technology eliminates
time consuming troubleshooting by clearly indicating system and battery connections are
OK or if a fault is present prior to charging a battery.
Six Stage Digital Performance Charging Fully charge and extend the life of your batteries.
- Stage 1: Unit Self Test
Stage 1: Unit Self Test
- Stage 2: Analyzing
Stage 2: Analyzing
- Stage 3: Charging
Stage 3: Charging
- Stage 4: Conditioning
Stage 4: Conditioning
- Stage 5: Auto Maintain
(Energy Saver Mode)
- Stage 6:
Stage 6: Storage Recondition Mode
Digital LED Display Bright LED indicators for all six stages in addition to AC Power On
indication.
Integrated Cable Wrap Body Design Minimize storage space. When not using your portable
charger simply wrap the cables around the body of the charger.
Ruggedized Weatherproof Design Our chargers are design with a rugged extruded aluminum
housing and constructed to take on harsh weather conditions.
Built-in Quality and Safety Spark free connections, built-in over-voltage, overload,
over-temperature and reverse polarity protection.
DC Cable Quick Connector Ring Terminal Cable and Clamps (6 amp model only).
Great for vehicle storage during non use periods.
2-Year Limited Warranty See pages 23 and 24.
Introduction
1
Important Safety Instructions
2
SAVE THESE INSTRUCTIONS
This manual contains important safety and operating instructions for the ODYSSEY
®
Battery Portable Charger.
WARNING
To reduce the risk of injury to user or property, the user must read and understand the
instruction manual and all warnings on the charger and battery before use.
WARNING
RISK OF EXPLOSIVE GAS MIXTURE. Read instructions in manual before using charger.
1. Connect and disconnect battery leads only when supply cord is disconnected.
2. For a battery installed in a vehicle, first connect the POSITIVE (RED) Clip of the battery
charger to the POSITIVE (POS,P,+) ungrounded post of the battery. Connect NEGATIVE
(BLACK) clip to vehicle chassis or engine block away from battery. Do not connect clip
to carburetor, fuel lines, or sheet-metal body parts. Connect to a heavy gage metal part
of the frame or engine block.
3. Do not overcharge battery - See Instruction Manual.
4. Do not smoke, strike a match or cause a spark in vicinity of battery.
5. Use in well-ventilated area.
6. Refer to Instruction Manual for further details.
WARNING
This equipment employs parts, such as switches and relays, that tend to produce arcs or sparks
and therefore, if used in a garage, locate in a room or enclosure provided for the purpose or not
less than 18 inches above the floor.
CAUTION
Risk of Electric Shock. Connect only to properly grounded outlets.
Do not expose to rain or snow.
If cords or wires/cables become damaged return complete unit to EnerSys
®
Energy Products Inc
for service/repair immediately before further use.
CAUTION
1. WARNING - RISK OF EXPLOSIVE GASES.
a. WORKING IN THE VICINITY OF A LEAD ACID BATTERY IS DANGEROUS. BATTERIES
GENERATE EXPLOSIVE GASES DURING NORMAL BATTERY OPERATION. FOR THIS
REASON, IT IS OF UTMOST IMPORTANCE THAT YOU FOLLOW THE INSTRUCTIONS
EACH TIME YOU USE THE CHARGER.
b. To reduce risk of battery explosion, follow these instructions and those marked on the
battery. Review cautionary marking on these products and on engine.
2. Use charger for charging a LEAD ACID battery only. It is not intended to supply power to an
extra-low-voltage electrical system or to charge dry-cell batteries. Charging dry-cell batteries
may burst and cause injury to persons and property.
3. NEVER smoke, strike a match or cause a spark or flame in vicinity of battery or engine.
4. NEVER charge a frozen, damaged or leaking battery.
5. If it is necessary to remove battery from vehicle to charge it, always remove grounded terminal
from battery first. Make sure all accessories in the vehicle are off in order to prevent an arc.
6. Study all battery manufacturer’s specific precautions such as removing or not removing cell
caps while charging and recommended rates of charge.
7. Do not use the battery charger unless the battery recommended charge voltage matches the
output voltage rating of the charger.
8. Use of an attachment not recommended or sold by EnerSys
®
Energy Products Inc may
result in a risk of fire, electric shock or injury to persons.
9. To reduce risk of damage to electric plug and cord, pull by plug rather than cord when
disconnecting charger.
10.Extension cords should not be used unless absolutely necessary. Use of an improper
extension cord could result in a risk of fire and electric shock. If an extension cord must be
used make sure:
a. Use only a properly wired extension cord in good electrical condition.
b. Use an industrial grade / heavy duty UL or CSA approved extension cord. Check
extension cord before use for damage, bent prongs, and cuts. Replace if damaged.
Always make your extension cord connection on the charger side first. After connecting
the extension cord to the charger proceed to plug the extension cord into a nearby 120
VAC GFCI protected (Ground Fault Circuit Interrupt) outlet. Below are manufacturer
recommendations for the right size UL or CSA Approved grounded extension cord.
i. Up to 50 feet in length use a 18 AWG extension cord.
ii. 50 to 100 feet in length use a 16 AWG extension cord.
iii. 100 to 150 feet in length use a 14 AWG extension cord.
11. Do not operate charger if any protective AC and DC cable insulation, charging clamps, DC fuse
holders and/or maintainer ring terminals have been damaged or compromised. Return the
charger for service and repair to EnerSys
®
Energy Products Inc immediately.
12. Do not operate the charger if it has received a sharp blow, direct hit of force, been dropped or
otherwise damaged in any way. Return the charger for service and repair to EnerSys
®
Energy
Products Inc immediately.
13. Do not disassemble charger. Incorrect reassembly may result in a risk of electric shock or
fire. If service or repair is required please call EnerSys
®
Energy Products Inc at
1-660-429-2165 between 8:30 am - 5:00 pm Central Standard Time. Unauthorized attempts
to service, repair or modify may result in a risk of electrical shock, fire or explosion and
will void warranty.
14. T o reduce risk of electric shock, unplug charger from outlet before attempting any maintenance
or cleaning. Turning off controls will not reduce risk.
15. Do not expose charger to rain or snow.
Important Safety Instructions
3
16. GROUNDING AND AC POWER CORD CONNECTION INSTRUCTIONS
a. Charger should be grounded to reduce risk of electric shock. Charger is equipped with
an electric cord having in equipment-grounding conductor and a grounding plug. The
plug must be plugged into an outlet that is properly installed and grounded in
accordance with all local codes and ordinances.
DANGER
Never alter AC cord or plug provided - If it will not fit outlet, have proper outlet installed by a
qualified electrician. Improper connection can result in a risk of an electric shock.
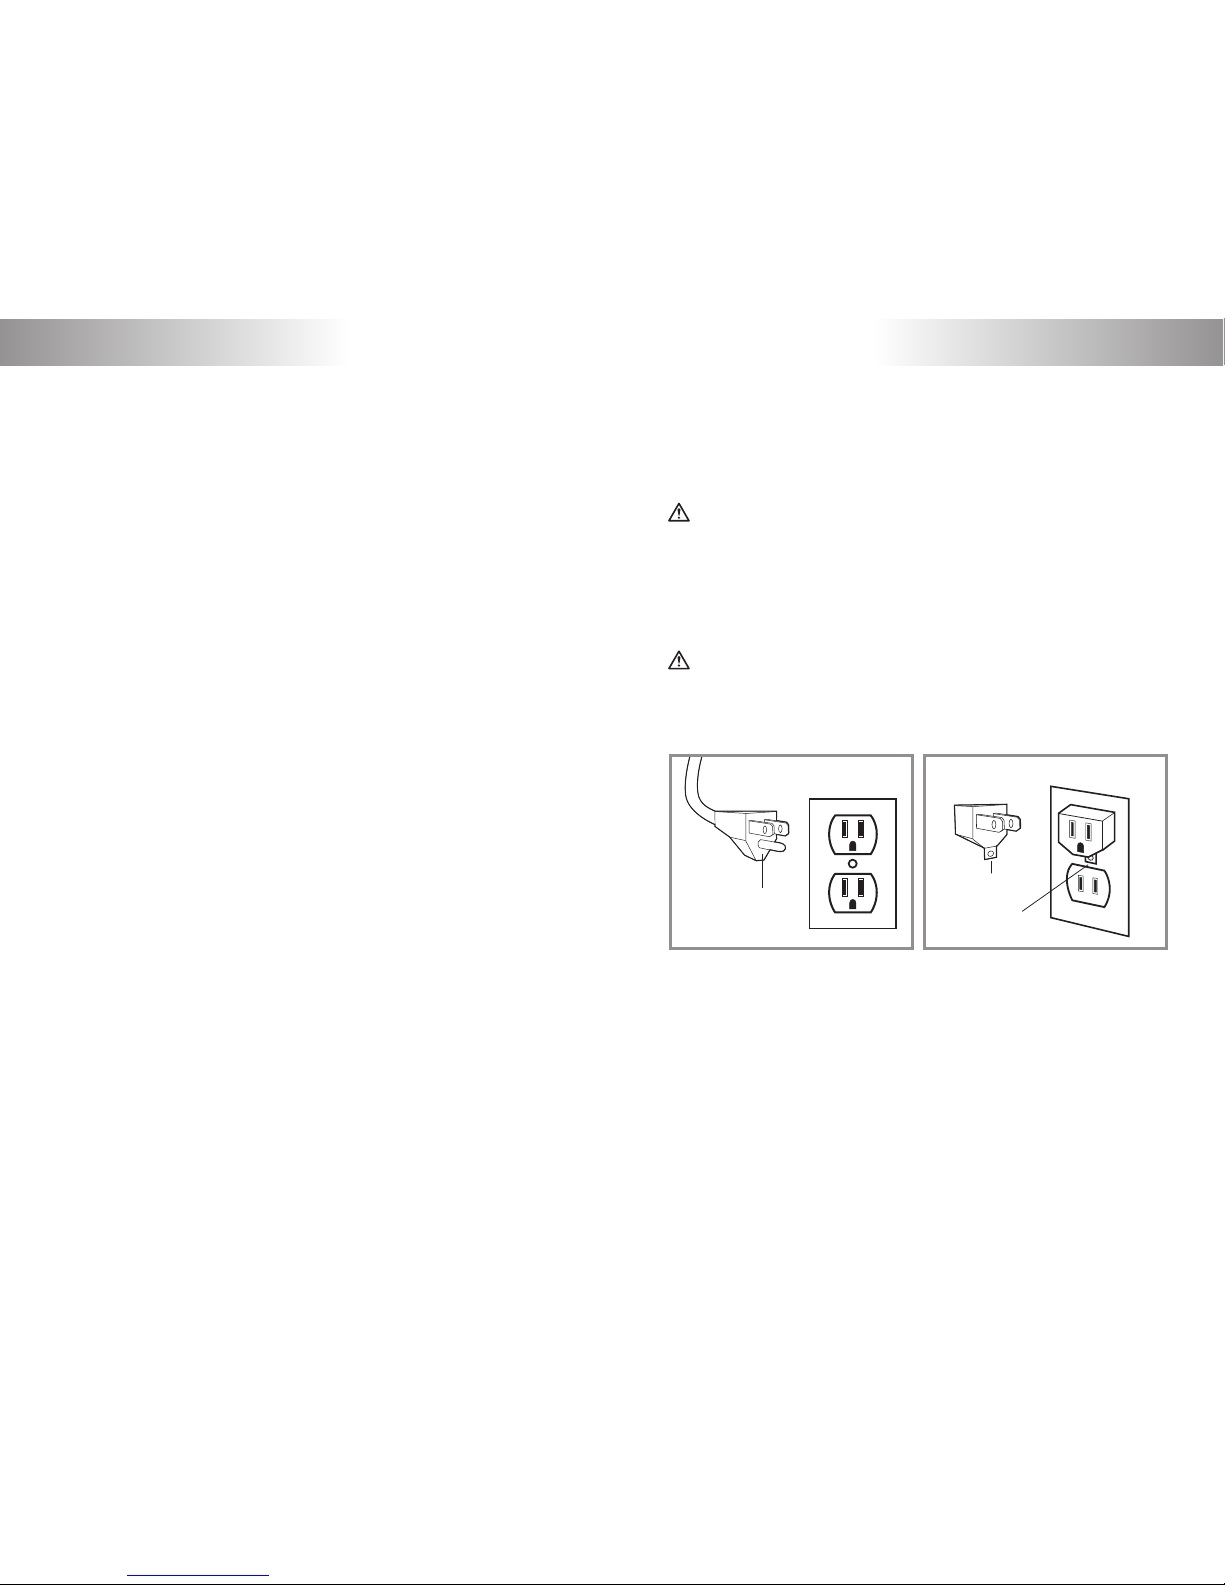
b. This battery charger is for use on a nominal 120-volt circuit, and has a grounding
plug that looks like the plug illustrated in Figure A. A temporary adapter, which looks
like the adapter illustrated in Figure B may be used to connect this plug to a twopole receptacle as shown in Figure B if a properly grounded outlet is not available.
The temporary adapter should be used only until a properly grounded outlet can be
installed by a qualified electrician.
DANGER
Before using adapter as illustrated, be certain that center screw of outlet plate is grounded.
The green-colored rigid ear or leg extending from adapter must be connected to a properly
grounded outlet - make certain it is grounded. If necessary, replace original outlet cover
plate screw with a longer screw that will secure adapter ear or lug to outlet cover plate and
make ground connection to grounded outlet.
Use of an adapter is not allowed in Canada. If a grounding type receptacle is not available,
do not use this appliance until the proper outlet is installed by a qualified electrician.
AC Cord Connections
4
Figure A
Grounding pin
Grounding means
Metal screw
Adapter
Figure B

17. PERSONAL PRECAUTIONS
CAUTION
a. Consider having someone close enough or within the range of your voice to come to your
aid when you work near a lead acid battery.
b. Have plenty of soap, water and baking soda nearby in case battery acid comes in contact
with skin, clothes or eyes.
c. Wear complete eye protection, hand and clothing protection. Avoid touching eyes while
working near a battery.
d. If battery acid contacts skin or clothing, wash immediately with soap and water. If acid
enters eye, immediately flood eye with running cold water for at least 15 minutes and get
medical attention immediately.
e. NEVER smoke, strike a match or cause a spark or flame in vicinity of battery or engine.
f. Be extra cautious to reduce risk of dropping a metal tool onto the battery. It might spark
or short-circuit a battery or other electrical hardware which may cause an explosion or fire.
g. Remove all personal metal items such as rings, bracelets, necklaces, watches and jewelry
when working near a battery. A battery can produce a short circuit current high enough
to weld a ring or any other metal, causing serious burns.
h. Use charger for charging a LEAD ACID battery only. It is not intended to supply power
to a low voltage electrical system other than in a start-motor application. Do not use
battery charger for charging dry-cell batteries that are commonly used with home
appliances. These batteries may burst and cause injury to persons and damage to property.
i. NEVER charge a frozen, damaged or leaking battery.
j. Keep other persons, children and pets away from batteries and your charger during
operation to avoid serious injury, death, fire or explosion.
k. Do not place the charger in the engine compartment or near moving parts. Place away
from the battery using the length of the DC cables.
l. Consult vehicle owner’s manual.
Personal Precautions
5
18. PREPARING TO CHARGE A BATTERY
CAUTION
a. When it is necessary to remove a battery from a vehicle to charge, make sure the
engine is off and all accessories in-vehicle are off, as to not cause an arc. Always
remove the grounded negative terminal from the battery first.
b. Study all battery manufacturers’ specific precautions; warnings and instructions while
charging and recommended rates of charge. Never charge a battery with missing safety
vent caps.
c. Be sure the area around the charger and batteries is well ventilated while the battery is being
charged.
If the electrolyte is splashed into an eye, immediately force the eye open and flood it
with clean cool water for at least 15 minutes. Get prompt medical attention.
If electrolyte is taken internally, drink large quantities of water or milk. DO NOT induce
vomiting. Get prompt medical attention.
Neutralize with baking soda any electrolyte that spills on a vehicle or in the work area.
After neutralizing, rinse contaminated area clean with water.
d. Clean battery terminals. Be careful to keep corrosion from coming in contact with eyes.
e. For flooded batteries with removable caps, ONLY ADD DISTILLED WATER in each cell
until electrolyte reaches levels specified by the battery manufacturer. Do not over fill.
For a maintenance free battery without removable caps, such as valve regulated lead
acid batteries, carefully follow manufacturer’s recharging instructions.
f. Study all battery manufacturer’s specific precautions while charging and recommended
rates of charge.
g. Determine voltage of battery by referring to car owner’s and battery manufacture
manual and labels and make sure that charger output voltage is a correct voltage
range for the battery you are charging. Refer to Battery Types specified in this manual
Preparing to Charge
6
 Loading...