

Page 1
14+
Instruction Manual
ODY–1228
INSPIRING IMAGINATIONINSPIRING IMAGINATION
Page 2

We hope you enjoy your purchase of the
Build-A-Drone and that this user manual helps
build your drone and fly it around your neighborhood.
Included Contents
1. (2.4G) Remote Controller
2. Rechargeable 600mAh Li-Po Battery
3. USB Charging Cable
4. Instruction Manual
5. Quickstart Guide
6. Construction Guide
7. (4x) Replacement Propellers
8. Screwdriver
9. (44x) Toy Construction Blocks
10. Large Velcro strap and 4 Small Velcro straps
1
Page 3

Controls
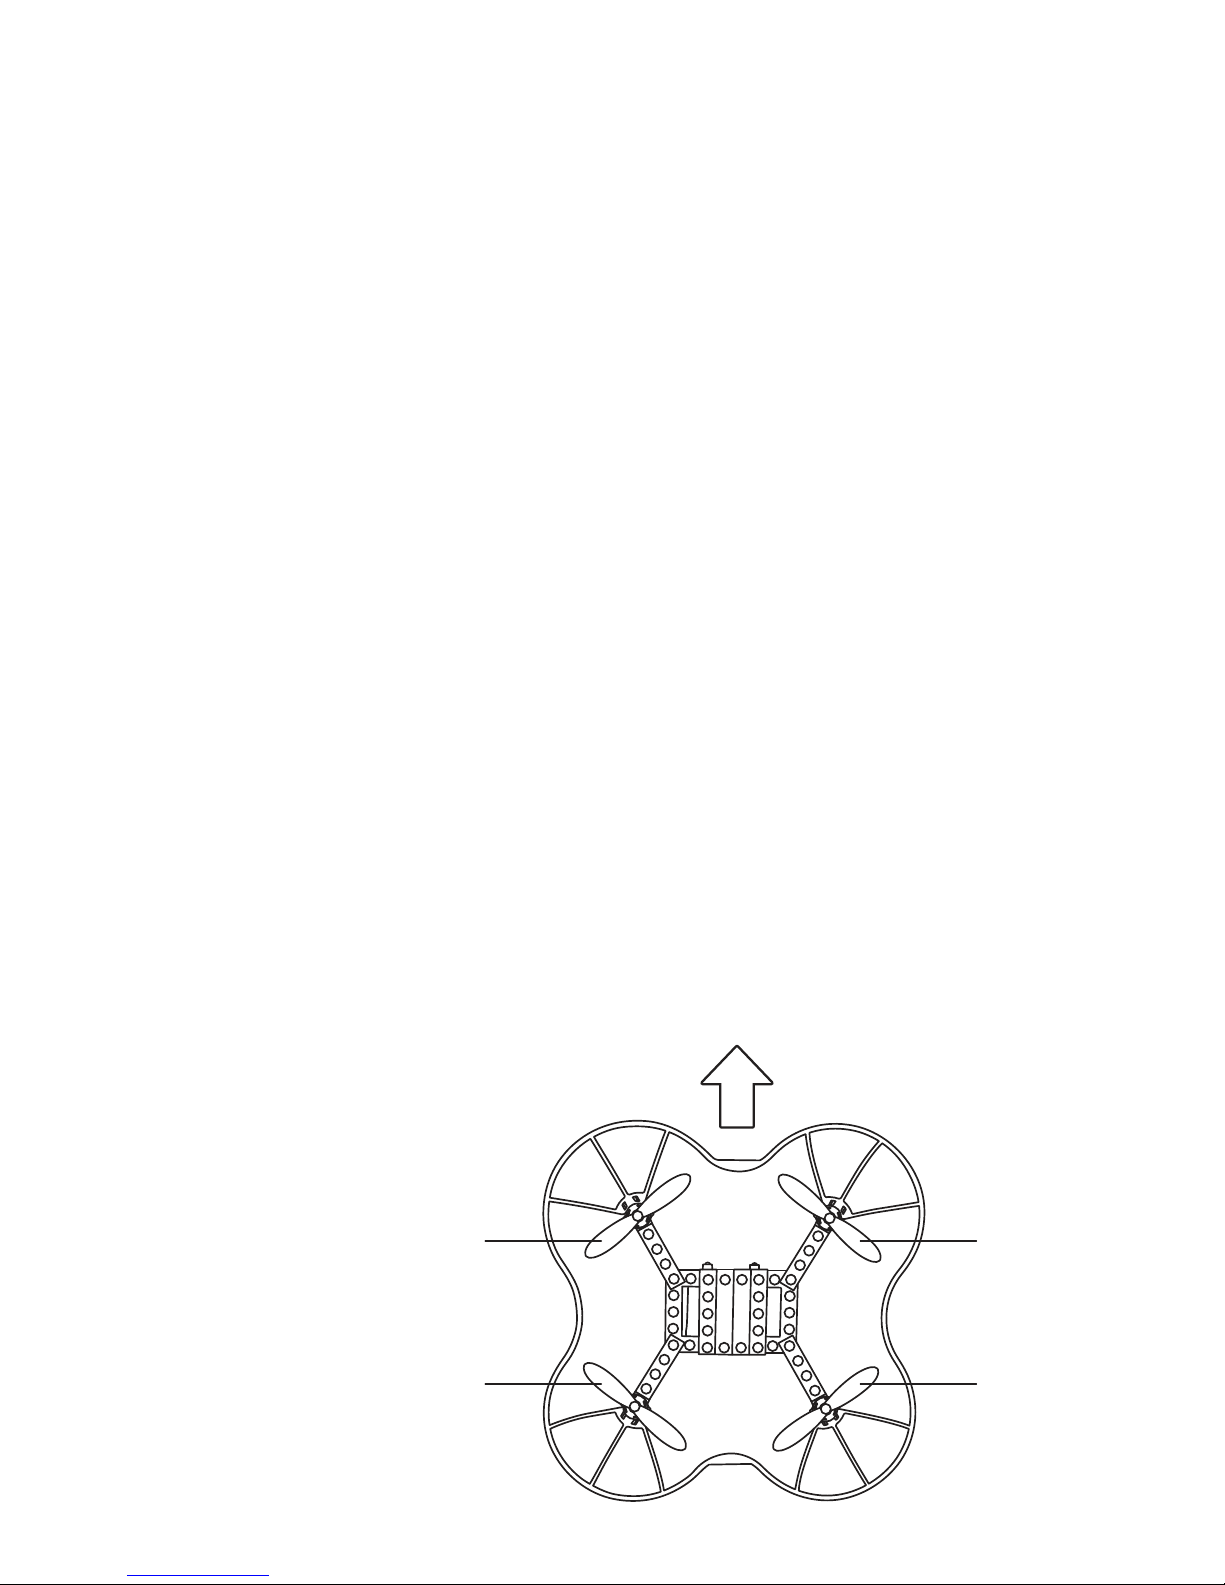
Replace the blade according to the corresponding location of
the propeller AB in the figure.
Front
Back
Rightward
trimmer
Not in use
Not in use
Directional stick
Trim reset
Headlight
control
4 speed
settings
Throttle stick
SmartFly tech
Left turn
trimmer
Leftward trimmer
One key
return
Right turn trimmer
Power switch
360° Flip
Forward
trimmer
Backward
trimmer
Indicator
2
Page 4
Specifications
Charging Time: About 40-60 minutes
Flying Time: About 5-6 minutes
Controlling Distance: About 30-50 meters
Battery for Quadcopter:
3.7V 600mAh 20c Li-Poly
Battery for Transmitter:
3 AA batteries (not included)
Flight Preparation
Drone Assembly
Part of the fun of the Build-A-Drone is building the
body of the drone! Build it before you fly it, so
please reference the assembly instructions (included in this kit) to see the three different ways you
can build your drone.
Propeller
Installation
A
B
A
B
3
Page 5

Please Note: The propellers are lightly labeled
with the motor arms they should be paired with. For
example, propeller A1 will be attached to the front
arm. Please see Step 1 in the Construction Guide
as a guideline when attaching the propellers.
Please ensure proper installation of the propellers
to fly the drone.
Step 1 Match your propellers to each motor arm by
the corresponding letter: A, B.
Step 2 Place each propeller on the small pin on
the corresponding motor arm.
Charging & Installing the Build-A-Drone
Batteries
Please Note: The Build-A-Drone comes with a
partially charged battery and does not include
batteries for the remote controller.
Warning: Please check the batteries regularly as
potential leakage and/or corrosion of old batteries
can damage the drone and/or create a fire hazard.
Caution:
• Remove the batteries immediately if you sense
any smell or smoke.
• Do not charge the batteries if they are hot, wait
4
Page 6
until they cool down.
• Do not charge the batteries next to flammable
sources or on a conductive surface.
• Do not overcharge the battery, once the charging
light turns off disconnect the battery.
• It is recommended that you use Odyssey batteries and battery chargers only. If you need additional batteries or chargers, they are available in our
Parts Shop on www.odysseytoys.com.
• For safety and best practice, unplug the battery
connection from the power source inside the drone
when not in operation.
Please Note: The Build-A-Drone’s Remote Control
does not come with batteries. Please use 3 AA
batteries.
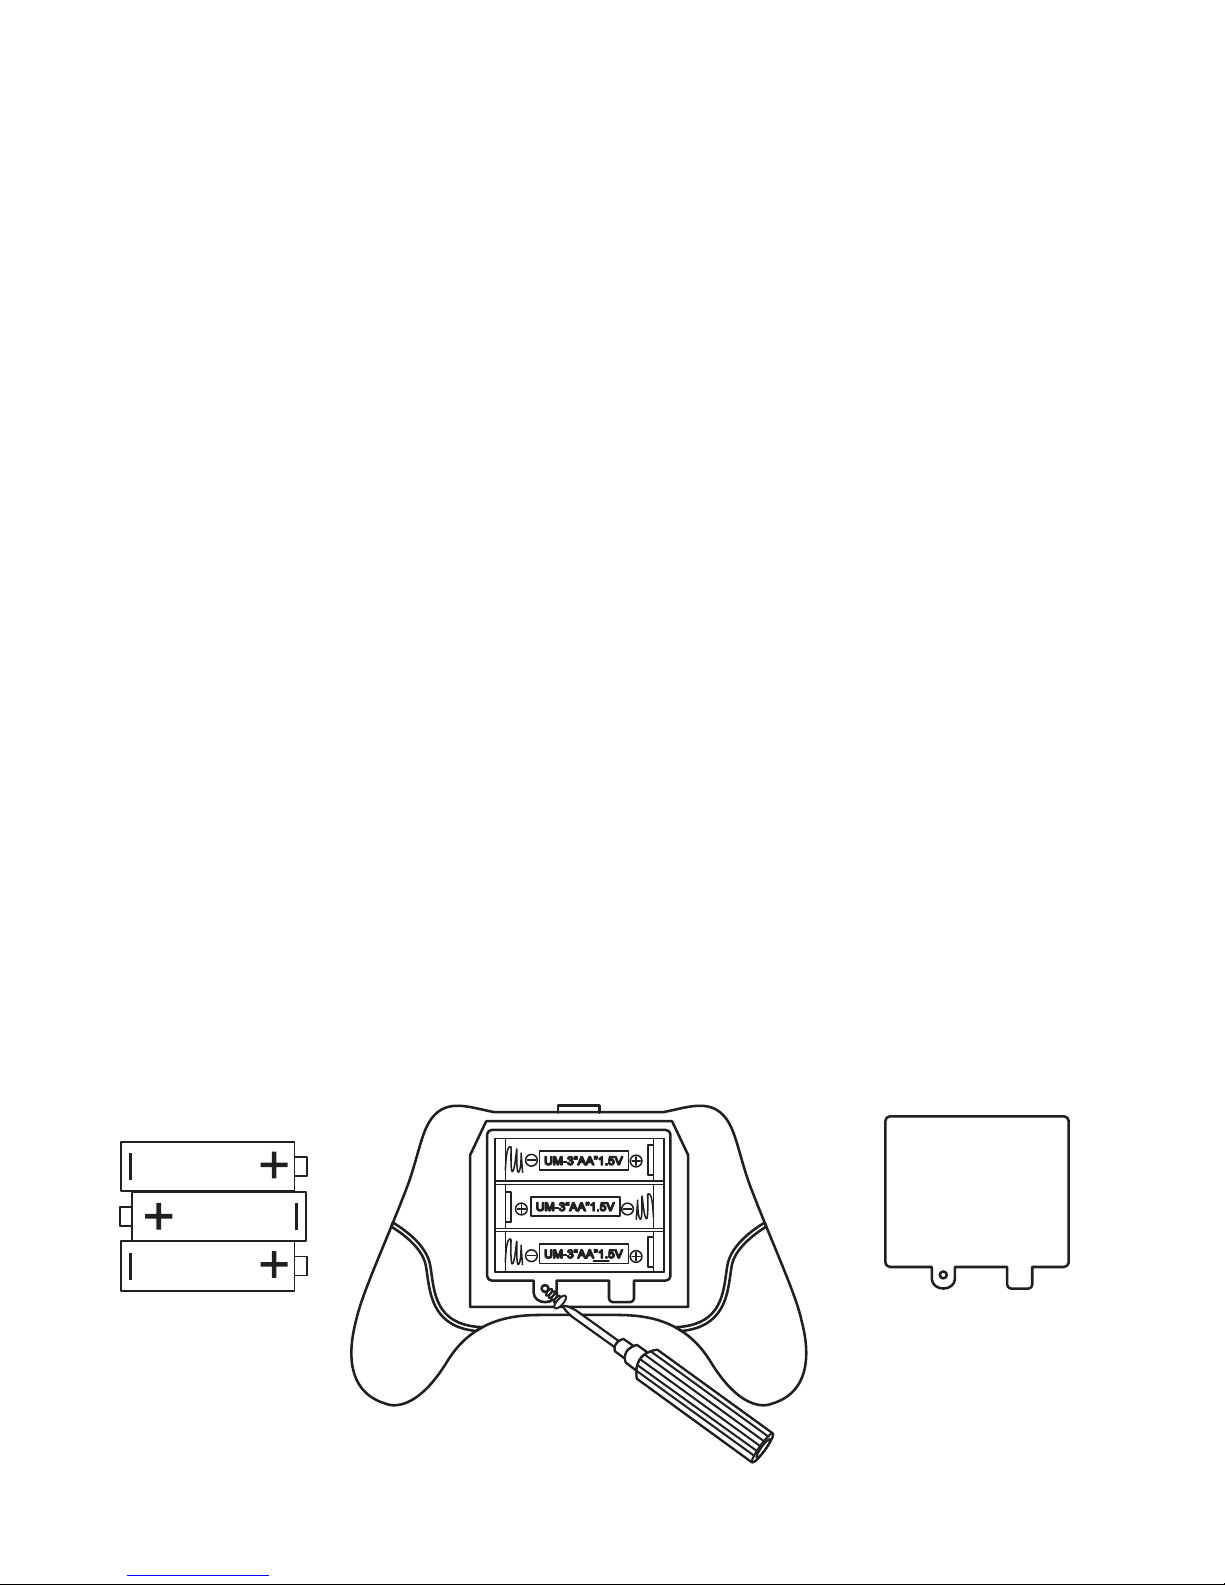
Remote Control Battery Installation
5
Page 7

Step 1 Using the included screwdriver, unscrew
the screw from the back of the remote control
battery pack and remove the battery lid.
Step 2 Insert your 3 AA batteries making sure to
line up the (+) and (-) signs.
Step 3 Reattach the battery lid by screwing it into
place.
Drone Battery and Charging
IMPORTANT: The battery does not need to be
removed and replaced each time you need to
charge your drone. This is because the drone is
built around the battery and has been designed to
charge without taking the drone apart.
*Please refer to the building manual to learn how to
build the drone around the battery.
Step 1 Insert the white connector of the battery
into the provided USB charging cable.
6
Page 8

Step 2 Insert the USB charging cable into a
computer. The charging cable indicating light bulb
with turn on to indicate charging has begun.
Please Note: Not all charging units will provide
enough power to charge the lithium battery. A
computer is typically the best source to power your
drone.
Step 3 The charge is complete when the red
indicating light bulb extinguishes. Remove the USB
charging cable from your computer and the battery
from the cable.
Let’s Fly –
Flying the Build-A Drone
Pairing
Please Note: Before every flight, the drone will
have to be paired to the remote controller.
Step 1 Connect the male end of the battery
charging cable to the female end of the drone
charging cable. Then place the drone on a flat
stable surface.
Please Note: the drone must be turned on before
the remote control to successful pair the two.
7
Page 9

Step 2 In the center of the remote control is the
red power button, press it once to turn ON. The
control’s LED will blink twice then turn a solid red.
The drone’s lights will be blinking continuously as
well.
Step 3 Move the left stick on the controller, the
throttle stick, UP and then DOWN. When the
drones LED lights go from blinking to solid, your
remote has paired with the drone.
Ascending – Descending
Ease the left throttle stick upwards to make the
Build-A-Drone go higher in altitude. Ease the left
throttle stick downwards to lower the
Build-A-Drone. Please note: The build a drone is
equipped with strong motors and will ascend
quickly, so make sure to ease into upward flight.
8
Page 10

Flying – Directions – Turning
Ease the right throttle stick (Directional Stick) up
and down to make the Build-A-Drone go forward
and backward.
Push the right directional stick left or right to turn
the Build-A-Drone in a specific direction.
9
Page 11

Press and hold the left throttle stick left or right and
the Build-A-Drone will rotate in that direction.
360° Flips
The Build-A-Drone can flip to the left or the right.
Please note that if the Build-A-Drone does not flip
mid-flight, it is likely due to a low battery.
Step 1 While hovering in mid-air press the top right
button.
Step 2 Choose the
direction of the 360° flip
by pressing the right
throttle stick forward or
backward.
Step 3 Observe the
Build-A-Drone conduct a
360° flip.
Speed Adjustment
Note: There are four different speed levels on the
Build-A-Drone which can be determined by pushing the Speed Button, top left red button on the top
of the remote controller.
To Change the Speed
Push the Speed button before flight or mid-flight to
10
Page 12

change the speed level.
• 1 Beep - Speed level one
• 2 Beeps - Speed level two
• 3 Beeps - Speed level three
• 4 Beeps - Speed level four
Trim
If the Build-A-Drone veers in any direction when
not ordered to do so, then an adjustment to the
trim needs to be made. The adjustment will be
made through the remote controller.
The following are the four adjustments that you can
make to the flight characteristics:
Please Note: To adjust the trim you will use the
secondary set of buttons below the left and right
directional and throttle sticks. These buttons are in
a circular formation.
Yaw
Left Turning and Right
Turning Trim: If the
Build-A-Drone is spinning
in circles or drifting in a
rotation, trim accordingly.
11
Page 13

To trim right, press the Right Turn Trimmer button
under the left throttle stick and to trim left press the
Left Turn Trimmer button under the left throttle stick.
Pitch
Backward and
Forward Trim: If the
Build-A-Drone drifts
backward or forward,
trim accordingly. To trim
forward press the (up) Forward Trimmer button
under the right directional stick and to trim backwards press the (down) Backward Trimmer button
under the right directional stick.
Roll
Leftward and Rightward Trim: If the
Build-A-Drone drifts left
or right, trim accordingly.
To adjust the left drift
press the Leftward Trim
button located under the right directional stick and
to adjust the right drift press the Rightward Trim
button located under the right directional stick.
12
Page 14

Automatic Trim
Command
To reset the drone to
it’s normal settings,
press the Trim Reset
button located under
the left throttle stick. This is the top circular button
Flying in SmartFly Tech mode
and using One-Key Return
The Build-A-Drone features SmartFly Tech and a
One-Key Return feature. Generally when you are
flying a drone, your front and back usually change
position as you rotate and fly in different directions.
This can make it difficult to tell which direction the
drone is flying in. Therefore, SmartFly Tech helps
you take control over the drone’s directions as
forward will always be facing the way that you are
facing.
SmartFly Tech Mode
In this mode, you do not need to worry about the
orientation of the drone. Whatever position the
drone’s front is in before taking off will be your front
13
Page 15

IF you initiate the SmartFly Tech mode. This is
useful if you would like to have to the drone return
to your general direction (i.e. One-Key Return).
One-Key Return
In this mode, the
drone will return back
to your general
direction automatically. However, the drone
will return back to you
IF, and ONLY IF, you are looking towards the BACK
of the drone. This means that if you are facing the
backside of the drone and you hit the One-Key
Return button, the drone will fly backwards towards
your general direction.
Initiating SmartFly Tech & One-Key Return
Step 1 Before taking off, place the drone on a flat
surface
Step 2 Press the SmartFly Tech button, which is
the up button located below the left throttle stick.
Step 3 Take flight and fly the drone. When you are
ready to return home ensure that the back of the
drone is facing you.
14
Page 16

Step 4 Press the One-Key Return button, which is
the down button located below the left throttle stick.
Care & Maintenance
• Do not submerge the unit in any liquids.
• Keep the unit dry.
• Disconnect the unit and monitor from USB power
sources when not in use.
• Do not place the unit near powerful, un-shielded
magnets.
• Do not expose the unit to extreme hot or cold
temperatures.
• Do not hit, drop, or smash the unit with extreme
force.
• Do not disassemble the unit for any reason.
NOT FOLLOWING THESE
PRECAUTIONS WILL VOID YOUR WARRANTY.
This device complies with part 15 of the FCC
Rules. Operation is subject to the following two
conditions: (1) This device may not cause harmful
interference, and (2) this device must accept any
interference received, including interference that
may cause undesired operation.
15
Page 17

Cautions & Warnings
• Suitable for ages 14 and up. Adult supervision is
always recommended.
• This product contains small parts which are a
choking hazard. Keep away from small children.
• Keep Quadcopter at least 10 feet away during
use.
• Accurately assemble the quadcopter and fly it
under the guidelines of this manual. Small parts
should be installed by an adult.
• Manufacturers and dealers disclaim all responsi-
bility for damage caused by misuse.
• Keep hands, hair and loose clothing away from
rotors when powered on to to prevent damage to
the vehicle or serious injury to oneself or others
around.
• The quadcopter should never be flown in high
winds in excess of 5 MPH or near a pool.
• Never leave the device unattended when being
charged.
16
Page 18

Odyssey Toys • Miami, FL 33179
For Customer Service please email:
Care@OdysseyToys.com
www.OdysseyToys.com
17
 Loading...