

Odyssey BLAZIN’ MOTO Instruction Manual

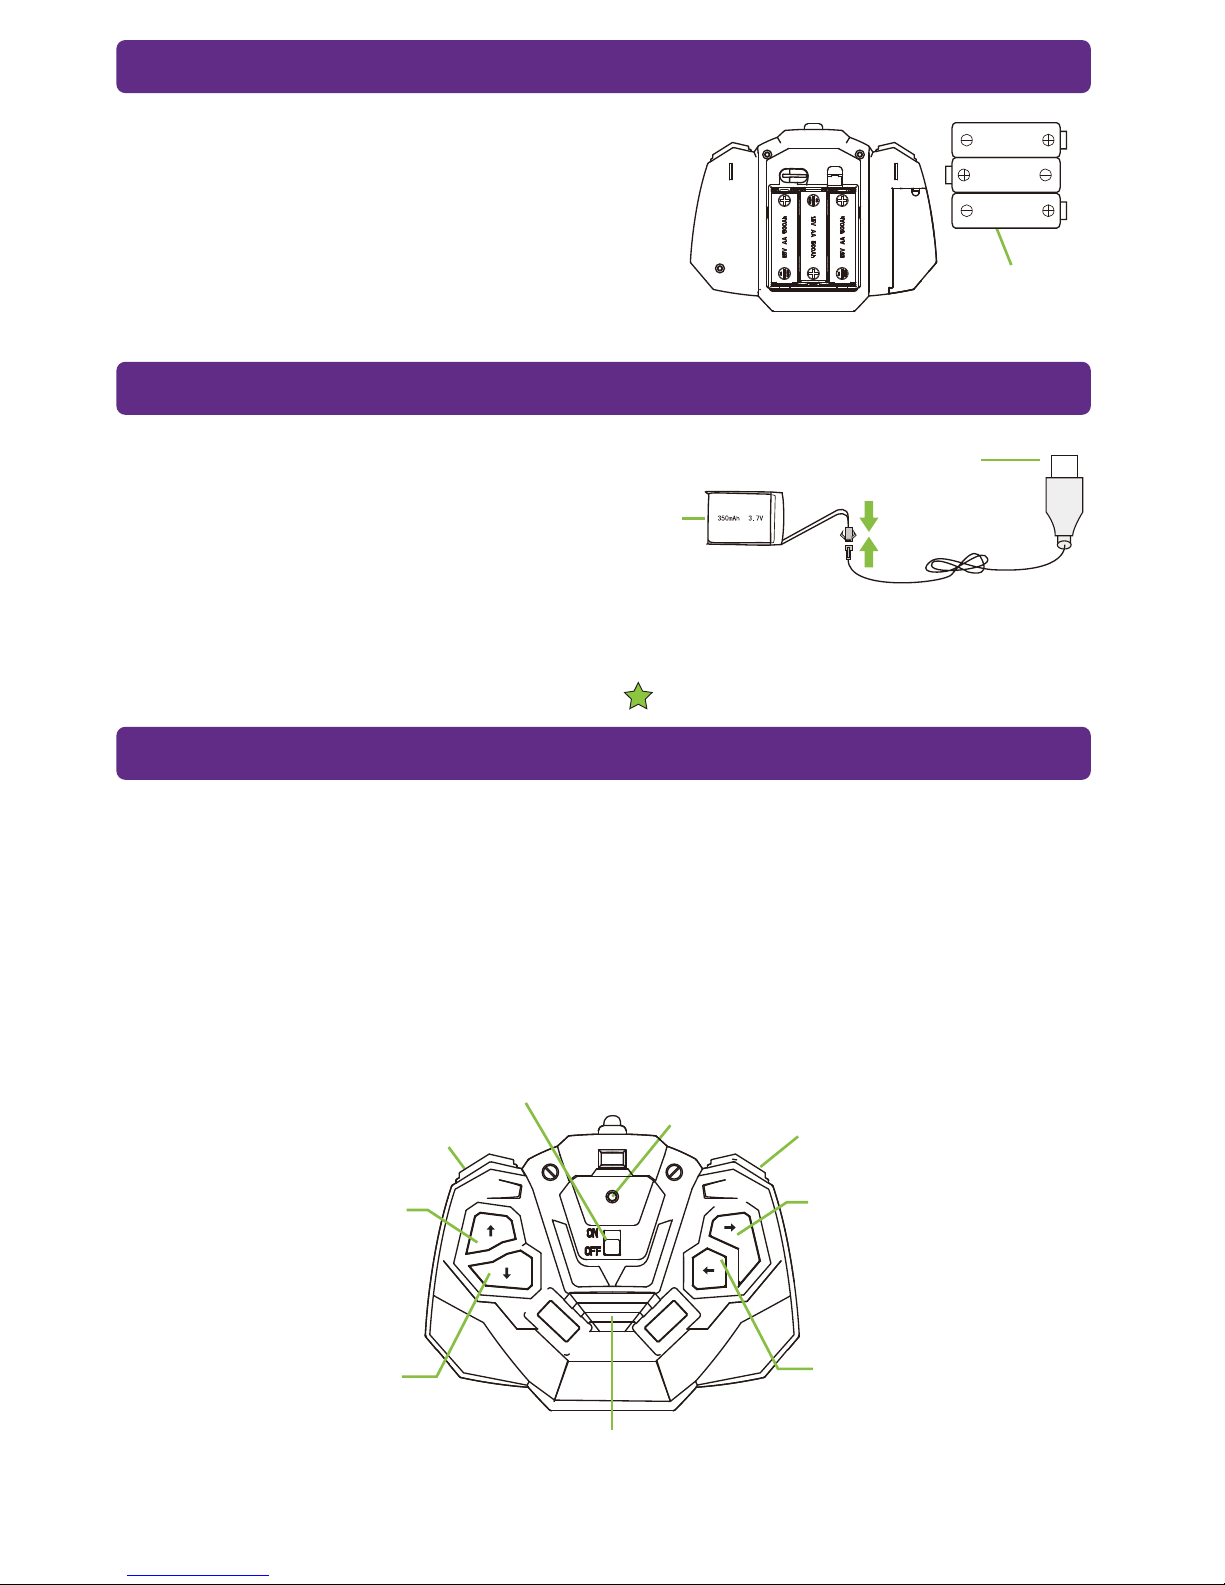
LiPo Battery
On/Off
Switch
Battery Connector
1
INSTRUCTION MANUAL: BLAZIN’ MOTO 8+
SETTING UP BLAZIN’ MOTO
1. Turn off the power switch.
2. Turn the battery cover knob to open compartment.
3. Connect the battery wire to the Blazin’ Moto’s connector as shown on the diagram.
4. Close the battery compartment and switch the power switch to On.
FOR
AGES
Demo
Transform
On/Off
Switch
Move Forward
Move Backward
Turn Left
Command Speaker
Turn Right
LED
Indicator
USB Charging Cord
Robot
LiPo
Battery
3x AA Batteries
2
SETTING UP THE REMOTE CONTROL
CHARGING THE BLAZIN’ MOTO’S BATTERY
OPERATING BLAZIN’ MOTO
1. Turn the battery cover knob to open the
compartment.
2. Install 3x new AA batteries taking care to
match the correct polarity (+/-).
3. Close the cover and turn the cover knob
to lock the cover in place.
- For best results the car needs to be within a 15’ foot range of the controller.
- For effective voice commands make sure you are within 12 inches of the
controller command speaker.
- If left unattended the car will go into power saving mode after 5 minutes. To
wake, press any button on the controller.
- If the sound becomes intermittent this indicates low battery. Please follow the
battery charging instructions to recharge.
Tip. Full charge takes approx. 1hr
1. Remove the battery from the robot as
shown in the robot setting up
instructions.
2. Connect the robot battery to the USB
charging cord connector.
3. Plug the USB cord into a 5v1a USB charger.
4. The charger light will turn on to indicate charging. When the charger light
goes out charging is complete and you can reinstall the battery in the robot.
Controller Functions
 Loading...