

ODSONIC 8810S User Manual
Warm Reminders:
【Quick Installation Guide─AllCam x Baby Temperature Monitor v1.0】
(Pic.1) (Pic.2) (Pic.3)
1. Please install the Gateway.
2. Pairing RF Sensors with the Gateway.
Please Prepare:
1. First time installation, network requirement: Gateway on the same Wi-Fi router as the
smartphone/tablet.
2. Required Application: “ALLCAM” APP
Gateway Installation
1. 【First-Time Installation】
1.1. Install " AllCam " APP: Search for “ALLCAM”
on GooglePlay / Apple Store or scan the QR Code on the right.
Please download and install the APP.
1.2. Plug in the power and the indicator light will be red.
1.3. After the Gateway has been powered for about 15 seconds, the indicator light will flash
green/red. (meaning it has entered AP-mode) When you see the flashing light, follow the steps below.
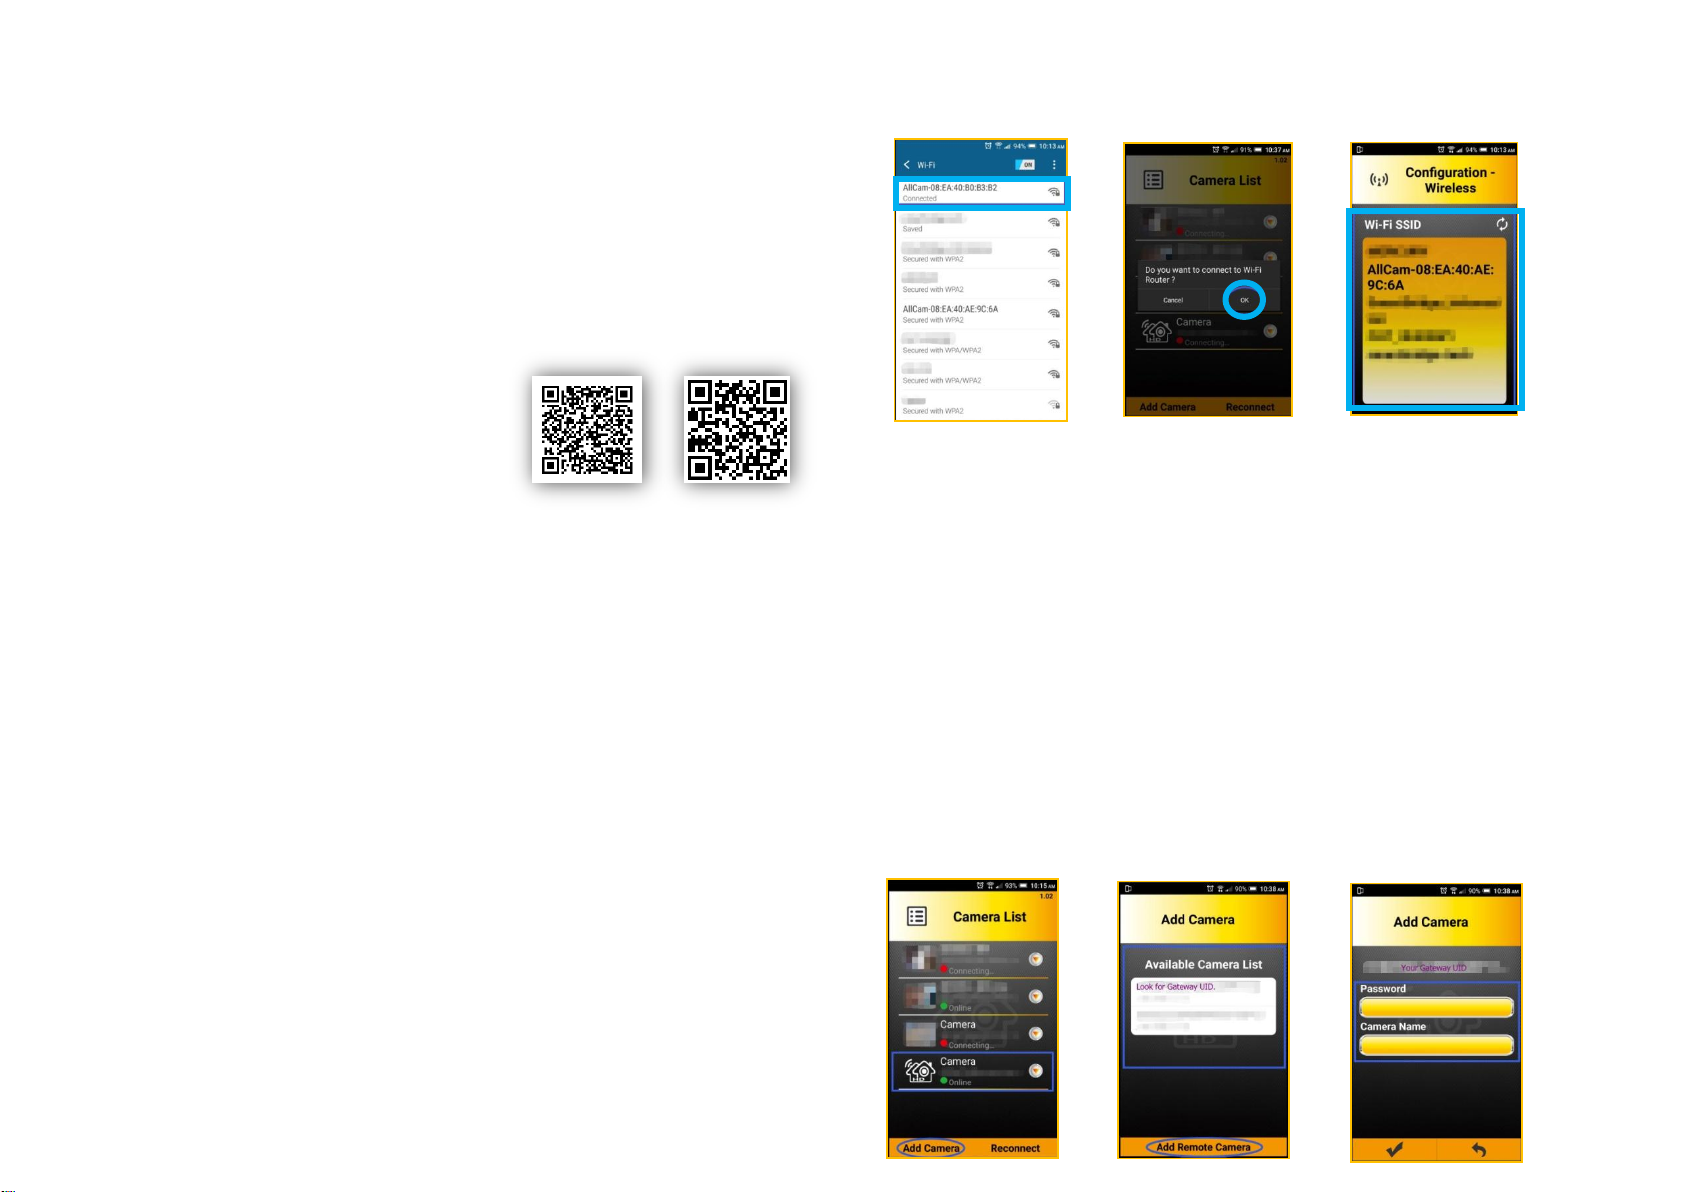
1.4. Connect to the Gateway AP point by going to the Wi-Fi options on your smartphone/tablet.
(Pic.1) Find and connect to:
“AllCam-XX:XX:XX:XX:XX:XX” (The actual MAC address will be displayed.), and enter the
password “12345678”.
1.5. After connecting to the Gateway AP, launch the installed APP “ALLCAM”:
1.5.1 When you see “Do you want to connect to Wi-Fi Router?” (Pic.2), If you have an
internet-ready Wi-Fi Router please press “OK”. When you see the Configuration-Wireless screen,
please select your Wi-Fi point (Pic.3) and connect to your router by entering your Wi-Fi password.
2. 【Adding a New User, After Installation】
2.1. Please first download and install the “ALLCAM” APP, you can find it in the Apple Store /Google
Play.
2.2. Please connect your smartphone/tablet to the same Wi-Fi router as the Gateway.
2.3. Launch the “ALLCAM” App, select “Add Camera” (Pic.4) and allow the system around 15
seconds to automatically scan for available Gateways.
2.4. Please select the according Gateway with your UID and select it (Pic.5), on the next screen
please enter your Gateway password (default is “admin”) and enter a name (Pic.6). Then select the
check mark to complete adding a new user.
(If adding multiple gateways, please repeat from step 2.1)
(Pic.4) (Pic.5) (Pic.6))
1.5.2 After connecting the Gateway to your router, wait about 30 to 40 seconds, when you see
(Pic.4) “Camera List” it means the installation was successful. The indication light on the
camera will turn solid green to indicate the same.
(If the password was incorrect, please wait for the Gateway to return to AP-Mode, and try
again.)
1.5.3 If you do not have an internet-ready Wi-Fi router, press “Cancel”. Then click on the
according Gateway under “Camera List”. Please note that it will not have any function outside the
local area and you will not receive any push notifications when a sensor is triggered.
1 QIG 08-2017 / v1.0
【Quick Installation Guide─AllCam x Baby Temperature Monitor v1.0】
the sensor to the desired location after pairing is done.
Baby Temperature Monitor – Pairing Process
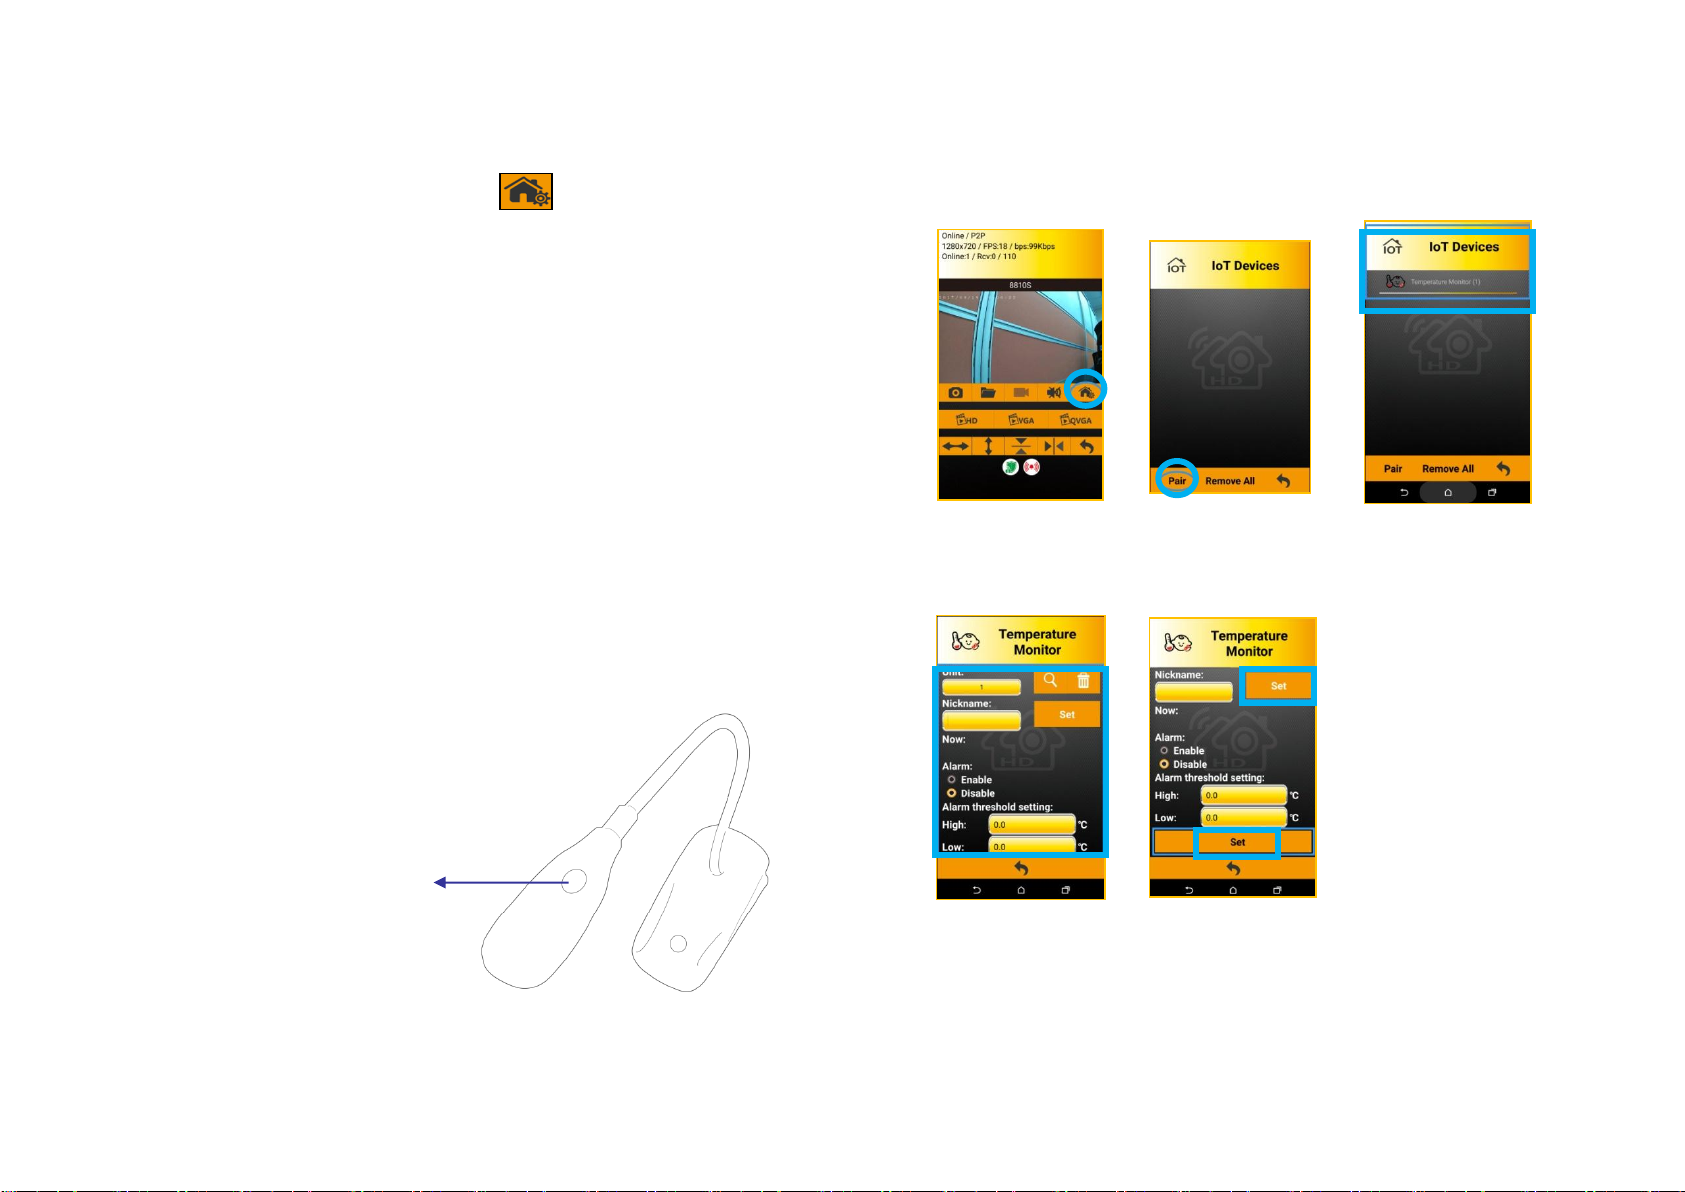
After setting up the Camera, click the IoT Devices button in Live View (Pic.8) to enter the IoT
Devices Menu.
1 Please place the Baby Temperature Monitor within 2 meters of the Camera.
○
2 Press the “Pair” key on the APP on your phone. (Pic.9)
○
3 Hold the Pairing Button on top of the Baby Temperature Monitor (Pic.7 [Below]) for 3 seconds,
○
and release the button. Then wait for 3 to 5 seconds for it to pairing process.
4 After Successful pairing, the Baby Temperature Monitor Icon will be added to the IoT Devices list.
○
(Pic.10) If it was not successful, please make sure the sensor is close to the Camera and the
Pairing Button was held down correctly and try again.
5 After pairing, click the Baby Temperature Monitor Icon to enter the settings menu. (Pic. 11,
○
Pic.12) Here you may name the sensor, and set the high/low threshold. Please remember to
press the “Set” button to save your settings.
(Pic.8) (Pic.9) (Pic.10)
(Pic.11) (Pic.12)
Pairing Button
(Pic.7)
※Please keep the Baby Temperature Monitor within 2 meters when pairing, and move
2 QIG 08-2017 / v1.0
 Loading...