

O’Dive ONE, TEK User Manual

O’DIVE - SIMPLIFIED USER’S MANUAL
Updated on 22.08.2019
Warning
O’Dive (ONE or TEK) is a connected acoustic sensor that allows the measure of the
decompression adequacy to the diver’s practice.
The features of the service imply practicing diving in a club or individually. O'Dive is not a
medical device and does not provide medical advice.
Any advice or other items available in our service are intended solely for general information
purposes. They are not intended to serve as a reference or to substitute professional
medical advice based on the personal situation of the user.
Azoth Systems disclaims any responsibility for actions taken by the user because of advice
and information provided by the service. In particular, if the user has not consulted a
medical doctor and does not have a medical certificate authorizing him to practice diving.
Direction of use
For a given set of dive parameters (depth, duration and decompression stops), it is
recognized by the scientific community that a decompression procedure generating no or a
few microbubbles is renowned safe.
The O'Dive solution assists the diver to help him optimize its practice, limiting his bubble
level, and therefore increasing his diving safety level.
The sensor measures the microbubble rate in the diver venous system following a dive.
Combined to the diving parameters, these measurements allow, first of all, the evaluation of
the quality of the decompression procedure used.
If the procedure is not optimal, the O'Dive app put at the diver's disposal a simulator
allowing him to visualize the effects of several actions to improve the quality of his
procedure while making progress in his practice.
By using regularly O’Dive technology, the diver will improve his self-understanding. He will
therefore be more likely to wisely adjust his decompression procedures and diving practice.
O’DIVE Perimeter and usage restriction
O’Dive ONE
O’Dive ONE allows for analyses of open-circuit dives with Air or Nitrox as bottom gas, with or
without use of oxygen enriched mixtures for decompression stops.
Multi-level dives can be handled, as long as the maximum depth is below 60m. The algorithm
will consider an equivalent square profile, based on the parameters input by the diver in the

app: maximum depth, total duration and actual decompression duration provided by the dive
computer. The additional stops eventually performed by the diver are taken into
consideration to evaluate their benefit on the exposure severity.
Repetitive and multiple dives - i.e. with a surface interval below 12 hours – can be analysed
(for example: cruise with several dive per day). The residual gas load is considered as long as
the diver is using the same computer for all his dives.
Sawtooth profiles and inadequate ascending speed cannot be detected with the manual
input mode offered by O’Dive One. Therefore, the results provided to the diver do not
consider these additional risk factors.
O’Dive TEK
O’Dive TEK allows for analyses of open-circuit and closed-circuit with Air or Trimix as bottom gas, with
or without use of oxygen enriched mixtures for decompression stops.
In any case, the nature of gases breathed at the bottom (diluent for CCR and bottom mix for
OCR) or during the stops (PpO2 for CCR and gas switch for OCR) as well as the computer GF
settings (GFLow/GFHigh) must be input in the app.
Incorrectly input fields can lead to results that don’t reflect the actual quality of the
decompression.
Two parameters input modes are available:
• Manual input: it is only to be used for square profiles or equated to square – i.e.
profiles whose bottom depth change amplitude is low compared to the maximum
depth reached (+/-5m), for example a wreck dive; the diver has to input all the fields
required to characterized the exposure severity, among which the descending speed,
the ascending speed to the first stop and the stops duration.
• Import mode: it allows a finer analysis of the actual profile based on the data stored
on the dive computer ; the multi-level dives are handled as long as the maximum
depth is below 120m; the additional stops eventually performed by the diver are taken
into consideration to evaluate their benefit on the exposure severity.
Repetitive dives - i.e. with a surface interval below 12 hours – cannot be analysed.
Sawtooth profiles cannot be detected. Therefore, the results provided to the diver do not
consider this additional risk factor.
Inadequate ascending speed are however taken into consideration in the results provided to
the diver, whether they are manually input or deducted from the analysis of the computer
data.
Step-by-step guide for using O’Dive
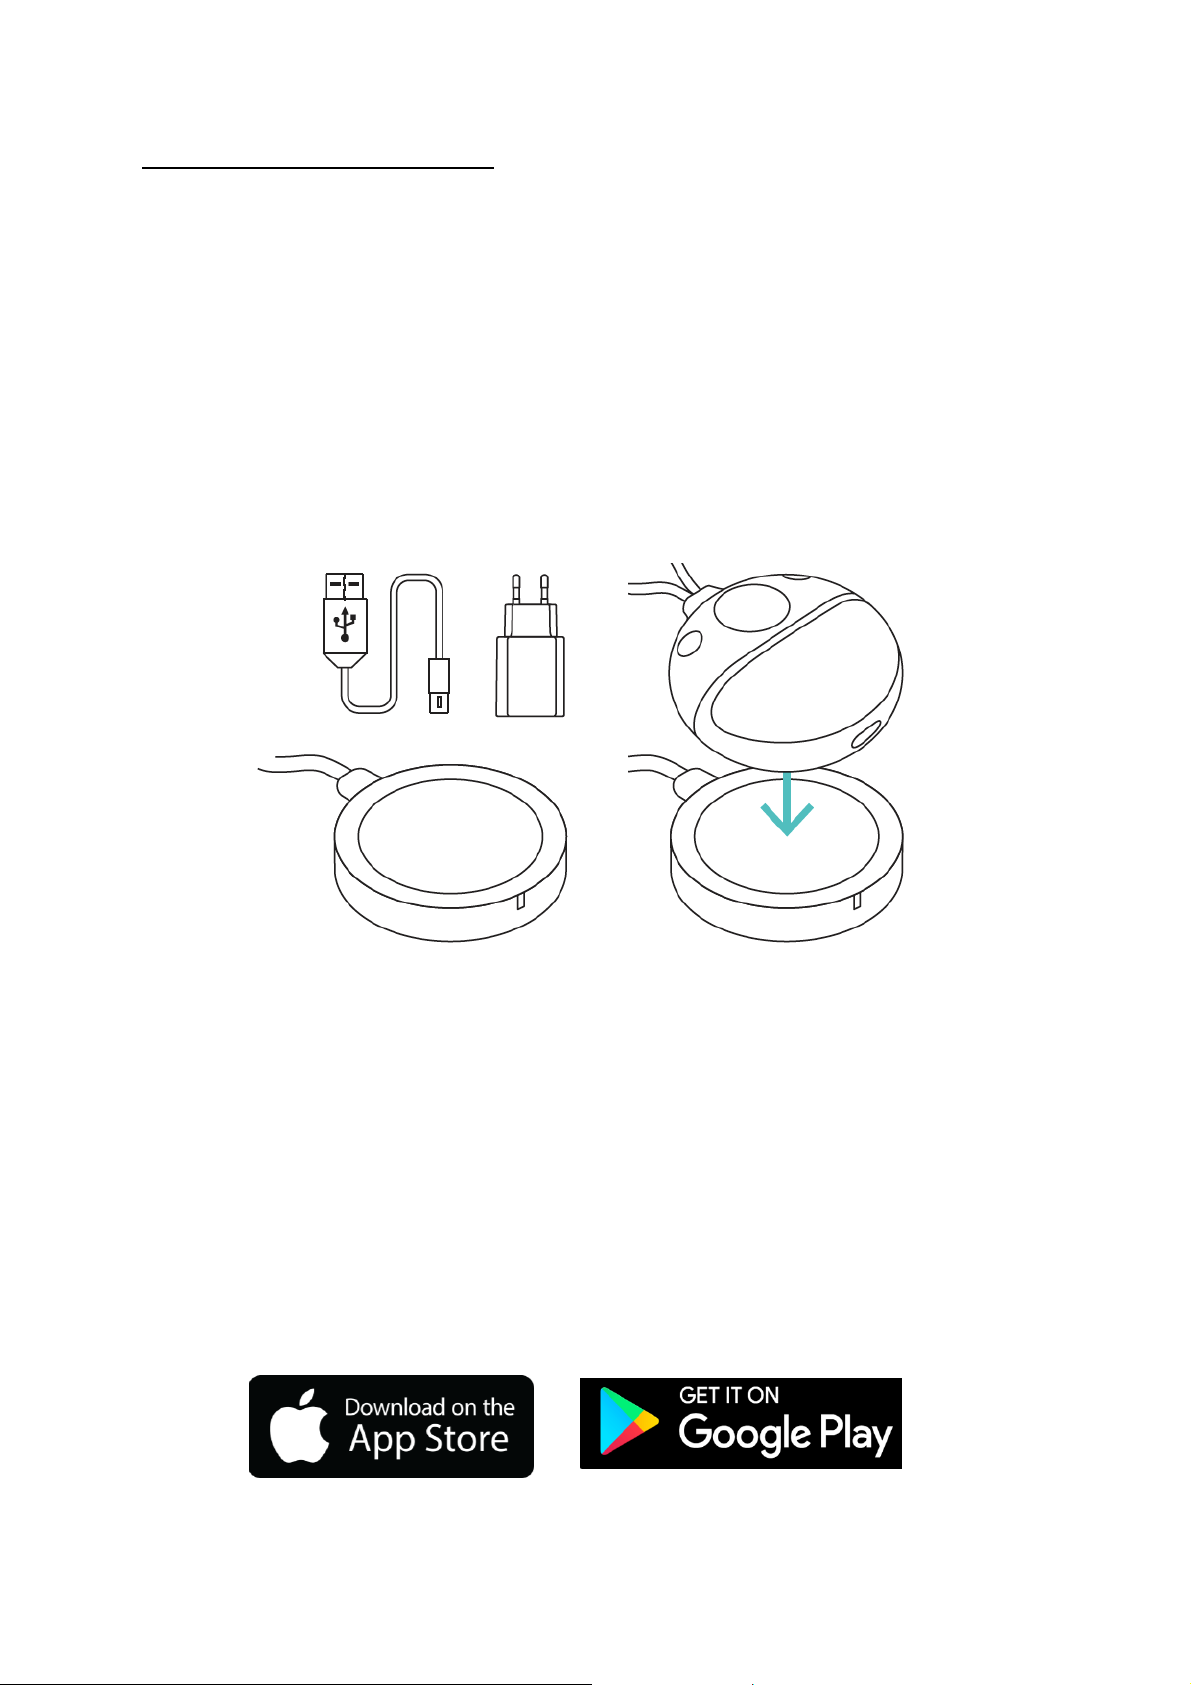
Step 1 – Charging the sensor
Before each use of the sensor, it is important to charge it in order to have the necessary
autonomy to the realization of your measurements.
IMPORTANT: It is strongly advised to make sure that the sensor is properly charging before
leaving it on its charging base, in order to avoid discharging and deterioration of the battery.
• Connect the induction charger to the provided 220V-60Hz adapter or to a USB port.
• Position the sensor on the charger, face with markings in contact with the induction
charger. When the sensor is in the right position, the charger’s indicator diode goes to
steady green and the sensor LED will flash rapidly in white, indicating that the sensor is
charging. If the battery is full enough, the LED will flash two times, then will stop.
• If the charger’s indicator diode doesn’t go to green and the sensor’s LED does not flash,
adjust the sensor position on the charger.
If the charger’s indicator diode flashes in light blue and the sensor starts (vibration + blue
flashing), remove the sensor from the charging base and turn it off, then put it back and
adjust its position after the charger’s indicator diode has come back to steady dark blue.
• At the end of the charge (maximum duration of 6 hours), the LED will stop. Your sensor is
then ready to be used.
Step 2 – Downloading the O’Dive app
The sensor is operating with the O’Dive ONE & O’Dive TEK apps, available on the Apple Store
and on Google Play.
Once the app is installed, you can use your sensor.
 Loading...