

Page 1

D
I
Y
G
A
M
I
N
G
N
O
T
E
B
O
O
K
SETUP GUIDE
Model: OCZDIY17A2 Series
Page 2
DIY GAMING NOTEBOOK
DIY Notebook Quick Installation Guide
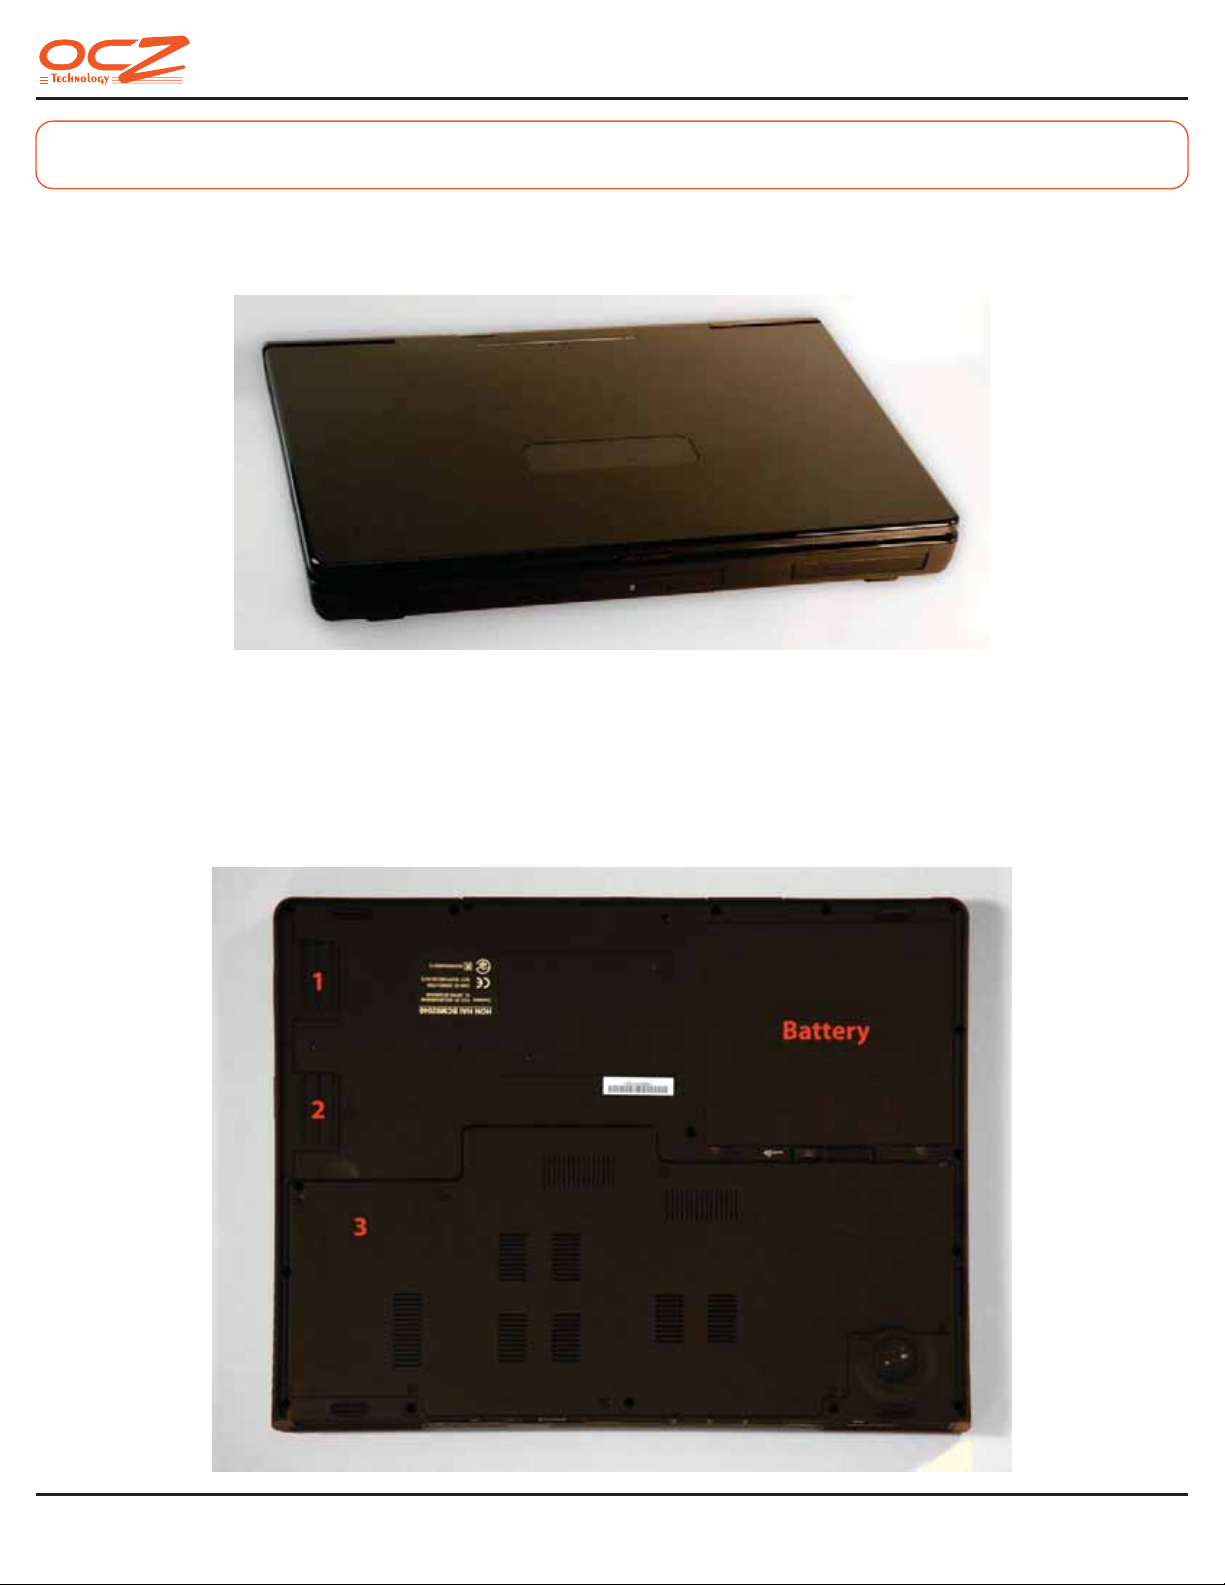
Carefully remove the notebook from the bag and sleeve and inspect it for damage. Please use the
protecve sleeve as pad and place the notebook on it when you work on the conguraon.
Familiarize yourself with the notebook before opening it up and exposing the inside to dust and
other environmental factors! The picture below shows the locaon of all important components
behind removable access panels, all other screws need not and should not be opened! The xxx
notebook features two hard disk drive bays (1 & 2). Panel (3) covers the motherboard with the CPU
socket, the memory slots and the graphics subsystem.
01
Page 3
DIY GAMING NOTEBOOK
Installing / Replacing the Hard Disk Drive
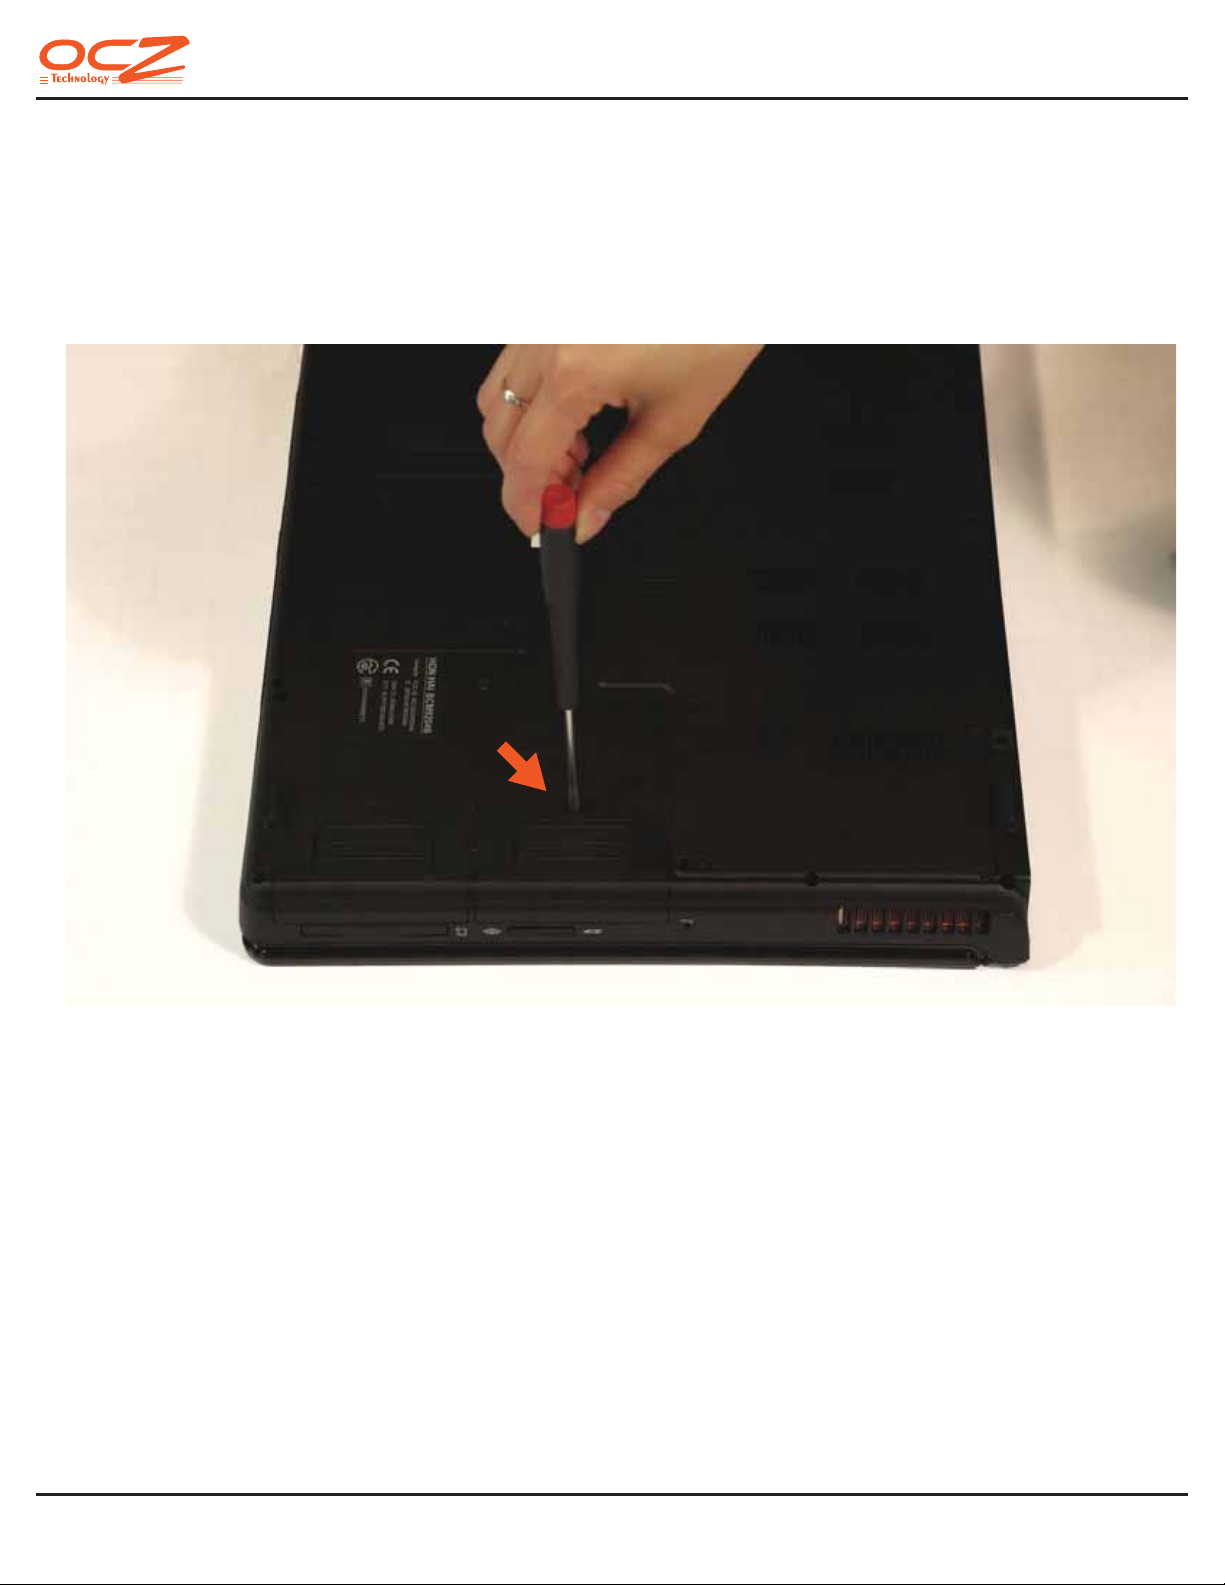
The OCZDIY17A2 notebook uses a Serial ATA (SATA) interface for the HDD, therefore, any 2.5” mobile
HDD purchased for this system needs to comply with the SATA standard. The two HDD bays are
located underneath panels (1) and (2). Carefully remove one screw as shown (arrow).
02
Page 4
DIY GAMING NOTEBOOK
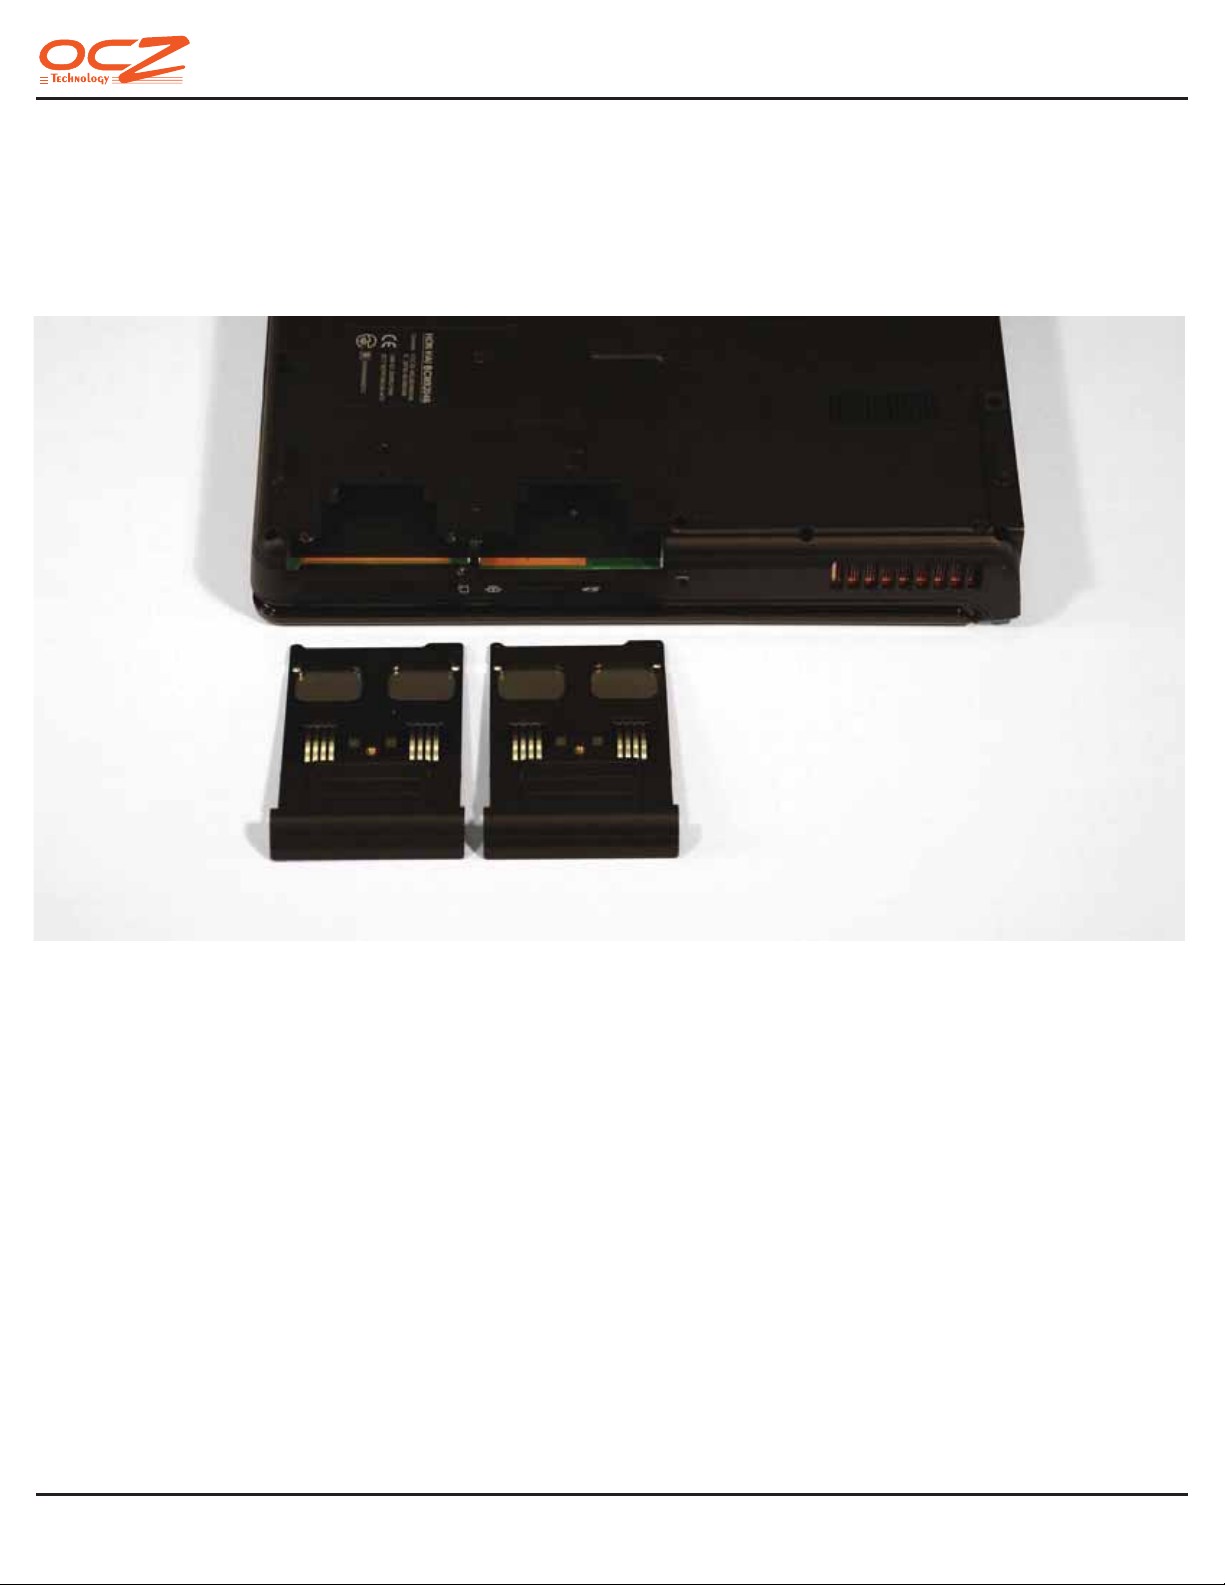
Aer removal of the screws, the drive mounts can be pulled from the laptop chassis.
03
Page 5
DIY GAMING NOTEBOOK
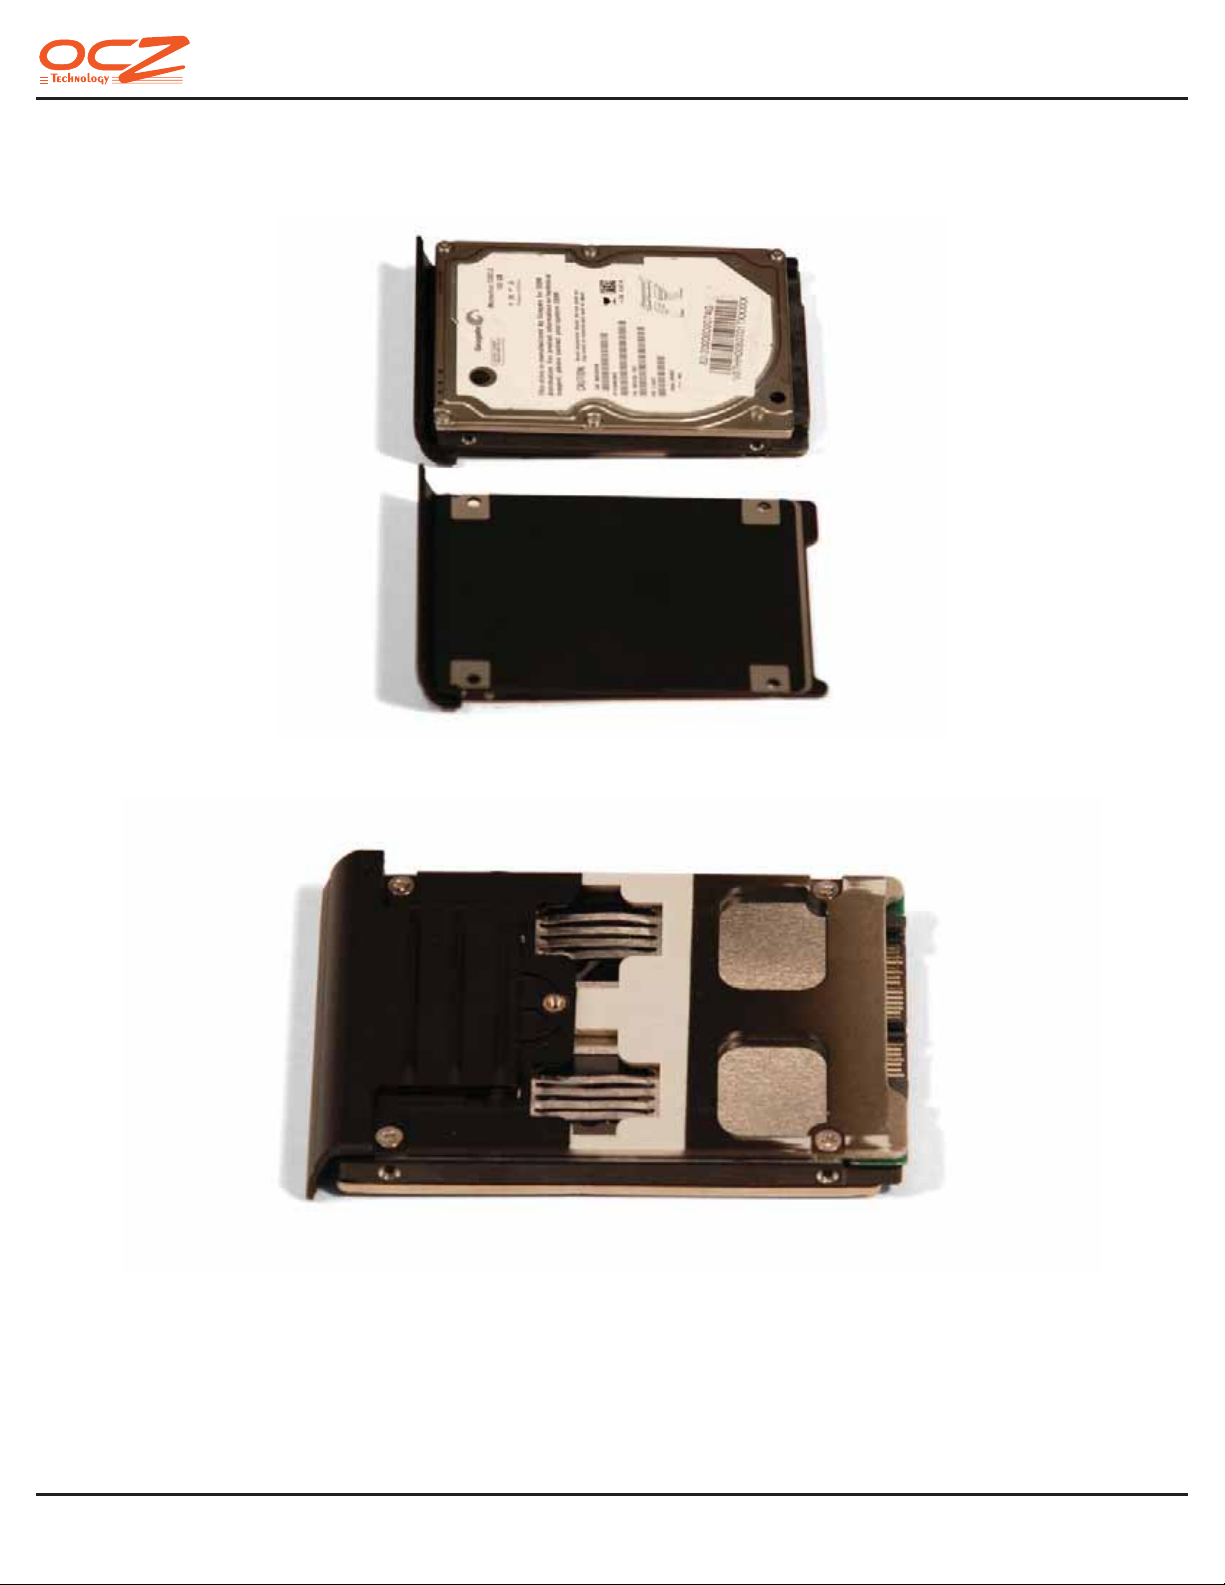
Turn the drive mount over as shown and align the HDD with the mounng holes for the screws.
Turn the drive mount over as shown and align the HDD with the mounng holes for the screws.
Once the drive is aached to the bay by fastening the four screws, the enre mount assembly can be
re-inserted into the chassis and secured using the chassis screw.
04
Page 6

DIY GAMING NOTEBOOK
a) Installing memory:
Locate the access panel for the motherboard (3) which features the memory expansion slots and the
CPU socket. Remove the nine screws using a small Phillips-type Screwdriver and gently li the
access panel at the relieved tab (arrow).
Please remove the baery before doing any upgrades or exchange of any electronic components to
avoid damage to your equipment.
05
Page 7

DIY GAMING NOTEBOOK
Idenfy the memory slots (shown inside the orange frame; arrow). For easier idencaon, the
picture shows the slots with memory modules already installed.
06
Page 8

DIY GAMING NOTEBOOK
In the case of a new laptop, the slots will be vacant and look like shown below:
Please note that the two memory slots are “keyed” (arrows) to ensure correct orientaon of the
memory modules. Also note the retenon clips (arrowheads) that will engage with the cutaway on
the memory modules to secure them in place.
07
Page 9

DIY GAMING NOTEBOOK
Posion the memory modules in the slots and slightly tap them to ensure their full inseron. Then
gently press the modules down starng with the lower module unl they lie at and engage with the
retenon clips as shown in the picture below.
Close the cover and secure it with the appropriate screws.
08
Page 10

DIY GAMING NOTEBOOK
b) Installing the CPU:
Centerpiece of the laptop is the processor or CPU. The CPU used in the OCZDIY17A2 laptop is a
mobile Intel Core2 Duo processor with a Socket PGA478 pinout. The CPU heatsink and blower are
already pre-assembled and mounted in the area outlined (arrow), and need to be removed in order
to install the processor.
09
Page 11

DIY GAMING NOTEBOOK
Locate the six screws (arrows) and unscrew them in the order indicated on the heatspreader (1-6).
Carefully li the cooling aggregate out of the cavity and place it on the side of the shell. It is not
necessary to disconnect the fan from its power header on the motherboard (see arrow, right
picture).
10
Page 12

DIY GAMING NOTEBOOK
Please pay aenon to the layout of the CPU socket. The corner marked by the arrow is used for
orientaon of the CPU (marked by a golden triangle on the CPU package). The arrowhead points to
the locking screw that opens the socket for CPU inseron (green marquee) or closes it to secure the
processor in place (red marquee).
11
Page 13

DIY GAMING NOTEBOOK
Note the golden triangle on the CPU package that needs to match the upper le corner In the
orientaon of the socket as shown in the pictures above. Also note the orientaon of the locking
screw with the notch facing the “closed” posion.
Please apply some thermal grease to the heatsink and/or CPU die and align the cooler with the
mounng screw-holes. Fasten the screws in sequence from 1-6. Close the cover and fasten all screws
to secure it in place.
12
Page 14

DIY GAMING NOTEBOOK
Congratulaons, it is me to connect the power supply to the baery and re up your new system.
Keep in mind that the inial charge of the baery may take up to 4 hours before you can fully enjoy
mobile operaon.
13
Page 15

L
I
B
I
S
S
O
P
E
S
E
I
T
I
T
I
N
I
F
OCZ Technology Inc.
860 E. Arques Ave.,
Sunnyvale, CA 94085 USA
(408) 733-8400 Phone
(408) 733-5200 Fax
(408) 733-8400 Sales
TECHNICAL SUPPORT
For warranty support and technical information about your DIY Gaming Notebook, visit www.ocztechnology.com. All OCZ PRODUCTS include free
technical support for direct, expert advice. Contact OCZ Technical support at (800) 459-1816 or email us at support@ocztechnology.com.
For support and technical information, please visit www.ocztechnology.com Copyright © OCZ TECHNOLOGY GROUP 2008. ALL RIGHTS RESERVED
N
I
 Loading...