

Page 1

Table of Contents
Introduction ………………………. 2-3
Package Contents …………………. 4
System Requirement ………………. 4
Software Setup …………………….. 5
Hardware Setup ……………………. 6
Specification ………………………… 6
Microsoft Windows is a trademark of Microsof t Corporation.
IBM PC/AT is a trademark of IBM Corporation.
CardWizardNT is a trademark of SystemSoft Corporation.
Page 2

Introduction
T he WL-260 is a high-performance PCI-to-PC Card Adapter that
supports One PC Card socket compliant with the 16-bit PC Card standard
defined in 1997 PC Card Standard.
The WL-260 provides a rich feature set that makes it the best choice
for bridging between PCI and PC Card in desktop computers. The WL-260
is compliant with the 16-bit PC Card specification defines in PCMCIA
Release 2.1 and JEIDA 4.1 and can supports any combination of 8-bit or 16bit PC Card in one socket, powered at 5.0V as required.
The host system interface of WL-260 is compliant with the PCI Local
Bus Specification 2.2.
The WL-260 is register set compatible with Intel 82365SL controller
and compatible with ExCA.
Unique software configurable interrupt routing circuit and necessary driver
software is provided together for WL-260 to service IO cards requiring
IRQ functionality from the socket. Enables the WL-260 to support most
of the 16-bit PC Card applications including: SRAM card, Linear Flash card,
ATA card, Modem card and LAN card.
Page 3
Introduction
Features
* Supports all kinds of 16-bit PC Card(PCMCIA 2.1/JEIDA 4.1) .
* One rear access PC Card Slot.
* PCI Local Bus Specification Revision 2.2 compliant.
* PC Card Standard 95/97 compliant.
* 5V operation.
* Intel 82365SL register compatible, ExCA compatible.
* Support IRQ steering, software drive provided.
* Ideal for data transfer or backup between desktop PC and
mobile computer.
The WL-260 provides user friendly access to the PC Card technology.
One rear PC Card (16-bit PCMCIA) socket is capable of accepting One
Type I/Type II or Type III PC Card .
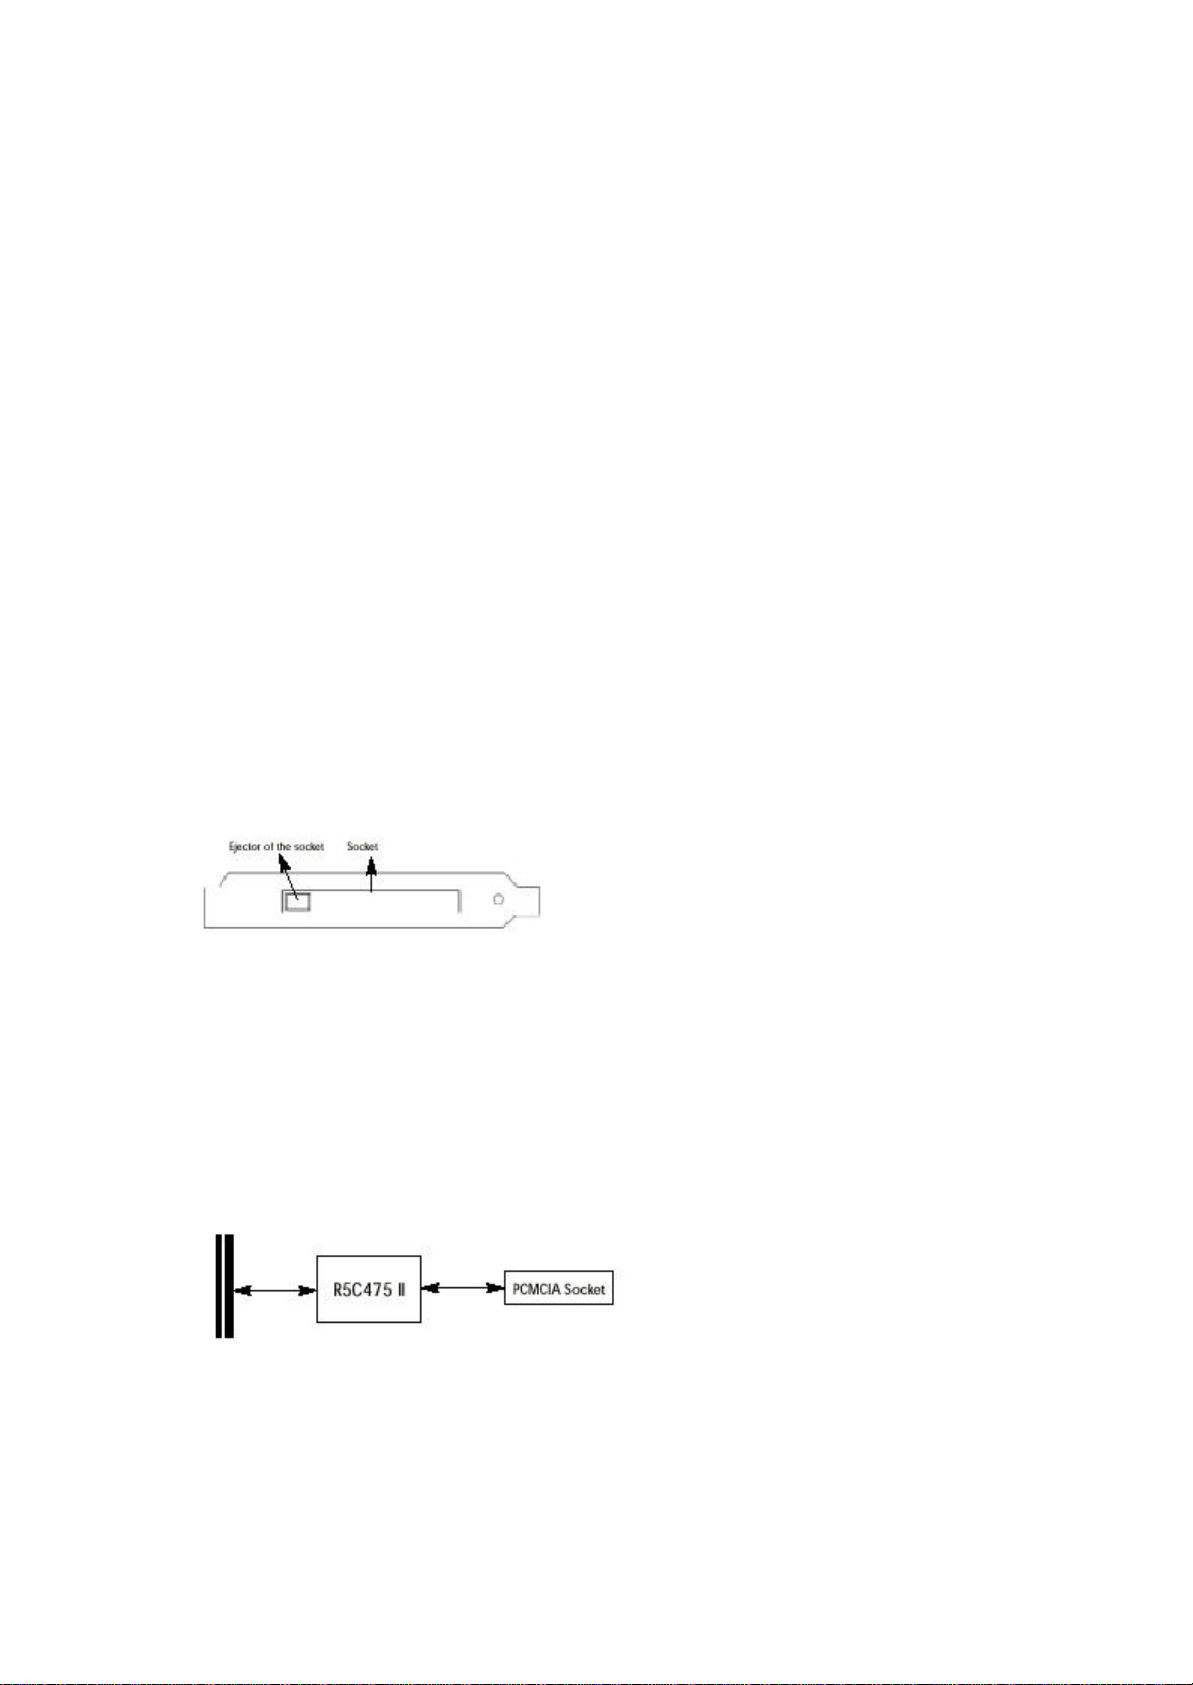
R5C475 II PCMCIA Socket
Socket Ejector of the socket
Fig. 1 Location of socket
Introduction
Application Block Diagram
Fig. 2
Page 4

Package Contents
n the package of the WL-260, you will find following contents. Contact
your local dealer if the package of your WL-260 does not contains
following contents:
* WL-260 Adapter x1
* User's Guide x1
*Setup Diskette x1
System Requirement
To install and use the WL-260, your system must have:
Hardware Requirement
* IBM PC Compatible Computer x1
* Free PCI Expansion Slot x1
Software Requirement
Microsoft Windows 95 OSR2 or
Microsoft Windows 98 or
Microsoft Windows 98 SE or
Microsoft Windows NT 4.0 (See Note.) or
Microsoft Windows 2000.
Note. To make the PC Card hot-swapping function in Windows NT 4.0 enabled,
the software CardWizardNT released by SystemSoft is required and is not
for free. Please contact your local dealer to get this software.
Page 5

Software Setup
T he device driver software contained in the Setup Diskette is necessary for
appropriate operation of the WL-260. Together with the special IRQ
steering circuit embedded in the R5C475 II chip set, the driver software
accomplish necessary hardware configuration and IRQ routing emulation for the
WL-260.
Included in the Setup Diskette are software drivers for various operating systems
including Windows 95 OSR2/98/98 SE, Windows NT 4.0, and Windows 2000.
CardWizardNT by SystemSoft is required to support the PC Card hot-swapping
function on Windows NT 4.0. Please contact your local dealer for more informa-tion.
A Setup program is provided to automatically identify the running system and
install corresponding software driver accordingly. Please follow the instructions
to install the device driver software for your WL-260.
Important Things You Should Know
To setup the WL-260 on a computer with Microsoft Windows 2000, be
sure to do the hardware setup first, then the software.
In Microsoft Windows 95 OSR2/98/98 SE/NT 4.0, that would be OK whatever
setting up the hardware or the software first.
About how to setup the hardware, please refer to Page 10.
Software Setup
Software Setup Procedure
1. Power ON your computer with Windows 95 OSR 2/98/98 SE/NT 4.0 /2000.
2. Insert the Setup Diskette into the floppy disk drive of your computer.
3. Click on the Start button on the task bar to open the Start menu.
4. Click on Run, the Run dialog box appears.
5. In the text box, type in A:\Setup.exe.
(where A: is the floppy disk drive letter) to execute the Setup program.
6. The Welcome dialog box appears, click Next to continue setup.
7. The Software License Agreement dialog box appears. Read
through the Software License Agreement, and then click Yes to
continue setup.
8. The Setup program will automatically identify the running system, install
corresponding software and configure your system for the WL-260.
Following the completion of software driver setup, the Setup Complete
dialog box appears.
9. Click Finish to complete the software setup.
Page 6

Hardware Setup
The WL-260 contains:
1. PCI-to-PC Card Interface Board
The PCI-to-PCMCIA Interface Board utilizes high speed PCI Local Bus and
bridges it into the 16-bit PC Card Slot.
WARNING:
Power OFF your computer before installing the WL-260 hardware.
Please follow the instructions to install your WL-260:
1. Before trying to install your WL-260, please POWER OFF your computer.
2. Disassemble and remove the cover of your computer. For instructions on
removing the cover of your computer, refer to the User's manual provided
with your computer.
3. Install the PCI Interface Board into the PCI slot and utilize the mounting screw
to secure the PCI Interface Board in place.
4. Replace and secure the cover of your computer.
5. Power ON your computer and re-start operating system.
Specification
* PCI Local Bus Specification Revision 2.2 compliant.
* PCMCIA 2.1, JEIDA 4.1 compliant.
* 5.0V operation.
* Intel 82365SL register compatible, ExCA compatible.
* ATA disk interface support.
* Supports Hot Swapping. Insert and remove PC Card without shutting
down your system.
* Power saving suspend mode support.
* Ambient temperature under bias 0C to 70C
* Storage temperature -65C to 150C
* PCI-to-PCMCIA host bridge R5C475 II
* Max. Power Supply on sockets VCC at 5.0V for 1A
 Loading...