

Page 1

Dumb Mode Guide
Using Your Modem with
Synchronous and Mainframe Computers
Revision B
YML199-3 B
January 1994
Page 2

ISBN 0 947206 89 2
Copyright
This manual is copyright. Apart from any fair dealing for the purposes of private
study, research, criticism or review, as permitted under the Copyright Act, no part
may be reproduced, stored in a retrieval system or transmitted in any form, by any
means, be it electronic, mechanical, recording or otherwise, without the prior written
permission of NetComm Limited.
Disclaimer
NetComm Limited accepts no liability or responsibility, for consequences arising
from the use of this product.
NetComm Limited reserves the right to change the specifications and operating
details of this product without notice.
Trademarks
NetComm is a registered trademark of NetComm Limited
SmartModem, ProRack and Cooee are trademarks of NetComm Limited
Pocket Rocket is a registered trademark of NetComm Limited
MNP is a registered trademark of Microcom Inc
Microcom Networking Protocol is a trademark of Microcom Inc
Hayes is a registered trademark of Hayes Microcomputer Products Inc
IBM is a registered trademark of International Business Machines Corporation
MS-DOS is a registered trademark of Microsoft Corporation
©1993 NetComm Limited ACN:002490486
PO Box 379, North Ryde, NSW, 2113, Australia
Incorporated in New South Wales Australia
Written by Bruce McKinnon
Version: 250892
Dumb Mode Guide i
Page 3

Contents
Introduction .......................................................................... 1
Conventions ........................................................................... 1
What is Dumb Mode? ........................................................... 3
Selecting Dumb Mode on Desktop Modems ........................... 3
Selecting Dumb Mode on ProRack Modems ........................... 4
Setting Up your Modem ......................................................... 4
Selecting Communications Speeds on Desktop Modems ......... 5
Selecting Communications Speeds on ProRack Modems ......... 6
Hints for Unix Computers and Multiplexers........................... 7
I Want More Information ....................................................... 7
Leased Line Operation ............................................................ 8
Dialling in Dumb Mode ........................................................ 9
Dialling with a Telephone Handset ........................................ 9
Using the Talk/Data Button to Dial ..................................... 10
Using DTR to Dial .............................................................. 12
Answering Calls in Dumb Mode ........................................ 14
Automatic Answering .......................................................... 14
Manual Answering ............................................................... 16
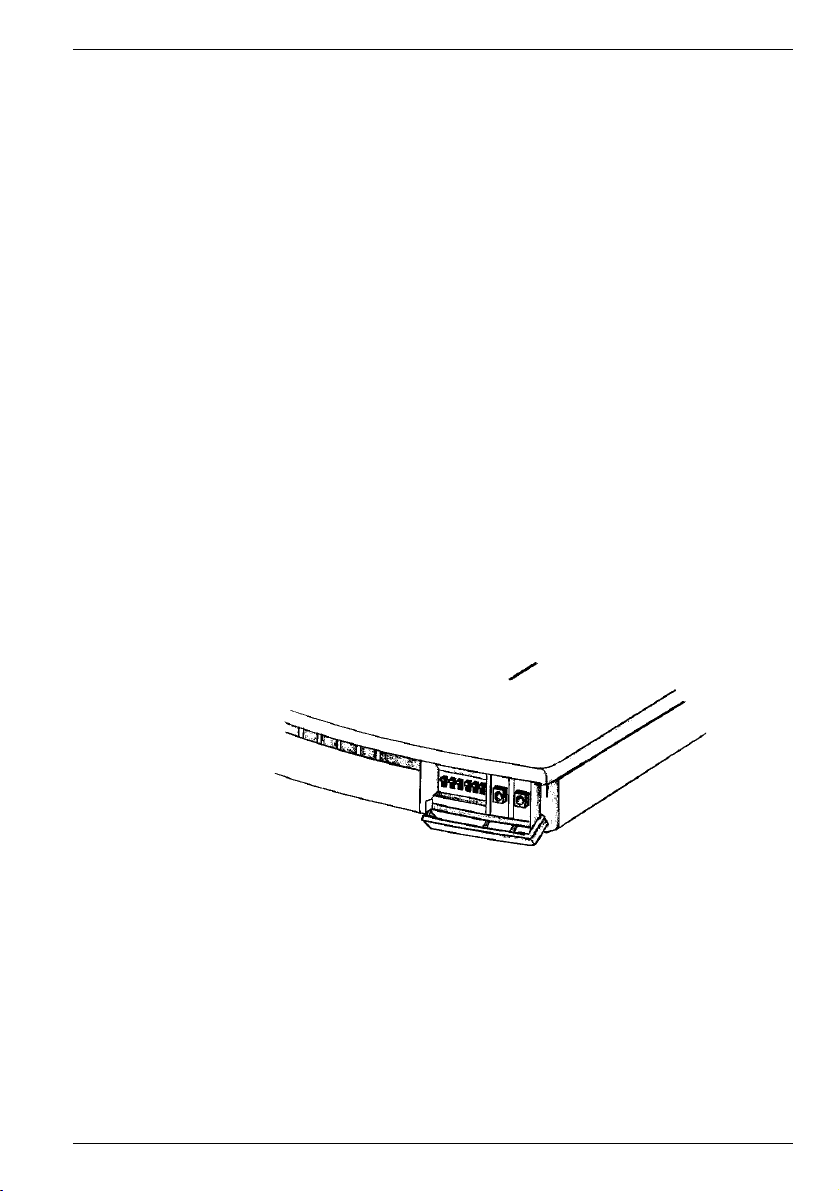
The Option Switches .......................................................... 18
Modems with Rear Panel Option Switches ........................... 18
Modems without Rear Panel Option Switches ...................... 19
ProRack Modems ................................................................. 20
Dumb Mode Guideii
Page 4

Introduction
Welcome to the Dumb-Mode Guide. This guide shows you how to use
your modem in “dumb mode”. Before reading any further, you should
install your modem — refer to the Installation Guide provided with your
modem.
Conventions
Throughout this guide, we use certain symbols, typestyles and conventions
to help you. For example, you might find a line that looks like this:
• Type:
When we want you to press the ENTER key, we use a symbol:
On some keyboards the
or ENTER, as appropriate for your keyboard. The same is true for keyboards
showing a symbol, rather than
In some cases where the <E> symbol might be confusing, we will tell
you to ‘Press the
When you see the bullet (•), it usually starts an action statement. We
want you to take some specific action, such as:
ATI3 <E>
What you actually type appears in a special typeface:
ATI3
Whatever appears on your screen will also be displayed in this manual in
this special typeface — for example: messages:
CONNECT
<E> (which means ‘and press
ENTER key is labelled RETURN. You press RETURN
RETURN = ENTER =
ENTER key’.
ENTER’)
RETURN or ENTER.
• Switch your computer on
• Type:
Dumb-Mode Guide 1
ATI3 <E>
Page 5

Note that we do not use a (.) full stop after an action statement.
We do that to avoid confusion when you are asked to type commands
and other information.
When we list general information, we use a box (❏), like this:
❏ How to begin dialling
❏ Using error-free communication
When we have special information we want you to take NOTE of,
we use a pointing finger (☞), like this:
☞ Before proceeding, complete both copies of the Warranty form.
Information we want you to pay special attention to is placed in a
WARNING box, like this:
WARNING
Regulations require that the modem,
when operating in originate mode, waits no
longer than 30 seconds for a carrier to be
detected from a remote modem.
Dumb-Mode Guide2
Page 6
What is Dumb Mode?
Your modem has two methods of operating with your computer.
The commonly used method is “smart mode”, where the computer
issues “AT” commands to the modem to make it dial and hang up
(refer to the Modem User’s Guide for an explanation of the AT
commands).
For computers which do not offer an asynchronous port or cannot
communicate synchronously using V.25bis commands, dumb mode
permits manual control of your modem.
Selecting Dumb Mode on Desktop Modems
To select Dumb mode:
• Place front panel Option switch 4 in the Down position
To select Smart mode:
• Place front panel Option switch 4 in the Up position
The Option switches and Mode and Talk/Data buttons
Some modems also have rear panel Option switches — check the
rear panel of your modem. Details of the use of each Option switch
is provided at the end of this guide.
HINT:
To restore the factory settings of your modem, switch it on holding
the Mode button in, until the modem “beeps” twice.
Dumb-Mode Guide 3
Page 7

Selecting Dumb Mode on ProRack Modems
To select Dumb mode on a ProRack modem:
• Place front panel Option switch 6 in the On (or Left) position
To select Smart mode:
• Place front panel Option switch 6 in the Off (or Right) position
ProRack Modem Option Switches
Setting Up your Modem
In most instances, your modem will need to be configured prior to
entering Dumb mode. All configuration of your modem is
performed using the AT commands.
For example, if you wish to have your modem dial a stored telephone
number when the computer asserts (or “raises”) the DTR signal,
you must first store the telephone number in the modem and select
stored number dialling operation, using the AT commands.
Details of how to use the AT commands are found in the Modem
User’s Guide. Detailed information about the commands supported
by your modem are found in the Modem Reference Guide, available
from Telesales or your modem dealer.
Dumb-Mode Guide4
Page 8

Selecting Communications Speeds on Desktop
Modems
If you are dialling in Dumb mode, the communication speed it
uses is dependant upon the setting of the front panel Mode LEDs.
To change the speed at which your modem connects after dialling:
• Place front panel Option switches 3 and 4 in the Down position
(select Dumb mode)
• Press the Mode button (located next to the front panel Option
switches) until the correct speed is indicated on the front panel
Mode LEDs
Refer to the table printed on the bottom of your modem. It shows
the meaning of each combination of the Mode LEDs.
To change the speed at which your modem connects after answering
an incoming call:
• Place front panel Option switch 4 in the Up position (select Smart
mode)
• Connect your modem to a personal computer — refer to the modem
Installation Guide for details
• Run a communications program (such as Cooee or MicroPhone)
and enter “local mode” or “terminal mode”
• Type:
Dumb-Mode Guide 5
ATBx&W <E>
where “x” is a valid setting of the B command. For example,
ATB13&W selects V.32 (9600 bps) mode.
The B command is used to set the communications standard used
by your modem. Refer to the Command Card, supplied with your
modem, for a description of the B command.
Page 9

Selecting Communications Speeds on ProRack
Modems
If you are dialling in Dumb mode, the communication speed it
uses is dependant upon the setting of the front panel Mode LEDs.
To change the speed at which your modem connects after dialling:
• Place front panel Option switches 5 and 6 in the On (or Left) position
to select Dumb mode
• Press the Mode button until the correct speed is indicated on the
front panel Mode LEDs
Refer to the table printed in your modem Installation Guide — it
shows the meaning of each combination of the Mode LEDs.
To change the speed at which your modem connects after answering
an incoming call:
• Place front panel Option switch 6 in the Off (or Right) position to
select Smart mode
• Connect your modem to a personal computer — refer to the modem
Installation Guide for details
• Run a communications program (such as Cooee or MicroPhone)
and enter “local mode” or “terminal mode”
• Type:
ATBx&W <E>
where “x” is a valid setting of the B command. For example,
ATB13&W selects V.32 (9600 bps) mode.
The B command is used to set the communications standard used
by your modem. Refer to the Command Card, supplied with your
modem, for a description of the B command.
Dumb-Mode Guide6
Page 10

Hints for Unix Computers and Multiplexers
Many Unix computers and multiplexers which offer synchronous
communications ports cannot cope with the response messages
generated by the modem. For this reason, you may wish to switch
off response messages before you connect your modem to the Unix
computer or multiplexer.
• Place front panel Option switch 4 in the Up position to select Smart
mode
For ProRack modems, place switch 6 in the Off (or Left) position.
• Connect your modem to a personal computer, a Unix computer or
a serial server — refer to the modem Installation Guide for details
• Run a communications program (such as Cooee or MicroPhone for
Windows, or TIP or CU for Unix) and enter “local mode” or
“terminal mode”
• Type:
• Exit the communications program
This command switches off response messages and character echo,
causes the modem to ignore characters sent to it from the host
while dialling or answering, and saves the changes in the modem.
If you are dialling from a synchronous multiplexer, or if you are
using a “pseudo leaded line” application with SLIP, CSLIP or PPP,
you must use stored number dialling. Refer to Synchronous Mode 2
in the Modem Reference Guide, which is available from Telesales.
ATE0Q1&N0&W <E>
I Want More Information
If you want more information about the AT commands supported
by your modem, you may purchase the Modem Reference Guide.
This book provides detailed information about the AT commands
and S Registers supported by your modem, as well as information
about how to use features such as synchronous mode, security and
DES encryption.
Dumb-Mode Guide 7
Page 11

To purchase the Modem Reference Guide, call NetComm Telesales
on (02) 888 5533. To assist with ordering please have the model
name and number of your modem ready (these are found on the
serial plate of your modem).
Leased Line Operation
Details of your modem’s leased lines features are found in the Modem
Reference Guide, available from Telesales or your dealer.
Dumb-Mode Guide8
Page 12

Dialling in Dumb Mode
There are three ways of dialling in dumb mode:
❏ Use a telephone handset connected to the modem.
❏ Store a telephone number in the modem and then have the computer
raise the DTR signal.
❏ Store a telephone number in the modem and then press the Talk/
Data switch.
☞ ProRack modems can dial only by raising the DTR signal to dial a
stored telephone number.
Dialling with a Telephone Handset
Manual dialling requires a telephone handset be connected to the
same phone line as your modem. Use a telephone cable with a
“piggy-back” socket to connect your modem and telephone handset
to the same phone line (refer to your Installation Guide for details).
This form of dumb-mode dialling is not supported by ProRack
modems.
• Set up your modem in “smart mode”, using the AT commands.
• Place front panel Option switch 4 in the Down position (select
Dumb mode)
• Place front panel Option switch 6 in the Down position (select
Originate mode)
• Place front panel Option switch 3 in the Down position (disable
auto-answering)
☞ Your modem cannot dial if auto-answer is enabled.
• If necessary, use the Mode button to select the required
communication speed
The connection speed of the modem is indicated by the Mode LEDs.
Refer to the table printed on the bottom of your modem; it shows
the meaning of each combination of Mode LEDs.
Dumb-Mode Guide 9
Page 13

• Press the Talk/Data button to Talk (this button is located next to
the front panel Option switches)
• Using the telephone handset, dial the number
• As soon as the other modem answers your call, press the Talk/Data
button to Data
If the AT&D2 command has been issued prior to entering Dumb
mode, your computer must raise the DTR signal before you press
the Talk/Data button.
• Place the handset on-hook
The OH and CD LEDs glow when the modem connects.
To hang up:
• Press the Talk/Data button to Talk
Using the Talk/Data Button to Dial
You may commence dialling by pressing the Talk/Data button,
located next to the front panel Option switches. By dialling in this
manner, you do not need to use a telephone handset.
This form of dumb-mode dialling is not supported by ProRack
modems.
• Place front panel Option switch 4 in the Up position (select Smart
mode)
• Connect your modem to a personal computer — refer to the modem
Installation Guide for details
• Run a communications program (such as Cooee or MicroPhone)
and enter “local mode” or “terminal mode”
• Type:
AT&Z0=phoneno <E>
Where “phoneno” is the telephone number you want your modem
to dial. This command stores the number as stored telephone
number zero.
☞ If you are using your modem over leased lines, do not store a
phone number.
Dumb-Mode Guide10
Page 14

• Type: AT&D2&M4 <E>
or:
Type:
AT&D2E0Q1&M2 <E>
Issue the &M4 command if you wish to use asynchronous
communications; issue &M2 if you wish to use synchronous
communications.
• Type:
AT&W <E>
The modem set up is saved.
• Place front panel Option switch 4 in the Down position (select
Dumb mode)
• Place front panel Option switch 6 in the Down position (select
Originate mode)
• Place front panel Option switch 3 in the Down position (disable
auto-answering)
☞ Your modem cannot dial if auto-answer is enabled.
• If necessary, use the Mode button to select the required
communication speed
The connection speed of the modem is indicated by the Mode LEDs.
Refer to the table printed on the bottom of your modem; it shows
the meaning of each combination of Mode LEDs.
• Raise the DTR signal on your computer
If your modem has a TR front panel LED, it glows when DTR is
raised.
• Press the Talk/Data button to Data
The Talk/Data button must be changed from Talk to Data to cause
the modem to dial.
Your modem dials stored telephone number zero. The OH and CD
LEDs glow when the modem connects.
To hang up:
• Have your computer lower the DTR signal or press the Talk/Data
switch to Talk
Dumb-Mode Guide 11
Page 15

Using DTR to Dial
You may commence dialling by having your computer raise its
DTR signal.
• Place front panel Option switch 4 in the Up position (select Smart
mode)
For ProRack modems, place switch 6 in the Off (or Right) position.
• Connect your modem to a personal computer — refer to the modem
Installation Guide for details
• Run a communications program (such as Cooee or MicroPhone)
and enter “local mode” or “terminal mode”
• Type:
AT&Z0=phoneno <E>
Where “phoneno” is the telephone number you want your modem
to dial. This stores the number as stored telephone number zero.
☞ If you are using your modem over leased lines, do not store a
phone number.
• Type:
AT&D2&M4 <E>
or:
Type:
AT&D2&M2 <E>
Issue the &M4 command if you wish to use asynchronous
communications; issue &M2 if you wish to use synchronous
communications.
• Type:
AT&W <E>
The modem set up is saved.
• Place front panel Option switch 4 in the Down position (select
Dumb mode)
For ProRack modems, place Option switch 6 in the On (or Left)
position.
• Place front panel Option switch 6 in the Down position (select
Originate mode)
For ProRack modems, place Option switch 8 in the On (or Left)
position.
Dumb-Mode Guide12
Page 16

• Place front panel Option switch 3 in the Down position (disable
auto-answering)
For ProRack modems, place Option switch 5 in the On (or Left)
position.
☞ Your modem cannot dial if auto-answer is enabled.
• If necessary, use the Mode button to select the required
communication speed
The connection speed of the modem is indicated by the Mode LEDs.
Refer to the table printed on the bottom of your modem; it shows
the meaning of each combination of Mode LEDs. For ProRack
modems, refer to the table printed in your modem Installation Guide.
• Press the Talk/Data button to Data (this button is located next to
the front panel Option switches)
ProRack modems do not have a Talk/Data button; they are
permanently set to “Data”.
• Raise the DTR signal on your computer
DTR must change from “low” to “high” to commence dialling.
Your modem dials the stored telephone number zero. The OH and
CD LEDs glow when the modem connects.
To hang up:
• Have your computer lower the DTR signal, or press the Talk/Data
button to Talk
Dumb-Mode Guide 13
Page 17

Answering Calls in Dumb Mode
Your modem is able to answer incoming calls, automatically or by
manual intervention.
Automatic Answering
Your modem is able to auto-answer incoming calls in Dumb mode.
You do not need a telephone handset to have your modem answer
incoming calls.
• Place front panel Option switch 4 in the Up position (select Smart
mode)
For ProRack modems, place Option switch 6 in the Off (or Right)
position.
• Connect your modem to a personal computer — refer to the modem
Installation Guide for details
• Run a communications program (such as Cooee or MicroPhone)
and enter “local mode” or “terminal mode”
• Type:
• Type:
• Type:
ATBx <E>
where “x” is a valid setting of the B command. The B command is
used to set the communications standard used by your modem. Refer
to the Command Card, supplied with your modem, for details of the
B command.
AT&D2&M0 <E>
or:
Type:
AT&D2E0Q1&M1 <E>
Issue the &M0 command if you wish to use asynchronous
communications; issue &M1 if you wish to use synchronous
communications.
AT&W <E>
The modem set up is saved.
Dumb-Mode Guide14
Page 18

• Place front panel Option switch 4 in the Down position (select
Dumb mode)
For ProRack modems, place Option switch 6 in the On (or Left)
position.
• Place front panel Option switch 6 in the Up position (select Answer
mode)
For ProRack modems, place Option switch 8 in the Off (or Right)
position.
• Place front panel Option switch 3 in the Up position (allow auto-
answering of incoming calls)
For ProRack modems, place Option switch 5 in the Off (or Right)
position.
If the &D2 command has been issued to the modem, DTR must be
raised by your computer.
• Press the Talk/Data button (located next to the front panel Option
switches) to Data
ProRack modems do not have a Talk/Data switch; they are
permanently set to “Data”.
Your modem answers incoming calls after the number of rings
specified in S Register 0.
Dumb-Mode Guide 15
Page 19

Manual Answering
For reasons of data security, it may be desirable to verbally identify
a caller before allowing connection to your computer. A telephone
handset must be connected to the same telephone line as your
modem to permit manual answering — refer to your modem
Installation Guide for details of connecting a telephone handset.
This form of dumb-mode answering is not supported by ProRack
modems.
• Place front panel Option switch 4 in the Up position (select Smart
mode)
• Connect your modem to a personal computer — refer to the modem
Installation Guide for details
• Run a communications program (such as Cooee or MicroPhone)
and enter “local mode” or “terminal mode”
• Type:
ATBx <E>
where “x” is a valid setting of the B command. The B command is
used to set the communications standard used by your modem. Refer
to the Command Card, supplied with your modem, for details of the
B command.
• Type:
AT&D2&M0 <E>
or:
Type:
AT&D2&M1 <E>
Issue the &M0 command if you wish to use asynchronous
communications; issue &M1 if you wish to use synchronous
communications.
• Type:
AT&W <E>
The modem set up is saved.
• Place front panel Option switch 4 in the Down position (select
Dumb mode)
• Place front panel Option switch 6 in the Up position (select Answer
mode)
Dumb-Mode Guide16
Page 20

• Place front panel Option switch 3 in the Down position (stop autoanswering of incoming calls)
If the &D2 command has been issued to your modem, your computer
must raise the DTR signal
• Press the Talk/Data button to Talk (this button is located next to the
front panel Option switches)
• When the telephone handset rings, pick it up and establish the caller
identity
The person calling you must perform a manual dial (that is, he/she must
dial using a telephone handset).
• When you are ready to allow access to your computer, press the Talk/Data
button to Data
• Place the handset on-hook
At the same time, the caller must make his/her modem enter “data mode”
and place his/her handset on-hook. (Refer to Dialling with a Telephone
Handset for details.)
The OH and CD LEDs glow when the modems connect.
Dumb-Mode Guide 17
Page 21

The Option Switches
The Option switches allow you to control the operation of your modem
in Dumb mode, as well as providing additional features in Smart mode.
This section explains the use of Option switches for desktop modems
(with or without rear panel Option switches) and ProRack modems.
Modems with Rear Panel Option Switches
If your modem has rear panel Option switches, these functions are
available:
Description Switch
DSR acts normally Sw 1 - Up
DSR mimics DTR Sw 1 - Down
DTR controlled by the computer Sw 2 - Up
DTR is assumed to be asserted Sw 2 - Down
DCD is asserted after a connection Sw 4 - Up
DCD is always asserted Sw 4 - Down
The operation of the front panel option switches is identical to desktop
modems without rear panel option switches. Refer to Modems without Rear
Panel Option Switches for details.
Because the operation of the rear panel Option switches may be duplicated
by the front panel Option switches, whichever Option switch sets an RS232 signal controls the signal. For example, if rear panel Option switch
1 is set in the Down position (DSR mimics DTR), but AT%F1 has been
issued and the front panel Option switch 2 is set to allow DSR to act
normally, DSR will mimic DTR. Likewise, setting either the front or
rear panel Option switches to assert DTR or DCD takes precedence over
the corresponding front or rear panel Option switch.
Dumb-Mode Guide18
Page 22

Modems without Rear Panel Option Switches
Switches 1 and 2 are used to select AT command mode or V.25bis
command mode, or control the state of the DTR and DSR signals.
Description AT%F Switch 1 Switch 2
AT command mode %F0 Up Up
V.25bis asynchronous %F0 Up Down
V.25bis synchronous (HDLC framing) %F0 Down Up
V.25bis sync (BSC character framing) %F0 Down Down
DTR controlled by computer %F1 Up n/a
DTR assumed to be asserted (raised) %F1 Down n/a
DSR acts normally %F1 n/a Up
DSR mimics DTR %F1 n/a Down
☞ n/a = not applicable
For details of the #F and %F commands, refer to the Modem Reference
Guide.
Switches 3 - 6 allow you to set up Dumb mode operation, as well as
manually selecting loopback tests in Smart mode.
Description AT#F Switch Switch
Smart mode n/a Sw 4 - Up n/a
Dumb mode n/a Sw 4 - Down n/a
Loopback Test Pattern Off #F1 Sw 3 - Up Sw 4 - Up
Loopback Test Pattern On #F1 Sw 3 - Down Sw 4 - Up
Analog Loopback Off #F1 Sw 5 - Up Sw 4 - Up
Analog Loopback On #F1 Sw 5 - Down Sw 4 - Up
Remote Digital Loopback Off #F1 Sw 6 - Up Sw 4 - Up
Remote Digital Loopback On #F1 Sw 6 - Down Sw 4 - Up
Auto-answer enabled n/a Sw 3 - Up Sw 4 - Down
Auto-answer disabled n/a Sw 3 - Down Sw 4 - Down
Asynchronous operation n/a Sw 5 - Up Sw 4 - Down
Synchronous operation n/a Sw 5 - Down Sw 4 - Down
Answer mode n/a Sw 6 - Up Sw 4 - Down
Originate mode n/a Sw 6 - Down Sw 4 - Down
☞ n/a = not applicable
Dumb-Mode Guide 19
Page 23

ProRack Modems
ProRack modem offer the following front panel Option switches:
Description Switch
Auto-answer enabled Sw 5 - Off (Right)
Auto-answer disabled Sw 5 - On (Left)
Smart mode Sw 6 - Off (Right)
Dumb mode Sw 6 - On (Left)
Asynchronous operation Sw 7 - Off (Right)
Synchronous operation Sw 7 - On (Left)
Answer mode Sw 8 - Off (Right)
Originate mode Sw 8 - On (Left)
V.25bis mode is selected with Option switches 3 and 4:
Description Switch 3 Switch 4
AT command mode Off (Right) n/a
V.25bis synchronous (HDLC framing) On (Left) Off (Right)
V.25bis sync (BSC character framing) On (Left) On (Left)
Dumb-Mode Guide20
 Loading...