

Page 1

O-Focus DM Photo/Cine
Pro Kit
O-Focus DM Photo/Cine
Part No. C1242-0001/C1242-0002
EN
www.ocon.com
User Guide
Page 2

!
Caution
Ÿ DO NOT hang heavy items over the handwheel.
Ÿ DO NOT attempt to move the camera by pulling on the O-Focus
DM handwheel.
Ÿ AVOID overtightening the drive gear onto the lens focus drive.
Ÿ ALWAYS use genuine OConnor parts and accessories with the
O-Focus DM.
Ÿ ALWAYS dismantle when not in use and before transporting.
Ÿ Never use solvents to clean the O-Focus DM. Wipe clean with a
damp cloth.
Copyright © 2014 The Vitec Group plc
Oconnor is a registered trademark of The Vitec Group plc or an affiliate thereof in one or more, but not all, countries.
O-Focus DM
Page 3

Contents
Caution . . . . . . . . . . . . . . . . . . . . . . . . . . . . . . . . . . . . . . . . . . . . . . . . . . . . . . . . . . . . . . 2
The O-Focus Dual Mini . . . . . . . . . . . . . . . . . . . . . . . . . . . . . . . . . . . . . . . . . . . . . . . . . . 4
Specification
O-Focus DM Photo Pro Kit . . . . . . . . . . . . . . . . . . . . . . . . . . . . . . . . . . . . . . . . . 6
O-Focus DM Cine Pro Kit . . . . . . . . . . . . . . . . . . . . . . . . . . . . . . . . . . . . . . . . . . 7
In th
e box
O-Focus DM Photo Pro Kit . . . . . . . . . . . . . . . . . . . . . . . . . . . . . . . . . . . . . . . . . 8
O-Focus DM Cine Pro Kit . . . . . . . . . . . . . . . . . . . . . . . . . . . . . . . . . . . . . . . . . . 9
Components . . . . . . . . . . . . . . . . . . . . . . . . . . . . . . . . . . . . . . . . . . . . . . . . . . . . . . . . . 10
Assembly
assembling the bridge . . . . . . . . . . . . . . . . . . . . . . . . . . . . . . . . . . . . . . . . . . . . 12
mounting the handwheel . . . . . . . . . . . . . . . . . . . . . . . . . . . . . . . . . . . . . . . . . . 13
mounting onto the
mounting the O-Focus to the lens . . . . . . . . . . . . . . . . . . . . . . . . . . . . . . . . . . . 15
setting the focal distances . . . . . . . . . . . . . . . . . . . . . . . . . . . . . . . . . . . . . . . . . 16
Options and extras . . . . . . . . . . . . . . . . . . . . . . . . . . . . . . . . . . . . . . . . . . . . . . . . . . . . 18
Maintenance
adjusting the handwheel tension belt. . . . . . . . . . . . . . . . . . . . . . . . . . . . . . . . . 21
camera rods . . . . . . . . . . . . . . . . . . . . . . . . . . . . . . . . . . . . . 14
3
Page 4
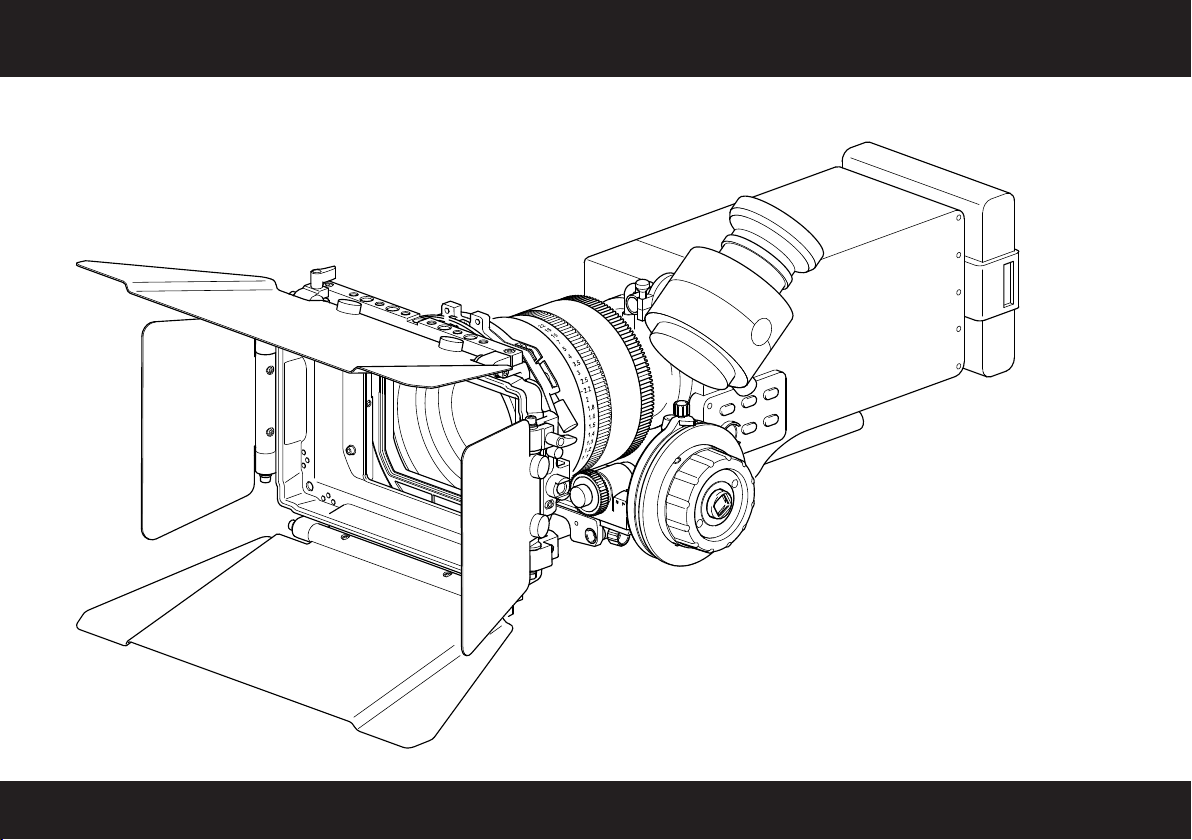
The O-Focus DM Cine
4
Page 5

Congratulations on the purchase of your new OConnor O-Focus DM!
We want you to get the most from your new O-Focus Dual Mini, and therefore encourage you to read this user
guide to familiarize yourself with its many features, some of which may be new to you. It also covers essential
information about safety and product care.
Features and benefits of your new O-Focus DM
The O-Focus Dual Mini, the latest addition to the range of genuine accessories from OConnor, offers a host of
inspired and productive features:
Ÿ the double-sided follow focus is constructed of lightweight, durable black anodized aluminum
Ÿ the low-profile design with a direct-drive gear is ideal for large barrel diameter lenses
Ÿ optimized focus throw: the O-Focus DM Photo offers a longer, more exacting focus pull for short
throw lenses and the O-Focus DM Cine offers a shorter, more exacting focus pull for cine lenses
Ÿ multi-functional, modular design: the bridge features a sliding dovetail design and accommodates
an LWS rod bridge (included) or, optionally, a heavy-duty bridge for 15/19 mm studio setups, as
well as interchangeable gears, mixed or matched handwheels, and a handwheel extension
Special features
The O-Focus DM is the first compact cine-specific unit. The O-Focus DM Photo has been optimized for use with
still photo lenses in cine setups.
The highly adaptable O-Focus DM Cine has been designed for precision movement control of higher sustained
torque loads. The eccentric design means it can be adjusted for optimal ‘line of sight’ as well as for reach.
The O-Focus DM follow focus integrates seamlessly with standard equipment such as cranks, gears, and whips,
thus protecting your investment in equipment by ensuring compatibility also in the future.
5
Page 6

Specification
O-Focus DM Photo Pro Kit (C1242-0001)
Weight of unit (incl. LWS rod bridge, handwheel) . . . . . . . . . . . . . . . . . 1.23 lbs (0.56 kg)
Weight of bridges (excl. handwheel). . . . . . . . . . . . . . . . . . . . . . . . . . . . . . . 0.73 lbs (0.33 kg)
Dimensions (excl. handwheel) . . . . . . . . . . . . . . . . . . . 7.2 m)
Dimensions of hard-stop handwheel . . . . . . . . . . . . . . . . . . . . . Ø3.2 x 3.7 in. (Ø82 x 94 mm)
Max. lens diameter (with LW rods). . . . . . . . . . . . . . . . . . . . . . . . . . . . . . . . . . . . . . Ø116 mm
Gear ratio . . . . . . . . . . . . . . . . . . . . . . . . . . . . . . . . . . . . . . . . . . . . . . . . . . . . . . 19:25 (1:0.75)
Positioning of driver gear . . . . . . . . . . . . . . . . . . . . . . . . . . main bridge interlock (back / front)
Module coupling system . . . . . . . . . . . . . . . . . . . . . . . . . . . . . . . . . . . . . . . . . . . backlash-free
Drive gear coupling . . . . . . . . . . . . . . . . . . . . . . . . . . . . . . . . . . . . . . . . standard serrated star
Rod system compatibility. . . . . . . . . . . . . . . . . . . . . . . . . . 15 mm LWS, studio 15 mm/19 mm
x 2.2 x 1.5 in. (182 x 57 x 37 m
Gears and friction wheel (see table on page 10 for details)
We reserve the right to alter specifications or change materials where absolutely necessary. All sizes or images shown throughout this publication are approximate
and images shown are as accurate as modern reproduction methods will allow. No liability can be accepted for any variation.
6
Page 7

Specification
O-Focus DM Cine Pro Kit (C1242-0002)
Weight of unit (incl. LWS rod bridge, handwheel) . . . . . . . . . . . . . . . . . 1.52 lbs (0.69 kg)
Weight of bridges (excl. handwheel). . . . . . . . . . . . . . . . . . . . . . . . . . . . . . . 0.73 lbs (0.33 kg)
Dimensions (excl. handwheel) . . . . . . . . . . . . . . . . . . . 7.2 m)
Dimensions of Cine handwheel. . . . . . . . . . . . . . . . . . . . . . . . . . Ø4 x 3.2 in. (Ø102 x 81 mm)
Max. lens diameter (with LW rods)
. . . . . . . . . . . . . . . . . . . . . . . . . . . . . . . . . . . . . . Ø116 mm
x 2.2 x 1.5 in. (182 x 57 x 37 m
Gear ratio . . . . . . . . . . . . . . . . . . . . . . . . . . . . . . . . . . . . . . . . . . . . . . . . . . . . . . 4)
Positioning of driver gear . . . . . . . . . . . . . . . . . . . . . . . . . . main bridge interlock (back / front)
Module coupling system . . . . . . . . . . . . . . . . . . . . . . . . . . . . . . . . . . . . . . . . . . . backlash-free
Drive gear coupling . . . . . . . . . . . . . . . . . . . . . . . . . . . . . . . . . . . . . . . . standard serrated star
Rod system compatibility. . . . . . . . . . . . . . . . . . . . . . . . . . 15 mm LWS, studio 15 mm/19 mm
Gears and friction wheel (see table on page 10 for details)
Specifications are subject to change without notice
35:19 (1:1.8
7
Page 8
In the box
O-Focus DM Photo Pro Kit
C1242-0001
O-Focus DM
Main bridge
C1242-1300
15 mm
LWS rod bridge
C1241-1540
Matching OConnor accessories:
Studio rod bridge
C1241-1100 (depending on lens)
Handwheel (for double-sided use)
C1241-1100 (Cine)
C1242-1100 (Photo)
Handwheel extension (70 mm)
C1241-1500
Marking disc
C1242-2421 (single, small)
Gear Z60
C1241-1900
O-Focus Hard-Stop
Handwheel
C1242-1100
Gear Z35
C1241-1700
Gear Z50
C1241-1800
Storm Case
(including foam insert)
C1241-1850
Marking Discs
(conical, 10 pack)
C1242-1530
Gear Z43
C1241-1600
Friction Driver 35
C1242-1001
(for details about driver sizes and lenses see table on page 10)
8
Page 9

O-Focus DM Cine Pro Kit
C1242-0002
15 mm
LWS rod bridge
C1241-1540
Matching OConnor accessories:
Studio rod bridge
C1241-1300 (depending on lens)
Handwheel (for double-sided use)
C1241-1100 (Cine)
C1242-1100 (Photo)
Handwheel extension (70 mm)
C1241-1500
“Glow-in-the-dark” marking disc
C1241-2117 (single disc, large)
C1241-1531 (10 pack, large)
O-Focus DM
Main bridge
C1242-1300
CFF-1 Studio Handwheel
(full-size offset knob)
C1241-1100
Gear Z60
C1241-1900
Gear Z50
C1241-1800
Gear Z35
C1241-1700
In the box
Storm Case
(including foam insert)
C1241-1850
Marking Discs
(10 pack)
C1241-1530
Crank Handle
C1241-1520
Gear Z43
C1241-1600
Friction Driver 35
C1242-1001
(for details about driver sizes and lenses see table on page 10)
9
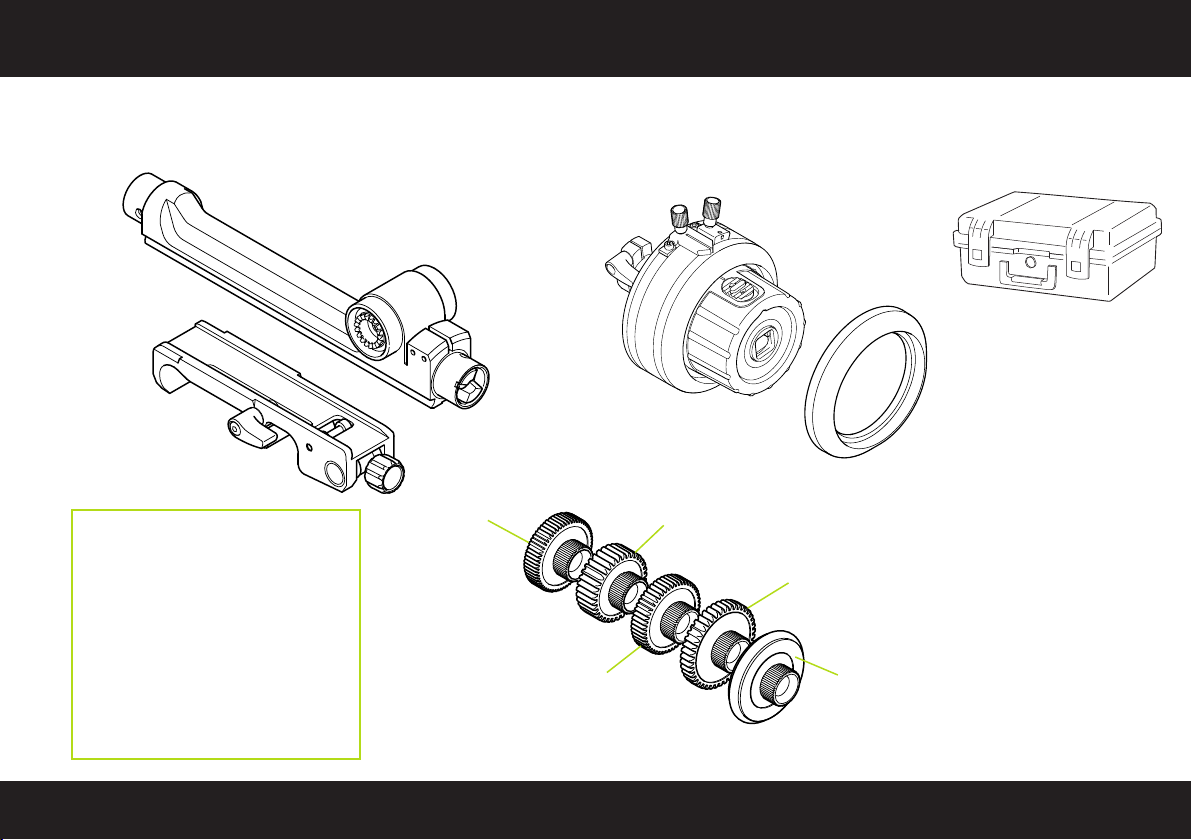
Page 10

Components
lock lever
LWS rod bridge
O-Focus DM Cine
C1242-0002
lock lever
index
eccentric
CINE handwheel
main bridge
rod clamp screw
driver gear
flip-lock
Part no.
C1241-1700
C1241-1600
C1241-1800
C1241-1900
C1242-1001
bridge interlock
(with output gears)
Gear size
35 tooth 0.8M 10 mm face
43 tooth 0.8M 6 mm face
50 tooth 0.6M 7.5 mm face
60 tooth 0.5M 7.5 mm face
Ø39 mm surface
witness marker
marking disc
standard square socket
for attachments
Lens type
Cine
Cine
Canon ENG focus
Fujinon ENG focus
non-geared photo
lenses
10
Page 11

index screws
centric
hard-stop handwheel
LWS rod bridge
lock lever
(rod bridge)
lock lever
main bridge
driver gear
flip-lock
rod clamp screw
Components
O-Focus DM Photo
C1242-0001
bridge interlock
(with output gears)
lock lever
witness marker
hard-stop
slider button
conical
marking disc
standard square socket
for attachments
11
Page 12

Assembly – assembling the bridge
Double-sided design
Flip-lock rod
clamp lever
Front and back output gears
1
Assemble the bridges. Slide the LWS rod bridge onto
the main bridge. Turn the lock lever clockwise to
secure the LWS bridge in position.
The position of the main bridge can be adjusted using
the sliding dovetail when mounting the O-Focus DM
to the lens (see page 14).
12
2
Mount the driver gear. Choose a compatible driver
gear for your lens (see page 10). Locate the driver
on the output gear at the front or back of the
interlock bridge as desired. Ensure the serrations
fully interlock, then tighten the hollow knurled screw.
Page 13

1
Push-fit the handwheel firmly onto the
main bridge. The handwheel must be
fully engaged for the backlashreducing mechanism to be effective.
2
Turn the lock lever clockwise to
secure the handwheel on the main
bridge.
mounting the handwheel
The O-Focus DM incorporates a Minimal Backlash Mechanism
to guarantee precision focus pull with less play and higher
accuracy. Note that the assembly instructions apply to both
types of handwheel.
3
When mounting the assembled bridges and
handwheel onto the camera rods underneath
the lens: Turn the knurled screw clockwise to
tighten the rod clamp, then flip down to lock the
O-Focus DM securely on the rod.
NOTE: Lock levers are fitted with a spring. Should a lever obstruct
the path of a camera rod, for example, adjust its position:
Pull the lever off the shaft as far as possible, turn it a few
degrees, then let it retract. Check the clamping is tight.
13
Page 14

mounting onto the camera rods
Mounting the O-Focus DM to the lens requires the assembly to
be adjusted in two steps: first assemble and mount the O-Focus
on the camera rods, then adjust the main bridge, until the driver
gear engages with the lens focus drive.
For more information about the focal length and diameter of a
wide range of camera lenses visit OConnor Labs online at the
OConnor website (OConnor > Labs > ‘Lens Diameters’).
2
Mount the O-Focus DM to the lens focus
drive. Push the main bridge towards the lens
focus drive, until the serrations of the driver
1
With the 15 mm LWS rod bridge securely
mounted underneath the lens, turn the lock
lever counter-clockwise to release the main
bridge assembly.
gear fully engage. Take care not to overtighten
the gear on the lens focus drive.
14
Page 15

mounting the O-Focus to the lens
3
Turn the lock lever clockwise to secure the
main bridge in position. Ensure the bridge is
firmly locked to avoid backlash.
Depending on the setup, the LWS rod bridge can also be replaced
with a studio bridge to accommodate heavy-duty 15 mm or 19 mm
studio camera rods (see page 10).
For more information about different types of camera rods visit
OConnor Labs online at the OConnor website
Labs > ‘Rod Standards Explained’).
(see OConnor >
4
Turn the handwheel and make sure that the
driver gear engages with the lens focus
drive adjusting the lens focus smoothly in
either direction.
15
Page 16

setting the focal distances
Set the lens focal range for the O-Focus DM Photo. Using a
suitable pen mark the reference points for the maximum and
minimum focal distances. Hard stops prevent lenses with
infinite rotation from being turned too far. The hard stops can
also be used as hard focus points for run and gun shooting.
2
Set the focal distances. Loosen the index,
move the large witness marker to the end
position, and tighten the screw. For the
start position set the index slightly beyond
the first marker. Finally, move the slider
button between the stops, then push it in.
16
1
Using the handwheel find the start focal
point, mark this point and set the index.
Turn the handwheel and establish the
end stop of the focus pull. Mark with a
pen, then adjust the index stoppers.
Page 17

setting the focal distances
1
Mount the marking disc. Align the tongue
on the handwheel with the cutout on the
marking disc, then push the disc onto
the handwheel until it audibly ‘clicks’ into
place.
CAUTION: Always remove the marking disc before cleaning. Do not use
solvents on the O-Focus DM. Follow the instructions supplied
with the marking pen when cleaning the marking discs.
2
Set the initial lens focus and loosen the
index to set it to the preferred eye level.
Use a pen to mark the focal reference
points on the marking disc, until the
desired distance is marked out.
Set the focal distances for the O-Focus DM Cine. Using a suitable
pen mark the lens focal reference points. The focus throw is
optimized for cine lenses to provide a shorter, more exacting
focus pull.
focus pull
3
If preferred, set the witness mark to
another focal reference point. Adjust the
index as required.
The O-Focus DM is now set up and
ready for use.
17
Page 18

Options and extras
For larger camera packages the O-Focus DM can also be used
with an optional 70 mm handwheel extension (see page 7 for
details). The eye level of the eccentric CFF-1 studio handwheel
can be adapted for optimal ‘line of sight’ and for reach.
Handwheel extension
(70 mm)(C1241-1500)
Note: Adjust the handwheel index up or down
for your preferred eye level.
18
The O-Focus DM has been optimized to work with
still photography lenses used in cinema applications.
A toothless friction driver wheel is included for use
with non-geared, rubber focus barrel still lenses.
Page 19

Mount a flexi-drive to the Cine Follow Focus One to enable the
focus to be adjusted quickly and easily. The flexi-drive assembly
comprises a handwheel, hand grip and shaft.
1
Connect the flexi-drive assembly together.
Flexidrive Assembly Kit:
Handwheel
C1241-1514
Shaft Assembly
C1241-1515
Hand Grip
C1241-1516
Always ensure that the flexi-drive is free from
!
grease and dirt, before and after use.
Options and extras
2
Connect the end of the flexi-drive to the Cine Follow
Focus One handwheel.
3
Hold the hand grip and rotate the flexidrive handwheel to adjust the focus.
19
19
Page 20

Options and extras
Mount a crank handle to the Cine Follow Focus One to
enable the focus to be adjusted with minimum effort.
Connect the crank handle to
1
the 12mm square drive of
the handwheel.
2
Rotate the crank handle to
adjust the focus.
20
Page 21

Adjusting the handwheel tension belt (if required).
1
Using a 2mm Allen key, loosen the two screws that secure
the tension belt housing.
Maintenance
2
Taking care, push down on the top of the tension belt housing to
increase the tension of the belt.
Do not over-tighten screws
!
3
While holding the tension belt housing in place, tighten the two
screws using a 2mm Allen key.
21
Page 22

Page 23

Page 24

Publication part No. C1242-4980/3
O
Connor
O
A V
A V
™
itec Group brand
Connor
™
itec Group brand
www.ocon.com
 Loading...