

Page 1

OCEANIC
®
Datamax Pro Plus
owner's guide
R1
Page 2

®
RESPONSIBLE COMPUTER DIVING
• Always Plan Each Dive
• Always Limit Your Dive to the Level of Your Training
and Experience
• Always Make Your Deepest Dive First
• Always Make The Deepest Part of Every Dive First
• Check Your Computer Often During the Dive
• Do A Safety Stop on Every Dive
• Allow Adequate Surface Interval Between Each Dive
• Allow Adequate Surface Interval Between Each Day of
Diving (12 Hours or Until Your Computer Clears)
Read And Understand This Owner's Guide
Thoroughly Before Using the Pro Plus.
Responsible
ii
Page 3

Datamax Pro Plus
WARNINGS and SAFETY RECOMMENDATIONS
• The Pro Plus is intended for use by recreational divers who have successfully completed a
nationally recognized course in scuba diving, and diving with enriched nitrogen-oxygen
(nitrox) mixtures.
• It is intended only for no decompression diving, NOT intentional decompression diving.
• It must not be used by untrained persons who may not have knowledge of the potential risks
and hazards of scuba diving, and diving with enriched nitrogen-oxygen (nitrox) mixtures.
• You must obtain scuba certification, and certfication in diving with enriched nitrogen-oxygen (nitrox) mixtures before using the Pro Plus if you have not already done so.
• It is NOT for use by military and commercial divers.
• It should NOT be utilized for any competitive, or repetitive square wave or decompression
diving, as it is intended solely for recreational use and no decompression multilevel diving.
• As with all underwater life support equipment, improper use or misuse of this product can
cause serious injury or death.
• Never participate in sharing or swapping of a dive computer.
• Conduct your dives in such a manner so as to insure that you continuously check the
computer's proper function.
• Read and understand this owner’s guide completely before diving with the Pro Plus.
• If you do not fully understand how to use this dive computer, or if you have any questions,
you should seek instruction in its use from your Authorized Oceanic Dealer before you utilize this product.
iii
Page 4

®
LIMITED TWO-YEAR WARRANTY
For details, refer to the Product Warranty Registration Card provided.
COPYRIGHT NOTICE
This owner’s guide is copyrighted, all rights are reserved. It may not, in whole or in part, be copied, photocopied, reproduced, translated, or reduced to any
electronic medium or machine readable form without prior consent in writing from Oceanic / 2002 Design. The Surface Time/Mode, Plan Mode, No Decompression Time, Decompression Stop Time, Dive Log, Low Battery, Elapsed Dive Time, Maximum Depth, Ascent Rate, and Caution Zone icons are protected by
copyright, and are trademarks of Oceanic.
Datamax Pro Plus Owner's Guide, Doc. No. 12-2141 (5/99)
© 2002 Design 1999
2002 Davis Street
San Leandro, Ca. USA 94577
510/569-3100
TRADEMARK NOTICE
Oceanic, the Oceanic logo, Datamax Pro Plus, the Pro Plus logo, Oceanglo, Smart Glo, Graphic Diver Interface, Tissue Loading Bar Graph, Pre Dive Planning
Sequence, Variable Ascent Rate Indicator, Set Point, Control Console, Turn Gas Alarm, and OceanLog are all registered and unregistered trademarks of Oceanic. All rights are reserved.
PATENT NOTICE
U.S. Patents have been issued, or applied for, to protect the following design features:
Graphic Diver Interface, Pre Dive Planning Sequence, Dive Time Remaining, Depth Alarm Set Point, Smart Glo, Main Menu Structure, Turn Gas Alarm Set
Point, End Gas Alarm Set Point, Depth Alarm Set Point, Breathing Gas Time Remaining Bar Graph, Data Sensing and Processing Device (U.S. Patent no.
4,882,678), Breathing Gas Time Remaining (U.S. Patent no. 4,586,136), and Variable Ascent Rate Indicator Bar Graph (U.S. Patent no. 5,156,055).
DECOMPRESSION MODEL
The programs within the Pro Plus simulate the absorption of nitrogen into the body by using a mathematical model. This model is merely a way to apply a
limited set of data to a large range of experiences. The Pro Plus dive computer model is based upon the latest research and experiments in decompression
theory. Still, using the Pro Plus, just as using the U.S. Navy (or other) No Decompression Tables, is no guarantee of avoiding decompression
sickness, i.e. “the bends.” Every diver’s physiology is different, and can even vary from day to day. No machine can predict how your body will react to a
particular dive profile.
R1
iv
Page 5

Datamax Pro Plus
CONTENTS
FEA TURES and DISPLAYS ....................................................................................... 1
Introduction ............................................................................................................................................... 2
Interactive Control Console....................................................................................................................... 2
Informational Displays............................................................................................................................... 3
Universal Graphic Diver Interface ......................................................................................................... 4
• Tissue Loading Bar Graph ............................................................................................................. 4
• Oxygen Accumlation Bar Graph .................................................................................................... 5
• Variable Ascent Rate Indicator ....................................................................................................... 6
• Breathing Gas Time Remaining Bar Graph ................................................................................... 6
Dive Time Remaining............................................................................................................................ 7
• No Decompression Dive Time Remaining..................................................................................... 7
• Oxygen Accumulation Time Remaining ......................................................................................... 8
• Breathing Gas Time Remaining..................................................................................................... 9
Alpha / Numeric Displays .................................................................................................................... 11
• Cylinder Pressure ........................................................................................................................ 11
• Depth Displays............................................................................................................................. 11
• Time Displays .............................................................................................................................. 11
• Ambient Temperature................................................................................................................... 12
Audible Alarm .......................................................................................................................................... 12
Backlight Feature .................................................................................................................................... 14
Operating Temperature ........................................................................................................................... 15
ACTIVATION and SETUP ........................................................................................ 17
Activation.................................................................................................................................................18
Surface Mode.......................................................................................................................................... 19
Main Mode Menu .................................................................................................................................... 19
v
Page 6

®
CONTENTS (CONTINUED)
Entering Settings..................................................................................................................................... 21
• To Set: Alternate On/Off ................................................................................................................... 21
• To Set: Audible Alarm On/Off ........................................................................................................... 22
• To Set: Depth Alarm Set Point ......................................................................................................... 22
• To Set: Turn Pressure Alarm Set Point ............................................................................................ 23
• To Set: End Pressure Alarm Set Point ............................................................................................. 24
• To Set: Date/Hour Format/Time ....................................................................................................... 24
• To Set: Sampling Rate ..................................................................................................................... 26
• To Set: Units of Measure ................................................................................................................. 27
• To Set: FO2 50% Default On/Off...................................................................................................... 27
EA Mode ................................................................................................................................................. 28
Summary of Access to Set Modes.......................................................................................................... 30
PRE DIVE and DIVE MODES .................................................................................. 31
Operational Modes.................................................................................................................................. 32
• Temperature/Date/Time Mode ......................................................................................................... 32
• FO2 Mode........................................................................................................................................ 32
• FO2 50% Default ......................................................................................................................... 33
• FO2 Set for an Air Dive................................................................................................................ 33
• Setting FO2.................................................................................................................................. 34
• FO2 Set for a Nitrox Dive............................................................................................................. 34
• Pre Dive Planning Sequence........................................................................................................... 35
• Prior to a Repetitive Dive ............................................................................................................. 36
• No Decompression Dive Mode ........................................................................................................ 37
• Main Display ................................................................................................................................ 37
• Secondary Display....................................................................................................................... 38
• Alternate Display.......................................................................................................................... 38
Ascending to the Surface........................................................................................................................ 40
Altitude Diving ......................................................................................................................................... 41
vi
Page 7

Datamax Pro Plus
CONTENTS (CONTINUED)
POST DIVE MODES................................................................................................. 43
First 2 Hours After a Dive........................................................................................................................ 44
• Transition Period.............................................................................................................................. 44
• To view Temperature/Date/Time .................................................................................................. 44
• To view That Dive's Log ............................................................................................................... 45
After the Transition Period ....................................................................................................................... 45
• To view Temperature/Date/Time ...................................................................................................... 45
• To access FO2 Mode ....................................................................................................................... 46
• To access Pre Dive Planning Sequence .......................................................................................... 46
• To access Time to Fly and Desaturate Countdowns........................................................................ 47
Log Mode ................................................................................................................................................ 48
After the First 2 Hours ............................................................................................................................. 50
Downloading Data to PC......................................................................................................................... 50
Summary of Access to Post Dive Modes ................................................................................................ 52
HANDLING THE EXTREMES .................................................................................. 53
Avoiding and Managing Decompression.................................................................................................54
• Tissue Loading Bar Graph............................................................................................................... 54
• Decompression Dive Mode.............................................................................................................. 55
• Main Display ................................................................................................................................ 55
• Secondary Display....................................................................................................................... 56
• Alternate Display.......................................................................................................................... 56
• Breathing Gas Time Remaining During Decompression ................................................................. 56
• Managing Decompression Stops..................................................................................................... 58
Violation Modes....................................................................................................................................... 58
• Conditional Violation Mode .............................................................................................................. 59
• Delayed Violation Mode................................................................................................................... 60
• Exceeding Maximum Operating Depth ........................................................................................ 61
vii
Page 8

®
CONTENTS (CONTINUED)
• Immediate Violation Mode ............................................................................................................... 61
• Gauge Mode .................................................................................................................................... 62
• Permanent Violation ........................................................................................................................ 62
Oxygen Exposure ................................................................................................................................... 63
• Partial Pressure of Oxygen.............................................................................................................. 63
• High PO2 Dive Mode ....................................................................................................................... 63
• High Oxygen Accumulation..............................................................................................................64
Unexpected Loss of Displayed Information ............................................................................................ 65
CARE and MAINTENANCE ..................................................................................... 69
Care and Cleaning .................................................................................................................................. 70
Annual Inspections and Service.............................................................................................................. 70
• To Obtain Service ............................................................................................................................ 71
Battery Life .............................................................................................................................................. 72
Low Battery Condition ............................................................................................................................. 72
Battery Replacement .............................................................................................................................. 73
Oceanic Facilities .................................................................................................................................... 77
REFERENCE ............................................................................................................ 79
No Decompression Limits ....................................................................................................................... 81
Decompression Model ............................................................................................................................ 81
Oxygen Exposure Limits ......................................................................................................................... 82
Multiple Tissue Tracking .......................................................................................................................... 82
Specifications .......................................................................................................................................... 84
Glossary .................................................................................................................................................. 87
Service Record ....................................................................................................................................... 90
viii
Page 9

Datamax Pro Plus
FEATURES
and
DISPLAYS
refer to page 16 for - WARNINGS and SAFETY RECOMMENDATIONS
1
Page 10
®
INTRODUCTION
Welcome to Oceanic and thank you for choosing the Pro Plus !
DECO
C Z
NO DECO
®
OCEANIC
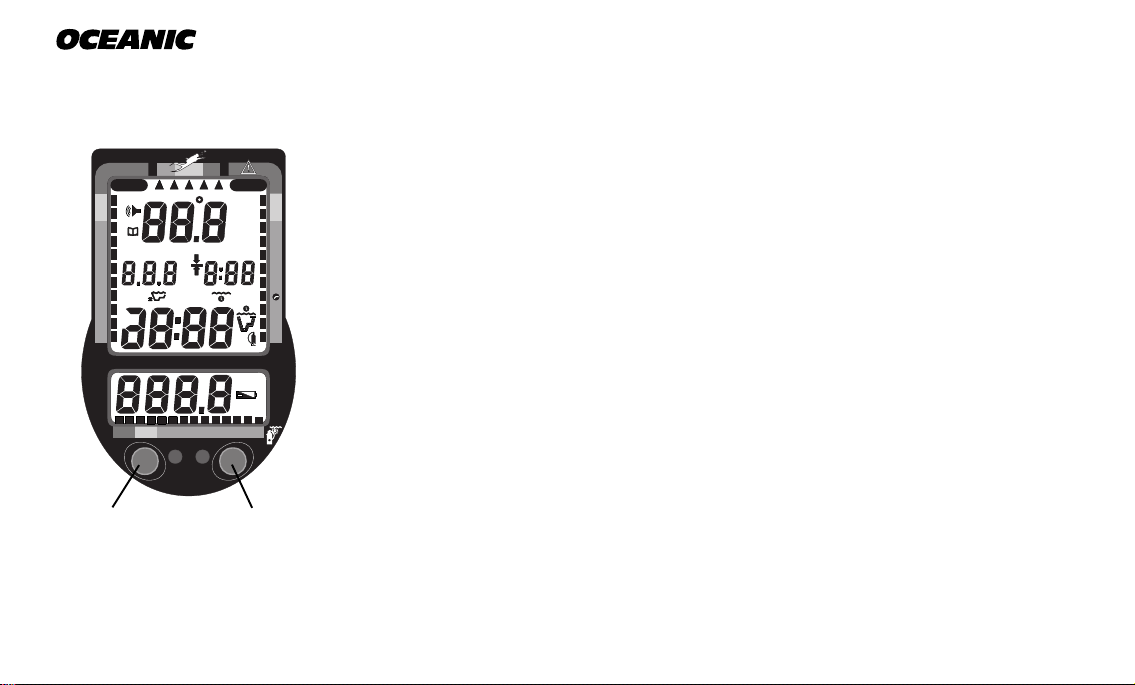
Fig. 1 - Interactive
Control Console
2
M
FT
MAX
M
FT
MAX
O
2
BAR
PSI
200 5 10 30 40 50 60
Smart
Glo
™
SelectAdvance
C Z O
2
The Pro Plus has a wide array of features described in detail throughout the
pages that follow. Due to the importance that they be understood thoroughly
prior to using the Pro Plus, information will be expanded upon and some refreshed as you proceed. Relax and read through the complete guide.
It is extremely important that you read this owner's guide in sequence and understand it completely before attempting to use the
Pro Plus.
Remember that technology is no substitute for common sense, and a dive com-
Pro PLUS
puter only provides the person using it with data, not the knowledge to use it.
INTERACTIVE CONTROL CONSOLE
The Interactive Control Console, consisting of the Advance (Left) button and
Select (Right) button (Fig. 1), allows you to select various display options and
access specific information when you choose to see it. The buttons can be
pressed repeatedly, or held in to scroll.
Page 11
INFORMATIONAL DISPLAYS
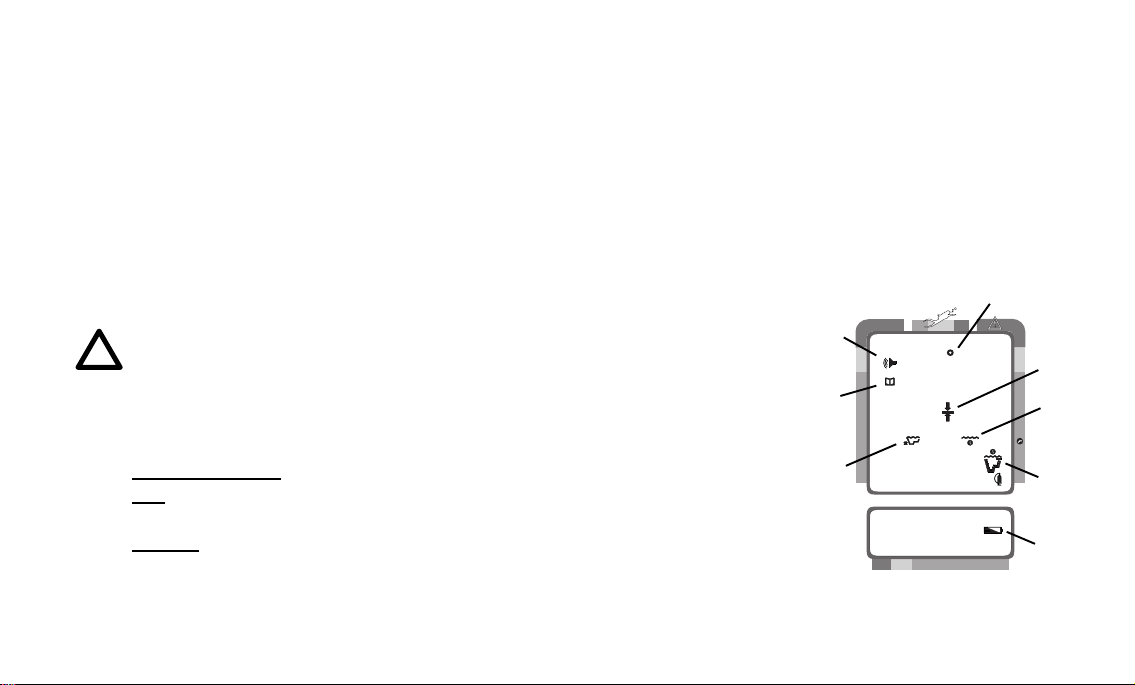
Operational modes and status information are visually represented numerically and/or graphically and can be understood at a glance with the aide of universal icons (Fig. 2) that identify and bring quick focus to the displays. Segmented bar graphs will show how close you are to critical limits.
Each Pro Plus numeric and graphic display represents a unique piece
of information. It is imperative that you understand the formats,
ranges, and values of the information represented to avoid any possible misunderstanding that could result in error.
NOTE: Throughout this owner's guide reference is made to the
term ''breathing gas'. The rational being that the Pro Plus can
be used for 'air' dives or 'nitrox' dives. For clarity these terms
are defined as -
Breathing Gas - the gaseous mixture breathed during a dive.
Air - a breathing gas that contains approximately 21% oxygen
and 79% nitrogen (nature's common nitrogen-oxygen mixture).
Nitrox - a nitrogen-oxygen breathing gas that contains a higher
fraction of oxygen (22 to 50%) than air.
Datamax Pro Plus
a. Operating Mode
b. Elapsed Dive Time
c. Deco Stop
d. Temperature
e. Audible
f. Log
g. Maximum Depth
h. Low Battery
d
DECO
e
C Z
f
NO DECO
g
200 5 10 30 40 50 60
Fig. 2 - Universal Icons
C Z O
c
b
2
O
2
a
h
3
Page 12
®
DECO
C Z
NO DECO
200 5 10 30 40 50 60
Fig. 3 - Bar Graphs
DECO
C Z
NO DECO
Fig. 4 - Tissue Loading
Bar Graph
4
UNIVERSAL GRAPHIC DIVER INTERFACE
C Z O
™
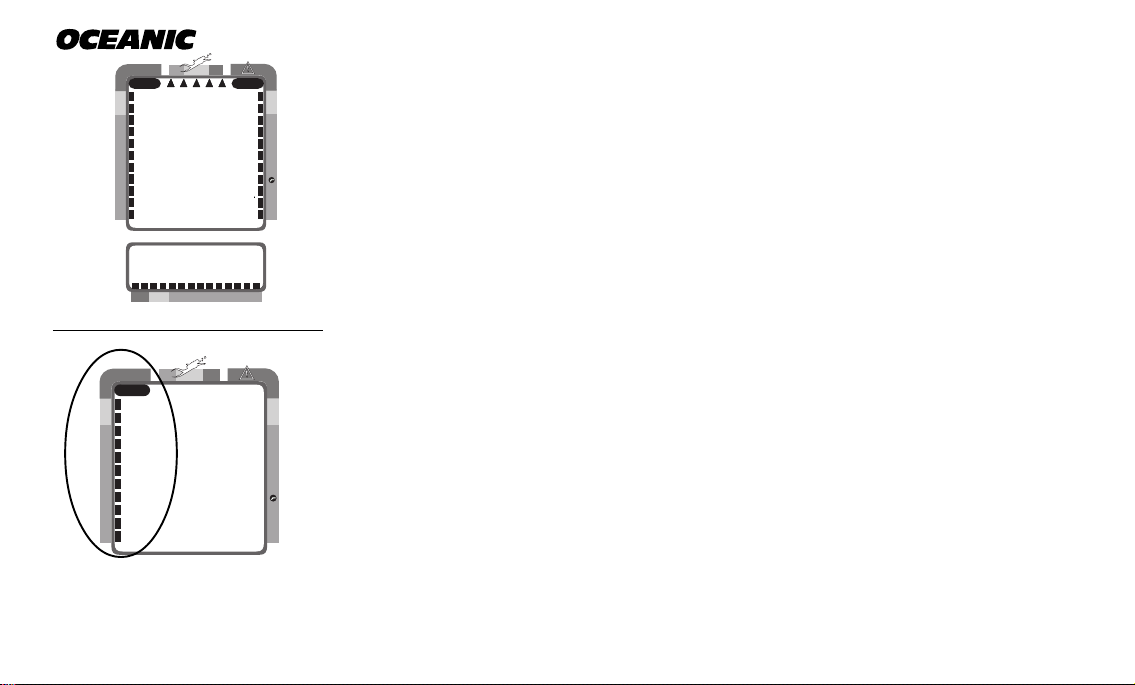
Four bar graphs referred to as the Universal Graphic Diver Interface™ appear
around the perimeter of the screens (Fig. 3). These segmented bar graphs are
2
located next to green, yellow, and red color coded portions of the peripheral
decal that denote normal, caution, and danger zones, respectively.
When underwater, you can quickly focus on the bar graphs to make sure that
they are in the green. You can quickly verify that you're not getting too close
to the no decompression limit or the limit for exposure to oxygen (accumulation), or ascending too fast.
Tissue Loading Bar Graph
C Z O
The Tissue Loading Bar Graph™ (TLBG) represents nitrogen loading (Fig. 4),
showing your relative no decompression or decompression status. As your
™
depth and elapsed dive time increase, segments will add to the graph beginning in the lower left portion of the screen. As you ascend to shallower depths,
2
this bar graph will begin to recede, indicating that additional no decompression time is allowed for multilevel diving.
The Tissue Loading Bar Graph monitors 12 different nitrogen compartments
simultaneously and displays the one that is in control of your dive. It is divided into a green No Decompression zone (NO DECO), a yellow Caution zone
(C.Z.), and a red Decompression zone (DECO). The bar graph gives a visual
Page 13
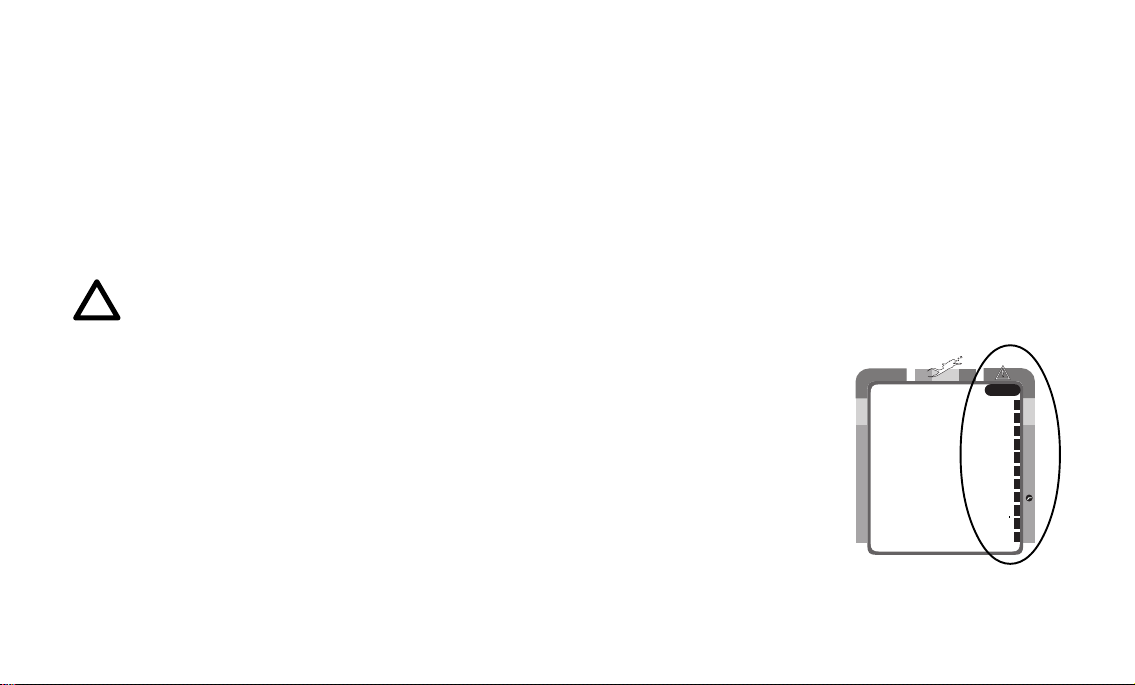
representation of just how close you are to the no decompression limit with a
yellow Caution (C.Z.) Zone that allows you to make a decision regarding safety
stop duration or necessity. The Tissue Loading Bar Graph™ has been granted
U.S. Patent No. 4,882,687.
The Tissue Loading Bar Graph™ also assists you with managing decompression (explained later) by filling a large red 'ceiling stop required' segment.
Oxygen Accumulation (O2) Bar Graph
NOTE: Displays associated with oxygen and the O2 bar graph
will only appear if FO2 has been set at a value other than 'Air'.
Datamax Pro Plus
The Oxygen Accumulation (O2) Bar Graph (Fig. 5) represents oxygen loading,
your relative oxygen tolerance dosage (OTU), showing the maximum of either
per dive accumulated oxygen, or 24 hour period accumulated oxygen. As your
exposure (accumulation of oxygen) increases during the dive, segments will
add to the bar graph starting in the lower right portion of the screen. As oxygen loading decreases, the bar graph will begin to recede, indicating that additional exposure (accumulation) is allowed for that dive, and 24 hour period.
The O2 bar graph also assists you with managing high partial pressure of oxygen (PO2) by flashing the large red Danger zone segment as a warning when
the level of PO2 exceeds the maximum allowed limit of 1.60 ATA.
DECO
C Z
NO DECO
C Z O
2
Fig. 5 - Oxygen Accumulation
(O2) Bar Graph
5
Page 14
®
Segments = Speed (rate)
0 = 0 - 20 fpm (0 - 6 mpm)
1 = 21 - 30 fpm (6.5 - 9 mpm)
2 = 31 - 40 fpm (9.5 - 12 mpm)
3 = 41 - 50 fpm (12.5 - 15 mpm)
4 = 51 - 60 fpm (15.5 - 18 mpm)
5 = 61+ fpm (18.5+ mpm)
(when 5, all will flash)
DECO
C Z
C Z O
a
NO DECO
2
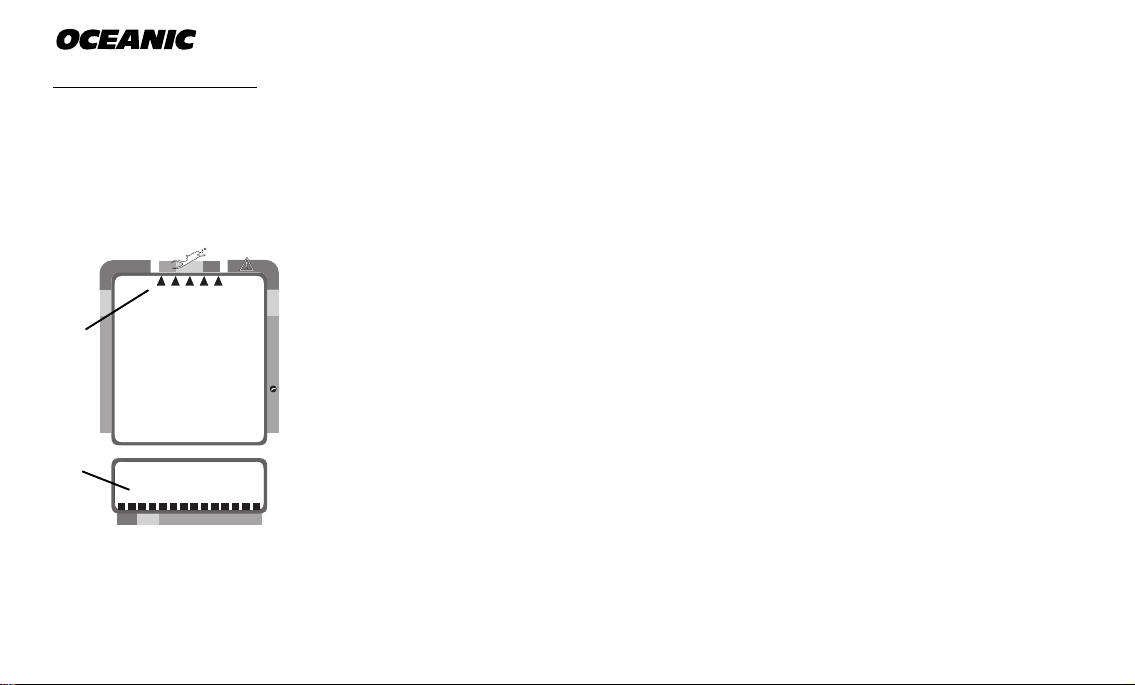
Variable Ascent Rate Indicator™ (VARI)
The Variable Ascent Rate Indicator™ (Fig. 6a) is provided to help you avoid
excessive ascent rates by displaying a visual representation of ascent speed,
rather than just showing that you are ascending too fast. The Variable Ascent
Rate Indicator has been granted U.S. Patent no. 5,156,055.
The 5 triangular segments of the bar graph, located beside green, yellow, and
red reference zones, appear beginning from the left and may be considered an
ascent rate speedometer. Green is a 'normal' rate, yellow is a 'caution' rate,
and red is 'Too Fast'.
In the event that your ascent rate exceeds the maximum recommended rate of
60 feet (18 meters) per minute, the bar graph segments will enter the red zone
and all 5 segments will flash once per second until your ascent speed is slowed.
If this occurs, you should immediately slow your ascent.
b
200 5 10 30 40 50 60
Fig. 6 - Variable Ascent
Rate Indicator and Breathing
Gas Time Remaining Bar
Graph
6
Breathing Gas Time Remaining Bar Graph
The Breathing Gas Time Remaining Bar Graph located along the bottom of
the lower display (Fig. 6b) provides a graphic representation of the time that
you can remain at your present depth and then, following a safe ascent, surface with a predetermined breathing gas reserve. This calculation and display
is based on your breathing gas consumption rate that is continually monitored
Page 15

by the Pro Plus, and it takes into account the breathing gas required for a safe
ascent including any required decompression stops.
The green, yellow, and red zones adjacent to the bar graph enable you to
quickly focus on remaining breathing gas times of 60 minutes or less, based on
your pre selected End Gas Alarm Set Point. The bar graph is more precise as
time remaining decreases toward the red zone.
DIVE TIME REMAINING
One of the most important pieces of information on the Pro Plus is the 'Dive
Time Remaining numeric display'. The Pro Plus constantly monitors three
critical pieces of information; no decompression status, oxygen accumulation
status, and rate of breathing gas consumption. The Dive Time Remaining display will indicate the time that is more critical for you at that particular moment (i.e.; whichever time is the least amount available of the three). The specific time being displayed is identified by the No Decompression Dive Time
icon, or the O2 Time icon, or the Gas Time Remaining icon (Fig. 7). This
unique feature has been granted U.S. Patent No. 4,586,136.
No Decompression Dive Time Remaining
Datamax Pro Plus
(No Decompression Time)
O
(Oxygen Accumulation Time)
(Breathing Gas Time)
2
No Decompression Dive Time Remaining is the maximum amount of time that
you can stay at your present depth before entering a decompression situation.
Fig. 7 - Dive Time Remaining
Identification
7
Page 16
DECO
C Z
NO DECO
FT
MAX
®
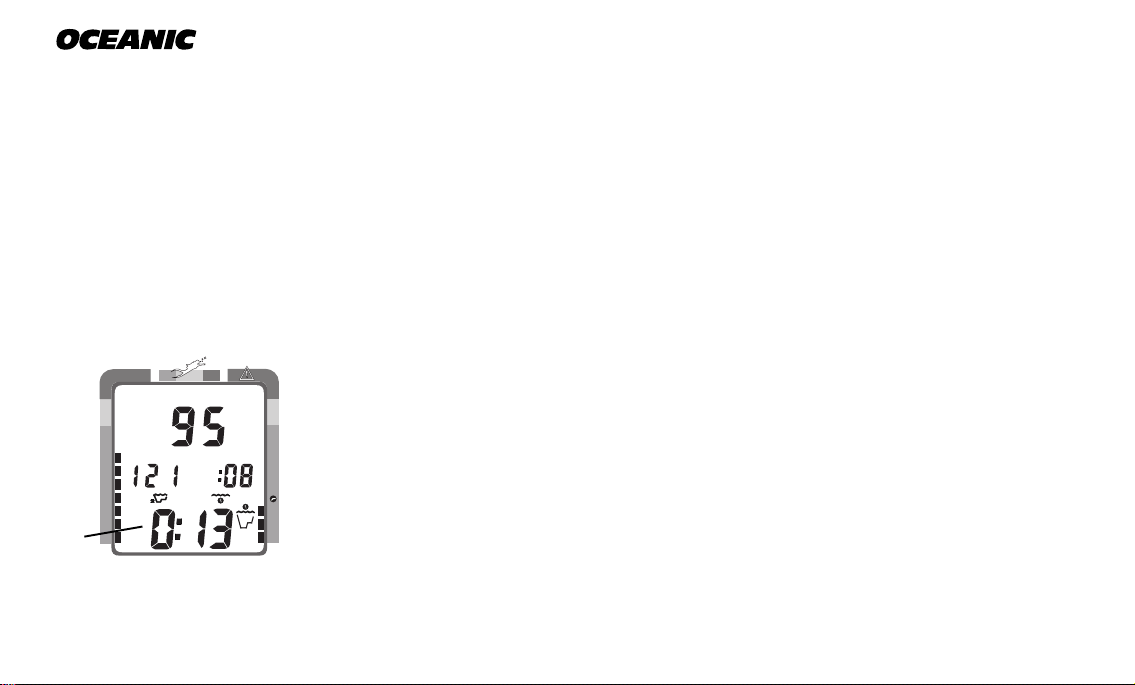
It is calculated based on the amount of nitrogen absorbed by twelve hypothetical tissue compartments. The rates each of these compartments absorb and
release nitrogen is mathematically modeled and compared against a maximum
allowable nitrogen level. Whichever one of the twelve is closest to this maximum level is the controlling compartment for that depth. Its resulting value
will be displayed numerically (Fig. 8a) along with the No Decompression Dive
icon and graphically as the Tissue Loading Bar Graph.
As you ascend from depth following a dive that has approached the no decompression limit, the Tissue Loading Bar Graph will recede as control shifts to
slower compartments. This is a feature of the decompression model that is the
basis for multilevel diving, one of the most important advantages the Pro Plus
offers.
C Z O
FT
The no decompression algorithm is based upon Haldane’s theory using maximum allowable nitrogen levels developed by Merrill Spencer. Repetitive diving
control is based upon experiments designed and conducted by Dr. Ray Rogers
2
and Dr. Michael Powell in 1987. Diving Science and Technology® (DSAT), a
corporate affiliate of PADI®, commissioned these experiments.
a
Fig. 8 - No Decompression
Dive Time Remaining
8
Oxygen Accumulation Time Remaining
Oxygen accumulation (exposure) during a dive, or 24 hour period, appears
graphically as the Oxygen Accumulation (O2) Bar Graph. As time remaining
Page 17
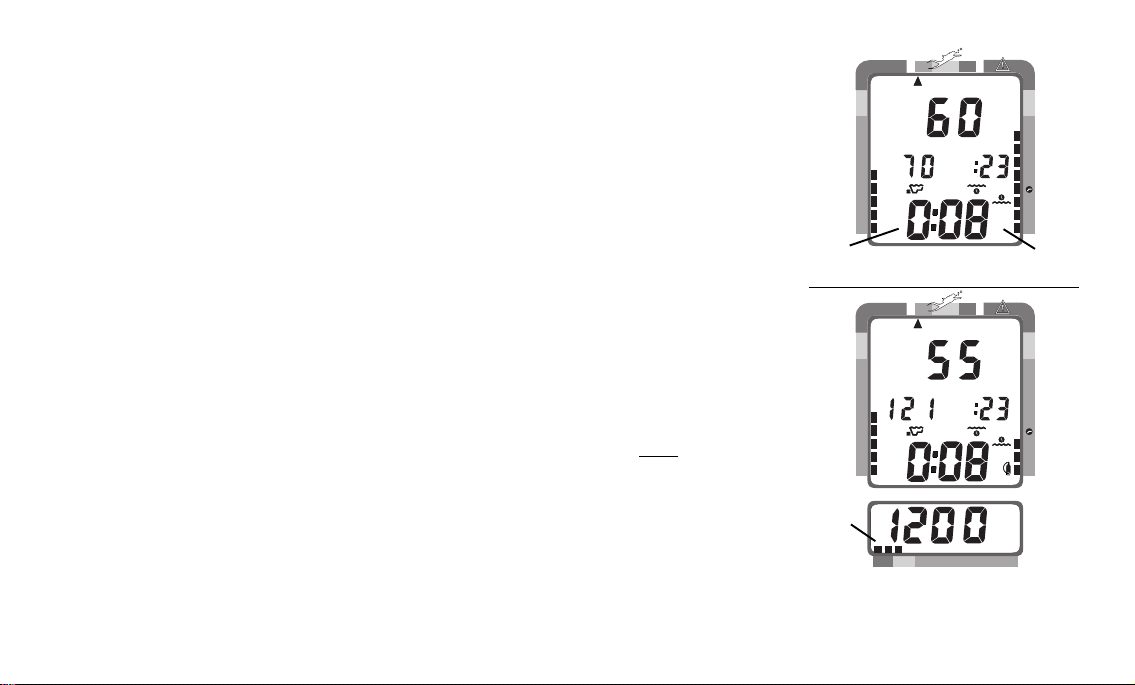
before reaching the oxygen exposure limit decreases, segments are added to
the O2 bar graph. When the amount of time remaining before reaching the
oxygen limit becomes less than the No Decompression Dive Time Remaining,
or Breathing Gas Time Remaining, calculations for that depth will be controlled by oxygen. Oxygen Time Remaining will then appear as the main numeric time display (Fig. 9a) as signified by the O2 Time icon (Fig. 9b) appearing on the display. As oxygen accumulation continues to increase, the O2 bar
graph will enter the yellow Caution Zone (described later).
Breathing Gas Time Remaining
Breathing Gas Time Remaining will appear as the numeric Dive Time Remaining display (Fig. 10) only when it is less than No Decompression Time Remaining and Oxygen Accumulation Time Remaining. Breathing Gas Time Remaining of 60 minutes, or less, will be displayed continuously as the Gas Time Remaining Bar Graph (Fig. 10a) regardless of which time is being displayed as
the numeric Dive Time Remaining. The bar graph represents only Breathing
Gas Time information and it will be the only indication of breathing gas time
remaining if you are in a decompression or violation mode.
The Pro Plus calculates Breathing Gas Time Remaining using a patented algorithm that is based on a diver's individual breathing gas consumption rate and
depth. Tank pressure is measured once each second, and an average rate of
consumption is calculated over a 90 second period. This rate of consumption is
Datamax Pro Plus
DECO
C Z
FT
NO DECO
MAX
a
Fig. 9 - O2 Time Remaining
DECO
C Z
FT
NO DECO
MAX
a
200 5 10 30 40 50 60
Fig. 10 - Breathing Gas Time
Remaining
C Z O
FT
2
O
2
b
C Z O
FT
2
PSI
9
Page 18

®
then used in conjunction with a knowledge of the depth dependence to predict
the breathing gas required for a safe ascent including any required decompression stops.
Breathing gas consumption and depth are continuously monitored, and
Breathing Gas Time Remaining reflects any change in your circumstances.
For example, when a buddy starts breathing from your octopus or you suddenly find yourself swimming against a strong current and begin breathing
more rapidly, the Pro Plus will recognize this change and adjust your Breathing Gas Time Remaining accordingly.
Remember, the Breathing Gas Time Remaining is the time you can remain at
the present depth and still surface with the tank pressure reserve (Gas Alarm
Set Point) that you set during setup. When Gas Time Remaining indicates
zero, you should immediately initiate a controlled ascent. There is no reason
to panic, the Pro Plus has allowed for the breathing gas necessary for a safe
ascent including any emergency decompression stops.
10
R
E
S
P
O
N
R
E
V
I
D
E
S
L
I
B
Page 19
ALPHA/NUMERIC DISPLAYS
Cylinder Pressure Display
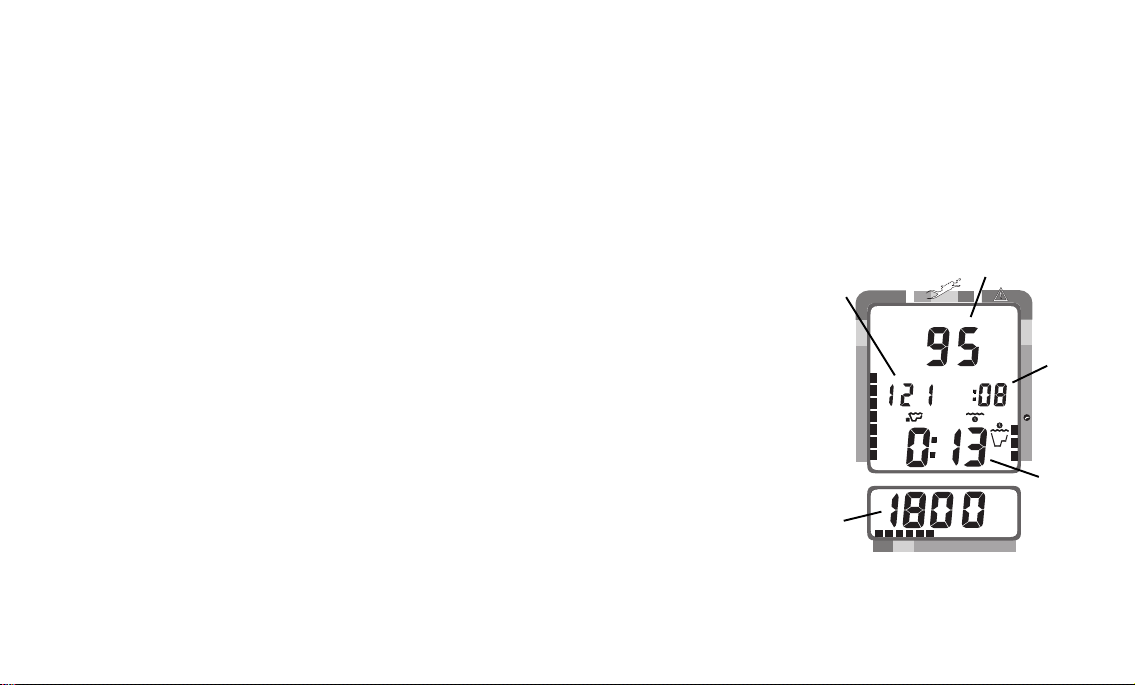
The Cylinder Pressure display appears in the lower screen (Fig. 11a) any time
the Pro Plus is connected to a pressurized cylinder and in an active mode. Values of pressure are displayed from 10 PSI (.5 BAR) up to 5000 PSI (352 BAR)
in increments of 10 PSI (.5 BAR).
Depth Displays
During a dive, CurrentDepth (Fig. 11b) and Maximum Depth reached
during that dive (Fig. 11c) are displayed from 0 to 330 feet (99.5 meters) in 1
foot (.5 meter) increments.
During a Decompression Dive, the required Ceiling Stop Depth is displayed
from 60 to 10 feet (20 to 3 meters) in 10 foot (3 meter) increments.
Datamax Pro Plus
b
c
DECO
C Z
NO DECO
FT
MAX
C Z O
FT
e
2
Time Displays
Time displays (Fig. 11 d & e) are shown in hour:minute format (i.e., 1:02 represents one hour and two minutes, not 102 minutes!). An exception to this is
Decompression Stop Time that displays 0 to 99 minutes (:00 to :99).
a
200 5 10 30 40 50 60
PSI
Fig. 11 - Pressure/Depth/
Time Displays
d
11
Page 20
®
The colon that separates hours and minutes blinks once per second when the
display is indicating real time such as elapsed Surface Time, Elapsed Dive
Time, or Time of Day. Dive Time Available, Dive Time Remaining, Decompression Stop Time, Total Ascent Time required, Time to Fly, or Desaturation
Time are calculated projections of time and use a solid (non-blinking) colon to
indicate that they are counting down, rather than up.
Depth and Time displays will be illustrated and described in more detail as applicable for each of the operating modes.
Temperature Displays
DECO
C Z
NO DECO
Fig. 12 - Temperature Dis-
play (on surface)
12
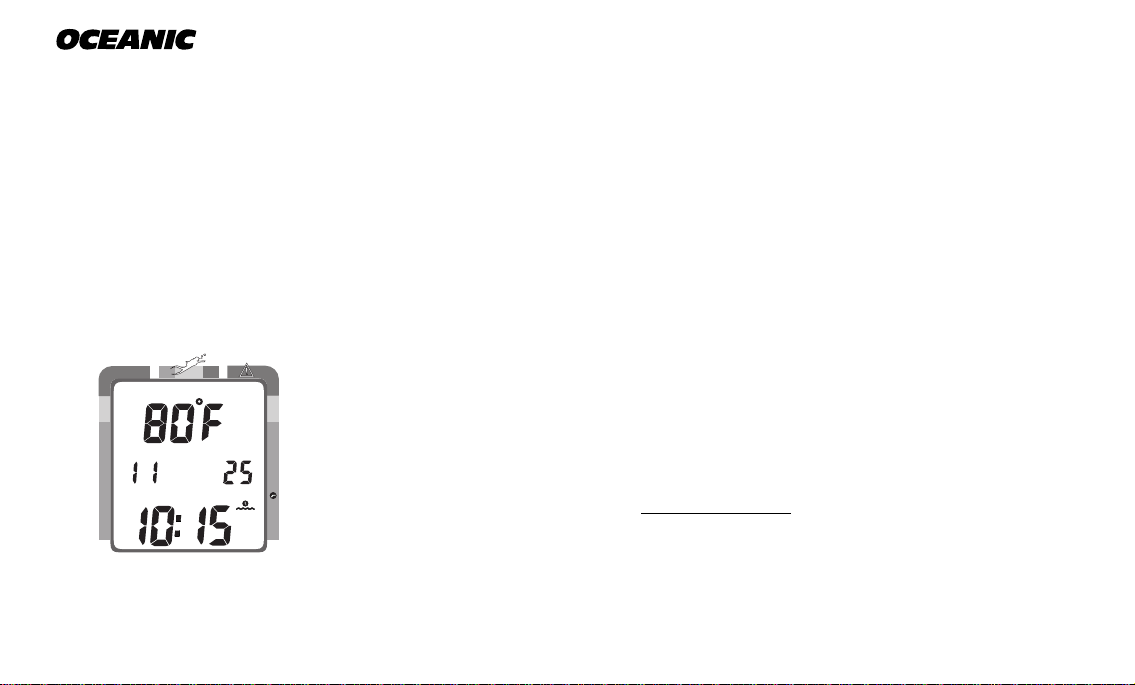
Ambient Temperatures from 0° to 99°F (-9 to 60°C) are displayed together with
date and time (Fig. 12) when the Advance (Left) button is pressed while in the
C Z O
Surface Mode or a dive mode (described later).
AUDIBLE ALARM
2
During situations that may pose potential danger, one Double Beep is emitted. These situations are:
• Entry into decompression.
• Decreasing to 5 minutes of Breathing Gas Dive Time Remaining.
• Partial pressure of oxygen equal to or greater than 1.40 ATA.
Page 21

When the Pro Plus senses immediate danger to you, it emits One Beep per
Second until the situation is corrected (if the Audible Alarm feature is set
ON). If the Audible Alarm feature is set OFF (described later), you will be
alerted instead by one Double Beep. Situations are:
• Descent deeper than the Depth Alarm Set Point.
• Ascent to a depth shallower than a required stop depth.
• Ascent rate that exceeds 60 ft./min (18 m/min).
• Gas Time Remaining equals zero (0:00).
• Partial pressure of oxygen equal to or greater than 1.60 ATA.
• Oxygen accumulation equal to or greater than the allowed per dive or 24
hour limit.
If you enter a Delayed or Immediate Violation Mode, a Single Long Beep will
be emitted. This will occur if:
• Depth is shallower than the required stop depth for more than 5 minutes.
• Required Decompression exceeds a 60 FT/ 18 M ceiling.
Datamax Pro Plus
Immediately following activation and a diagnostic check the Pro Plus will emit
a Short Beep.
Upon reaching the Turn Gas Alarm set point (described later), Six Beeps will
be emitted.
Responsible
13
Page 22

®
C
r
BACKLIGHT FEATURE
In addition to using a high contrast LCD for easy readability in low light conditions, the backlight features evenly illuminate the full upper and lower displays.
Smart Glo™, the surface mode backlight, senses the intensity of light that is
passing through small ports located between the control buttons (Fig. 13). If a
low level of light is sensed, the Smart Glo™ backlight will illuminate the display for button depression time plus 10 seconds when either button is pressed.
Oceanglo®, the dive mode backlight, will illuminate the displays for button depression time plus 5 seconds when the Select (Right) control button is pressed.
Additional illumination time can be obtained by pressing the button again.
O
Fig. 13 - Smart Glo Sensors
200 5 10 30 40 50 60
Smart
Glo
™
14
P
NOTE: Extensive use of the backlight reduces estimated battery life. Also, the backlight will not activate during a 'low battery condition', or when downloading data to a PC.
OPERATING TEMPERATURE
The Pro Plus will operate in almost any temperature diving environment in
the world between 32 and 140 °F (0 and 60 °C).
Page 23

At extremely low temperatures, the LCD may become sluggish, but this will
not affect it's accuracy. If stored or transported in extremely low temperature
areas (below freezing), you should warm the module and its battery with body
heat before diving.
Even though the Pro Plus will operate in this wide range of temperatures, it is
possible to damage the electronics if left exposed to direct sunlight,
or in a hot confined space (like a car trunk). After the dive, cover the
Pro Plus and keep it out of the sun. If inadvertently left in the direct sunlight for a long period, the LCD display may become totally black. If this occurs, immediately immerse the Pro Plus in water. The display should recover
its normal appearance after a few minutes. Damage from excess heat, or
cold, is not covered by the Pro Plus two year limited warranty.
Datamax Pro Plus
R
E
S
P
O
N
R
E
V
I
D
E
S
L
I
B
Be a -
RESPONSIBLE DIVER
at all times.
15
Page 24

®
WARNINGS and SAFETY RECOMMENDATIONS
• Inspect your Pro Plus prior to every dive, checking for any signs of the entrance of moisture,
damage to the housing, or damage to the LCD display. If these or other signs of damage are
found, return the unit to an Authorized Oceanic Dealer. DO NOT attempt to use it until it
has received factory service.
• Oceanic advocates responsible diving practices consistent with your individual level of formal training and experience, and does not recommend decompression diving or diving below
130 feet (39 m).
• Always carry primary and backup dive lights when conducting dives that could include low
light situations.
• You should never, under any circumstances, swap your computer with another unit between
dives, or share your computer with another diver underwater. It is impossible for two divers
to stay precisely together underwater, and your computer's dive profile tracking of previous
dives will be pertinent to you only. Nitrogen and oxygen loading of a second user may be significantly different and thus swapping dive computers could lead to inaccurate and potentially dangerous predictions of decompression and oxygen accumulation status. This rule
applies to the use of all dive computers, but is especially important when using the Pro Plus,
due to the personal information it provides.
16
Page 25

Datamax Pro Plus
ACTIVATION
and
SETUP
refer to page 29 for - WARNINGS and SAFETY RECOMMENDATIONS
17
Page 26
®
DECO
C Z O
M
FT
MAX
M
FT
MAX
O
BAR
PSI
2
2
C Z
NO DECO
200 5 10 30 40 50 60
Fig. 14 - Diagnostic Mode
ACTIVATION
Connect the regulator assembly to a full cylinder and pressurize by slowly
opening the cylinder valve. Note that to enter settings, access information
such as the log, or to download data it is not necessary to pressurize the unit.
To activate the Pro Plus, press the Select (Right) button once and release. It
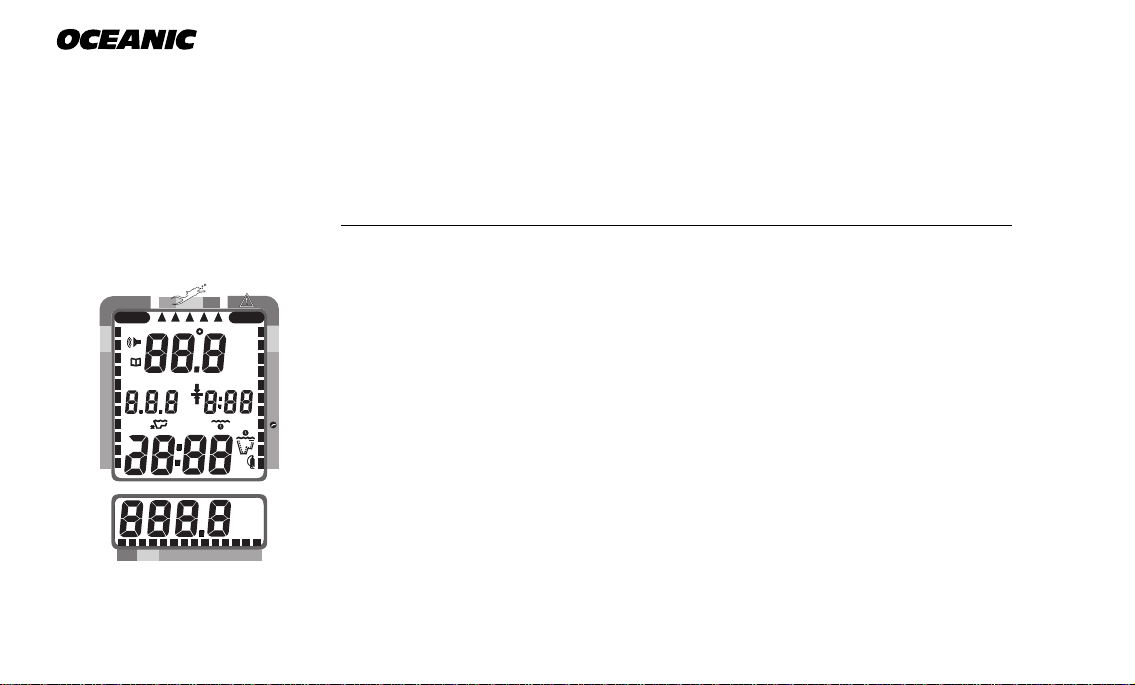
will immediately enter Diagnostic Mode, displaying all “8’s” (Fig. 14), followed
by “dashes”, and a countdown from 9 to 0. While conducting diagnostics, the
displays are illuminated by the Smart Glo™ backlight as display functions and
battery voltage are checked to ensure that everything is working correctly.
Upon activation, the Pro Plus will also check the ambient barometric pressure,
and calibrate its present depth as zero. At elevations of 2,000 feet (610
meters), or higher, it will recalibrate itself to measure depth in feet of fresh
water instead of feet of sea water.
If no dive is made within 2 hours after initial activation, the Pro Plus will automatically deactivate to conserve its battery power. Always check the dis-
play before entering the water to ensure that it is activated.
18
Page 27
SURFACE MODE
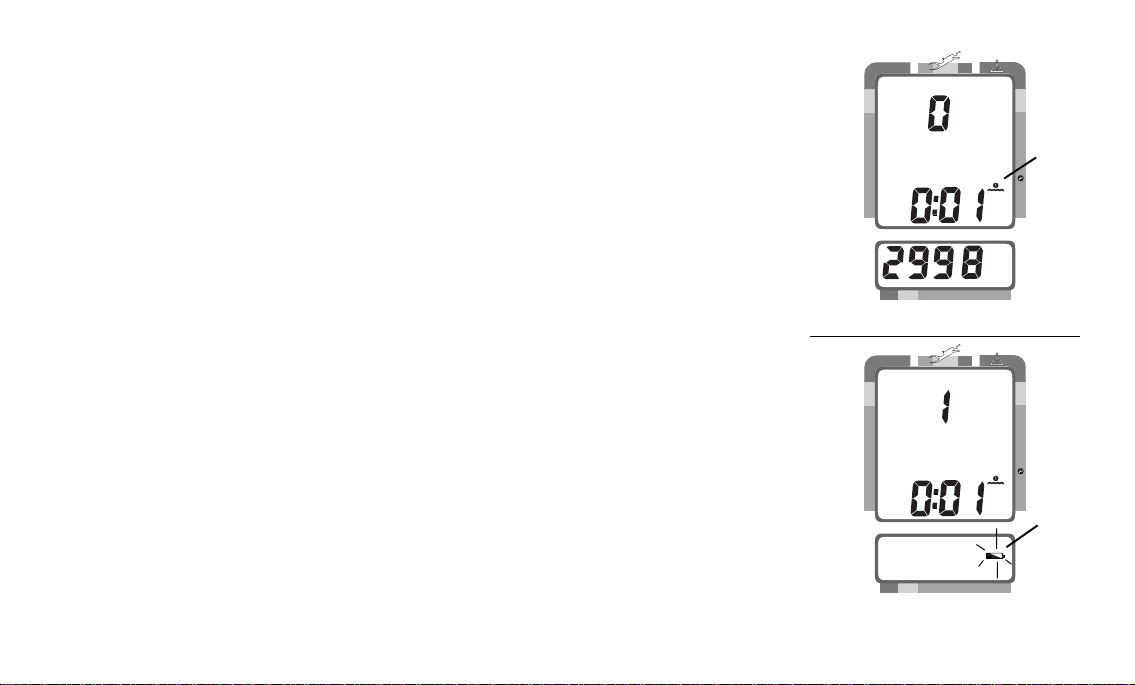
Surface Mode, identified by the Surface Time icon (Fig. 15a), immediately follows Diagnostic Mode after initial activation. Information displayed includes
the Dive Number '0' (no dive made yet), Surface Time with flashing colon, and
cylinder pressure.
If battery voltage is below the level sufficient for a day's operation, the Battery
icon will be displayed (Fig. 16a). Below 15% of rated voltage, all graphic displays will shut off except the Battery icon that will flash for 4 seconds, then
the unit will shutdown.
Datamax Pro Plus
DECO
PSI
C Z O
a
2
C Z
NO DECO
200 5 10 30 40 50 60
Fig. 15 - Surface Mode
MAIN MODE MENU
Using the control buttons while on the surface, you can access:
• Temperature/Date/Time mode
• FO2 Set mode
• Pre Dive Planning Sequence
• Time to Fly/Desaturate
• Log mode
• Set mode
DECO
C Z
NO DECO
200 5 10 30 40 50 60
C Z O
2
Fig. 16 - Low Battery
a
19
Page 28

®
The menu structure of the Set Mode enables you to:
• set Dive Mode Alternate Display (On or Off)
• set Audible Alarm (On or Off)
• select Depth Alarm value
• select Turn Pressure Alarm value
• select End Pressure Alarm value
• set Year/Month/Day
• select Hour Format (12 or 24 hour)
• set Hour/Minute
• select Dive Profile Sampling Rate (for PC download data)
• set Units of Measure (Imperial or Metric)
• set FO2 Default (On or Off)
• initiate download of data (External Access)
R
E
S
P
O
N
R
E
V
I
D
E
S
L
I
B
Be a -
RESPONSIBLE DIVER
at all times.
20
Before going diving, enter settings that will be common for each of your dives
(e.g., Units of Measure, etc.). This will save you time at the dive site.
Setting the FO2 value for a nitrox mix is a 'pre dive' setting that is entered before nitrox dives. This is described on page 34.
As described later, some of the settings will have to be reentered when the battery is replaced
Page 29
ENTERING SETTINGS
• The Advance (Left) button is used to gain access to settings.
• The Select (Right) button is used to toggle between, or scroll through, the
individual set points available for each of the settings.
• The Advance (Left) button is then used to accept and save the set point
and revert to Surface Mode, or continue to the next setting.
• See page 30 for a 'Summary of Access to Set Modes' that also
notes 'settings entered by the factory'.
NOTE: While in the Set Mode, if neither button is pressed, the
unit will automatically revert to Surface Mode in 2 minutes.
Datamax Pro Plus
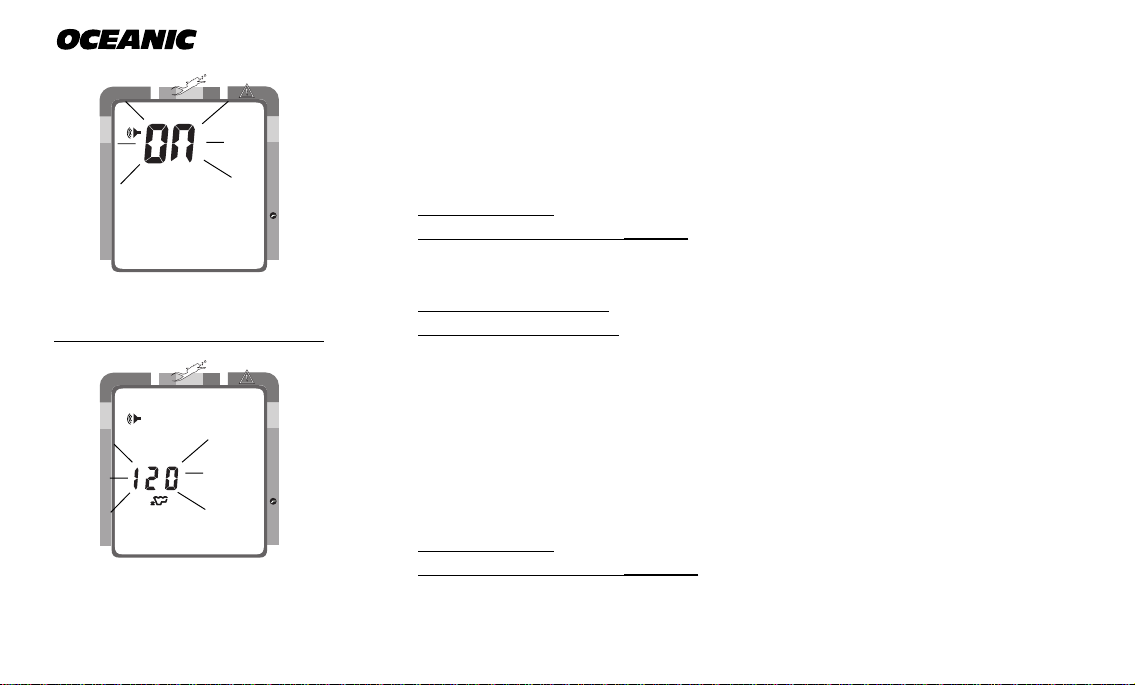
TO SET: ALTERNATE DISPLAY ON/OFF
'OFF' - Dive Modes 'will display' Max Depth and Elapsed Dive Time
'ON' - Max Depth and Elapsed Dive Time are 'accessed' by pressing a button
• press BOTH buttons simultaneously, while in Surface Mode
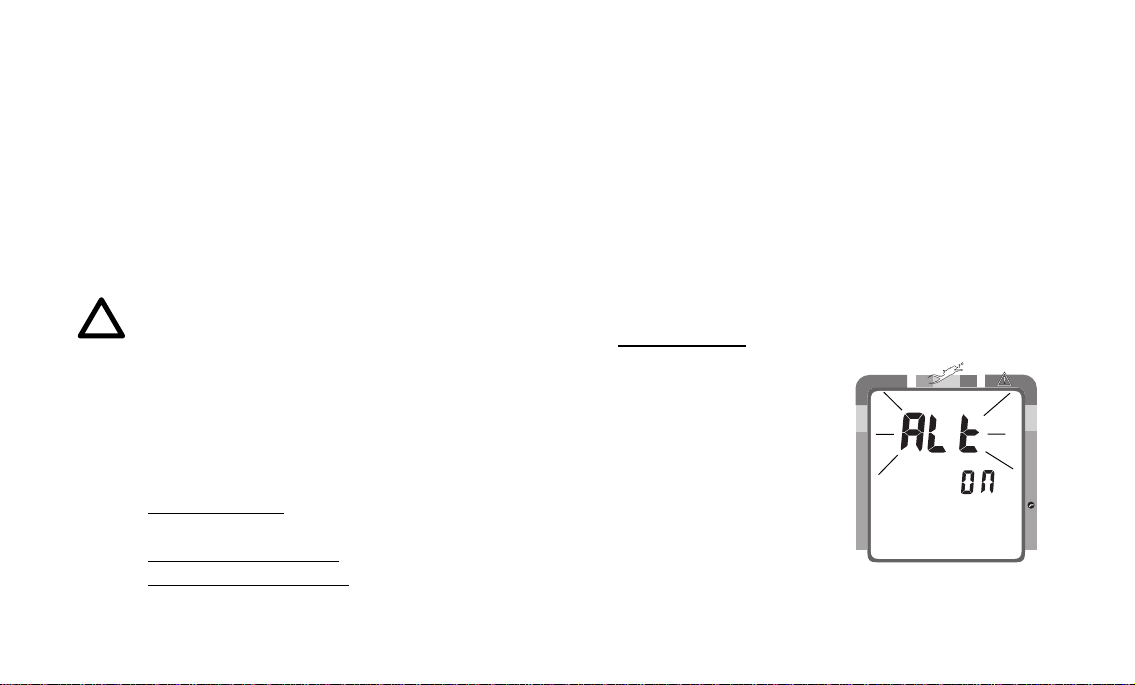
• 'Alt' appears with 'On', or 'Off', flashing (Fig. 17)
• press Select (Right) button to toggle between 'On' and 'Off'
• press Advance (Left) button to accept the setting displayed, and either -
• revert to Surface Mode (if this setting was changed), or -
• advance to Set:Audible Alarm (if this setting was not changed)
DECO
C Z
NO DECO
C Z O
2
Fig. 17 - Set Alternate
Display On/Off
21
Page 30
DECO
C Z
NO DECO
®
TO SET: AUDIBLE ALARM ON/OFF
C Z O
'OFF' - if the unit senses a condition that poses immediate danger (page 13), it
emits a double beep. Other alarms are silenced
'ON' - alarms will be sounded for all conditions as listed on pages 12 and 13.
2
• press BOTH buttons simultaneously, while in Surface Mode
• press Advance (Left) button 1 time
• the Audible Alarm icon appears with 'On', or 'Off', flashing (Fig. 18)
Fig. 18 - Set Audible Alarm
On/Off
DECO
C Z
NO DECO
FT
MAX
C Z O
2
Fig. 19 - Set Depth Alarm
22
• press Select (Right) button to toggle between 'On' and 'Off'
• press Advance (Left) button to accept the setting displayed, and either -
• revert to Surface Mode (if this setting was changed), or -
• advance to Set:Depth Alarm (this setting was not changed)
TO SET: DEPTH ALARM SET POINT
The Depth Alarm can be set to values between 30 feet (10 meters) and 320 feet
(97.5 meters) in 10 foot (3/3.5 meter) increments.
• press BOTH buttons simultaneously, while in Surface Mode
• press Advance (Left) button 2 times
• Max Depth and Audible Alarm icons appear with the Max Depth value
flashing (Fig. 19)
Page 31

• press Select (Right) button until the desired Max Depth value appears
• press Advance (Left) button to accept the setting displayed, and either -
• revert to Surface Mode (if this setting was changed), or -
• advance to Set: Turn Pressure Alarm (this setting was not changed)
Example of Pressure Alarm Set Points: Starting with 3000 psi, set the
Turn Pressure Alarm for 2000 psi and the End Pressure Alarm for 1000 psi
(e.g., 1000 psi used going out, 1000 psi used coming back, 1000 psi reserve).
Datamax Pro Plus
TO SET: TURN PRESSURE ALARM SET POINT
The Turn Pressure Alarm can be set to values between 1000 psi (68.5 BAR)
and 3000 psi (206.5 BAR) in 250 psi (17 BAR) increments to alert you. To disable the alarm feature, set the value at 00 psi (00 BAR).
• press BOTH buttons simultaneously, while in Surface Mode
• press Advance (Left) button 3 times
• Breathing Gas Time and Audible Alarm icons appear with the Pressure
value flashing (Fig. 20)
• press Select (Right) button until the desired Pressure value appears
• press Advance (Left) button to accept the setting displayed, and either -
• revert to Surface Mode (if this setting was changed), or -
• advance to Set: End Pressure Alarm (this setting was not changed)
DECO
C Z
NO DECO
200 5 10 30 40 50 60
C Z O
2
PSI
Fig. 20 - Set Turn Pressure
Alarm Set Point
23
Page 32
®
DECO
C Z
NO DECO
PSI
200 5 10 30 40 50 60
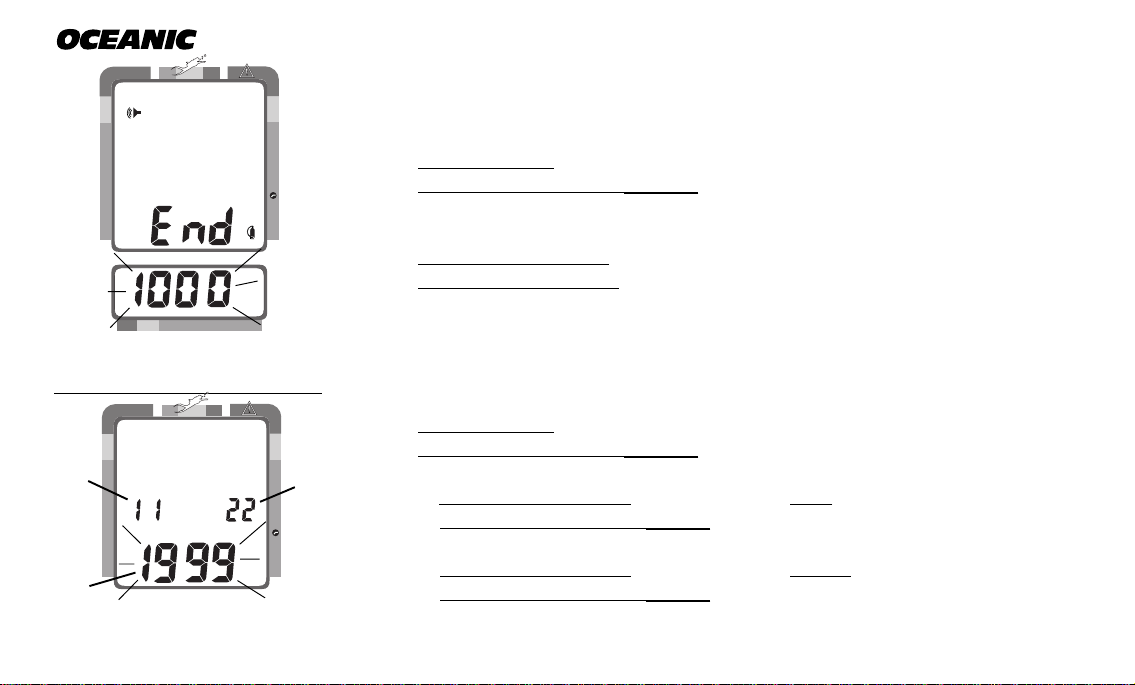
Fig. 21 - Set End Pressure
Alarm Set Point
DECO
C Z
b
NO DECO
a
Fig. 22 - Set Date
24
TO SET: END PRESSURE ALARM SET POINT
C Z O
The End Pressure Alarm can be set to values between 300 psi (20 BAR) and
1500 psi (68 BAR) in 100 psi (6 BAR) increments to warn you.
2
• press BOTH buttons simultaneously, while in Surface Mode
• press Advance (Left) button 4 times
• Gas Time and Audible icons appear with Pressure value flashing (Fig. 21)
• press Select (Right) button until the desired Pressure value appears
• press Advance (Left) button to accept the setting displayed, and either -
• revert to Surface Mode (if this setting was changed), or -
• advance to Set: Year (this setting was not changed)
TO SET: DATE/HOUR FORMAT/TIME
C Z O
• press BOTH buttons simultaneously, while in Surface Mode
• press Advance (Left) button 5 times
• the Date appears with the Year setting (Fig. 22a) flashing
c
2
• press Select (Right) button until the correct Year appears
• press Advance (Left) button 1 time to accept the setting displayed
• the Month setting (Fig. 22b) flashes
• press Select (Right) button until the correct Month appears.
• press Advance (Left) button 1 time to accept the setting displayed
• the Day setting (Fig. 22c) flashes
Page 33
• press Select (Right) button until the correct Day appears.
• press Advance (Left) button 1 time to accept the setting displayed
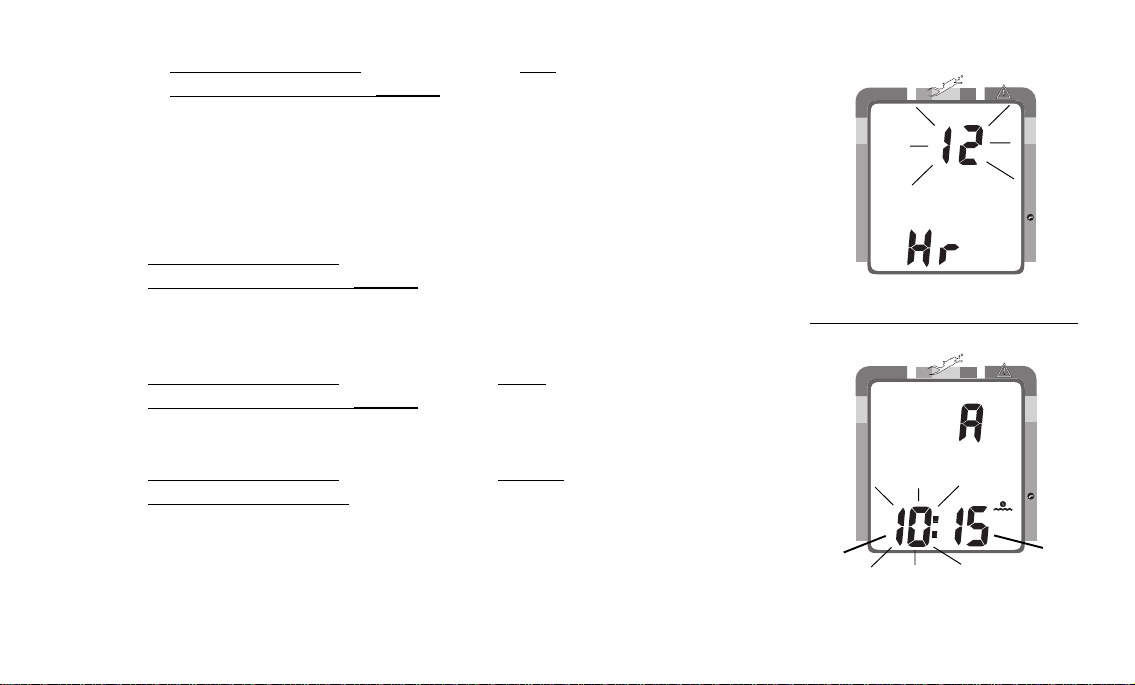
• the Hour Format appears flashing (Fig. 23)
Datamax Pro Plus
DECO
C Z
C Z O
• 12 Hr format = 12: Am to 11: Pm
• 24 Hr format = 0: to 24: (hours)
• press Select (Right) button to toggle between '12' and '24'
• press Advance (Left) button 1 time to accept the setting displayed
• the Time appears with the Hour setting (Fig. 24a) flashing
• press Select (Right) button until the correct Hour appears.
• press Advance (Left) button 1 time to accept the setting displayed
• the Minute setting (Fig. 24b) flashes
• press Select (Right) button until the correct Minute appears.
• press Advance (Left) button to accept the setting displayed, and either -
• revert to Surface Mode (if this setting was changed), or -
• advance to Set: Sampling Rate (Date/Time settings not changed)
NO DECO
2
Fig. 23 - Set Hour Format
DECO
C Z O
C Z
NO DECO
M
2
a
Fig. 24 - Set Time
b
25
Page 34
®
DECO
C Z
NO DECO
C Z O
FT
2
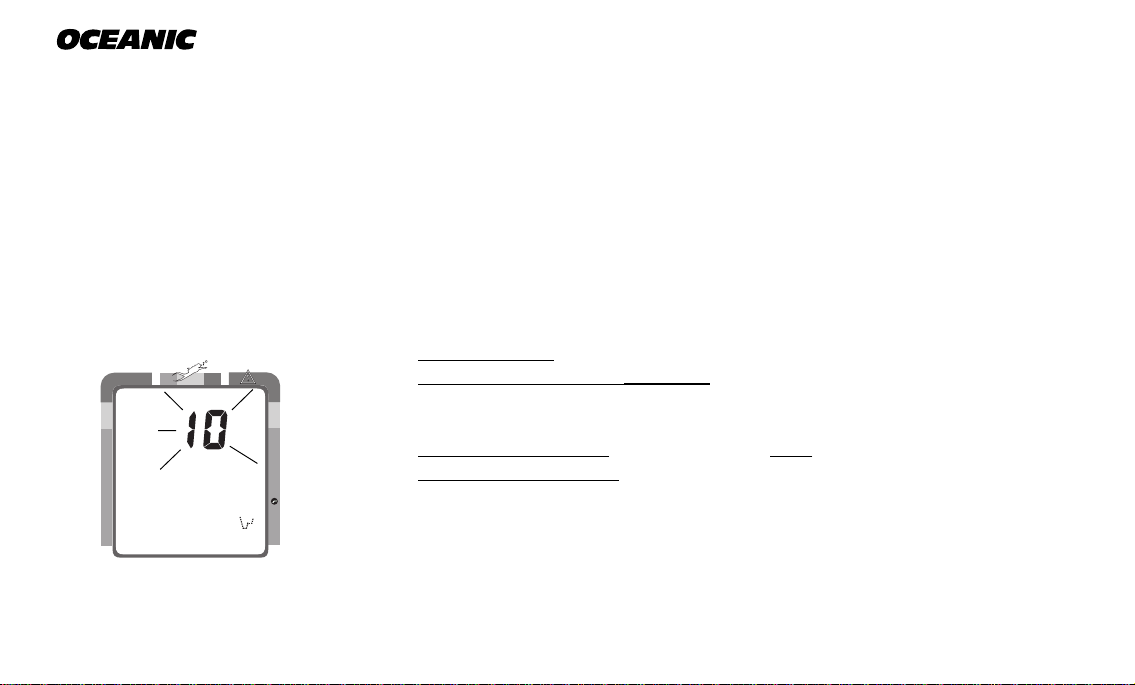
Fig. 25 - Set Sampling Rate
TO SET: SAMPLING RATE
Sampling Rate is the Time, or Depth, interval at which data samples will be
recorded for subsequent download to the OceanLog™ PC software program. It
has 'no effect' upon displayed data or data stored in the unit's viewable Log.
Rates available are 2 FT (.5M), 5 FT (1.5 M), 10 FT (3 M), 2 SEC, 5 SEC, 10
SEC, 15 SEC, 20 SEC, 25 SEC, 30 SEC.
Lower rates = more samples and more memory 'used' per dive. Fewer dives
can be stored for download, however profile graphs will be smoother.
• press BOTH buttons simultaneously, while in Surface Mode
• press Advance (Left) button 11 times
• the Rate setting appears flashing (Fig. 25)
• press Select (Right) button until the desired Rate appears.
• press Advance (Left) button to accept the setting displayed, and either -
• revert to Surface Mode (if this setting was changed), or -
• advance to Set: Unit (this setting was not changed)
26
Page 35
TO SET: UNITS OF MEASURE
• press BOTH buttons simultaneously, while in Surface Mode
• press Advance (Left) button 12 times
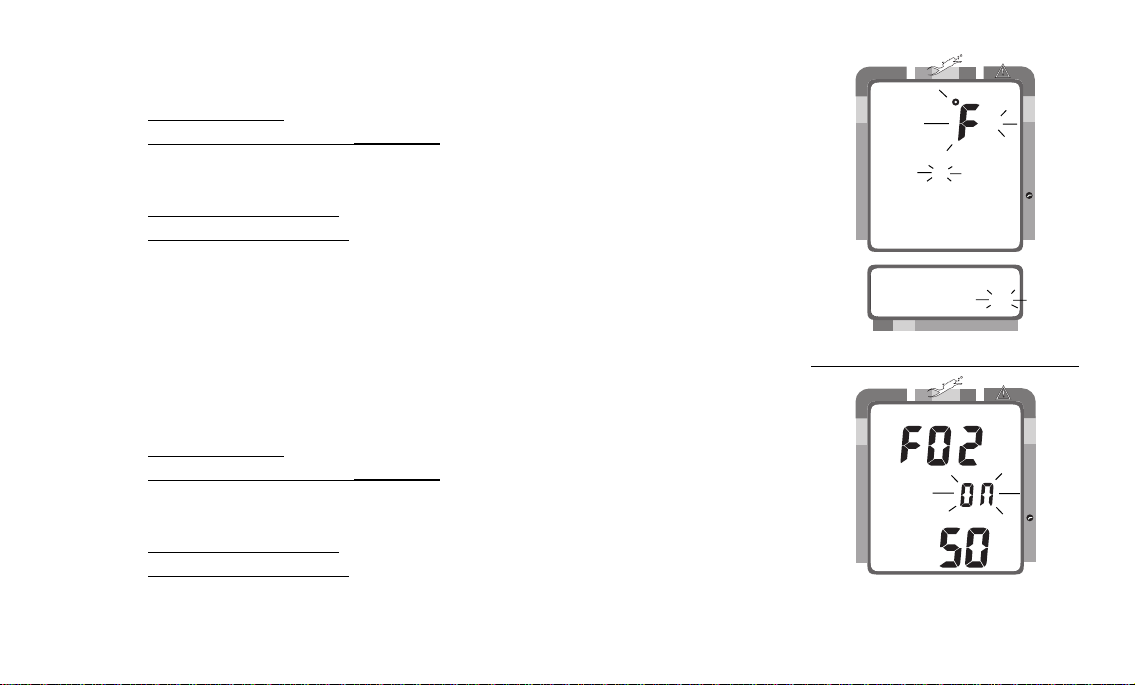
• the Units of Measure icons appear flashing (Fig. 26)
• press Select (Right) button to toggle between 'FT, °F' and 'M, °C'
• press Advance (Left) button to accept the setting displayed, and either -
• revert to Surface Mode (if this setting was changed), or -
• advance to Set: FO2 Default (this setting was not changed)
TO SET: FO2 50% DEFAULT (described on page 33) ON/OFF
'Off' - FO2 value set point remains at the % set until changed or shut down
'On' - FO2 value set point reverts to 50% after dives (must be set each dive)
• press BOTH buttons simultaneously, while in Surface Mode
• press Advance (Left) button 13 times
• FO2 50 appears with On or Off flashing (Fig. 27)
• press Select (Right) button to toggle between 'On' and 'Off'
• press Advance (Left) button to accept the setting displayed, and either -
• revert to Surface Mode (if this setting was changed), or -
• advance to EA Mode (this setting was not changed)
Datamax Pro Plus
DECO
C Z
FT
NO DECO
200 5 10 30 40 50 60
C Z O
FT
2
PSI
Fig. 26 - Set Units of Measure
DECO
C Z
NO DECO
C Z O
2
Fig. 27 - Set FO2
50% Default On/Off
27
Page 36
C Z
®
EA MODE
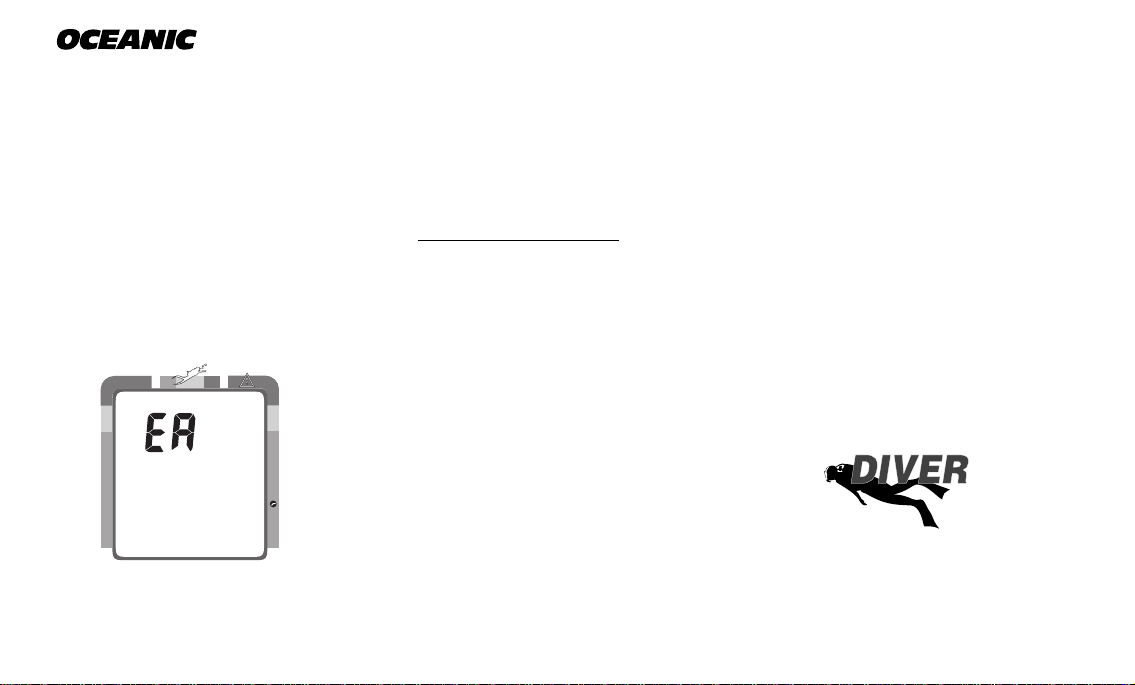
Although included in the menu structure, External Access (EA) Mode has no
settings. It is accessed only when data is being downloaded (copied) to the
OceanLog™ PC software program for storage and viewing. This is described
on page 50.
• press Advance (Left) button to 'bypass EA Mode' (Fig. 28) and revert to
Surface Mode
DECO
C Z O
NO DECO
Fig. 28 - EA Mode
28
2
Responsible
Page 37

Datamax Pro Plus
R
E
S
P
O
N
S
I
B
L
E
D
I
V
E
R
WARNINGS and SAFETY RECOMMENDATIONS
• Never activate the Pro Plus underwater. This may result in inaccurate depth and no-decompression time displays. If the unit is activated when deeper than 4 feet (1 meter) underwater, or at elevations higher than 14,000 feet (4,267 meters), it will perform a diagnostic check
followed by immediate shutdown.
• During activation and diagnostics, if any display or function varies from the information
presented here, return the Pro Plus to your Authorized Oceanic Dealer for inspection.
• If a Low Battery condition is indicated following diagnostics, Oceanic strongly recommends
that you DO NOT dive until the battery is replaced.
29
Page 38

®
SUMMARY OF ACCESS TO SET MODES
(
settings entered by the factory appear in italics
To access a specific Set mode from the Surface Mode, press the button(s) as follows:
SET MODE TO ACCESS TO VIEW TO SAVE
To access/set> Both '1' time>
)
• Alternate Display
• Audible Alarm
• Depth Alarm
• Turn Pressure
• End Pressure
• Year
(1999)
• Month
• Day
• Hour Format
• Hour
• Minute
• Sample Rate
• Units (
• FO2 Default
• EA (download) Left '14' times> > > > Left - to Surface
(1)
(1)
(12)
(00)
Imperial
(Off)
(On)
(330 ft)
(3000 psi)
(1500 psi)
(12)
(10 FT)
) Left '12' times> Right - toggle> Left - to Surface* or Default
(On)
Left '0' time> Right - toggle (On/Off)> Left - to Surface* or Audible
Left '1' time> Right - toggle (On/Off)> Left - to Depth Alarm
Left '2' times> Right - 10 ft (3 m)/sec> Left - to Turn Pressure
Left '3' times> Right - 250 psi (17 BAR)/sec> Left - to End Pressure
Left '4' times> Right - 100 psi (7 BAR)/sec> Left - to Year
Left '5' time> Right - 1 year/sec> Left - to Month
Left '6' times> Right - 1 month/sec> Left - to Day
Left '7' times> Right - 1 day/sec> Left - to Hour Format
Left '8' times> Right - toggle 12/24> Left - to Hour
Left '9' times> Right - 1 hour/sec> Left - to Minute
Left '10' times> Right - 1 minute/sec> Left - to Surface* or Rate
Left '11' times> Right - 1 rate/sec> Left - to Surface* or Units
Left '13' times> Right - toggle (On/Off)> Left - to Surface* or EA
* If the setting was altered
30
Page 39

Datamax Pro Plus
PRE DIVE
and
DIVE MODES
refer to page 42 for - WARNINGS and SAFETY RECOMMENDATIONS
31
Page 40

®
DECO
C Z
NO DECO
Fig. 29 - Temperature/
Date/Time
32
OPERATIONAL MODES
While on the surface, the Interactive Control Console enables you to access six
operational modes and activate the backlight. During a dive, it enables you to
view 'alternate' displays of information and activate the backlight.
TEMPERATURE/DATE/TIME MODE
To view Ambient Temperature/Date/Time (Fig. 29) while in Surface Mode:
• press the Advance (Left) button 1 time
• During low light conditions, the Smart Glo™ backlight will illuminate the
display for button depression time plus 10 seconds.
• The unit reverts to Surface Mode after 10 seconds, unless the Advance
(Left) button is pressed to access FO2 Mode.
C Z O
Set for Imperial units of measure, Month is on the left and Day on the right.
Set for Metric, Day is on the left and Month on the right. Year doesn't appear.
2
FO2 MODE
The Pro Plus can be used either as an Air computer or as a Nitrox computer.
After activation, it will operate as an Air computer without displaying information associated with oxygen calculations, unless the percentage of oxygen
(FO2) is set for a value other than 'Air' (i.e., a numerical value of 21 to 50 %).
Page 41
FO2 50% Default
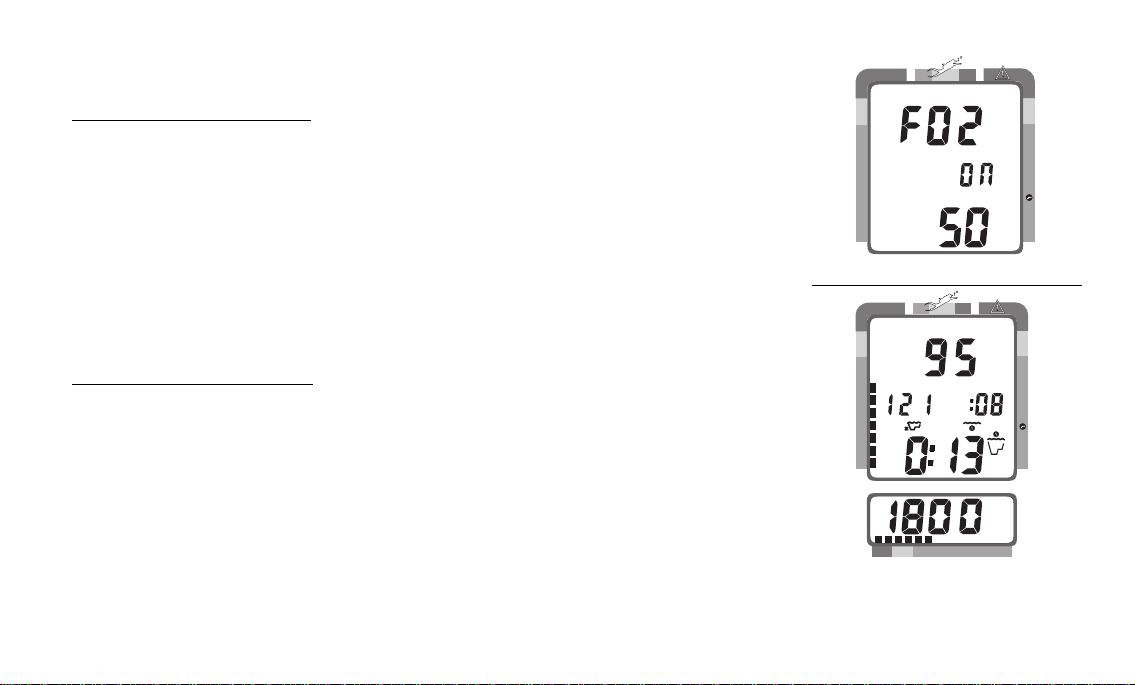
If the Default is set to 'On' and FO2 is set to a value 'greater than 21%', the
FO2 value will automatically revert to 50% 10 minutes after that dive.
Datamax Pro Plus
DECO
C Z
C Z O
• FO2 must be reset for each repetitive nitrox dive, or the value will automatically 'default' to 50 (Fig. 30) and the dives will be calculated based on
50% O2 for oxygen calculations and 21% O2 (79% nitrogen) for nitrogen
calculations.
• If you surface for greater than 10 minutes during a dive, a subsequent
descent will be considered a new dive and the FO2 value must be reentered.
If the Default is set to 'Off', the FO2 value for repetitive dives remains the
same until the FO2 set point is manually changed.
FO2 Set for an Air Dive
When set with an FO2 value of 'Air', the Pro Plus will perform calculations the
same as if FO2 were set for 21% oxygen, internally accounting for oxygen loading for any subsequent Nitrox dives. However, oxygen related displays, warnings, and the O2 Bar Graph will not appear on the display for that dive (Fig.
31), or subsequent dives, unless FO2 is set for a numerical value (21 to 50%).
NO DECO
Fig. 30 - FO2 Default
DECO
C Z
NO DECO
FT
MAX
200 5 10 30 40 50 60
C Z O
FT
2
PSI
Fig. 31 - Dive Mode
(FO2 Set for 'Air')
2
33
Page 42
®
Setting FO2
DECO
C Z
b
FT
NO DECO
MAX
a
Fig. 32 - Setting FO2
DECO
C Z
FT
NO DECO
MAX
Fig. 33 - FO2 21%
34
C Z O
To access FO2 Mode while in the Surface Mode and set the unit for Air or the
percentage (%) of oxygen (FO2) in your nitrox mix:
• press the Advance (Left) button 2 times
2
• press the Select (Right) button repeatedly, or press and hold it, until the
value of FO2 for the nitrox mix being used is displayed
O
2
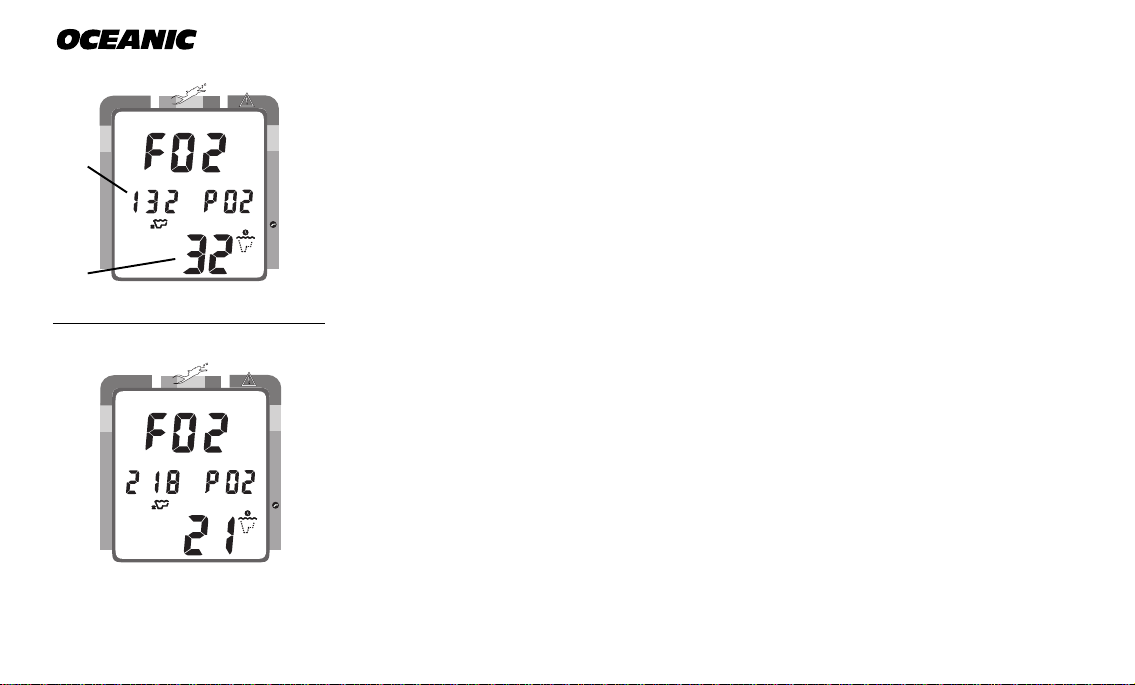
• the FO2 value displayed (Fig. 32a) will advance from 21 to 50 (%) in increments of 1 (%), then display 'Air' again.
• the Maximum Depth that can be achieved with an oxygen partial pressure (PO2) of 1.60 ATA will be displayed (Fig. 32b) for each FO2 value.
No value will appear for Air.
C Z O
The unit reverts to Surface Mode after 10 seconds, unless the Advance (Left)
button is pressed to access the Pre Dive Planning Sequence.
2
FO2 Set for a Nitrox Dive
You can set the Pro Plus for nitrogen-oxygen (nitrox) mixtures of 21% to 50%
O
2
oxygen (O2). If FO2 is set at a value of 21% (Fig. 33), the unit will remain set
as a '21% nitrox computer' for subsequent nitrox dives until FO2 is set to a
higher value, or until it automatically turns off and is reactivated.
Page 43
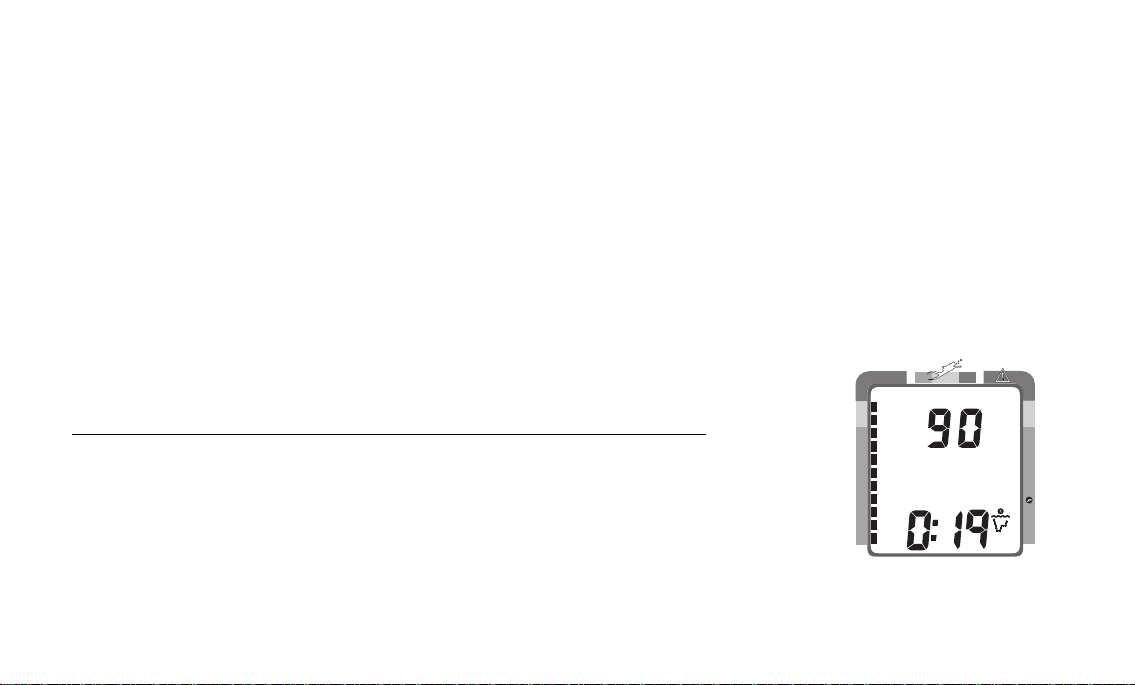
Once a dive is made with the Pro Plus set as a nitrox computer (FO2 set for a
numerical value), it cannot be set for 'Air' until 24 hours after the last nitrox
dive. However, you can set FO2 for 21% for use with air.
PRE DIVE PLANNING SEQUENCE™
Oceanic strongly recommends that you review the Pre Dive Planning
Sequence (PDPS) prior to every dive to help you plan your dive as required to avoid exceeding no decompression or oxygen exposure limits. This is especially important for repetitive dives, when the Pre Dive Plan-
ning Sequence (Fig. 34) will indicate for you the no decompression dive times
that are available to you on your next dive, based on any residual nitrogen or
oxygen accumulation (whichever is in control) following your last dive and surface interval.
To access the Pre Dive Planning Sequence while in the Surface Mode:
Datamax Pro Plus
DECO
C Z
C Z O
FT
• press the Advance (Left) button 3 times
• press repeatedly, or press and hold, the Select (Right) button
• a sequence of depths from 30 to 160 feet (9 to 48 meters) in 10 foot (3
meter) increments will be displayed
The unit reverts to Surface Mode 10 seconds after the Select (Right) button is
released, unless the Advance (Left) button is pressed to access the Log Mode.
NO DECO
2
Fig. 34 - Pre Dive
Planning Sequence
35
Page 44
®
DECO
C Z
NO DECO
C Z O
FT
2
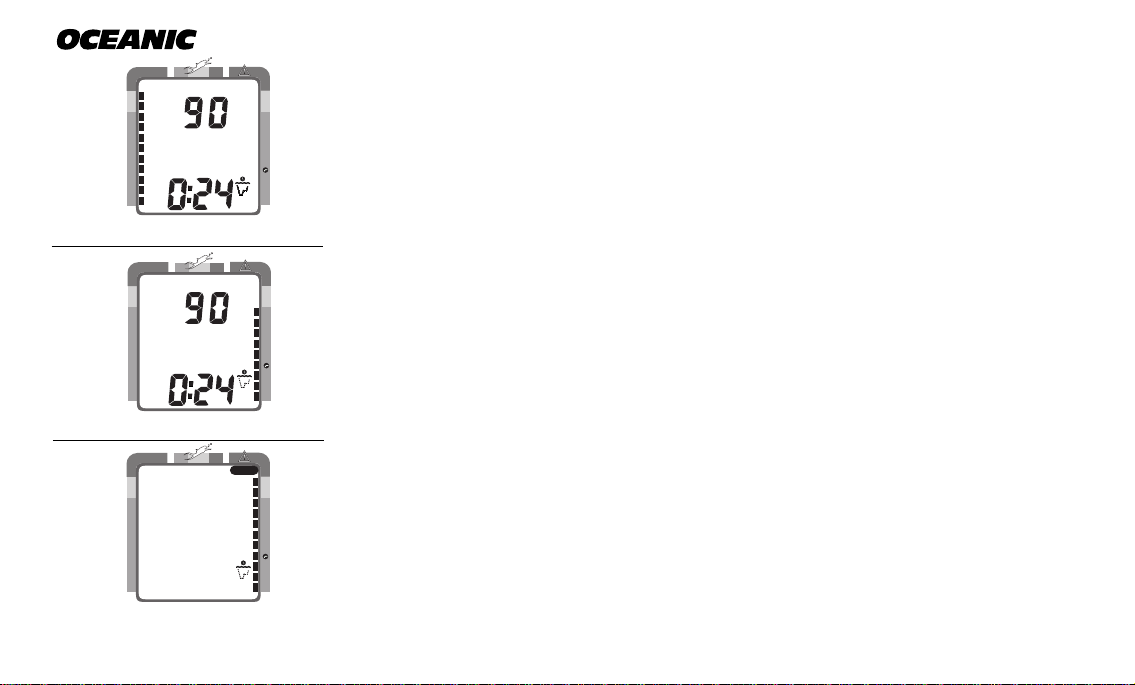
Fig. 35 - Nitrogen Control
DECO
C Z
NO DECO
C Z O
FT
2
O
2
Fig. 36 - Oxygen Control
DECO
C Z
C Z O
With each depth display, you will see either 'predicted' no decompression limits
based upon your previous dive profiles (if calculated to be nitrogen controlled),
or 'predicted' oxygen tolerance limits based upon accumulation of oxygen (if
calculated to be oxygen controlled).
No decompression times are only displayed for depths where there is at least 3
minutes of dive time available at the depth, taking into account a descent rate
of 120 feet (36 meters) per minute. Depths greater than the maximum depth
that can be achieved with a partial pressure of oxygen (PO2) of 1.60 ATA will
not be displayed.
Prior to a Repetitive Nitrox Dive
If the segments of the Tissue Loading Bar Graph are displayed (Fig 35) during
the Pre Dive Planning Sequence, that next dive is calculated to be controlled
by nitrogen loading.
If the segments of the O2 bar graph are displayed (Fig. 36), that next dive is
calculated to be controlled by oxygen loading.
NO DECO
2
O
2
Fig. 37 - O2 Limit Exceeded
36
The Pro Plus will store oxygen accumulation for up to 10 dives conducted during a 24 hour period. In the event that the maximum limit for oxygen loading
has been exceeded for that day, all of the segments of the O2 bar graph will be
displayed (Fig. 37).
Page 45
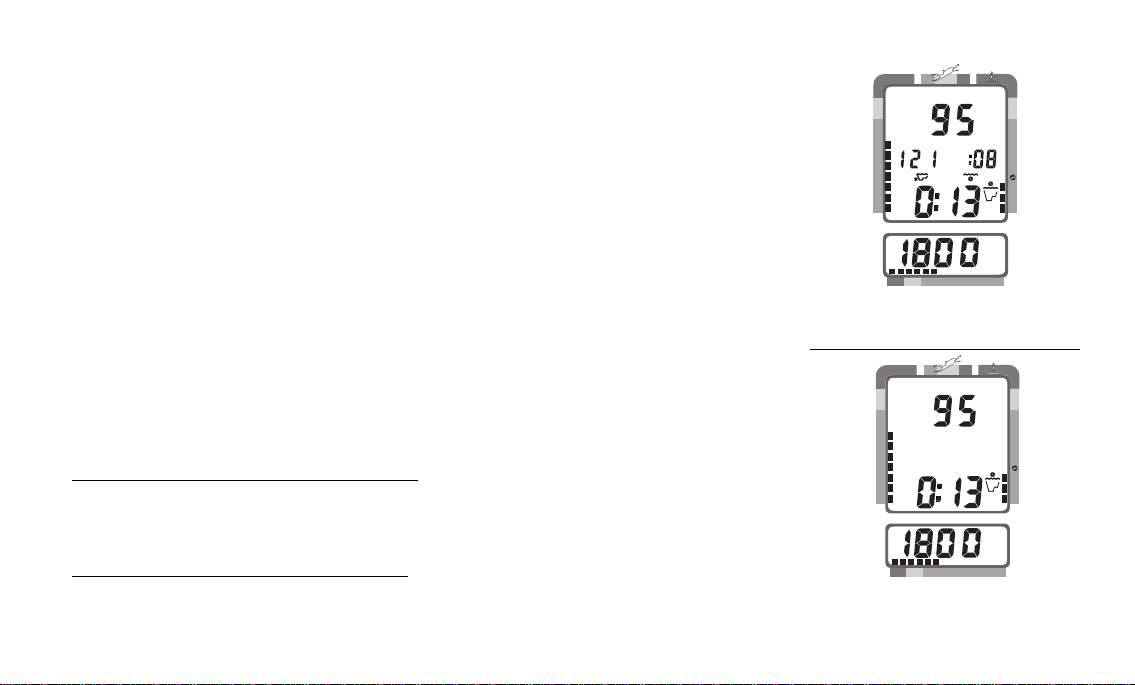
Depth and Time displays will not appear until the O2 bar graph recedes into
the green (normal) zone (e.g., your daily oxygen dosage decreases an amount
equivalent to the amount accumulated during the latest dive completed).
Datamax Pro Plus
DECO
C Z
C Z O
FT
NO DECOMPRESSION DIVE MODE
As long as it is activated on the surface, the Pro Plus will enter the No Decompression Dive Mode when you descend deeper than 5 feet (1.5 meters), regardless of the operating mode it is in. If activated below 4 feet (1 meter), the unit
will perform a diagnostic check and shutdown.
To activate the Oceanglo® backlight underwater, press the Select (Right) button. The display will be illuminated for button depression time plus 5 seconds.
It will not activate if a Low Battery condition exists.
Main Display (data shown depends on Alternate ON/OFF setting)
If the Alternate Display is set to 'OFF', information (Fig. 38) includes Current Depth, Elapsed Dive Time (and icon), Dive Time Remaining (and
icon), Maximum Depth for that dive (and icon), and tank Pressure.
If the Alternate Display is set to 'ON', information (Fig. 39) includes:
Current Depth, Dive Time Remaining (and icon), and Pressure. Elapsed Dive
Time and Maximum Depth are 'accessed' in Large Format, as described next.
NO DECO
FT
MAX
200 5 10 30 40 50 60
2
PSI
Fig. 38 - Main Display
(Alternate Off)
DECO
C Z
NO DECO
200 5 10 30 40 50 60
C Z O
FT
2
PSI
Fig. 39 - Main Display (Alt On)
37
Page 46
DECO
C Z
NO DECO
®
Secondary Display (access if Alternate is set ON or OFF)
C Z O
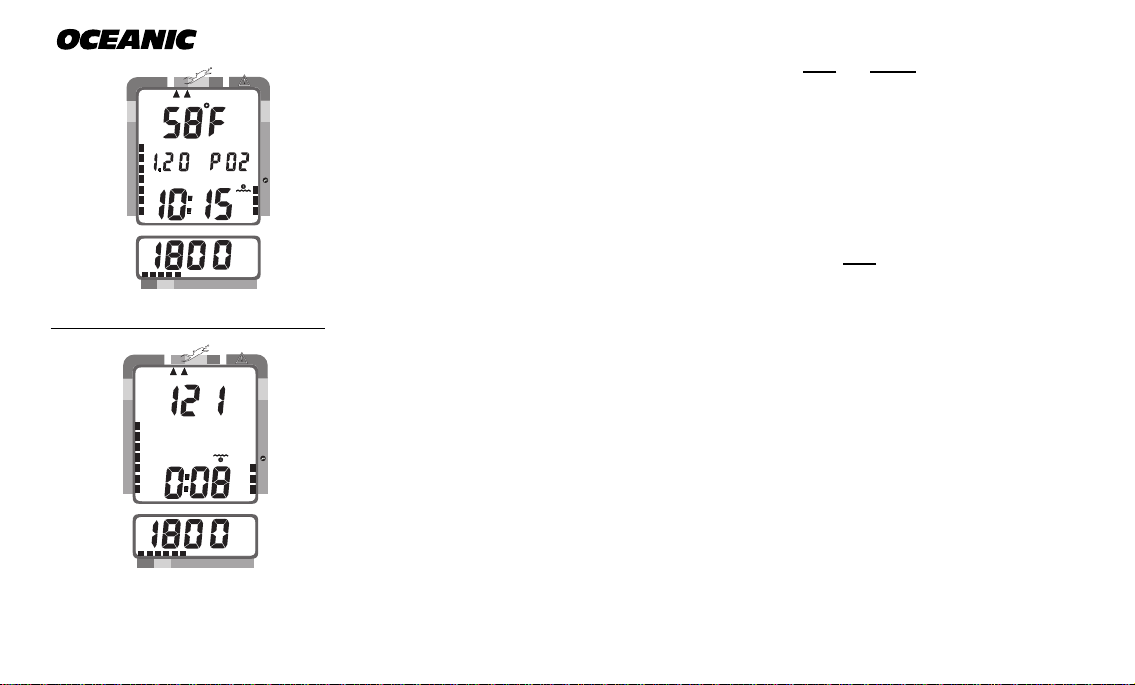
To view water Temperature, Time of Day, and if FO2 was set for a numerical
value, display the current level of PO2 (Fig. 40):
2
• press the Advance (Left) button 1 time
• the unit will revert to the Main Display after 10 seconds, if the Advance
(Left) button is not pressed again.
PSI
200 5 10 30 40 50 60
Fig. 40 - Secondary Display
DECO
C Z
NO DECO
200 5 10 30 40 50 60
FT
MAX
C Z O
2
PSI
Fig. 41 - Alternate Display
38
Alternate Display (access only if Alternate is set ON)
To view water Elapsed Dive Time and Maximum Depth in Large Format in
place of Current Depth and Dive Time Remaining (Fig. 41):
• press the Advance (Left) button 2 times, or -
• press the Advance (Left) button 1 time, if viewing Temp/Time/PO2.
• the unit will revert to the Main Display after 10 seconds, or if the Advance (Left) button is pressed.
The Graphic Diver Interface (bar graphs) will be active with each display
representing nitrogen loading, oxygen accumulation (if FO2 was set for a value
other than Air), ascent rate, and breathing gas time remaining.
Page 47
DECOMPRESSION DIVE MODE
The Pro Plus provides information that will help you avoid, or if necessary,
manage emergency decompression.
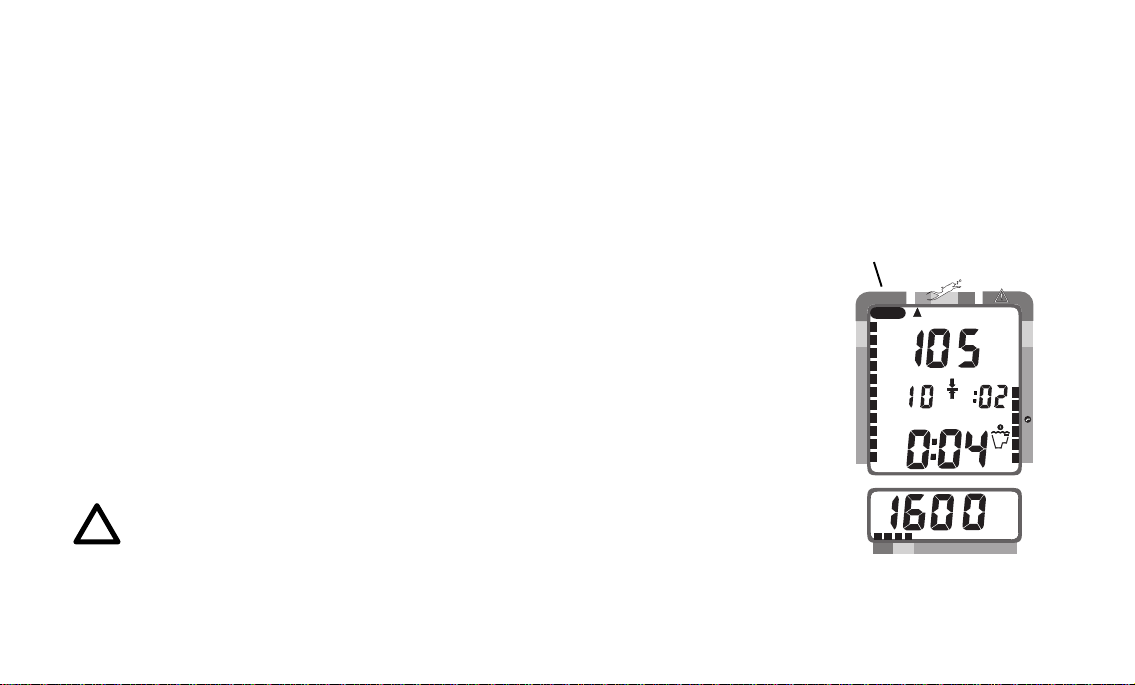
The Decompression Dive Mode activates when the Tissue Loading Bar Graph
enters the red 'DECO' zone (Fig. 42a).
Datamax Pro Plus
VIOLATION MODES
The Pro Plus enters Violation Modes when it is unable to predict an ascent
procedure.
GAUGE MODE
If the Pro Plus enters a Permanent Violation Mode, it will not display information relating to nitrogen or oxygen loading for the remainder of that dive or for
subsequent dives conducted during the 24 hour period after surfacing.
NOTE: Decompression Dive Mode, Violation Modes, and Gauge
Mode are described on pages 54 - 62.
a
DECO
C Z
FT
NO DECO
200 5 10 30 40 50 60
C Z O
FT
2
PSI
Fig. 42 - Entering Into
Decompression Mode
39
Page 48
DECO
C Z
NO DECO
FT
MAX
®
ASCENDING TO THE SURFACE
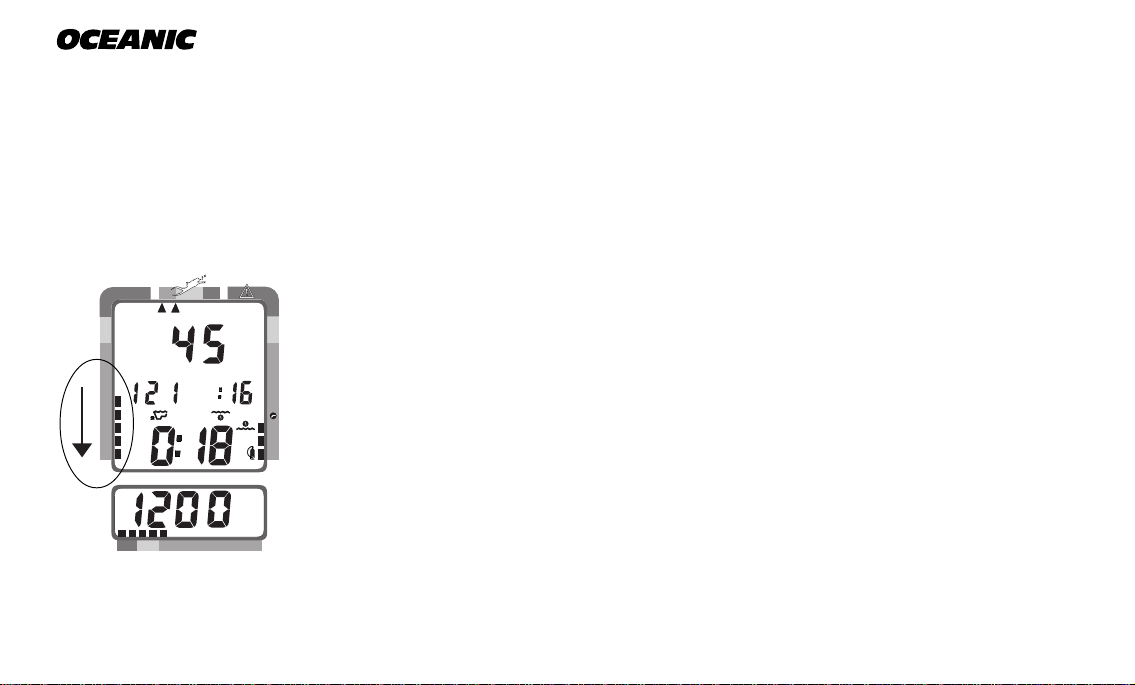
While ascending to shallower depths, the segments that have filled up the Tissue Loading Bar Graph will begin to recede (Fig. 43), offering a graphic representation of your multilevel diving capability. By 'backing off' on the bar graph
(fewer segments), you can establish a personal level of conservatism and margin of protection.
If you entered Decompression Mode, you must not complete your ascent until
the Tissue Loading Bar Graph is at least inside the yellow Caution Zone.
C Z O
FT
2
If you have not entered Decompression Mode, a safety stop made between 15-20 feet (5-6.5 meters) is strongly recommended as a standard procedure before completing your ascent.
You should make every effort to complete all of your ascents with the Tissue
Loading Bar Graph inside of the green zone.
PSI
200 5 10 30 40 50 60
Fig. 43 - Tissue Loading Bar
Graph (receding)
40
While you cannot provide a guarantee against the occurrence of decompression sickness, you may choose your own personal zone of
caution based upon your individual age, physique, excessive weight,
training, experience, etc. to reduce the statistical risk.
Page 49
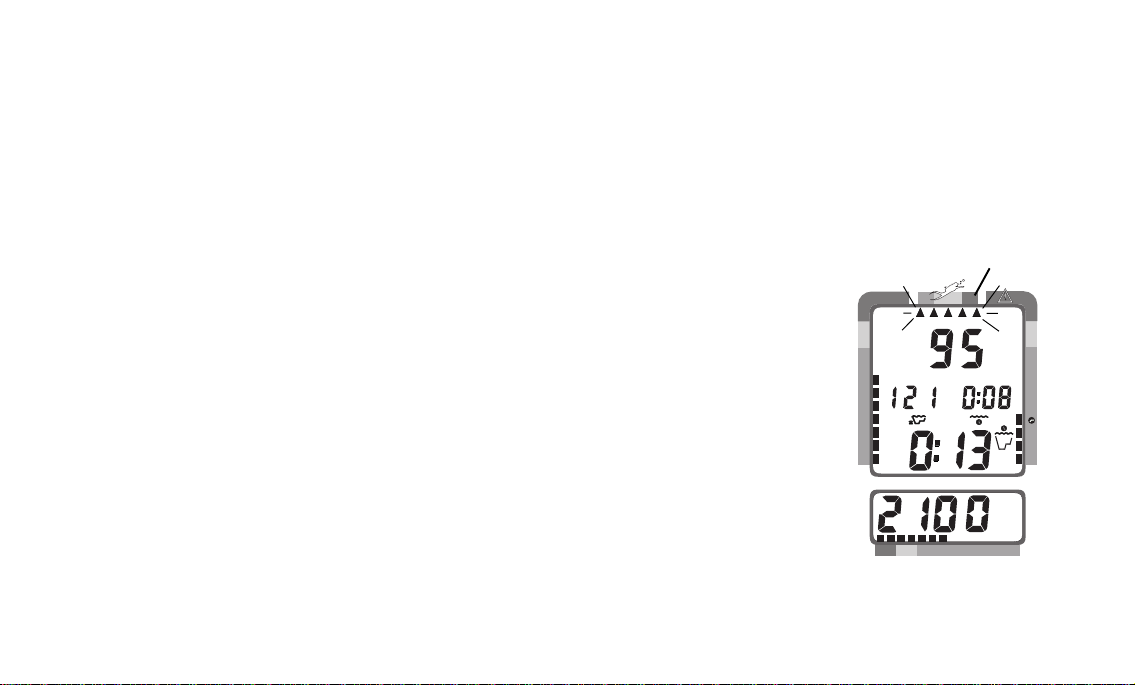
The Variable Ascent Rate Indicator™ shows how fast you are ascending.
When you exceed the maximum recommended ascent rate of 60 feet per
minute (18 meters per minute), the bar graph will enter the red (Too Fast)
zone (Fig. 44a). You will be alerted by all segments of the bar graph flashing.
The flashing will stop when your ascent rate is slowed.
ALTITUDE DIVING
Datamax Pro Plus
The mathematical model within the Pro Plus accounts for the reduced No Decompression dive time available at higher elevations based on NOAA (National
Oceanic and Atmospheric Administration) guidelines. When diving in high
altitude lakes or rivers from 2,000 to 14,000 feet (610 to 4,268 meters), the Pro
Plus will adjust automatically, providing corrected depth and reduced No Decompression and Oxygen Exposure times.
Also, when above 2,000 feet (610 meters), depth calibration is automatically
changed to read in feet of freshwater rather than feet of seawater. If activated
above 14,000 feet (4,268 meters), the unit will perform a diagnostic check and
shutdown.
a
DECO
C Z
NO DECO
FT
MAX
200 5 10 30 40 50 60
C Z O
FT
2
PSI
Fig. 44 - Ascent 'Too Fast'
41
Page 50

®
WARNINGS and SAFETY RECOMMENDATIONS
• The percentage of oxygen (FO2) in the nitrox mix being used must be set 'before each' nitrox
dive, unless the FO2 50% Default is set to 'Off'.
• The Pre Dive Planning Sequence provides predicted times for subsequent dives. Depending
on cylinder size, breathing gas consumption, and oxygen accumulation you may have less
time available than indicated because of breathing gas quantity or other limitations.
• The Pro Plus must be manually activated and be in an operating mode prior to start of a
dive. The unit will not activate automatically by immersion in water.
• Every effort should be made to keep each of the bar graphs in the green throughout your
dives to reduce your risk of exposure to decompression sickness and oxygen toxicity.
• Until it has shut itself off, you must not use the Pro Plus at a different altitude than the altitude where it was originally activated. Doing so will result in an error equal to the difference in barometric pressure, and possibly a false dive mode with erroneous data.
42
Page 51

Datamax Pro Plus
POST
DIVE
MODES
refer to page 51 for - WARNINGS and SAFETY RECOMMENDATIONS
43
Page 52
C Z
DECO
®
FIRST 2 HOURS AFTER A DIVE
C Z O
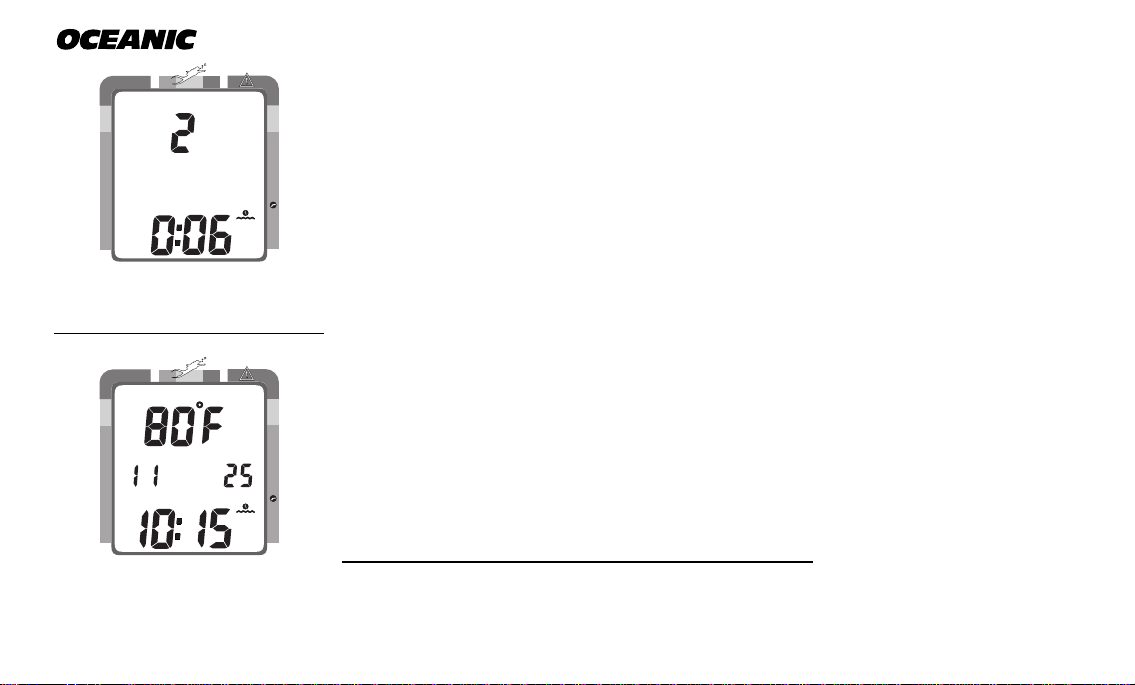
When you ascend to 3 feet (1 meter) or shallower, the Pro Plus will enter Surface Mode and begin counting your surface interval.
NO DECO
Fig. 45 - Post Dive
Surface Mode (<10 min)
DECO
C Z
NO DECO
Fig. 46 - Temperature/
Date/Time
44
2
TRANSITION PERIOD
The first 10 minutes is, in affect, a Transition Period during which time the
following information is displayed (Fig. 45):
• Surface Mode icon (flashing).
• 'Number' of that dive
• Surface Interval (colon flashing).
C Z O
• Tissue Loading Bar Graph indicating current nitrogen loading.
• O2 Bar Graph indicating current oxygen loading (if a nitrox dive)
If you descend during the 10 minute transition period, time underwater will be
2
considered a continuation of that dive. The time at the surface (if less than 10
minutes) will not be added as Elapsed Dive Time.
To view the Temperature/Date/Time (Fig. 46):
• press the Advance (Left) button 1 time
• the unit will revert to Surface Mode after 10 seconds, if no button is
pressed
Page 53
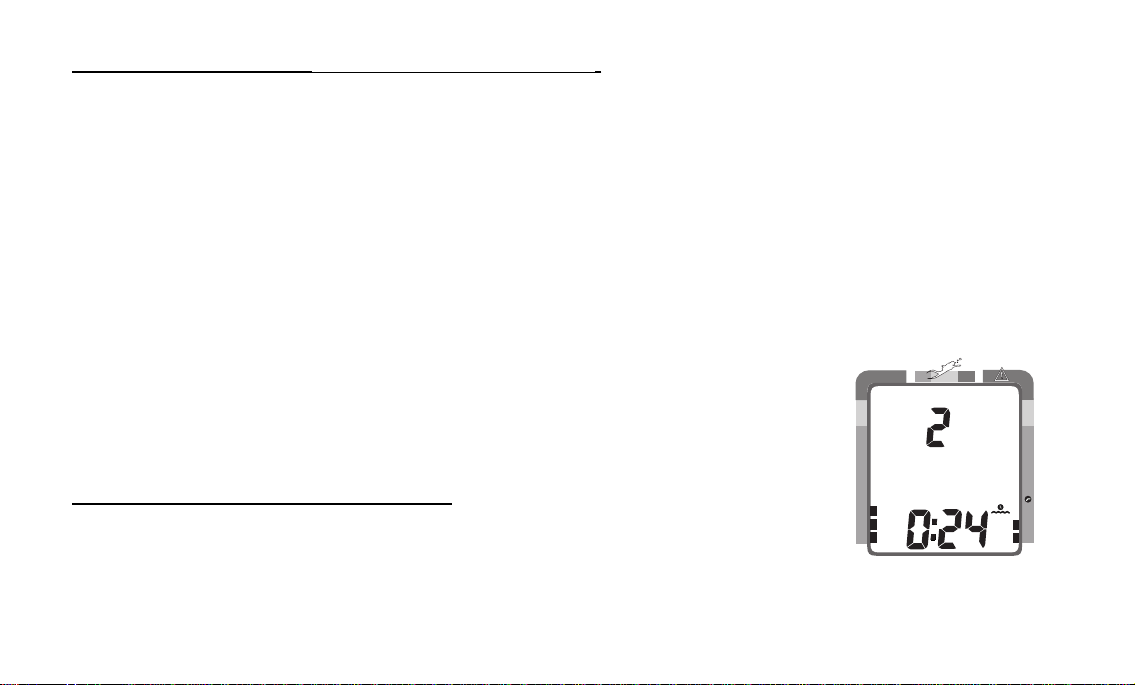
To view that Dive's Log (during the Transition Period):
• press the Advance (Left) button 2 times, or -
• press the Advance (Left) button 1 time, if viewing Temp/Date/Time
• the unit will revert to Surface Mode after 2 minutes, if no button is
pressed
Data will not be stored in the unit's memory until the 10 minute Transition
Period is completed.
Once 10 minutes have elapsed, that dive and Transition Period are completed,
and a subsequent descent will be considered a new dive.
AFTER THE TRANSITION PERIOD
For the remainder of the first 2 hours after surfacing, the information described above will continue to be displayed as Surface Mode (Fig. 47), and you
will have full access to other modes.
To view the Temperature/Date/Time:
• press the Advance (Left) button 1 time
• During low light conditions, the Smart Glo™ backlight illuminates the display for button depression time plus 10 seconds.
• the unit will revert to Surface Mode after 10 seconds, if no button is
pressed
Datamax Pro Plus
DECO
C Z
NO DECO
Fig. 47 - Surface Mode
(first 2 hours)
C Z O
2
45
Page 54
®
DECO
C Z
NO DECO
FT
MAX
C Z O
2
O
2
Fig. 48 - FO2 (Default OFF)
DECO
C Z
NO DECO
FT
MAX
C Z O
2
O
2
Fig. 49 - FO2 (Default ON)
DECO
C Z
NO DECO
C Z O
FT
2
Fig. 50 - Adjusted NDLs
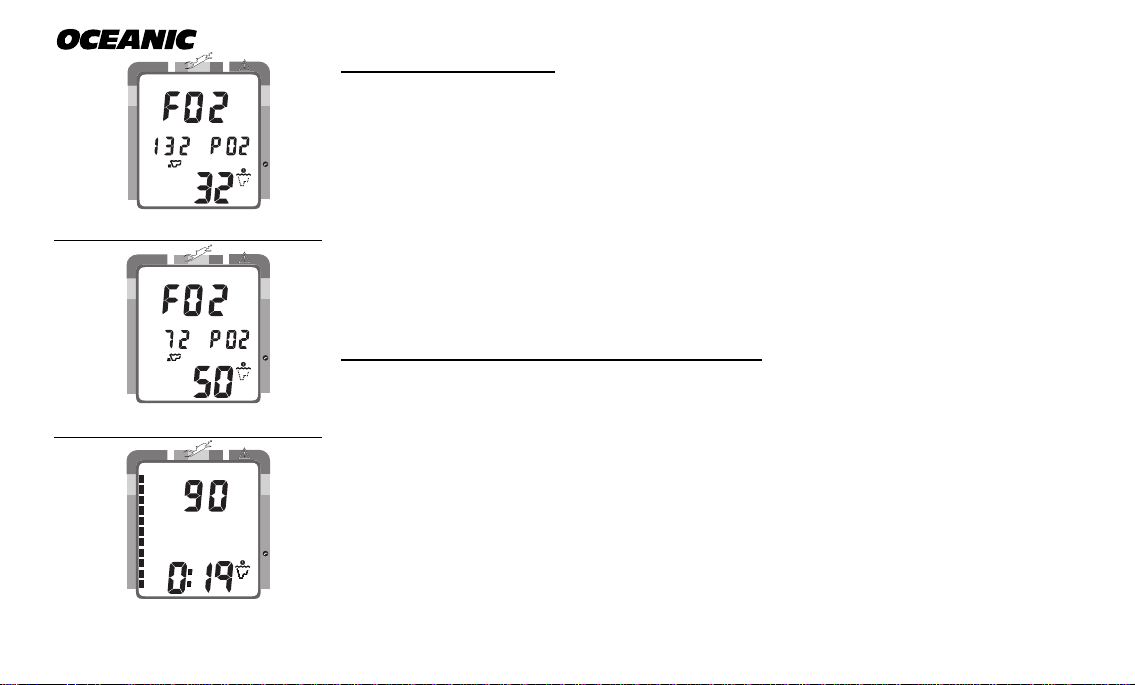
To access FO2 Mode:
• press the Advance (Left) button 2 times (while in Surface Mode)
• If the FO2 Default was set OFF, the FO2 setting displayed will be the
same value previously set (Fig. 48).
• If the FO2 Default was set ON, the FO2 value displayed (Fig. 49) will be
the 'default value' of 50 (%) and will have to be set for the breathing gas
used for the next dive.
• press the Select (Right) button to alter the setting, if required.
• the unit reverts to Surface Mode after 2 minutes, unless the Advance
(Left) button is pressed to access the Pre Dive Planning Sequence.
To access Pre Dive Planning Sequence™:
• press the Advance (Left) button 3 times (while in Surface Mode)
• press the Select (Right) button to scroll through the sequence
• The unit reverts to Surface Mode after 2 minutes, unless the Advance
(Left) button is pressed to access the Fly Mode.
The Pre Dive Planning Sequence will now show 'adjusted' No Decompression
Limits (Fig. 50) based on residual nitrogen calculated to be remaining from the
previous dives. Calculated dive times and the maximum allowed depth displayed will increase as the real time surface interval increases after completion
of a dive.
46
Page 55
The Pre Dive Planning Sequence will only scroll to the maximum depth allowed by the nitrogen or oxygen limit, whichever is in control. The respective
bar graph will be displayed to indicate which is in control.
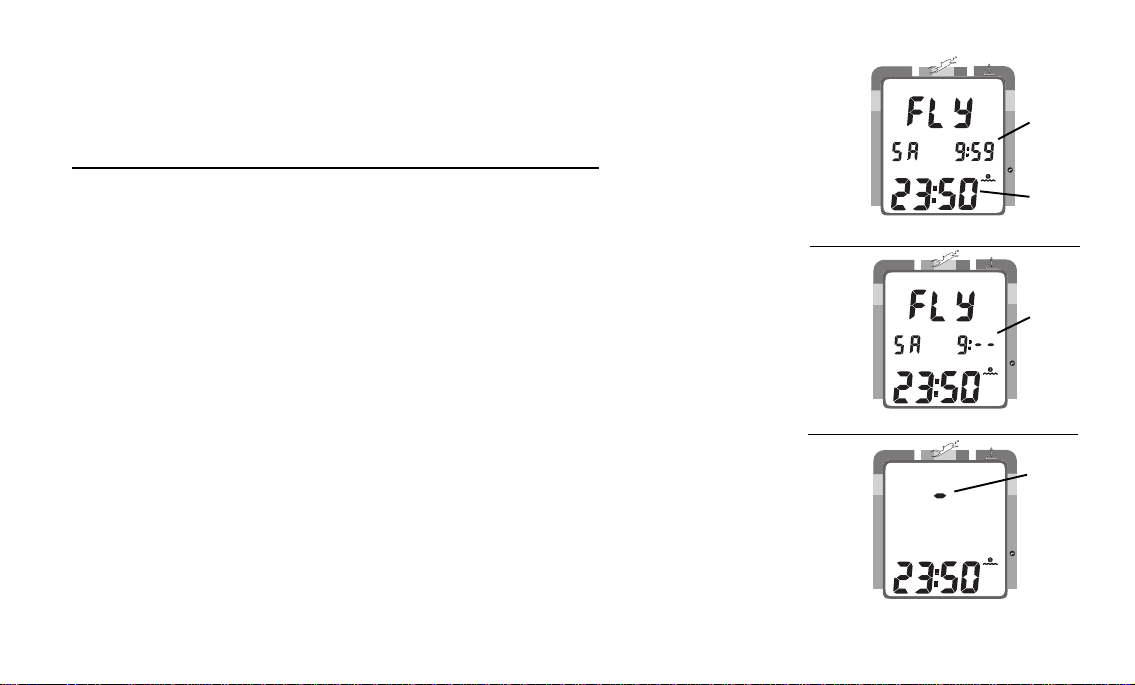
To access Time to Fly and Desaturate Countdowns:
• press the Advance (Left) button 4 times (while in Surface Mode)
• press the Select (Right) button to view the sequence
• The unit reverts to Surface Mode after 2 minutes, unless the Advance
(Left) button is pressed to access the Log Mode.
The Time To Fly counter begins counting down 10 minutes after the last dive
has ended (after the 10 minute Transition Period) displaying the word 'FLY'
with a countdown (Fig. 51a) that starts at 23:50 (hr:min) and counts down to
0:00 (hr:min).
The Time to Desaturate counter (Fig. 51b), provides calculated time for tissue
desaturation at sea level. The countdown starts at 9:59 (hours:minutes) maximum and counts down to 0:00. If the time is calculated to be greater than
9:59, the display will indicate 9:- - (Fig. 52a) until it decreases to 9:59.
If a violation occurred during the dive, Time to Desaturate will not be displayed and a single dash ( - ) will appear (Fig. 53a) instead of the letters FLY.
Datamax Pro Plus
DECO
C Z
NO DECO
Fig. 51 - Time to Fly/Desaturate
DECO
C Z
NO DECO
Fig. 52 - Desaturate (>9:59)
DECO
C Z
NO DECO
Fig. 53 - After Violation
C Z O
b
2
a
C Z O
a
2
a
C Z O
2
47
Page 56
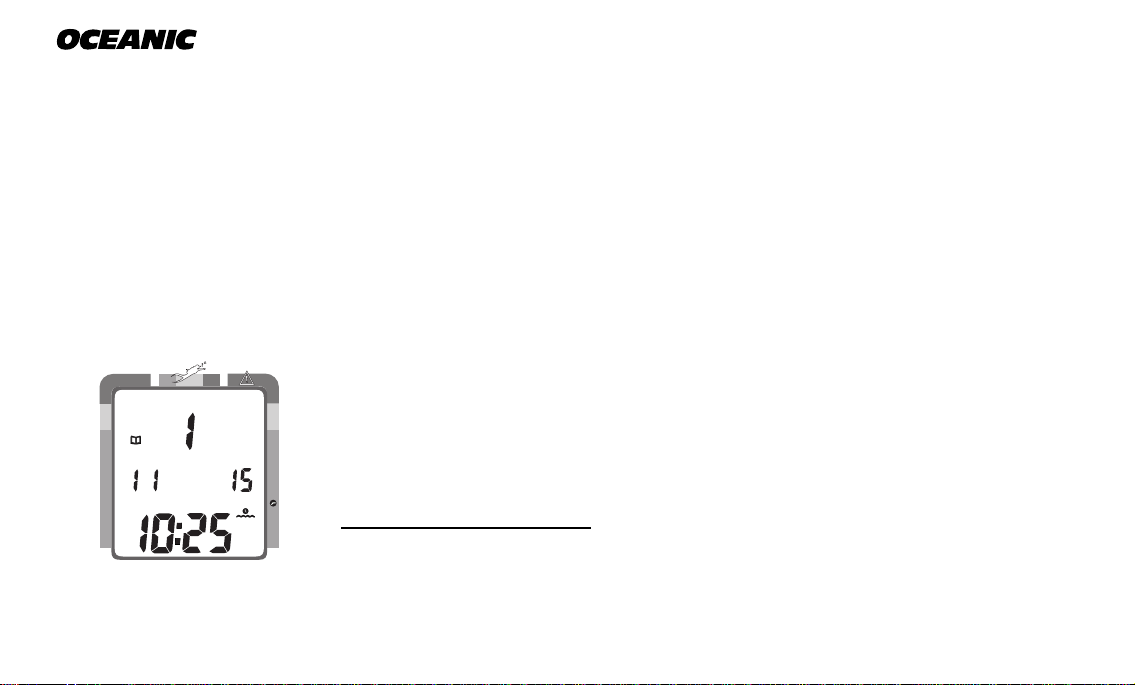
®
DECO
C Z
NO DECO
C Z O
2
Fig. 54 - Log Mode
(first screen - date/time)
LOG MODE
Information from your 12 latest dives is stored in the Log for viewing. After
12 dives are accumulated, each subsequent dive will overwrite the oldest dive
in the log (i.e., the most recent dive deletes the oldest). Log information will
not be lost when batteries are removed, but factory service will delete the logs.
Dives are displayed in a reverse sequence that starts with the dive most recently recorded back to the oldest of the 12 dives stored. Thus, your most recent dive will always be the first shown in the sequence. Each dive has three
log screens - Date/Time started, Nitrogen data, and Oxygen data.
Dives are identified by the Date/Time and number. The first dive of a new day
(after midnight) will be #1.
The Advance (Left) button is used to access each dive's log.
The Select (Right) button is used to view second and third screens for that dive
(Nitrogen and Oxygen related data).
To access the Log Mode:
• press the Advance (Left) button 5 times (while in Surface Mode)
• the first screen (Fig. 54) of the most recent dive will appear
• Log Mode icon and Dive Number
• Date and Time of Day that the dive started (and icon)
48
Page 57
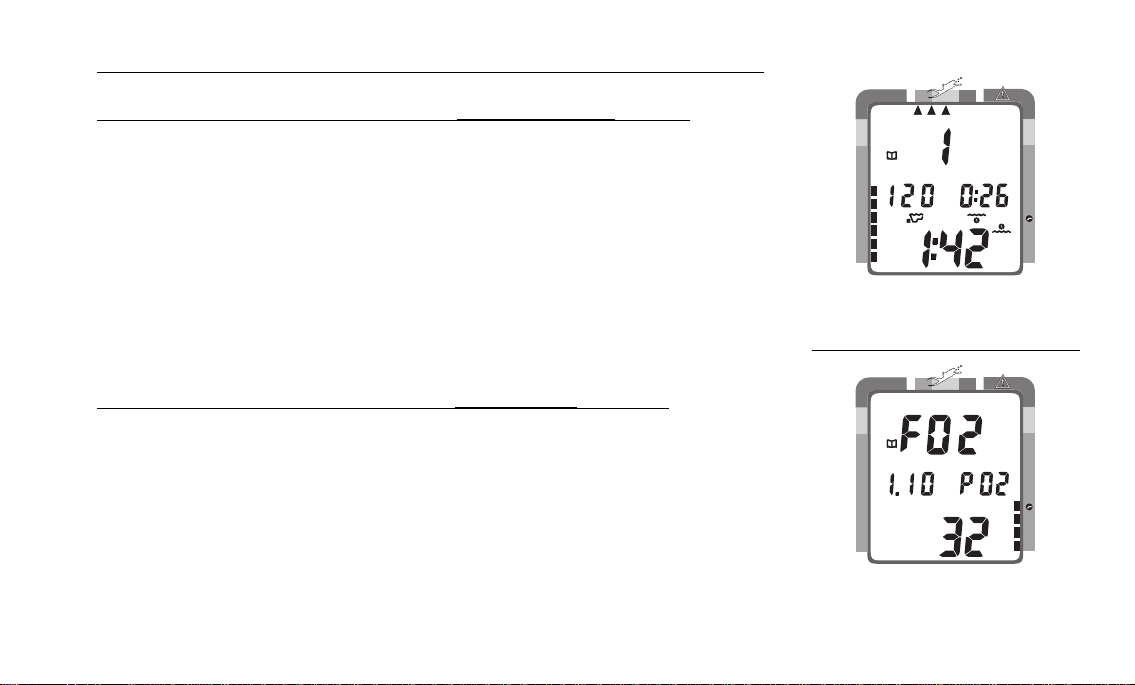
To access a specific dive's log, press the Advance (Left) button repeatedly.
To view the second screen for that dive (Nitrogen Log- Fig. 55):
• press the Select (Right) button 1 time
• Log Mode icon
• Dive number
• Maximum Depth reached for the dive (and icon)
• Elapsed Dive Time (and icon)
• Surface Interval prior to that dive (and icon)
• Variable Ascent Rate Indicator - showing the maximum ascent rate
maintained for 4 consecutive seconds during the dive
• Tissue Loading Bar Graph - showing tissue nitrogen loading at the
end of the dive
To view the third screen for that dive (Oxygen Log - Fig. 56):
• press the Select (Right) button 1 time
• Log Mode icon
• FO2 value - set for that dive (and 'FO2' symbol)
• Maximum PO2 level - reached during that dive (and 'PO2' symbol)
• O2 bar graph - showing oxygen loading at the time you surfaced.
• If FO2 was set for 'Air' for that dive, the O2 screen will only display 'FO2'
and 'Air'.
• press the Advance (Left) button 1 time to view the first screen of the previous dive's log.
Datamax Pro Plus
DECO
C Z
FT
NO DECO
Fig. 55 - Log Mode
(second screen - nitrogen)
DECO
C Z
NO DECO
Fig. 56 - Log Mode
(third screen - oxygen)
C Z O
2
C Z O
2
O
2
49
Page 58
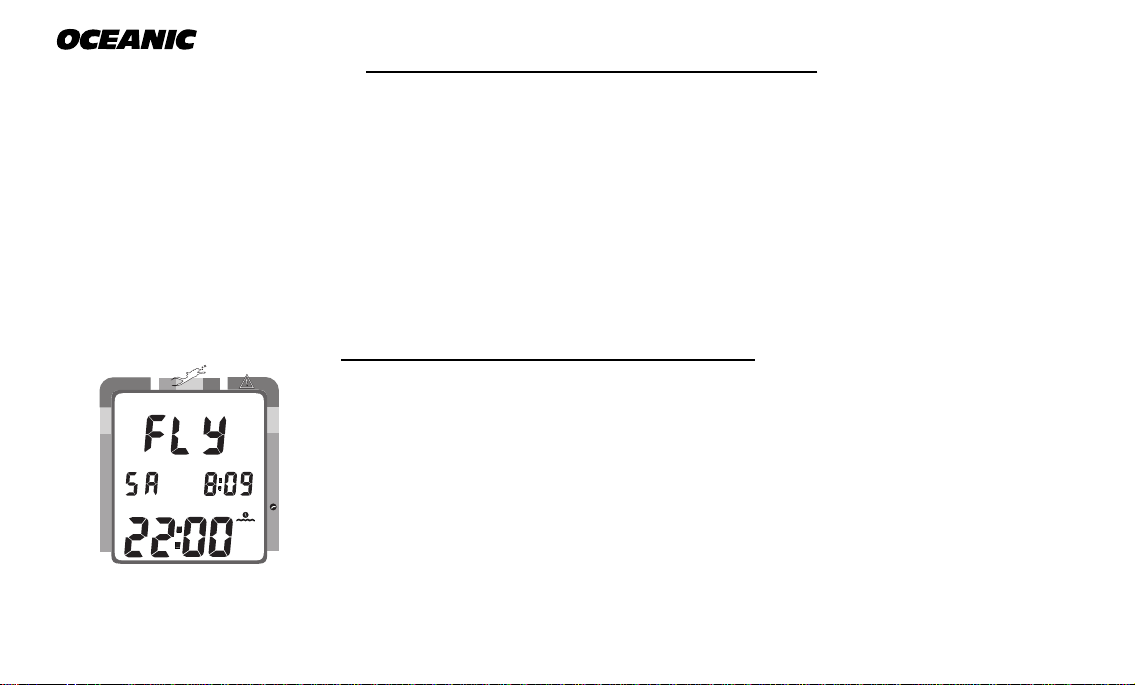
C Z
DECO
®
To exit Log Mode and return to the Surface Mode:
• press the Advance (Left) button repeatedly to proceed through the remaining recorded dives.
• the unit will automatically revert to Surface Mode after 2 minutes, if no
button is pressed
AFTER THE FIRST 2 HOURS
Two hours after the last dive the Surface Mode will no longer be displayed.
The Time to Fly and Desaturate countdown timers will be displayed continuously, giving the final countdowns from 22:00 and 9:xx to 0:00 (Fig. 57).
To access other modes or enter settings:
• press the Select (Right) button to enter Surface Mode
C Z O
• the unit will revert to Fly Mode after 2 hours, if no button is pressed
DOWNLOADING DATA TO PC
NO DECO
Fig. 57 - Display
(after 2 hours on surface)
50
2
Using special infrared linking hardware and a unique PC software program,
data from your dives can be downloaded (copied) from your Pro Plus into an
IBM compatible PC program running on a Windows® 95 or 98 operating system. Instructions for performing the interface and download are provided
with the OceanLog™ for Pro Plus hardware and software package. The
OceanLog™ program provides profile data sampled throughout the dive.
Page 59
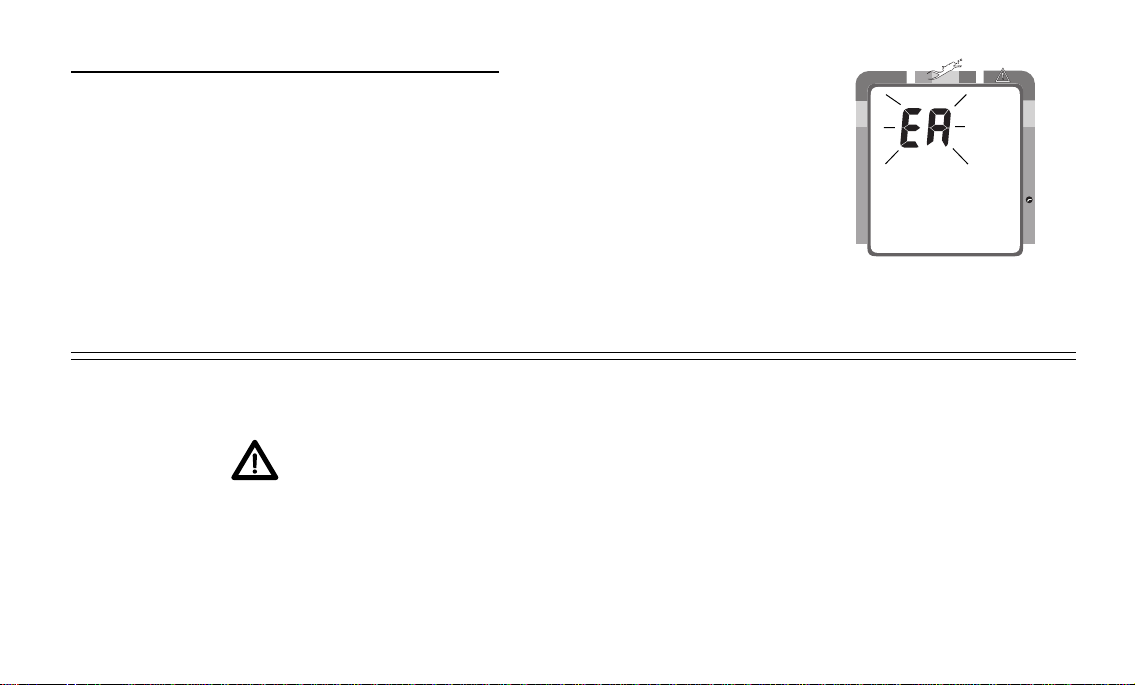
Datamax Pro Plus
To access the External Access (EA) Mode:
• press both buttons simultaneously while in Surface Mode
• press the Advance (Left) button 14 times
• the letters EA appear, flashing (Fig. 58)
• press the Advance (Left) button to revert to Surface Mode, or -
• press the Select (Right) button to initiate download
• the unit will automatically revert to Surface Mode after download is complete, or in 2 minutes if no button is pressed
• the backlight will not operate while in EA Mode
DECO
C Z
NO DECO
Fig. 58 - EA Mode
WARNING and SAFETY RECOMMENDATION
• The longer you wait to fly (or travel to higher elevations) after diving, the more you will reduce your exposure to decompression sickness.
C Z O
2
51
Page 60

®
SUMMARY OF ACCESS TO POST DIVE MODES
During the first 2 hours after a dive* (
MODES TO ACCESS TO VIEW
Backlight press Either '1 time'
Temperature/Date/Time press Left '1 time'
FO2 set press Left '2 times' > press Right (hold or repetitive)
Pre Dive Plan Sequence press Left '3 times' > press Right (hold or repetitive)
Fly/Desaturate press Left '4 times'
Log Mode press Left '5 times' > press Right (hold or repetitive)
Set Mode press Both '1 time' > Refer to page 30 of this Guide
EA Mode press Both '1 time' > press Left '14 times' > Right '1 time'
*After the First 2 Hours, the unit will remain in Fly/Desaturate Mode. To access other Modes:
• press the Right button to return to the Surface Mode, then press the buttons as indicated above.
after the 10 minute Transition Period has ended
52
):
Page 61

Datamax Pro Plus
HANDLING
THE
EXTREMES
refer to pages 66-68 for - WARNINGS and SAFETY RECOMMENDATIONS
53
Page 62
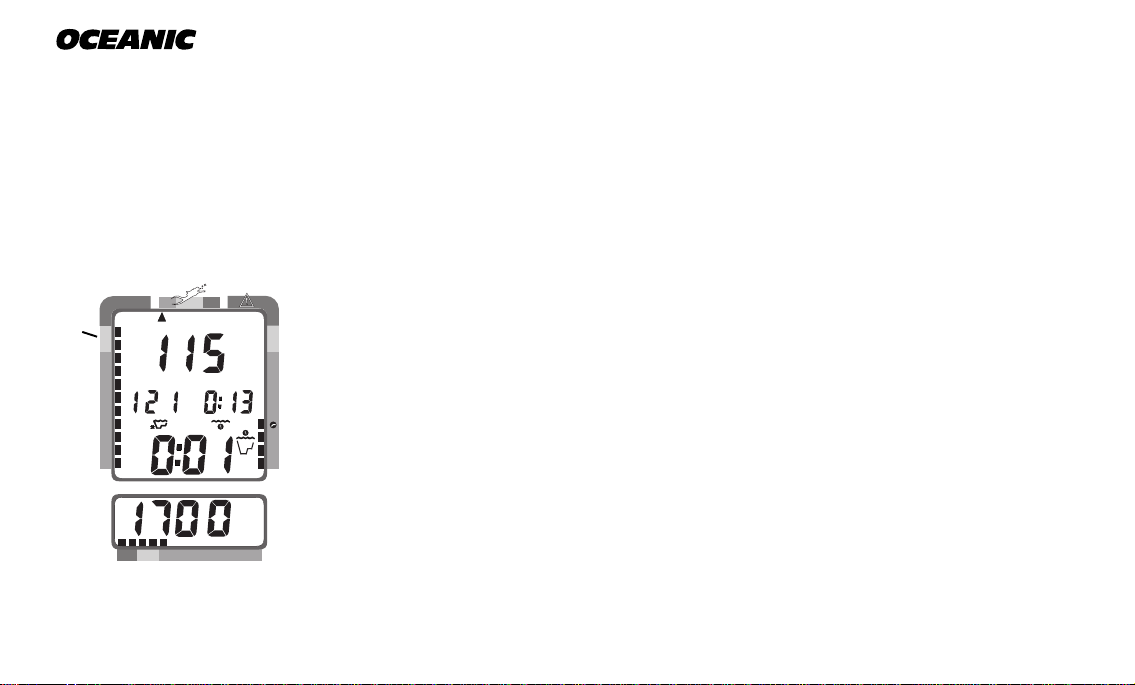
®
AVOIDING AND MANAGING DECOMPRESSION
The Pro Plus is a sophisticated instrument designed with capabilities that go
beyond the range of recreational diving with compressed air. It will help you
to avoid and, if necessary, manage decompression.
TISSUE LOADING BAR GRAPH™
The Tissue Loading Bar Graph™ offers you a convenient way to consistently
DECO
a
C Z
C Z O
FT
monitor how close you are coming to the No Decompression Limit. As you use
the Pro Plus and become familiar with the Tissue Loading Bar Graph, you will
notice that it displays fewer segments for shorter dive times and shallower
depths. Use this feature to adjust conservatism to your diving needs.
FT
NO DECO
MAX
200 5 10 30 40 50 60
Fig. 59 - Caution Zone
54
PSI
2
Use the yellow Caution (C.Z.) Zone (Fig. 59a) as a visual reference to
place a wider margin of protection between you and the No Decompression Limit.
Oceanic suggests keeping the Tissue Loading Bar Graph in the green
No Decompression (NO DECO) zone during all of your dives, and that
it be in the green when leaving the water.
Page 63
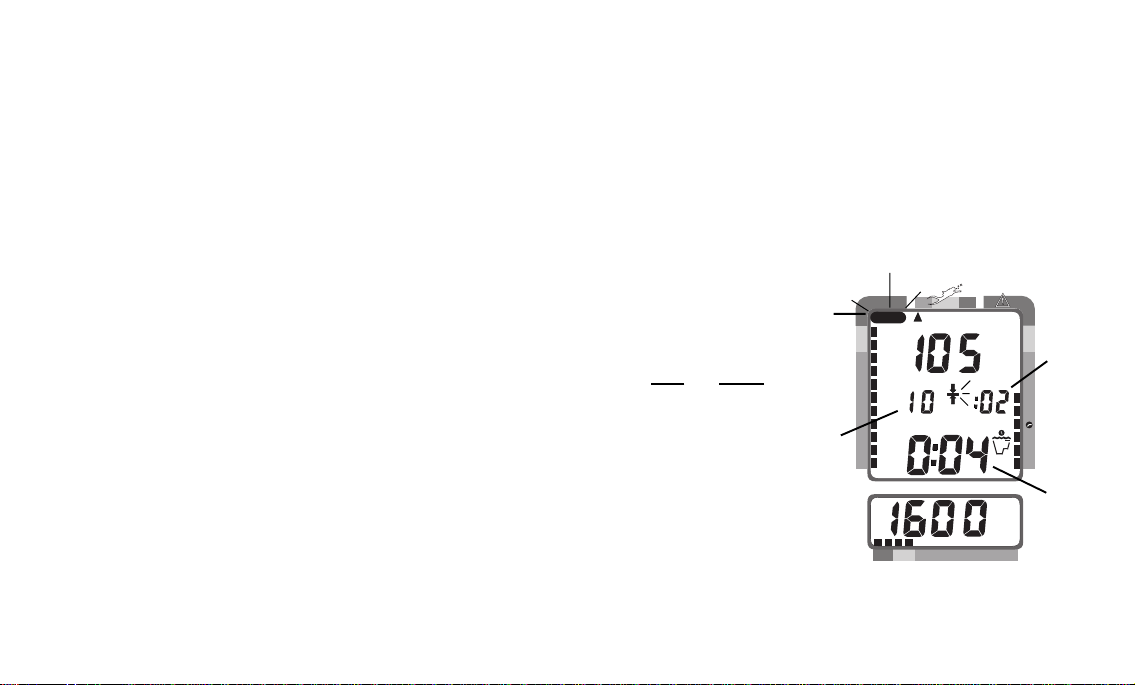
DECOMPRESSION DIVE MODE
The Pro Plus is designed to help you by providing a complete representation of
how close you are to entering decompression. Decompression Dive Mode activates when theoretical no decompression time/depth limits are exceeded.
In the event that you enter Decompression Mode, as indicated by a double
beep, the large red segment of the Tissue Loading Bar Graph (Fig. 60a) flashing, and ceiling bar of the Decompression Mode icon flashing, immediately begin a safe controlled ascent to a depth slightly deeper than, or equal to, the Required Ceiling Stop Depth indicated (Fig. 60b) and decompress for the Stop
Time indicated (Fig. 60c).
Main Display (data shown is the same if Alternate is set ON or OFF)
Information displayed in addition to Stop Depth/Time includes:
• current Depth and tank Pressure
• Total Ascent Time (Fig. 60d) - that includes stop times required at all
ceilings and vertical ascent time calculated at 60 ft (18 m) per minute.
• O2 bar graph (if a nitrox dive), Variable Ascent Rate Indicator, and
Breathing Gas Time Remaining bar graph
Additional data can be accessed using the Advance (Left) button, and the
Oceanglo® backlight can be activated using the Select (Right) button.
Datamax Pro Plus
DECO
a
C Z
FT
NO DECO
b
200 5 10 30 40 50 60
Fig. 60 - Main Display
(Alternate set ON or OFF)
C Z O
FT
c
2
d
PSI
55
Page 64
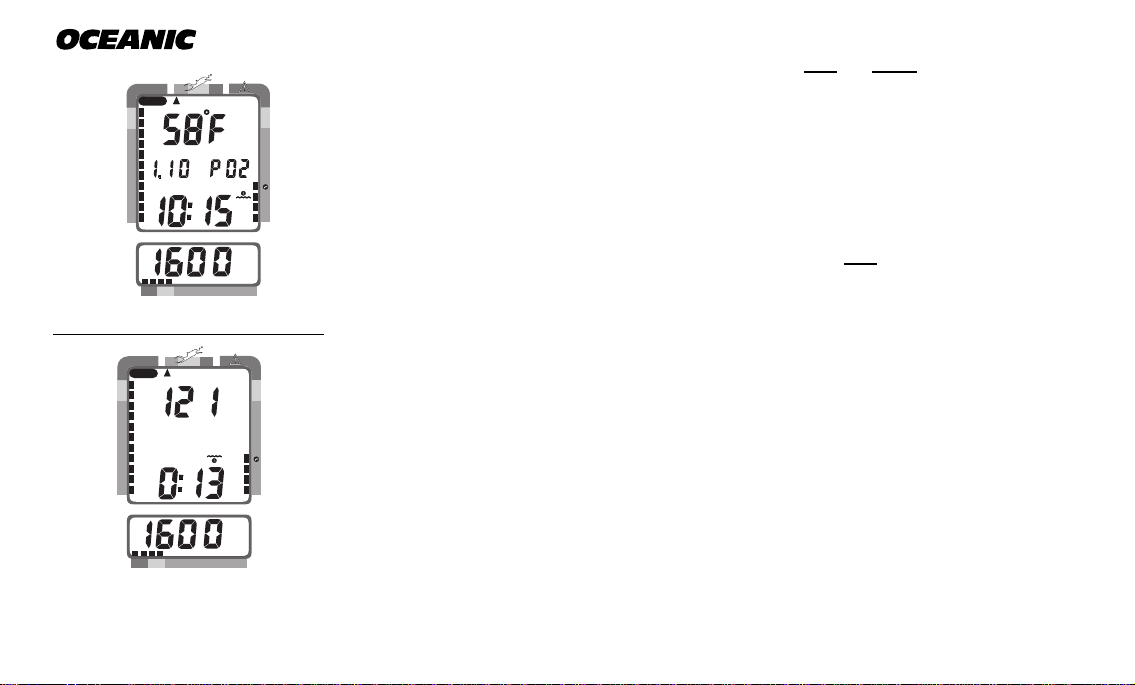
DECO
C Z
NO DECO
®
Secondary Display (access if Alternate is set ON or OFF)
C Z O
To view water Temperature, Time of Day, and 'if FO2 was set for a numerical
value', display the current level of PO2 (Fig. 61):
2
• press the Advance (Left) button 1 time
• the unit will revert to the Main Display after 10 seconds if the Advance
(Left) button is not pressed again.
PSI
200 5 10 30 40 50 60
Fig. 61 - Secondary Display
DECO
C Z
NO DECO
200 5 10 30 40 50 60
FT
MAX
C Z O
2
PSI
Fig. 62 - Alternate Display
56
Alternate Display (access only if Alternate is set ON)
To view Maximum Depth and Elapsed Dive Time, in Large Format, in place of
Current Depth and Total Ascent Time (Fig. 62):
• press the Advance (Left) button 2 times, or -
• press the Advance (Left) button 1 time, if viewing Temp/Time/PO2.
• the unit will revert to the Main Display after 10 seconds, or if the Advance (Left) button is pressed.
BREATHING GAS TIME REMAINING DURING DECOMPRESSION
Breathing Gas Time Remaining will fluctuate throughout your dive, decreasing as you dive deeper or breath heavier, and increasing as you ascend to shallower depths or relax your breathing efforts. If you inadvertently exceed no
decompression limits, the Pro Plus will provide critical information regarding
your remaining breathing gas supply.
Page 65
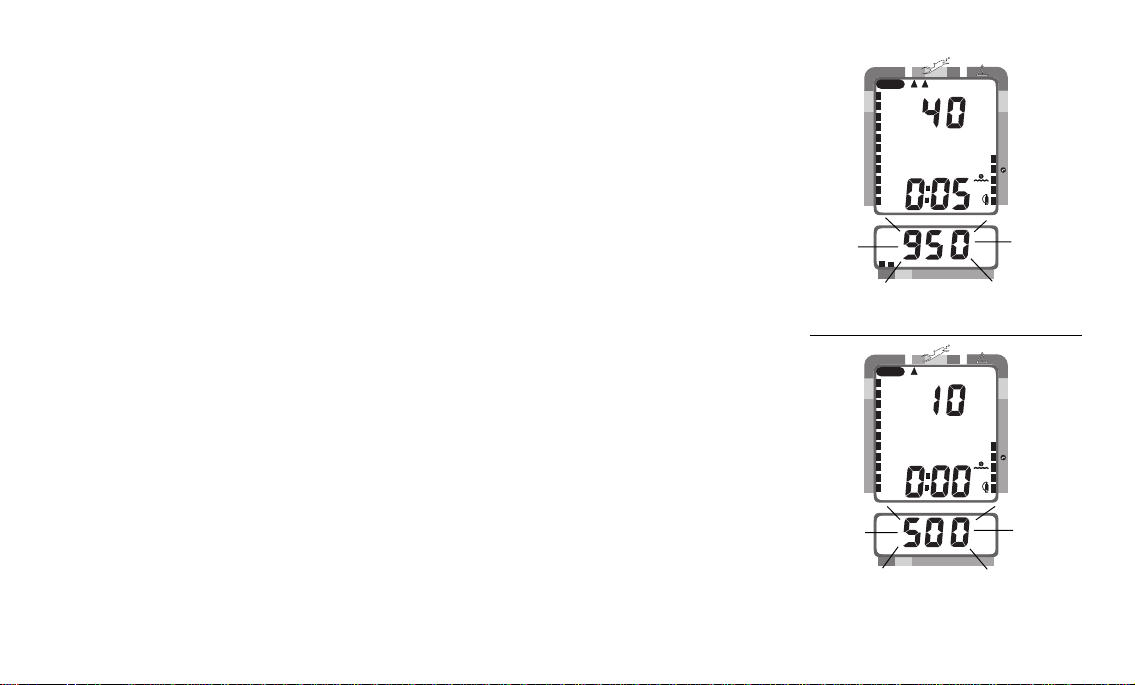
Once you enter Decompression Mode, you will need to refer to the Gas Time
Remaining bar graph for Breathing Gas Time Remaining information.
The rationale being that Dive Time Remaining is not displayed numerically in
Decompression Mode (No Decompression time is zero and in control).
When Breathing Gas Time Remaining decreases to 5 minutes, the tank Pressure numerals will flash and a Double Beep will sound (Fig. 63). This means
that only 5 minutes remain before your breathing gas supply will be reduced to
the minimum level necessary to perform the required decompression stops and
still provide a tank pressure reserve upon surfacing.
When the Breathing Gas Time Remaining decreases to zero minutes, the Audible Alarm will continuously beep once per second* (Fig. 64), signaling the
need for an immediate safe ascent to your first decompression stop.
*If the audible alarm feature was set to OFF, only a double beep will be
emitted to alert you.
There is no need to panic. The Pro Plus has allowed for (calculated) the
breathing gas you will consume while making a safe controlled ascent, including that required for decompression stops, and still provide the surfacing tank
pressure reserve you chose (set) as the End Pressure Alarm Set Point.
Datamax Pro Plus
DECO
C Z
NO DECO
200 5 10 30 40 50 60
Fig. 63 - Breathing Gas Time
Remaining (5 minutes)
DECO
C Z
NO DECO
200 5 10 30 40 50 60
Fig. 64 - Breathing Gas Time
Remaining (zero minutes)
C Z O
FT
2
PSI
C Z O
FT
2
PSI
57
Page 66
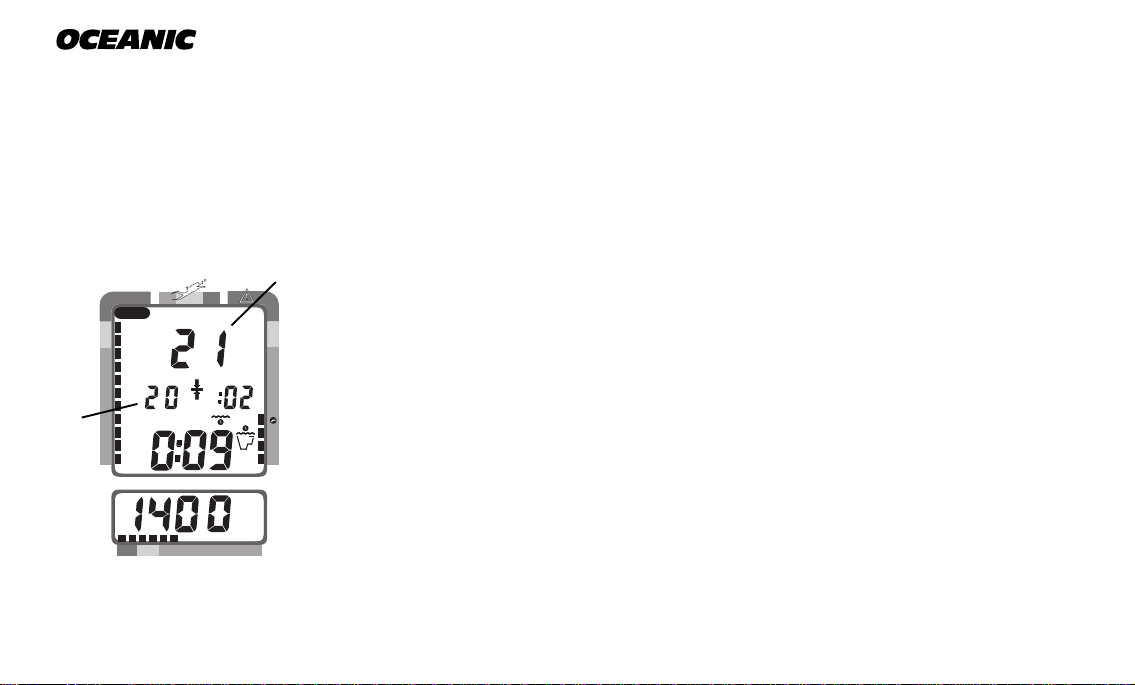
®
MANAGING DECOMPRESSION STOPS
The amount of decompression credit time that you receive is dependent on
depth, with slightly less credit given the deeper you are.
You should stay slightly deeper (Fig. 65a) than the Required Stop Depth indicated (Fig. 65b) until the next shallower Stop Depth appears. Then, you can
slowly ascend to, but not shallower than, that indicated ceiling Stop Depth.
a
Once all required decompression has been completed, the Pro Plus will switch
to the No Decompression Dive Mode. This is indicated by Total Ascent Time
= 0:00, and the Tissue Loading Bar Graph receding into the Caution Zone.
C Z
DECO
C Z O
FT
Dive Time Remaining now appears in place of Total Ascent Time displaying
FT
NO DECO
b
2
No Decompression Dive Time remaining, or Oxygen Accumulation Time remaining, or Breathing Gas Time remaining (whichever time is the least).
VIOLATION MODES
PSI
200 5 10 30 40 50 60
Fig. 65 - Managing a Decom-
pression Stop
58
While in Violation Modes, the secondary and Alternate displays previously described can be accessed using the Advance (Left) button, and the Oceanglo®
backlight can be activated using the Select (Right) button.
Page 67
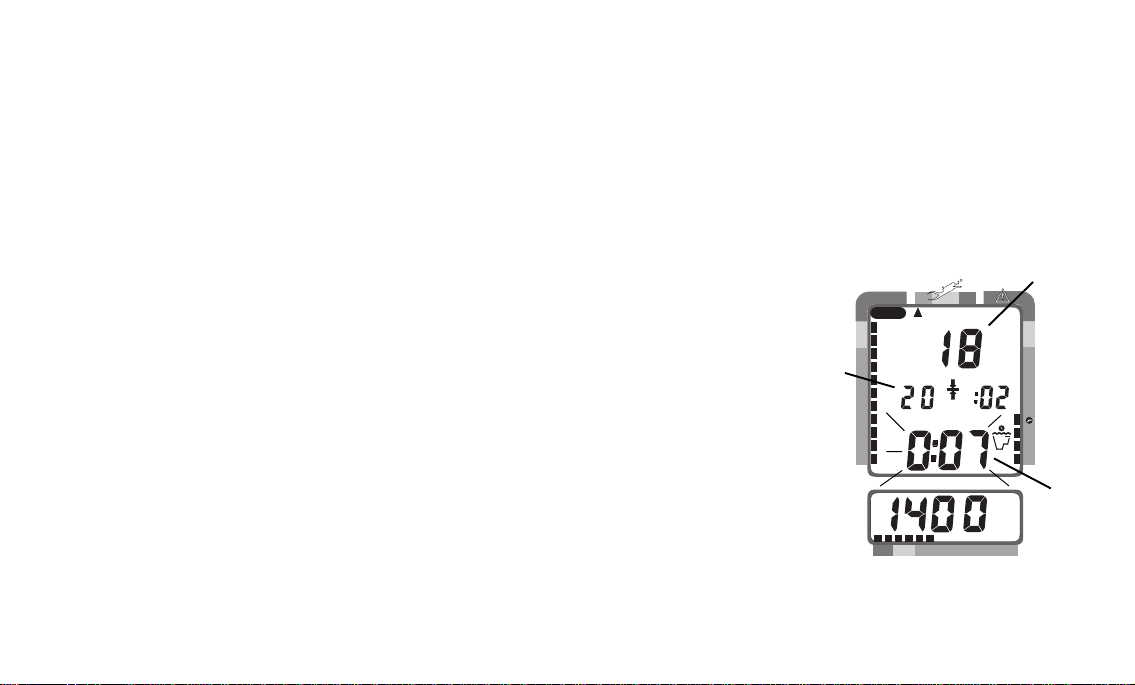
CONDITIONAL VIOLATION MODE
The Pro Plus will enter the Conditional Violation Mode if you ascend shal-
lower (Fig. 66a) than the Required Decompression Ceiling Stop Depth
displayed (Fig. 66b).
The audible alarm will beep once per second* and the Total Ascent Time dis-
play (Fig. 66c) will flash until you descend below the Required Stop Depth.
Datamax Pro Plus
*If the audible alarm feature was set to OFF, only a double beep will be
emitted to alert you.
If you descend below the required decompression ceiling before 5 minutes have
elapsed, the Pro Plus will continue to function as if no violation had occurred.
In this case, no off-gassing credit will be given, and for each minute above the
ceiling 11/2 minutes of penalty time is added to Required Stop Time.
The added penalty decompression time will have to be 'worked off' first, before
obtaining off-gassing credit. Once the penalty time is worked-off, and off-gassing credit begins, required decompression Stop Depths and Time will decrease
toward zero, then the Tissue Loading Bar Graph will recede into the caution
zone and the Pro Plus will revert to the No Decompression Dive Mode.
a
DECO
C Z
C Z O
FT
b
FT
NO DECO
200 5 10 30 40 50 60
2
PSI
Fig. 66 - Conditional Viola-
tion
c
59
Page 68
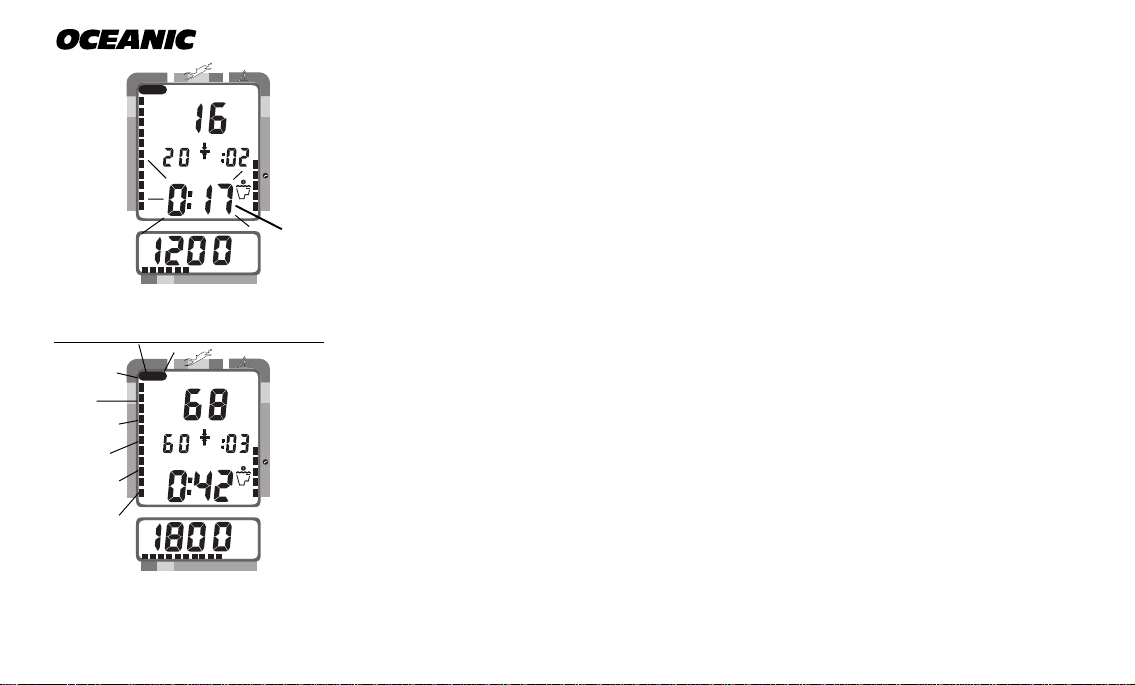
®
DECO
C Z
C Z O
FT
DELAYED VIOLATION MODE
Three conditions cause the Pro Plus to enter the Delayed Violation Mode:
FT
NO DECO
2
a
PSI
200 5 10 30 40 50 60
Fig. 67 - Delayed Violation
(> 5 minutes above Stop)
DECO
C Z
FT
NO DECO
200 5 10 30 40 50 60
C Z O
FT
2
PSI
Fig. 68 - Delayed Violation
(Required Stop >60FT/18M)
60
1. Above the Required Ceiling Stop Depth for 'more than 5 minutes'.
The Audible Alarm will emit one long beep and the Total Ascent Time display
(Fig. 67a) will flash until you descend below the Required Stop Depth.
You would then need to follow the Stop Depths and Times toward the surface
until the Tissue Loading Bar Graph recedes into the caution zone.
2. Decompression requires a Ceiling Stop Depth 'between' 60 feet (18
meters) and 70 feet (21 meters). The Audible Alarm will emit one long
beep and the Tissue Loading Bar Graph will flash. Total Ascent Time needed
to get back to the surface will still be displayed (Fig. 68).
You must ascend to just deeper than 60 feet (18 meters) staying as close to 60
feet (18 meters) as possible without causing the Total Ascent Time display to
flash. When the Required Stop Depth indicates 50 FT/ 15 M, etc., you can ascend to, but no shallower than those depths and continue decompressing.
The Pro Plus cannot accurately calculate decompression times for Stop Depths
much greater than 60FT (18M) and offers no indication of how much time
spent underwater would result in the need for a greater stop depth.
Page 69
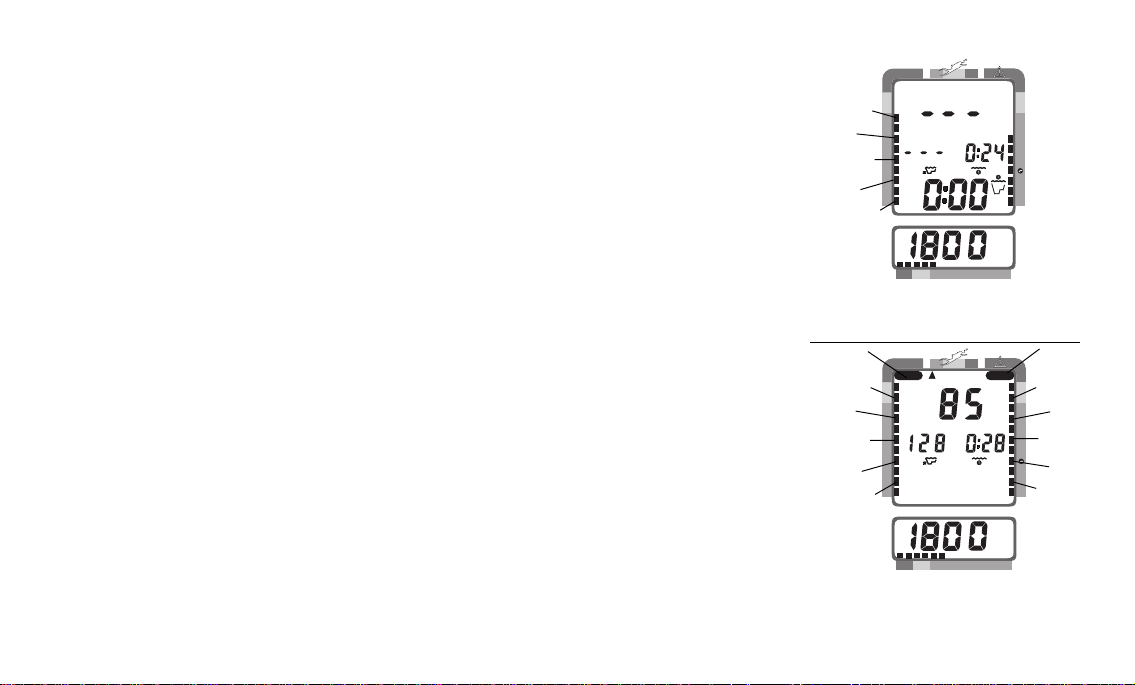
3. You exceed the maximum operating depth (330 feet/99.5 meters).
The Audible Alarm will beep once per second* when youdescend deeper than
the Depth Alarm set point that you selected (set).
Datamax Pro Plus
DECO
C Z
C Z O
FT
*If the Audible Alarm feature was set to OFF, only a double beep will be
emitted to alert you.
Upon descending deeper than 330 feet (99.5 meters), the Tissue Loading Bar
Graph will flash and the Current Depth and Max Depth displays will only indicate 3 dashes (Fig. 69) until ascent is made to a depth shallower than 330 feet
(99.5 meters), at which time the Current Depth display will be restored. Max
Depth will only display 3 dashes for the remainder of that dive and in the log.
IMMEDIATE VIOLATION MODE
Five minutes after reaching the surface from a dive in which a Delayed Violation occurred, the Pro Plus will enter an Immediate Violation Mode.
If a ceiling much greater than 60FT (18M) is required, an Immediate Violation
Mode (Fig. 70) will be entered. This situation would be preceded by entering
Delayed Violation Mode, previously described. The Pro Plus would then operate with limited functions (Current Depth, Max Depth, and Elapsed Dive
Time) in Gauge Mode during the remainder of that dive and for 24 hours after
surfacing.
NO DECO
FT
MAX
200 5 10 30 40 50 60
2
PSI
Fig. 69 - Delayed Violation
(deeper than 330ft/99.5m)
DECO
C Z
NO DECO
FT
MAX
200 5 10 30 40 50 60
C Z O
FT
2
PSI
Fig. 70 - Immediate Violation
61
Page 70
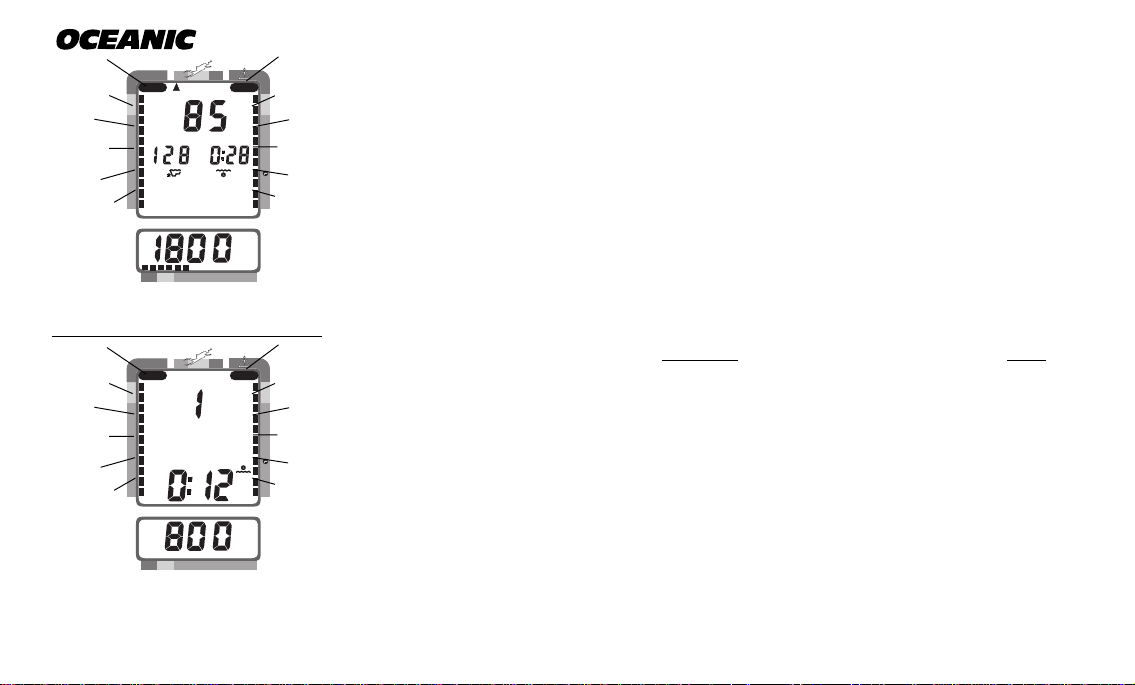
®
DECO
C Z
NO DECO
FT
MAX
200 5 10 30 40 50 60
C Z O
FT
2
PSI
Fig. 71 - Gauge Mode
(underwater)
DECO
C Z
C Z O
GAUGE MODE
The Pro Plus will operate with limited functions in Gauge Mode during the 24
hours after a dive in which a Permanent Violation occurred. Underwater, the
Gauge Mode is a continuation of the Immediate Violation Mode that turns the
Pro Plus into a digital instrument without any decompression or oxygen monitoring functions. Dive Time Remaining will not be displayed and the Tissue
Loading Bar Graph and O2 Bar Graph will flash as a warning of this condition
(Fig. 71).
After surfacing, Gauge Mode does not provide the FO2, Pre Dive Planning Sequence, or Time to Fly features (Fig. 72). The countdown timer that appears
when you try to access Time to Fly does not represent 'Time to Fly'. It is only
provided to inform you of the time remaining before normal Pro Plus operation
can resume with full features and functions.
NO DECO
200 5 10 30 40 50 60
Fig. 72 - Gauge Mode
(surface)
62
2
PERMANENT VIOLATION
Entering the Immediate Violation Mode, then Gauge Mode, will result in loss
of all Pro Plus decompression and oxygen monitoring functions for 24 hours
PSI
after that dive. This condition is considered a Permanent Violation.
In the event that a dive is made during the 24 hour period, a full 24 hour sur-
face interval must be served before the all functions are restored.
Page 71
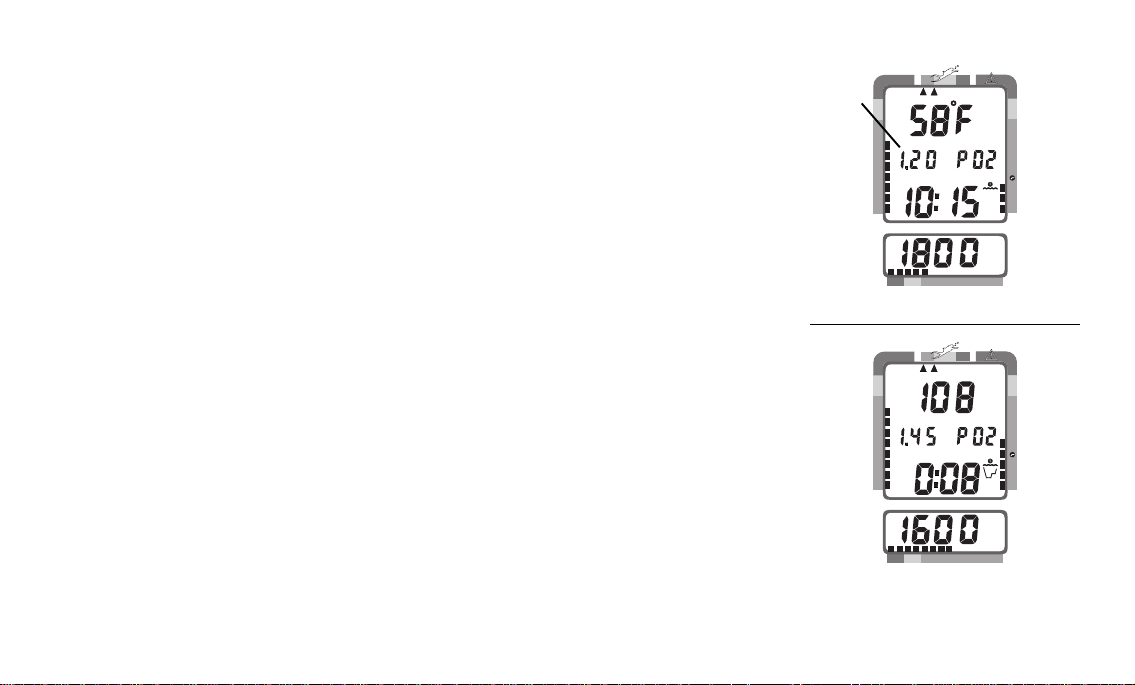
OXYGEN EXPOSURE
The Pro Plus is a sophisticated instrument designed with capabilities that go
beyond the range of recreational diving with compressed air. It will help you
to avoid and manage excessive oxygen exposure.
PARTIAL PRESSURE OF OXYGEN
Datamax Pro Plus
DECO
a
C Z
NO DECO
C Z O
2
As depth increases during the dive, the partial pressure of oxygen (PO2) increases. To view the current value of PO2 (Fig. 73a):
• press the Advance (Left) button 1 time to access the Secondary Display.
HIGH PO2 DIVE MODE
The Pro Plus enters the High PO2 Dive Mode when partial pressure of oxygen
becomes equal to, or greater than, 1.40 ATA. The current PO2 value and the
symbol 'PO2' will appear and remain on display (Fig. 74) until PO2 decreases
below a value of 1.40 ATA. If the Alternate Display is set to ON, they replace
Max Depth and Elapsed Dive Time. A double beep will sound to alert you.
If partial pressure of oxygen continues to increase, the value of PO2 displayed
will increase from 1.40 toward a maximum value of 5.00 ATA in increments of
'.01' ATA.
PSI
200 5 10 30 40 50 60
Fig. 73 - Current PO2
DECO
C Z
NO DECO
200 5 10 30 40 50 60
C Z O
FT
2
PSI
Fig. 74 - High PO2
(=/> 1.40 ATA)
63
Page 72
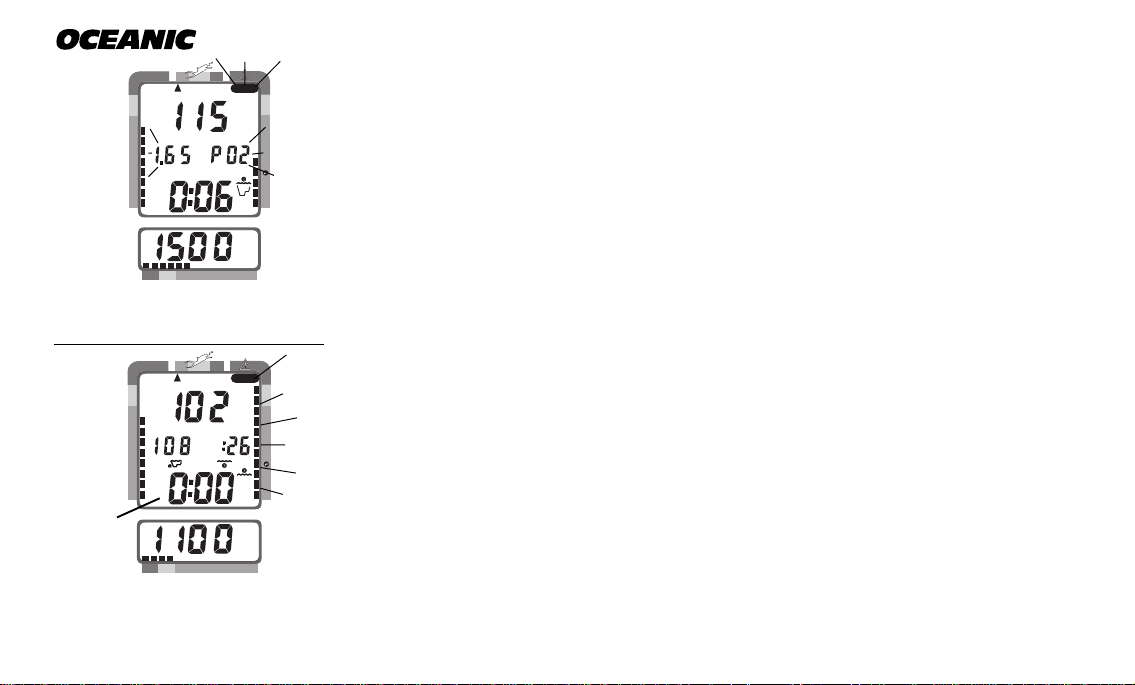
DECO
C Z
NO DECO
®
When PO2 reaches a value of 1.60 ATA (Fig. 75), the large red segment of the
C Z O
FT
O2 bar graph, the PO2 value, and PO2 symbol will flash continuously and the
Audible Alarm will emit one beep per second* as a warning until the level of
PO2 decreases below 1.60 ATA.
2
*If the audible alarm feature was set to OFF, only a double beep will be
emitted to alert you.
Fig. 75 - High PO2
(=/> 1.60 ATA)
DECO
C Z
NO DECO
a
Fig. 76 - High O2
64
PSI
200 5 10 30 40 50 60
FT
FT
MAX
O
2
PSI
200 5 10 30 40 50 60
HIGH OXYGEN ACCUMULATION
The O2 bar graph provides you with a convenient graphic representation of
your oxygen accumulation, displaying either oxygen accumulated during that
dive, or during your repetitive dives conducted during that 24 hour period,
C Z O
whichever of the two is greater at that time.
The yellow Caution Zone of the O2 Bar Graph offers you a convenient way to
2
consistently monitor how close you are coming to the limits of oxygen tolerance. Use it as a visual reference to place a wider margin of protec-
tion between you and the Limits.
If the theoretical amount of oxygen accumulated equals, or exceeds, the per
limit of single exposure , or exposure for the 24 hour period, Oxygen Dive Time
Remaining becomes 0:00 (Fig. 76a). The O2 Bar Graph will enter the red danger zone and the full bar graph will flash and the Audible Alarm will emit one
Page 73

beep per second* as a warning until the level of oxygen decreases below the
limit.
*If the audible alarm feature was set to OFF, only a double beep will be
emitted to alert you.
You must immediately focus on making a safe controlled ascent to the surface
to prevent further exposure. As your accumulation (dose) decreases during
your surface interval, the O2 bar graph will gradually recede into the yellow
(caution) zone and green (normal) zone.
Oceanic suggests always leaving the water with the Oxygen Accumulation Bar Graph in the green (normal) zone.
Datamax Pro Plus
UNEXPECTED LOSS OF DISPLAYED INFORMATION
If your Pro Plus stops working for any reason, it is important that you have
anticipated this possibility and are prepared for it.
If you dive in situations where your trip would be ruined or your safety would
be jeopardized by losing the use of your Pro Plus, an analog or digital backup
system or use of standard air (or nitrox) tables is highly recommended.
R
E
S
P
O
N
R
E
V
I
D
E
S
L
I
B
Be a -
RESPONSIBLE DIVER
at all times.
65
Page 74

®
WARNINGS and SAFETY RECOMMENDATIONS
• There are few legitimate excuses for making unplanned Decompression dives, and the consequences of this type of diving can be severe. By making an unplanned Decompression dive
without the necessary preparation and training, you will have placed yourself in an unnecessarily dangerous situation. Allow a surface interval of at least 24 hours before reentering
the water in the event a dive requires emergency decompression.
• By entering decompression, you automatically impose a “ceiling” above you which you cannot immediately ascend beyond, denying you free access to the surface.
• Existing data for making planned decompression dives is extremely limited, and virtually
nonexistent for repetitive decompression diving. Decompression diving greatly increases
your risk of decompression sickness.
• Decompression diving, or diving deeper than 130 feet (39 m), will greatly increase your risk
of decompression sickness.
• Special training, equipment, and support are necessary for diving deeper than the maximum
recommended sport diving depth limit of 130 feet (39 meters). Oceanic does not advocate
diving to depths below 130 feet (39 meters), the basis for which is purely theoretical.
66
Page 75

Datamax Pro Plus
WARNINGS and SAFETY RECOMMENDATIONS
• Exiting the water with the Tissue Loading Bar Graph in the red decompression zone greatly
increases the risk of decompression sickness, and may result in injury or death.
• The oxygen features of the Pro Plus are intended for use only by recreational divers trained
for nitrox diving by an instructor certified by a recognized training agency to teach diving
with nitrox.
• The Pro Plus enters Immediate Violation Mode when a situation totally exceeds its capacity
to predict an ascent procedure. These dives represent gross excursions into decompression
that are beyond the boundaries and spirit of the Pro Plus design. If you are following these
dive profiles, Oceanic advises you not use a Pro Plus dive computer.
• If you exceed certain limits, the Pro Plus will not be able to tell you how to get safely back to
the surface. These situations exceed tested limits and can result in loss of some Pro Plus
functions for 24 hours after the dive in which a violation occurred.
• The Pro Plus is not intended for use by military or commercial divers.
67
Page 76

®
WARNINGS and SAFETY RECOMMENDATIONS
• Maximum limits for exposure to oxygen should not be exceeded, and the consequences of
CNS (Central Nervous System) oxygen toxicity can be severe, resulting in Gran Mal convulsions and drowning.
• Conducting repetitive dives using enriched nitrogen-oxygen mixtures can lead to oxygen
buildup, reducing oxygen tolerance while increasing the risk of pulmonary oxygen toxicity.
• In the event that you exceed the maximum per dive allowable oxygen exposure limit, it is
recommended that you allow a surface interval of at least 2 hours before reentering the water. If you exceed the maximum 24 hour period allowable oxygen exposure limit, you must
allow a surface interval of at least 24 hours before reentering the water.
• Allowing the O2 Bar Graph to enter the red (Danger) zone greatly increases the risk of CNS
oxygen toxicity, and may result in serious injury or death.
• It should not be considered that the capabilities built into the Pro Plus provide any implied
approval or consent from Oceanic for individuals to exceed the defined limits of recreational
dive profiles, as agreed on by all internationally recognized training agencies.
68
Page 77

Datamax Pro Plus
CARE
and
MAINTENANCE
refer to page 78 for - WARNINGS and SAFETY RECOMMENDATIONS
69
Page 78
DECO
C Z
NO DECO
®
®
Prevent
Scratches
with an
Oceanic
Lens
Protector
CARE AND CLEANING
The Pro Plus must be protected from shock, excessive heat, chemical attack,
and tampering. The housing, made of an impact resistant resin, is extremely
shock resistant but susceptible to chemical attack and scratches. Protect the
lens against scratches with a transparent Oceanic Instrument Lens Protector.
Small scratches will naturally disappear underwater.
AFTER THE DIVE
C Z O
2
Soak and rinse the Pro Plus in fresh water following each dive, and check the
low pressure sensor guard cap to ensure that it is free of any debris or obstructions. Use lukewarm water or a slightly acidic vinegar/water bath to dissolve
any salt crystals. After removal from a fresh water bath, place the Pro Plus
under gently running water and towel dry before storing. Transport cool, dry,
and protected.
70
OCEANIC
200 5 10 30 40 50 60
Smart
Glo
™
Pro PLUS
ANNUAL INSPECTIONS AND SERVICE
Your Pro Plus should be inspected annually by an Authorized Oceanic Dealer
who will perform a factory prescribed function check and inspection for damage or wear. To keep the 2 year limited warranty in effect, this inspection
must be completed one year after purchase (+/- 30 days).
Page 79

Oceanic recommends that you continue to have this inspection performed every year to ensure your Pro Plus is working properly. The costs of annual inspections are not covered under the terms of the 2 year limited warranty.
NOTE: Annual inspections are only performed by Authorized
Oceanic Dealers and are not performed by the factory.
TO OBTAIN SERVICE
Take your Pro Plus to an Authorized Oceanic Dealer or send it to the 'nearest'
Facility listed on page 77. When shipping your Pro Plus be sure to:
• Send only the Pro Plus with hose (do not attempt to remove the hose).
• Package it using a protective cushioning material.
• Include a legible note stating specific reason for return, your name, street
address, daytime phone number, serial number, and a copy of your original sales receipt and Warranty Registration Card.
• Send freight prepaid and insured to the nearest Oceanic service facility.
• Non-waranty service must also be prepaid (call for an estimated cost).
• If you are sending the unit to Oceanic USA, call Oceanic Customer Service or email [email protected] to obtain an RMA number.
• Record all dive data in the Log or download the data in memory. All data
will be erased when your Pro Plus receives factory service.
For more information regarding service and products, visit Oceanic's web site.
Datamax Pro Plus
Responsible
71
Page 80
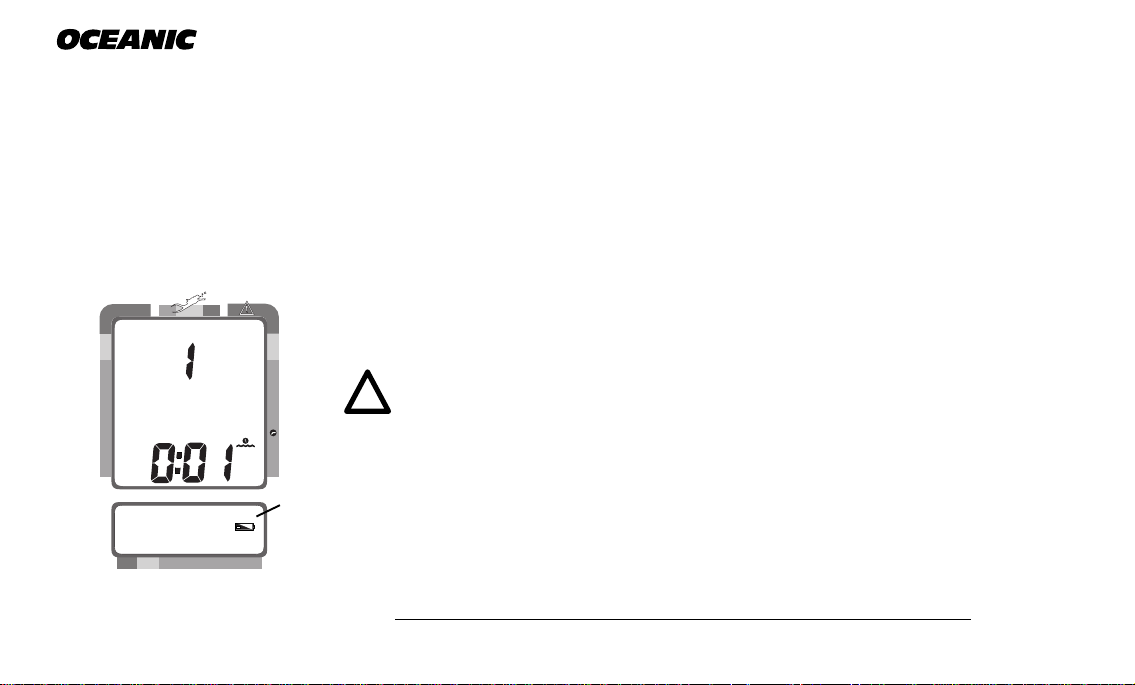
®
DECO
C Z
NO DECO
200 5 10 30 40 50 60
C Z O
2
Fig. 77 - Low Battery
BATTERY LIFE
Battery consumption rate varies throughout periods of operation, which begin
upon activation and continue for 24 hours after surfacing from a dive. The exact number of dives, or hours of operation, that you will obtain with a battery
is subject to variables, such as, temperature, the number of dives conducted
during an operational period, and how often the backlight is used.
Tests and calculations indicate that a new Tadiran® 1/2AA model TL-2150,
.95Ah, 1.0 ma, Lithium battery will maintain unit operation for approximately
300 dive hours (if 1 - 1 hour dive per dive day) to over 600 dive hours (if 2 or
more 1 hour dives per dive day). Yearly replacement is recommended.
NOTE: The disposable battery supplied with the unit is not
covered by the Pro Plus limited 2 year warranty.
LOW BATTERY CONDITION
a
During unit operation, voltage level is checked every 10 minutes. A Low Battery condition is indicated by the Battery icon appearing in the lower display
(Fig. 77a). Upon decreasing to a voltage level that will not maintain proper
unit operation, the icon will flash for 5 seconds followed by shutdown of the
unit. The backlight will not operate during a Low Battery Condition.
72
Page 81
If the unit did not display the Low Battery icon 'prior' to entering the Dive
mode, and a low battery condition occurs during a dive, you will be alerted by
the Low Battery icon appearing on the display. There will be sufficient battery
power to maintain unit operation 'for the remainder of that dive'.
NOTE: The Pro Plus will continue to function on real time for
a period of 10 seconds after the battery is removed, maintaining Nitrogen and Oxygen calculations for a repetitive dive. By
having a new battery ready to insert prior to removing the battery hatch and the battery that's in the unit, you can take advantage of this enhanced feature.
CAUTION: If the new battery is not inserted within 10 seconds
after removal of the battery that's in the unit, you must wait for
a minimum of 2 minutes prior to inserting the new battery.
Otherwise, the unit may enter Dive Mode, perform a quick dive
while on the surface, log the dive, then resume normal operation. Also, Nitrogen and Oxygen calculations will be erased and
Date and Time will have to be reset.
Therefore, to retain calculated data for repetitive dives, the
battery must be replaced in less than 10 seconds!
R1
Datamax Pro Plus
R
E
S
P
O
R
E
V
I
D
N
E
S
L
I
B
73
Page 82
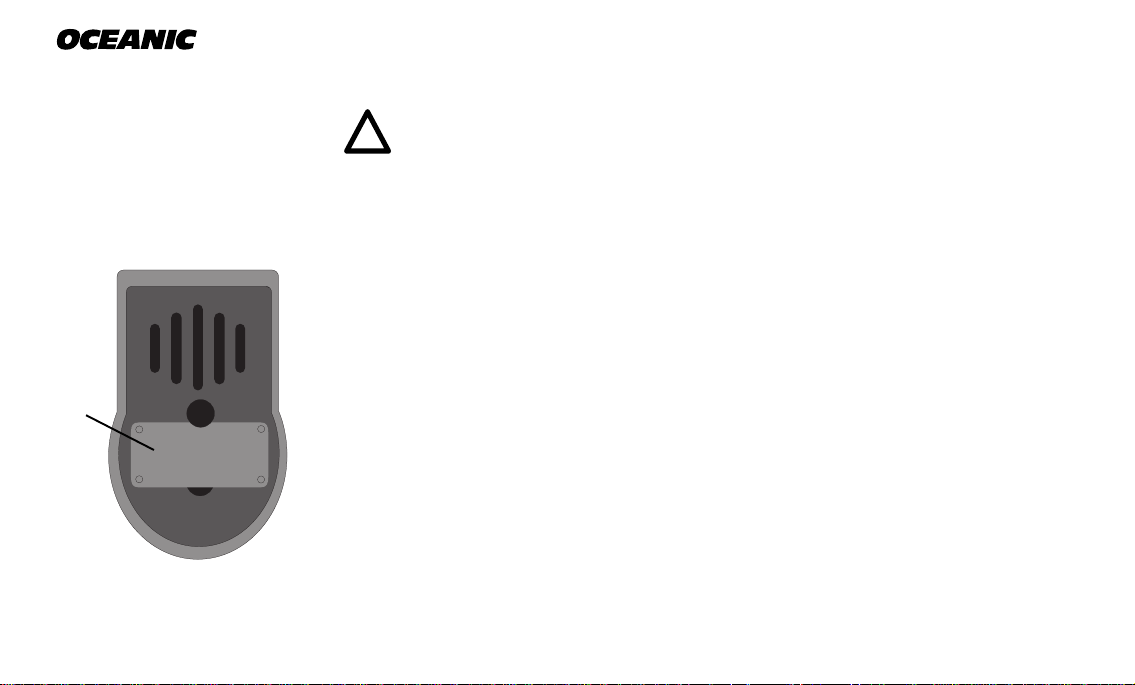
a
X
X
Fig. 78 - Case Back
74
®
BATTERY REPLACEMENT
NOTE: The following procedure must be closely adhered to.
Damage due to improper battery replacement is not covered by
the Pro Plus limited 2 year warranty.
BATTERY REMOVAL
The battery compartment should only be opened in a dry and clean environment, with extreme care taken to prevent the entrance of moisture or dust.
Examine the case back to find the Battery Hatch (Fig.78a):
• Remove the four screws that secure the battery hatch to the housing by
turning counter clockwise with a small philips head screwdriver.
X
X
• Lift the hatch up and out of the housing.
• Lift the batttery, positive (+) end first out of the battery compartment.
• Remove the battery hatch o-ring and inspect it for any signs of deterioration or deformity. DO NOT use tools to remove the o-ring.
• O-ring replacement is highly recommended to ensure proper sealing.
• Closely check the battery hatch and the housing sealing surfaces for any
signs of damage that might impair proper sealing. If found, return your
Pro Plus to your Authorized Oceanic Dealer, and DO NOT attempt to use
it until it has received factory service.
R1
Page 83
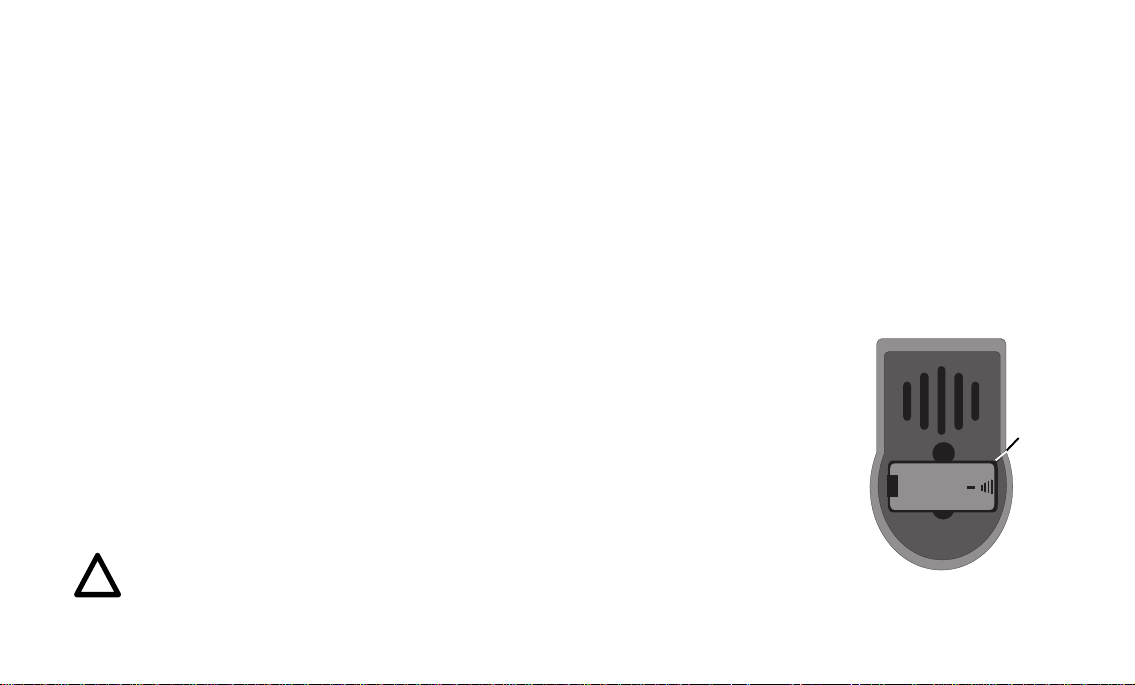
• Closely examine the inside of the battery compartment for any signs of
corrosion indicating entrance of moisture into the unit. If found, return
your Pro Plus to an Authorized Oceanic Dealer, and DO NOT use it until
it has received service.
If water or corrosion is found in the battery compartment, DO NOT use it until it has received proper service. It is best to have your unit inspected and
cleaned by an Authorized Oceanic Dealer. If you are cleaning the unit -
• Inspect the lens and case to ensure they are not cracked or damaged.
• Discard the battery and DO NOT attempt to reuse it.
• Check the o-ring seating surfaces for damage (nicks, cuts, divots, etc.).
• Flush the battery hatch and compartment with a solution of 50% white
vinegar and 50% water. Rinse with fresh water, and allow to air dry overnight or blow dry with a hair dryer set at no heat.
Datamax Pro Plus
BATTERY INSTALLATION
• To replace the battery hatch o-ring, lightly lubricate it with silicon grease
and place it on the beveled outer edge of the battery compartment (Fig.
79). Ensure that it is evenly seated.
NOTE: This o-ring must be a genuine Oceanic part that can be
purchased from your Authorized Oceanic Dealer. Use of any
R1
other o-ring will void the Pro Plus warranty.
O-ring
Battery
+
Cavity
POS
NEG
Fig. 79 - O-ring Installation
75
Page 84
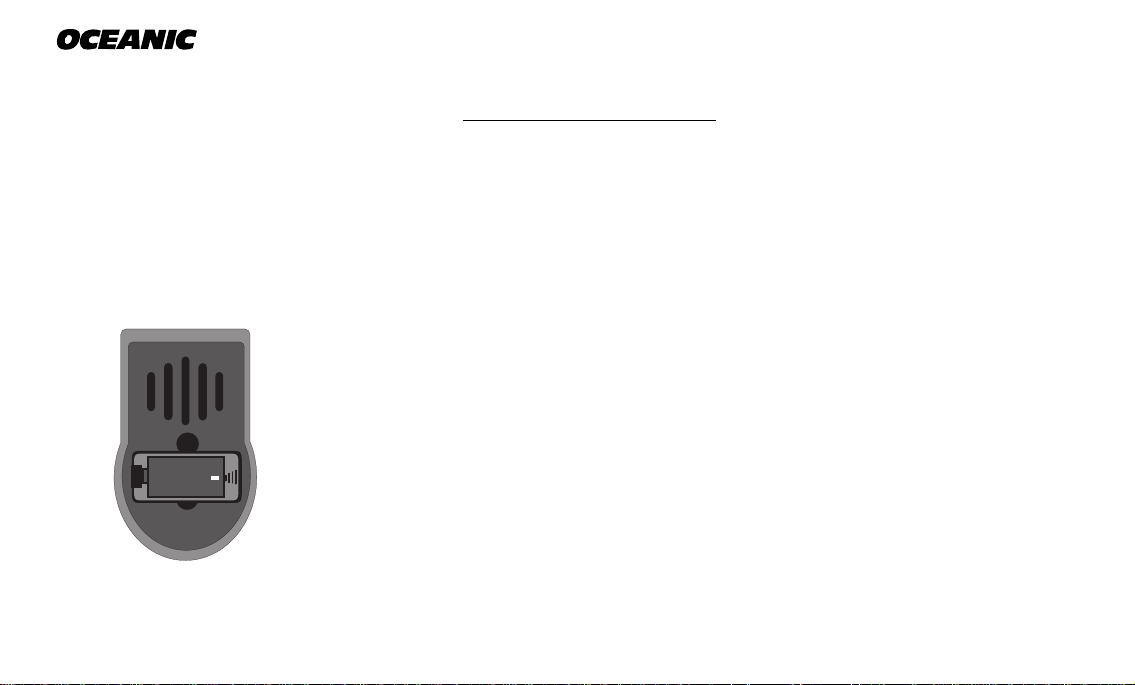
®
• Place a new 3.6 volt TADIRAN®, model TL-2150, .95Ah, 1.0ma, Lithium
battery, negative end first, into the battery compartment toward the
spring, ensuring proper orientation of the positive (+) and negative (-)
ends (Fig. 80).
• Carefully place the battery hatch into position so that it seats on top of
the o-ring, and while holding it in place with your thumb, secure it with
the four screws by turning them clockwise with a small Philips head
screwdriver. DO NOT attempt to use any other screws.
• Carefully tighten the screws until secure by alternately turning them each
one turn at a time. Turn the upper left, then the lower right, then the
lower left, then the upper right.
• Repeat the sequence until all of the screws are evenly secure. The outer
surface of the battery hatch should be flush with the outer surface of the
housing. DO NOT overtighten.
INSPECTION
Battery
+
NEG
POS
Fig. 80 - Battery Orientation
76
• Activate the unit and watch carefully as it performs a full diagnostic and
battery check and enters Surface Mode.
• Observe the LCD display to ensure it is consistently clear and sharp in
contrast throughout the screen.
• If any portions of the display are missing or appear dim, or if a Low Battery condition is indicated, return the unit to your Authorized Oceanic
Dealer for a complete evaluation before attempting to use it.
R1
Page 85

OCEANIC USA
2002 Davis Street
San Leandro, Ca. 94577
Tel: 510-562-0500 Fax: 510-569-5404
http://www.oceanicusa.com
Datamax Pro Plus
Oceanic International (Pacific)
Kapolei, Hawaii
Tel: 808-682-5488 Fax: 808-682-1068
Oceanic Europe
Pomezia, Italy
Tel: 39-6-910-4148 Fax: 39-6-910-4163
Oceanic SW, Ltd
Devon, United Kingdom
Tel: 44-1-404-89-1819 Fax: 44-1-404-89-1909
Oceanic Germany
Numberg, Germany
Tel: 49-911-324-6630 Fax: 49-911-312-999
Oceanic Diving Australia Pty. Ltd
Sorrento, Victoria, Australia
Tel: 61-3-5984-4770 Fax: 61-3-5984-4307
Oceanic Asia-Pacific Pte. Ltd
Singapore
Tel: 65-779-3853 Fax: 65-779-3945
Oceanic Japan
Tokyo, Japan
Tel: 3-3664-6541 Fax: 3-3667-6187/6
77
Page 86

®
WARNINGS and SAFETY RECOMMENDATIONS
• Never, under any circumstances, poke any object through any slots or holes of the Pro Plus.
Doing so may damage the depth sensor, possibly resulting in erroneous depth and/or dive
time remaining displays.
• If you are in doubt about the accuracy of your Pro Plus depth readings, DO NOT attempt to
dive with it until it has been inspected by Oceanic Customer Service.
• Never pressure test the Pro Plus in an air environment. Doing so may damage the depth
sensor; possibly resulting in erroneous depth or time readings.
• Never spray aerosols of any kind on, or near, the Pro Plus. The propellants may chemically
attack the plastic.
• When the Low Battery icon is displayed prior to a dive, DO NOT attempt to dive with the
Pro Plus until the battery is replaced.
R1
78
Page 87

Datamax Pro Plus
REFERENCE
refer to page 80 for - WARNINGS and SAFETY RECOMMENDATIONS
79
Page 88

®
WARNINGS and SAFETY RECOMMENDATIONS
• Diving at high altitude requires special knowledge of the variations imposed upon divers,
their activities, and their equipment by the decrease in atmospheric pressures. Oceanic recommends completion of a specialized Altitude training course by a recognized training
agency prior to diving in high altitude lakes or rivers.
• Altitude compensation provided by the Pro Plus takes place when the unit is activated. DO
NOT dive at any different altitude until the Pro Plus shuts off. It will recalibrate automatically when reactivated at the new altitude.
• When returning to lower altitudes, diving should not be conducted until the Pro Plus automatically clears of any residual nitrogen and oxygen loading and resets to operate at the
new altitude.
• Decompression diving is inherently hazardous and greatly increases your risk of decompression sickness - even when performed according to the computer's calculations.
• Using the Pro Plus, just as using the U.S. Navy, or other, No Decompression Tables, is no
guarantee of avoiding decompression sickness, i.e. “the bends.”
80
Page 89

Datamax Pro Plus
NO DECOMPRESSION LIMITS
Note how the No Decompression Limits for the Pro Plus are contrasted with the U.S. Navy limits (Fig. 81). For most depths, the
Pro Plus provides somewhat less no decompression times than the
U.S. Navy Tables. However, while the No Decompression Limits
may be less, you will receive greatly increased allowable bottom
times as you take advantage of the multilevel dive capabilities offered by the Pro Plus. Notice also that the Pro Plus Pre Dive Planning Sequence does not scroll past 160 feet (48 meters).
DECOMPRESSION MODEL
The decompression model used by the Pro Plus is based on the no
decompression multilevel repetitive dive schedules successfully
tested by Dr. Ray Rogers and Dr. Michael Powell. These tests did
not include repetitive dives deeper than 90 feet (27 meters) or decompression dives.
Due to the present unavailability of statistical data, Pro Plus decompression predictions are based on U.S. Navy theory. Therefore,
pay special attention to the Warnings and Safety Recommendations that have been provided in this owner's guide.
Depth NDL-mins. Navy
Pro Plus U.S.
feet (meters) Eng (Metric) NDL -mins.
30 (9) 260 (283) - - -
35 - - - - - - 310
40 (12) 137 (144) 200
50 (15) 80 (84) 100
60 (18) 57 (58) 60
70 (21) 40 (41) 50
80 (24) 31 (31) 40
90 (27) 24 (26) 30
100 (30) 19 (20) 25
110 (33) 16 (16) 20
120 (36) 13 (13) 15
130 (39) 10 (11) 10
140 (42) 9 (9) 10
150 (45) 8 (8) 5
160 (48) 7 (7) 5
170 (51) * * 5
180 (54) * * 5
190 (57) * * 5
[* The Pro Plus will not scroll past 160 feet (48
meters), or when projected bottom /descent time
is less than three minutes.]
Fig. 81 - No Decompression Limits
81
Page 90

®
Maximum
Exposure Time
OXYGEN EXPOSURE LIMITS
Predicted exposure limits and oxygen calculations of the Pro Plus are based on
maximum exposure durations (Fig. 82) published by the National Oceanic and
Atmospheric Administration in the October 1991 NOAA Diving Manual.
PO2
(ATA)
0.60
0.70
0.80
0.90
1.00
1.10
1.20
1.30
1.40
1.50
1.60
Fig. 82 - Oxygen
Exposure Limits
82
Per Dive
(Min.)
720
570
450
360
300
240
210
180
150
120
45
Per 24hr
(Min.)
720
570
450
360
300
270
240
210
180
180
150
MULTIPLE TISSUE TRACKING
The Pro Plus tracks twelve tissue compartments with halftimes ranging from
5 to 480 minutes. The Tissue Loading Bar Graph always displays the controlling compartment that is the only one important at that time. Think of the
Tissue Loading Bar Graph as twelve separate transparent displays laid on top
of one another (Fig. 83). The tissue compartment that has filled up fastest is
the only one the viewer can see from the top.
At any particular point, one tissue compartment may be absorbing nitrogen,
while another that was previously higher may be off-gassing. Figure 84 illustrates the point at which one compartment “hands over” control to another
compartment at a different depth. This feature of the Decompression Model is
the basis of multilevel diving, one of the most important contributions the Pro
Plus offers you.
Page 91
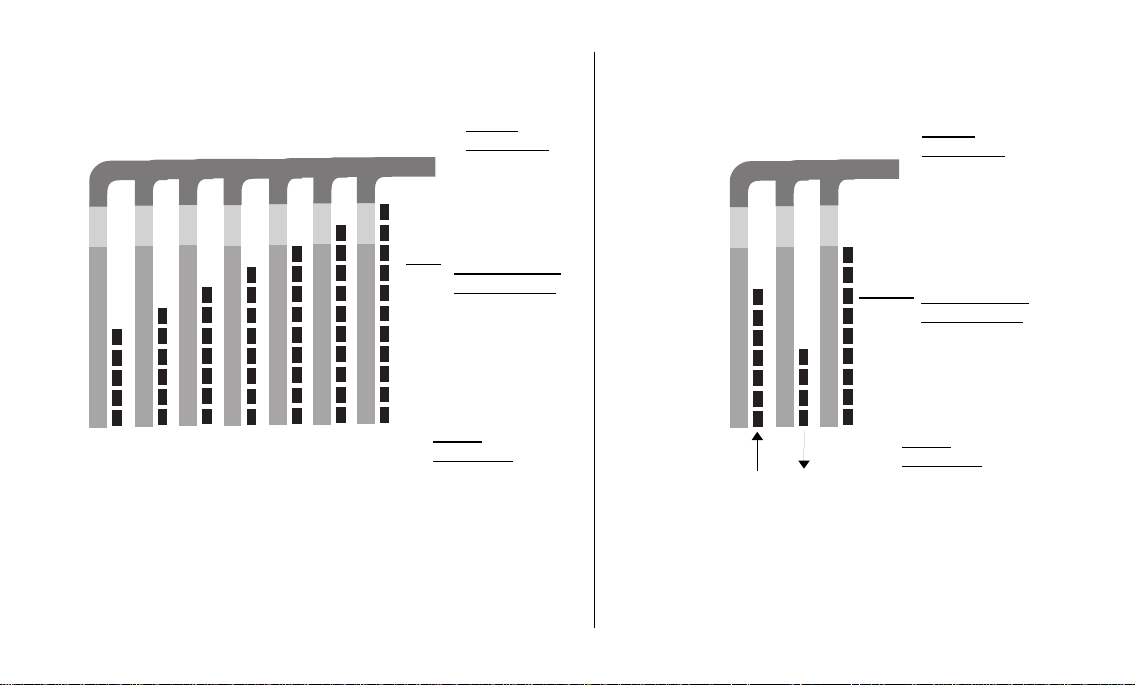
Datamax Pro Plus
C Z
etc.
DECO
DECO
C Z
160
C Z
120
DECO
C Z
80
DECO
40
DECO
C Z
20
DECO
C Z
C Z
DECO
Tissue
Half-Time
DECO
C Z
40 20
DECO
C Z
DECO
C Z
Tissue
Half-Time
Display Seen
by the Diver
Display Seen
by the Diver
NO DECO
NO DECO
etc.
6
NO DECO
7
NO DECO
NO DECO
8
NO DECO
NO DECO
NO DECO
11
No. of
Segments
9^
No. of
9
9
v
Segments
10
9
NO DECO
NO DECO
Fig. 83 - Tissue Compartment Control Fig. 84 - Tissue Compartment Control Hand-Over
83
Page 92

®
SPECIFICATIONS
NO DECOMPRESSION MODEL
Basis:
• Modified Haldanean Algorithm
• 12 tissue compartments
Data Base:
• Diving Science and Technology (DSAT) - Rogers/Powell
Performance:
• Tissue compartment halftimes (in mins.) Spencer’s “M” values
5, 10, 20, 40, 80, 120, 160, 200, 240, 320, 400, 480
• Reciprocal subsurface elimination
• 60 minute surface credit control for compartments faster than 60 minutes
• Tissue compartments tracked up to 24 hours after last dive
Decompression Capabilities:
• Decompression stop ceilings at 10, 20, 30, 40, 50, & 60 feet
(3, 6, 9, 12, 15, & 18 meters)
Altitude Algorithm:
• Based on NOAA tables
Oxygen Exposure Limits:
• Based on NOAA tables
84
OPERATIONAL MODES
• Activation/Diagnostic
• Surface -
• Temperature/Date/Time
• FO2 Set Point
• Pre Dive Planning Sequence
• Time to Fly/Desaturate
• Dive Log (Date/Nitrogen/Oxygen)
• Set -
• Alternate (On/Off)
• Audible Alarm (On/Off)
• Depth Alarm Value
• Turn Pressure Alarm Value
• End Pressure Alarm Value
• Year, Month, Day
• No Decompression Dive - Main
• Secondary
• Alternate (Large Format)
• Decompression Dive -Main
• Secondary
• Alternate (Large Format)
• Violation (conditional, delayed, & immediate)
• Gauge
• High PO2
• High O2
• Backlight (Oceanglo®/SmartGlo™)
• Hour Format (12/24)
• Hour, Minute
• Sampling Rate
• Units (Imperial/Metric)
• FO2 Default (On/Off)
• External Access (EA) - download
Page 93

SPECIFICATIONS (continued)
DISPLAY RANGE/RESOLUTION
Numeric Displays:
• Dive Number 0 - 9 1
• Depth 0 - 330 ft (0 - 99.5 m) 1 ft (.5 m)
• Maximum Depth 330 ft (99.5 m) 1 ft (.5 m)
• FO2 Set Point 21 - 50 % 1 %
• PO2 Value .01 - 5.00 ATA .01 ATA
• Dive Time Remaining 0 - 9 hr. 59 min. 1 minute
• Total Ascent Time 0 - 9 hr. 59 min. 1 minute
• Decompression Stop Time 0 - 99 min. (per stop depth) 1 minute
• Elapsed Dive Time 0 - 1 hr. 59 min. 1 minute
• Surface Time 0 - 23 hr. 59 min. 1 minute
• Dive Log Surface Interval 0 - 23 hr. 59 min. 1 minute
• Time to Fly 23 hr. 50 min. - 0* 1 minute
• Time to Desaturate 9 hr. 59 min. - 0 1 minute
• Cylinder Pressure 0 - 5000 psi (0 - 352 BAR) 10 psi (.5 BAR)
• Temperature 0 to 99°F (-9 to 60°C) 1°
GRAPHIC DIVER INTERFACE
Tissue Loading Bar Graph:
No Decompression zone (green) 9
No Deco Caution zone (yellow) 2
Decompression Warning zone (red) 1
Range: Resolution:
(* starting 10 min. after the dive)
(* starting 10 min. after the dive)
segments
Datamax Pro Plus
Oxygen Accumulation (O2) Bar Graph: segments
Normal zone (green) 9
Caution zone (yellow) 2
Danger zone (red) 1
Variable Ascent Rate Indicator (VARI):
Normal zone (green) 1 21 - 30 6.5 - 9
Caution zone (yellow) 2 31 - 40 9.5 - 12
Too Fast zone (red flashing) 5 61 + 18.5 +
Breathing Gas Time Remaining Bar Graph:
Normal zone (green) 10
Caution zone (yellow) 2
Danger zone (red) 2
Special Displays:
• Diagnostic Display Activation
• Out of Range >330 feet (>99.5 meters)
• Gauge Mode Countdown Timer 22:00 - 0:00 hours (after violation)
segments feet/min. meters/min.
0 0 - 20 0 - 6
3 41 - 50 12.5 - 15
4 51 - 60 15.5 - 18
segments
Occurrence
85
Page 94

®
SPECIFICATIONS (continued)
OPERATIONAL PERFORMANCE
Function:
• Depth ± 1% of full scale
• Timers 1 second per day
Dive Counter:
• Displays Dives #1, 2, 3, 4, 5, 6, 7, 8, 9, 0 (continues #1 to #0)
• Displays #0 for dives #10, 20, etc.
• Resets to Dive #1, upon diving (after midnight - new date)
Dive Log Mode:
• Stores 12 most recent dives in memory for viewing
• After 12 dives, adds 13th dive in memory and deletes the first dive
Altitude:
• Operational from sea level to 14,000 feet (4,267 meters) elevation
• Recalibration of depth readings from 'feet of sea water' to 'feet of fresh water'
when higher than 2,000 feet (610 meters) elevation
Power:
• Battery 1 - 3.6 volt, 1/2AA TADIRAN® model TL-2150, .95Ah,
1.0ma, Lithium (must be 3.6 v, .95Ah, 1.0ma rating)
• Shelf life Up to 10 years
• Replacement User replaceable (annual recommended)
• Life expectancy 300 dive hours (if 1 - 1 hour dive per dive day) to over
600 dive hours (if 2 or more 1 hour dives per dive day).
Yearly replacement is recommended.
Accuracy:
86
Activation:
• Manual (push button) - cannot be activated by water immersion
• Cannot be activated deeper than 4 feet (1.5 m)
• Cannot be activated at elevations higher than 14,000 feet (4,267 m)
• Needed before first dive (of an activation period).
• Automatically shuts off if no dive is made within 120 minutes after
initial activation. Reactivation required.
• Cannot be shut off manually.
Setting FO2:
• Automatically set for 'Air' upon activation
• Remains set for Air unless an FO2 numerical value is set
• Nitrox set points from 21 to 50 %
• If set for 21%, remains set for 21% until changed
• If set for >21%, reverts to 50% 10 minutes after the dive (however,
if the FO2 Default setting is OFF, the previous value set will be
retained)
ACCESSORIES
Optional items available from your Authorized Oceanic Dealer:
• Battery Kit - includes 1 battery, 1 o-ring, silicon grease
• Lens Protector - adheres to lens face, prevents scratches
• OceanLog™ for Pro Plus - PC Download Package
(hardware and software program)
Page 95

Datamax Pro Plus
GLOSSARY
Air Dive - A dive conducted using air (approximately 21% oxygen & 79% nitrogen) as the breathing gas.
Algorithm - A step-by-step mathematical formula designed to accomplish a particular result (i.e. Dive Time Remaining in the
Pro Plus).
Altitude Dive - A dive made at an elevation above sea level (2,000+ ft. / 610+ m.) where a different set of no decompression
tables is used .
Ascent Rate - The speed that a diver ascends toward the surface.
Audible Alarm - A computer emitted tone that alerts the diver tp potential danger.
Breathing Gas Time Remaining - A graphic display of remaining dive time based on a calculation of cylinder pressure and
the diver's breathing rate and depth.
C.Z. - Abbreviation for Caution Zone.
Caution Zone - The yellow sections of the bar graphs that give a visual indication of a diver’s proximity to respective limits.
Ceiling - See decompression ceiling.
Clean Dive - A dive preceded by 24 hours of no diving activity.
CNS - Abbreviation for the Central Nervous System of the body.
Competitive Dive - A dive conducted for profit or prize.
Compartment - A term applied to the hypothetical modeling of nitrogen absorption in the tissues (more accurate than the
term “tissue” because dive computer models have no direct relation to human tissues).
DCS - Abbreviation for decompression sickness, i.e., “the bends”.
DECO - Abbreviation for Decompression.
Decompression Ceiling - The shallowest depth a diver may reach upon ascent without risking decompression sickness.
Decompression Stop - The depth(s) at which a diver must pause during ascent to allow absorbed nitrogen to escape naturally
from the tissues.
Depth Sensor - An electro-mechanical device that converts water pressure into an electrical signal, that is converted to a visual
depth display.
87
Page 96

®
GLOSSARY (continued)
Diagnostic Mode - The first display seen on dive computers after initial activation during which time a self–check for internal
faults is performed.
Display - A visual readout of information.
Dive Log Mode - A computer display of previous dive information.
Dive Time Remaining - A display of the time before a diver must surface based on no-decompression status,or oxygen
accumulation status.
Elapsed Dive Time - The total time spent underwater during a dive between 5 feet (1.5 meters) on initial descent to 3
feet (1 meter) on final ascent.
FO2 - The fraction (percent / 100) of oxygen (O2) in the breathing gas mixture.
Graphic Diver Interface
™
- A feature of Oceanic dive computers. Easily understandable color coded bar graphs that indicate
diver status; green = normal, yellow = caution, red = danger.
Icon - a small pictorial representation of an operational mode
Integrated Dive Computer - A dive computer that monitors and displays cylinder pressure in addition to no decompression
information.
LCD - Abbreviation for liquid crystal display, an easily viewed low voltage display usually found on dive computers
Maximum Depth - The deepest depth attained during a dive.
Mode - A specific set of functions in a dive computer.
Multi-level Dive - A type of dive profile where the diver spends various times at different depths (opposite of a “Square Wave”
dive profile).
Nitrox - A nitrogen-oxygen breathing gas mixture that contains a higher fraction of oxygen than air.
Nitrox Dive - A dive conducted using nitrox (22 to 50 % O2) as the breathing gas.
No Deco - Abbreviation for No Decompression.
No Deco Time Remaining - The amount of dive time remaining based on no-decompression status.
No Decompression - Any part of a dive where the diver can surface without requiring a decompression stop.
O2 Bar Graph - A visual representation of oxygen accumlation on a dive computer display.
88
Page 97

Datamax Pro Plus
GLOSSARY (continued)
Oceanglo® - An Oceanic name for an instrument backlight feature.
OceanLog™ - An Oceanic name for a PC interface hardware/software package.
OTU - Abbreviation for oxygen tolerance unit. A Hamilton's Repex method term for oxygen dose.
Out of Range - The point at which a dive computer can no longer supply correct dive information.
Oxygen Tolerance - Dose or exposure to the physiological affects of elevated levels of oxygen.
Oxygen Toxicity - The adverse physiological affects of exposure to elevated levels of oxygen.
Partial Pressure - The proportion of the total pressure contributed by a single gas in a mixture of gases.
PDPS - Abbreviation for Pre Dive Planning Sequence
PO2 - Partial pressure of oxygen. The proportion of total pressure of a gas mixture contributed by oxygen.
Pre Dive Planning Sequence
meters) used when dive planning.
Repetitive Dive - Any dive that takes place within 12 hours of a previous dive.
Safety Stop - A depth at which a diver may choose, but is not required, to pause during ascent to allow absorbed nitrogen to
escape naturally from the tissues.
Smart Glo™ - An Oceanic name for an instrument backlight feature sensitive to light intensity.
Square Wave Dive - A type of dive profile where the entire dive is spent at one depth between descent and ascent.
Tissue - See Compartment.
Tissue Compartment - See Compartment.
Tissue Loading Bar Graph™ - A graphic display of simulated nitrogen absorption on Oceanic dive computers.
TLBG - Abbreviation for Tissue Loading Bar Graph.
Transducer - An electro-mechanical device in a dive computer that acts as a depth or pressure sensor.
Transition Period - The first 10 minutes of surface time after ascending above 3 feet (1 meter) from a dive.
VARI - Abbreviation for Variable Ascent Rate Indicator.
Variable Ascent Rate Indicator™ - A display on the Pro Plus that shows ascent rate as a bar graph alongside a color–coded
indicator (part of the Graphic Diver Interface).
™
- A display of available dive times at 10 foot. (3 meter) intervals from 30 to 160 feet. (9 to 48
89
Page 98
®
PRO PLUS SERVICE RECORD
THE CODE OF THE
RESPONSIBLE DIVER
AS A RESPONSIBLE DIVER
I UNDERSTAND AND ASSUME
THE RISKS I MAY ENCOUNTER
WHILE DIVING.
RESPONSIBLE DIVING BEGINS WITH
• DIVING WITHIN THE LIMITS OF MY
ABILITY AND TRAINING
• EVALUATING THE CONDITIONS
BEFORE EVERY DIVE AND MAKING
SURE THEY FIT MY PERSONAL
CAPABILITIES
• BEING FAMILIAR WITH AND
CHECKING MY EQUIPMENT BE FORE AND DURING EVERY DIVE
• KNOWING MY BUDDY'S ABILITY
LEVEL AS WELL AS MY OWN
• ACCEPTING THE RESPONSIBILITY
FOR MY OWN SAFETY ON EVERY
DIVE
90
Serial Number ________________
R
E
Date of purchase ______________
S
P
O
N
Purchased from _______________
Below to be filled in by an Authorized Oceanic Dealer:
Date Service Performed Dealer / Technician
R
E
V
I
D
E
S
L
I
B
Page 99
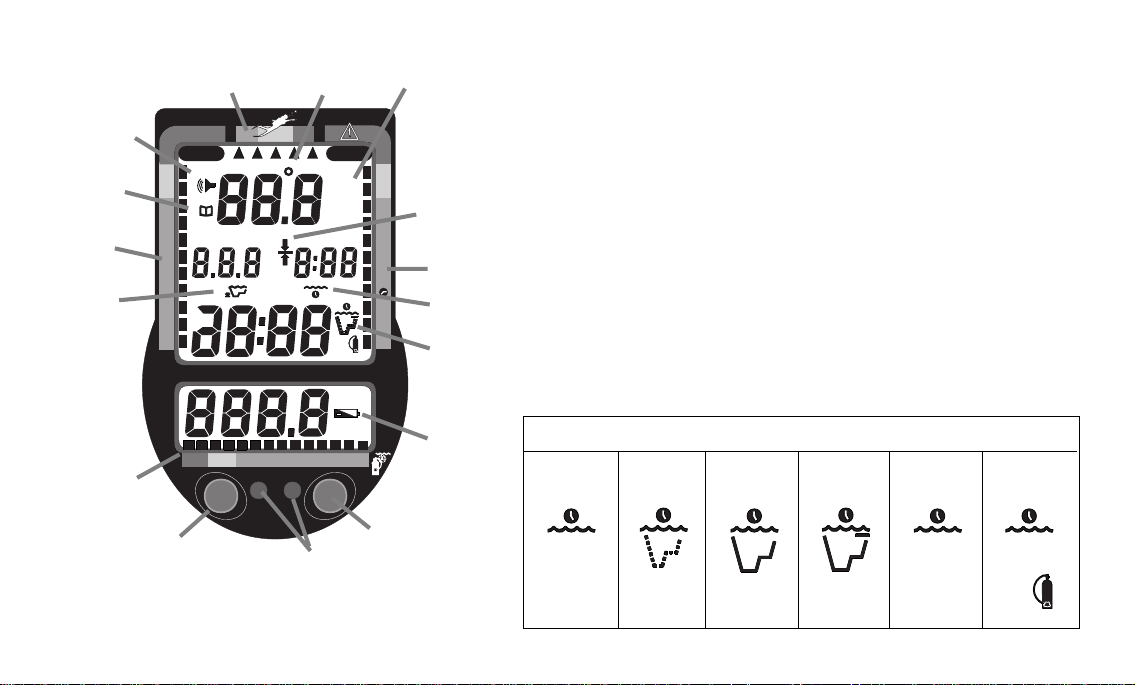
b
g
f
a
e
DECO
C Z
NO DECO
®
OCEANIC
M
FT
MAX
200 5 10 30 40 50 60
d
Smart
n
Graphic Interface Legend
Glo
h
a. Tissue Loading Bar Graph
b. Variable Ascent Rate Indicator
c. Oxygen Loading Bar Graph
d. Breathing Gas Time Remaining Bar Graph
e. Icon - Maximum Depth
f. Icon - Log Mode
g. Icon - Audible Alarm
h. Icon - Temperature
M
FT
MAX
C Z O
i
i. Icon - Deco Stop Ceiling
2
c
j
O
2
BAR
PSI
™
m
Pro PLUS
k
l
Surface
j. Icon - Elapsed Dive Time
k. Icon - Operating Mode (detail A)
l. Icon - Low Battery
m. Control Button - Select
n. Control Button - Advance
o. Sensors - Smart Glo™/ Download
Detail 'A' - Operating Mode Icons
Plan No Deco Deco Gas Time
O2 Time
o
O
2
Page 100

OCEANIC USA
2002 Davis Street
San Leandro, Ca. 94577
USA
Phone: 510/562-0500
Fax: 510/569-5404
Web: http://www.oceanicusa.com
Doc. No. 12-2141,R1 (10/25/99)© 2002 Design 1999
 Loading...