

Ocean Digital WR-330D User Manual

Wooden Internet with DAB Radio
WR-330D
User Manual
Please read this user manual carefully before using the receiver

Contents
Important Safety Instructions...........................................1
Battery Instructions.........................................................2
Location of Controls.........................................................3
Remote Control................................................................4
Switching the radio on......................................................5
Connecting to your WiFi Network.....................................6
Internet Radio..................................................................7
Bluetooth ........................................................................9
Media Center..................................................................10
FM Radio........................................................................11
DAB Radio......................................................................12
Information Center.........................................................13
Configuration.................................................................14
Trouble Shooting............................................................18
Technical Specification..................................................20

Important Safety Instructions
War ning: To preven t fire or shock ha zard, do no t expose the un it to rain or
mois ture.
To avoid e lectric al shock, do no t dismant le. Refer a ll servicin g to qualifi ed servic e
pers onnel.
1. Ple ase read al l of the instru ctions ca refully a nd retain for f uture ref erence.
2. Whe n using ele ctrical app liances , basic saf ety precaut ions shou ld always b e
foll owed.
3. This ap pliance is no t intende d for use by pe rsons (incl uding chi ldren) wi th
redu ced physi cal, sensor y or mental c apabili ties, or lack o f experie nce and
know ledge, un less they hav e been give n supervi sion or instr uction co ncernin g
use of t he applia nce by a person r esponsi ble for the ir safety.
4. This pr oduct is not a to y! Childr en should b e supervise d to ensure t hat they do not
play w ith the app liance.
5. Any re pairs mus t be done by qual ified serv ice perso nnel. There are n o userserv iceable p arts inside . Do not atte mpt to repa ir by yoursel f.
6. Kee p the unit aw ay from sharp e dges that c ould caus e damage.
7. Kee p the unit fr ee from dust an d away from h eat sourc es, direct su nlight,
humi dity, water or oth er liquid s.
8. Use o nly with th e provided ad aptor.
9. Do no t operate t he product wi th a damage d adaptor c ord or plug, or i f the produ ct
malf unction s, or is droppe d or damage d in any mann er.
10. If t he adapto r cord is damag ed, it must b e replace d by the manufa cturer, it s
serv ice agent o r similarly q ualified p ersons in o rder to avoid h azard.
11. When re moving the ad aptor plu g from the wall outlet, al ways pull d irectly on th e
plug ; never pul l on the cord.
12. Do n ot immers e the unit in wat er or other l iquids.
13. Do n ot operat e the unit if it ha s been expo sed to wate r, moisture or a ny other
liqu id in order t o prevent ele ctric sho ck, explo sion and/or i njury to yo urself an d
dama ge to the uni t.
14. Do n ot use the un it for anythi ng other th an its inte nded use.
15. Do n ot store th e unit in direc t sunligh t or in high hu midity cond itions.
16. Do n ot insert f oreign obje cts into an y opening o n the unit.
17. Un plug the ad aptor after t he unit has b een used, b efore it is cle aned and wh ilst
bein g repaire d.
18. Do n ot use liqu id cleaners o r aerosol c leaners . Use a damp clot h for clean ing.
19. Ke ep the unit a way from flamm able mate rials.
- 01 -

Battery Instructions
1. Rep lace with b atteries of t he same or eq uivalen t type as recom mended.
2. Ens ure corre ct polarity w hen inser ting batt eries.
3. Do no t expose ba tteries to ex cessive h eat sourc es such as fire an d direct
sunl ight.
4. Rem ove any bat teries from t he remote c ontrol wh en it is not bein g used for a lo ng
peri od of time to a void leakag e.
5. Kee p batteri es out of reach o f childre n.
6. Rec hargeab le batterie s should on ly be charg ed under adul t supervi sion.
7. Do no t throw in fir e, crush, pun cture, di smantle o r otherwise d amage the
batt eries.
8. Do no t expose ba tteries to he at or fire as th ey may expl ode.
9. Do no t dispose o f batteries i n your hous ehold was te. Contact y our local c ouncil
for in formati on on disposa l or recycl ing.
- 02 -
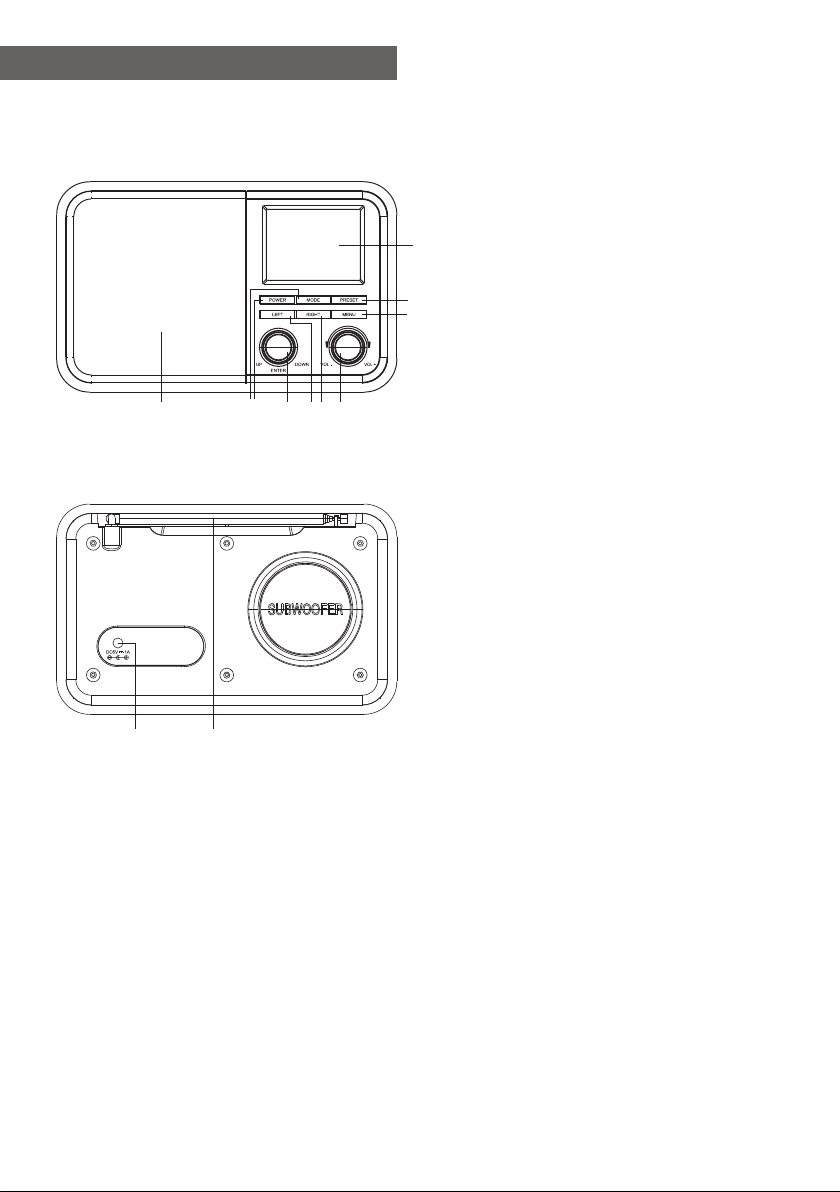
Location of Controls
2 1
10
11
12
745
1. Pow er
On/S tandby mo de
2. Mod e
9
Pres s to change t he radio mode
(Swi tch betwe en Internet r adio /
DAB ra dio / FM radi o/ Media Cent er
3
[UPn P] / Blueto oth)
6
3. Pre set
Pres s and hold to e nter favour ite
8
list
Pres s briefly to r ecall the fav ourite
list
4. Lef t
Back t o previou s menu / left cur sor
5. Rig ht
Righ t cursor / En ter edit menu
unde r Favouri te list
6. Men u
Acce ss main men u
7. Up / Do wn / Enter
Rota te to scrol l up or down on the
main m enu / Push to c onfirm or
sele ct menu opt ions / Push to st op
or res ume playb ack of radio
chan nel
8. Volume dia l
Rota te to adjus t the volume le vel
9. TFT 2 .4” color s creen
10. Sp eaker
11. DC IN j ack
12. Antenna
- 03 -
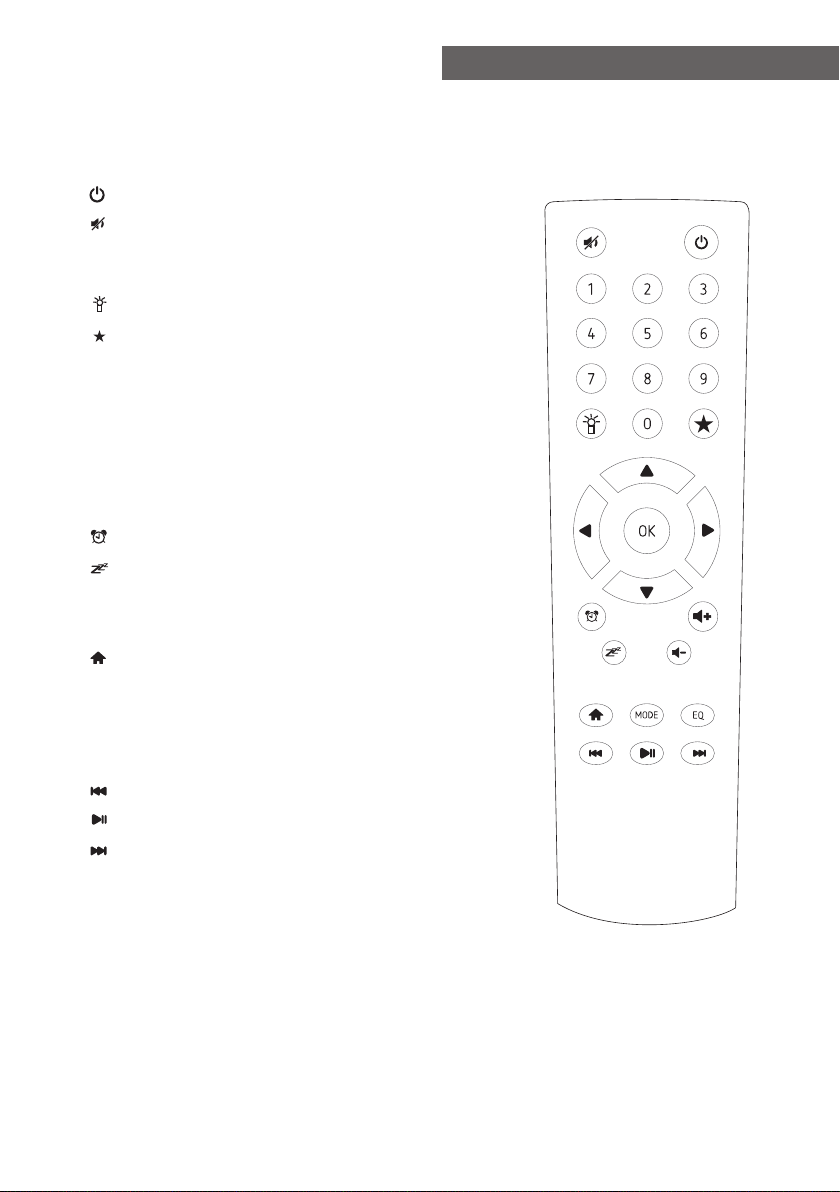
Remote Control
The re mote cont rol uses 2 x 'AAA ' batteri es(batteries not inc luded). O pen the
batt ery compa rtment and in sert the ba tteries e nsuring cor rect pola rities.
1. : Sta ndby butt on
2. : Mut e
3. 0-9 : Favorit e station key / i nput lett ers and
numb ers for WiF i Encryptio n code
4. :Di m the displ ay
5. : Fav orite but ton, adding s tation to y our
favo rite list
6. ▲ : Cur sor up
7. ▼ : Cur sor down
8. ◄ : Cur sor left / ba ck to previou s menu
9. ► : Cur sor right
10. OK : c onfirm bu tton
11. : Alarm bu tton
12. : Sl eep Timer
13. Vol+ : Vol ume up
14. Vol- : Vol ume down
15. : Ma in Menu
16. Mo de: Switc h between Int ernet Rad io, DAB
Radi o, FM Radio , Media Cente r (UPnP)
and Bl uetooth
17. EQ : E qualize r
18. : Pr evious so ng (for UPnP / Blue tooth)
19. : Pl ay/paus e (for UPnP / Bluet ooth)
20. : Ne xt song (fo r UPnP / Bluetoot h)
- 04 -
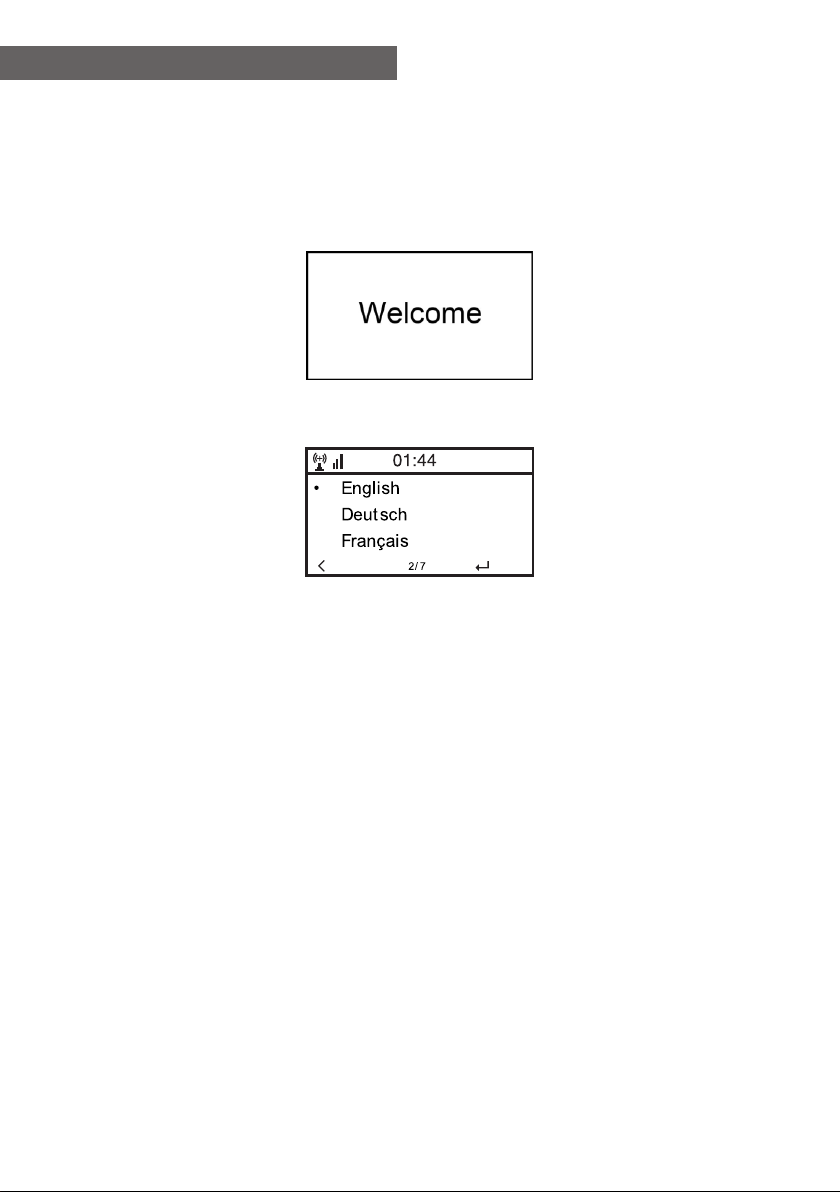
Switching the radio on
Conn ect the mai ns adaptor to t he radio un it - one end to t he DC IN on the rad io and
the ot her end to th e AC mains wall so cket.
Caut ion: Use on ly the mains ad aptor sup plied with th e radio. Co nnecting a
powe r supply wi th a different ra ting will cau se perman ent damage to t he radio
and ma y be hazard ous.
The ra dio will po wer up and disp lay Welcome :
Sele ct the lang uage for the ra dio menu:
It wil l ask to set th e <Check Netw ork when Po wer on>, it is su ggested t o choose
<Yes> . Th e radio will al ways chec k the avail able WiFi net work auto matical ly.
- 05 -
 Loading...