

Ocean Digital wr-282cd User Manual

User Manual
WR-282CD
Please read this user manual carefully before using the receiver.
1
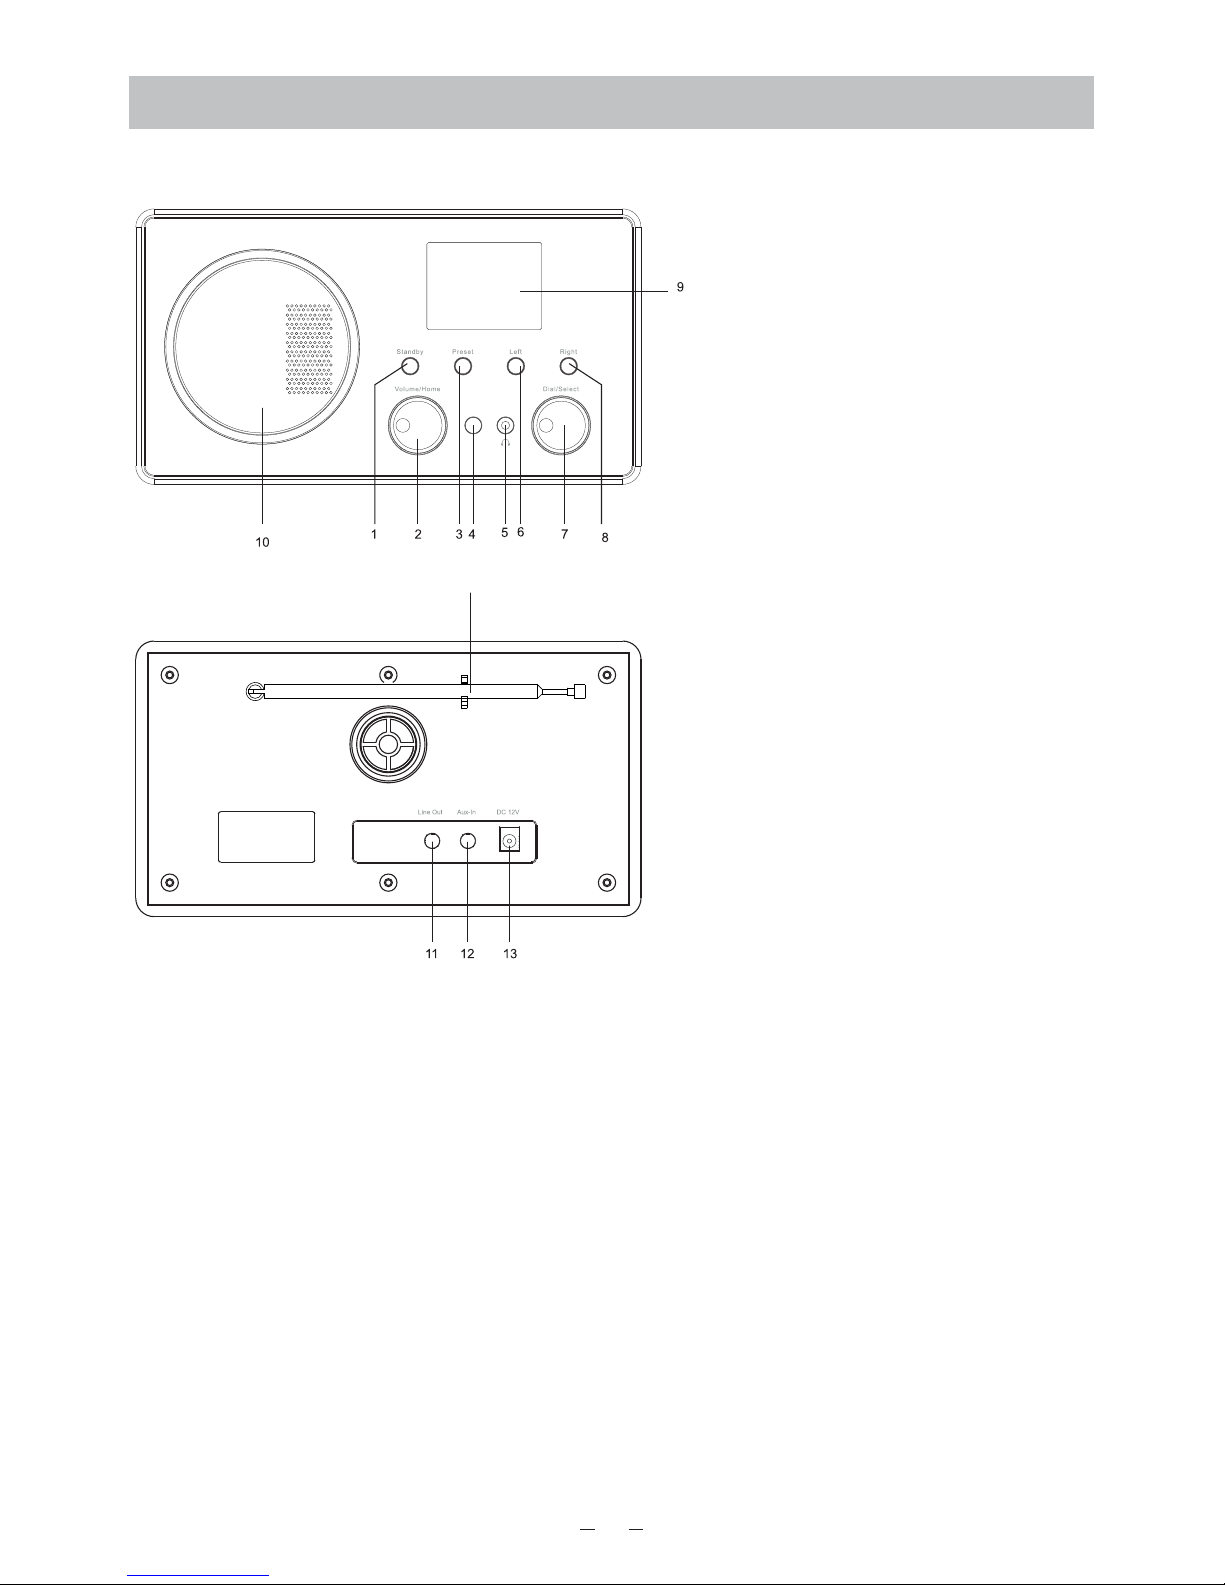
1. Standby button
2. Volume/Home
Rotate to adjust the volume
level/Press the knob to return
Home (main menu).
3. Preset
Long press to add to favourite
list. Press it briefly to recall the
preset list.
4. Infrared remote sensor
5. 3.5 mm earphone jack
6. Left
Left cursor/Press to return to
previous menu.
7. Dial/Select
Rotate to browse the
menu/Return to the station
list/Press to confirm a selection.
8. Right
Right cursor/Press to return to
the station list/View radio info
9. 2.4” color display
10. Speaker
11. Line out Jack
12. Aux-In Jack
13. DC IN Socket
14. Telescopic antenna
Location of Controls
14
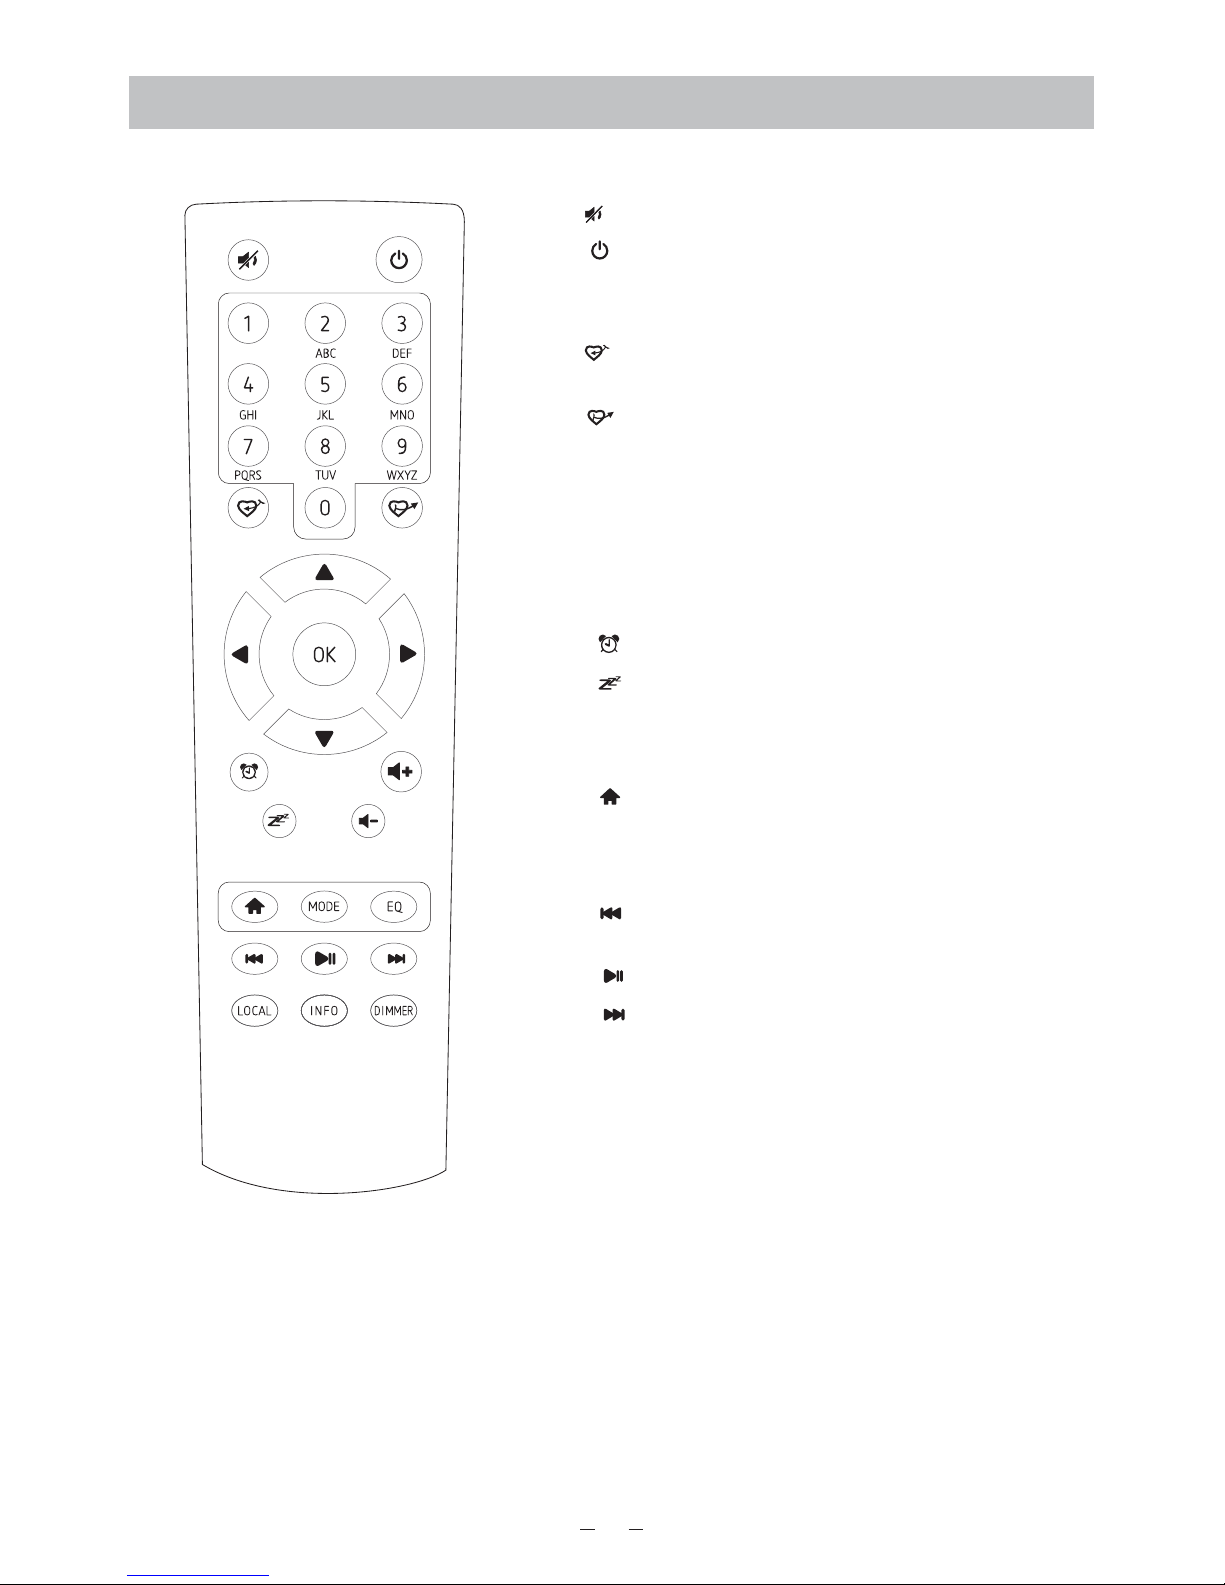
Remote Control
1. : Mute
2. : Standby button
3. 0-9: Favorite station key / input letters and
numbers for WiFi Encryption code
4. : Preset the current playing station to
Favorite
5. : Recall the favorite list
6. ▲: Cursor up
7. t : Cursor left / back to previous menu
8. u : Cursor right
9. ▼: Cursor down
10. OK: confirm button
11. : Alarm button
12. : Sleep Timer
13. Vol+: Volume up
14. Vol-: Volume down
15. : Main Menu
16. Mode: Switch between the modes of radio
17. EQ: Equalizer
18. : Previous station on the list/previous
track on UPnP
19. : Play/pause for internet radio
20. : Next station on the list/next track on
UPnP
21. Local: Access the local station list (Local
area set up in Configuration)
22. Info: View the detailed info of the radio channel
or the music info under UPnP.
23. Dimmer: Dim down the backlight of display
2

Key“0”―― 0,‘DEL’
Key“1”―― ‘1’->‘@’->‘ ’(space) ->‘!’-> “ (double quotes)
->‘#’->‘$’->‘%’->‘&’-> ’(single quotes)->‘( ’
->‘) ’->‘*’->‘+’->‘, ’->‘-’->‘.’->‘/’->‘:’->‘;’->‘<’->‘=’->‘>’->‘?’->‘[’->‘\’->‘]’->‘^’ >‘_’->‘`’->‘{’->‘|’->‘}’->‘~’
Key “2”―― 2,A,B,C,a,b,c
Key“3”―― 3,D,E,F,d,e,f
Key“4”―― 4,G,H,I,g,h,i
Key“5”―― 5,J,K,L,j,k,l
Key“6”―― 6,M,N,O,m,n,o
Key“7”―― 7,P,Q,R,S,p,q,r,s
Key“8”―― 8,T,U,V,t,u,v
Key“9”―― 9,W,X,Y,Z,w,x,y,z
Remark: press ’►’ to move to next character and press ’OK’ button to confirm.
You can also press▲▼ to change the character /number, then press the right key to confirm
the entry.
After you finish the entry, press the select button to confirm.
Remote control character list
Getting started
Connect the mains adaptor to the radio unit, one end to the DC IN on the radio and the other
end to the AC mains wall socket.
Caution: Use only the mains adaptor supplied with the radio. Connecting a power
supply with a different rating will cause permanent dam age to the radio and may be
hazardous.
The display on the front of the radio will light up and show:
Then you can select your prefer language on the radio.
It will ask you if you want to Enable the <Check Network when Power on>, it is suggested to
choose <Yes>. Then the radio will always check the available WiFi network automatically.
Welcome
• English
Deutsch
Fr ançais
< 2/7 8
01:44
3
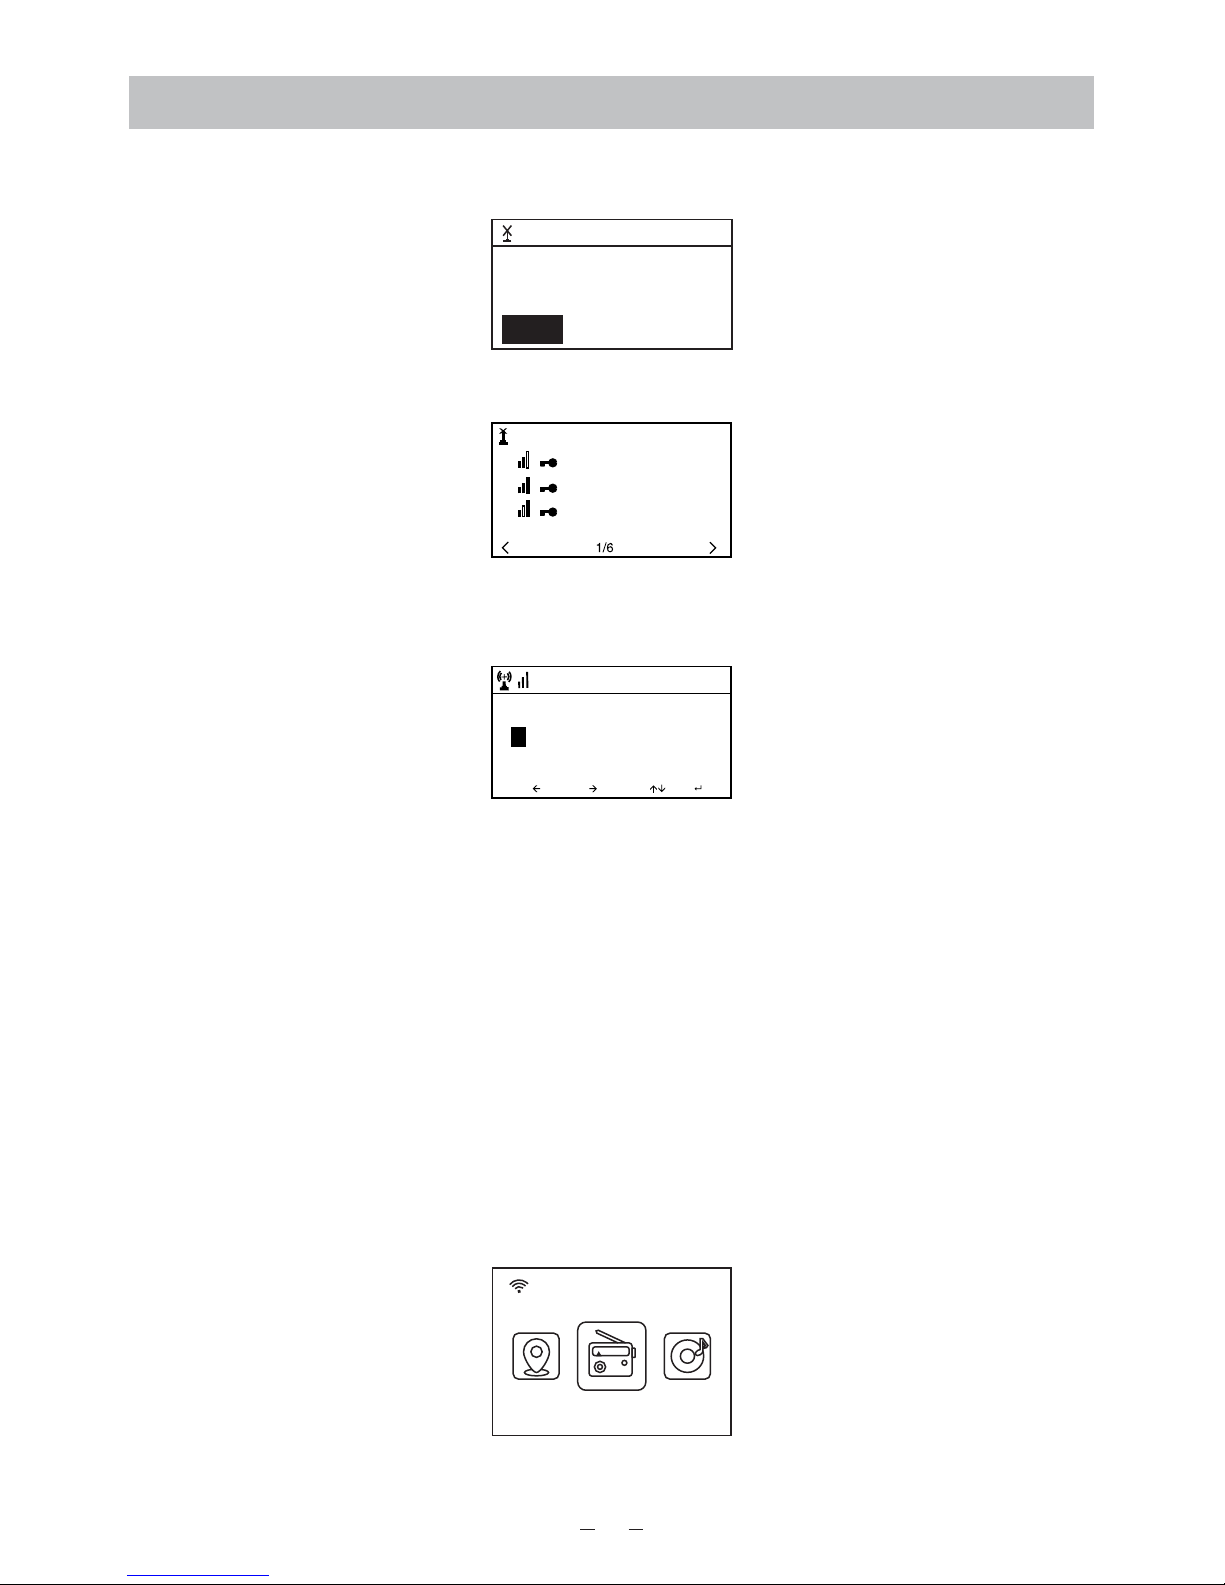
Connecting to your WiFi network
The screen below will appear. You can choose <Yes> to proceed to search for the available
WiFi network. If your router has the WPS function, you can select <Yes(WPS)> to proceed.
It will then start scanning the network. After the search is done, it will display a list of the
available router.
Choose your router from the list, enter the WEP(Wired Equivalent Privacy) or WPA(Wi-Fi
Protected Access) code. If your network is not configured to be with the WEP or a WPA code,
the unit will connect to the router automatically.
Note: The encryption code would have been set up by the person who set up and
configured your network.
Please follow the steps below to enter the encryption code of your router using the buttons on
the radio:
- Rotate the <Dial/Select> knob to browse the character
- Press the right button to skip to the next entry
- After you finish with the entries, press the <Dial/Select> knob to confirm. Do NOT press the
right button again.
To use the remote control entering the password, please refer to the “Remote control
character list” to learn how to select the characters. Press the “►” button for the next entry,
press “◄” button to delete the character or to amend it. When the last character is entered,
press the <OK> button this time.
Do NOT press the “►” button.
The radio will start connecting to the network.
After the router is connected successfully, it will display the main menu as follow:
You can now start enjoying the internet radio.
01:01
Would you like to
configure Networ k now?
Yes(WPS) NOYes
01:44
Linksys
Homeaudio
Demo
MOVE INPUT: OK
Enter Password
1/1
16:23
08:58
Int ernet R adio
5
4

Internet Radio
Choose <Internet Radio> from the menu, you can see several listed options.
To start listening the radio stations worldwide, select <Radio Station/Music>.
My Favorite
This is to show the list of your Favorite stations which have been assigned to the presets.
To preset a station:
While you are playing the favorite station, long pressing the <Preset> button ( on
the remote) and the <Add to My Favorite> menu will display. Press the rotary knob to
confirm. The playing station will be added to the preset list automatically.
The presets will be stored in ascending order. You can store up to 250 presets.
Note: Presets 1 to 5 are reserved for your own choice of the dedicated radio
channels. The preset will be stored from no. 6 onwards, you can scroll to choose
no. 1-5 at your preference.
For DAB, you can store up to 100 presets.
For FM, you can store up to 20 presets.
You can edit your favorite list anytime. Go to Internet radio> My Favourite or press
the <Preset> button ( on the remote), When it displays the list of favorite stations
then press the right button. The following options will display:
Delete – To delete the selected station
Shift up- To shift the selected station by one level up on the ranking
Shift down – To shift the selected station by one level down on the ranking
Rename – To rename the selected station
Play – press and play the selected station
Choose the radio station that you want to make with the above changes. Then press
the Right key, it will enter into the list with the options listed above. Then choose your
desire action.
To recall a preset station:
Press the <Preset> button ( on the remote) briefly and choose your desire station
Radio Station / Music
Select this option, then you can select your desired radio station by Category, Genre or
Location., etc.
Press r otary knob to con firm
The sym bol on the top row me ans
stati on is added to preset list
Delet e
Shift U p
Shift D own
< 1/5 >
iRadio
5
 Loading...