

Ocean Digital WR-10 User Manual
WR-10
UserManual
Internet Radio Tuner
Please read this user manual carefully before using the receiver

Location of Controls.......................................................1
Remote control..............................................................2
How to input security code for your wireless network.........3
1. To start up................................................................5
2. Network Setup..........................................................5
3.Overview of features and functions.............................6
4. Internet Radio..........................................................7
5. Media Centre............................................................9
6. DAB+/DAB Radio......................................................9
7. FM Radio...............................................................10
8. Bluetooth playback..................................................11
9. Alarm Setting..........................................................11
10. Sleep Timer Setting.................................................12
11. Configuration..........................................................12
12. Remote control via PC / Smart phone
- Tuning internet radio & manage favourite................16
13. Trouble Shooting....................................................19
Helpful Tips.................................................................20
Technical Specification............................................... ..21
Contents

1
2
3
4
7
8
9
10
6
5
11
12
13
14
16
17
18
Name
Operation
Power button
Press to enter/exit from Standby mode
Headphone jack
6.35 mm Headphone output with volume
controlled by dial (with line-out, volume is
controlled by amplifier)
Power LED
Lit when DC-in has valid power
IR sensor
Receives Infra red signal from remote control
LCD
2.4”TFT color display
Tune/Select
Press to display main menu to view different
radio modes / setting options
Press to exit to previous menu / delete entry of
character's input/ cursor left
Press to cycle through the display option in radio
playing mode / Enter edit menu in Favourite
list / cursor right
Rotate to navigate menu
Rotate to adjust volume of headphone
Press to select an item
Wi-Fi antenna
LAN jack
Digital out – Optical
Digital out - Co-axial
15
Line out - R
Line out - L
Antenna jack for DAB/FM
DC-IN Jack
Power On/Off switch
External Wi-Fi antenna
10/100 Mbps RJ45
- 01 -
Menu
Back
Forward
Location of Controls
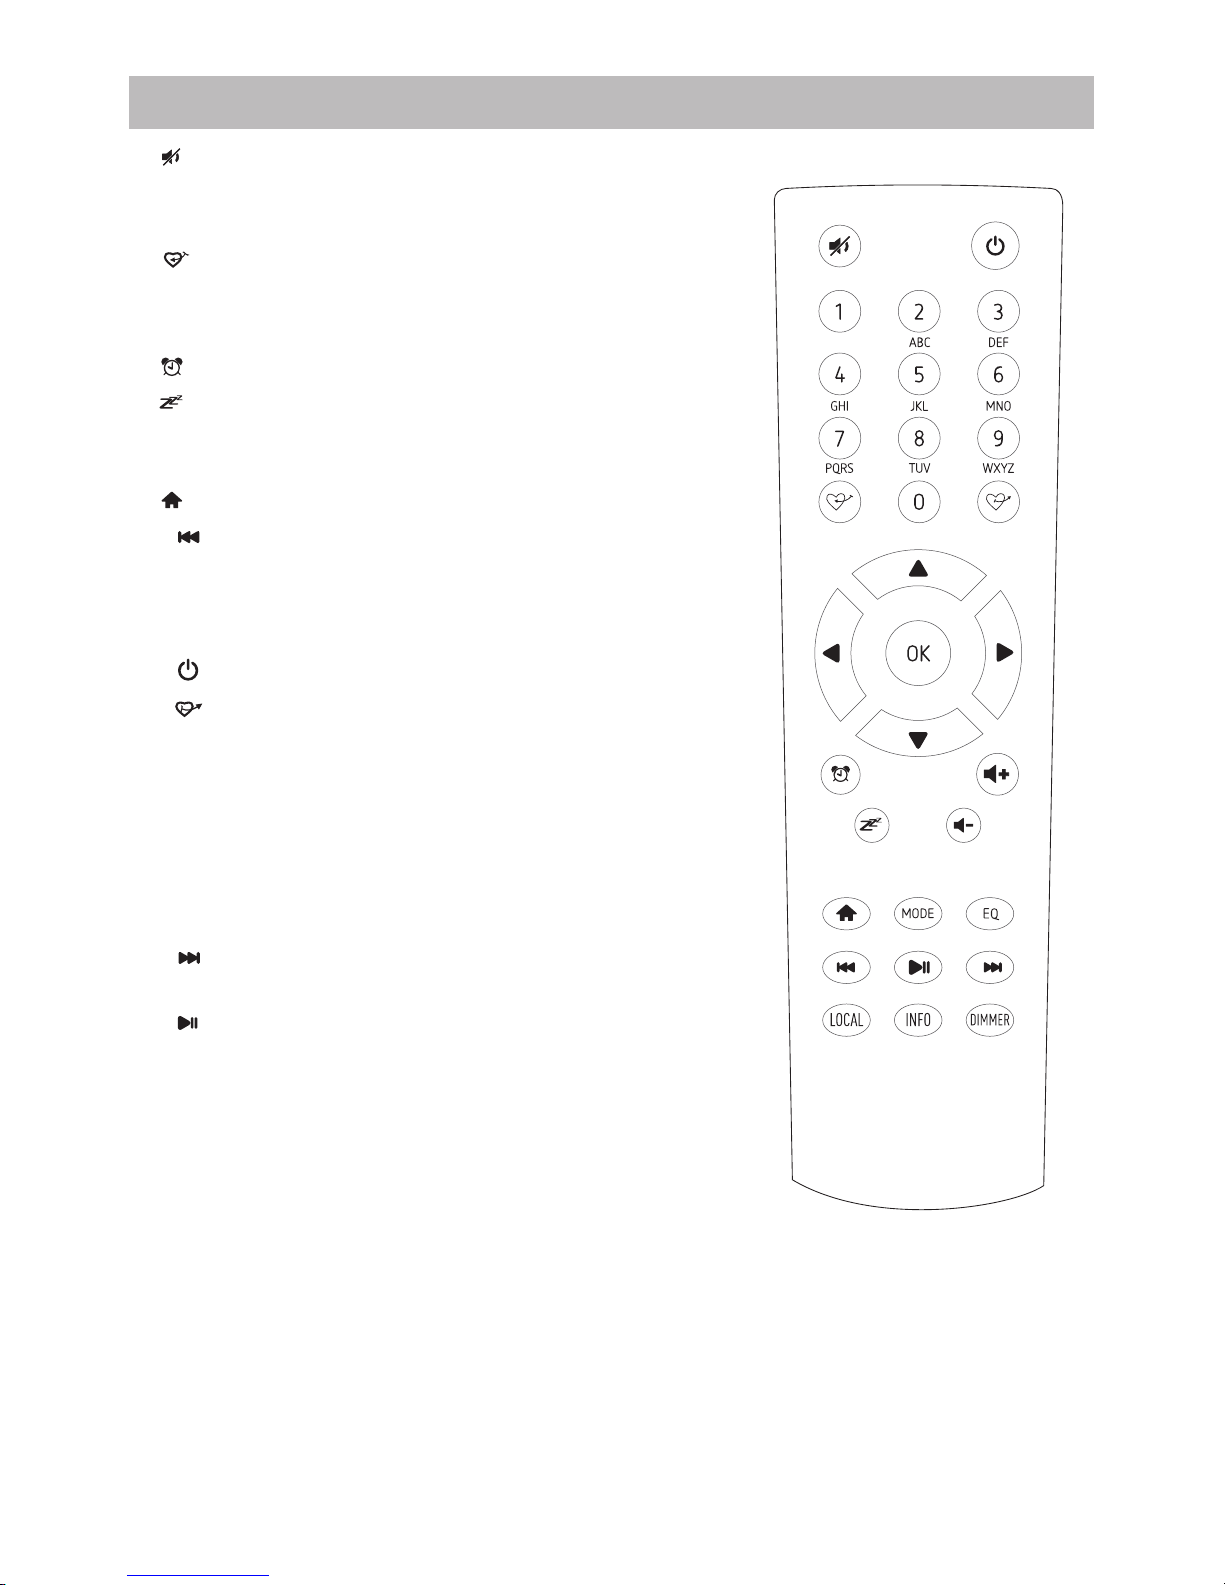
1. : Mute
2. 0-9: Input index number on the list / input characters
for WiFi security code
3. : Preset the current playing station to Favorite
4. ▲ : Cursor up
5. ◄ : Cursor left / back to previous menu
6. : Alarm button
7. : Sleep Timer
8. Mode: Switch between Internet
radio/DAB/FM/Bluetooth/Media Centre
9. : Main Menu
10. : Previous station on the list/previous track on
bluetooth/Media Centre
11. Local: Access the local station list
(Local area set up in Configuration)
12. : Press to toggle between Standby and Operation
13. : Recall the favorite list
14. OK: confirm button
15. ► : Cursor right
16. ▼: Cursor down
17. Vol+: Volume up
18. Vol-: Volume down
19. EQ: Equalizer (for Headphone out and Line out only)
20. : Next station on the list/next track on
bluetooth/Media Centre
21. : Play/pause for Bluetooth/Media Centre
Play/stop for Internet radio
22. Dimmer: Access the Dimmer menu to adjust the
brightness of the display
23. Info: Quick access to Network and System
information
- 02 -
Remote control

- 03 -
How to input security code for your wireless network
Using remote control
On the alpha-numerical keypad, press each button repeatedly to cycle through the letters,
numbers and symbols as listed below.
To input a character, scroll to the correct one and when it is highlighted, press the ► button to
input the next character. When it comes to the last character of the password and it is
highlighted, press [OK] to confirm.
Button 1: 1 and different kind of symbols !@#$%^&*()_+[]{};:'"\|,./<>?
Button 2: 2ABCabc
Button 3: 3DEFdef
Button 4: 4GHIghi
Button 5: 5JKLjkl
Button 6: 6MNOmno
Button 7: 7PQRSpqrs
Button 8: 8TUVtuv
Button 9: 9WXYZwxyz
Button 0: 0
Using control button on the Tuner
Use the [Tune/Select] knob to scroll through the characters, when the correct one is
highlighted, press [Forward/ ► ] button to input the next character. When it comes to the last
character of the password and it is highlighted, press [Tune/Select] to confirm.
Note: The security code is case sensitive.
- 04 -
Before you start
Please ensure the following is ready:
You have a broadband internet connection.
A wireless broadband router is connected to the internet successfully. The radio supports
Wireless B, G and N connection (Wireless N router can also be used with the setting on B or
G).
You know the Wired Equivalent Privacy (WEP) or Wi-Fi Protected Access (WPA) data
encryption code/password. You need to key in the correct code when the radio is connected to
the wireless router for network connection. If you do not know the code/password, please
contact the person /technician who set up the router/network for you.
The radio can work via Wireless network connection (Wi-Fi connection) and Wired connection
(Ethernet Rj45).
Precautions
The radio should not be used in a high temperature or high humidity environment over
prolonged periods of time as this may damage the unit.
Keep the radio away from liquids as it may get damaged. Please switch off the radio
immediately if water or liquids is spilled into the radio. Consult with the shop you bought this
radio for any question.
Avoid using or storing the unit in dusty or sandy environment.
Do not open and repair the radio by yourself.
Use only the AC adaptor supplied with the radio. Connecting a power supply with a different
rating will cause permanent damage to the radio and may be hazardous.
Clean only with dry cloth.

- 05 -
1. To start up
2. Network Setup
• Remove internet radio tuner (called Tuner hereafter) from the package box.
• Plug in the DC adapter and switch the Power on/off switch (on the rear cabinet) to ON. Press
[ ] button on the front (Power LED will be briefly lit).
◦ Caution: Use only the adaptor supplied with the radio. Connecting a power supply with a
different rating will cause permanent damage to the radio and may be hazardous.
• The Tuner is intended to connect with external powered speaker. It does not have amplifier
and speaker driver built-in. Please connect your stereo through the Analogue output or
Digital output located on the rear panel of the Tuner for listening.
Note - All radio modes work through Analogue and Digital output, except DAB and FM which
work only with Analogue output.
Internet connection can be setup via Wired LAN or Wireless LAN (WiFi).
Your Tuner requires a broadband Internet connection through wired Ethernet or WiFi. The
easiest way is use a CAT 5 or CAT 6 cable to connect through wired Ethernet to a Wifi router,
which connects to an Adsl modem or a cable modem provided by your ISP.
Wired LAN (Ethernet)
For Wired Ethernet connection to a router with DHCP enabled, the network configuration for
Internet connection is automatically done and the Tuner can be used for Internet radio and
UPnP sharing without user interaction. When the network is connected, the Ethernet icon
will appear on the top left corner.
Wireless LAN (Wi-Fi)
• If this is first time use, the Configure Network wizard will be displayed. Choose Yes to start
configuring network. Press the [Back/ ◄ ] button to highlight Yes and press [Tune/Select] to
confirm.
• Select Add/Remove AP from the list, use the [Tune/Select] knob to scroll and press it to
confirm, then choose Add AP (Scan):
• It will start scanning the available Wi-Fi routers around. Scroll to your network and press
[OK] to confirm. If your wifi network has a security code protected, it will ask you to enter the
passphrase/password. Please refer to the above section 'How to input security code for
your wireless network' on P.3.
Note: The password is case sensitive. Please consult with the one who setup your network if
you don't know the password.
Confi gure Netwo rk?
<Yes> No
Add AP
Remove AP
Add/Remove AP
AP:[ ]
 Loading...