

Ocean Beach DB-1 User Manual
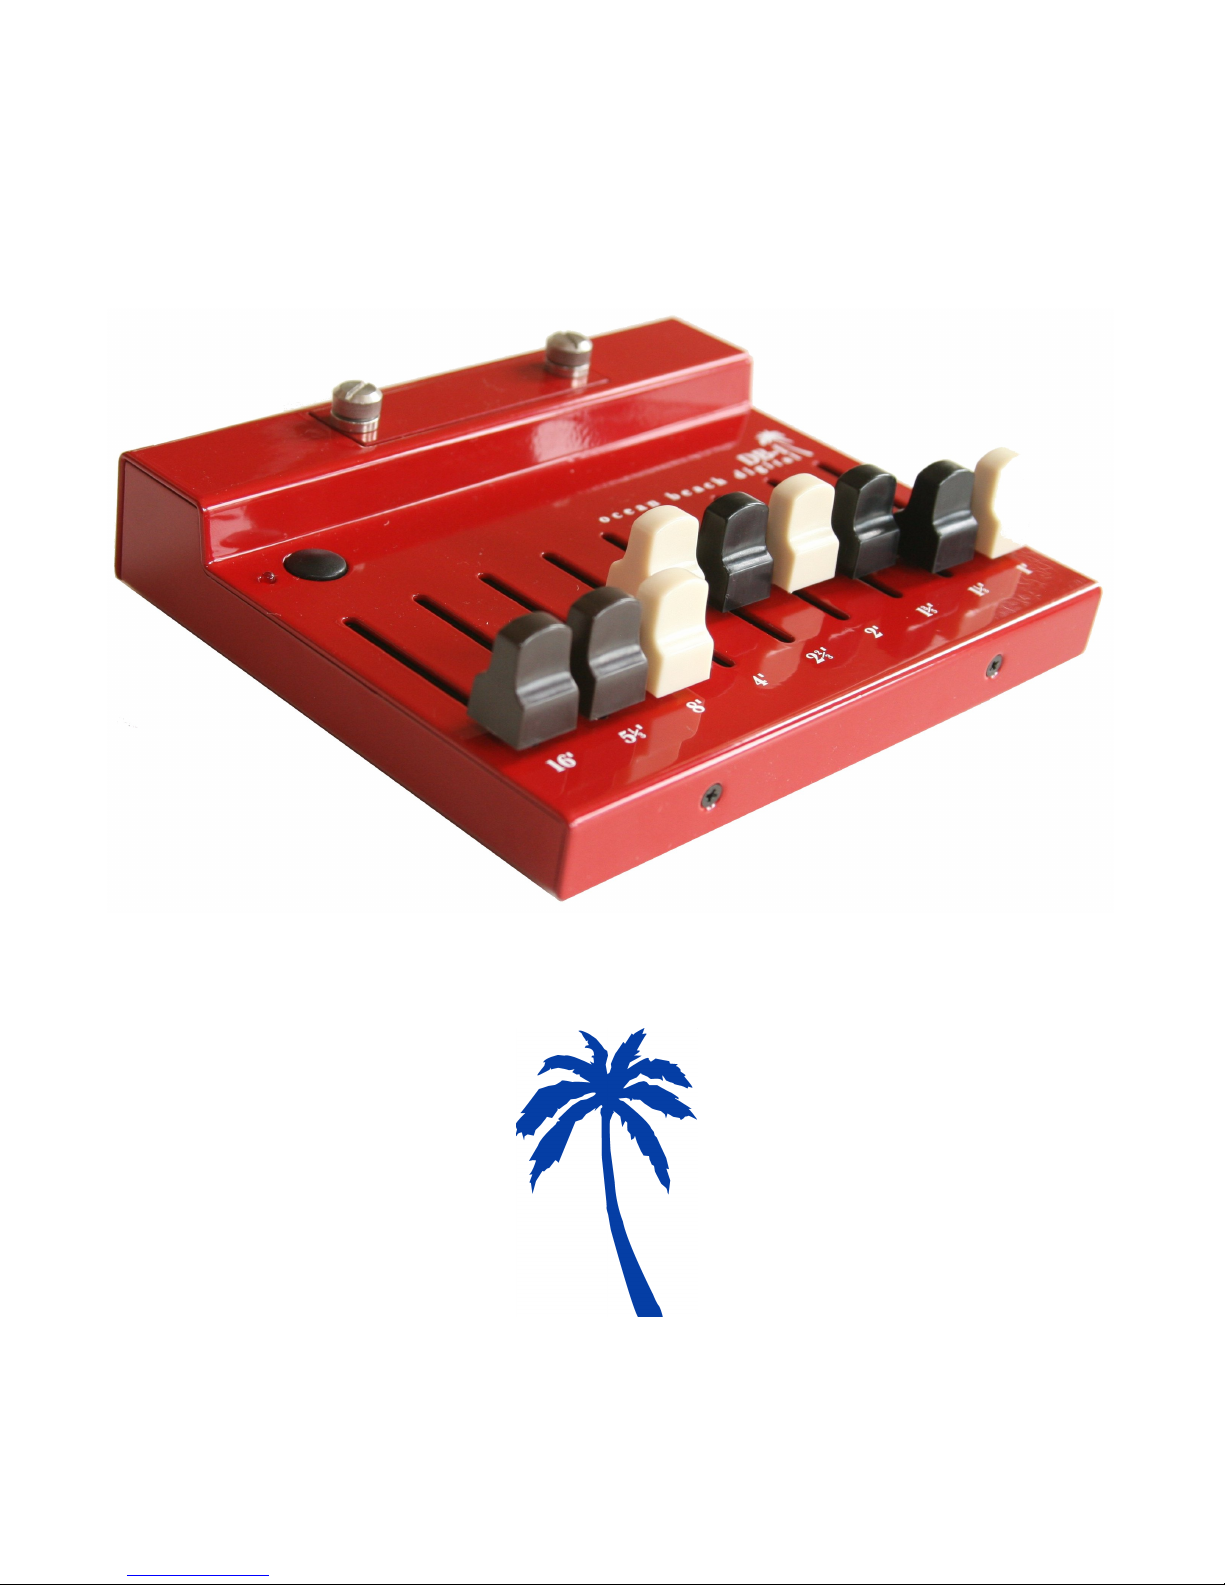
Drawbar Controller DB-1
User Manual
Ocean Beach Digital
www.oceanbeachdigital.com
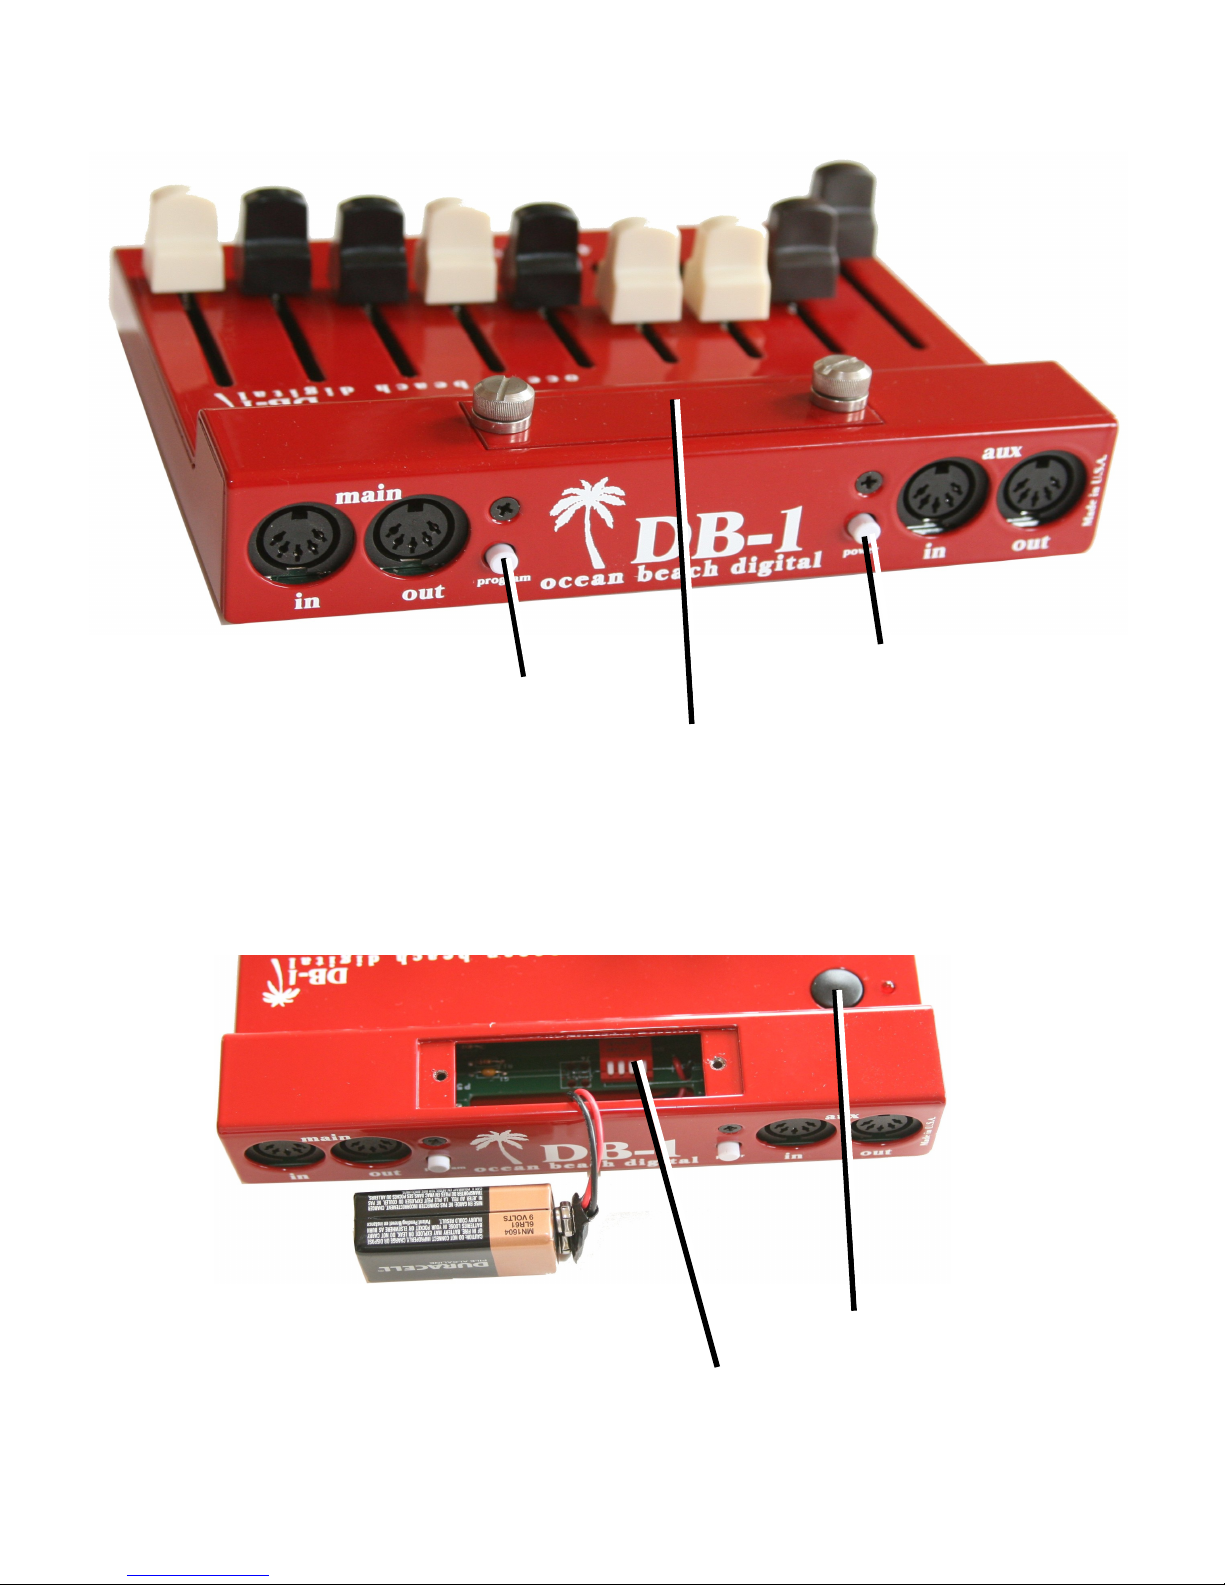
Program
Button
Top Button
Power
Button
DIP Switches
Battery
Door

Thank You
Thank you for your purchase of the DB-1 Drawbar Controller from Ocean Beach Digital. The DB-1
Drawbar Controller was created specifically to complement the Nord and will greatly enhance the
experience of playing organ sounds on these keyboards. Now you can finally reach over and grab a
handful of drawbars just like you would on a B-3.
A lot of effort was put into making the DB-1 as easy to set up as possible. However, the various Nord
organ keyboards use different MIDI mappings for drawbar events, so the DB-1 needs to know which
Nord you are using. This is accomplished by setting some small switches (called DIP switches) inside
the battery compartment. It is necessary to set these switches in the correct position for the DB-1
Drawbar Controller to work correctly with your keyboard. It may also be necessary to program
the MIDI channel, depending on your keyboard setup. Please note – if you do not configure the
DB-1 Drawbar Controller correctly, it will not work for your setup. And nobody wants that. So please,
take care to follow the steps in this manual to set everything up. You will only need to configure your
DB-1 Drawbar Controller(s) once, and then these settings are stored permanently unless you change
them later.
One quick note: throughout this manual you will encounter terms like “Nord,” “Electro,” “Stage EX”
and so on. These are all trademarks of Clavia DMI AB, the Swedish company that manufactures these
keyboards. The DB-1 Drawbar Controller is manufactured in San Diego, California by Ocean Beach
Digital. Words like “Nord” and “Electro” are used for descriptive purposes in order to explain how to
use this DB-1 Drawbar Controller with their various products. You should understand that the two
companies not affiliated in any way, nor should you infer any such affiliation.
Once again, thank you for your purchase. We hope you enjoy your new DB-1 Drawbar Controller.
Getting Started
OK, you’re probably eager to get going with your new DB-1 Drawbar Controller, so we’ll try to make
this as quick and painless as possible. Here are the five steps you need to follow:
1. Determine your keyboard & drawbar configuration
2. Set the DB-1 Drawbar Controller DIP Switch(es) accordingly
3. Make all your MIDI connections
4. Check for power
5. Teach your DB-1 Drawbar Controller(s) what MIDI channel(s) to use
That’s it. So we will tackle each of these steps one at a time.
1

Step 1: Determining your keyboard and drawbar configuration
Because you just bought this DB-1 Drawbar Controller, it’s probably safe to assume that you have a
Nord keyboard that you want to connect it to. There are three “families” of Nord keyboards this
Controller can talk to:
!
The Electro family (Electro, Electro 2, Electro 3, Electro 4, Electro Rack)
!
The Stage family (Stage, Stage EX, Stage 2)
!
The organ family (C1, C2)
and as luck would have it, these three families use different MIDI messages for drawbar commands.
Also, you may be using one or two DB-1 Drawbar Controllers with your keyboard, and that affects how
you set up your Drawbar Controllers.
So the first step is to figure out what your configuration is. Are you using one DB-1 Drawbar Controller
with an Electro? Are you using two Drawbar Controllers with a C1? That sort of thing. If you’re using
two DB-1 Drawbar Controllers, you will need to designate one controller as the Upper manual
drawbars, and the other one the Lower manual drawbars.
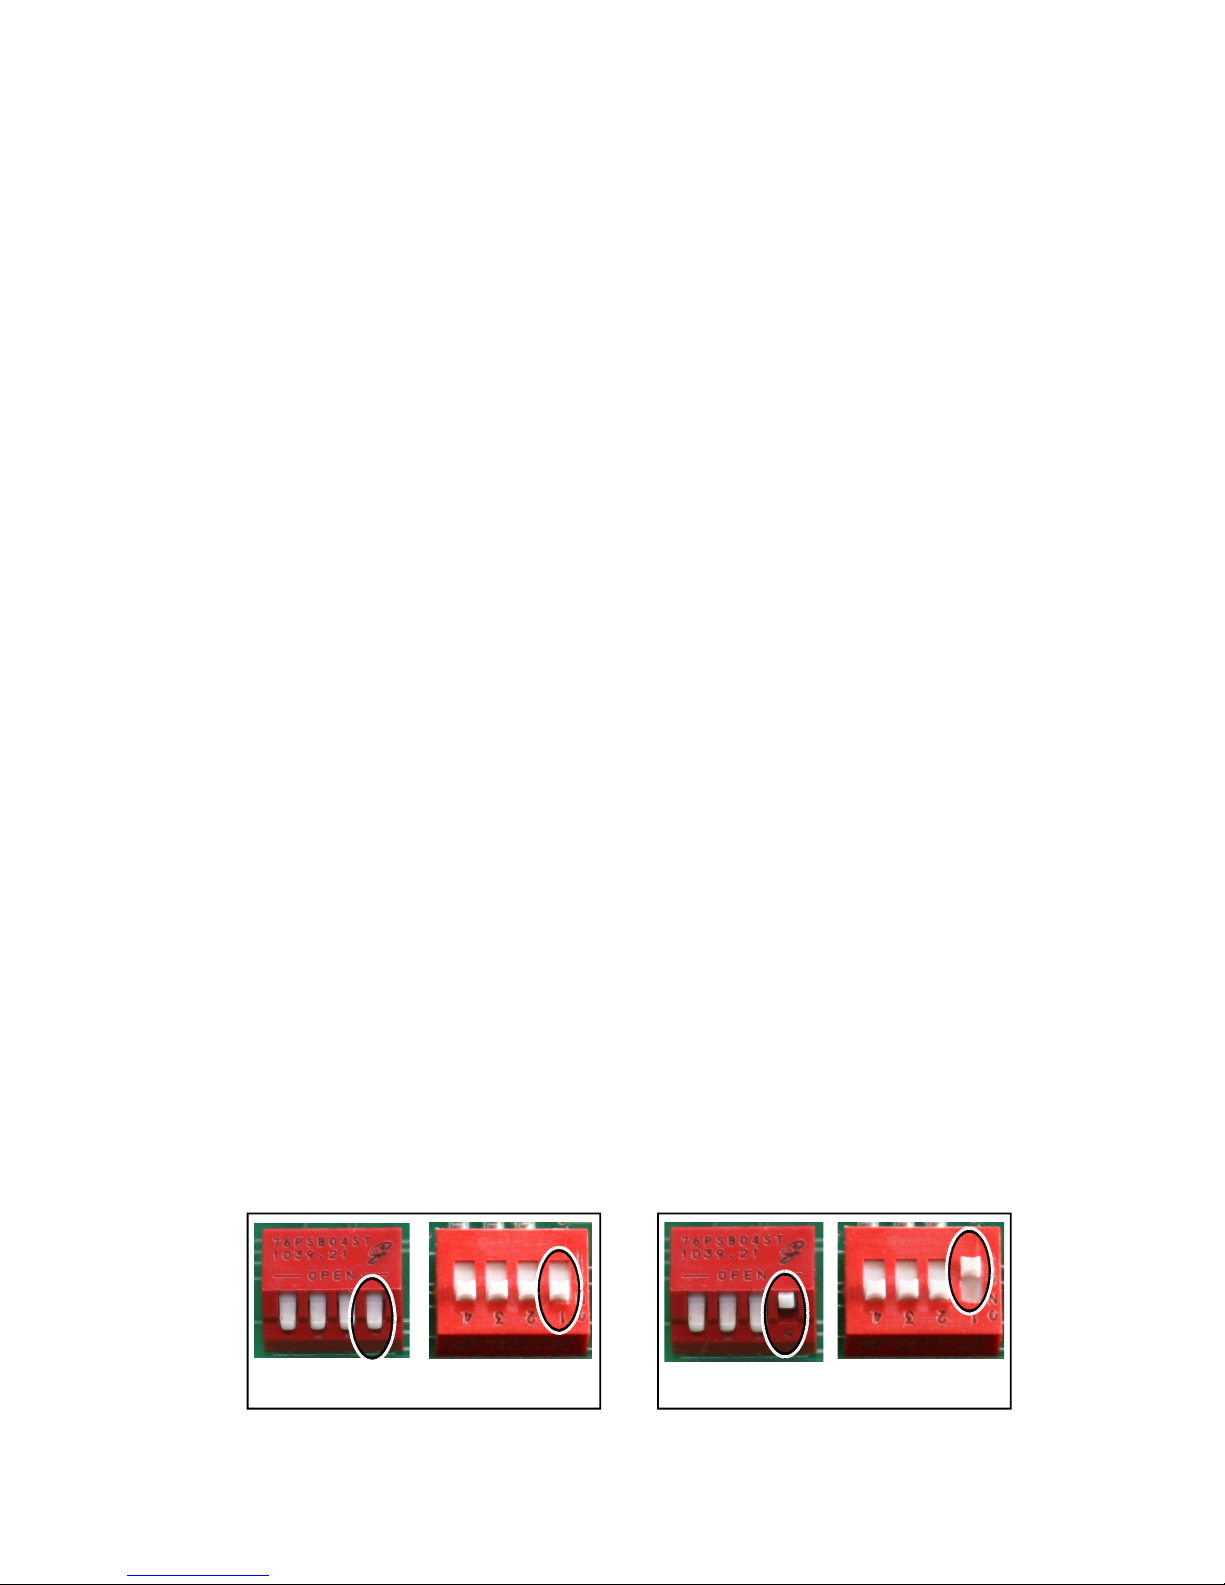
Step 2: Setting the DIP Switches
Inside the battery compartment of your DB-1 Drawbar Controller there’s a set of four small white
switches called “DIP switches.” For each Drawbar Controller in your setup, you will need to put those
switches in the correct position. Otherwise, your controller will send the wrong MIDI commands and
all kinds of crazy things will happen. You don’t want that.
The photos and descriptions that follow describe the switches as viewed from the rear of the Drawbar
Controller, looking down into the battery compartment. So the MIDI jacks should be facing towards
you and the front of the unit away from you. We are only concerned with the three left-most switches as
viewed from the rear of the DB-1.
Depending on when your DB-1 was manufactured, the DIP switches may be toggle / paddle style
switches, or they may be sliding switches. Both styles are shown here. As you can see they are very
similar, but use the one that most closely resembles the switches in your DB-1.
All the DIP switch configurations are summarized on the next page. Note that the first group of three
are the settings when you’re using a single DB-1 Drawbar Controller, and the second group of three are
for when you’re using two of them.
2

Electro / Electro 2 / Electro 3 / Electro 4
Stage / Stage EX / Stage 2
C1 / C2
o n e D B - 1 c o n t r o l l i n g b o t h m a n u a l s
MIDI channel is set automatically
MIDI channels must be programmed in Learn mode
MIDI channel(s) must be programmed in Learn mode
down-down-down
down-down-up
down-up-down
lower manual for Electro / 2 / 3 / 4
t w o D B - 1 s - o n e f o r e a c h m a n u a l
each manual for C1 / C2
upper for Electro / Electro 2 / 3 / 4
Stage / Stage EX / Stage 2
MIDI channel must be programmed in Learn mode
MIDI channel must be programmed in Learn mode
MIDI channel must be programmed in Learn mode
down-up-up
up-down-down
up-down-up
GSi VB3 / Jupiter / Kronos / Kurzweil
Hammond-Suzuki / other
MIDI channel, polarity, and Control Change number
are programmed via Configurator App
up-up-up
s p e c i a l
3
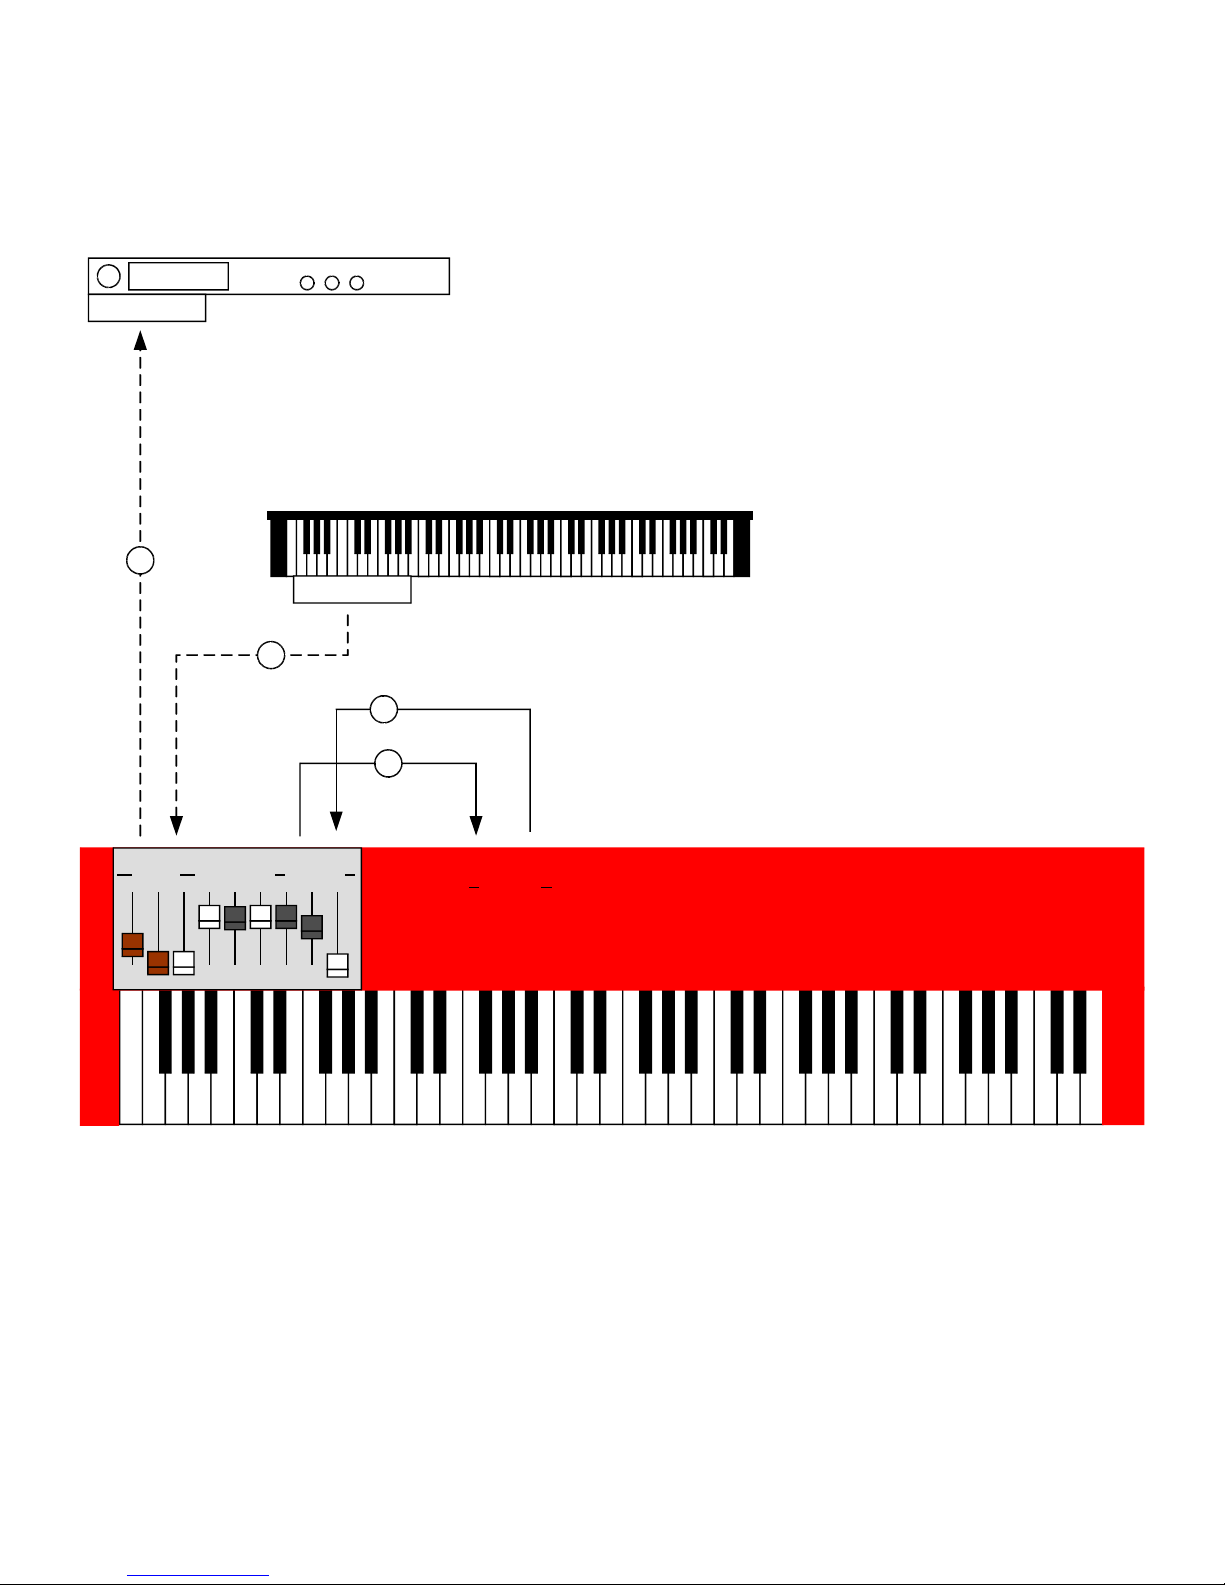
Step 3: Making all the MIDI connections: one DB-1 Drawbar Controller
midi out
optional keyboard acting as lower organ manual
midi in
optional external sound module
a
b
c
d
out in
main
out in
aux
outin
midi
If you have one DB-1 Drawbar Controller, regardless of which Nord you have, your MIDI connections
should look like this:
The MIDI connections are as follows:
a. DB-1 Drawbar Controller MAIN OUT to Nord MIDI IN
b. DB-1 Drawbar Controller MAIN IN from Nord MIDI OUT
c. DB-1 Drawbar Controller AUX OUT to external sound module (optional)
d. DB-1 Drawbar Controller AUX IN from external keyboard triggering Nord (optional)
4
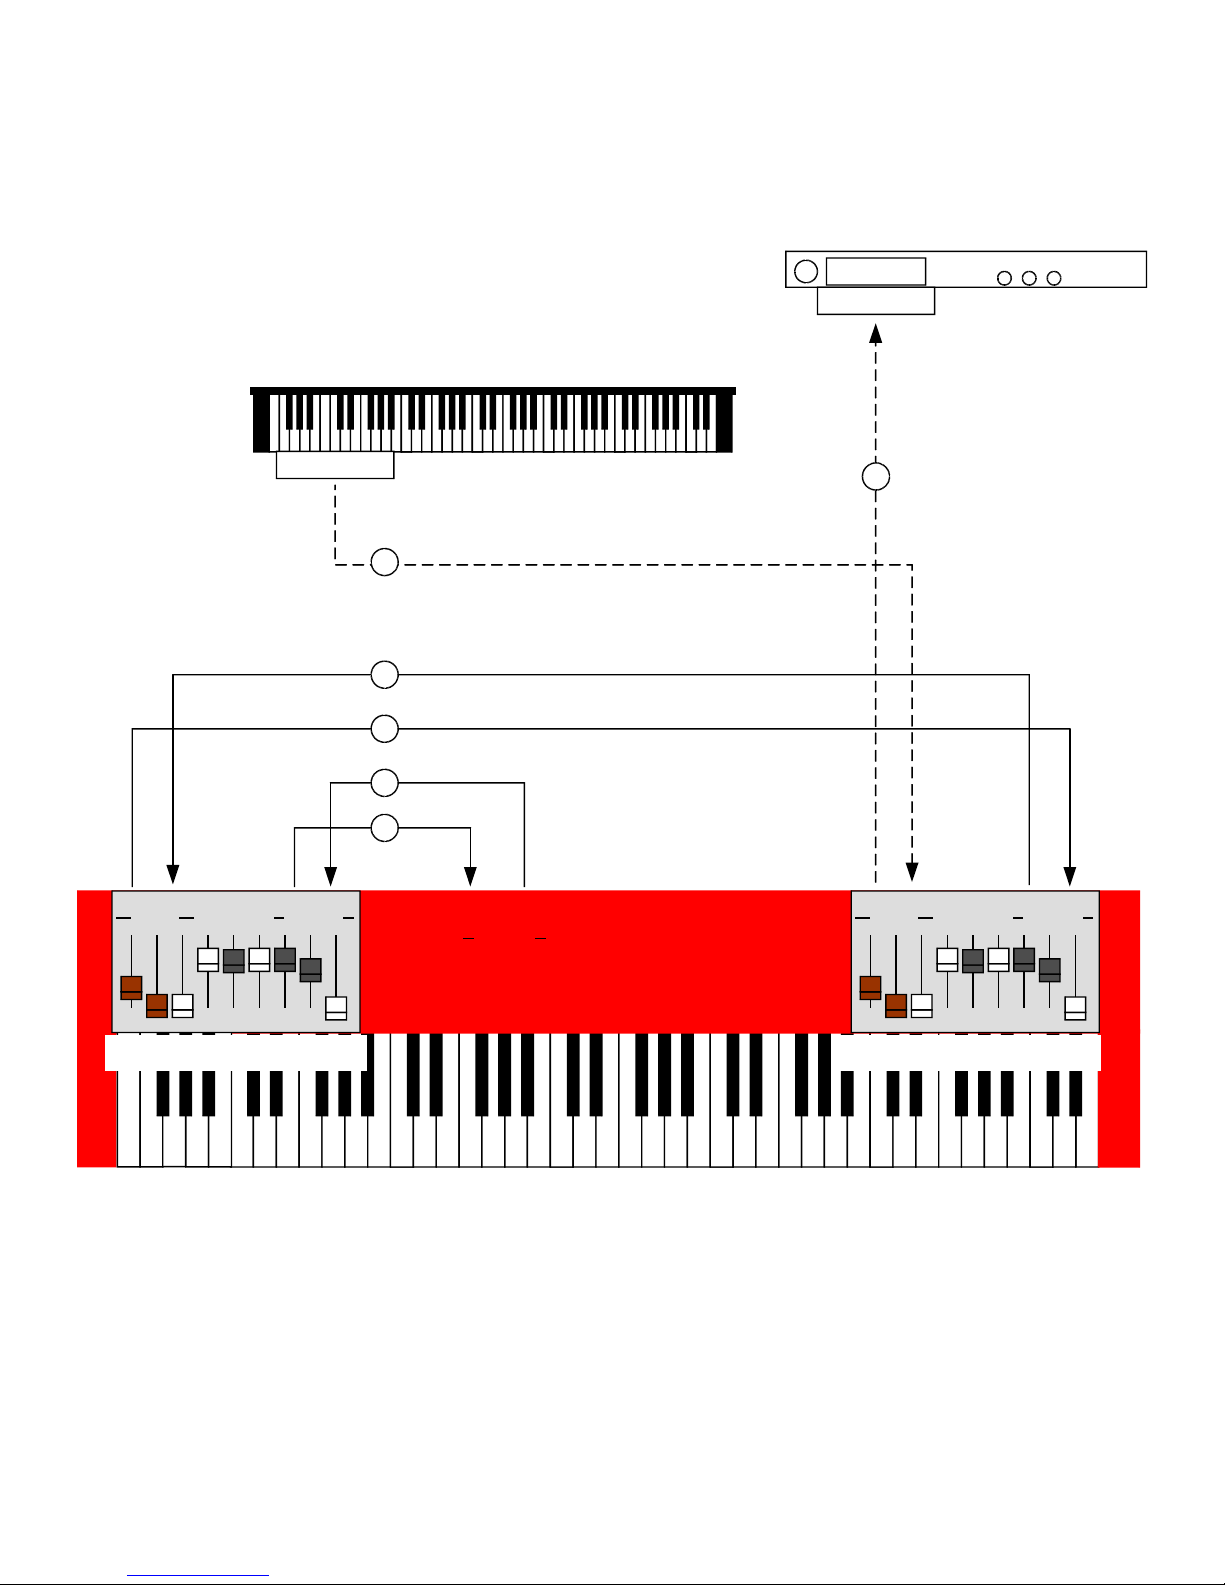
Step 3: Making all the MIDI connections: two DB-1 Drawbar Controllers
midi in
optional external sound module
midi out
optional keyboard acting as lower organ manual
a
b
c
d
e
f
outin
midi
out in
main
out in
aux
lower drawbarsupper drawbars
out in
main
out in
aux
If you have two DB-1 Drawbar Controllers, regardless of which Nord you have, your MIDI
connections should look like this:
a. Upper Drawbar MAIN OUT to Nord MIDI IN
b. Upper Drawbar MAIN IN from Nord MIDI OUT
c. Upper Drawbar AUX OUT to Lower Drawbar MAIN IN
d. Upper Drawbar AUX IN from Lower Drawbar MAIN OUT
e. Lower Drawbar AUX OUT to external sound module (optional)
f. Lower Drawbar AUX IN from external keyboard triggering Nord (optional)
5
Step 4: Check for Power
When power switch is off, DB-1
draws power from MIDI bus
When power switch is off, DB-1
cannot draw power from MIDI bus
The DB-1 was designed to run, when possible, using the voltage present on the MIDI signal coming in
the MAIN MIDI IN jack. For this reason, if you plan to run off MIDI bus power, you need to make both
MAIN MIDI IN and OUT connections as described above. That generally seems to work just fine for
simple setups (ie nothing else connected via MIDI except your Nord and the DB-1.)
If your setup involves the use of the AUX MIDI connections, it may be necessary to use a 9v battery.
Power up your Nord, and double check the MIDI connections described above. The DB-1's power
button operates differently from other power buttons you've encountered:
button is in: DB-1 draws its power from the internal 9v battery (not included)
button is out: DB-1 draws its power from the MIDI bus
Whenever the DB-1 has power, the LED will flicker whenever you move a drawbar. If you don't see
this, or if the DB-1 appears to be operating erratically, try installing a fresh 9v battery and putting the
power button in the in position whenever the DB-1 is in use.
When inserting the battery into the battery compartment, take care not to accidentally bump any of the
DIP switches into different positions. And when whenever there’s no battery in place, you should use
the protective battery terminal cover to prevent the battery harness contacts from inadvertently shorting
against anything inside the drawbar controller.
Some Words About MIDI Bus Power
This DB-1 Drawbar Controller has been designed to run off MIDI bus power when possible. But you
should understand that there is no MIDI Specification for drawing power off the MIDI bus. This is
really unfortunate, as it’s quite handy for a small device such as this one. Ocean Beach Digital has
gone to great lengths to minimize the current consumption of the DB-1 so that it can run under MIDI
bus power in as many scenarios as possible. Most of our customers have found that a single drawbar
module connected to a single keyboard works fine under MIDI bus power. But you may need to use a
battery if you have a more complicated MIDI setup or if you are using multiple DB-1s.
By the way – we also provided a way to make the power switch “off” position really truly off. That’s
what the rightmost DIP switch is for. You'll probably never need to use it.
6
 Loading...