

Page 1

Océ | XMPie User Guide
Océ PRISMAweb V4.0
The e-Business solution for Print Service Providers
Page 2

© Copyright 2005, 2006,2007 by Océ Printing Systems GmbH.
All rights reserved. This User Documentation or parts of it may not be copied, reproduced, or used in any way
without the express permission in writing. Information in this document is subject to change without notice
and does not represent a commitment.
Océ and PRISMA are registered trademarks of Océ Technologies B.V.. This document may contain further
registered trademarks, trademarks and service marks that are the property of their respective owners.
_
Page 3

XMPie PersonalEffect Integration Guide i
Content
XMPie PersonalEffect Server Information................................. 2
Print Provider Side ........................................................................... 3
Set-up Configuration ................................................................ 3
Configuration Check ................................................................. 4
Importing an XMPie PersonalEffect Template to the Océ
PRISMAweb System ................................................................. 5
Print Buyer Side ............................................................................. 11
Ordering From a Template...................................................... 11
Uploading a Database File ............................................... 13
Restrictions and Known Limitations ............................................... 15
Imposition.............................................................................. 15
Appendix: Troubleshooting for XMPie............................................. 16
Checklist................................................................................. 16
Troubleshooting ..................................................................... 17
Page 4

ii XMPie PersonalEffect Integration Guide
Page 5

XMPie PersonalEffect Integration Guide 1
Océ PRISMAweb XMPie PersonalEffect is an application that enables Print Buyers to effectively reach their
customers via print, web, and e-Mail, within the framework of dynamic publishing campaigns. By
integrating XMPie PersonalEffect with Océ PRISMAweb, the Print Buyers can have access to the XMPie
PersonalEffect application through the PRISMAweb workflow.
XMPie PersonalEffect integration with the PRISMAweb enables the following:
• Print Buyer ability to access, customize and order VI campaigns directly from PRISMAweb
• Dynamic proofing and the generation of all VI output formats, which are supported in PersonalEffect,
and are available directly from PRISMAweb, in a completely transparent way.
• An integrated, online solution that places the Print Provider at the center of all relevant media
campaign information.
The following chapter describes the procedure involved in importing an XMPie PersonalEffect template to
the PRISMAweb system. The chapter continues by outlining how to create a Job from an XMPie
PersonalEffect template located in the PRISMAweb system.
Note:
The XMPie PersonalEffect application must reside on the same domain or workgroup as
PRISMAweb.
Page 6
2 XMPie PersonalEffect Integration Guide
Caution: Before working with the XMPie PersonalEffect option, the IP of the XMPie PersonalEffect
server, the
Customer Name, User and Password must be accessed.
In addition, an expert level of understanding of the PersonalEffect accounts and
campaigns and variable template creation is required in order to effectively present the
templates for order by the Print Buyer.
XMPie PersonalEffect Server Information
Server IP:
Customer:
User:
Password:
Page 7
Print Provider Side
XMPie PersonalEffect Integration Guide 3
Print Provider Side
Set-up Configuration
To create the link between the Account(s)/Campaign(s) on the XMPie Personal Effects Server and the Océ
PRISMAweb system, carry out the following steps:
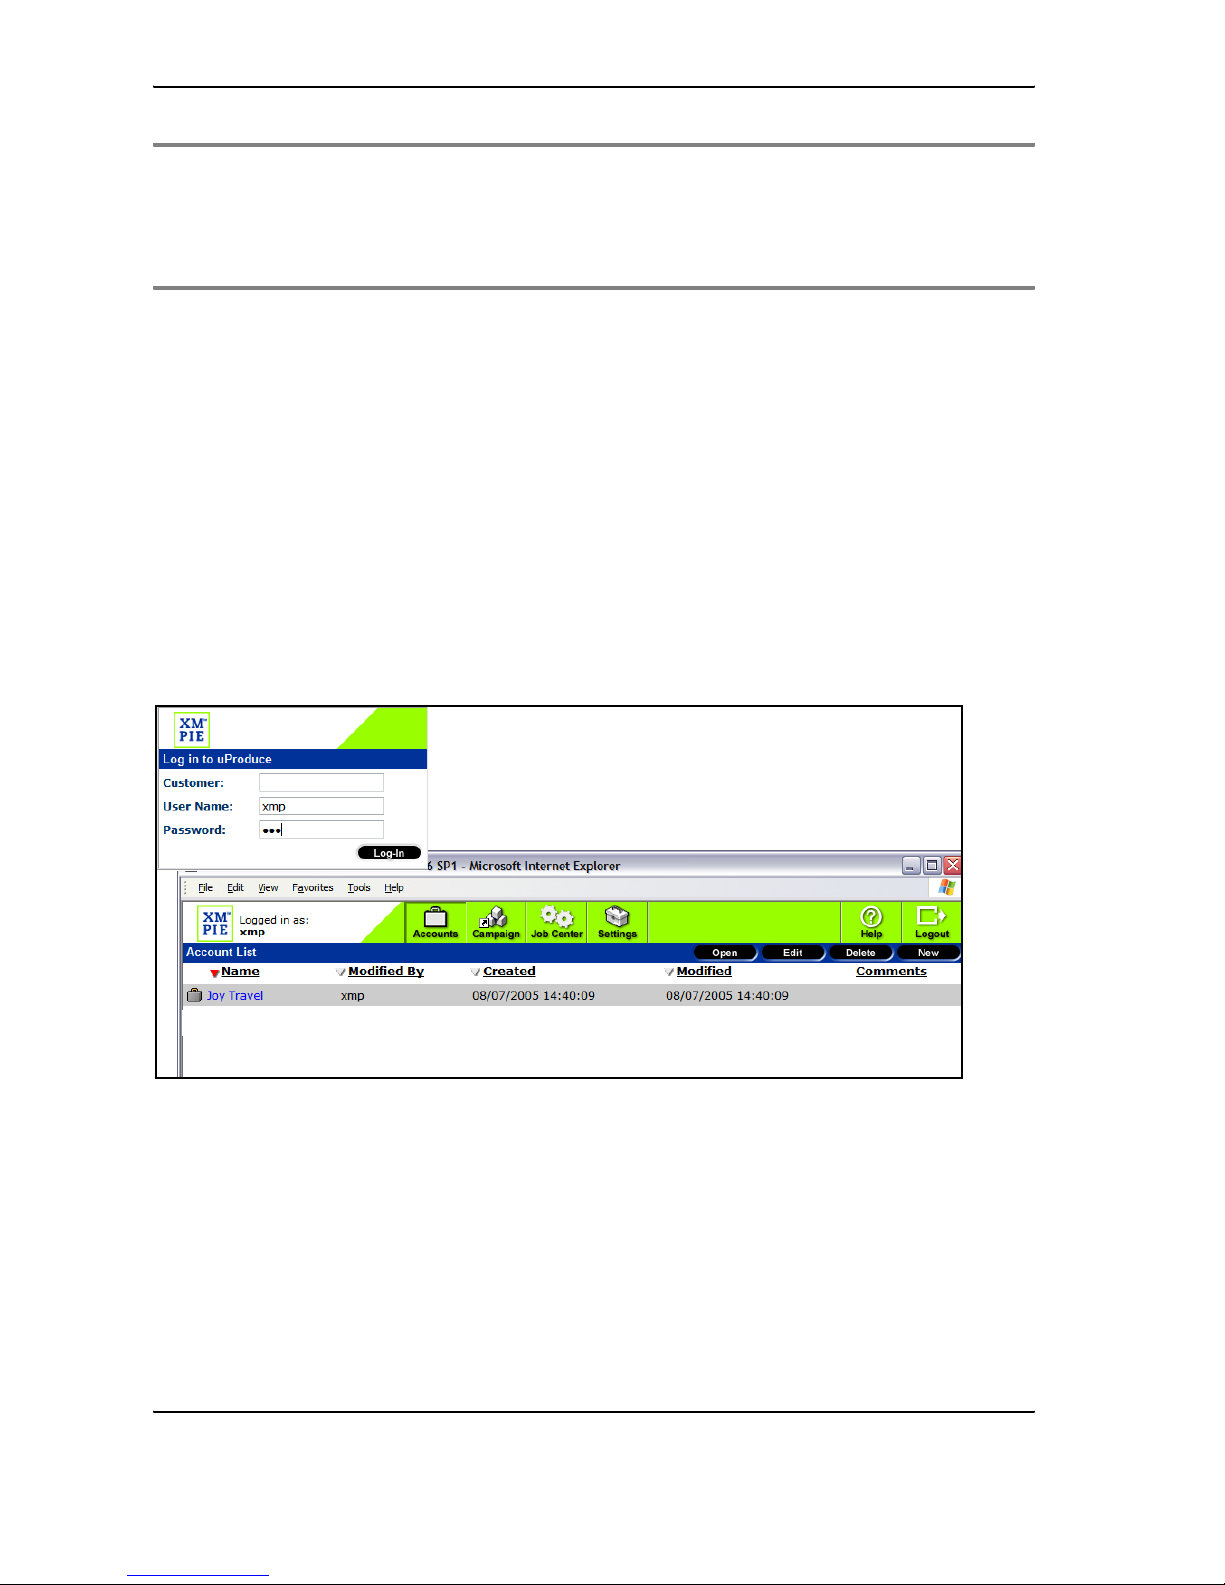
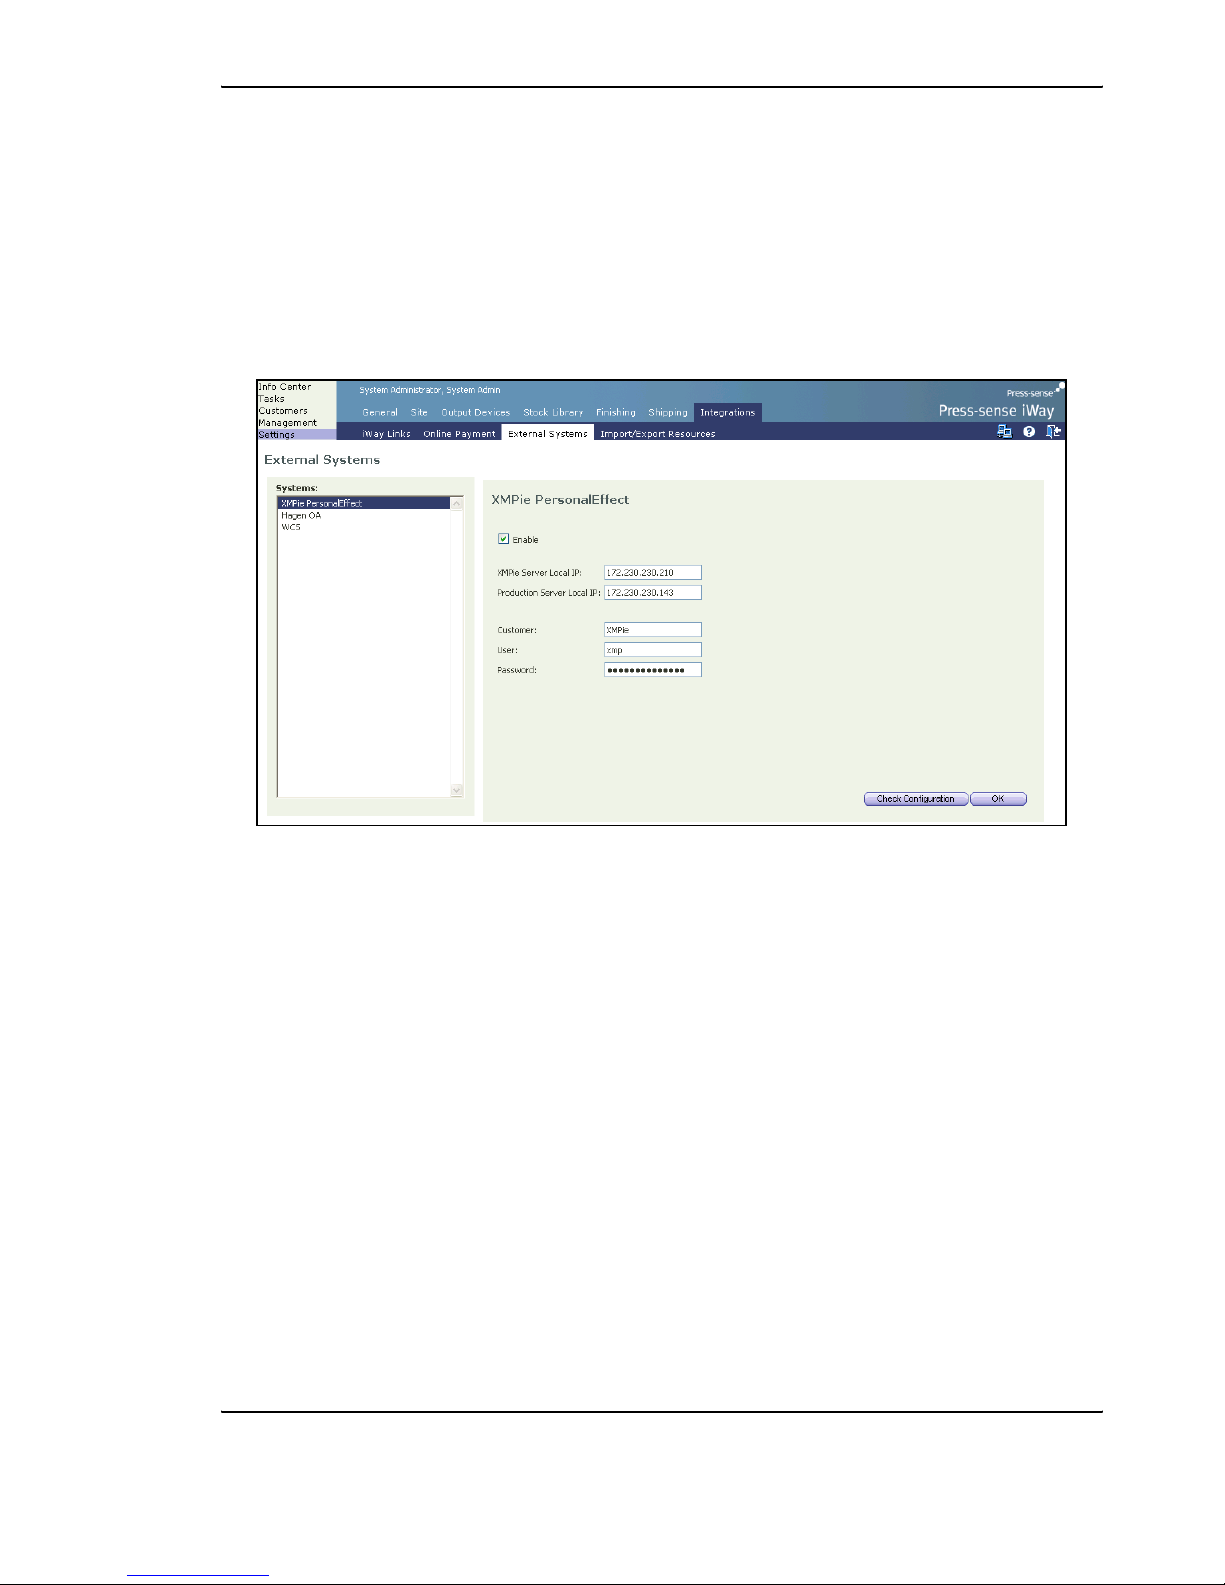
1 On the Print Provider side, access the External Systems window by clicking on Settings/
Integrations/External Systems.
2 Select XMPie in the Systems pane.
3 Enter the XMPie Personal Effects.
• Server IP
•Customer
•User
• Password
4
Click on OK.
Page 8

Print Provider Side
4 XMPie PersonalEffect Integration Guide
Configuration Check
To verify the configuration settings, carry out the following steps:
1 Click on the Check Configuration button in the Set-up Configuration panel; the Production Server
Tests
window appears.
When a setting has been configured appropriately, the status in the
Production Server Tests window
appears as Passed. However, when a setting has been configured incorrectly, the status appears as Failed
and the
Production Server Tests window displays a comment on the failure.
Test Comment
XMPie Api calls
Verify that the XMPie server has been installed and that, in
Settings,
the
XMPie Server Local IP field has been correctly configured.
Vali d a te Login I n f o
Verify that the XMPie server has been installed and that, in
Settings,
the
Customer, User and Password fields have been correctly
configured.
Copy file to XMPie server
Verify the following:
• In Settings, the Production Server Local IP field has been
correctly configured
• The NewEdition folder on the Production server is shared
• The share name is "iWayDataFiles" with full permissions to
'Everyone'
Copy file from XMPie server
Verify that the XMPie server has been installed and that in
Settings, the
XMPie Server Local IP field has been correctly configured.
Page 9

Print Provider Side
XMPie PersonalEffect Integration Guide 5
In order to verify XMPie PersonalEffect connectivity with the Web Server server, carry out the following
steps:
1 On the XMPie PersonalEffect server, click on the Start button and then click on Run.
2 In the Run dialog box, enter the value appearing in the XMPie uProduce Server Tests field box and
then click on
OK.
Note:
The appearance of Windows Explorer confirms XMPie connectivity. However, if a dialog box
appears that prompts entering a login and a password, refer to the XMPie Installation
Manual.
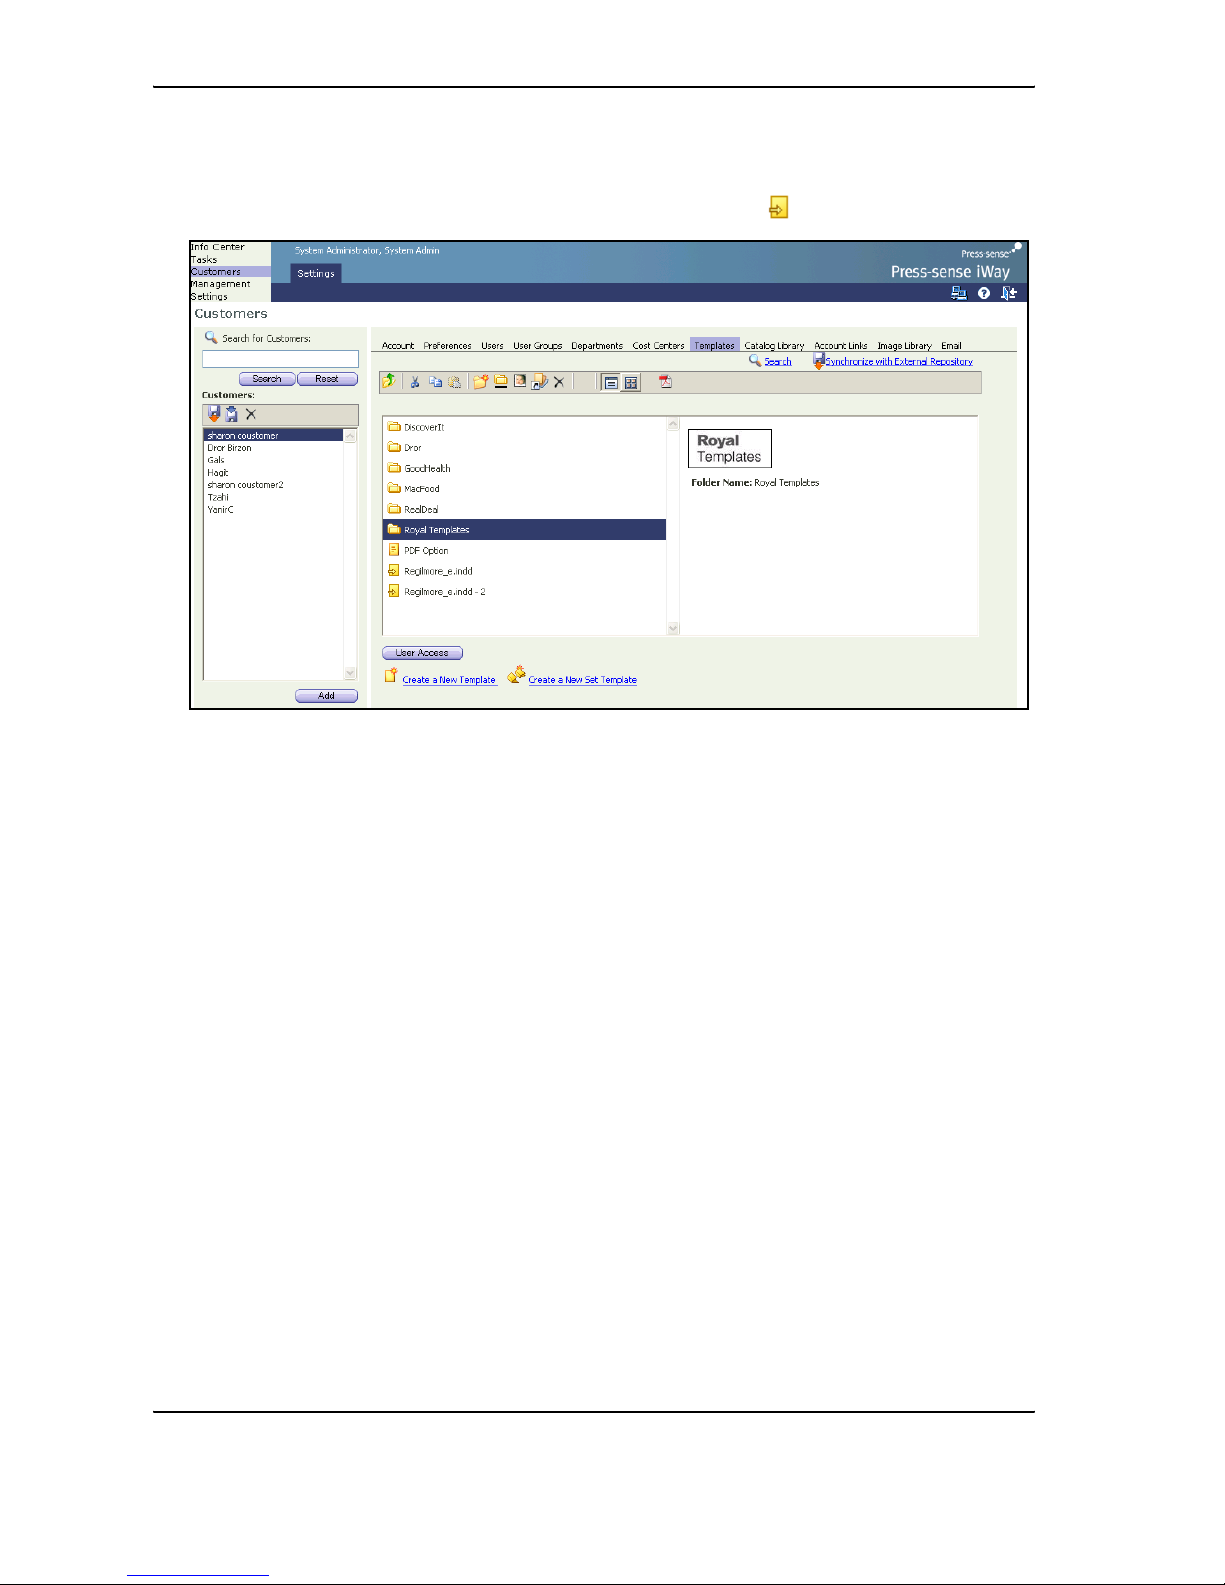
Importing an XMPie PersonalEffect Template to the Océ
PRISMAweb System
To import an XMPie PersonalEffect template to the Océ PRISMAweb system, carry out the following steps:
1 On the Print Provider side, access the Customers Templates window by clicking on Customers/
Settings/Templates.
Page 10

Print Provider Side
6 XMPie PersonalEffect Integration Guide
2 Click on the Synchronize with External Repository link; the Import Template Wizard opens with
the
Choose Document Source window.
3 Click on the XMPie radio button and then click on the Start Import Wizard button; the Choose
Campaign
window appears.
Page 11

Print Provider Side
XMPie PersonalEffect Integration Guide 7
4 From the dropdown boxes, select an account and a campaign and then click on Next; the Choose
XMPie Personal Effects Document
window appears.
5 Select a document (template) and then click on Next; the Choose Job Type window appears.
Page 12
Print Provider Side
8 XMPie PersonalEffect Integration Guide
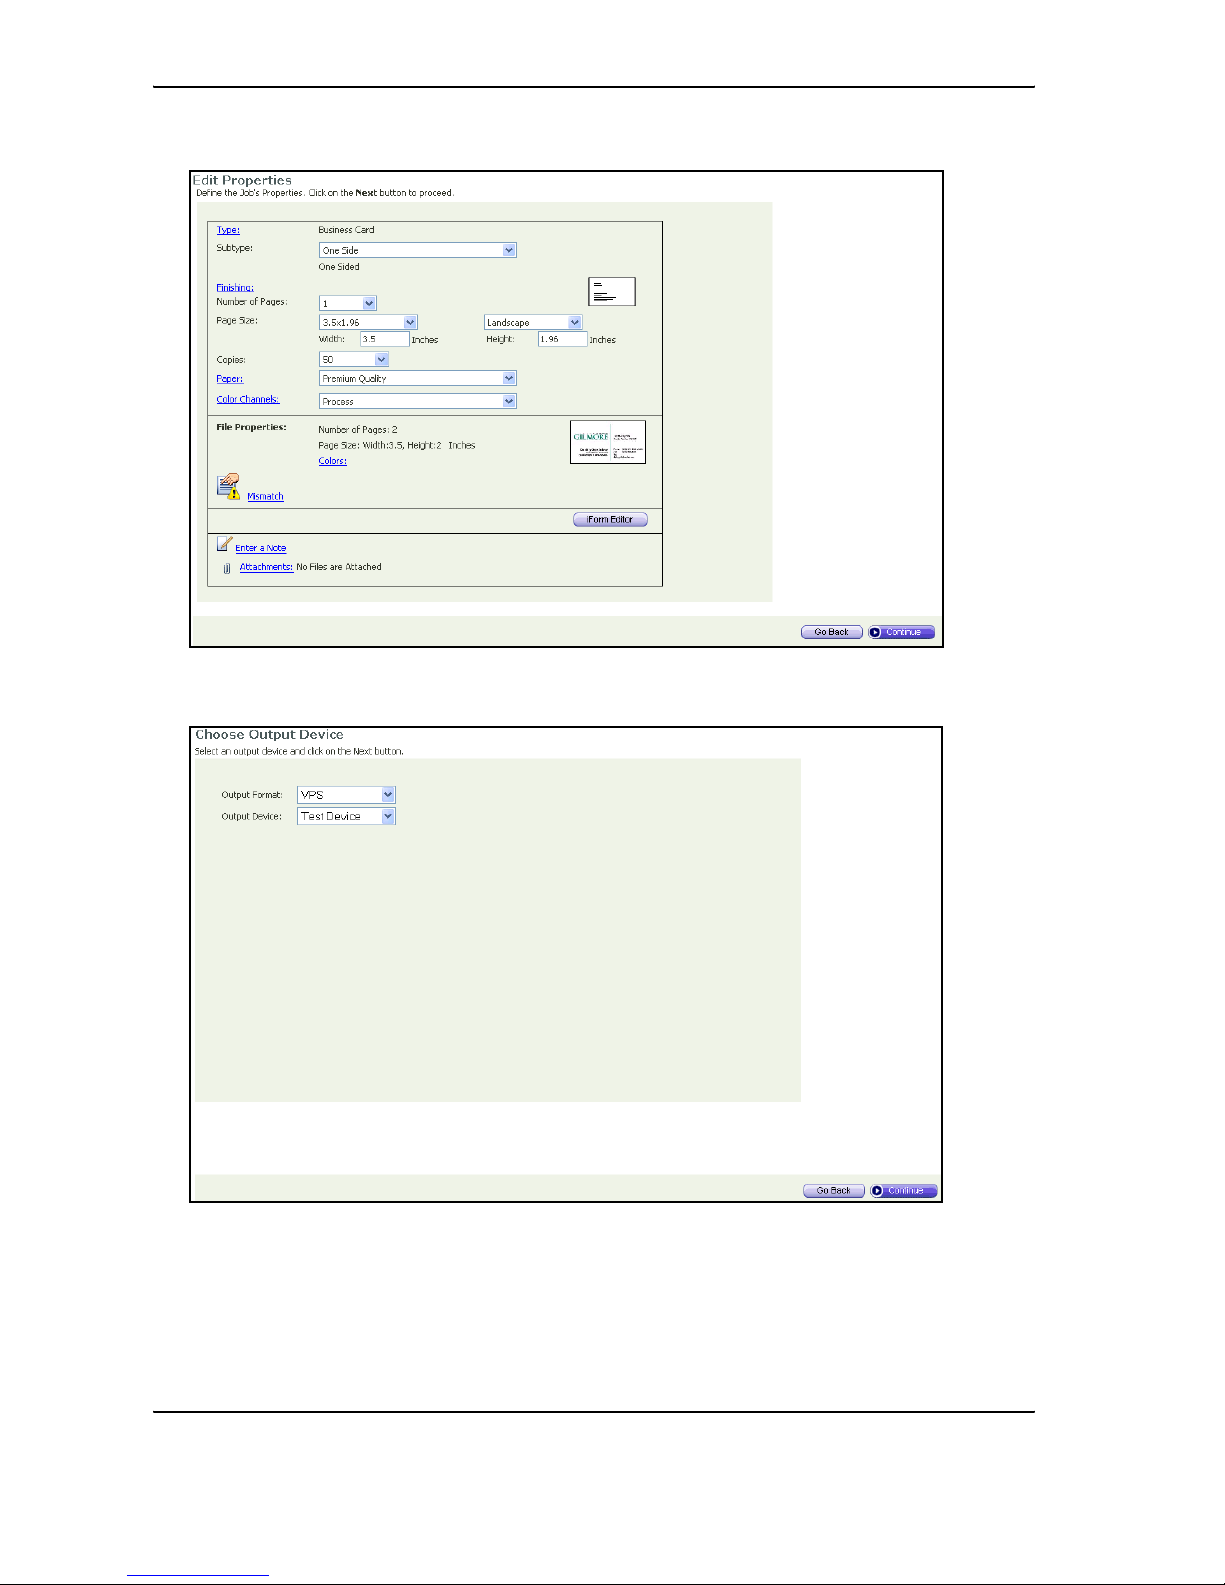
6 Select an appropriate Job Type and click on the Next button; the Edit Properties window appears.
7 Define the Job's properties and then click on the Next button; the Choose Output Device window
appears.
Page 13
Print Provider Side
XMPie PersonalEffect Integration Guide 9
8 From the dropdown boxes, select the appropriate Output Format and Output Device and then click
on the
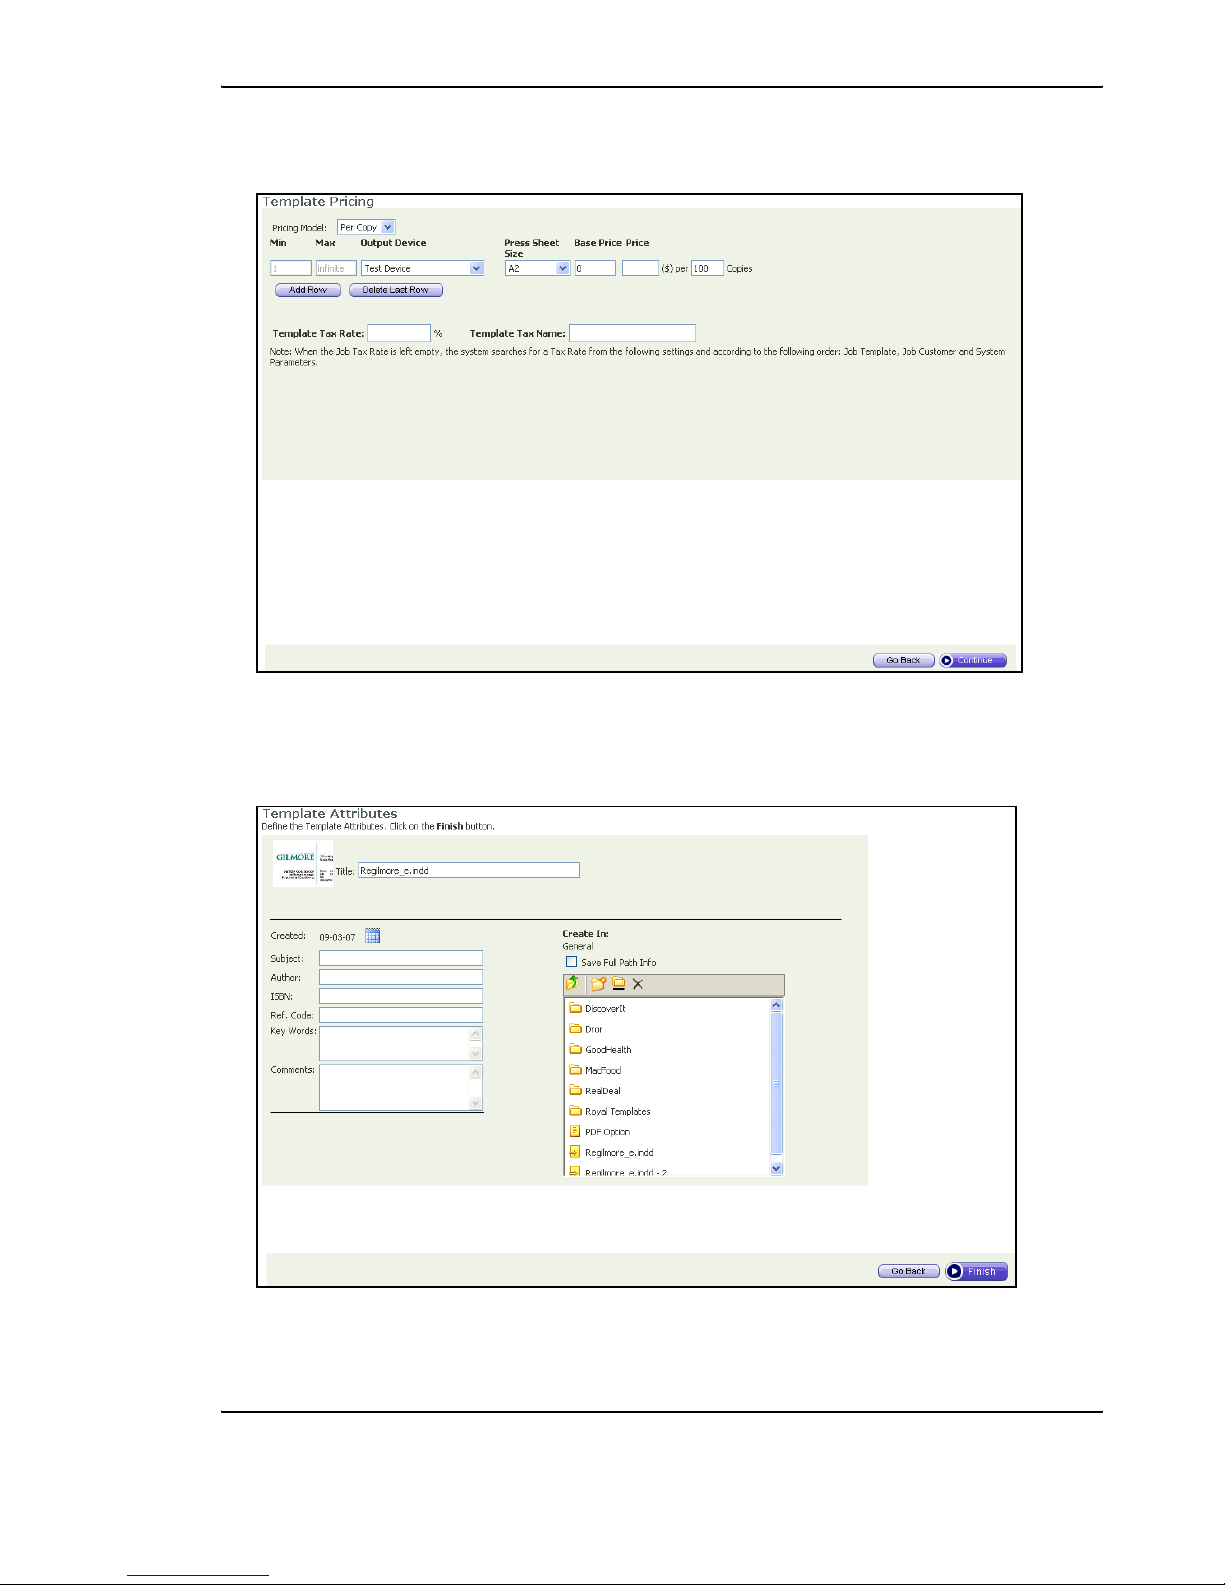
Next button; the Template Pricing window appears.
9 Define the template pricing and then click on the Next button; the Template Attributes window
appears.
Note:
Information entered into Template Attributes will be used by the Template Search
engine for establishing the precise location of the template.
Page 14
Print Provider Side
10 XMPie PersonalEffect Integration Guide
10 Define the template attributes and then click on the Finish button; the XMPie template now appears in
the
Customers/Templates window, together with all of the other PRISMAweb templates.
Note:
XMPie PersonalEffect templates are represented by the icon.
Page 15

Print Buyer Side
XMPie PersonalEffect Integration Guide 11
Print Buyer Side
Ordering From a Template
After the Print Provider has uploaded an XMPie PersonalEffect template to the Océ PRISMAweb system, the
template is available for creating new Jobs and the workflow follows regular procedure for PRISMAweb
templates.
To order a new Job from an XMPie PersonalEffect template, carry out the following steps:
1 On the Print Buyer side, click on Order Jobs; the Order Jobs window appears.
Page 16

Print Buyer Side
12 XMPie PersonalEffect Integration Guide
2 On the Print Documents from Our Catalog launch pad, click on Start Order; the Choose a
Template
window appears.
3 Select the target template and then click on Continue; the Enter the Variable Data window appears.
4 Enter all Variable Data information and then click on Add To Cart to send the Job to the Shopping Cart.
5 To complete the Job order, click on Add to Cart and Checkout.
6 Continue with the PRISMAweb workflow as outlined in the Print Provider Guide.
Page 17

Print Buyer Side
XMPie PersonalEffect Integration Guide 13
Uploading a Database File
1 To upload a database file into the Variable Data Form, click on the Add Records link; the Add Variable
Data Records
window appears.
Note:
When using the Add Records option, complete only those fields marked with the pin
symbol.
Page 18

Print Buyer Side
14 XMPie PersonalEffect Integration Guide
2 Browse to a target database and click on Continue; the Upload Variable Data Database window
appears.
3 In each Field Name dropdown box, select the appropriate field name and then click on Continue; the
Vari a b le Data Expr ess window appears.
Note:
The Variable Data Express enables accessing a PDF Preview. All PDF previews, in the
XMPie workflow, are automatically generated as low-res images by the XMPie server.
4 Click on Add to Cart in order to send the Job to the Shopping Cart or click on Add to Cart and
Checkout
in order to complete the workflow.
Page 19

Restrictions and Known Limitations
XMPie PersonalEffect Integration Guide 15
Restrictions and Known Limitations
Imposition
The Imposition feature cannot be used with the VDX format.
Page 20

Appendix: Troubleshooting for XMPie
16 XMPie PersonalEffect Integration Guide
Appendix: Troubleshooting for XMPie
Important Note: In order to successfully integrate XMPie PersonalEffect with Océ PRISMAweb, all
configuration parameters and formatted variable data must be correct.
Checklist
Veri fy the f ollow i ng:
1 The PRISMAweb server and XMPie PersonalEffect server are located in the same domain or workgroup
2 The Newedition folder on the PRISMAweb server is shared and that the share name is "iWayDataFiles"
with the full permissions to "Everyone". Verify that the share is accessible from the XMPie server, e.g.
you can copy some files to the folder:\\<FFWS server IP>\iWayDataFiles
3 The XMPie installation folder on the XMPie computer is shared and that the share name is "XMPie"
with the relevant permissions. Verify that the share is accessible from the PRISMAweb server, e.g. you
can copy some files to the folder:\\<XMPie server IP>\XMPie
4 The Proof and Print output can be created from the specific template (campaign) on the XMPie
PersonalEffect server
5 The ability to import the working template into the PRISMAweb. Additionally, verify that you can see
the PDF preview of the imported template
6 That a Job can be created from this template. Upload only a few records (in CSV format) from the
variable data that was used for the testing of this template on the XMPie PersonalEffect server. Verify
that the number of records you get in the preview is correct.
7 In the production queue, that the Paper Run size is larger than the Job size.
8 The XMPie's APIs were installed on the uProduce server. The installer can be found in the "XMPie API
CD" (Catalog num: IWIM).
Page 21

Appendix: Troubleshooting for XMPie
XMPie PersonalEffect Integration Guide 17
Troubleshooting
Note: On some computers, the DoProduceCustomizedEx.asp does not work. In such cases,
replace this file with DoProduceCustomized.asp and carry out the following steps:
1. Change (rename) the DoProduceCustomizedEx.asp file name to
DoProduceCustomizedEx_old.asp.
2. Copy and paste the DoProduceCustomized.asp file into the same folder and change the
name to DoProduceCustomizedEx.asp.
Problem # Description
1 You always get the same PDF preview of the VI Job. See Checklist items #1 and #2.
2
An Error Message appears informing that the external Job cannot be created.See
Checklist item #6. If the Job is working with sample data, verify that the Va r i able D a t a is
properly formatted, e.g. number and date fields can be converted to numbers and
dates.
3
An Error Message appears informing that in the Production queue the Job cannot be
imposed.See Checklist item #7.
4 When a PDF cannot be created, run the configuration check as described on page 4.
Page 22

Appendix: Troubleshooting for XMPie
18 XMPie PersonalEffect Integration Guide
 Loading...