

Page 1

Océ User Manual
High Capacity Stacker-E1
Operating information
Page 2

Copyright
Copyright 2011 by Canon Inc. All rights reserved.
No part of this publication may be reproduced or transmitted in any form or by any means,
electronic or mechanical, including photocopying and recording, or by any information
storage or retrieval system without the prior written permission of Canon Inc.
© 2011, Océ
All rights reserved. No part of this work may be reproduced, copied, adapted, or transmitted
in any form or by any means without written permission from Océ.
Océ makes no representation or warranties with respect to the contents hereof and specifically disclaims any implied warranties of merchantability or fitness for any particular purpose.
Furthermore, Océ reserves the right to revise this publication and to make changes from
time to time in the content hereof without obligation to notify any person of such revision
or changes.
Edition: 07-2011
Page 3

Contents
Contents
Chapter 1
Preface.................................................................................................................5
Notes for the reader...................................................................................6
Naming conventions for finishers (commercial naming and naming in
User Interfaces)..........................................................................................8
Chapter 2
Parts and their functions....................................................................................9
Machine description.................................................................................10
Status and Error indicators......................................................................12
Chapter 3
Use the stacker.................................................................................................15
Output locations.......................................................................................16
Stacker modes..........................................................................................17
Remove sheets from the stacker.............................................................18
Chapter 4
Troubleshooting................................................................................................23
Paper jams................................................................................................24
Labels inside the stacker for clearing paper jams...........................24
Overview of paper jams inside the stacker......................................27
Clear a paper jam in the entrance of the delivery area ("B" LED is
flashing)...............................................................................................29
Clear a paper jam in the delivery area ("C" LED is flashing)...........31
Clear a paper jam in the delivery area ("D1-D3" LEDs are flashing).33
Clear a paper jam in the stacking area ("E1-E2" LEDs are flashing).36
Clear a paper jam in the horizontal delivery and output area ("F1-F4"
LEDs are flashing)...............................................................................38
Clear paper jams in the output tray..................................................41
Errors.........................................................................................................44
When a stacking error occurs............................................................44
When the power does not turn on....................................................45
Place the cart in the stacker...............................................................46
Place the trays in the stacker.............................................................48
Appendix A
Specifications....................................................................................................51
Specifications............................................................................................52
3
Page 4

Contents
4
Page 5

Chapter 1 Preface
Page 6
Notes for the reader
Notes for the reader
Introduction
This manual helps you to use the High Capacity Stacker-E1. The manual contains a description of the product and guidelines to use and operate the High Capacity Stacker-E1.
Definition
Attention-Getters
Parts of this manual require your special attention. These parts can provide the following:
•
Additional general information, for example, information that is useful when you
perform a task.
•
Information to prevent personal injuries or property damage.
Warning, Caution and Note
The words Warning, Caution and Note draw your attention to important information.
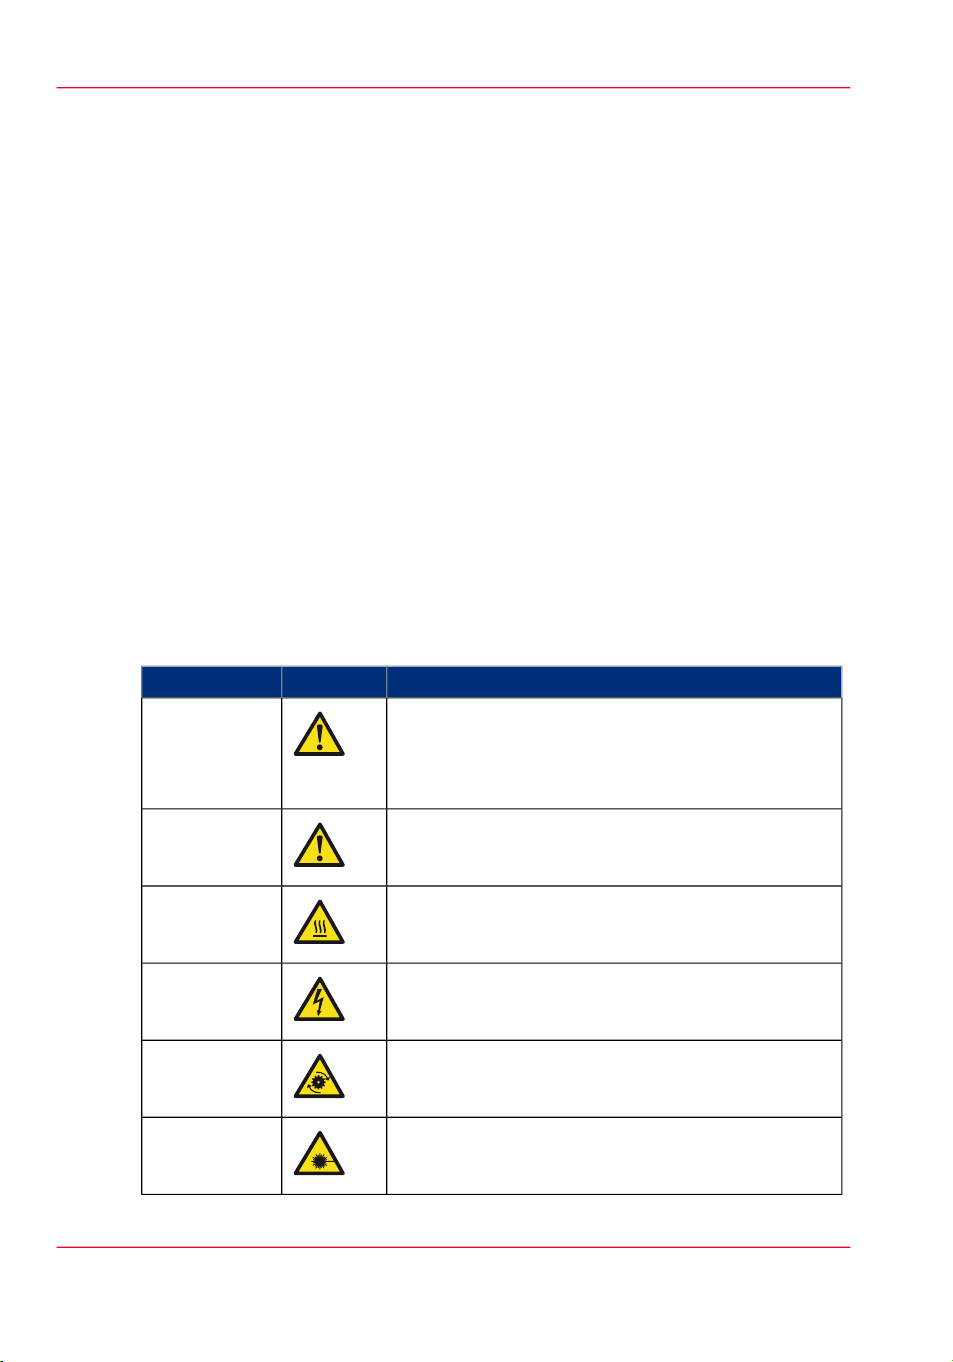
Overview of the attention-getters#
Warning
IndicatesIconWord
Ignoring this warning could cause serious injury or
even death.
The Warning indication has several icons that warn
against various hazards. The icons are shown below.
General hazardWarning
Hot surfaceWarning
Electric shockWarning
Moving partsWarning
Laser beamWarning
Chapter 1 - Preface6
Page 7
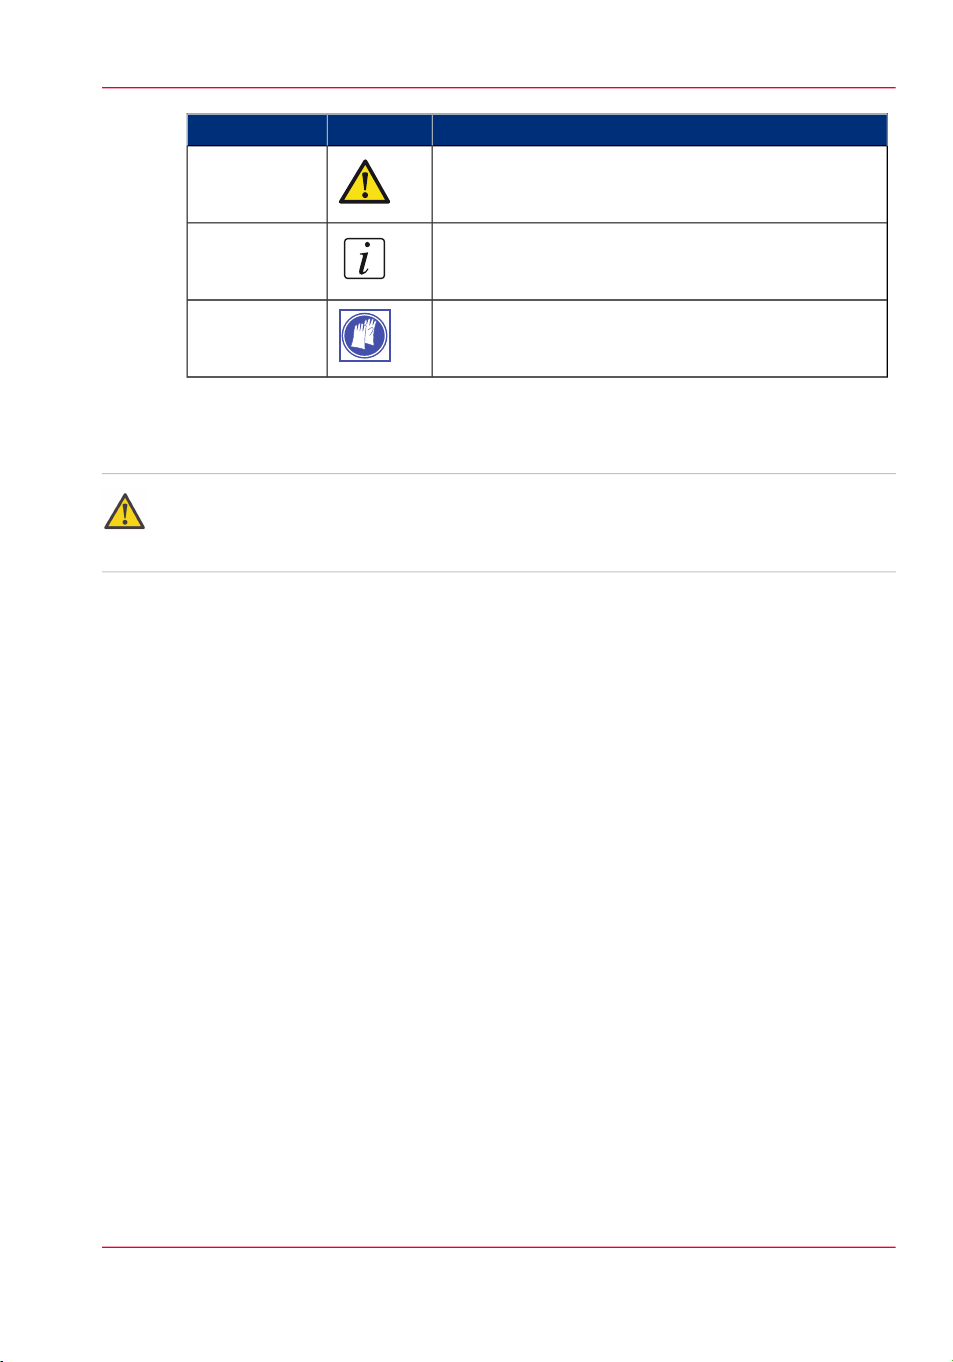
Caution
Important safety instructions
Warning:
Do not touch the stacker/stapler while the machine is printing, as this may result in personal injury.
Notes for the reader
IndicatesIconWord
Ignoring this warning could cause injury or damage to
property.
Indicates additional important information.Note
The use of heat-resistant gloves is mandatory when you
carry out these actions.
Chapter 1 - Preface 7
Page 8

Naming conventions for finishers (commercial naming and naming in User Interfaces)
Naming conventions for finishers (commercial naming and
naming in User Interfaces)
Hardware and hardware naming in User Interfaces
To improve the readability of texts in User Interfaces of operator panels and software,
the finishers are generally referred to by their function. The table below shows the naming
conventions for finishers (commercial product names and the way these are referred to
in User Interfaces).
Note:
In some cases, there is only 1 name for several modules. The reason is that a configuration
can only contain 1 of the available types of modules.
Conversion table for commercial names versus user-friendly names in User Interfaces#
Commercial product name:
In UI, printer driver and software referred to as:
'Stacker/stapler'Finisher-AF1
'Stacker/stapler'Saddle Finisher-AF2
'Puncher'Puncher Unit-BP1/BQ1/BR1
'Folder'Paper Folding Unit-F1
'Inserter'Document Insertion Unit-F1
'Stacker'High-Capacity Stacker-E1
'Trimmer'Booklet Trimmer-D1
'Trimmer'Two-Knife Trimmer-A1
'Perfect Binder'Perfect Binder-C1
'Scanner'Duplex Color Image Reader Unit-D1
Chapter 1 - Preface8
Page 9

Chapter 2 Parts and their functions
Page 10
Machine description
Machine description
Introduction
The High Capacity Stacker-E1 enables you to stack a large volume of paper. You can also
attach more than one stacker.
You can stack up to 1000 (80 g/m² [20 lb Bond]) sheets in the output tray and 5000
sheets (80 g/m² [20 lb Bond]) in both the left and right stack trays of the stacker.
Note:
Do not place objects under the output tray as this can break the output tray.
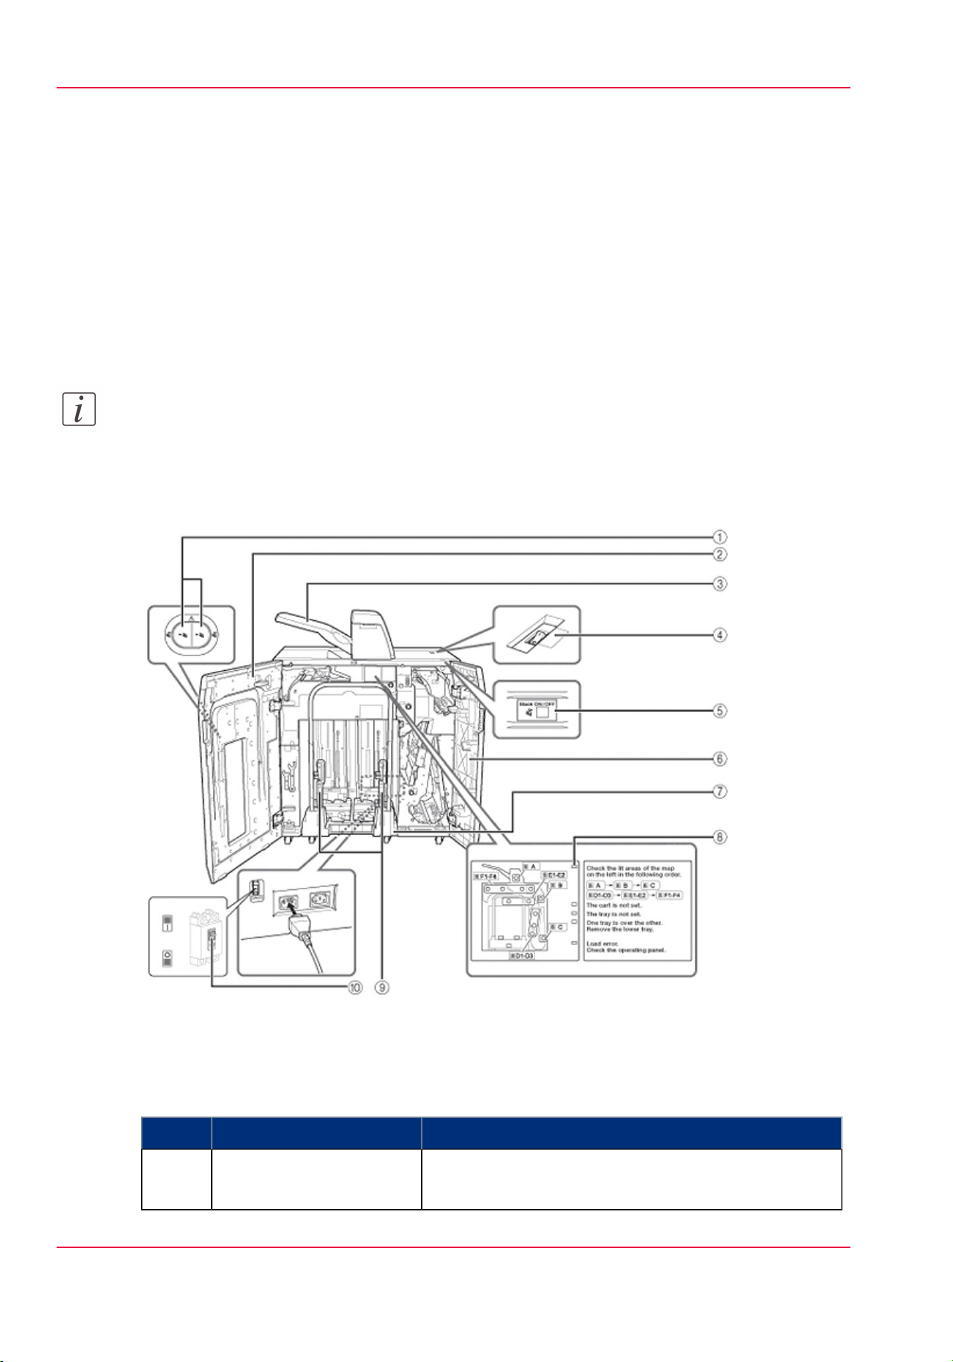
Illustration
[10] Parts and their functions
Main sections
Main sections#
1
Chapter 2 - Parts and their functions10
Open button of the
front cover
FunctionPart
Press the open button of the front cover to open
the front cover.
Page 11

Machine description
FunctionPart
Front cover2
Open the front cover to remove the stacked sheets
(see ‘Remove sheets from the stacker’ on page 18) or
to check for a paper jam (see ‘Overview of paper
jams inside the stacker’ on page 27).
Sample prints are output to this tray.Output tray3
Main power switch4
Put the main power switch into the "I" position
to turn on the stacker.
Note:
Turn on the optional equipment before
you turn on the printer.
This button has no function.5
Right cover6
Open this cover to remove jammed paper (see
‘Overview of paper jams inside the stacker’ on page
27).
Cart7
Use the cart to remove the stacked sheets (see ‘Re-
move sheets from the stacker’ on page 18).
The left and right stack tray enable you to stack
up to 5,000 sheets (80 g/m² [20 lb Bond]) per
tray.
Error indicators8
The error indicators flash / light when:
•
there is a paper jam (see ‘Overview of paper jams
inside the stacker’ on page 27 and ‘Clear paper
jams in the output tray’ on page 41).
•
a tray is not set (see ‘Place the trays in the stacker’
on page 48).
•
the trays are overlapping (see ‘Place the trays in
the stacker’ on page 48).
•
a stacking error occurs (see ‘When a stacking
error occurs’ on page 44).
Paper Holders9
Install the paper holders to the handle of the cart,
to secure the stack when you carry the stacked
sheets.
Circuit breaker10
The circuit breaker detects excess current or leakage current. (See ‘When the power does not turn on’
on page 45).
Chapter 2 - Parts and their functions 11
Page 12

Status and Error indicators
Status and Error indicators
Introduction
The High Capacity Stacker-E1 has the following indicators:
#
Status indicator
On the open button of
the front cover
FunctionLocation
The status indicator indicates the status
of the stacking area.
Inside the stackerError indicator
Status and error indicators
[11] Front cover status indicators
Status indicators#
Internal error indicator1
The error indicator shows the location
where the error occurred.
FunctionIndicator
This indicator flashes when there is an error in the
internal part of the stacker.
•
2
Loading indicator
(right)
Chapter 2 - Parts and their functions12
This indicator flashes when the stacker loads
paper into the right tray.
•
This indicator lights when the right tray is full.
Page 13
Status and Error indicators
FunctionIndicator
•
3
Right indicator on the
open button of the
front cover
This indicator flashes when the right tray moves
upward or downward.
•
This indicator lights when the right tray finished moving downward.
•
4
Left indicator on the
open button of the
front cover
This indicator flashes when the left tray moves
upward or downward.
•
This indicator lights when the left tray finished
moving downward.
•
Loading indicator (left)5
This indicator flashes when the stacker loads
paper into the left tray.
•
This indicator lights when the left tray is full.
[12] Error indicators inside the stacker
The indicator flashes / lights when you remove the paper of when a paper jam has occurred.
Error indicators#
FunctionIndicator
Internal error indicator6
This indicator flashes when a paper jam occurred.
Also the error indicator, that shows the jam location, flashes. (see ‘Overview of paper jams inside the
stacker’ on page 27).
Chapter 2 - Parts and their functions 13
Page 14

Status and Error indicators
7
Error indicator for the
cart
FunctionIndicator
This indicator lights when the cart is not placed
correctly (see ‘Place the cart in the stacker’ on page
46).
8
Error indicator for the
trays
This indicator lights when the tray is not placed
correctly. Also the error indicator, that shows the
tray that is not placed correctly, lights. (see ‘Place
the trays in the stacker’ on page 48).
9
Error indicator for
overlapping trays
Stacking error indicator10
This indicator lights when the trays are overlapping
(see ‘Place the trays in the stacker’ on page 48).
This indicator flashes when a stacking error occurred. (see ‘When a stacking error occurs’ on page
44).
Chapter 2 - Parts and their functions14
Page 15

Chapter 3 Use the stacker
Page 16

Output locations
Output locations
Introduction
The High Capacity Stacker-E1 has three output locations, that can be addressed separately.
Note:
If you use media which length in feed direction is longer than 229 mm (9.0"), the media
will output across both stack trays. In this case you can use only one stack tray, so then
you have two output locations.
Output locations
Output locations#
Output tray
DescriptionOutput location
This output location is mainly used for sample
prints.
Right stack tray (stack tray 1)
Left stack tray (stack tray 2)
This output location is used to stack a large volume
of sheets.
This output location is used to stack a large volume
of sheets.
Chapter 3 - Use the stacker16
Page 17
Stacker modes
Introduction
The stacker is equipped with a number of stacker modes.
Stacker modes
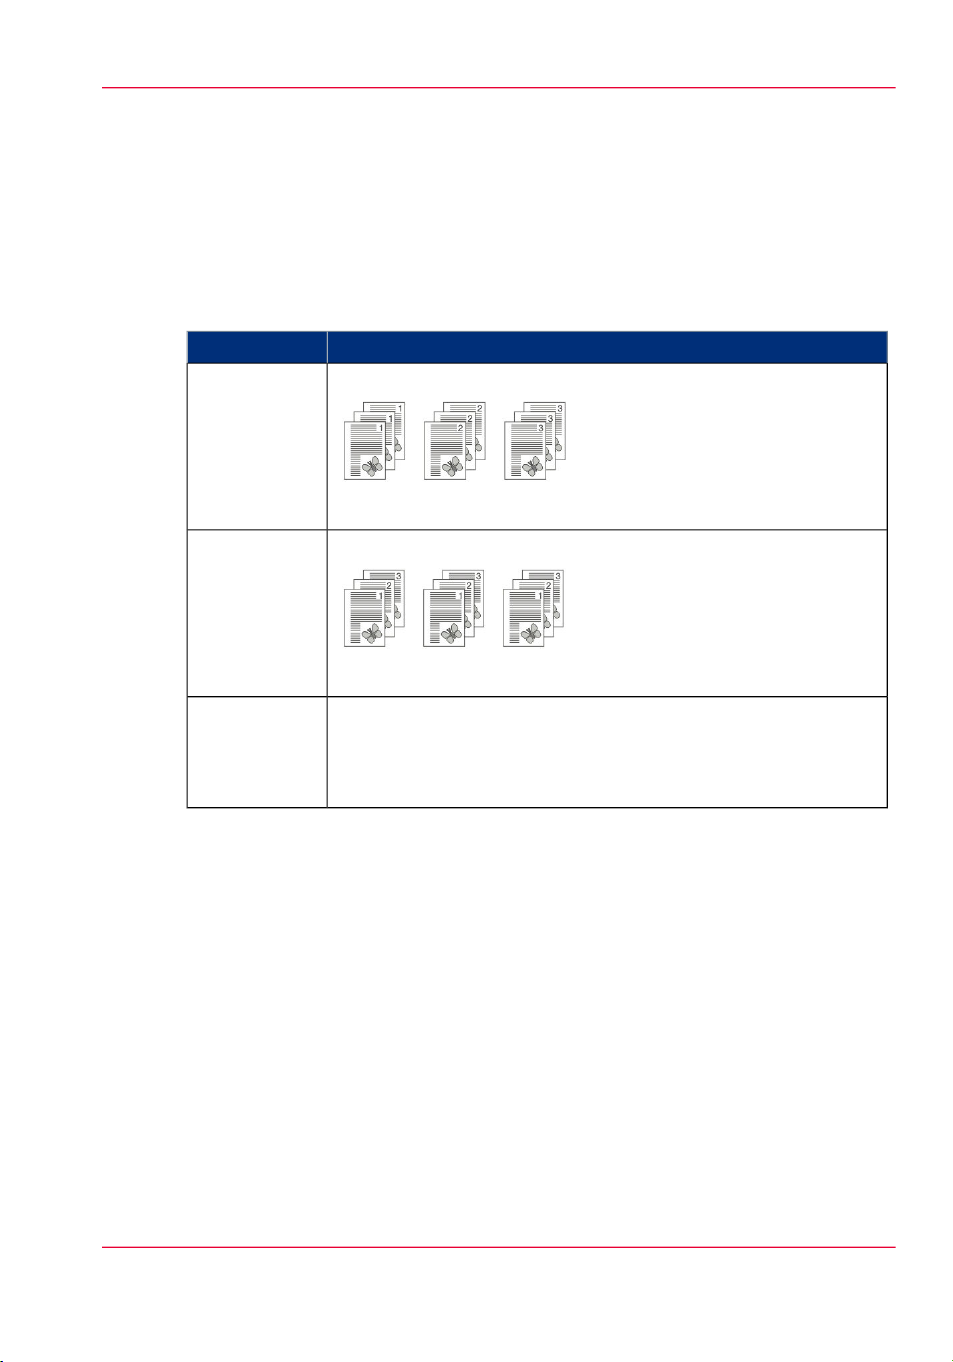
Stacker modes#
Sort by page
Stacker modes
DescriptionMode
Sorting method of the prints
[13] Sort by page
Sort by set
Offset stacking
Sorting method of the prints
[14] Sort by set
The offset stacking function creates a visible distinction between
sets or jobs in an output location. The active workflow profile or
the active automated workflow determines the default type of offset
stacking.
Chapter 3 - Use the stacker 17
Page 18

Remove sheets from the stacker
Remove sheets from the stacker
When to do
When you want to remove a large amount of sheets, use the cart.
When you want to remove a small amount of sheets, you can directly remove the sheets
from the tray.
Before you begin
The stack trays can be removed separately. If you press the right side of the open button
of the front cover, the right stack tray moves downward. If you press the left side of the
open button of the front cover, the left stack tray moves downward.
If the stacked sheets overlap both left and right stack trays, both trays move downward
when the left or right side of the open button is pressed.
You can remove sheets from one of the stack trays, even when the machine output the
sheets to the other stack tray.
If the machine is in sleep mode, you can not open the stacker. You have to press the
control power switch to reactivate the machine. Then you have to press the open button
of the front cover.
You cannot open the stacker, while the machine is operating, until
•
both the left and right stack tray are at rest
•
and the status indicator on the open button of the front cover stops flashing and remains lit.
Note:
You have to take care when optional equipment is attached to the machine. You can
make prints to other optional equipment, even if the cover of the stacker is open.
Warning:
When you remove the sheets, take care that you do not cut your hands on the edges of
the sheets.
Chapter 3 - Use the stacker18
Page 19

Remove the cart with sheets loaded
Remove the cart with sheets loaded#
1
Press the open button of the front
cover.
Remove sheets from the stacker
RemarksActionStep
The open button flashes while the
trays are moving downward.
2
Open the front cover, and then pull
out the cart.
When you carry the sheets:
•
Remove the paper holders from
the cart.
•
Install the paper holders as shown
below.
Chapter 3 - Use the stacker 19
Page 20

Remove sheets from the stacker
3
After you removed the sheets from
the cart, insert the cart in the stacking
area.
RemarksActionStep
When you insert the stack trays,
make sure you align them with the
cart alignment label. The stack trays
will not move upward, unless they
are aligned with the cart alignment
label, even if you close the front cover.
Make sure that you store the paper
holders in the cart. If the paper
holders are not correctly stored, you
cannot close the front cover.
Chapter 3 - Use the stacker20
Page 21

Close the front cover.4
Remove sheets from the stack tray
#
1
Press the open button of the front
cover.
Remove sheets from the stacker
RemarksActionStep
The stack trays automatically move
upward.
WARNING
When you close the cover, be careful
not to get your fingers caught.
RemarksActionStep
The open button flashes while the
stack trays are moving downward.
2
When the stack tray moves downward, press the open button.
Before you press the open button,
make sure that the stack tray is low
enough to remove the sheets from
the stacking area.
Chapter 3 - Use the stacker 21
Page 22

Remove sheets from the stacker
3
Open the front cover and then remove the sheets from the stack tray.
Close the front cover.4
RemarksActionStep
When the cart is in the stacking area:
•
Pull out the cart.
•
Remove the sheets from the stack
tray.
•
Insert the cart in the stacking area.
The trays automatically move upward.
WARNING
When you close the cover, be careful
not to get your fingers caught.
Chapter 3 - Use the stacker22
Page 23

Chapter 4 Troubleshooting
Page 24

Labels inside the stacker for clearing paper jams
Paper jams
Labels inside the stacker for clearing paper jams
Introduction
If a paper jam occurs inside High Capacity Stacker-E1, the operator panel will display
the location of the paper jam and a procedure to clear the paper jam. The procedure
contains references to the error locations you must check, for example D1 or D2. The
illustration below shows an overview of all the error locations.
Illustration
[26] Error locations
Chapter 4 - Troubleshooting24
Page 25

Labels inside the stacker for clearing paper jams
[27]
Legend for the illustrations above#
TranslationEnglish text
Top coverTop Cover
Right coverRight Cover
Front coverFront Cover
Overview of the error locations and their labels
The table below describes the error locations in the order these must be checked in general. Depending on the paper jam, the order to check the error locations can be different.
Always follow the instructions on the operator panel to clear a paper jam.
Note:
If two stackers are attached to the machine, the stacker on the right is displayed as "(Sa)",
and the stacker on the left is displayed as "(Sb)".
Chapter 4 - Troubleshooting 25
Page 26

Labels inside the stacker for clearing paper jams
#
Location labelOrder
Top cover1
(S) A2
Right cover3
(S) B4
(S) C15
(S) C26
(S) D17
(S) D28
(S) D39
Front cover10
(S) E111
(S) E212
(S) E113
(S) E214
(S) F115
(S) F216
(S) F317
(S) F418
Chapter 4 - Troubleshooting26
Page 27

Overview of paper jams inside the stacker
Overview of paper jams inside the stacker
Introduction
If a paper jam occurs inside High Capacity Stacker-E1, the operator panel will display
the location of the paper jam and a procedure to clear the paper jam. The areas with the
jammed paper are also indicated by the flashing of the error indicators. You have to open
the front cover to see the error indicator. Follow the procedure on the operator panel to
clear the paper jam.
Note:
You have to take care when optional equipment is attached to the machine. You can
make prints to other optional equipment, even if the cover of the stacker is open.
Warning:
When you remove the sheets, take care that you do not cut your hands on the edges of
the sheets.
Warning:
When you remove jammed sheets, take care not to cut your hands on the inside of the
machine. If you cannot remove the sheets, contact Service or your local authorized dealer.
Paper jams inside the stacker
#
Location of the paper jam
the stacker
Delivery area of the stacker
Stacking area of the stacker
cator
"B" LEDEntrance of the delivery area of
"C" LEDDelivery area of the stacker
"D1-D3"
LEDs
"E1-E2"
LEDs
ActionError indi-
‘Clear a paper jam in the entrance of
the delivery area ("B" LED is flashing)’
on page 29
‘Clear a paper jam in the delivery area
("C" LED is flashing)’ on page 31
‘Clear a paper jam in the delivery area
("D1-D3" LEDs are flashing)’ on page
33
‘Clear a paper jam in the stacking area
("E1-E2" LEDs are flashing)’ on page
36
Chapter 4 - Troubleshooting 27
Page 28

Overview of paper jams inside the stacker
Location of the paper jam
Horizontal delivery and output
area of the stacker
•Status and Error indicators, on page 12
cator
"F1-F4"
LEDs
ActionError indi-
‘Clear a paper jam in the horizontal
delivery and output area ("F1-F4"
LEDs are flashing)’ on page 38
Chapter 4 - Troubleshooting28
Page 29

Clear a paper jam in the entrance of the delivery area ("B" LED is flashing)
Clear a paper jam in the entrance of the delivery area ("B"
LED is flashing)
When to do
"B" LED inside the stacker is flashing.
Clear a paper jam
Clear a paper jam#
RemarksActionStep
1
Press the open button to open the
front cover.
If you press the open button when
the tray moves downward, the front
cover opens.
Open the right cover.2
3
Open the B guide and remove any
jammed paper.
Chapter 4 - Troubleshooting 29
Page 30

Clear a paper jam in the entrance of the delivery area ("B" LED is flashing)
RemarksActionStep
Close the B guide.4
WARNING
When you close the guide, be careful
not to get your fingers caught.
Close the right cover.5
WARNING
When you close the guide, be careful
not to get your fingers caught.
Close the front cover.6
WARNING
When you close the guide, be careful
not to get your fingers caught.
Chapter 4 - Troubleshooting30
Page 31

Clear a paper jam in the delivery area ("C" LED is flashing)
Clear a paper jam in the delivery area ("C" LED is flashing)
When to do
"C" LED inside the stacker is flashing.
Clear a paper jam
Clear a paper jam#
RemarksActionStep
1
Press the open button to open the
front cover.
If you press the open button when
the tray moves downward, the front
cover opens.
Open the right cover.2
3
Open the C guide and remove any
jammed paper.
Chapter 4 - Troubleshooting 31
Page 32

Clear a paper jam in the delivery area ("C" LED is flashing)
Close the C guide.4
Close the right cover.5
RemarksActionStep
WARNING
When you close the guide, be careful
not to get your fingers caught.
WARNING
When you close the cover, be careful
not to get your fingers caught.
Close the front cover.6
WARNING
When you close the cover, be careful
not to get your fingers caught.
Chapter 4 - Troubleshooting32
Page 33

Clear a paper jam in the delivery area ("D1-D3" LEDs are flashing)
Clear a paper jam in the delivery area ("D1-D3" LEDs are
flashing)
When to do
"D1-D3" LEDs inside the stacker are flashing.
Clear a paper jam
Clear a paper jam#
RemarksActionStep
1
Press the open button to open the
front cover.
If you press the open button when
the tray moves downward, the front
cover opens.
Open the right cover.2
3
Open the D1 guide and remove any
jammed paper.
Chapter 4 - Troubleshooting 33
Page 34

Clear a paper jam in the delivery area ("D1-D3" LEDs are flashing)
RemarksActionStep
4
Open the D2 guide and remove any
jammed paper.
5
Turn the D3 knob to the right and
remove any jammed paper.
WARNING
When you turn the knob, be careful
not to get your fingers caught.
Close the D1 and D2 guides.6
WARNING
When you close the guide, be careful
not to get your fingers caught.
Close the right cover.7
WARNING
When you close the cover, be careful
not to get your fingers caught.
Chapter 4 - Troubleshooting34
Page 35

Clear a paper jam in the delivery area ("D1-D3" LEDs are flashing)
RemarksActionStep
Close the front cover.8
WARNING
When you close the cover, be careful
not to get your fingers caught.
Chapter 4 - Troubleshooting 35
Page 36

Clear a paper jam in the stacking area ("E1-E2" LEDs are flashing)
Clear a paper jam in the stacking area ("E1-E2" LEDs are
flashing)
When to do
"E1-E2" LEDs inside the stacker are flashing.
Clear a paper jam
Clear a paper jam#
RemarksActionStep
1
Press the open button to open the
front cover.
If you press the open button when
the tray moves downward, the front
cover opens.
Open the right cover.2
3
Turn the E1 knob to the left and remove any jammed paper.
WARNING
When you turn the knob, be careful
not to get your fingers caught.
Chapter 4 - Troubleshooting36
Page 37

Clear a paper jam in the stacking area ("E1-E2" LEDs are flashing)
RemarksActionStep
Close the right cover.4
WARNING
When you close the cover, be careful
not to get your fingers caught.
Close the front cover.5
WARNING
When you close the cover, be careful
not to get your fingers caught.
Chapter 4 - Troubleshooting 37
Page 38

Clear a paper jam in the horizontal delivery and output area ("F1-F4" LEDs are flashing)
Clear a paper jam in the horizontal delivery and output area
("F1-F4" LEDs are flashing)
When to do
"F1-F4" LEDs inside the stacker are flashing.
Clear a paper jam
Clear a paper jam#
RemarksActionStep
1
Press the open button to open the
front cover.
If you press the open button when
the tray moves downward, the front
cover opens.
Open the right cover.2
3
Open the F1 guide and remove any
jammed paper.
Chapter 4 - Troubleshooting38
Page 39

Clear a paper jam in the horizontal delivery and output area ("F1-F4" LEDs are flashing)
RemarksActionStep
Close the F1 guide.4
WARNING
When you close the guide, be careful
not to get your fingers caught.
Open the F2 guide.5
6
Turn the F3 knob to the left and remove any jammed paper.
WARNING
When you turn the knob, be careful
not to get your fingers caught.
Close the F2 guide.7
WARNING
When you close the guide, be careful
not to get your fingers caught.
Chapter 4 - Troubleshooting 39
Page 40

Clear a paper jam in the horizontal delivery and output area ("F1-F4" LEDs are flashing)
RemarksActionStep
8
Open the F4 guide and remove any
jammed paper.
Close the F4 guide.9
WARNING
When you close the guide, be careful
not to get your fingers caught.
Close the right cover.10
WARNING
When you close the cover, be careful
not to get your fingers caught.
Close the front cover.11
WARNING
When you close the cover, be careful
not to get your fingers caught.
Chapter 4 - Troubleshooting40
Page 41

Clear paper jams in the output tray
When to do
If a paper jam occurs inside the output tray of the stacker
•
the operator panel displays a message indicating the location of the paper jam
•
and instructions on how to clear the paper jam.
If more than one stacker is configured, you can use this procedure to clear the paper jams.
Note:
You have to take care when optional equipment is attached to the machine. You can
make prints to other optional equipment, even if the cover of the stacker is open.
Warning:
When you remove the sheets, take care that you do not cut your hands on the edges of
the sheets.
Clear paper jams in the output tray
Warning:
When you remove jammed sheets, take care not to cut your hands on the inside of the
machine. If you cannot remove the sheets, contact your local authorized dealer.
Chapter 4 - Troubleshooting 41
Page 42

Clear paper jams in the output tray
Clear paper jams in the output trays
Clear paper jams in the output trays#
1
Open the top cover of the output
tray.
RemarksActionStep
When you have a configuration with
an inserter, open the inserter first
before you open the top cover.
After you removed the paper jam,
close the top cover of the output tray
before the inserter.
If you close the inserter before the
top cover, the top cover will close
automatically, which can result in
personal injury.
2
Remove the jammed paper inside the
output tray.
Chapter 4 - Troubleshooting42
Page 43

Clear paper jams in the output tray
RemarksActionStep
3
Close the top cover of the output
tray.
WARNING
When you close the cover, be careful
not to get your fingers caught.
Chapter 4 - Troubleshooting 43
Page 44

When a stacking error occurs
Errors
When a stacking error occurs
When to do
The error indicator on the open button of the front cover flashes. And an error indicator
inside the stacker lights when sheets are stacked diagonally in the stacker.
The operator panel displays an error message.
When a stacking error occurs
Remove the stacked sheets from the stacker (see ‘Remove sheets from the stacker’ on page
1.
18).
Touch resume printing on the operator panel to start or continue printing.
2.
Chapter 4 - Troubleshooting44
Page 45

When the power does not turn on
When to do
If you cannot operate the stacker, even though the main power switch of the stacker and
the power switch of the printer are both turned to the "I" position.
When the power does not turn on
Check that the circuit breaker is not in the OFF position.
1.
If the circuit breaker is in the OFF position, contact your local authorized dealer, without
2.
turning the circuit breaker back ON.
When the power does not turn on
Chapter 4 - Troubleshooting 45
Page 46

Place the cart in the stacker
Place the cart in the stacker
When to do
The error indicator on the open button of the front cover flashes, and the error indicator
for the cart lights.
Required tool
•
Cart
Note:
If the stack tray is in the stacking area, the stacker can load sheets into the stack tray,
except in case of loading errors.
To remove sheets from the tray when the cart is not placed in the stacking area, you have
to do the following:
Place the cart in the stacker.
1.
Close the front door.
2.
The stack tray moves upward.
When you press the open button of the front cover, the stack tray moves downward and
3.
is placed in the cart.
Place the cart in the stacker
Place the cart#
1
Press the open button to open the
front cover.
Chapter 4 - Troubleshooting46
RemarksActionStep
Page 47

Place the cart in the stacker
RemarksActionStep
Insert the cart in the stacking area.2
Close the front cover.3
WARNING
When you close the cover, be careful
not to get your fingers caught.
Chapter 4 - Troubleshooting 47
Page 48

Place the trays in the stacker
Place the trays in the stacker
When to do
The error indicator on the open button of the front cover flashes, and the error indicator,
that shows the stack tray that is not placed correctly, lights.
The error indicator on the open button of the front cover flashes, and the error indicator
for overlapping stack trays lights.
Place the stack trays in the stacker
Place the stack trays in the stacker#
1
Press the open button to open the
front cover.
Insert the stack trays correctly.2
RemarksActionStep
When inserting the stack trays, make
sure that you align them with the cart
alignment label. The stack trays will
not move upward unless they are
aligned with the cart alignment label,
even if you close the front cover.
•
If a stack tray is not placed in the
stacker, insert the stack tray.
•
If the stack trays are overlapping,
remove the overlapping stack tray
and insert it correctly.
Chapter 4 - Troubleshooting48
Page 49

Place the trays in the stacker
RemarksActionStep
Close the front cover.3
WARNING
When you close the cover, be careful
not to get your fingers caught.
Chapter 4 - Troubleshooting 49
Page 50

Place the trays in the stacker
Chapter 4 - Troubleshooting50
Page 51

Appendix A Specifications
Page 52

Specifications
Specifications
High Capacity Stacker-E1
Note:
Whenever a number of sheets is mentioned in the table below, the figure is based on
media of 80 g/m² (20 lb Bond).
Specifications of High Capacity Stacker-E1#
once
tray
SpecificationItem
(Offset) stacking for a large volume of sheetsDescription
Up to 2Number of units connected at
1,000 sheets eachOutput capacity for the output
Output capacity for the stack
trays
Supported media sizes for the
output tray
Supported media sizes for the
stack trays
Dimensions (HxWxD)
Weight
10,000 sheets A4, B5, LTR, EXEC (5,000 per
stack tray) or 5,000 sheets A3, B4, A4R, 13" x
19", 12" x 18", 11" x 17", Legal, LetterR, 320 x
450 mm (SRA3)
Minimum 182 mm x 182 mm (7.2" x 7.2")
Maximum 330.2 mm x 487.7 mm (13" x 19.2")
Minimum 257 mm x 182 mm (10.1" x 7.2")
Maximum 330.2 mm x 630 mm (13" x 24.8")
If you use media which length in feed direction is
longer than 229 mm (9.0"), the media will output
across both stack trays.
50 - 300 g/m² (14 lb Bond - 110 lb Cover)Supported media weights
1362 mm x 997 mm x 792 mm (53.62" x 39.25"
x 31.25")
When the second High Capacity Stacker is attached, the total width is 1999 mm (78.7")
210 kg (463 lb)
When the second High Capacity Stacker is attached, the total weight is 420 kg (926 lb)
Appendix A - Specifications52
Page 53

Power source
Specifications
SpecificationItem
US: 120-127V AC, 60Hz, 15A
EUR/Oceania: 220-240V AC, 50/60Hz, 6A
The second stacker must get power from the first
stacker.
Appendix A - Specifications 53
Page 54

Index
Index
B LED
Paper jam .......................................................29
Breaker
Breaker ...........................................................10
C
C LED
Paper jam .......................................................31
Capacity
Output tray ....................................................52
Stack tray ........................................................52
Cart
Cart ...................................................10, 18, 46
Stacking area ...................................................46
Circuit breaker
Circuit breaker ................................................45
Clearing
Paper jam .......................................................24
Conversion table for commercial names and user
interface names
Conversion table for commercial names and user
interface names .................................................8
Error indicators ..............................................10
Error location
Error location .........29, 31, 33, 36, 38, 41, 48
Stacking area ...................................................44
Error locations
Labels .............................................................24
F
F1-F4 LEDs
Paper jam .......................................................38
Front cover
Front cover .....................................................10
H
Hardware naming in User Interfaces
Hardware naming in User Interfaces .................8
Horizontal delivery
Paper jam .......................................................38
I
Indicator
Error ...............................................................12
Status ..............................................................12
D
D1-D3 LEDs
Paper jam .......................................................33
Delivery area
Paper jam .................................................31, 33
Dimension
Stacker ............................................................52
E
E1-E2 LEDs
Paper jam .......................................................36
Entrance of delivery area
Paper jam .......................................................29
Error
Error ...............................................................27
No power .......................................................45
Error indicator
Error indicator ................................................12
Error indicators
54
L
Labels
Clearing paper jam .........................................24
Error locations ................................................24
M
Machine description
Machine description .......................................10
Main power switch
Main power switch .........................................10
Media size
Output tray ....................................................52
Stack tray ........................................................52
Media weights
Media weights ................................................52
N
No power
No power .......................................................45
Page 55

Index
Number of units connected
Number of units connected ............................52
O
Offset stacking
Offset stacking ................................................17
Open button
Open button ..................................................10
Output area
Paper jam .......................................................38
Output locations
Output locations ............................................16
Output tray
Output tray ..............................................10, 16
Capacity .........................................................52
Media size .......................................................52
Paper jam .......................................................41
P
Paper holders
Paper holders ..................................................10
Paper jam
Paper jam .................................................24, 27
B LED ............................................................29
C LED ...........................................................31
D1-D3 LEDs .................................................33
Delivery area ............................................31, 33
E1-E2 LEDs ...................................................36
Entrance of delivery area .................................29
F1-F4 LEDs ...................................................38
Horizontal delivery .........................................38
Output area ....................................................38
Output tray ....................................................41
Stacking area ...................................................36
Power
Power .............................................................52
Error ...............................................................45
Power source
Power source ..................................................52
Right cover
Right cover .....................................................10
S
Sort by page
Sort by page ....................................................17
Sort by set
Sort by set .......................................................17
Specifications
Stacker ............................................................52
Stack tray
Stack tray ........................................................16
Capacity .........................................................52
Media size .......................................................52
Stack trays
Stack trays ......................................................48
Stacker
Dimension ......................................................52
Main sections .................................................10
Parts ...............................................................10
Remove sheets ................................................18
Specifications ..................................................52
Weight ...........................................................52
Stacker mode
Offset stacking ................................................17
Sort by page ....................................................17
Sort by set .......................................................17
Stacking area
Cart ................................................................46
Error location .................................................44
Paper jam .......................................................36
Stacking error
Stacking error .................................................44
Status indicator
Status indicator ...............................................12
W
Weight
Stacker ............................................................52
R
Remove cart with sheets
Remove cart with sheets ..................................19
Remove sheets
Stacker ............................................................18
Remove sheets from stack tray
Remove sheets from stack tray ........................21
55
 Loading...