

Occhio Piu piano LED, Piu piano in LED Instructions Manual

Più piano LED
Più piano in LED
Instructions
2
Electrical components must be tted only
by qualied personnel.
The spotlight must be disconnected from
the mains before any work is carried out
on it.
Maintain the minimum safety distance
from ammable materials.
Before working on the spotlight (tting it,
changing the bulb or inserts, aligning the
spotlight head, etc.), always switch it off
and let it cool for at least 30 minutes.
Caution, risk of burns.
Never touch the spotlight/spotlight
head while hot.
Repairs must be carried out only by
authorised, qualied personnel or the
manufacturer.
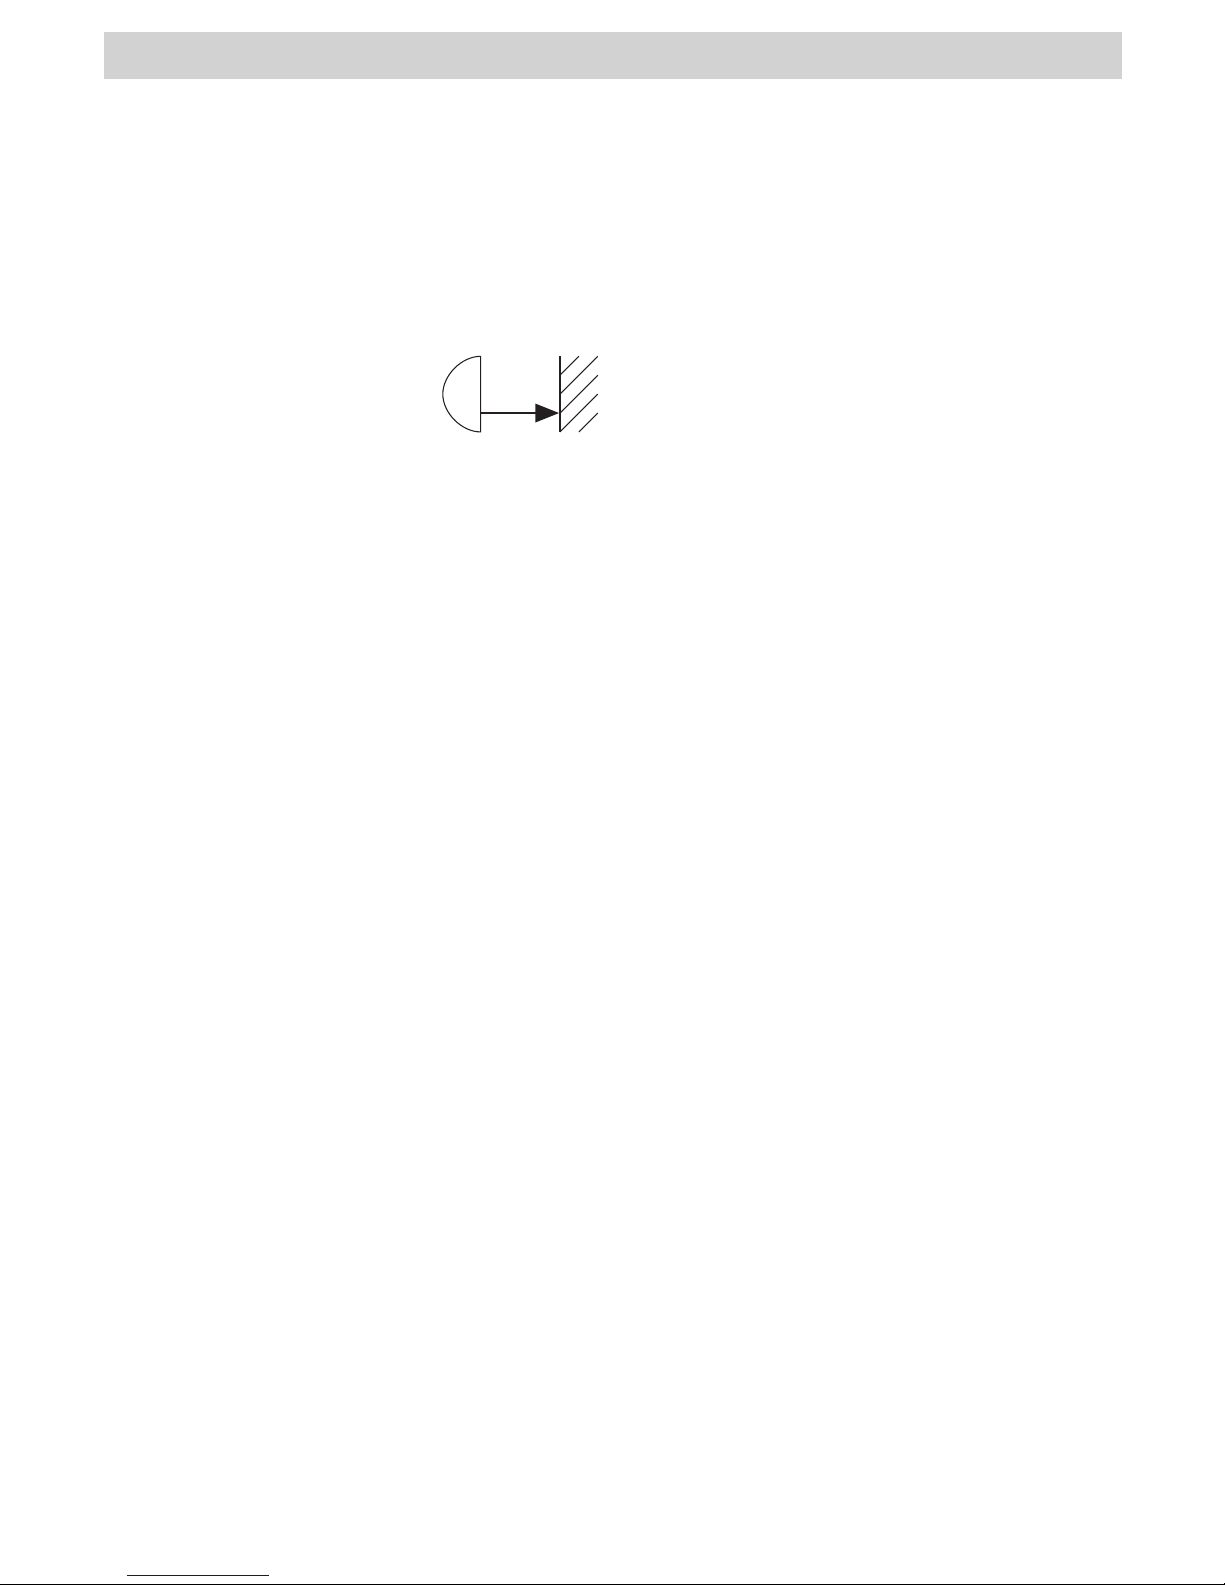
$
0.2m
Safety precautions

3
Occhio Più piano LED and Occhio
Più piano in LED are LED spotlights in
safety class 2.
The spotlights are optionally available with
differently equipped heads.
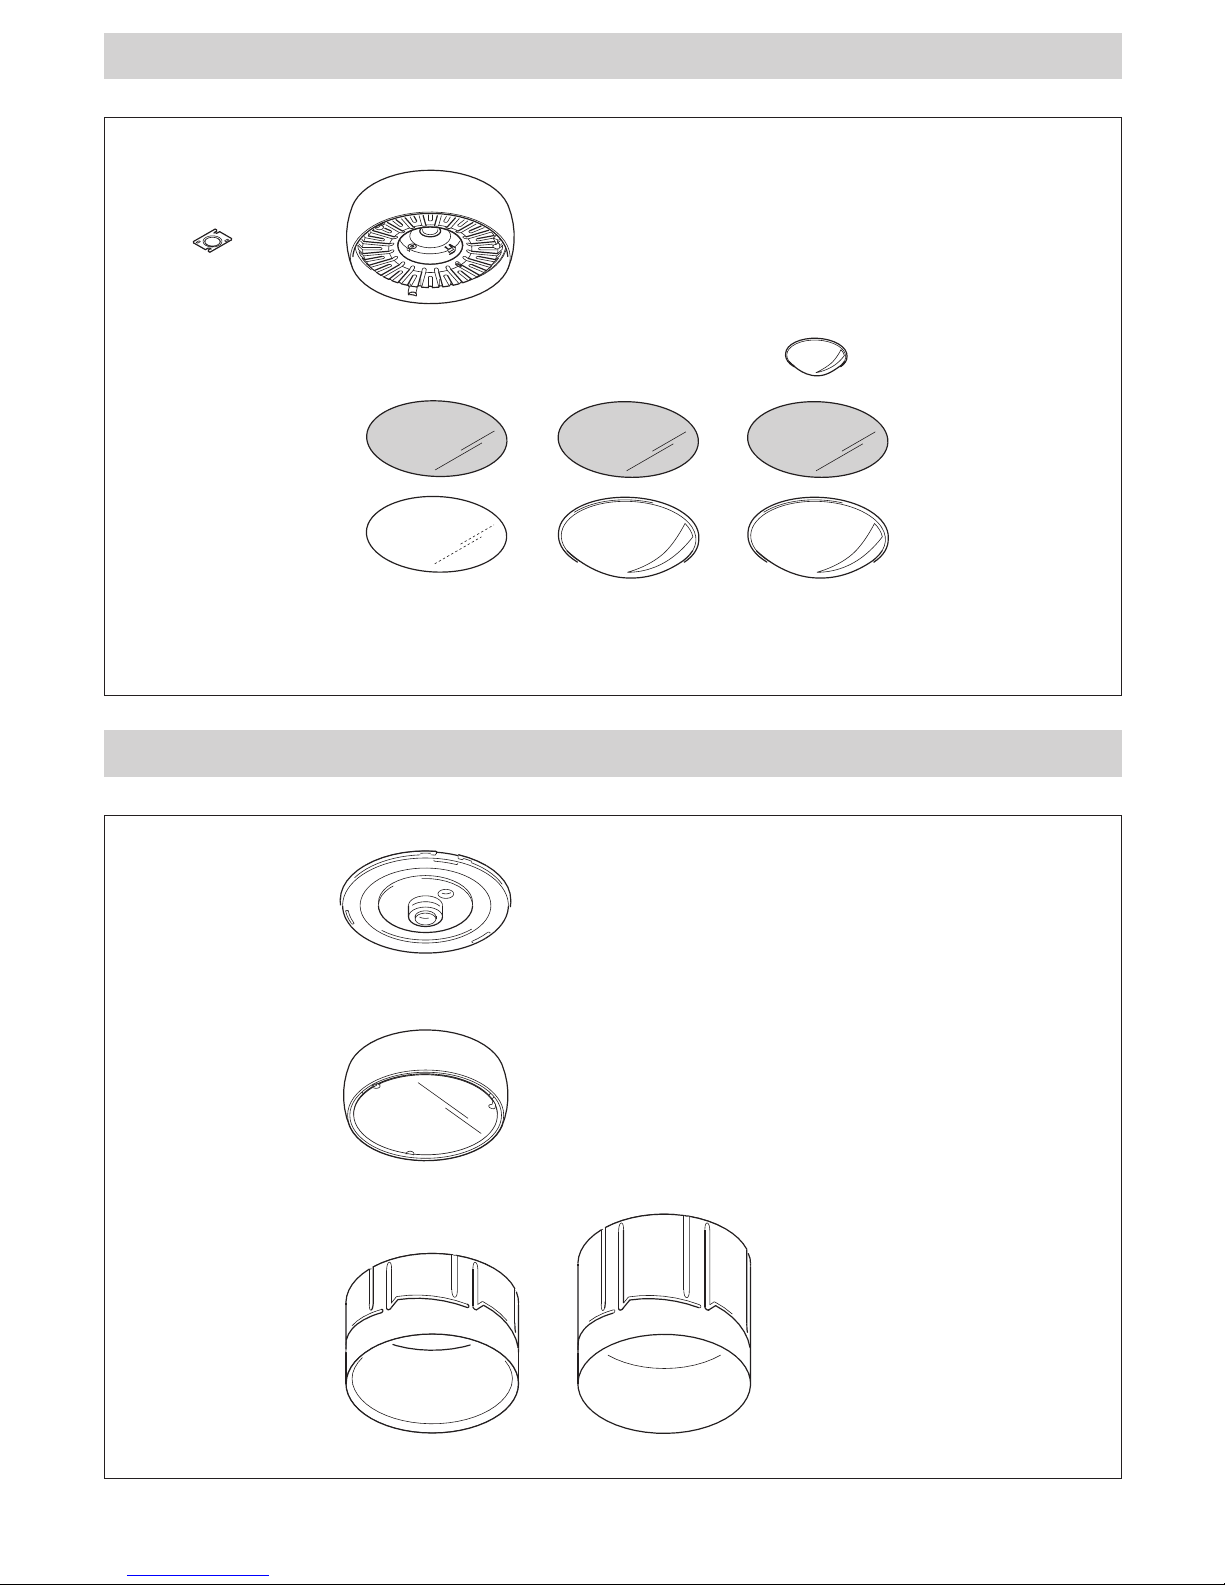
Product description
Contents
2 Safety precautions
3 Product description
3 Contents
2 Fitting diagram
4 Più piano mounting ring with cover
5 Più piano plaster ring
6 Più piano retaining ring for panels
7 Più piano spotlight
3 Preparation
8 Più mounting ring with cover
10 Più doppio mounting ring with cover
12 Più plaster ring
18 Più retaining ring for panels
3 Fitting
22 Fitting the spot
26 Fitting the glass inserts/lens
28 Preparing the tube
3 Installation
32 Electrication
34 Inserting the spotlight
35 Putting the cover in place (only if
tting with mounting ring)
36 Adjusting the tube
37 Adjusting the head
4 Removing the spotlight
Replacing the bulb/inserts
38 Removing the spotlight
40 Removing/replacing the inserts
44 Removing the spot lens
46 Replacing the bulb
Other information and contact
50 Care instructions
50 Information & contact
Technical data
51 Technical data
52 Più piano LED
53 Più piano in LED
54 Mounting
54 Bulb
54 Transformer
4
Fitting diagram – Più piano with mounting ring and cover
Cut-out dia.:
144 mm
Ceiling thickness:
10-50 mm
Mounting ring
tube piano in
incl. head
installation depth:
135 mm
tube piano
incl. head
installation depth:
96 mm
cover
doppio cover
C
B B
C
S
C
B B
C
S
LED driver
5
Cut-out dia.:
166 mm
Ceiling thickness:
10-35 mm
Fitting diagram – Più piano with plaster ring
Mounting ring
Plaster ring
tube piano in
incl. head
installation depth:
135 mm
tube piano
incl. head
installation depth:
96 mm
C
B B
C
S
LED driver
6
Fitting diagram – Più piano with retaining ring for panels
Cut-out dia.:
132.5 mm
Ceiling thickness:
10-22 mm
Retaining ring
tube piano
incl. head
installation depth:
96 mm
tube piano in
incl. head
installation depth:
135 mm
C
B B
C
S
LED driver
7
Fitting diagram – Più piano head
Fitting diagram – Più piano tube + head
head
satinised glass
colour lter
(optional)
satinised glass/
colour lter
(optional)
colour lter
(optional)
bulb
(already tted)
head
tube piano intube piano
lid
B C S
spot lens 40°
lens
lens
8
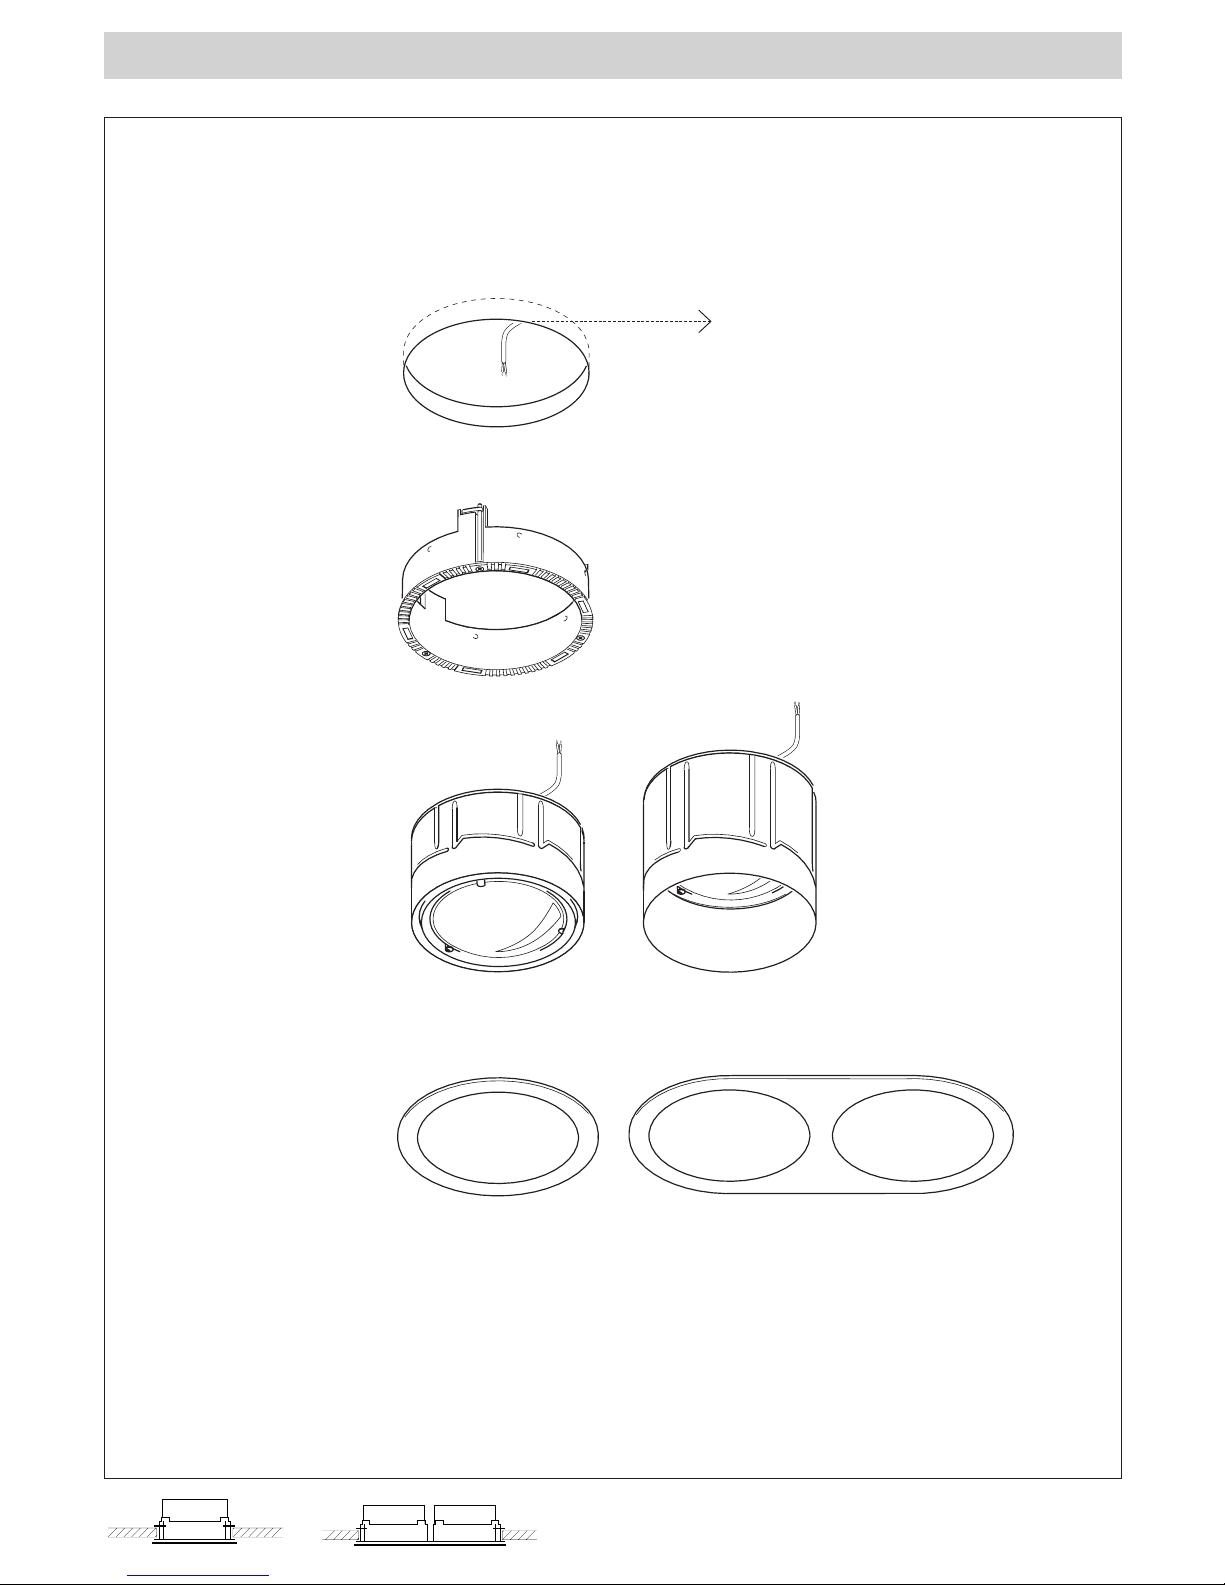
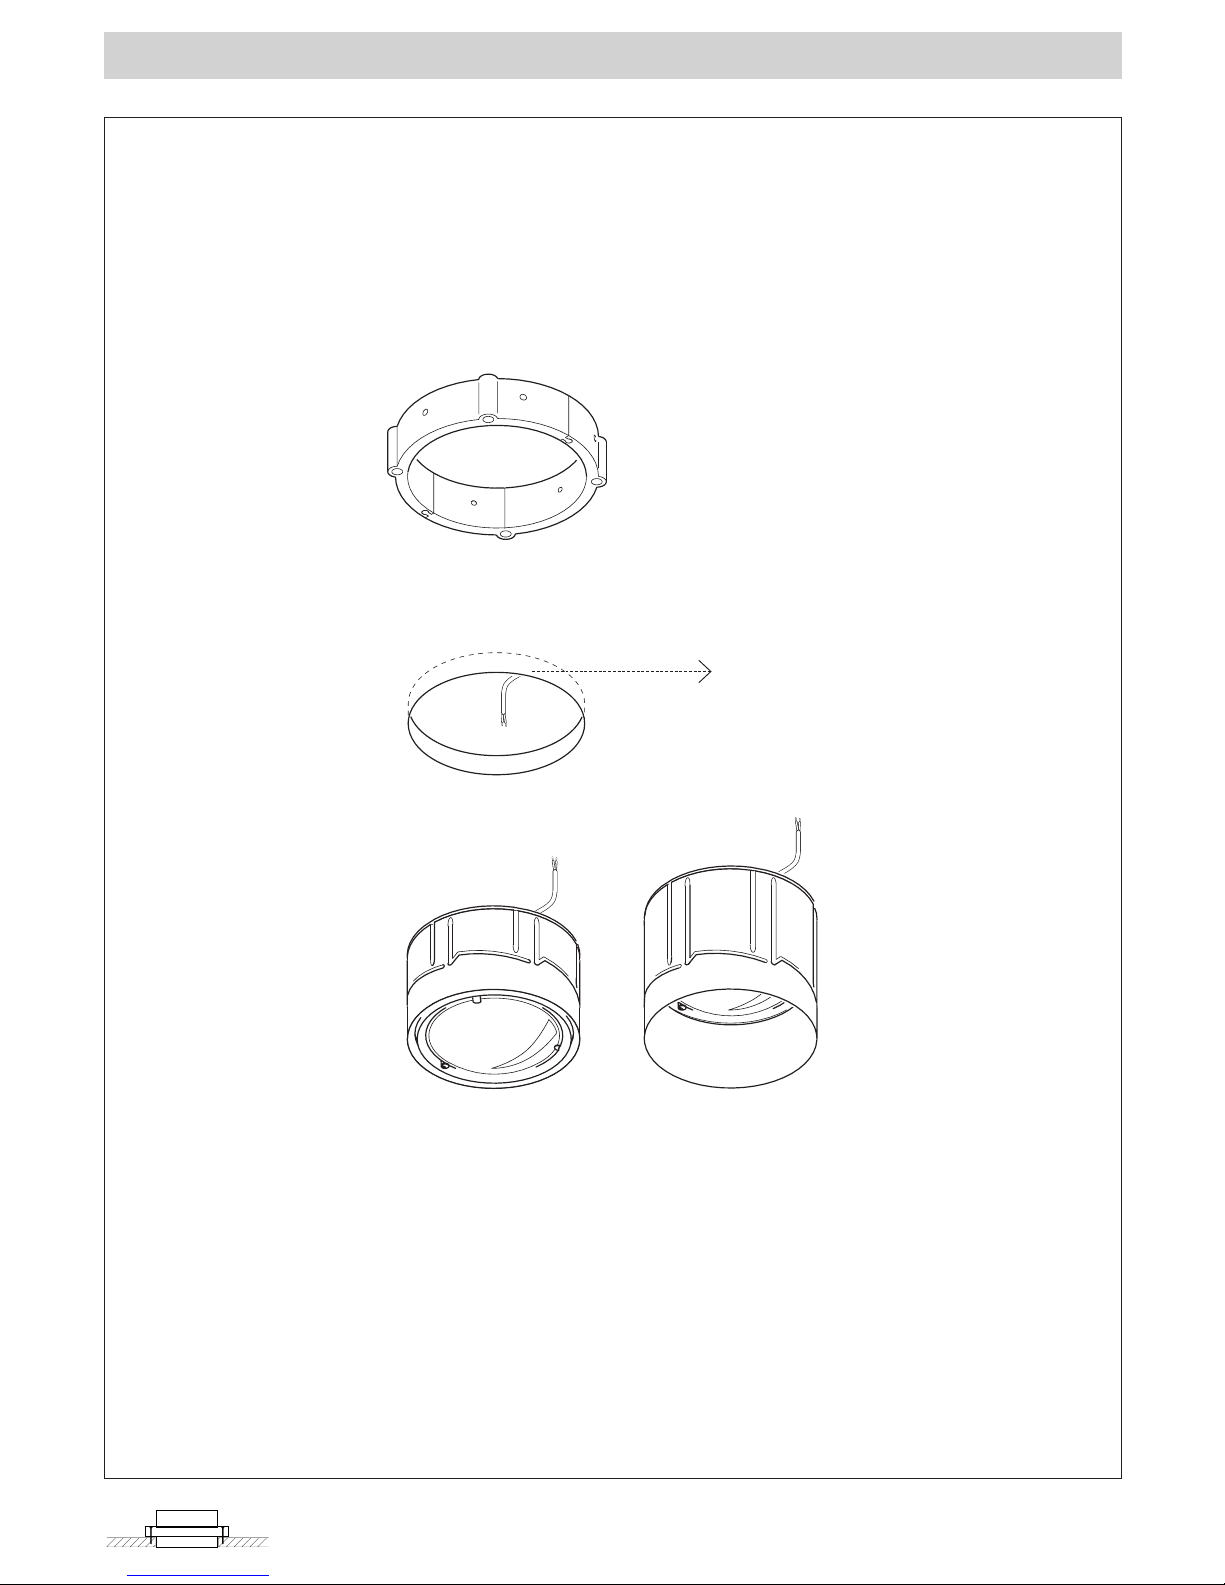
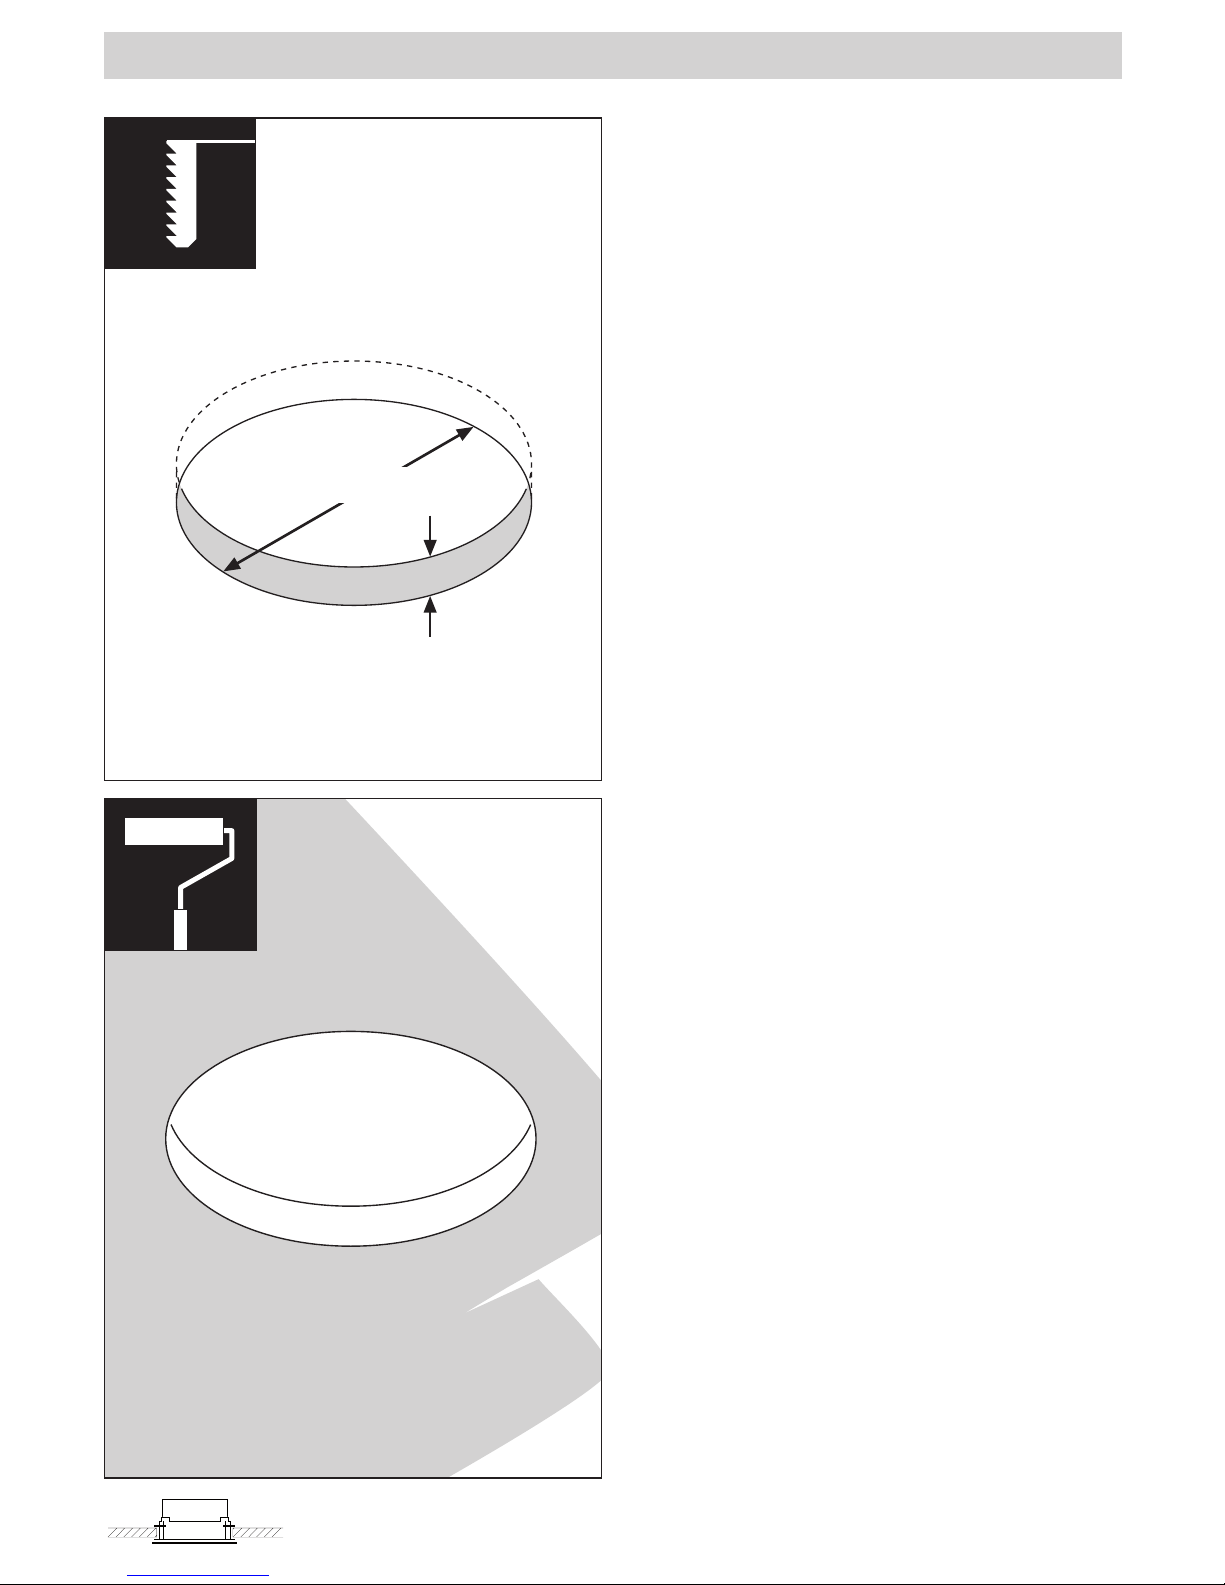
1 Preparing Più mounting ring with cover
Create a circular opening with a 144 mm
diameter.
Ceiling thickness: 10 mm to max. 50 mm.
Carry out any painting and decorating
work.
dia. 144 mm
10-50 mm
C
B B
C
S
9
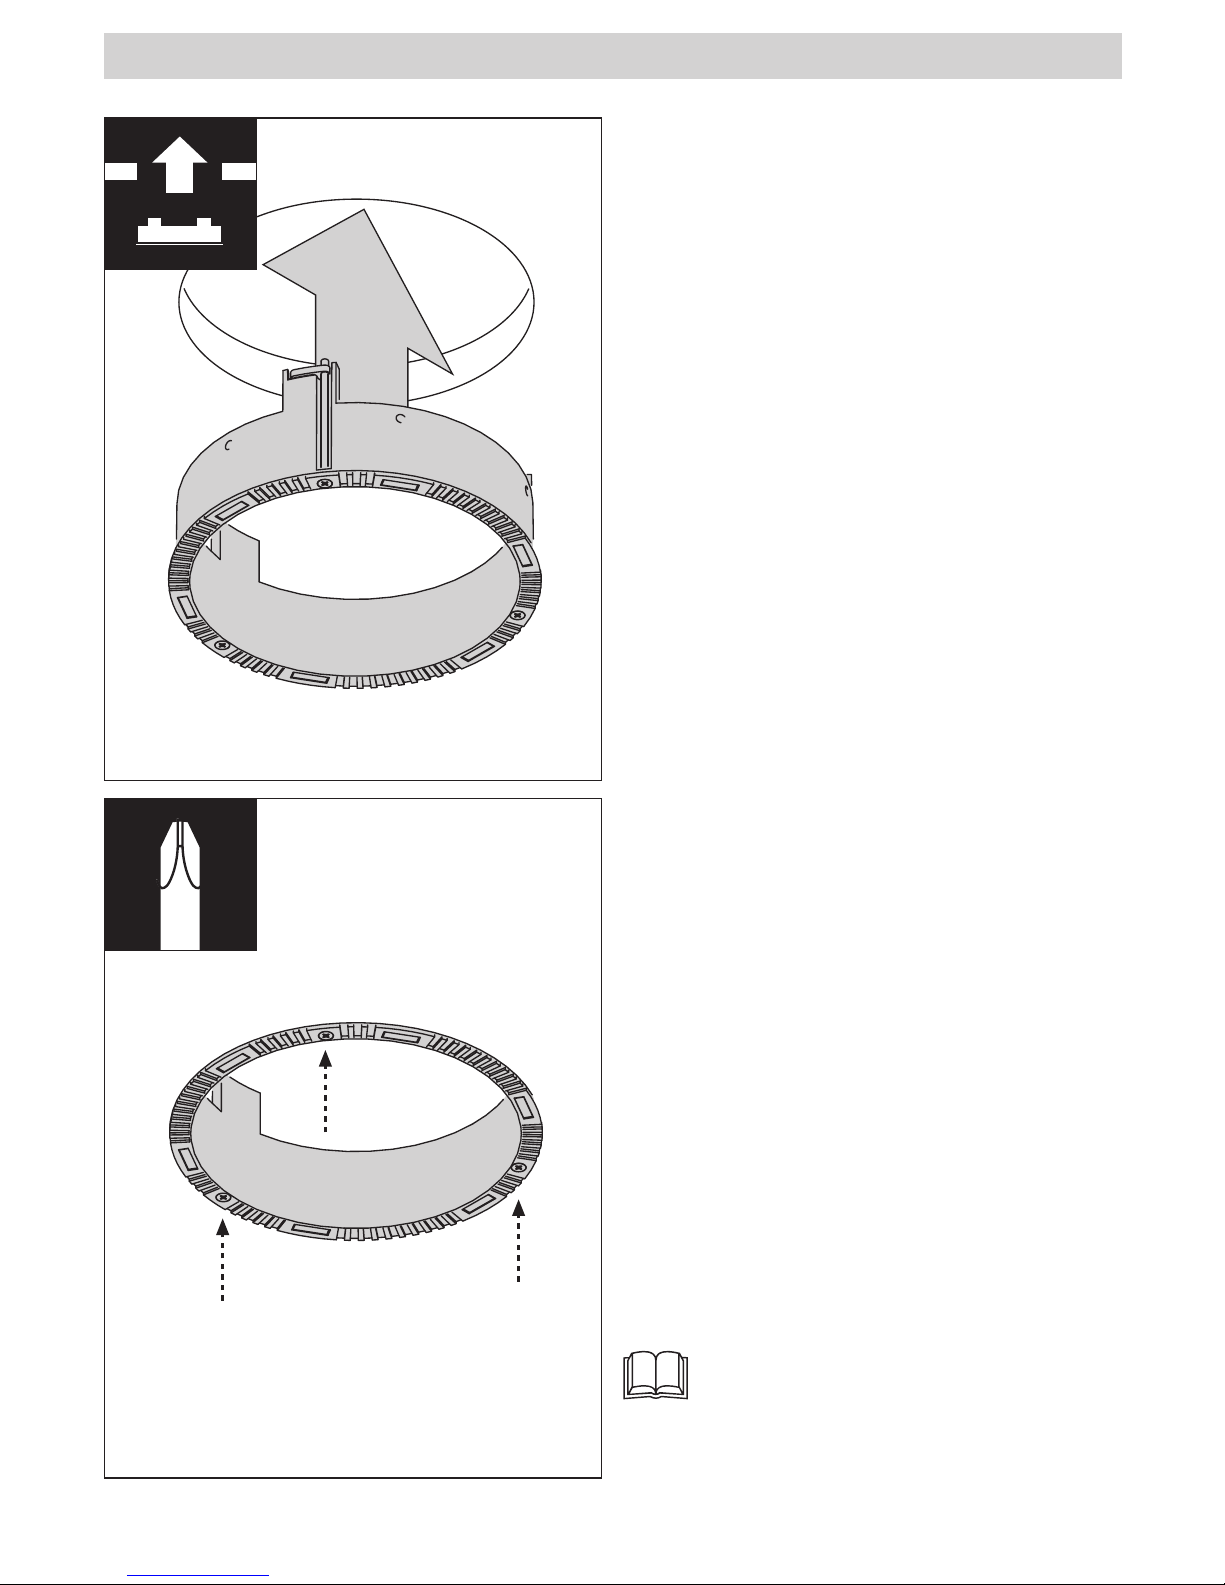
1 Preparing Più mounting ring with cover
Tighten 3 screws.
Check that the mounting ring is held in
place rmly.
Further installation:
Fitting
Place the mounting ring in the opening.
10
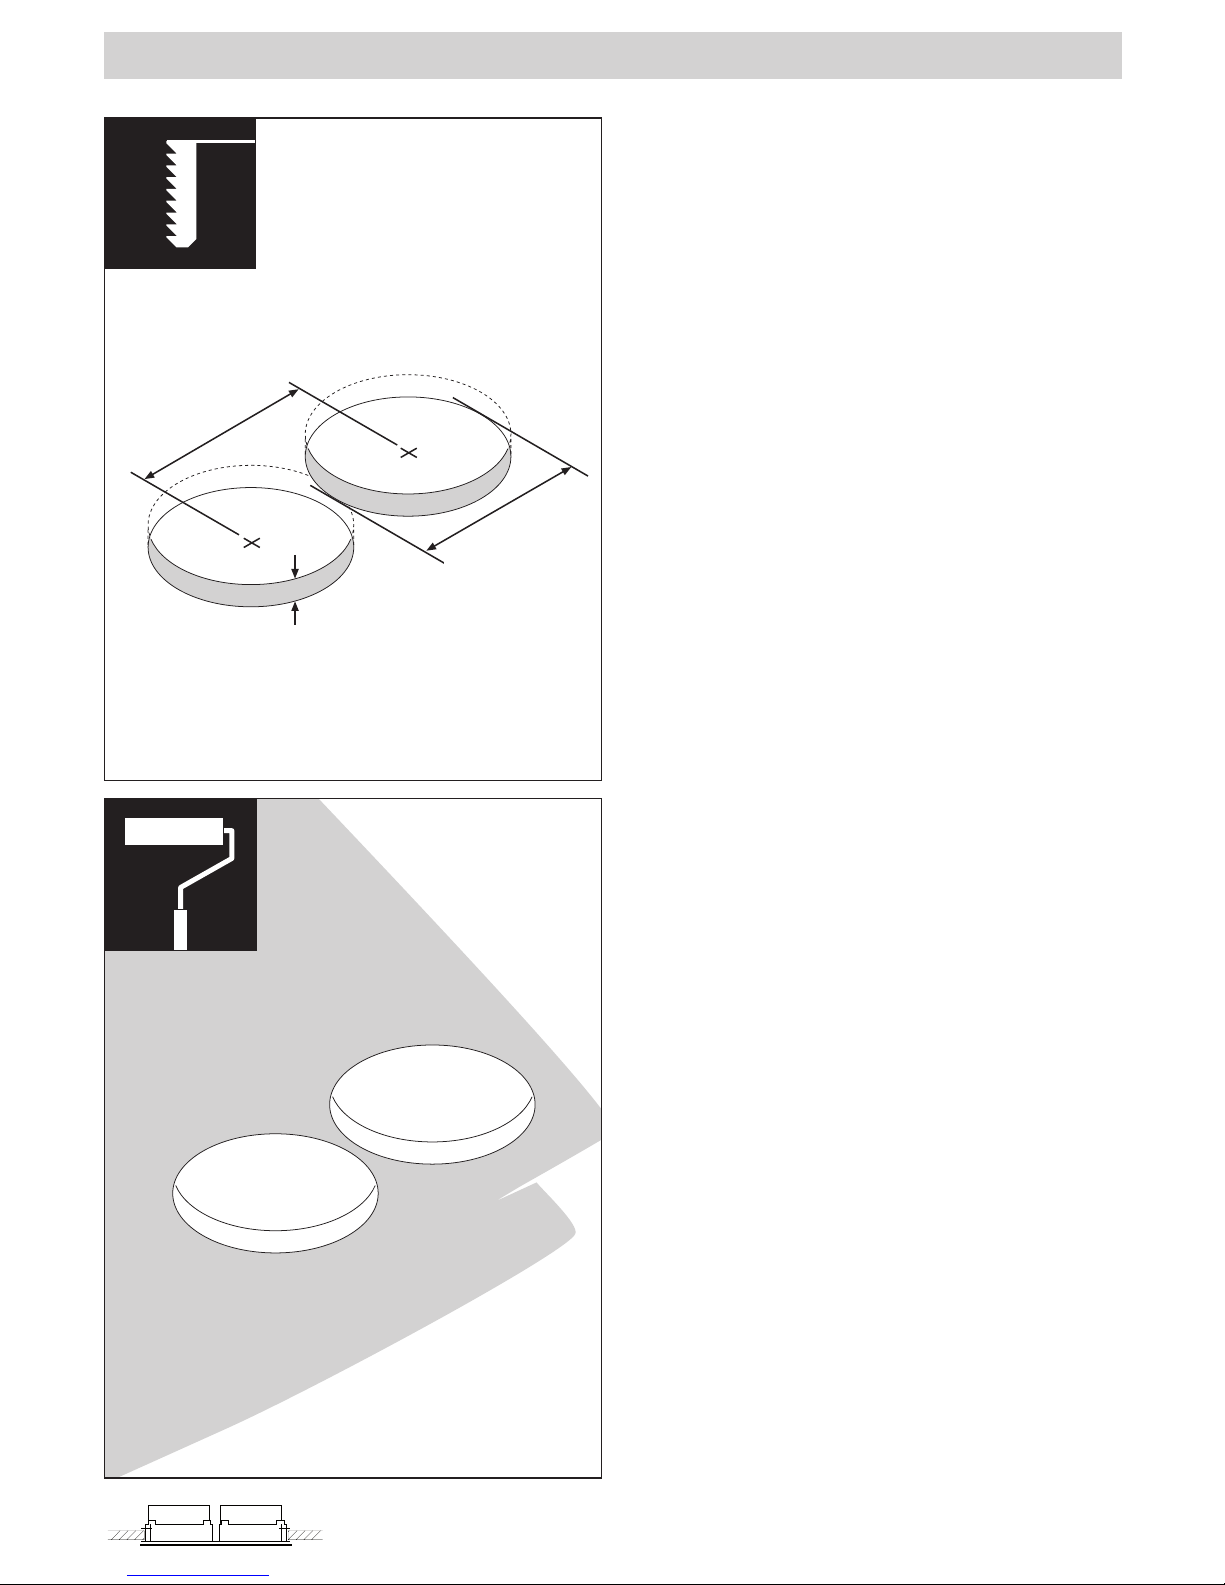
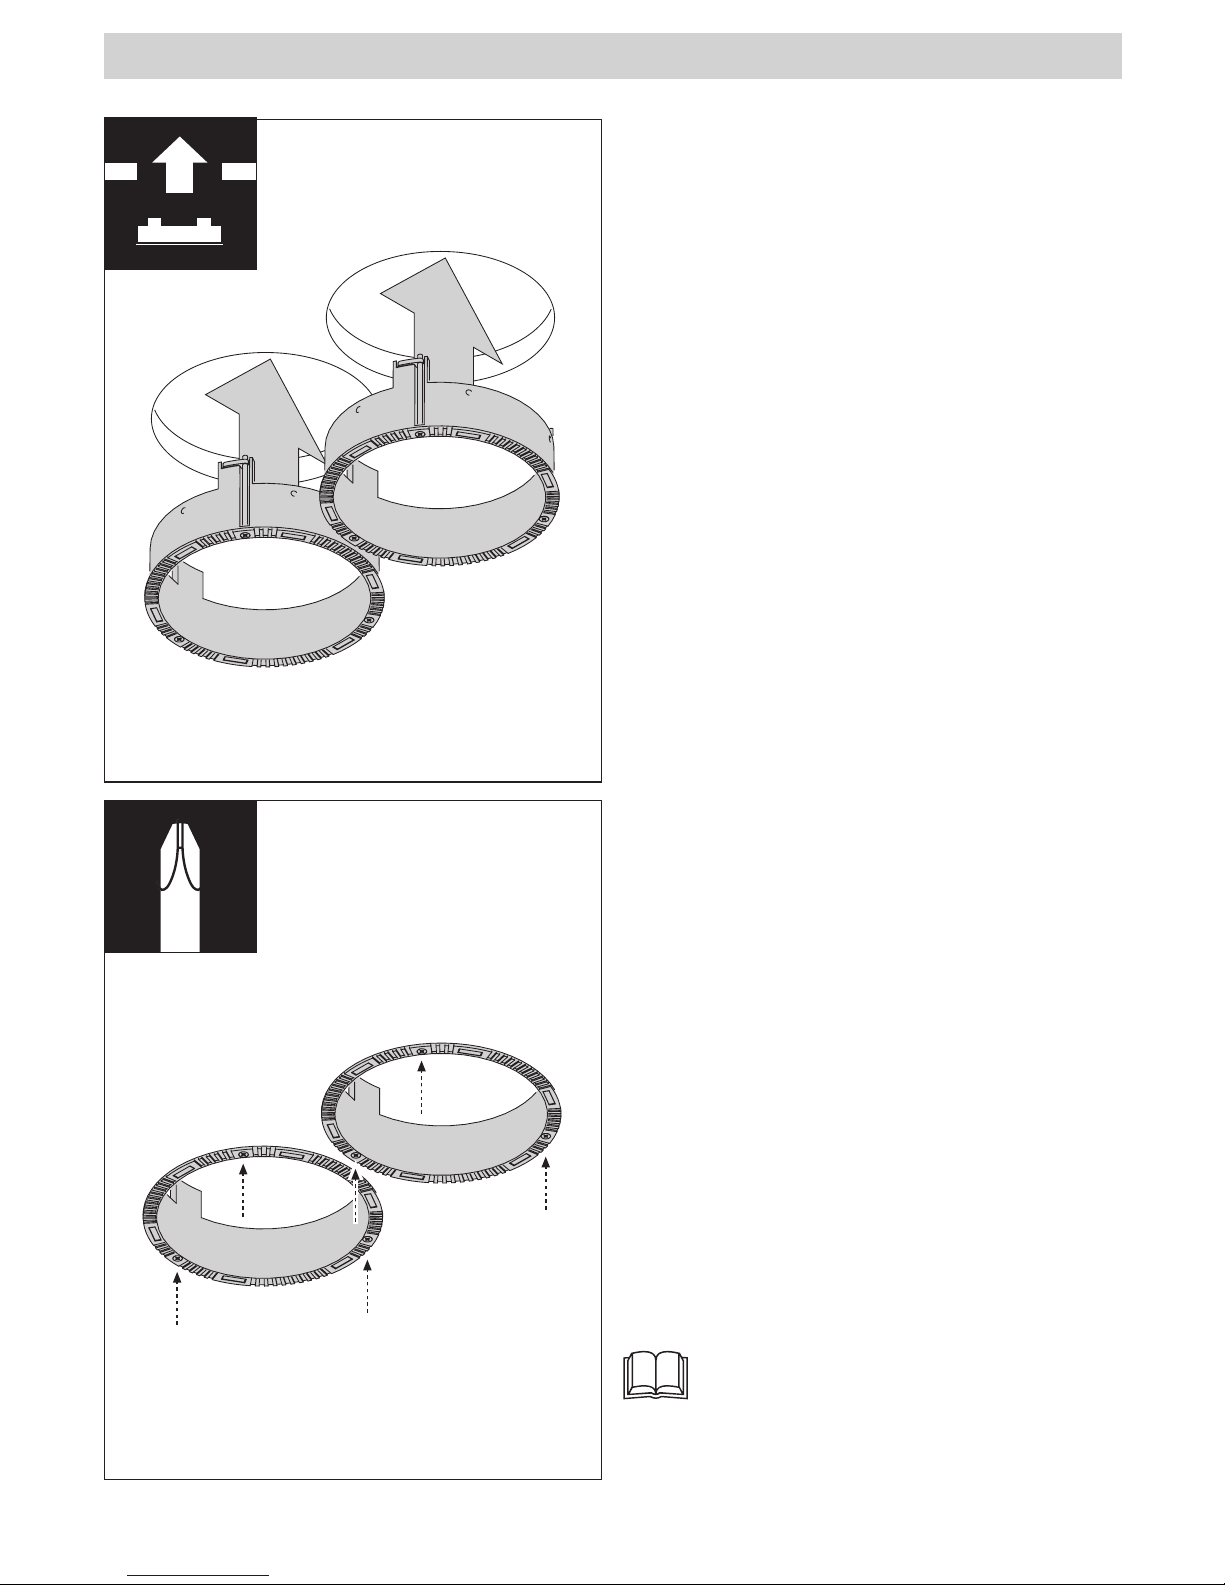
1 Preparing Più doppio mounting ring with cover
Create two circular openings each with a
144 mm diameter.
Distance between the circle centres: 162
mm
Ceiling thickness: 10 mm to max. 50 mm.
Carry out any painting and decorating
work.
dia. 144
mm
162 mm
10-50 mm
C
B B
C
S
11
1 Preparing Più doppio mounting ring with cover
Tighten 2 x 3 screws.
Check that the mounting rings are held
rmly in place.
Further installation:
Fitting
Place the mounting rings in the opening.

12
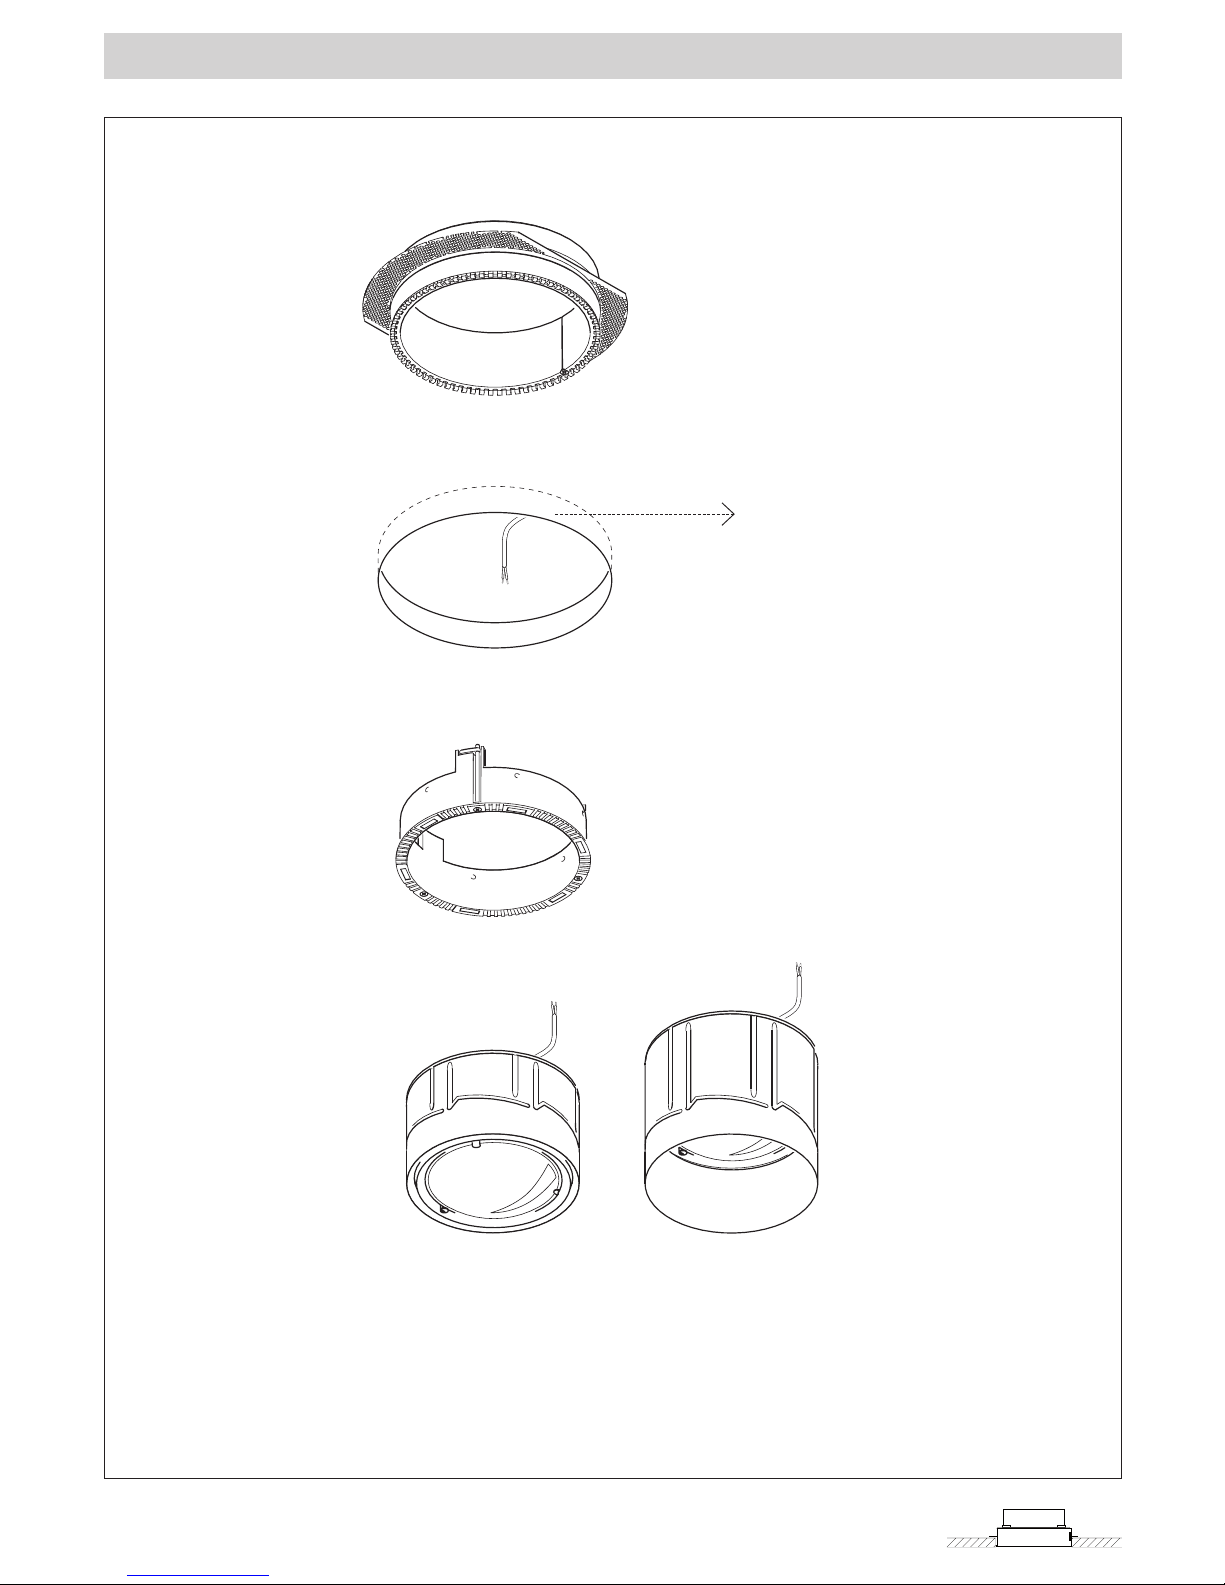
1 Preparing Più plaster ring
Create a circular opening with a 166 mm
diameter.
Ceiling thickness: 10 mm to max. 35 mm.
dia. 166 mm
10-35 mm
Guide the plaster ring through the
opening.
Should the cavity be too shallow, unscrew
the perforated plate from the plaster ring.
Then pass the perforated plate, without
the plaster ring, through the opening.
After xing the perforated plate into place,
screw the plaster ring back in.
C
B B
C
S

13
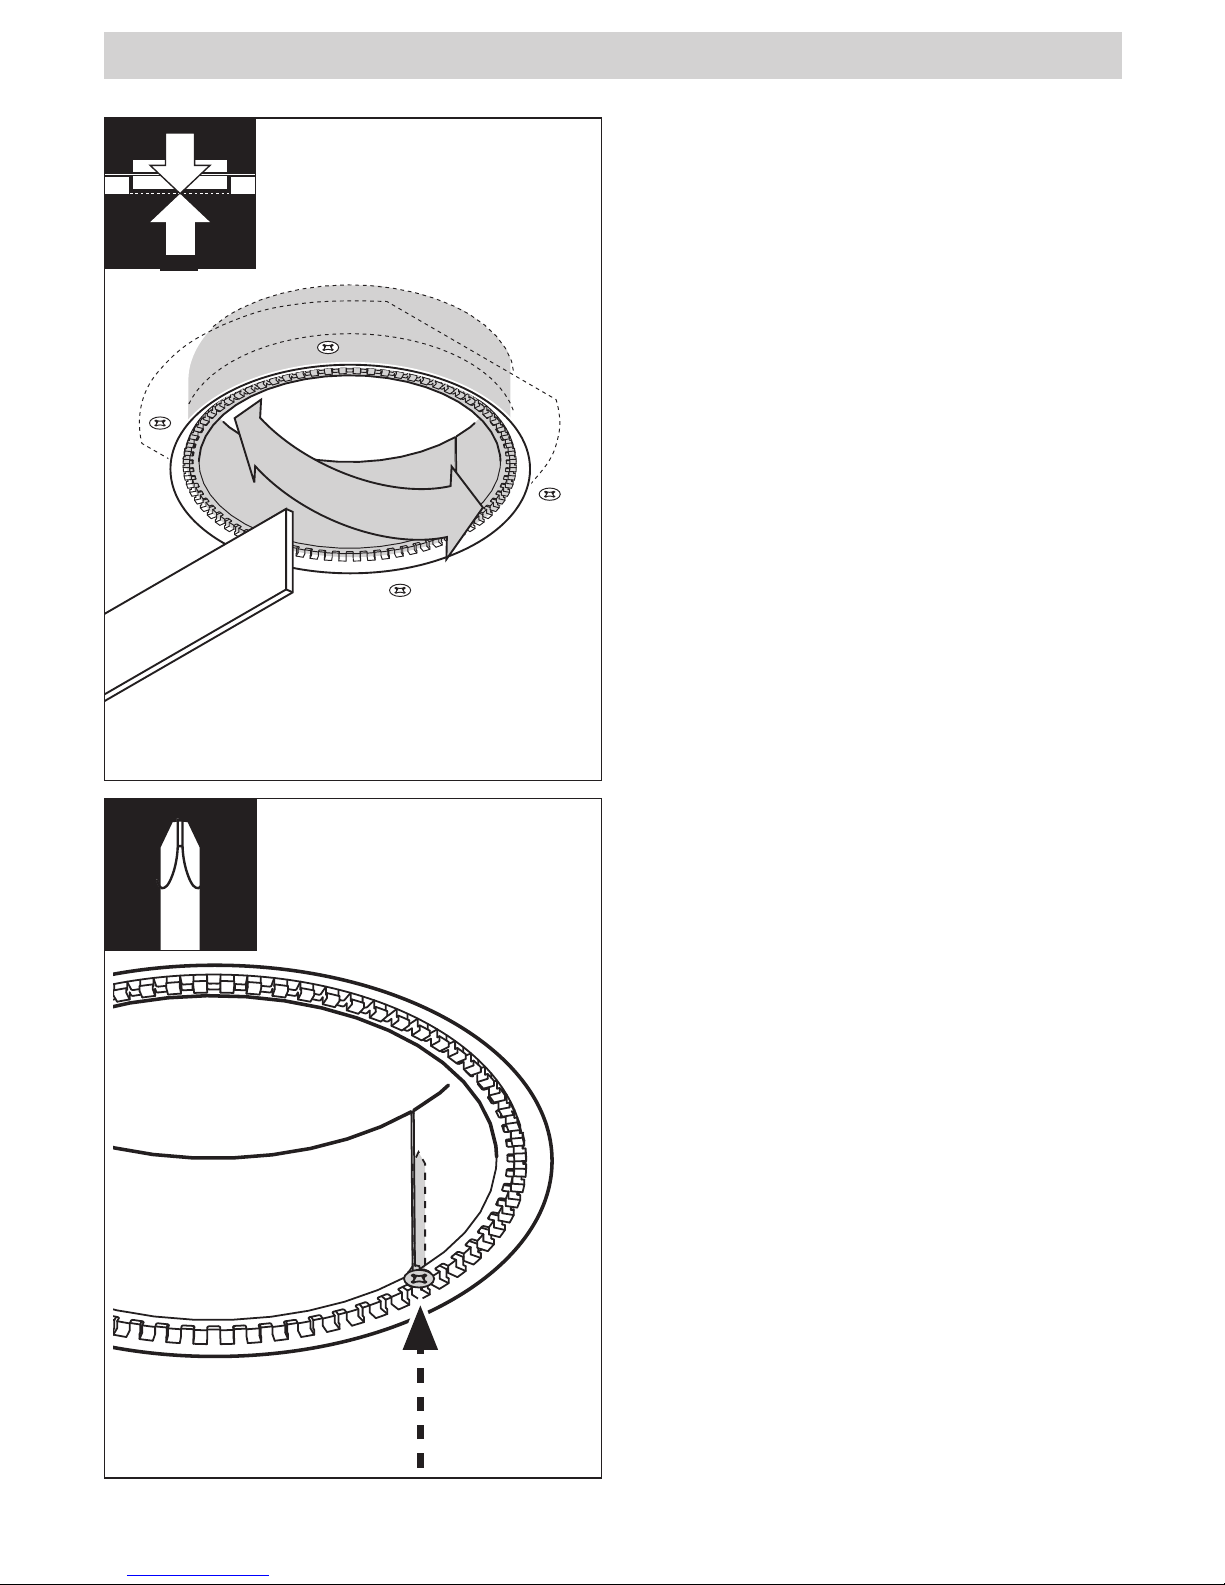
1 Preparing Più plaster ring
Insert the plaster ring into the opening
with the grooved edge facing downwards.
Using 4 drywall screws (supplied),
screw down the perforated plate of the
plaster ring through the ceiling panel.
14
1 Preparing Più plaster ring
Adjust the plaster ring to the level of the
plaster by screwing it in or out.
To x the position at which the plaster
ring is set, screw the supplied screw into
the plaster ring so that it is ush.
15
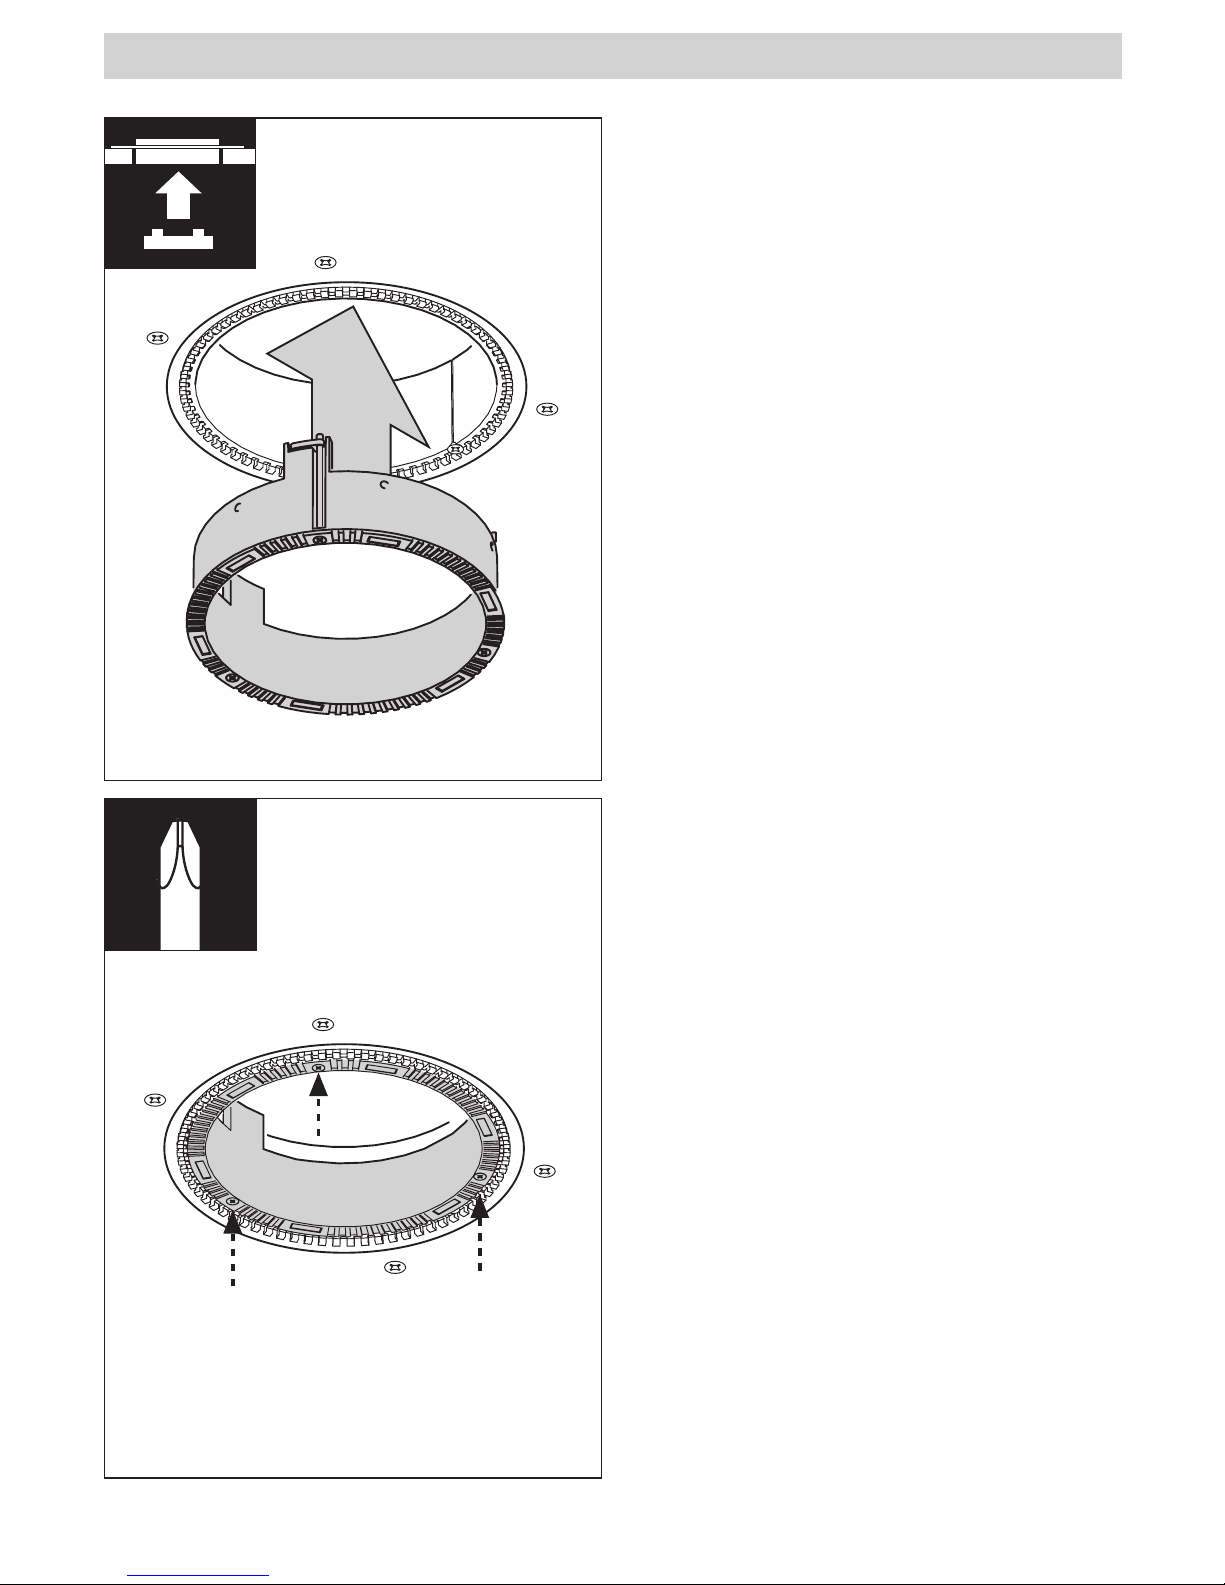
1 Preparing Più plaster ring
Insert the mounting ring into the plaster
ring.
Tighten 3 screws.
Check that the mounting ring is held in
place rmly.

16
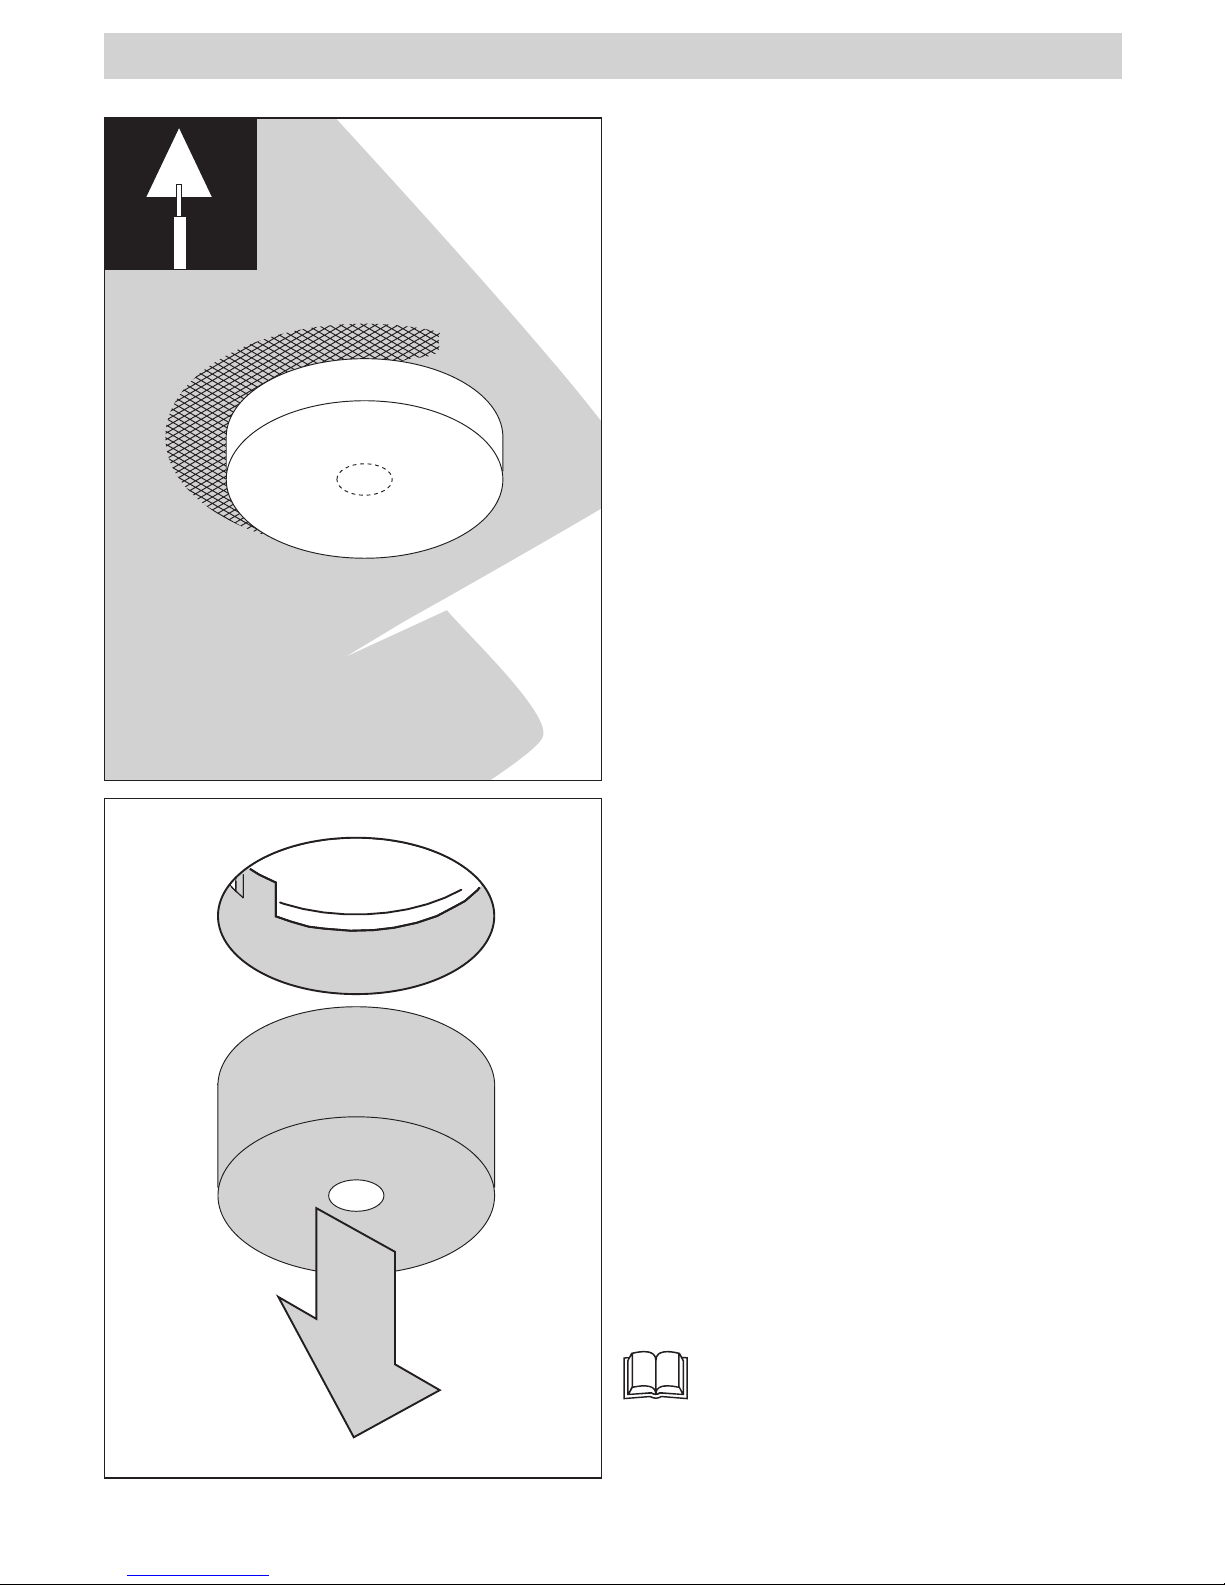
1 Preparing Più plaster ring
Place the protective cover in the opening.
Prime the ceiling and grooved areas of
the mounting rings with primer.
Take care to ensure that no primer is
applied to the inside of the mounting ring.
Allow primer to harden according to the
instructions given.
17
1 Preparing Più plaster ring
Carefully remove the protective cover. To
do so, pierce it in the middle if required.
If necessary, remove any residual plaster
from the inside of the mounting ring using
ne sandpaper.
Apply a thin layer of plaster.
Apply a ring of wire mesh to protect
against later stress cracks, then plaster.
Allow plaster to harden according to the
instructions given.
When hardened, sand down and replaster if required.
Allow plaster to harden according to the
instructions given.
Carry out any painting and decorating
work.
Further installation:
Fitting
 Loading...