


AHAP330 Skin
Installation Instructions
**** WARNING ****
Please thoroughly read the product warning
below before installation to provide for a safe
work environment.
1. Always consider the hazard to other people:
a. During installation, use warning signs, etc.
b. Don’t work with people directly below the work area as equipment
could fall and cause an injury
2. Be sure to securely fasten the access point to the wall or ceiling to before
installing the skin.
Installation Instructions
AHAP330 Skin
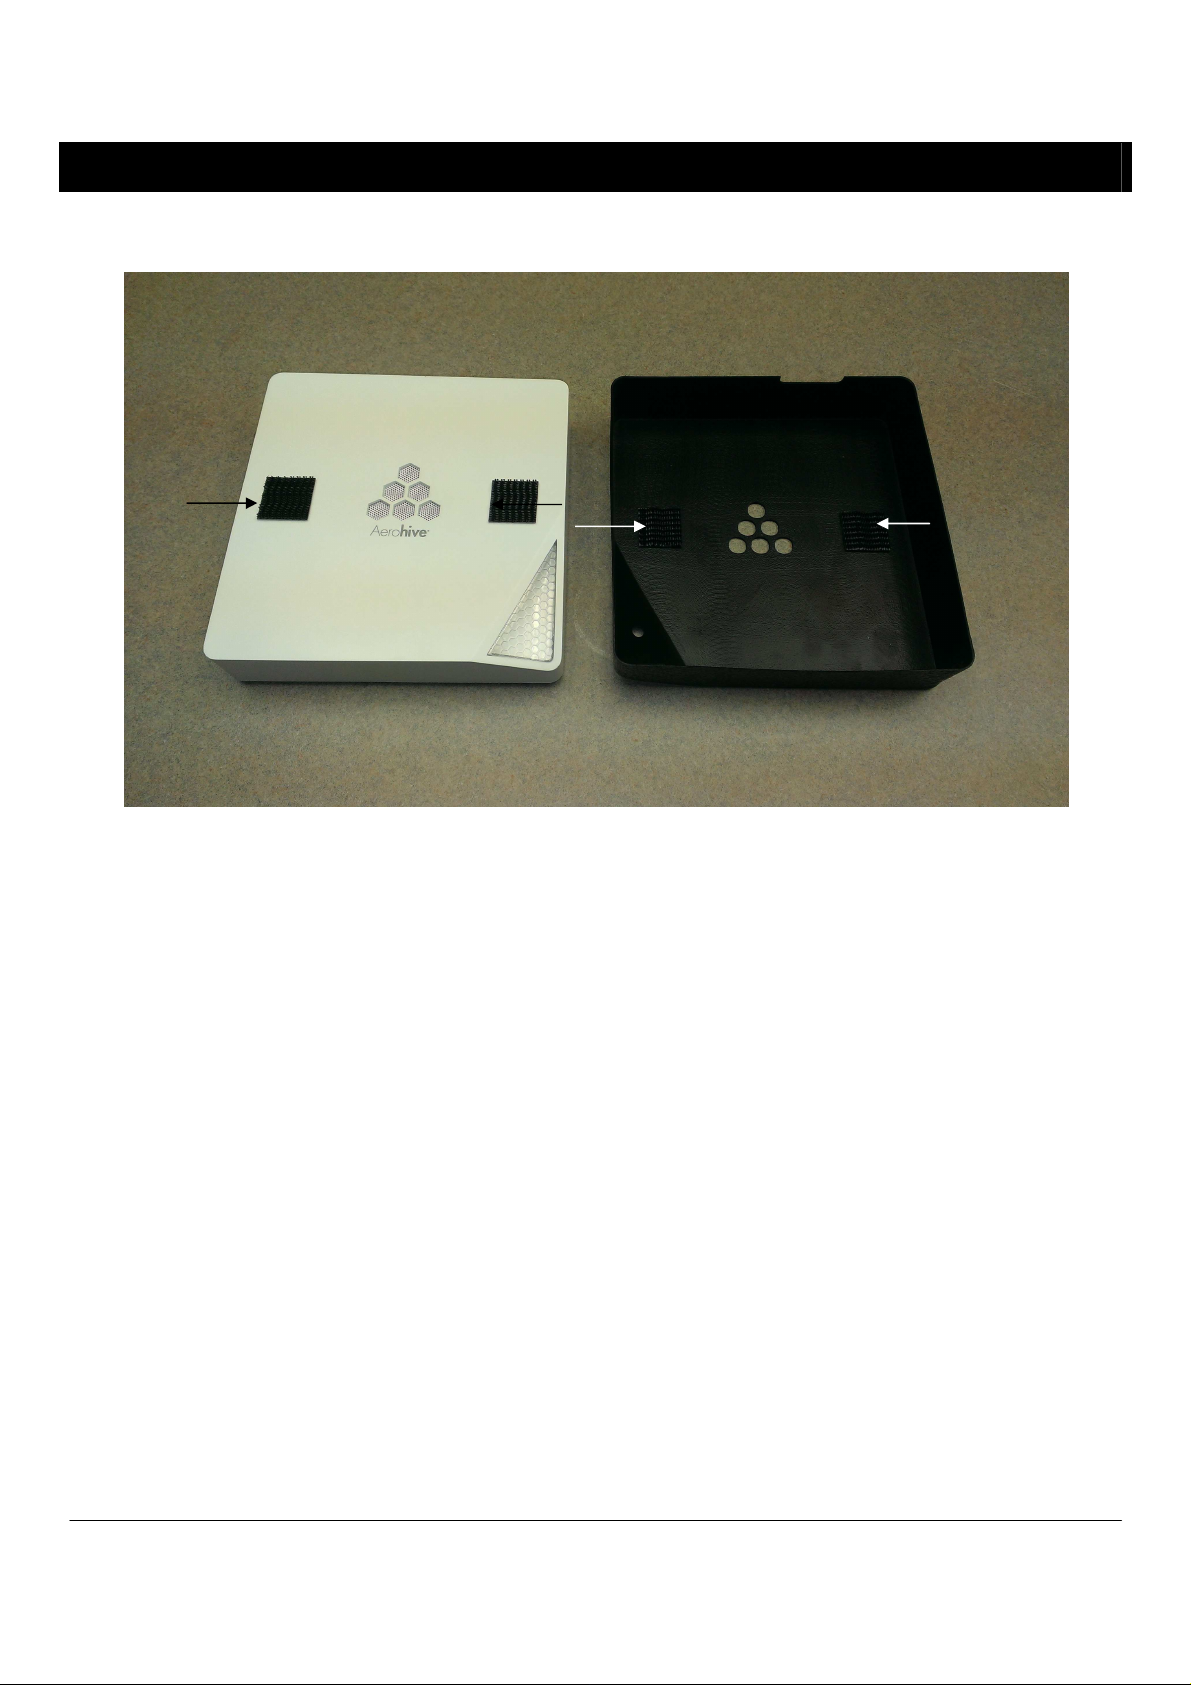
Figure 1: Aerohive AP330 Figure 2: Oberon Skin
The following procedure should be used to install the Oberon skin on the Aerohive Networks AP330
access point.
1) Be sure that the surfaces of the Aerohive AP and the skin are clean. Prepare both surfaces by
wiping with an alcohol swab to remove dirt and oil.
2) Remove the protective covering to expose the adhesive on the Velcro strips and place one
piece on each side the plastic dome of the Aerohive Access Point near the metal center
section as shown in Figure 1.
3) Repeat the procedure for the dome, placing the Velcro strips just outside of the raised emboss
inside the skin as shown in Figure 2.
4) Place the skin onto the Aerohive AP and press firmly to lock the Velcro strips together. Note
that the Velcro strips have significant holding power and removing the cover will be very
difficult.
Rev 04/04/14 Oberon, Inc.
•
1315 S. Allen Street
•
State College, PA 16801 Copyright 2014
 Loading...