


MODEL 1017
Installation Instructions
**** WARNING ****
Please thoroughly read the product warning
below before installation to provide for a safe
work environment.
1. When fastening the enclosure lid, be sure that the screws are completely
fastened to prevent the lid from accidentally falling
Installation Instructions
Model Numbers 1017
Assembly Components:
- Wall / Ceiling Enclosure, Model 1017 Assembly – 1 each
- Tamper Resist Lid Screws – 6 each
- Cross Recessed Lid Screws – 6 each
- AP Mounting Bracket – 1 each
- #6 Screws – 4 each
- #2 Screws – 4 each
If any of these items are missing, contact your Oberon representative.
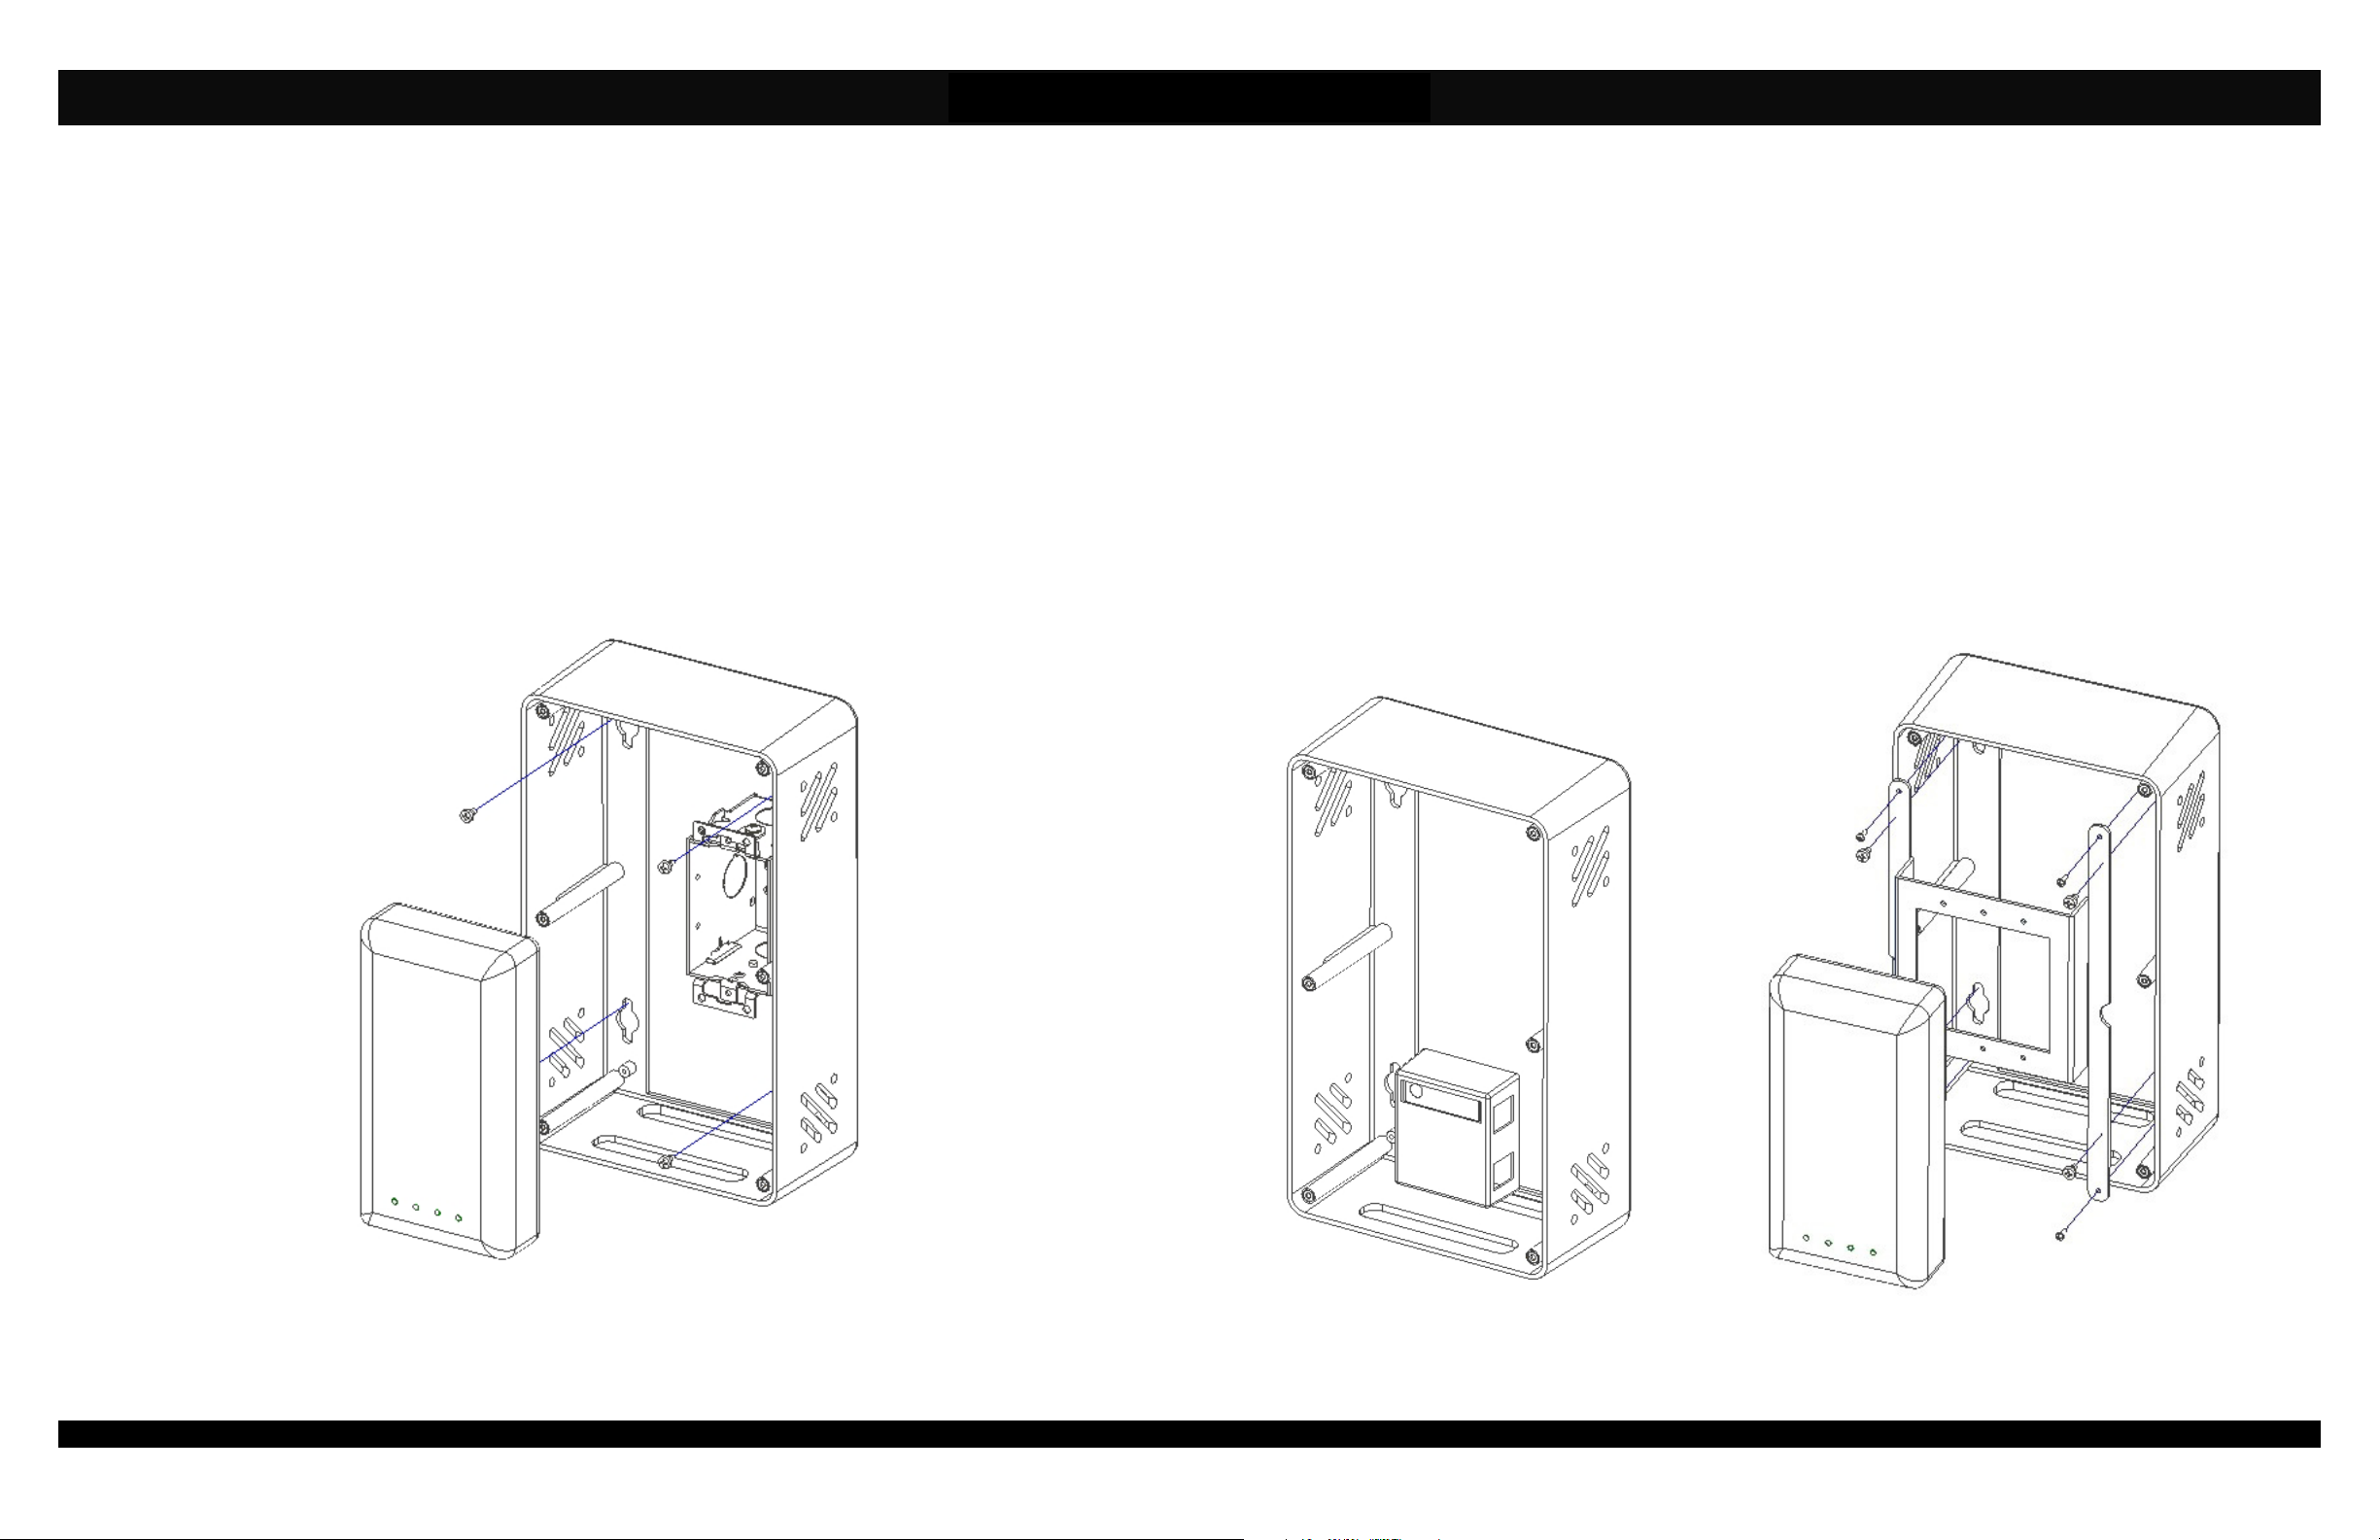
Over Wall Plate Installation
Step 1 – Remove the enclosure lid and align the enclosure's back cutout over the wall plate or data wall-box. Using the
keyhole mounting slots, mark the pilot hole locations for wall anchors or other hardware (not included).
Step 2 – Fasten the enclosure to the surface using the pre-drilled hole locations and wall anchors or other hardware. Attach
the Ethernet cable to the access point and attach the access point to the data wall-box using the manufacturer's specified
mounting plate (Figure 1).
Step 3 – Fasten the lid with the provided screws, crossed recessed or tamper resistant. Installation is now complete.
Figure 1 - Access Point Install Over Wall Plate
Equipment Cord to Enclosure Installation
Step 1 – Remove the enclosure and mark the pilot hole locations for wall anchors or other hardware (not included) using the
keyhole slots.
Step 2 – Fasten the enclosure to the surface using the pre-drilled hole locations and wall anchors or other hardware.
Step 3- A surface mount box (or biscuit jack) and equipment cord can be conveniently mounted inside the Model 1017. (Nonplenum rated cables can be used inside a plenum rated enclosure). Use an adhesive backed surface mount box. Consider
bend radius of horizontal cable and equipment cord when attaching the surface mount box.
Step 4 – Fasten the AP Mounting Bracket to the enclosure embosses using the provided #2 screws. If a surface mount box is
installed, attach the equipment cord from the surface mount box to the access point. Otherwise, attach the Ethernet cable
directly to the access point through the bottom cutout and attach the access point to the AP Mounting Bracket using the
manufacturer's specified mounting plate (Figure 3).
Step 5 – Fasten the lid with the provided screws, crossed recessed or tamper resistant. Installation is now complete.
Figure 2 – Surface Mount Box Install To Enclosure
Figure 3 – Access Point Install To Mounting Bracket
(877) 867-2312 • www.oberonwireless.com
P/N 2479 & 2599 06-6-16 Oberon, Inc. •••• 1315 South Allen Street •••• State College, PA 16801 Copyright 2016
 Loading...