

Installation Instructions
Model Number 1008-00
Assembly Components:
- Right angle wall mount – 1 each
- #6 - 32 screw (for attaching T-bar Bracket) – 2 each
- #8 - 32 screw (for attaching access point mounting plate) – 4 each
- Interlocking Adhesive strips – 4 each
- T-bar Bracket – 1 each
- Installation Instructions – 1 each
If any of these items are missing, contact your Oberon representative.
Find a flat work surface to assemble the mount, access point’s mounting plate, conduit clamp(s), T-bar clip, and antenna(s)
prior to mounting on wall.
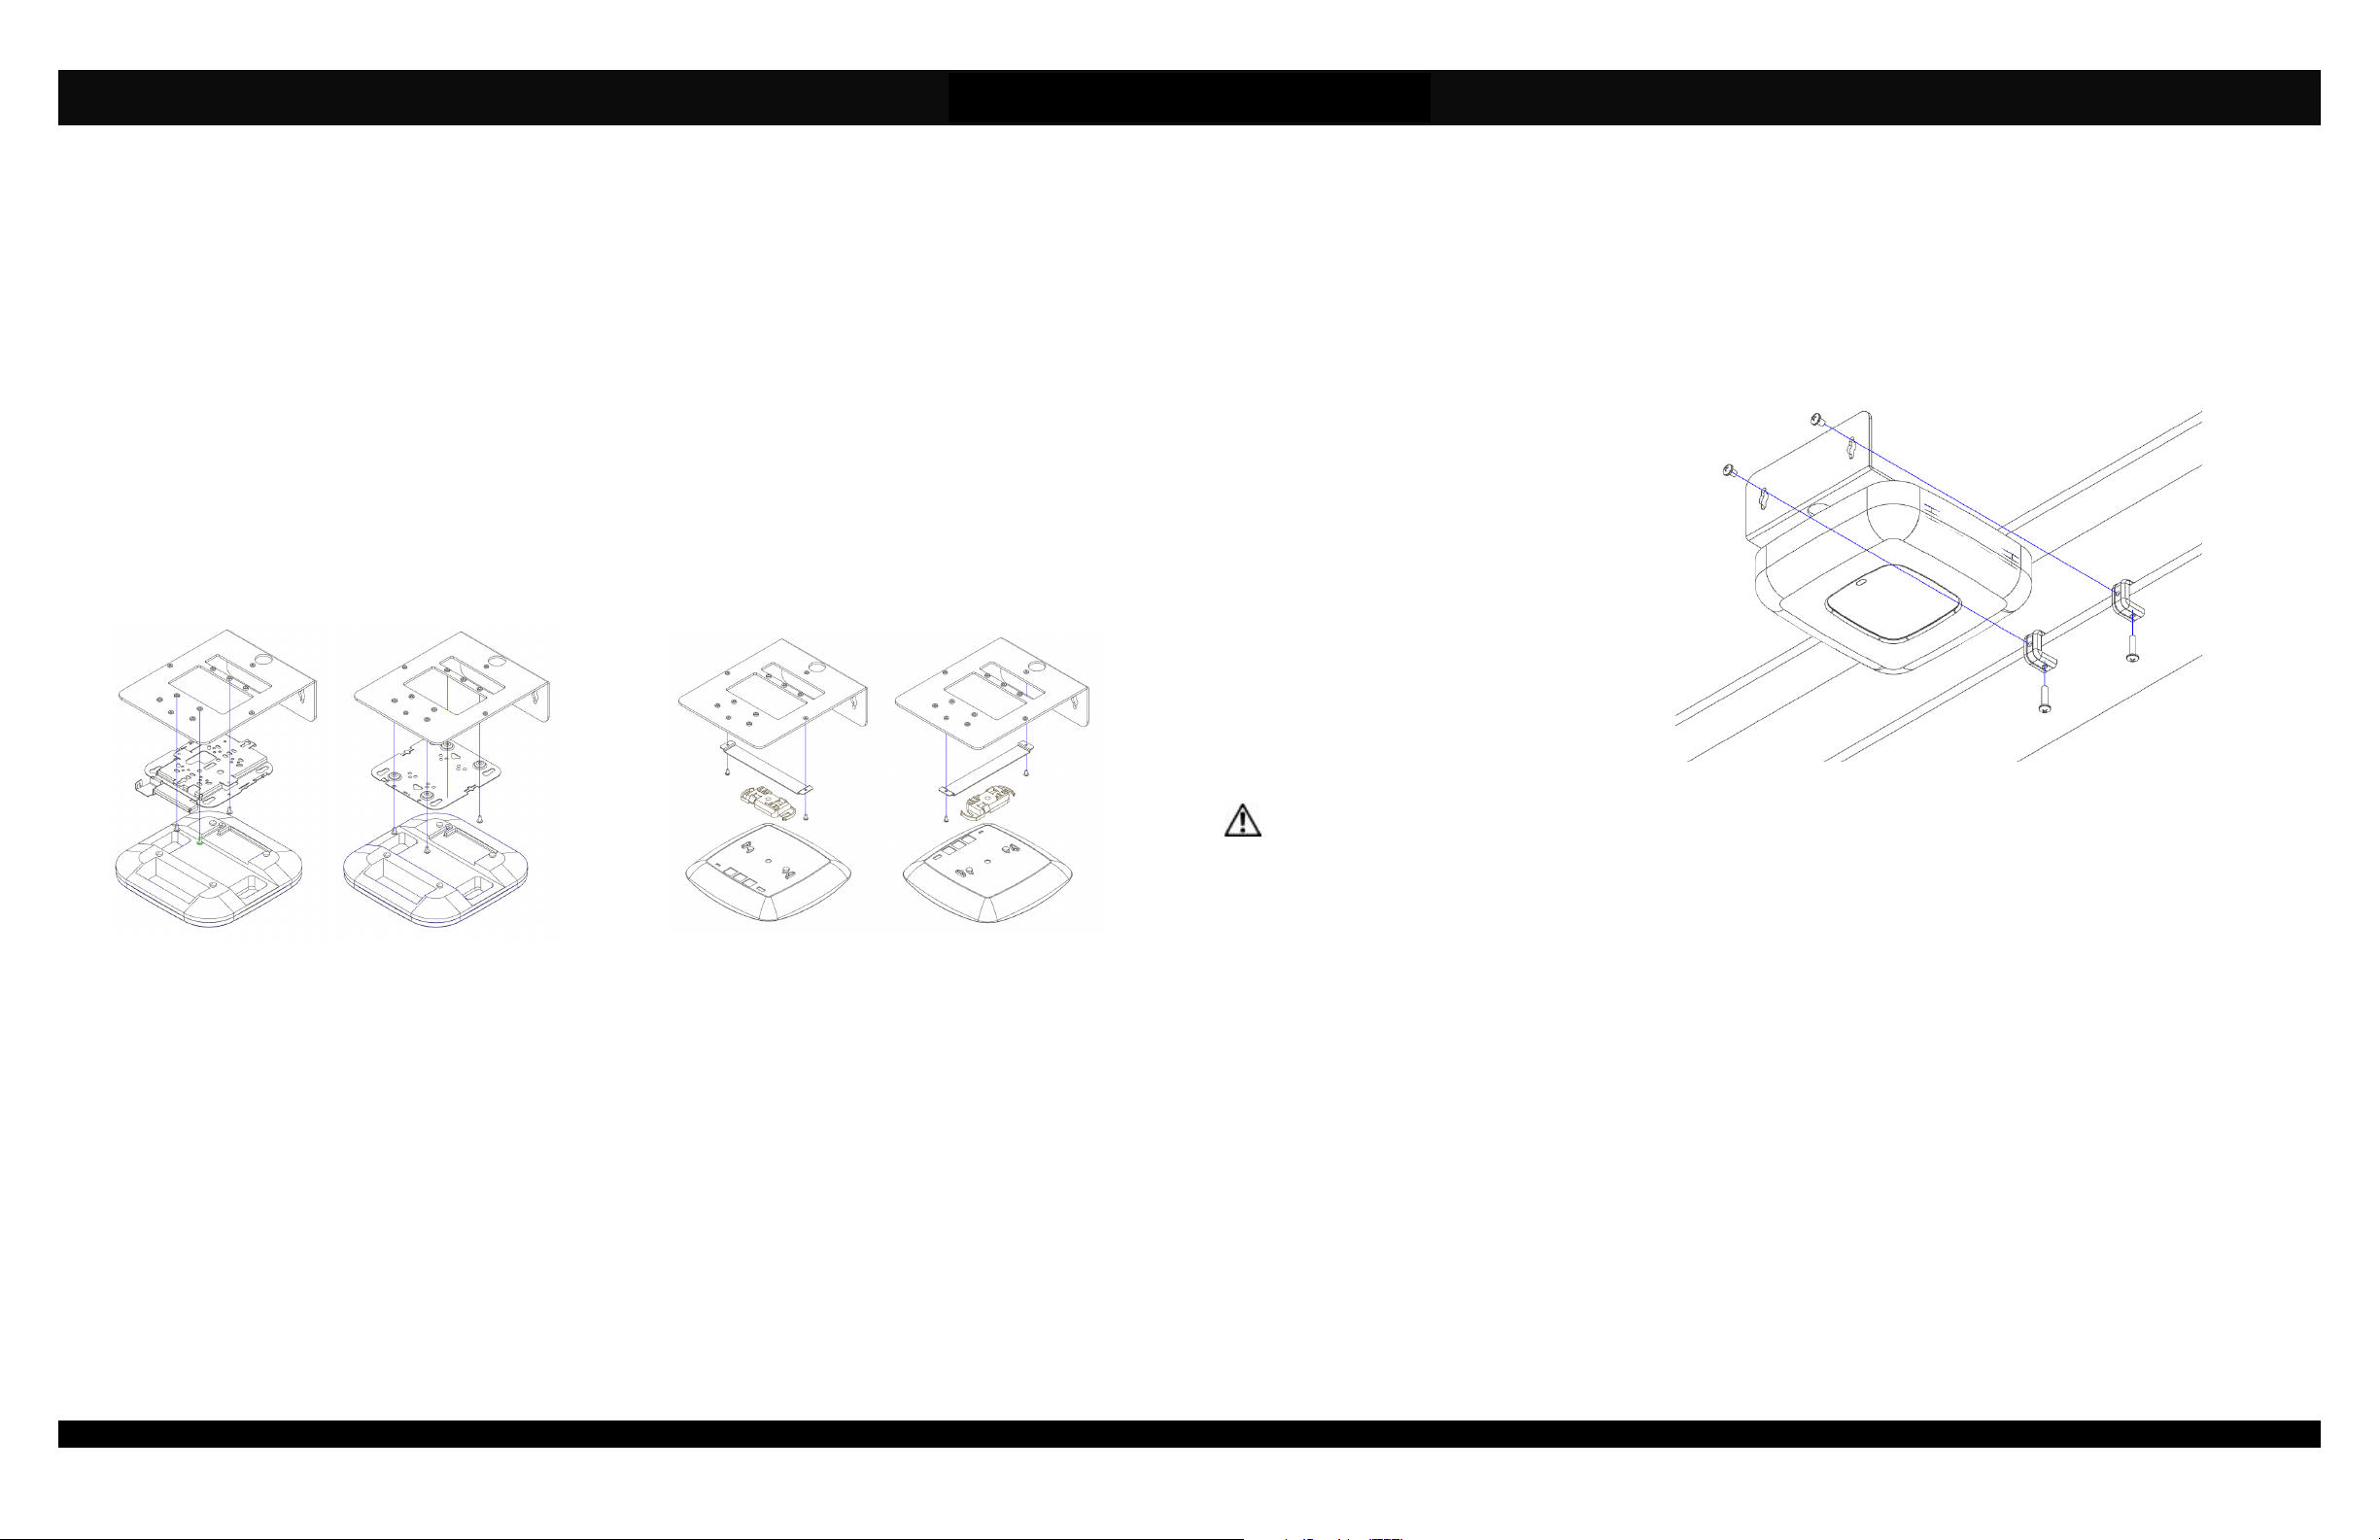
Step 1 – Place the mount assembly on the work surface.
Figure 1
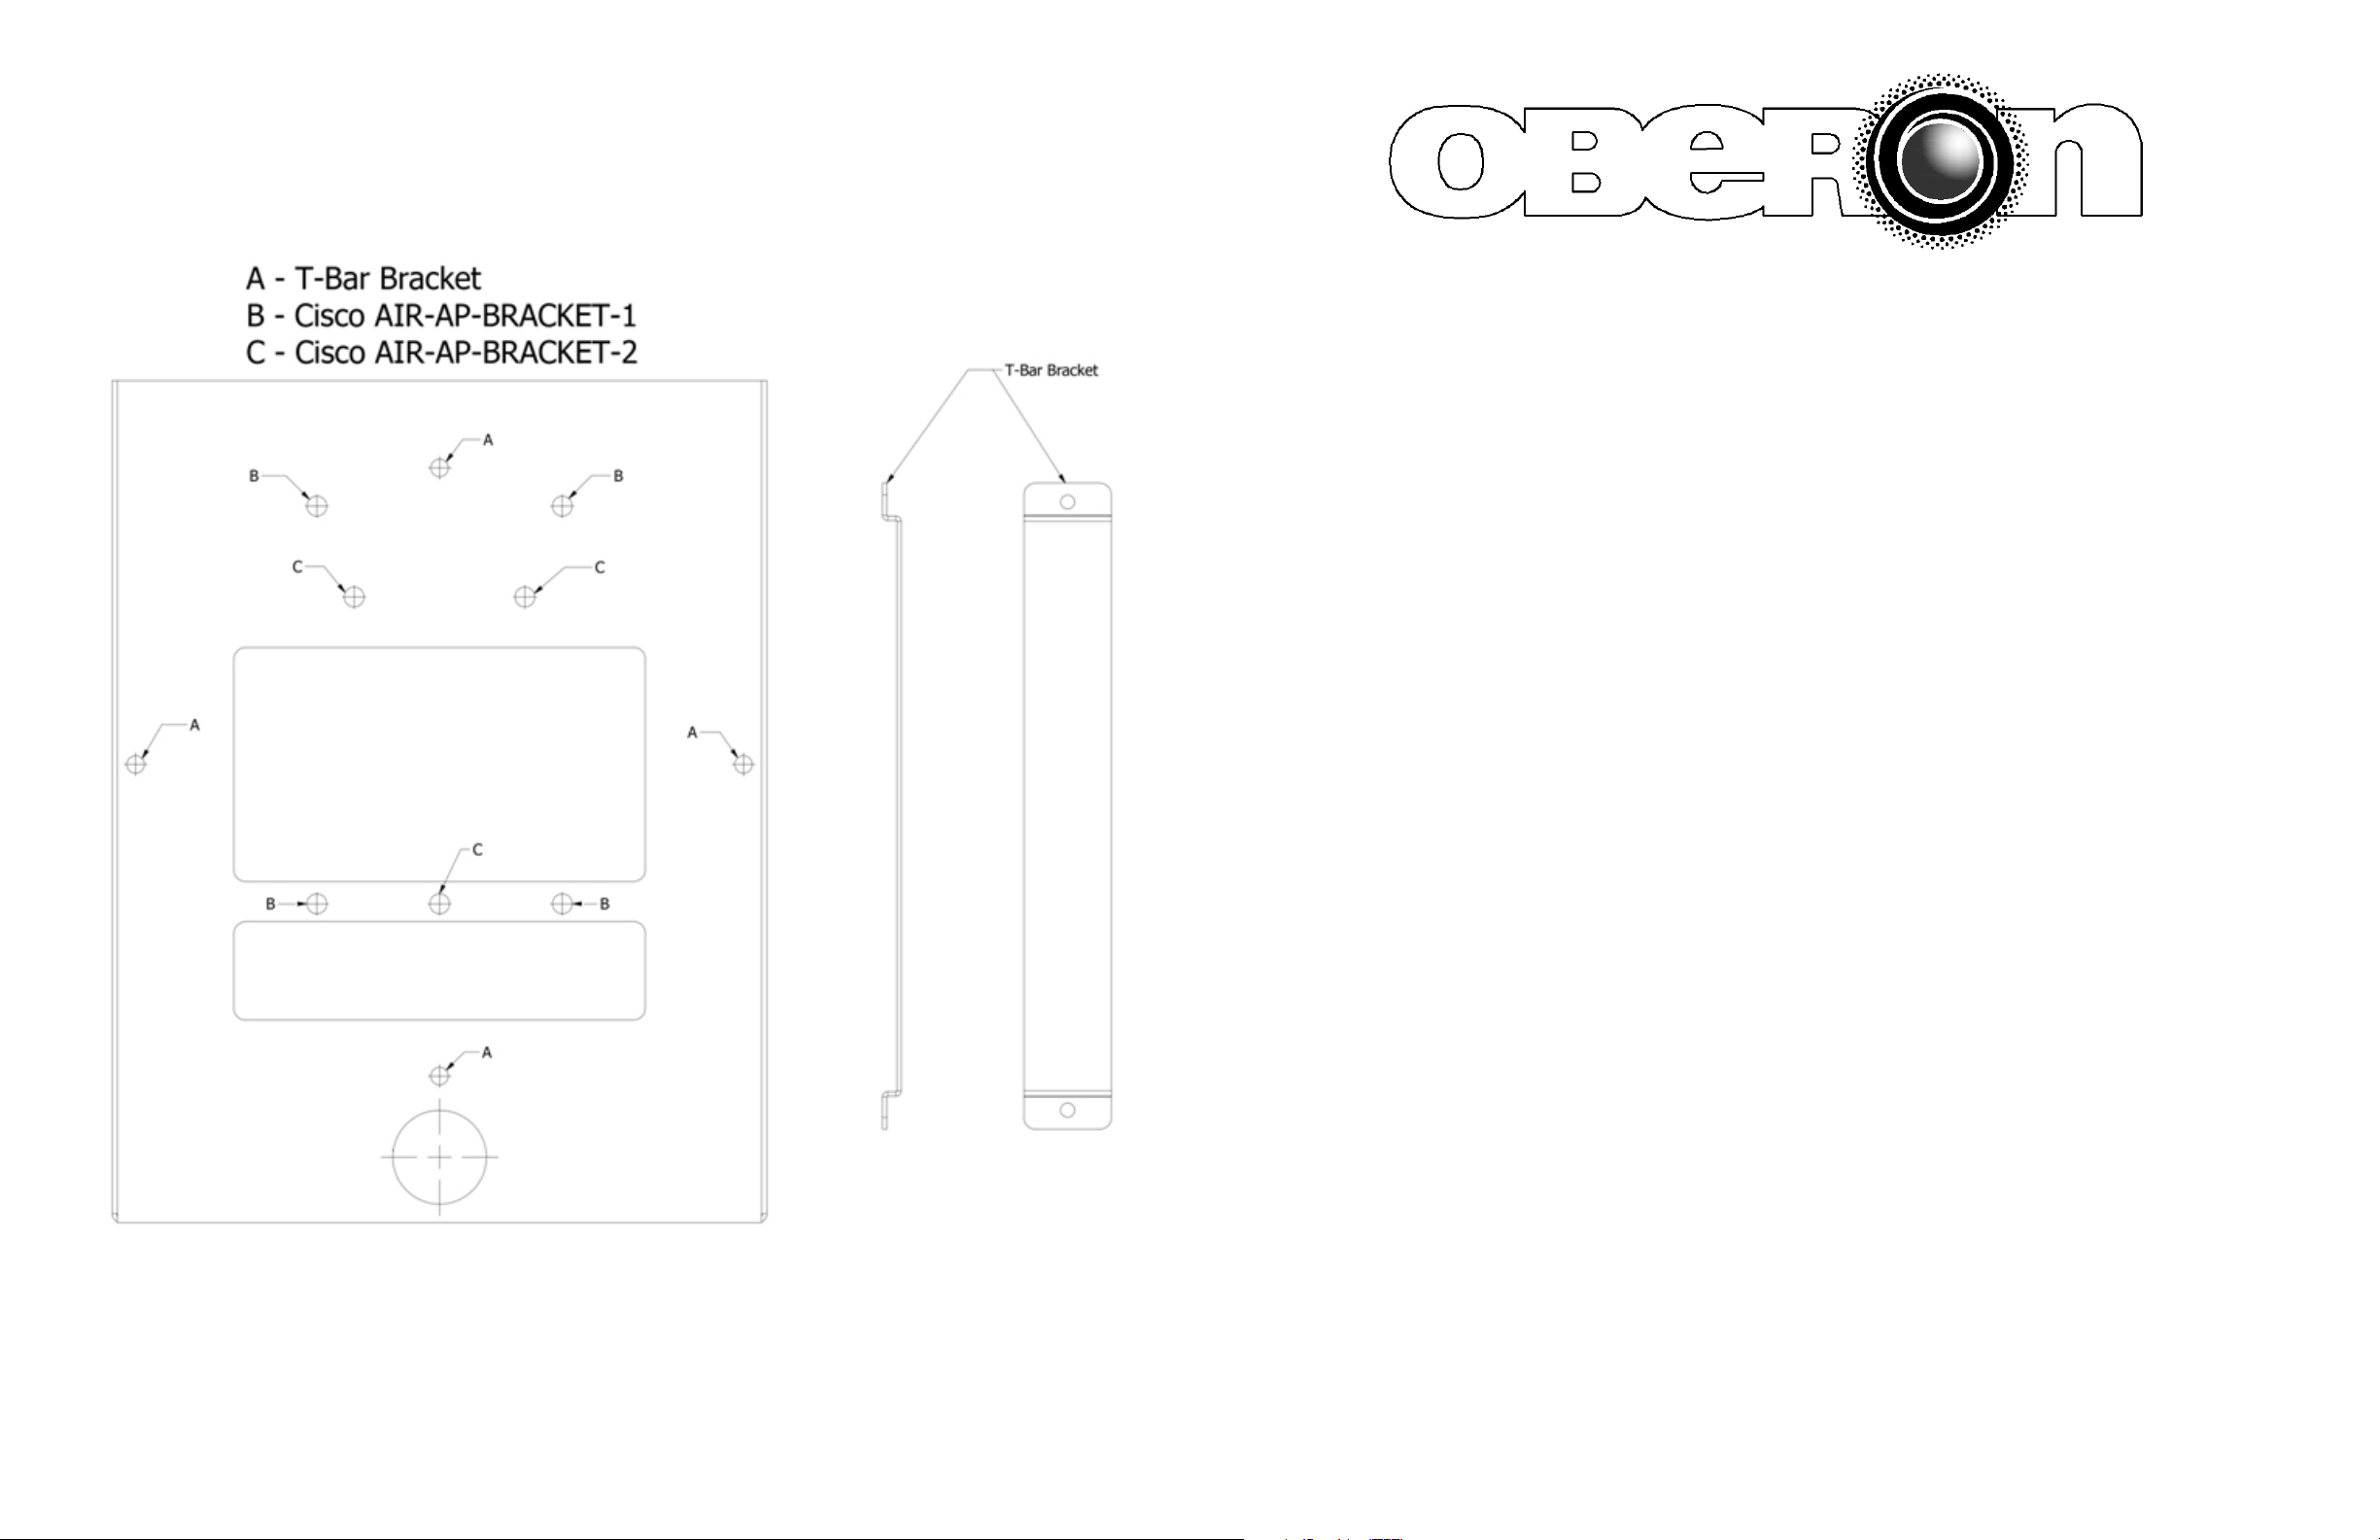
Step 2a (Cisco Access Points Only) – Use the legend
on the back page to determine which hole pattern to
use (Figure 4). Securely fasten the access point’s
mounting bracket to the mount using the included (4)
# 8-32 screws (Figure 1).
Step 3 – If applicable, install the vanity cover. Apply two pieces of the interlocking adhesive strips to the access point and two
to the vanity cover so when the cover is placed over the access point, the strips make contact.
The mount is now ready for wall mounting.
Page 2
P/N 2332 – Rev. 10/3/2014 Oberon, Inc. •••• 1315 South Allen Street •••• State College, PA 16801 Copyright 2014
Step 2b (Other Manufacturers) – Fasten the provided
T-Bar bracket in the best position for the access point,
then securely fasten the access point and its respective
mounting plate or bracket (Figure 2).
Figure 2
(877) 867-2312 • www.oberonwireless.com
Step 4 – Mount the beam clamps to the desired location while maintaining the spacing of the mounting key slots on the back
side of the bracket. Tighten the underside bolts to secure the beam clamps. Use the provided 1/4-20 screws to fasten the
bracket and access point assembly (Figure 3).
Step 5 – Attach the data and power cables to
the access point prior to securing the access
point to the mounting bracket. After the access
point is secured to the mounting bracket, attach
antennas to the access point if required.
**IMPORTANT** - It is important that the
mount is securely fastened to the wall to
prevent human injury or damage to the
access point.
Figure 3
Page 3
MODEL 1008-00
Installation Instructions
**** WARNING ****
Please thoroughly read the product warning
Page 4
Figure 4
below before installation to provide for a safe
work environment.
1. Always consider the hazard to other people:
a. During installation, use warning signs, etc.
b. Don’t work with people directly below the work area as equipment
could fall and cause an injury
2. Be sure to securely fasten the mount to the wall to prevent the mount
from becoming dislodged.
Page 1
 Loading...