

Page 1
Samsung ML-3050 / Dell 1815dn MFP
Oasis Imaging Products, Inc. Technical Support: 800- 322- 8992 ext 110
Reference Information:
OEM Cartridge Yield @ 5% Tools Required
Standard 4000 Phillips Screwdriver
High Yield 8000 Small Flathead Screwdriver
Needle Nose Pliers
Supplies Required
Toner
Drum
Wiper Blade
Chip
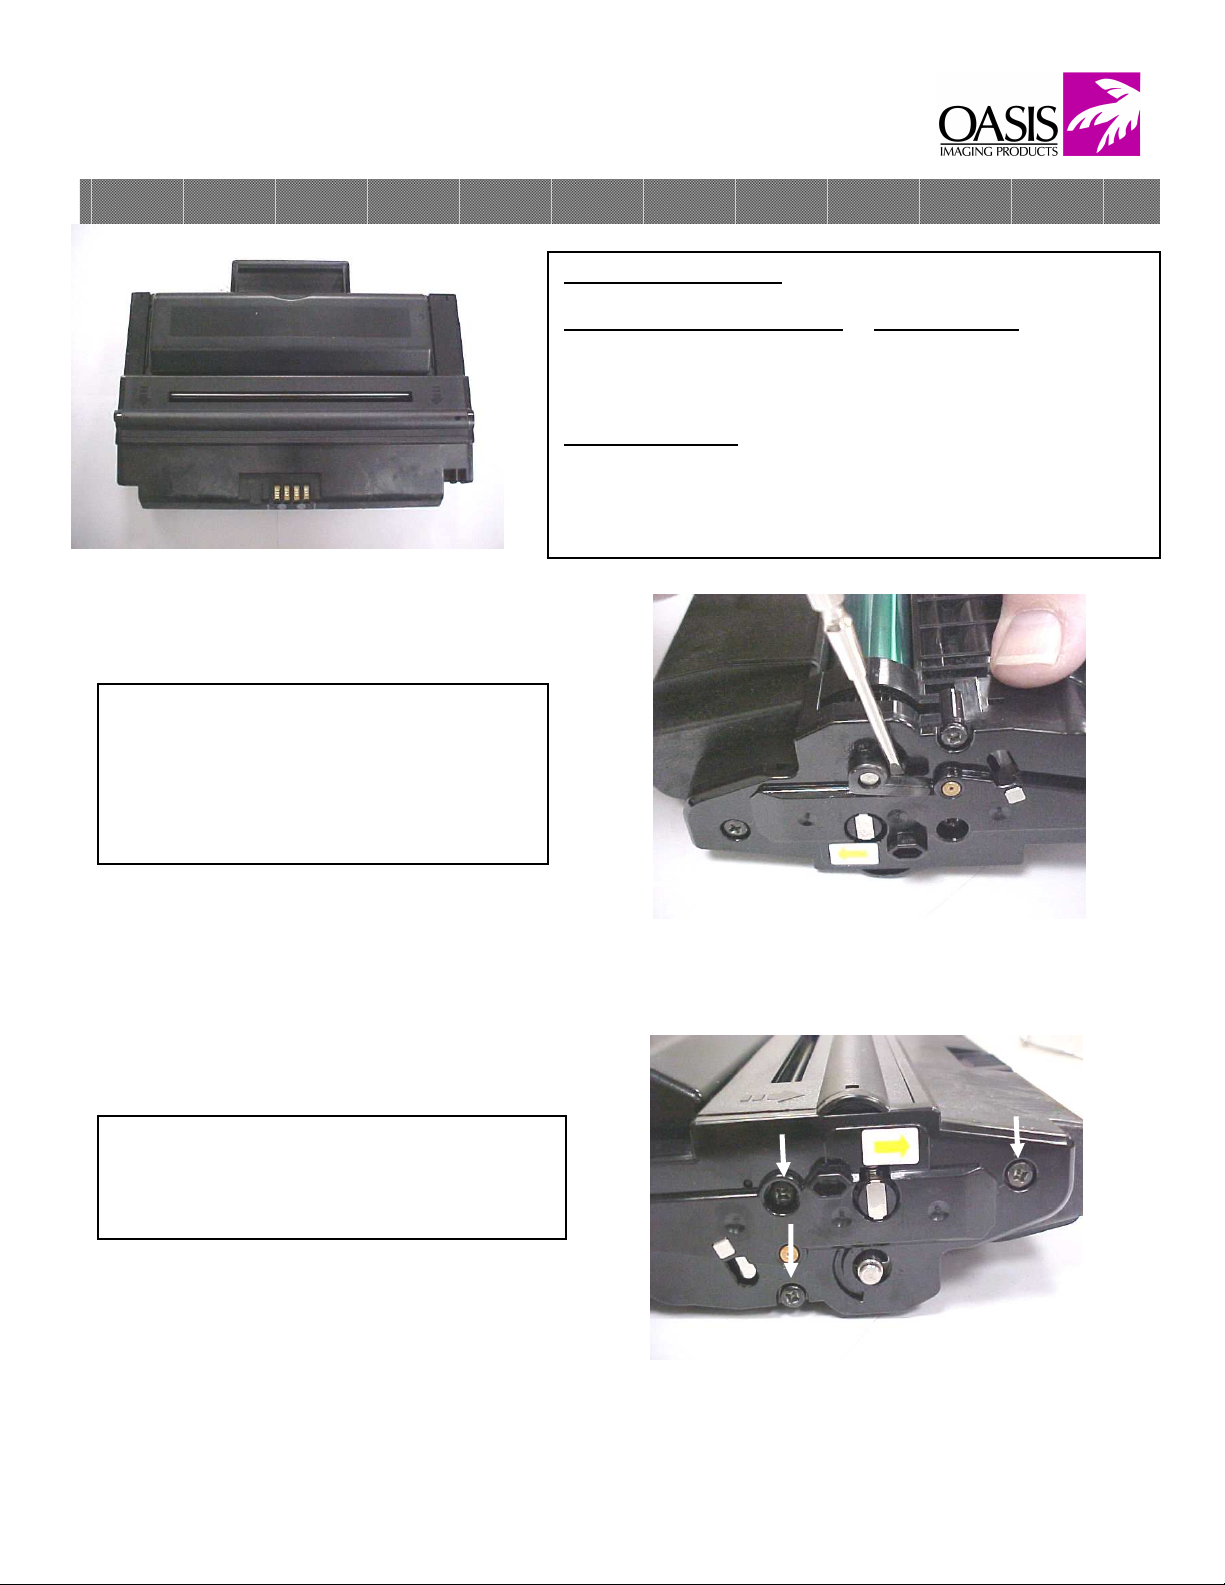
1. Place the unit on a work bench with the OPC
drum facing up. Using a small flathead
screwdriver, pry off the axle bearing bushing
drum lock. Repeat process on opposite side
(Fig. 1).
2. Using a Phillips screwdriver, remove the three
screws on the contact side end cap (Fig. 2).
Fig. 1
Fig. 2
Samsung ML-3050 / Dell 1815dn MFP 1
Page 2
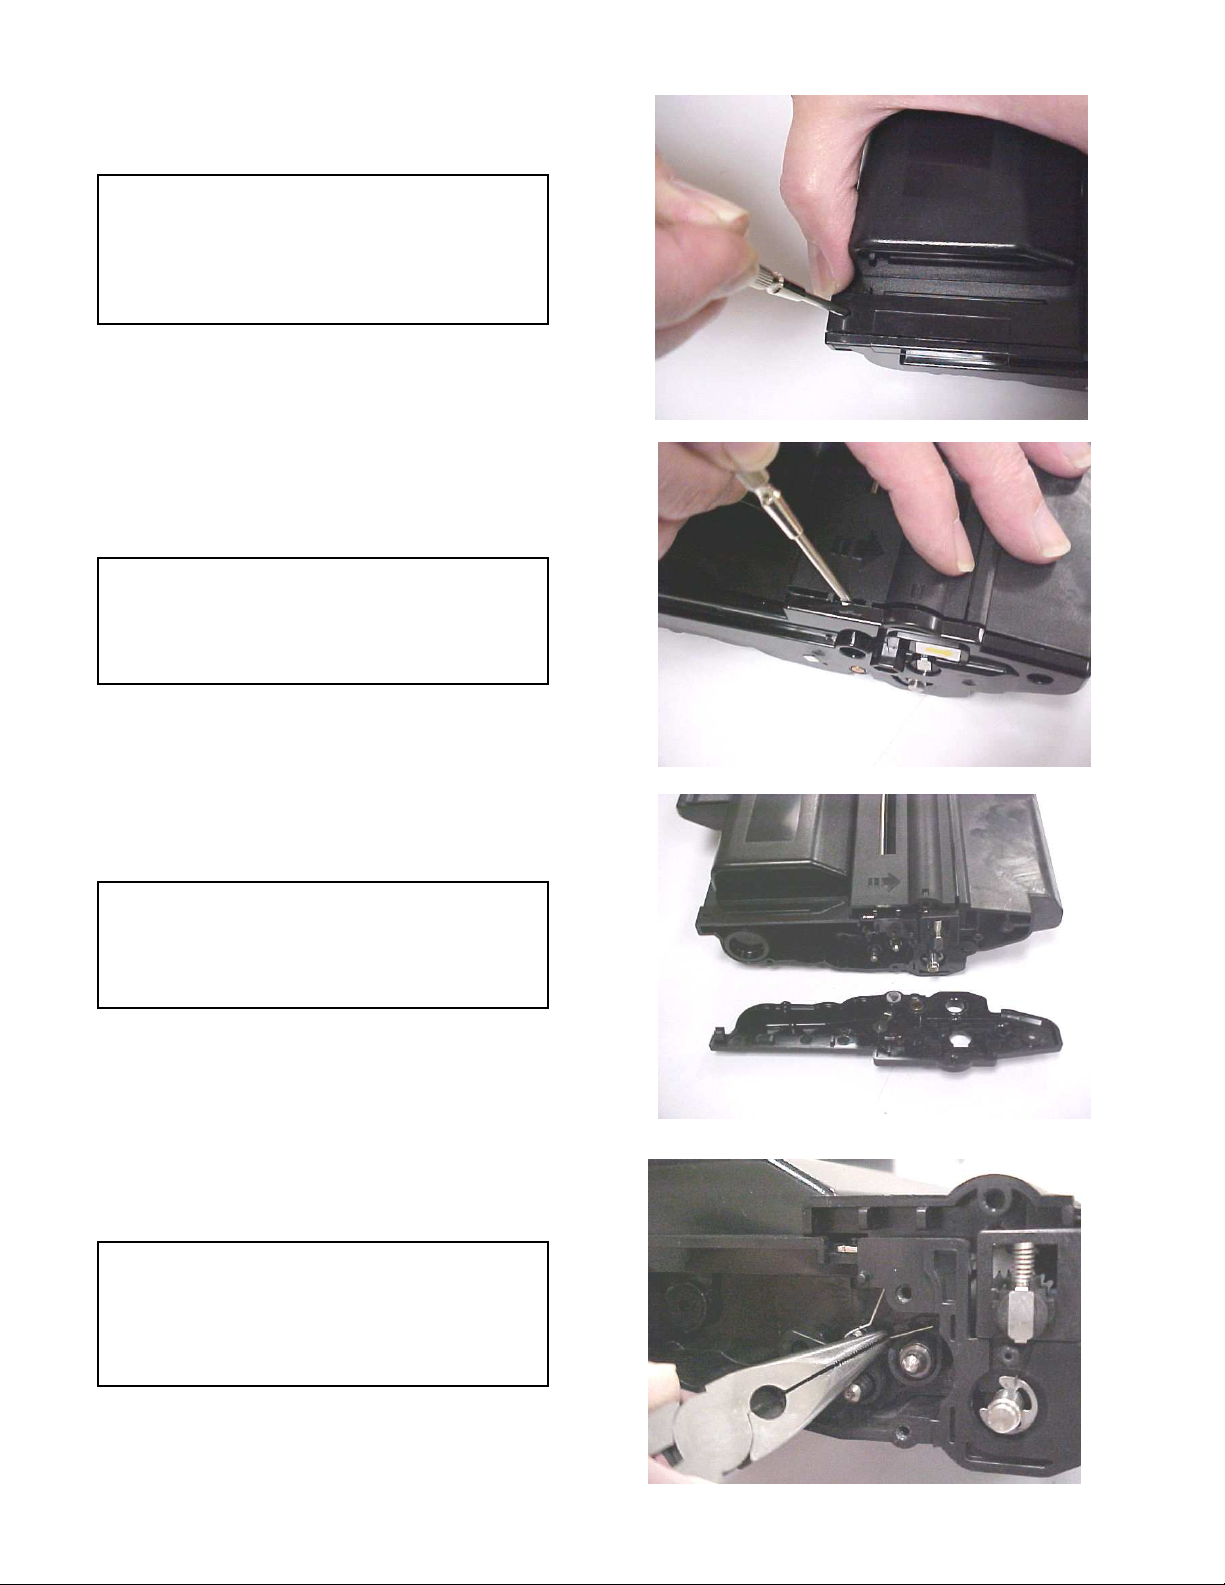
3. Using a small flathead screwdriver, depress
the locking tab to release the contact side end
cap (Fig. 3).
4. Pry off the contact side end cap using a
flathead screwdriver (Fig 4).
Fig. 3
Fig. 4
5. Contact end cap configuration (Fig. 5).
Fig. 5
6. Remove the doctor blade contact spring
using needle nose pliers (Fig. 6). Note spring
configuration for reassembly.
Fig. 6
Samsung ML-3050 / Dell 1815dn MFP 2
Page 3
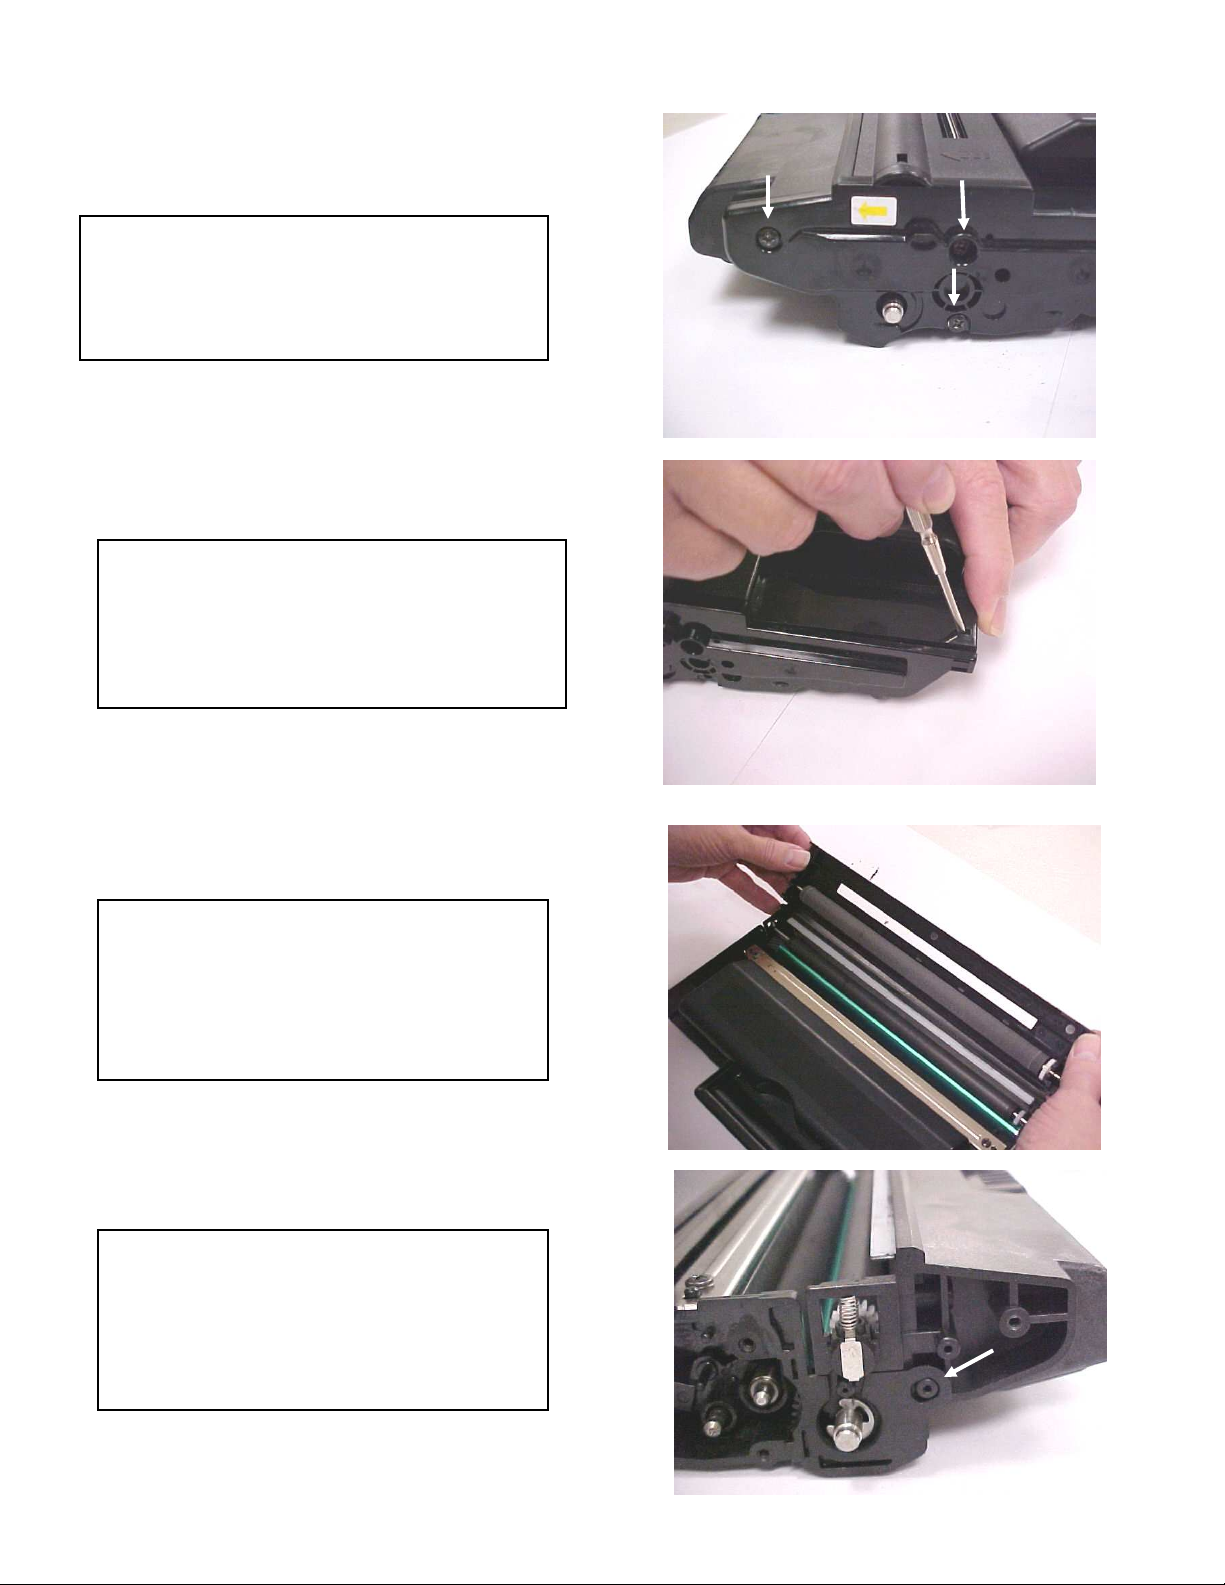
Fig. 7
7. Using a Phillips screwdriver, remove the three
screws on the gear side end cap (Fig. 7).
8. Using a small flathead screwdriver, depress
the locking tab on the gear side end cap (Fig. 8).
Pry off the end cap as in step 4.
9. Remove the PCR cleaning roller housing
and clean the roller with compressed air and
vacuum
(Fig. 9).
10. Spread tabs apart on both sides of the
cartridge while lifting on the OPC drum axle to
separate the toner hopper from the waste
hopper (Fig. 10).
Fig. 8
Fig. 9
Fig. 10
Samsung ML-3050 / Dell 1815dn MFP 3
Page 4

Fig. 11
Fig. 1
2
11. Toner and waste hopper separated
(Fig. 11).
Toner Hopper Disassembly
12. Use a small flathead screwdriver to
unsnap the release lock on the developer
roller end cap
(Fig. 12).
13. Use needle nose pliers to remove the
developer roller end cap
(Fig. 13).
Fig. 13
14. Slide the developer roller drive gear off
the developer roller shaft and out of the
housing end
(Fig. 14).
Fig. 14
Samsung ML-3050 / Dell 1815dn MFP 4
Page 5

15. Slide the developer roller to the left (1), then
right and out of the hopper section (2).
Clean the developer roller with compressed air
and vacuum. Clean with a cloth and Isopropyl
Alcohol if necessary (Fig 15).
16
. Remove the two screws that hold the doctor
blade with a Phillips screwdriver (Fig. 16). Clean
the doctor blade with compressed air and
vacuum. Clean with a cloth and Isopropyl Alcohol
if necessary.
17
. Gently remove the fill plug with a small flat
screwdriver and blow out and vacuum the
inside of the toner hopper (Fig. 17).
1
2
Fig. 15
Fig. 16
Waste Hopper Disassembly
Fig. 17
18. Use a small flathead screwdriver to pry off the
E clip from the OPC drum axle (Fig. 18).
Fig. 18
Samsung ML-3050 / Dell 1815dn MFP 5
Page 6

einsert the drum axle
19
. Pull the drum axle out towards the direction of
the OPC drum drive gear (grey colored gear)
(Fig. 19).
Note: During reassembly, r
into the contact side (thin black gear side) to
alleviate damaging the contact inside the drum.
Fig. 19
20. Hold the PCR by the white gear, push
towards the opposite side until it pops out of
the contact saddle, then pull out of the opposite
side saddle. Remove the PCR and clean with a
lint-free cloth and water (Fig. 20).
Fig. 20
21. Remove the two screws that hold the wiper
blade with a Phillips screwdriver. Clean the
wiper blade with compressed air and vacuum
(Fig. 21).
22. Clean the waste hopper using compressed
air and vacuum. Check the recovery blade and
replace if necessary (Fig. 22).
Fig. 21
Fig. 22
Samsung ML-3050 / Dell 1815dn MFP 6
Page 7

23. The chip is located on the center of the
waste hopper. Use a small flathead screwdriver
to snap off the two ultrasonic weld pins holding
the chip cover in place (Fig. 23).
24. Remove the chip cover and replace the
chip (Fig. 24).
25. Stick double sided tape on broken weld
area and reattach the cover (Fig. 25).
Fig. 23
Fig. 24
Fig. 25
Replace defective parts, add appropriate toner,
and reassemble cartridge in reverse order.
Samsung ML-3050 / Dell 1815dn MFP 7
To reach all office in the US & Canada call (800) 322 -8992
Page 8

Illinois
Fax: (972) 692-6976
Corporate Offices
New Hampshire
(603) 880-3991
Fax: (603) 598-4277
California
Fax: (714) 908-7788
Tennessee
R & D Center
Fax: (901) 366-9756
Texas
Fax: (972) 692-6976
South America
International:
(603) 880-1552
Fax: (603) 386-7575
Canada
Fax: (972) 692-6976
Europe
Netherlands
011-31-24-388-2233
Fax: 011-31-24-355-7373
North Carolina
Fax: (603) 386-7575
© 1998 Oasis Imaging Products, Inc. Any attempt to reproduce any part of these instructions without the written consent of Oasis
Imaging Products, Inc. may result in legal action. All registered trademarks are the property of their respective owners.
Samsung ML-3050 / Dell 1815dn MFP 8
 Loading...